
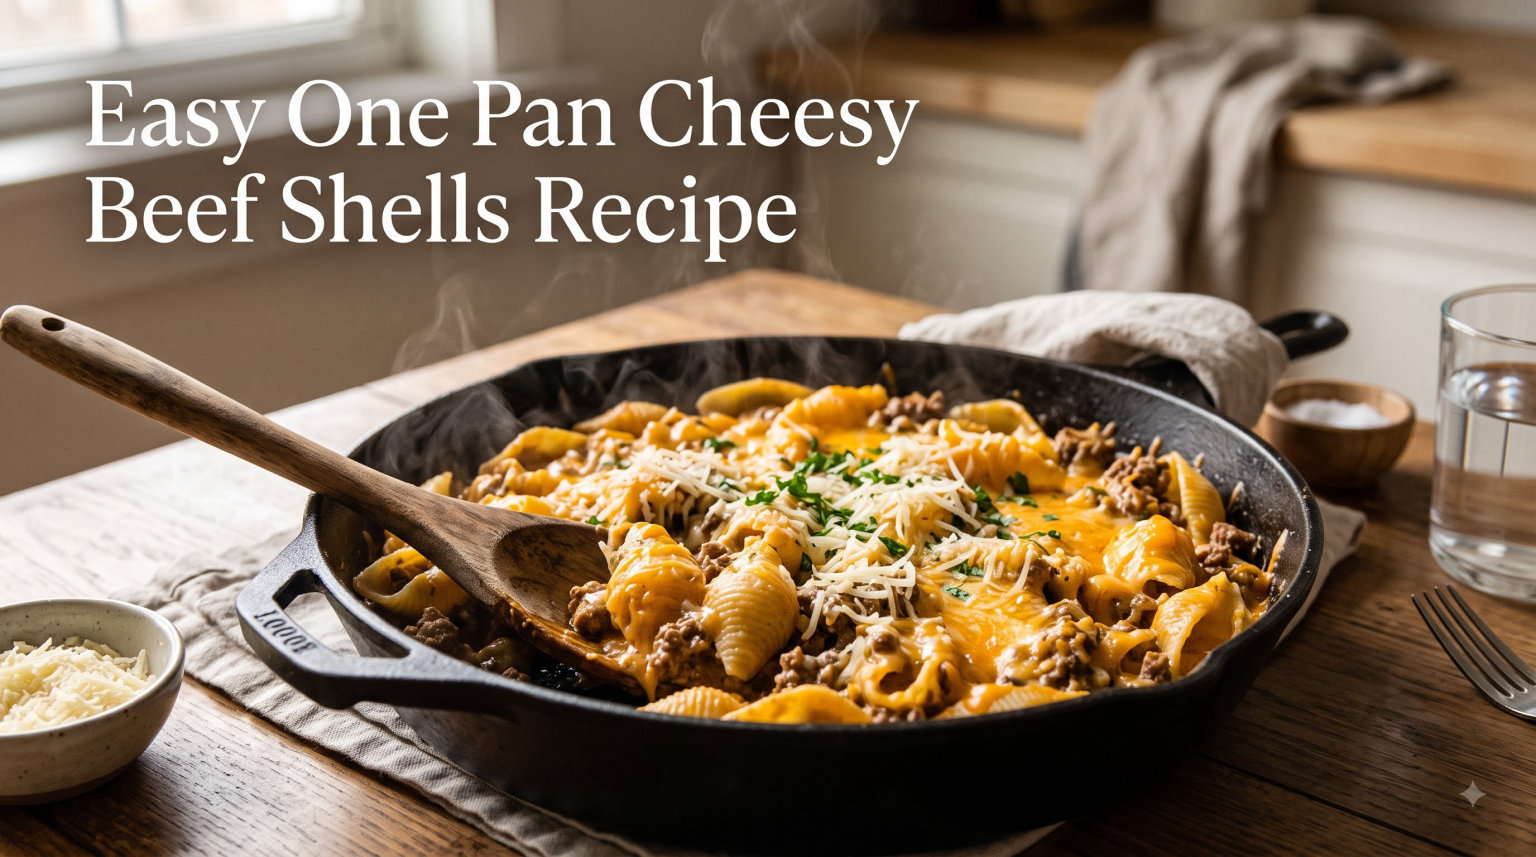
For one pan cheesy beef shells recipe, my quickest answer is simple: ground beef, tomato paste, broth, cream, pasta shells, and cheese become a fast skillet dinner with only one pan to wash. The method stays reliable when you simmer uncovered and stir often enough to prevent sticking while preserving the starch that thickens the sauce.
I have also included cheesy beef pasta skillet guidance for the exact moments that decide the result, from prep and doneness to storage. For another practical dinner, browse these one-pot pasta recipes.
Table of Contents
A reliable plan for Easy one pan cheesy beef shells recipe
Why You’ll Love This Recipe
This is the kind of weeknight dinner pasta that solves real problems. Here is why it has earned a permanent spot in my meal plan.
-
True one-pan method. The pasta shells cook directly in the beef broth and tomato sauce, so there is no separate pot of boiling water and no colander to wash.
-
Ready in about 30 minutes. From the moment you start browning the beef to the moment you are eating takes half an hour, maybe less on a good night.
-
Foolproof for beginners. There is very little to mess up here. If you can brown ground beef and stir, you can make this dish.
-
Picky-eater approved. The creamy, cheesy sauce hides the onion and garlic, and the small shell shape is fun for kids to eat.
-
Budget friendly. Ground beef, pantry pasta, broth, and cheese keep the grocery bill low without sacrificing flavor.
-
Easy cleanup. One pan, one wooden spoon, one cutting board. That is the whole mess.
Ingredients You’ll Need
For dependable one pan cheesy beef shells recipe, simmer uncovered and stir often enough to prevent sticking while preserving the starch that thickens the sauce. The same rule keeps cheesy beef pasta skillet focused and balanced instead of hard pasta or a thin, greasy cheese sauce. You may also want to save these ground beef dinner ideas for your next meal plan.
This recipe leans on simple pantry staples. Here is everything that goes into the pot, with a few notes on why each ingredient matters.
For the Beef Base
-
1 tablespoon olive oil – Just enough to get the beef browning without sticking.
-
1 pound lean ground beef – 90 percent lean is my go-to. It has enough fat for flavor but not so much that you end up draining grease.
-
1 medium yellow onion, diced – The backbone of the savory flavor.
-
3 cloves garlic, minced – Added late so it does not burn.
-
1 teaspoon kosher salt – Plus more to taste at the end.
-
1/2 teaspoon black pepper .
-
1 teaspoon Italian seasoning – A blend of oregano, basil, and thyme works well here.
-
1 tablespoon tomato paste – This builds a deep, savory backbone that plain tomato sauce alone cannot do.
For Cooking the Shells
-
3 cups beef broth – This is the liquid the pasta absorbs as it cooks. Low-sodium gives you control over the salt level.
-
1 cup water – Added with the broth to make sure the shells have enough liquid to fully cook.
-
1 can (8 ounces) tomato sauce – Adds body and a gentle acidity that balances the cheese.
-
8 ounces dry small pasta shells – About 2 cups. Medium shells also work if that is what you have.
For the Cheese Sauce
-
1/2 cup heavy cream – Makes the sauce silky without needing a flour-based roux.
-
1 and 1/2 cups sharp cheddar cheese, freshly shredded – Please shred your own. Pre-shredded cheese is coated in anti-caking powder that makes the sauce grainy.
-
1/2 cup mozzarella cheese, freshly shredded – Adds that stretchy, pull-apart cheese texture.
-
1 tablespoon Worcestershire sauce – One of my favorite secret ingredients for ground beef pasta. It gives a savory umami punch.
-
Optional: 1 tablespoon fresh parsley, chopped – For color and freshness on top.
Equipment Needed
You do not need anything fancy. A large skillet with a lid, a wooden spoon, a cutting board, and a chef’s knife cover it. I use a 12-inch deep skillet because it gives the shells room to move and prevents the sauce from bubbling over. A Dutch oven also works well if your skillet is on the smaller side.
A box grater for the cheese is also worth pulling out. Freshly grated cheese melts smoothly into the sauce, while pre-shredded cheese leaves you with a lumpy texture that never fully incorporates.
How to Make One Pan Cheesy Beef Shells
For food-safety temperatures and handling limits, I follow the USDA food-safety guidance and use an instant-read thermometer whenever doneness is uncertain.
I judge one pan cheesy beef shells recipe by the finished texture and temperature, not by the clock alone. With cheesy beef pasta skillet, The beef must reach 160°F, the shells should be al dente, and the sauce should cling before the cheese goes in off heat. For a useful companion guide, see these 30-minute meals.
-
Brown the Beef and Aromatics: Heat the olive oil in a large skillet over medium-high heat. Add the ground beef and break it apart with a wooden spoon. Cook for about 4 to 5 minutes until it is browned all the way through, then add the diced onion. Continue cooking for another 3 minutes until the onion is soft and translucent. If you are using beef that is fattier than 90 percent lean, drain off most of the grease, leaving about a tablespoon in the pan for flavor.
-
Add Garlic and Seasonings: Add the minced garlic, Italian seasoning, kosher salt, and black pepper. Stir for about 30 seconds, just until the garlic smells fragrant. Do not let it brown or it will taste bitter. Now stir in the tomato paste and cook it for one full minute. This step matters more than it sounds. Cooking tomato paste in hot oil caramelizes the sugars and removes the raw, metallic taste. You are building a deeper flavor base for the rest of the dish.
-
Add the Liquids and Pasta: Pour in the beef broth, water, and tomato sauce. Stir well, scraping up any browned bits stuck to the bottom of the pan. Those browned bits are pure flavor. Stir in the dry pasta shells and bring the mixture to a gentle boil. Once it bubbles, reduce the heat to medium-low, cover the skillet with a lid, and let it simmer for 12 to 15 minutes. Stir every 3 to 4 minutes so the shells do not stick to the bottom. You will know the pasta is done when it is tender but still has a slight bite, also known as al dente . Most of the liquid should be absorbed by now, leaving a saucy but not soupy texture.
-
Stir in the Cream and Cheese: Take the skillet off the heat. This is the move most people skip, and it is the reason their cheese sauce breaks or gets grainy. Stir in the heavy cream first, then add the shredded cheddar and mozzarella a handful at a time, stirring continuously. The residual heat from the pasta and sauce is enough to melt the cheese into a smooth, velvety sauce. If the pan is still over the burner, the cheese can separate and turn oily. Off the heat, it stays silky. Finish with the Worcestershire sauce and stir one more time. Taste and add more salt and pepper if needed.
-
Serve and Garnish: Let the dish rest for 2 to 3 minutes before serving so the sauce has time to thicken slightly. Spoon into bowls, top with fresh parsley if you are using it, and serve hot. A little extra sprinkle of shredded cheese on top never hurts.
Here is where the magic happens. This cheesy beef shells comes together in five straightforward steps, and the pasta cooks right in the sauce.
Pro Tips and Troubleshooting
-
How to Prevent Pasta from Sticking: The number one complaint people have with one-pot pasta recipes is that the shells stick together or to the bottom of the pan. The fix is simple: stir every 3 to 4 minutes while the pasta is simmering, and make sure the heat is low enough to maintain a gentle simmer rather than a rolling boil. Also, do not skip the step of scraping the bottom of the pan when you add the liquid. Any pasta that settles into stuck-on bits will weld itself there.
-
Adjusting the Liquid for Your Pasta: Different brands of pasta shells absorb slightly different amounts of liquid. If you open the lid at the 12-minute mark and the pasta looks done but there is still a lot of broth, just simmer uncovered for another 2 minutes. If the liquid has absorbed but the shells are still crunchy, add another quarter cup of hot water and cover for another 2 minutes.
-
Why the Cheese Sauce Should Be Added Off the Heat: Boiling cheese causes the proteins to seize and the fats to separate, which gives you a broken, oily sauce. By pulling the skillet off the burner before adding cheese, the sauce stays creamy and smooth every time.
-
Use Freshly Shredded Cheese: Pre-shredded bagged cheese is tossed with cellulose and potato starch to keep it from clumping in the bag. Those same additives stop it from melting cleanly into your sauce. Five extra minutes with a box grater is worth the texture difference.
I have cooked this recipe enough times to know exactly where it can go sideways. These tips come from real kitchen failures so you do not have to repeat them.
Substitutions and Variations
-
Protein Swaps: Ground turkey works well if you want something lighter. Add an extra drizzle of olive oil since turkey is leaner than beef. Ground Italian sausage is delicious if you want more seasoning built in, just skip the Italian seasoning in the recipe.
-
Pasta Swaps: If you cannot find small shells, medium shells, cavatappi, rotini, or elbow macaroni all work. Avoid long pastas like spaghetti or linguine for this method. They do not cook evenly in a shallow layer of sauce.
-
Cheese Swaps: Sharp cheddar and mozzarella are my default, but you can swap in Monterey Jack, provolone, or pepper jack if you want a little kick. A finishing sprinkle of Pecorino Romano adds a salty, nutty depth that is hard to beat. You can absolutely use Velveeta instead of shredded cheese if you want an ultra-smooth, creamy sauce. Cube half a cup and stir it in off the heat along with the cream. The result is silky and mild, which kids tend to love.
-
Make It Lighter: Swap the heavy cream for half-and-half if you want a slightly lighter sauce. You can also use reduced-fat cheese, though the sauce will be less creamy. I would not recommend going fully fat-free because the sauce needs some fat to stay smooth.
-
Add Some Veggies: Stir in a cup of frozen peas, diced bell peppers, or sliced mushrooms when you add the pasta. They cook right along with everything else and bulk up the dish without much extra effort.
This recipe is forgiving. Here are some swaps I have tested personally, along with a few I would avoid.
What to Serve With Cheesy Beef Shells
This creamy beef and shells is a complete meal on its own, but a simple side rounds things out. A crisp green salad with a tangy vinaigrette cuts through the richness of the cheese sauce. I like a basic mix of romaine, cucumber, and a lemon dressing.
Garlic bread or toasted sourdough is perfect for scooping up extra sauce. If you want something green, roasted broccoli or green beans with a squeeze of lemon pair nicely. For drinks, a medium-bodied red like a Chianti or a cold amber beer works well with the beefy, cheesy flavors.
Storage and Leftovers
-
How to Reheat: Reheat gently in a skillet over low heat with a splash of beef broth or milk to loosen the sauce back up. The microwave works too, but stir halfway through and cover with a damp paper towel to keep it from drying out.
-
Can You Freeze It?: You can freeze this dish, but the texture of the cheese sauce will change slightly. Cooked dairy-based sauces can separate when frozen and reheated. If you want to freeze it, portion it into individual containers and freeze for up to 2 months. Thaw overnight in the fridge and reheat gently with a splash of broth.
-
Meal Prep Tips: This recipe doubles easily if you are cooking for a crowd or prepping lunches for the week. Portion into meal prep containers with a side of veggies, and you have grab-and-go lunches ready to go. To stretch it further, serve it over a bed of rice or with a side of crusty bread.
Leftovers keep well in an airtight container in the fridge for 3 to 4 days. The pasta will absorb more liquid as it sits, so the sauce will be thicker the next day. That is completely normal and actually makes it a great make-ahead lunch.
Frequently Asked Questions
How do I know when cheesy beef shells is ready?
The beef must reach 160°F, the shells should be al dente, and the sauce should cling before the cheese goes in off heat.
How do I prevent hard pasta or a thin, greasy cheese sauce?
Simmer uncovered and stir often enough to prevent sticking while preserving the starch that thickens the sauce.
Can I substitute another short pasta for shells?
Yes. Elbows, rotini, or small penne work, but start checking early because shapes absorb liquid at different rates.
What should I serve with cheesy beef shells?
A green salad, steamed broccoli, peas, or roasted zucchini adds color and freshness to the rich skillet.
Can I make cheesy beef shells ahead?
Refrigerate in shallow containers and loosen with a small amount of broth or milk during reheating.
Can I freeze cheesy beef shells?
Freeze cooled portions for up to two months; thaw overnight and reheat slowly to protect the pasta texture.
Conclusion
For one pan cheesy beef shells recipe, the most important move is to simmer uncovered and stir often enough to prevent sticking while preserving the starch that thickens the sauce. That same discipline makes cheesy beef pasta skillet useful on a busy day without sacrificing flavor or texture.
I recommend reading the method once, preparing every ingredient, and using the doneness cues above as the final authority. Ground beef, tomato paste, broth, cream, pasta shells, and cheese become a fast skillet dinner with only one pan to wash.