
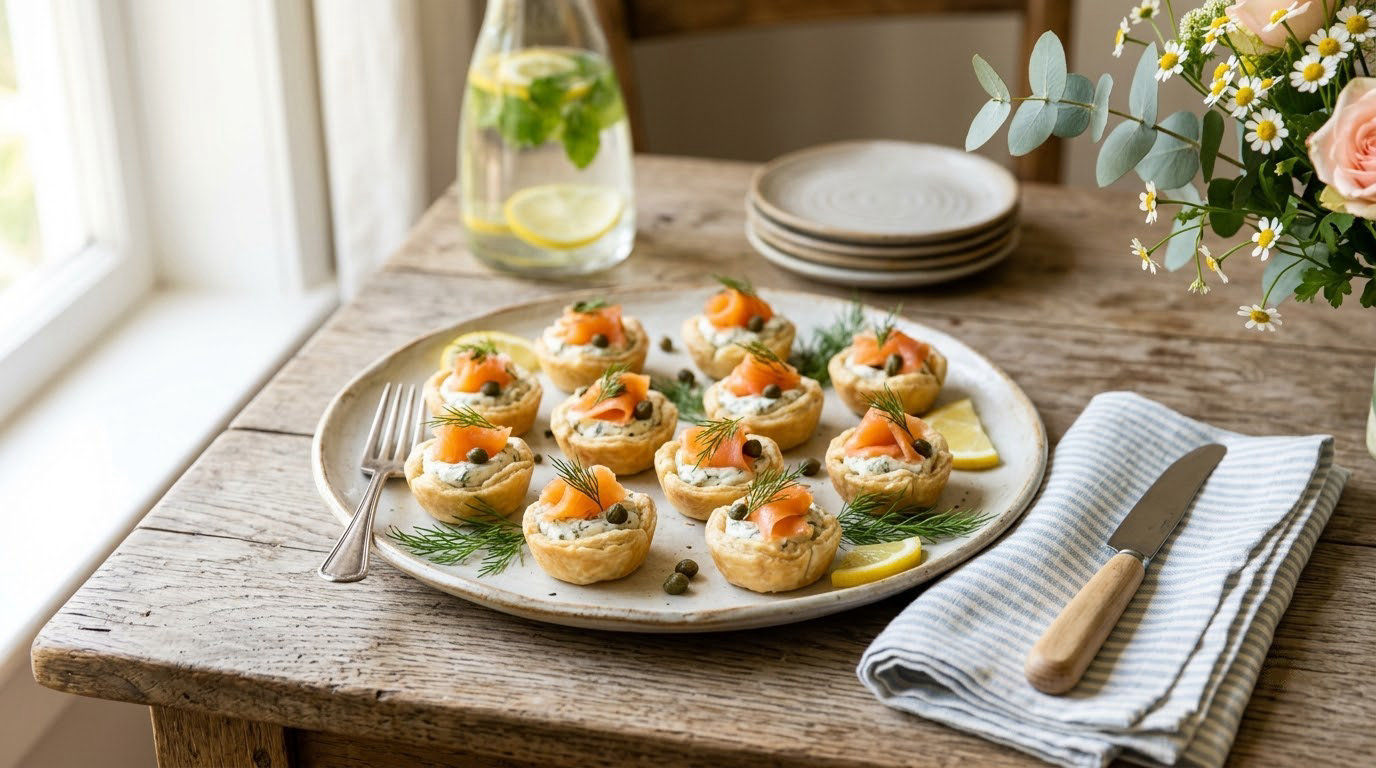
These 15 easy baby shower food ideas are the ones I keep coming back to: a mix of warm savories, one-bite finger foods, brunch plates, and desserts that a single host can actually finish before guests arrive. Every recipe here is written out in full, with quantities, times, and doneness cues, so nothing is a vague suggestion.
Most of them are make-ahead, most travel to a table without a knife, and every one scales cleanly from a 15-person sprinkle to a 40-plus guest afternoon bash. If you’re planning months out, put the date in your calendar now, then come back to this list closer to the day. For a bigger sweet table, my chocolate dessert recipe roundup picks up right where the cookies leave off.
Table of Contents
15 Easy Baby Shower Food Ideas at a Glance
Here’s the whole spread on one page: what each dish takes, how hard it is, and the occasion it fits best. Use this table to pick before you shop.
| Recipe | Time | Difficulty | Best for |
|---|---|---|---|
| 1. Mini Quiche Cups | 40 minutes | Easy | Warm savory, brunch showers |
| 2. Herbed Chicken or Turkey Pinwheels | 15 minutes + 1 hour chill | Easy | Big crowds, protein pick |
| 3. Veggie Pinwheel Sandwiches | 20 minutes + 1 hour chill | Easy | Meat-free table |
| 4. Caprese Skewers | 20 minutes | Easy | No-cook hosting, picky eaters |
| 5. Deviled Eggs Without the Fuss | 30 minutes | Easy | Classic party table, brunch |
| 6. Mini Caprese Flatbreads | 25 minutes | Easy | Late-morning showers |
| 7. Slow-Cooker Pulled Pork Tacos | 15 minutes plus 7 hours | Easy | Feeding 30 or more |
| 8. Turkey and Cranberry Crescent Rolls | 20 minutes | Easy | Holiday and fall showers |
| 9. Make-Ahead Pasta Salad | 25 minutes + 2 hours chill | Easy | Buffet lines, cold mains |
| 10. Fruit Yogurt Parfaits | 15 minutes | Easy | Morning showers, brunch |
| 11. Strawberry Shortcake Cups | 35 minutes | Easy | Spring and summer showers |
| 12. Brown Butter Chocolate Chip Cookies | 40 minutes | Medium | Dessert tables, make-ahead baking |
| 13. Lemon Bars | 50 minutes | Medium | Gender-neutral dessert table |
| 14. Fresh Berry Trifle | 30 minutes + 4 hours chill | Easy | Centerpiece dessert, large groups |
| 15. Baby Shower Chocolate-Covered Strawberries | 35 minutes | Easy | Sweet finish, no baking |
1. Mini Quiche Cups
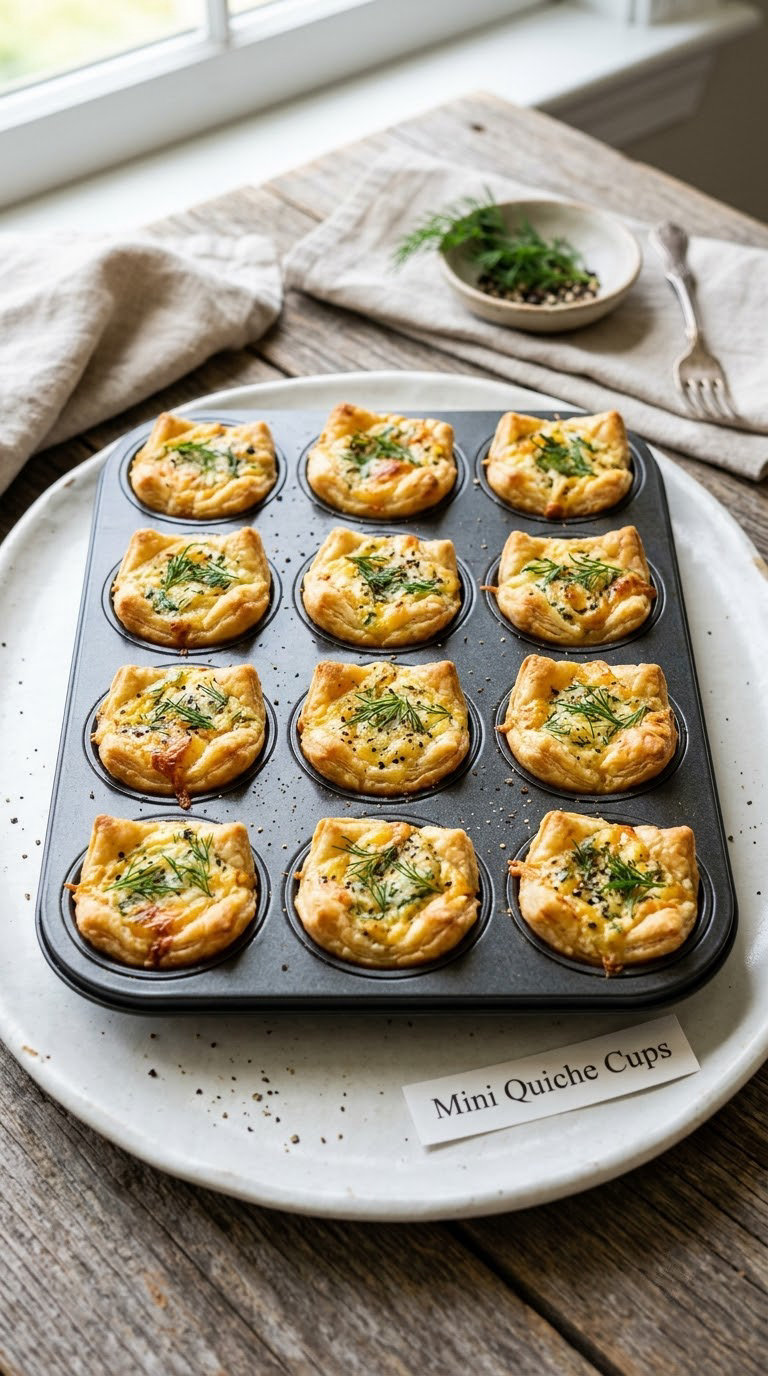
Mini quiche cups are the one savory item guests consistently ask about, because they arrive hot, they hold a whole meal, and nobody needs a plate. This version leans on a store-bought crust so the whole tray is done in forty minutes.
Yield: 24 cups · Prep: 15 minutes · Cook: 22 to 25 minutes · Total: 40 minutes · Difficulty: Easy
Ingredients
- 1 refrigerated pie crust (9 inch), at room temperature
- 6 large eggs
- 1 cup (240 ml) whole milk
- 1/2 cup (120 ml) heavy cream
- 1/2 teaspoon salt, plus 1/4 teaspoon black pepper
- 1 cup (150 g) shredded Gruyere or sharp cheddar
- 1 cup (120 g) cooked diced ham or bacon
- 1 cup (115 g) frozen chopped spinach, thawed and pressed dry
- 2 tablespoons chopped fresh dill
Instructions
- Heat the oven to 350°F (177°C) and lightly grease a 24-cup mini muffin pan.
- Roll the crust to 1/8 inch thick and press a small circle into each cup, patching any cracks with your fingers.
- Whisk the eggs, milk, cream, salt, and pepper in a large bowl until completely smooth, with no streaks of white.
- Stir in the cheese, ham, spinach, and dill.
- Divide the mixture evenly among the crusts, filling each about three-quarters full.
- Bake 22 to 25 minutes, until the edges are set and puffed and the centers still jiggle slightly when you nudge the pan.
- Cool 5 minutes in the pan, then run a knife around each cup to release.
Tip: Filling the cups only three-quarters full keeps them from spilling over and puffing into shapeless domes. A full cup looks dramatic and lands on the serving platter in pieces.
Swap it: Skip the ham and add 1 cup (150 g) of roasted red pepper for a meat-free version. Swiss and Gruyere both melt smoother than sharp cheddar, too.
Storage: Refrigerate in an airtight container up to 4 days. Freeze unbaked, filled cups on a tray, then bag them for up to 2 months and bake from frozen at 350°F (177°C) for about 28 minutes. Reheat leftovers 10 minutes at 325°F (163°C). Contains milk, egg, and wheat.
2. Herbed Chicken or Turkey Pinwheels
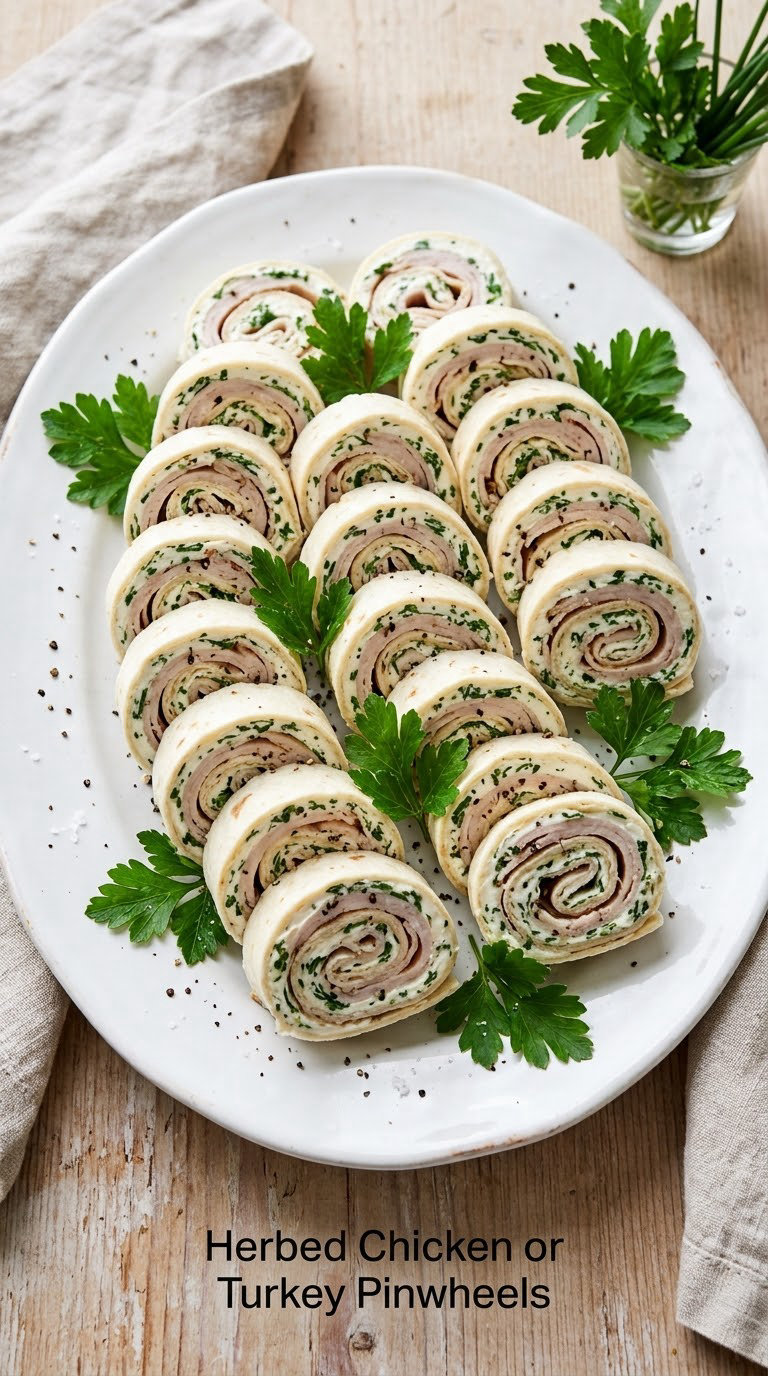
These pinwheels are the workhorse of a party spread: they look assembled, they’re built from cooked meat, and nobody needs a napkin. The filling is a smooth cream cheese base, which keeps the slices soft and holds their spiral.
Yield: 40 pieces · Prep: 15 minutes · Cook: none · Total: 15 minutes plus 1 hour chill · Difficulty: Easy
Ingredients
- 8 flour tortillas (8 inch)
- 8 oz (225 g) cream cheese, softened
- 1/2 cup (120 ml) mayonnaise
- 2 tablespoons chopped fresh parsley or dill
- 1 tablespoon Dijon mustard
- 1/2 teaspoon garlic powder
- 12 oz (340 g) fully cooked chicken or turkey breast, sliced thin
- 1/2 cup (75 g) shredded cheddar, or 1/2 cup (80 g) quartered green grapes
- Freshly ground black pepper
Instructions
- Mix the cream cheese, mayonnaise, parsley, Dijon, garlic powder, and a few grinds of pepper until smooth.
- Spread the filling over each tortilla in an even layer, leaving a 1-inch border at the edges.
- Layer the sliced chicken in a single row across the center, then add the cheese or grapes on top.
- Roll each tortilla tightly, seam side down, and cut into 5 slices about 1/2 inch thick.
- Arrange the slices in overlapping rows on a platter, cover, and chill at least 1 hour before serving.
Tip: Slicing cold, straight from the fridge, gives you clean spirals. Warmed pinwheels smear and the cream cheese slides out the bottom.
Swap it: Grapes instead of cheese make this a lighter option that suits a midday shower. To make it gluten-free, use gluten-free tortillas and check that the deli meat is labeled gluten-free.
Storage: Keep refrigerated up to 4 days, in a single layer so the cut faces don’t smudge. Slices freeze well in an airtight bag for up to 3 weeks; thaw in the fridge about 20 minutes before serving. Contains milk, egg, and wheat.
3. Veggie Pinwheel Sandwiches
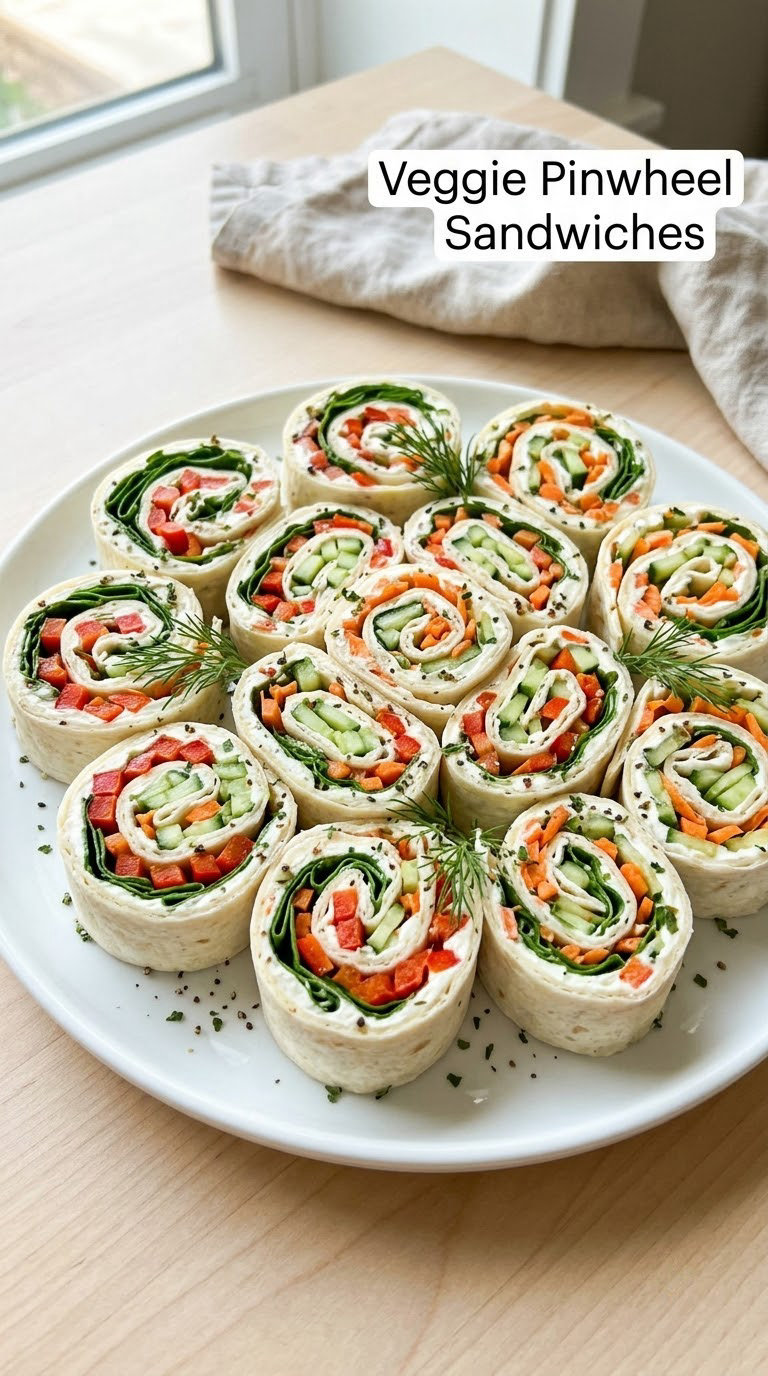
Veggie pinwheels are the answer for the guest who isn’t eating meat and doesn’t want to be handed a second deviled egg. The trick is thin, even strips of vegetable rolled tightly enough that every slice shows the full spiral.
Yield: 40 pieces · Prep: 20 minutes · Cook: none · Total: 20 minutes plus 1 hour chill · Difficulty: Easy
Ingredients
- 8 flour tortillas (8 inch)
- 8 oz (225 g) cream cheese, softened
- 1/4 cup (60 ml) ranch dressing, or 1/4 cup (60 g) hummus
- 1 cup (30 g) fresh spinach leaves, chopped
- 1/2 red bell pepper, cut into thin strips
- 1 medium carrot, peeled into thin ribbons with a peeler
- 1/2 English cucumber, cut into thin half-moons
- 2 green onions, thinly sliced
- 1/4 teaspoon salt and a few grinds of black pepper
Instructions
- Stir the cream cheese with the ranch dressing or hummus, the salt, and the pepper until evenly combined.
- Spread the mixture over each tortilla in an even layer, to within an inch of the edges.
- Scatter the spinach over the filling, then line up the bell pepper, carrot, and cucumber strips in a tight row across the middle.
- Roll each tortilla firmly, tucking the filling in as you go to keep the vegetables from sliding out.
- Wrap the rolls in plastic wrap and chill at least 1 hour, or overnight.
- Slice into 5 rounds each, then stand the rounds cut-side up on a platter.
Tip: Pat the cucumber and pepper dry with a paper towel before rolling. Water trapped against the cream cheese is what turns the bottom of each pinwheel into a soggy mess by hour two.
Swap it: Dairy-free and gluten-free together: use dairy-free cream cheese, hummus, and a gluten-free wrap. Check that the tortillas are labeled gluten-free, since most standard ones are not.
Storage: Refrigerate up to 3 days in a covered container, cut side up. These don’t freeze well because the vegetables go watery, so make them the night before at the latest. Contains milk, egg, and wheat in the classic version.
4. Caprese Skewers
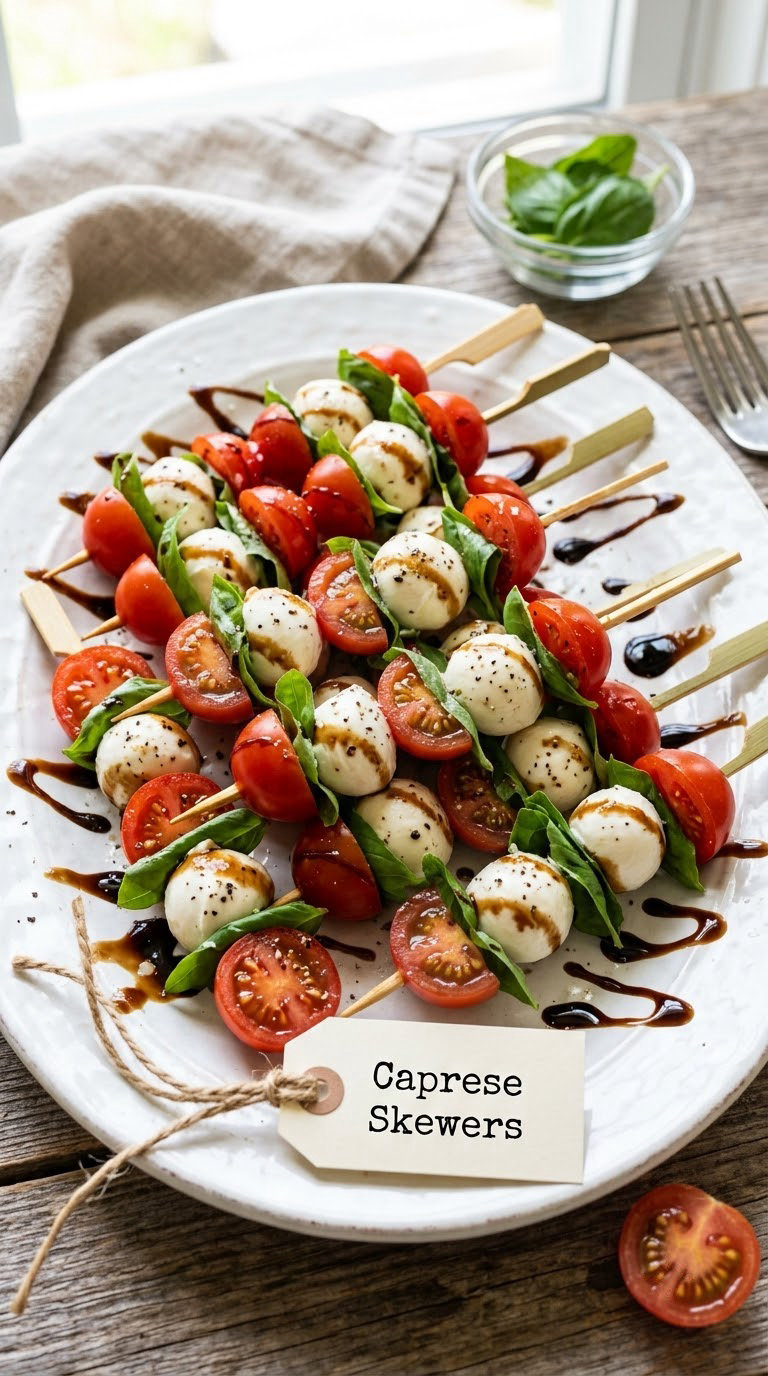
Caprese skewers take twenty minutes, need no heat, and land on the list in three different spots: vegetarian, no-cook, and friendly to people avoiding crunchy textures. They’re also the dish I recommend first-time hosts make, because almost nothing can go wrong.
Yield: 24 skewers · Prep: 20 minutes · Cook: none · Total: 20 minutes · Difficulty: Easy
Ingredients
- 1 pint (300 g) cherry tomatoes, each halved
- 8 oz (225 g) mini mozzarella pearls, drained
- 1/2 cup (15 g) fresh basil leaves, lightly torn
- 24 small wooden skewers or 8 cocktail picks
- 2 tablespoons extra-virgin olive oil
- 2 tablespoons balsamic glaze
- Flaky salt, to taste
Instructions
- Halve the tomatoes and blot both the cut faces and the mozzarella dry on a clean towel.
- Thread one tomato half, one mozzarella pearl, and one basil leaf onto each skewer.
- Repeat once so each skewer holds two of each, then stand the finished skewers in a low bowl or lay them in rows on a platter.
- Drizzle with olive oil and a thin zigzag of balsamic glaze.
- Finish with a small pinch of flaky salt just before guests eat, not before.
Tip: Draining the mozzarella in a sieve for ten minutes and patting it dry keeps the balsamic from sliding off into a puddle. Wet cheese is the whole difference between a pretty skewer and a soggy one.
Swap it: Large fresh mozzarella sliced into 1-inch cubes works instead of pearls, and a balsamic vinaigrette drizzle is less sweet than glaze if you’re serving alongside dessert. For wooden-free serving, layer the same ingredients in a shallow dish and let guests spoon their own.
Storage: Refrigerate up to 2 days, and add the basil no earlier than a few hours before serving so it doesn’t wilt. Thread without the basil and freeze the tomato-mozzarella skewers for up to 1 month. Contains milk.
5. Deviled Eggs Without the Fuss

Deviled eggs are the item people expect on a shower table, and the “without the fuss” part is about method, not shortcuts. Baking instead of boiling gives you an even cook, and a piping bag turns lumpy spoonfuls into a clean rosette.
Yield: 24 halves · Prep: 10 minutes · Cook: 15 minutes · Total: 30 minutes · Difficulty: Easy
Ingredients
- 12 large eggs
- 1/2 cup (120 ml) mayonnaise
- 2 tablespoons sour cream
- 1 teaspoon Dijon mustard
- 1/2 teaspoon salt, plus a few grinds of black pepper
- 1 teaspoon pickle relish, optional
- 1 tablespoon finely chopped chives
- Smoked paprika, for dusting
Instructions
- Heat the oven to 350°F (177°C) and place the eggs in a single layer in a muffin pan or on a lined baking sheet.
- Bake 15 minutes, then transfer the eggs straight into a bowl of ice water and let them sit 10 minutes. The hot-water-to-ice jump is what peels them cleanly.
- Peel the eggs under a thin stream of water, then halve them lengthwise and scoop the yolks into a bowl.
- Mash the yolks with the mayonnaise, sour cream, Dijon, salt, pepper, relish, and most of the chives until smooth and thick.
- Spoon the mixture into the white halves, or pipe a rosette in each.
- Dust with paprika and the remaining chives just before serving.
Tip: If the yolk filling slumps when you spoon it in, chill the mashed mixture for 20 minutes before filling. Cold filling holds its shape and stays put on a warm platter.
Swap it: Greek yogurt for the sour cream makes it lighter and adds tang, and a tablespoon of finely grated apple is a surprisingly good stand-in for the relish. For a low-carb guest, serve the whites with a filling made from yolks plus avocado instead of mayonnaise.
Storage: Refrigerate in a covered container for up to 2 days, keeping the filling side up and the surface sealed. These travel well in a rigid container set in a bag of ice. Contains egg and milk.
6. Mini Caprese Flatbreads
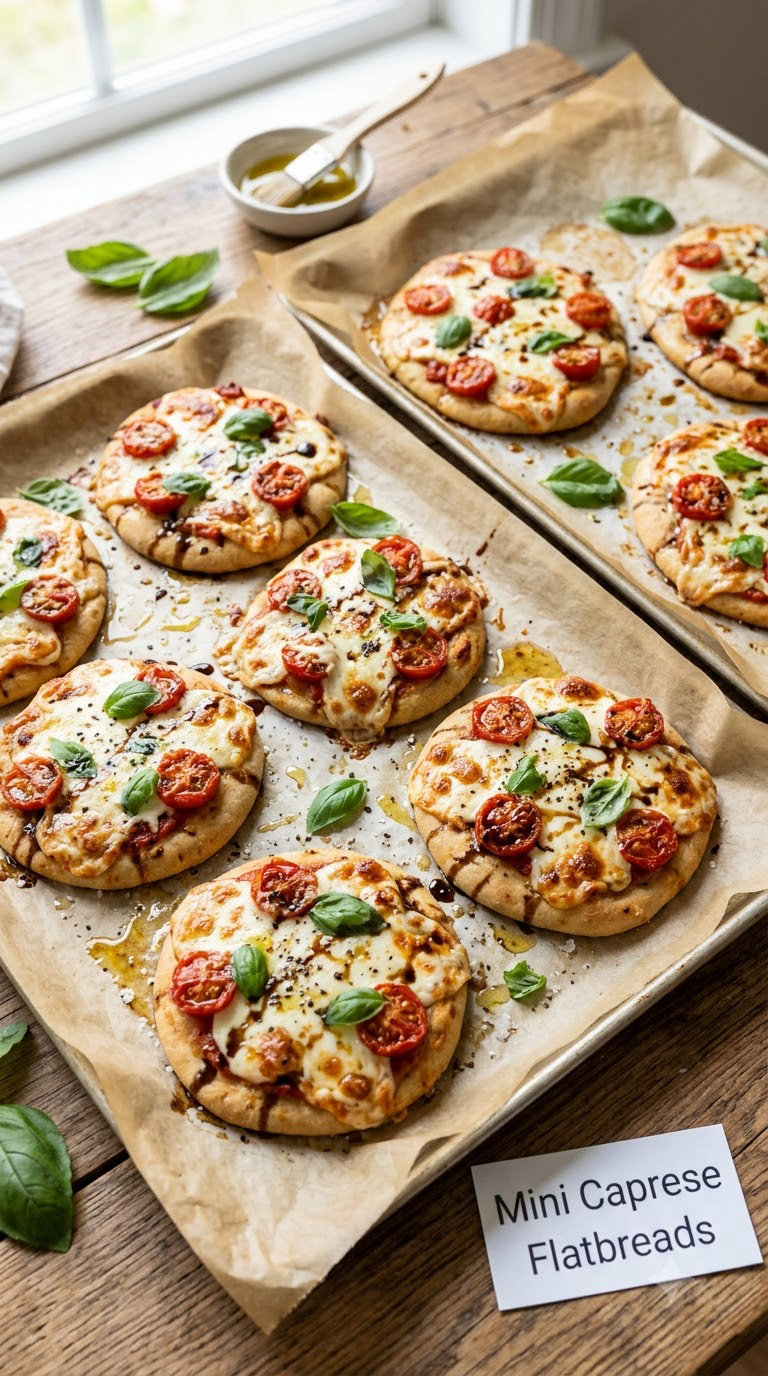
Mini Caprese flatbreads give you the same flavor as the skewers with a warm, blistered edge, which means the spread doesn’t turn into a cold-food-only buffet. They’re quick enough to bake while guests are still putting coats away.
Yield: 12 flatbreads · Prep: 10 minutes · Cook: 12 to 15 minutes · Total: 25 minutes · Difficulty: Easy
Ingredients
- 2 small naan breads or 2 rounds of ready-made pizza dough
- 4 oz (115 g) mozzarella, shredded
- 8 cherry tomatoes, sliced thin
- 2 tablespoons extra-virgin olive oil, divided
- 1/4 teaspoon salt
- 1/4 cup (6 g) fresh basil leaves, torn
- 1 tablespoon balsamic glaze, for drizzling
Instructions
- Heat the oven to 425°F (218°C) and line a sheet pan with parchment.
- Brush each flatbread with 1 tablespoon of olive oil and sprinkle with the salt.
- Scatter the mozzarella evenly over the surface, leaving a bare inch at the edges.
- Arrange the tomato slices on top and drizzle with the remaining tablespoon of olive oil.
- Bake 12 to 15 minutes, until the edges are crisp and deep golden and the cheese is melted and blistered in spots.
- Slide onto a cutting board, add the basil, cut into wedges, and finish with the balsamic glaze.
Tip: Pull them at the first sign of browning on the crust, not at the end of the timer. A high-heat bake goes from blistered to scorched in about two minutes, and the toppings go with it.
Swap it: One large round of pizza dough cut into six wedges works just as well, and a gluten-free crust bakes identically here. If you’re avoiding dairy, top with roasted red pepper and a drizzle of olive oil after the bake.
Storage: Refrigerate up to 3 days in a single layer, or freeze the baked flatbreads for up to 1 month. Reheat in a 400°F (204°C) oven for 6 to 8 minutes so the crust re-crisps. Contains wheat and milk.
7. Slow-Cooker Pulled Pork Tacos
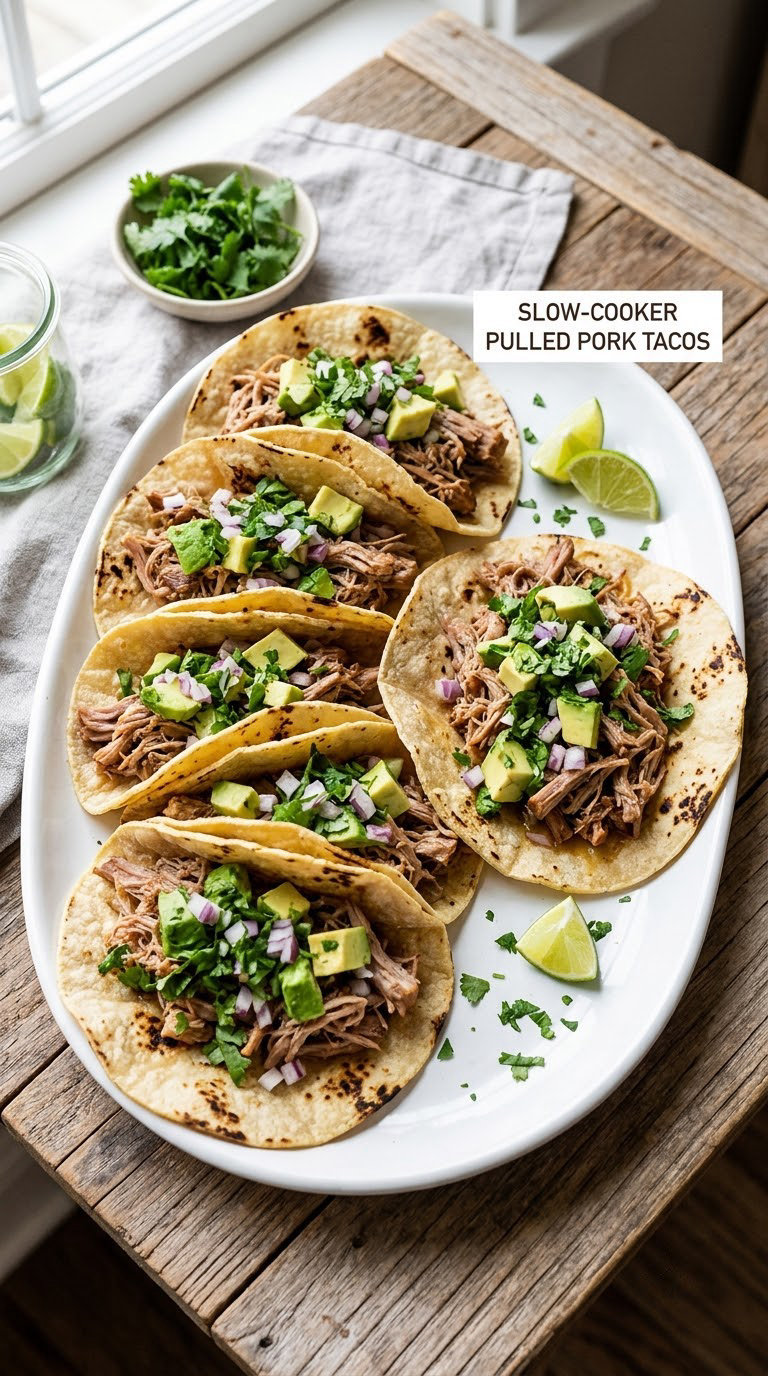
Pulled pork is the answer when the guest list is big and the oven is needed for something else. The slow cooker does the work all morning, and guests build their own tacos, which keeps the line moving and the dishes down.
Yield: 24 servings · Prep: 15 minutes · Cook: 7 to 8 hours on low · Total: about 8 hours, mostly unattended · Difficulty: Easy
Ingredients
- 4 lb (1.8 kg) boneless pork shoulder, trimmed and cut into chunks
- 2 tablespoons smoked paprika
- 1 tablespoon chili powder
- 1 tablespoon garlic powder
- 1 tablespoon brown sugar
- 2 teaspoons salt
- 1 cup (240 ml) barbecue sauce
- 1/2 cup (120 ml) apple juice
- 24 small corn tortillas
- Diced avocado, chopped cilantro, lime wedges, pickled red onion, and slaw, for serving
Instructions
- Mix the paprika, chili powder, garlic powder, brown sugar, and salt in a small bowl.
- Rub the spice mix over every surface of the pork, working it into the chunks with your hands.
- Place the pork in the slow cooker, pour in the barbecue sauce and apple juice, and cover.
- Cook on low for 7 to 8 hours, until a fork slides into the meat with no resistance and the juices run clear.
- Check the temperature with an instant-read thermometer in the thickest part. Pork shoulder is safe at 145°F (63°C), though it usually shreds better closer to 195°F (90°C) after seven hours.
- If you pull it at 145°F (63°C), rest the pork for 3 minutes, then shred it with two forks and stir it back into the juices.
- Warm the tortillas in a dry skillet, 20 seconds a side, or wrap them in foil and warm in the oven at 350°F (177°C) for 10 minutes.
Tip: Watch the sauce in the last hour. Turn the heat to warm if the liquid looks thin and the meat starts to scorch on the bottom.
Swap it: A can of shredded barbecue chicken turns this into a 10-minute dish on the same tortillas. For a gluten-free table, serve the meat over rice in small bowls with the toppings alongside instead of using flour tortillas.
Storage: Refrigerate the shredded meat in its juices for 3 to 4 days, and reheat on a skillet over medium heat until steaming. It also freezes in meal-sized portions for up to 3 months. Warm tortillas separately, always. Contains pork and, in flour tortillas, wheat.
8. Turkey and Cranberry Crescent Rolls
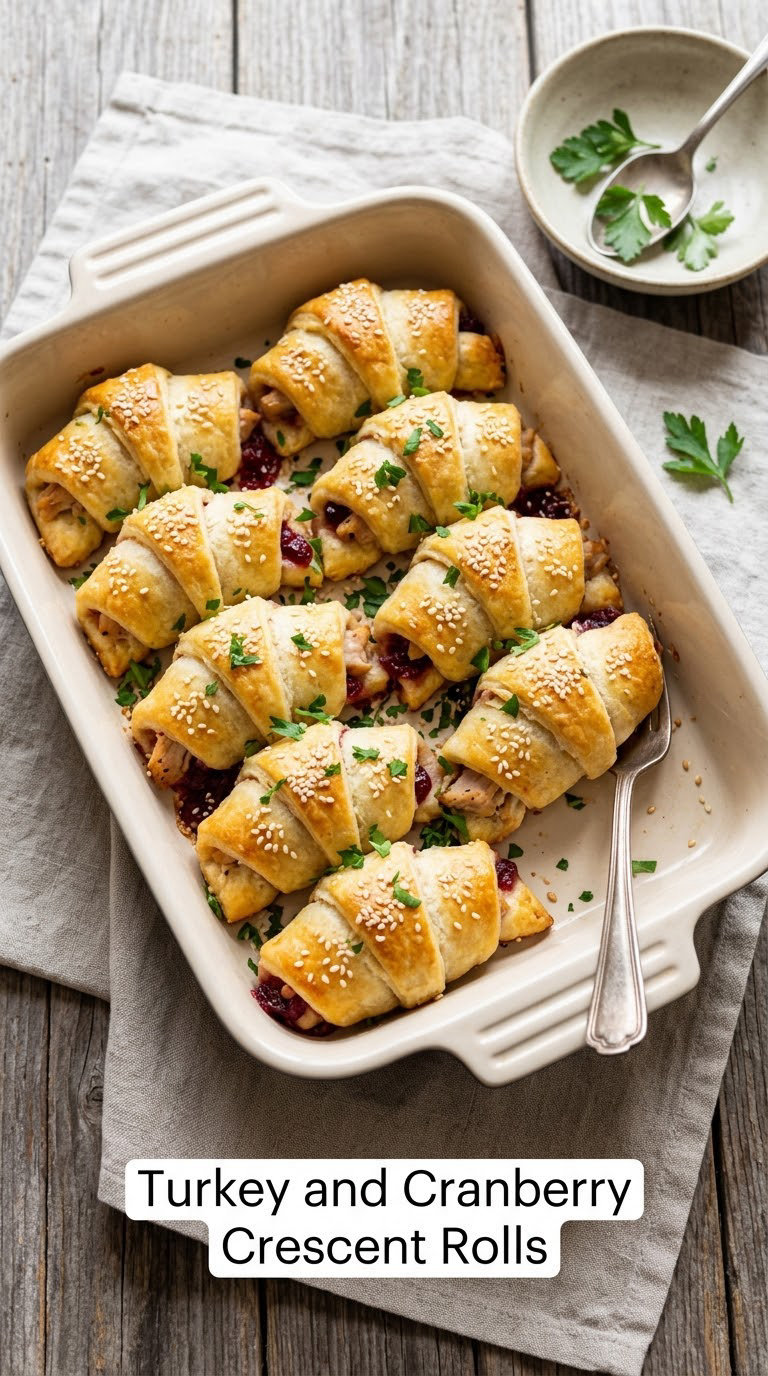
Turkey and cranberry crescent rolls are a fall and winter shower staple that uses a can of turkey, a spoonful of leftover cranberry sauce, and dough that does the work. Cut them in half and they become one-bite pieces with a sweet-tart edge.
Yield: 32 pieces (16 rolls) · Prep: 5 minutes · Cook: 15 to 18 minutes · Total: 20 minutes · Difficulty: Easy
Ingredients
- 2 cans (8 oz / 227 g each) refrigerated crescent roll dough
- 8 oz (225 g) fully cooked shredded turkey
- 1/2 cup (115 g) whole-berry cranberry sauce, or 1/3 cup homemade
- 2 tablespoons butter, melted
- 1 tablespoon granulated sugar
- 1 teaspoon Dijon mustard
- 1/2 teaspoon dried rosemary, crushed
- 1 egg, beaten, for the wash
- 1 tablespoon sesame seeds and a few parsley sprigs, for finishing
Instructions
- Heat the oven to 375°F (190°C) and line a baking sheet with parchment.
- Mix the turkey with the cranberry sauce, the Dijon, the rosemary, and half the melted butter until evenly combined.
- Unroll both dough cans and separate the triangles along the perforations, keeping each triangle in one layer.
- Place a heaping teaspoon of filling near the wide end of each triangle and roll from that end toward the point.
- Leave about half an inch of the wide end showing so the filling doesn’t push out, then press the seam flat.
- Arrange the rolls seam side down with a little space between them, brush with the remaining butter, and brush lightly with the beaten egg.
- Bake 15 to 18 minutes, until deep golden brown on the tops and the layers are visibly puffed and set.
Tip: Seal the wide end of each roll with a fork or a small dab of butter. Cranberry is wet, and an unsealed seam leaks onto the sheet and crisps to a dark patch.
Swap it: Ham and a little orange zest works in place of the turkey, and a spoon of fig jam plus goat cheese makes it vegetarian enough for a meat-light table if you swap the dough for a puff pastry sheet.
Storage: Keep at room temperature in a covered container for up to 6 hours, then refrigerate for up to 4 days. Freeze baked rolls for up to 3 weeks and reheat at 350°F (177°C) for 8 minutes. Contains wheat, milk, and egg.
9. Make-Ahead Pasta Salad
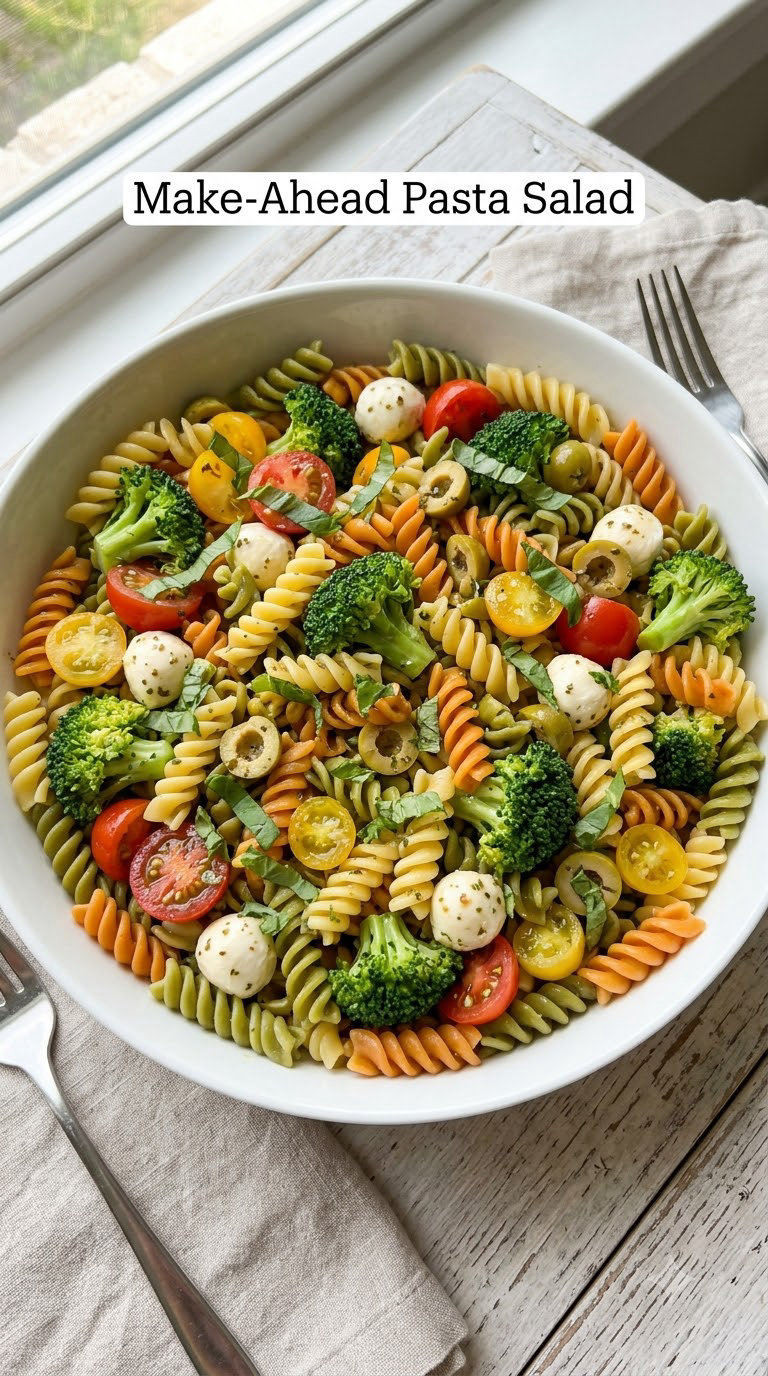
A pasta salad is the item that keeps a buffet line from stalling, because it sits at room temperature and portions itself with a big spoon. This version is built to be mixed in the morning and eaten four hours later, without the noodles turning to paste.
Yield: 12 servings · Prep: 10 minutes · Cook: 12 minutes · Total: 25 minutes plus 2 hours chill · Difficulty: Easy
Ingredients
- 12 oz (340 g) rotini, farfalle, or penne
- 2 cups (140 g) broccoli florets, cut into small pieces
- 1 1/2 cups (240 g) cherry tomatoes, halved
- 1 cup (140 g) mozzarella pearls, halved
- 1/2 cup (75 g) pitted green olives, sliced
- 1/2 cup (80 g) creamy Italian dressing
- 1/3 cup (40 g) grated Parmesan
- 1/2 cup (15 g) fresh basil leaves
- 1/2 teaspoon salt and 1/4 teaspoon black pepper
Instructions
- Bring a large pot of salted water to a boil and cook the pasta for 9 to 11 minutes, until al dente and still firm in the center.
- Drain, then rinse the pasta under cool water for 30 seconds and shake it dry. Skipping the rinse is what makes cold pasta salad taste like yesterday’s lunch.
- Blanch the broccoli in the same pot for 60 seconds, then drain and rinse under cold water.
- Combine the pasta, broccoli, tomatoes, mozzarella, and olives in a large bowl.
- Pour over the dressing and the Parmesan, add the salt and pepper, and toss well until every piece is lightly coated.
- Fold in the basil and refrigerate at least 2 hours before serving. Stir once again just before it goes to the table.
Tip: Dress the salad 2 to 4 hours before serving, not the night before. Overnight, the noodles drink the dressing and the salad turns heavy and dull.
Swap it: For a dairy-free version, skip the mozzarella and Parmesan and use a lemon-olive oil dressing. Gluten-free pasta holds its texture in a cold salad better than most people expect.
Storage: Refrigerate up to 4 days in a sealed container. For longer storage, freeze the cooked, rinsed pasta with a teaspoon of oil for up to 2 months and mix it with fresh dressing and vegetables after thawing. Contains wheat and milk.
10. Fruit Yogurt Parfaits
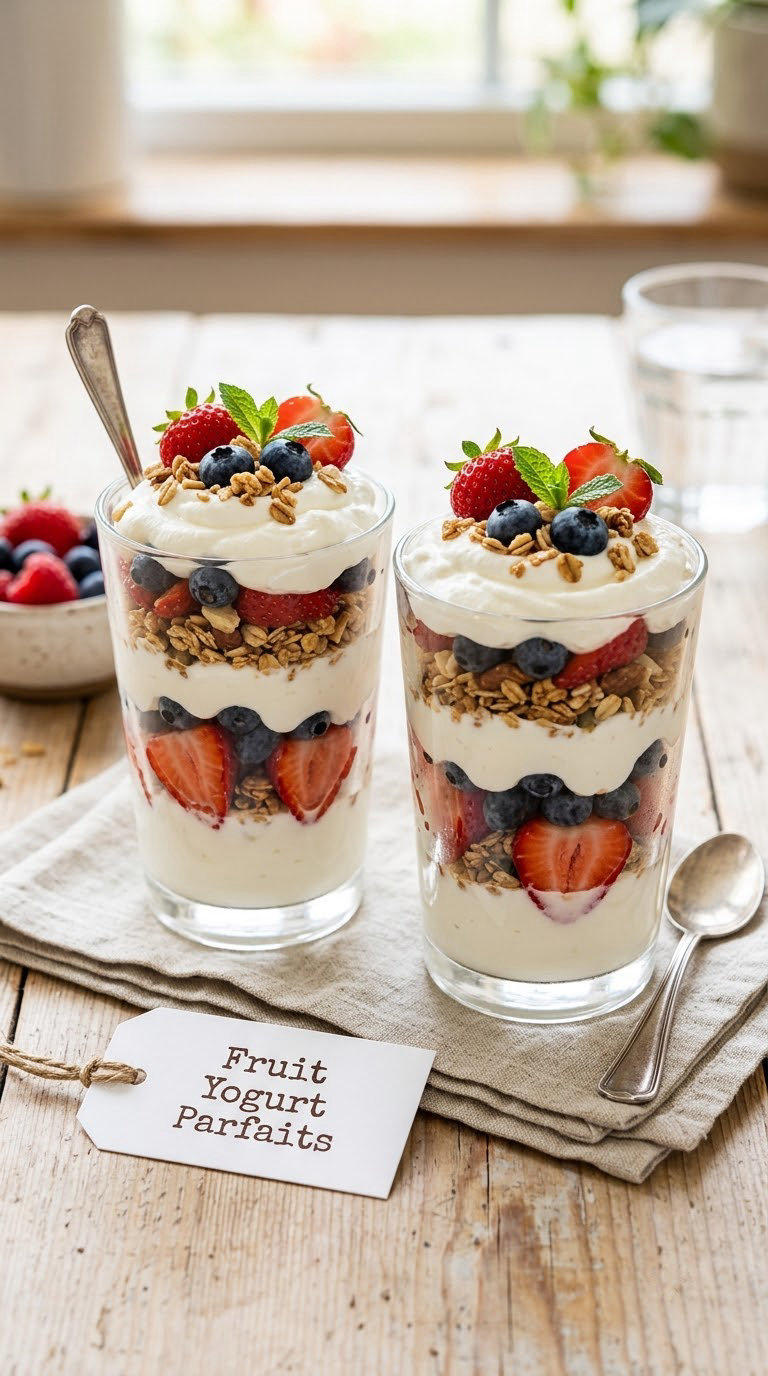
Parfaits look like they came from a café, and assembly is the entire recipe. Use clear cups and let the layers show, because the color is the whole point and it photographs well at a sprinkle.
Yield: 24 cups · Prep: 15 minutes · Cook: none · Total: 15 minutes · Difficulty: Easy
Ingredients
- 4 cups (960 g) plain or vanilla Greek yogurt
- 3 cups (450 g) mixed berries, such as strawberries, blueberries, and raspberries
- 2 cups (110 g) granola
- 1 cup (150 g) heavy cream, whipped with 1 tablespoon powdered sugar
- 1 tablespoon honey, plus more to taste
- 24 clear 8-ounce plastic or glass cups
Instructions
- Wash the berries and dry them thoroughly, then cut the larger strawberries into thin slices.
- Whip the cream with the powdered sugar to soft peaks and set aside, covered and cold.
- Sweeten the yogurt with the honey and stir it smooth. Taste it, since Greek yogurt varies a lot in acidity.
- Layer 1/3 cup of yogurt, then 1/3 cup of berries, then a small sprinkle of granola in each cup.
- Repeat once so every cup is layered rather than topped, and finish each with a small spoon of whipped cream.
- Chill the finished cups until serving.
Tip: Add the granola in the hour before serving, never the night before. Granola softens in a few hours in a chilled cup, and a soggy bottom layer ruins the crunch that makes the dessert work.
Swap it: A low-sugar swap for guests managing blood sugar: use plain Greek yogurt, berries, and toasted chopped walnuts in place of the granola and honey. Coconut yogurt works if the rest of the table is dairy-free; add the granola separately so nobody is guessing.
Storage: Assemble up to 8 hours ahead and refrigerate. Store the cut berries and whipped cream separately for up to 4 days, and freeze the berries alone for up to 3 months. Contains milk; the version with granola also contains wheat and oats.
11. Strawberry Shortcake Cups
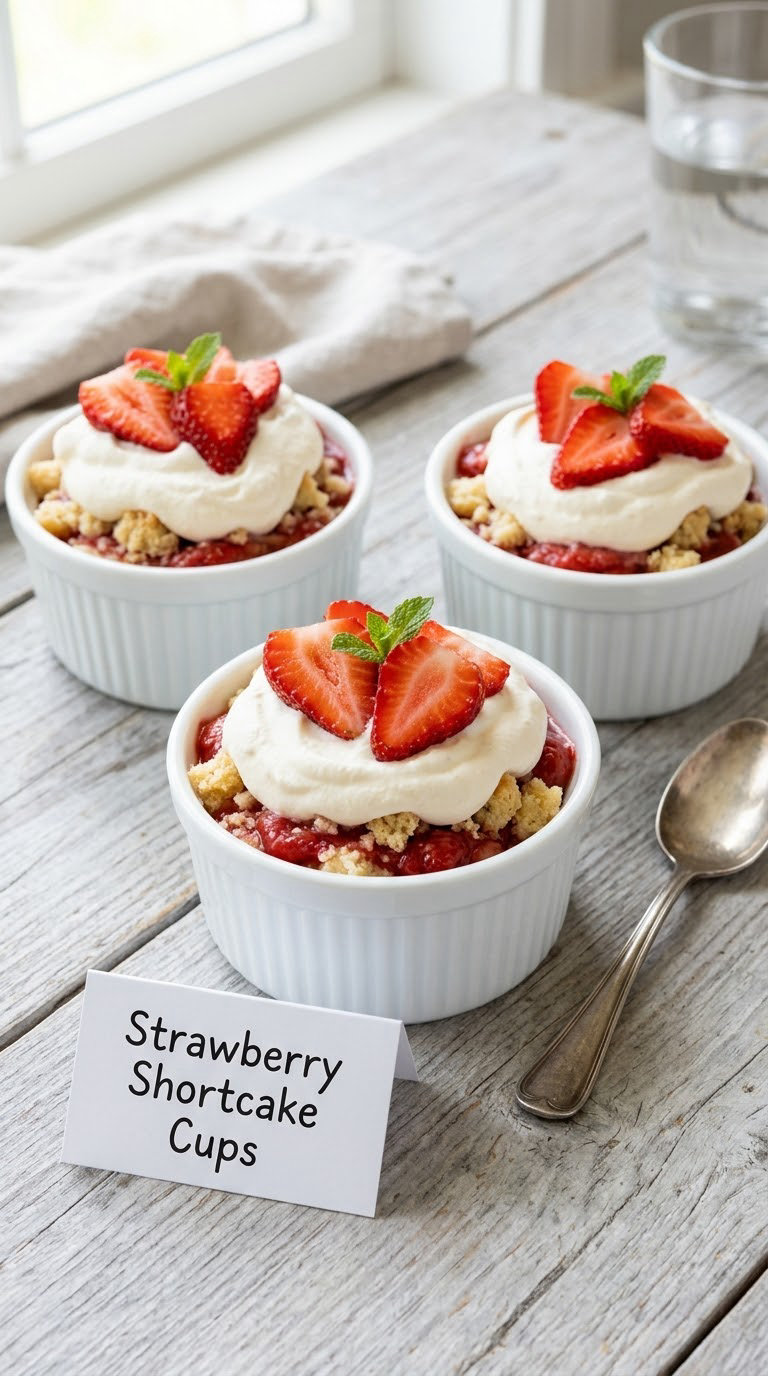
These are the individual desserts that let you skip cutting anything at the party, and the batter comes together in a single bowl in about five minutes. Ramekins bake faster than one big cake, so they’re ready while guests are still arriving.
Yield: 12 cups · Prep: 10 minutes · Cook: 20 to 24 minutes · Total: 35 minutes · Difficulty: Easy
Ingredients
- 1 cup (125 g) all-purpose flour
- 1/2 cup plus 2 tablespoons (100 g) granulated sugar
- 1 teaspoon baking powder
- 1/4 teaspoon salt
- 4 tablespoons (57 g) unsalted butter, melted and cooled
- 1 large egg
- 1/2 cup (120 ml) whole milk
- 1 teaspoon vanilla extract
- For serving: 2 cups (300 g) sliced strawberries, 1 cup (150 g) whipped cream, and 2 tablespoons powdered sugar
Instructions
- Heat the oven to 350°F (177°C) and grease 12 ramekins or a 12-cup muffin pan, ignoring any paper liners.
- Whisk the flour, sugar, baking powder, and salt together in a large bowl.
- Make a well in the center, then add the melted butter, egg, milk, and vanilla and whisk until the batter is smooth with no dry pockets.
- Divide the batter evenly between the ramekins, filling each about two-thirds full.
- Bake 20 to 24 minutes, until the tops are golden, the edges have pulled from the sides, and a toothpick in the center comes out clean.
- Cool 10 minutes in the pan, then turn out onto a rack.
- Just before serving, top each cup with a spoonful of strawberries, a dollop of cream, and a dusting of powdered sugar.
Tip: Wait the full 10 minutes before turning them out. A warm, fragile cake tears into crumbs, and the crumb goes right down the side of the ramekin.
Swap it: Use the same batter with peaches or blueberries in season, and stir 1 teaspoon of lemon zest into the batter for a brighter flavor. A gluten-free one-to-one flour blend bakes without any other change.
Storage: Refrigerate the unfrosted cakes in a covered container for up to 3 days; add strawberries and cream only when it’s time to serve. Freezer-friendly for up to 2 months wrapped tightly. Contains wheat, milk, and egg.
12. Brown Butter Chocolate Chip Cookies
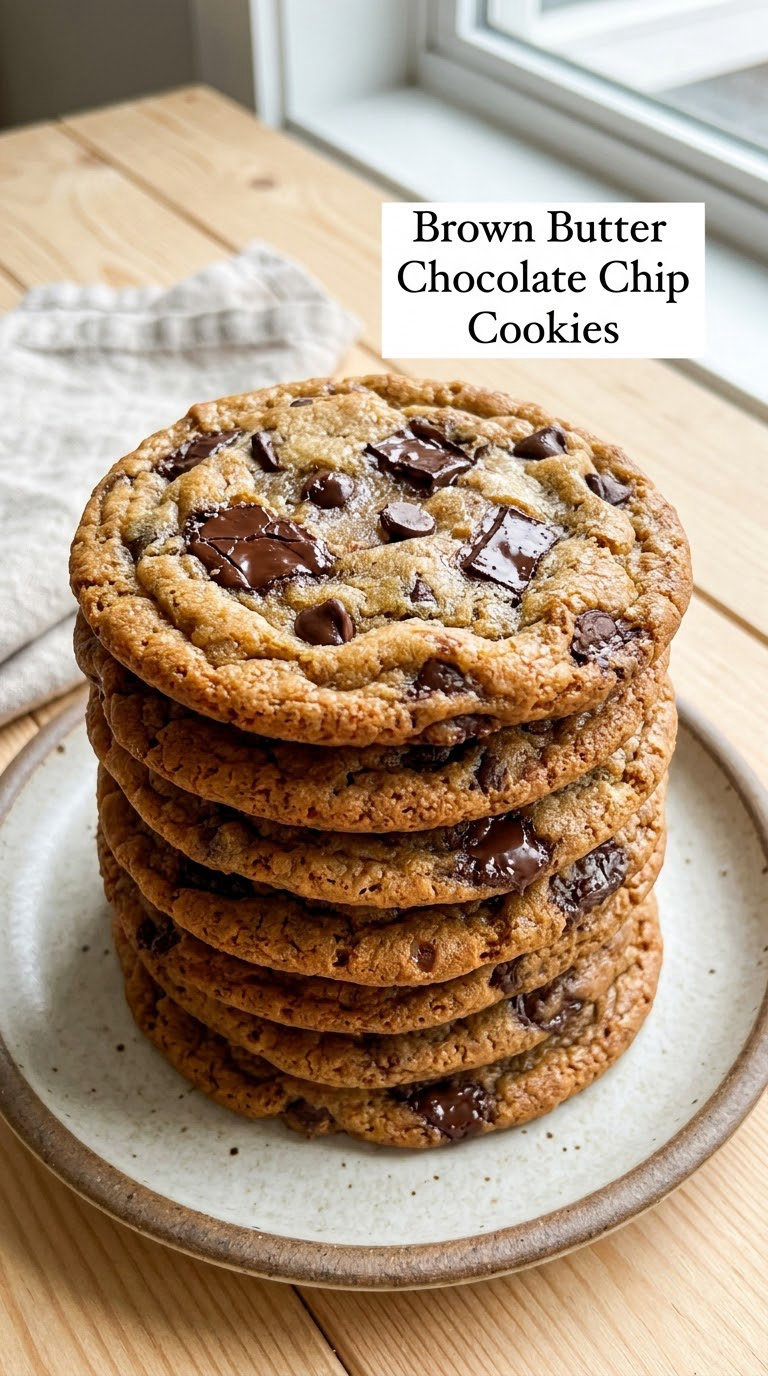
Browning the butter before the dough is mixed is the whole trick: it adds a nutty, toffee depth that plain butter never reaches. These are the cookies to bake three days ahead, then bring to room temperature in a sealed bag so they stay soft.
Yield: 24 cookies · Prep: 20 minutes · Cook: 11 to 13 minutes per tray · Total: 40 minutes · Difficulty: Medium
Ingredients
- 1 cup (227 g) unsalted butter
- 1 cup (213 g) packed dark brown sugar
- 1/2 cup (100 g) granulated sugar
- 2 large eggs
- 2 teaspoons vanilla extract
- 2 1/4 cups (281 g) all-purpose flour
- 1 teaspoon baking soda
- 1 1/2 teaspoons fine salt
- 1 teaspoon instant espresso powder, optional
- 10 oz (283 g) semisweet chocolate chips or chopped chocolate
Instructions
- Melt the butter in a light-colored saucepan over medium heat and keep cooking, swirling, until it foams, quietens, and the milk solids turn golden and smell like toasted nuts, 5 to 7 minutes.
- Pour the butter into a bowl, scraping in the browned bits, and let it cool 20 minutes until it stops being warm to the touch.
- Whisk both sugars into the cooled butter, then beat in the eggs and vanilla until glossy.
- Fold in the flour, baking soda, salt, espresso powder, and chocolate until no dry streaks remain.
- Chill the dough, covered, for at least 2 hours and up to 3 days.
- Heat the oven to 350°F (177°C) and line two sheet pans with parchment.
- Portion the dough into 24 balls, about 2 tablespoons each, and space them 2 inches apart.
- Bake 11 to 13 minutes, until the edges are set and golden and the centers still look slightly underdone.
- Cool on the pan 5 minutes, then transfer to a rack.
Tip: Pull the cookies when the center still looks soft and underbaked. They firm up as they cool, and a tray that looks done in the oven usually bakes dry.
Swap it: Swap the semisweet chips for chopped milk chocolate or 1 cup (120 g) chopped toffee for a sweeter cookie. A dairy-free chocolate bar works, and the dough is otherwise unchanged.
Storage: Baked cookies keep 5 days in an airtight container, with a slice of bread in the bag if you like them soft. Scooped dough balls freeze flat for 3 months and bake from frozen at 325°F (163°C) for 13 minutes. Contains wheat, milk, and egg.
13. Lemon Bars
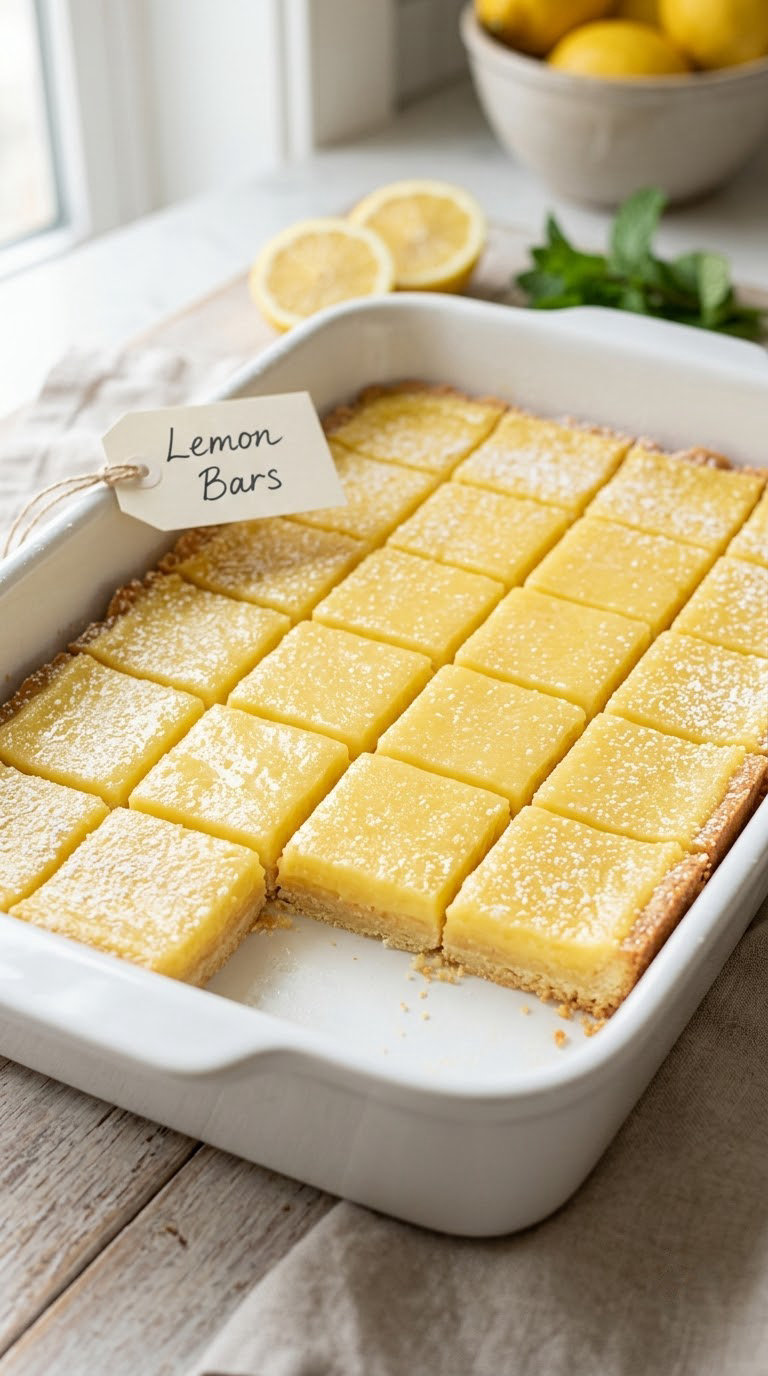
Lemon bars are the most gender-neutral dessert on this list, and they’re the one people eat two of without being asked. Filling them into a single pan means one bake, one knife, and nothing to plate at the last minute.
Yield: 16 bars · Prep: 20 minutes · Cook: 30 to 35 minutes · Total: 50 minutes · Difficulty: Medium
Ingredients
- For the crust: 6 tablespoons (85 g) unsalted butter, melted, plus 1 1/2 cups (200 g) all-purpose flour, 1/3 cup (50 g) powdered sugar, and 1/4 teaspoon salt
- For the filling: 4 large eggs, 3/4 cup (150 g) granulated sugar, 1/3 cup (75 ml) fresh lemon juice, 2 teaspoons lemon zest, 4 tablespoons (57 g) unsalted butter, melted, and 1 teaspoon all-purpose flour
Instructions
- Whisk the crust ingredients in an 8-inch square baking pan until evenly combined, with no streaks of butter.
- Press the mixture firmly into the pan in an even layer and bake at 325°F (163°C) for 12 to 15 minutes, until the edges are light golden and the center looks dry.
- Whisk the eggs, sugar, lemon juice, zest, melted butter, and flour in a bowl until smooth and pourable.
- Pour the filling over the hot crust and return the pan to the oven at 350°F (177°C) for 18 to 22 minutes, until the top is set, glossy, and jiggles only slightly when you tap the edge.
- Cool completely in the pan on a rack before cutting, about 2 hours.
- Cut into 16 squares with a thin knife dipped in hot water and wiped clean between cuts.
Tip: Fill the hot crust immediately. A cold crust drinks the liquid filling and develops a soggy, cracked base, which is the single most common lemon bar failure.
Swap it: Lime works in place of lemon for a sharper, less sweet bar, and a 1-to-1 gluten-free flour blend makes a sturdy crust. For a dairy-free version, use a vegan buttery spread that browns well.
Storage: Cover and refrigerate for up to 5 days; bring to room temperature about 20 minutes before serving. Freeze cut bars in layers for up to 3 months. Contains wheat, milk, and egg.
14. Fresh Berry Trifle
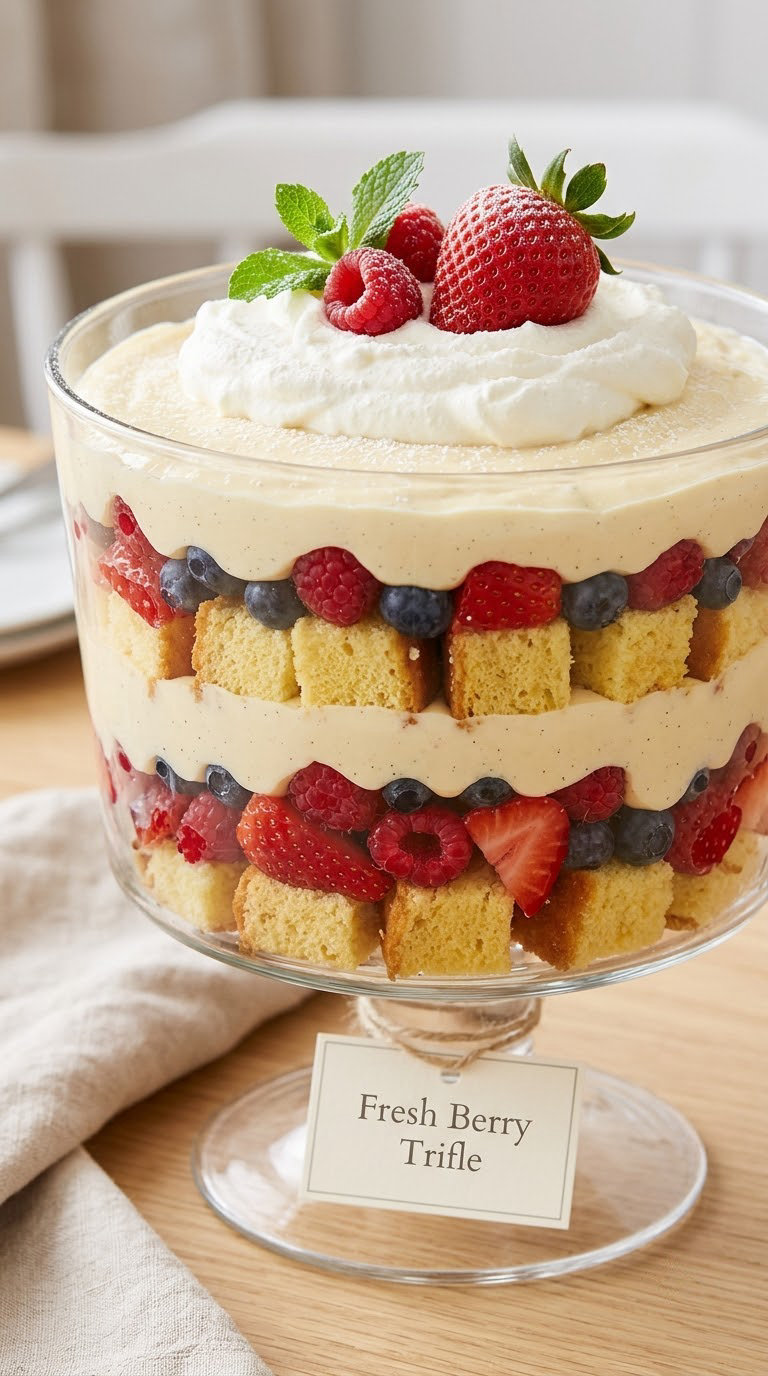
A trifle is the single dessert that can serve forty people without forty plates, and the glass bowl makes it the centerpiece without any decorating. Keep the layers distinct rather than stirring them together, both for looks and for texture.
Yield: 16 servings · Prep: 30 minutes · Cook: none · Total: 30 minutes plus 4 hours chill · Difficulty: Easy
Ingredients
- 1 box (450 g) angel food or pound cake, cut into 1-inch cubes
- 4 cups (600 g) mixed berries, such as strawberries, raspberries, and blueberries
- 2 cups (480 ml) heavy cream
- 1/2 cup (60 g) powdered sugar
- 1 teaspoon vanilla extract
- 1/2 cup (110 g) vanilla instant pudding mix, optional, for a shortcut custard
- 1/2 cup (75 g) toasted sliced almonds, optional
- Fresh mint and whole strawberries, for the top
Instructions
- Whip the cream, powdered sugar, and vanilla to soft peaks and refrigerate.
- Set aside a dozen whole berries for the top and roughly chop the rest; let the chopped fruit sit 10 minutes and drain the juice it releases.
- Layer a third of the cake cubes in the bottom of a large glass bowl and press them into an even layer.
- Spoon a third of the berries over the cake, then a third of the whipped cream, adding the reserved berry juice as you go so the cake stays moist.
- Repeat the cake, berry, and cream layers twice more, ending with cream in the top layer.
- Cover and chill at least 4 hours, preferably overnight, until the layers are firm and the whole bowl is cold.
- Dust with the almonds, top with the whole berries and mint, and serve.
Tip: Chill the bowl you assemble in. A room-temperature glass bowl warms the cream and dairy in the middle of a party, which is the fastest way to make a trifle unsafe to eat.
Swap it: Make the pudding version instead of the cream: whip the pudding mix with 2 cups (480 ml) milk for 2 minutes, chill it, and use it in place of half the whipped cream. It holds for a day, and the layer stays clean. To make it gluten-free, swap the cake for a gluten-free pound cake.
Storage: Refrigerate for up to 3 days and keep the bowl out of sun and heat. Don’t freeze it; the cake goes dry and the cream breaks. Contains milk, egg, and wheat in the classic version.
15. Baby Shower Chocolate-Covered Strawberries
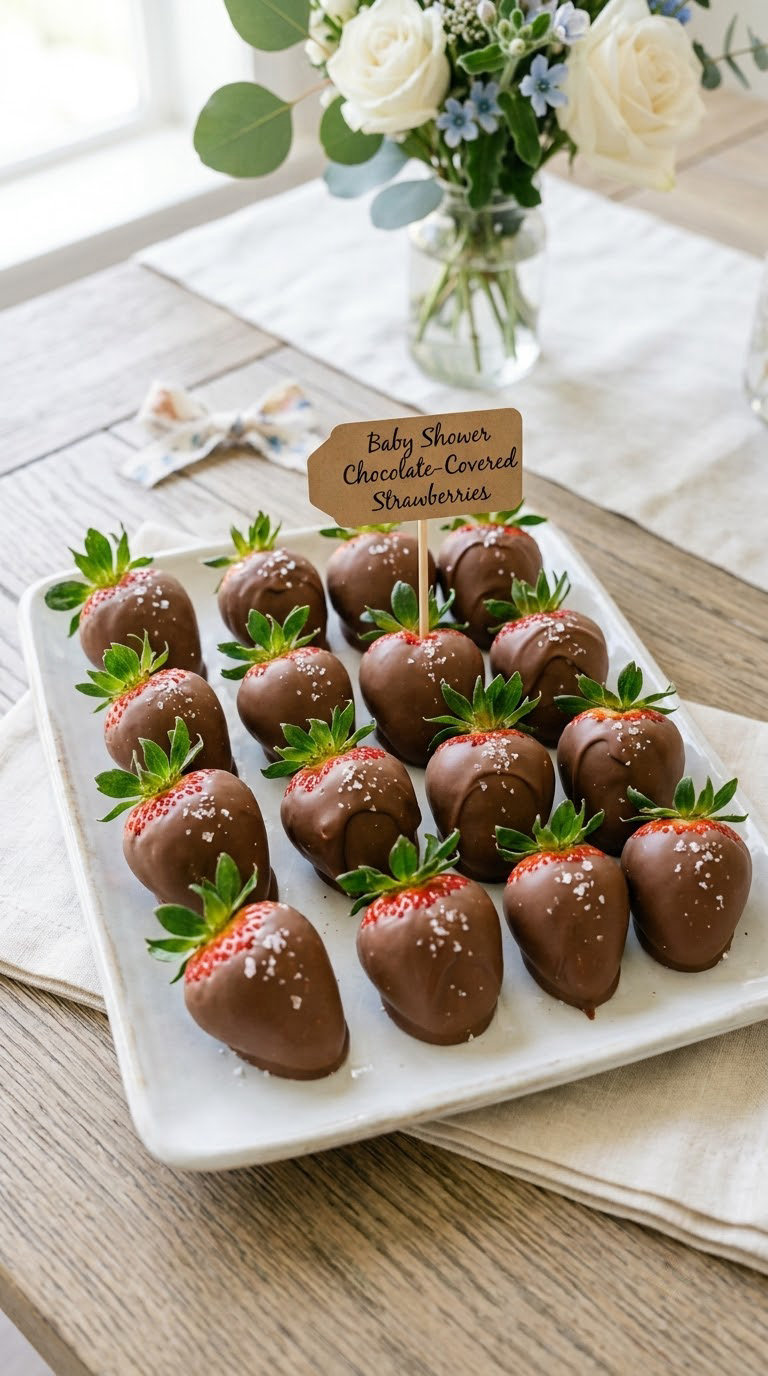
This is the dessert to make when you have no time or no oven. Berries go in cold water, get dried properly, and get dipped in chocolate that you can buy already melted or melt yourself in under five minutes.
Yield: 30 dipped strawberries · Prep: 20 minutes · Cook: 5 minutes to melt chocolate · Total: 35 minutes plus 20 minutes to set · Difficulty: Easy
Ingredients
- 1 lb (450 g) strawberries, stems left on
- 8 oz (227 g) semisweet or milk chocolate, or 8 oz (227 g) melting chocolate wafers
- 2 tablespoons (28 g) coconut oil or vegetable shortening, for a thinner dip
- 2 tablespoons sprinkles, chopped nuts, or shredded coconut, for the top
- Flaky sea salt, to taste
Instructions
- Wash the strawberries in cool running water, remove the hulls, and dry them completely on a clean towel for at least 30 minutes.
- Line a baking sheet with parchment or wax paper.
- Melt the chocolate in a microwave-safe bowl in 20-second bursts, stirring between each, until smooth. Stir in the coconut oil until the mixture runs off the spoon in a ribbon.
- Hold a strawberry by the stem, twist it into the chocolate, and turn it so about two-thirds of the berry is coated.
- Tap the excess off against the rim of the bowl, then set the berry on the prepared sheet.
- Add the sprinkles while the chocolate is still glossy, and finish with a small pinch of flaky salt.
- Let the berries set at cool room temperature for 15 to 20 minutes, or refrigerate them for 10 minutes.
Tip: Dry berries completely and stay cool while they set. Any water on the skin or in the air turns the chocolate dull and streaky, and a warm kitchen makes it bloom before it hardens.
Swap it: White chocolate needs a lower heat, so melt it in short bursts and keep it under 110°F (43°C) or it seizes. For a dairy-free option use dairy-free chocolate chips with 1 tablespoon coconut oil. Add a squeeze of lemon to dark chocolate to cut the sweetness.
Storage: Store only washed, fully dried berries, on parchment in the fridge for up to 4 days. Bring them out 20 minutes before serving. Dipped berries freeze for about 1 month, though the coating dulls. Contains milk unless you use dairy-free chocolate.
Tips for Making These
A few planning decisions decide whether the day feels calm or chaotic, and none of them involve a recipe.
- Count portions, not dishes. For a two-hour afternoon shower, plan 8 to 10 savory bites per guest and 3 to 4 small desserts. Five savory dishes and two desserts covers roughly 25 people; scale the quantities up from there, not the number of recipes.
- Pick two savory, one brunch, and two sweet. That combination fills people without putting out a full meal, and it leaves room for the cake if someone’s bringing one.
- Do 80 percent of the cooking the day before. Quiche cups, deviled eggs, pinwheels, cookies, lemon bars, and chocolate-covered strawberries all improve or hold fine overnight. Save flatbreads, pasta salad assembly, and any whipped cream for the morning.
- Hold cold food under two hours. Set the platter out when guests arrive, keep it on a chilled platter or over an ice tray, and move anything perishable indoors within two hours. Pulled pork is the one dish that stays comfortably out longer, since it is held hot.
- Label the dishes that matter. Tiny folded tent cards with “contains egg,” “gluten-free,” and “dairy” on them solve more guest stress than any recipe change, and it takes five minutes.
- Keep one no-cook option. Caprese skewers, pinwheels, and chocolate-covered strawberries can be assembled while guests arrive, so a late start doesn’t leave you with nothing on the table.
How to plan these easy baby shower food ideas for a crowd
Work from guest count, not recipe count. Write down how many people are coming, subtract the partners and coworkers who skip dessert if that group is large, then divide your list into hot food, cold finger food, and sweets.
For 15 to 20 guests, three savory items and two desserts is plenty. From 25 to 40, go to four savory, one warm main, and three desserts. The pulled pork tacos are the reason that scale-up is cheap: the same four pounds of pork that feeds 24 tacos becomes 40 small tacos when you stop using whole ones and hand out two per person.
If you’re hosting a small sprinkle of 15 or fewer, cut the list in half. Skewers, pinwheels, and strawberries feed that group comfortably, and you skip the oven entirely. My easy party food ideas for a summer gathering follow the same build-your-own logic if you need more no-cook options.
How to keep everything safe and calm on the table
Cold appetizers and desserts are the easiest part of a shower menu to get right, because the whole job is temperature and time. Refrigerate everything until the moment you set it out, and don’t let it sit on a warm table in a sunlit room for more than two hours.
For a longer party, set the cold platters on trays filled with ice, and pull the deviled eggs and the yogurt parfaits out of the fridge in two waves. In warm weather, move the chocolate-covered strawberries inside; they are the one dessert that sweats and streaks.
One more thing worth doing: cook and cool the pulled pork and the eggs separately from the raw prep, and refrigerate leftovers within two hours. A shower with a dozen pregnant guests and a week of leftovers nobody wants to smell is a real risk. For more ideas on simple mains that reheat well, the easy comfort food dinner ideas roundup covers the same ground.
Frequently Asked Questions
How much food do I need for a baby shower with 20 guests?
For a two-hour afternoon shower with 20 guests, plan 8 to 10 savory bites and 3 to 4 small desserts per person. Five savory dishes, one warm main, and two desserts covers that comfortably, with room for cake if someone brings one. A table of three savory items, one brunch dish, and two sweets is enough for 15 guests. Buy a little extra on the two items guests tend to finish first.
Which options in these 15 easy baby shower food ideas can be made ahead?
Most of them. Mini quiche cups, deviled eggs, both pinwheels, the crescent rolls, cookies, lemon bars, and chocolate-covered strawberries can be finished a day or more in advance. Make the pasta salad, flatbreads, and trifles the morning of the shower, and wait to add granola to the parfaits and whipped cream to shortcake cups until an hour before serving, or they go soft.
What can I serve to guests who do not eat meat?
The veggie pinwheels, Caprese skewers, mini Caprese flatbreads, mini quiche cups made without ham, fruit yogurt parfaits, lemon bars, and chocolate-covered strawberries are all meat-free. Skip the crescent roll turkey, the pulled pork, and the pinwheels made with chicken. Label each dish at the table so guests can choose confidently without asking you mid-party.
How long can the appetizers and desserts sit out safely?
Cold appetizers and desserts should sit out no more than two hours at room temperature, and only one hour if the room is warmer than 80°F (27°C). Keep them refrigerated until guests arrive, then set platters on ice trays and swap them out as they empty. Hot food like pulled pork and quiche cups is safe above 140°F (60°C), so hold them in a warmed slow cooker or covered dish.
What are easy baby shower foods for guests who avoid crunchy or highly seasoned foods?
The Caprese skewers, vegetable pinwheels, yogurt parfaits without granola, chocolate-covered strawberries, deviled eggs without pickled relish, and the mild lemon bars are all soft and not spicy. Skip the cookies, the granola layer in the parfaits, the flatbreads with crisp edges, and the pulled pork with pickled onions and chili seasoning. Keeping one gentle, soft option on the table prevents guests from simply going without.
Which Recipe Should You Make First?
Start with the Caprese skewers. They need no heat, take twenty minutes, sit at room temperature without turning sad, and the tomato-basil-mozzarella combination is about as close to universally liked as food gets. If someone in your group eats no meat or is avoiding crunchy and seasoned dishes, they’re still welcome at the table, which is the other reason they work first.
After that, build a spread of two savory dishes, one brunch item, and two desserts rather than cooking all 15. For an afternoon shower I’d go pulled pork tacos, deviled eggs, quiche cups, the berry trifle, and the lemon bars, with the chocolate-covered strawberries as the five-minute dessert you assemble when guests arrive. Whatever you pick from these 15 easy baby shower food ideas, write the oven-on and oven-off items on a sticky note the night before, and the day itself stays fun.