
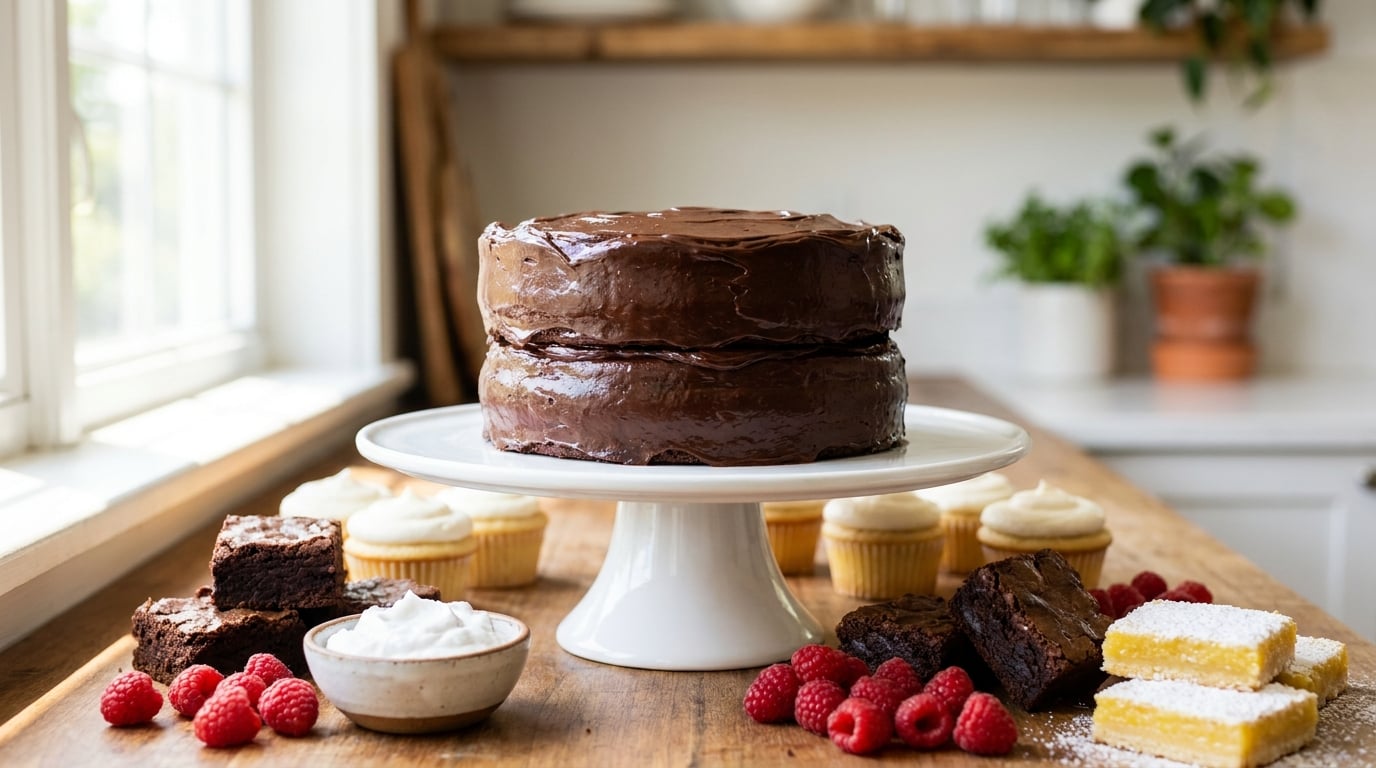
Dairy free dessert recipes for parties are easier than most cooks expect, and the ten on this page are the ones I actually cook when people are coming over. Every recipe below is written out in full, with real quantities, times and storage notes, so you can pick one, scale it and serve it without a second trip to the grocery store.
Hosting is harder when a guest cannot eat the dessert. One dairy-free cake or tray of bars quietly covers milk allergy, lactose intolerance and vegan guests at the same time, and nobody at the table has to sit with a plate of fruit while everyone else digs in. I cook for mixed tables most weeks in summer and again from October through December, and these ten have survived every one of those.
All ten hold well, travel without a cooler, and can be finished a day or two ahead. None of them need a stand mixer, and most are one bowl.
Table of Contents
Dairy Free Dessert Recipes for Parties at a Glance
| Recipe | Time | Difficulty | Best for |
|---|---|---|---|
| 1. Rich Chocolate Layer Cake | 1 hr 20 min | Medium | Birthdays and the main table |
| 2. Fudgy Brownies | 45 min | Easy | First-timer crowd-pleaser |
| 3. Vanilla Cupcakes with Berry Swirl | 55 min | Easy | Kids parties and clean hands |
| 4. Chocolate Chip Party Cookies | 40 min | Easy | Cookie table and make-and-take bags |
| 5. Lemon Shortbread Bars | 55 min | Medium | Spring and summer buffets |
| 6. Strawberry Shortcake Trifle | 30 min + chill | Easy | No-oven summer gatherings |
| 7. Coconut Cream Party Pie | 25 min + chill | Easy | Make-ahead and warm-weather hosting |
| 8. Banana Pudding | 25 min + chill | Easy | Puddings served in cups |
| 9. Salted Caramel Fruit Tart | 45 min + chill | Medium | Elegant displays and brunch |
| 10. S’mores Party Bars | 35 min | Easy | Transport, freezing, casual crowds |
1. Rich Chocolate Dairy Free Layer Cake
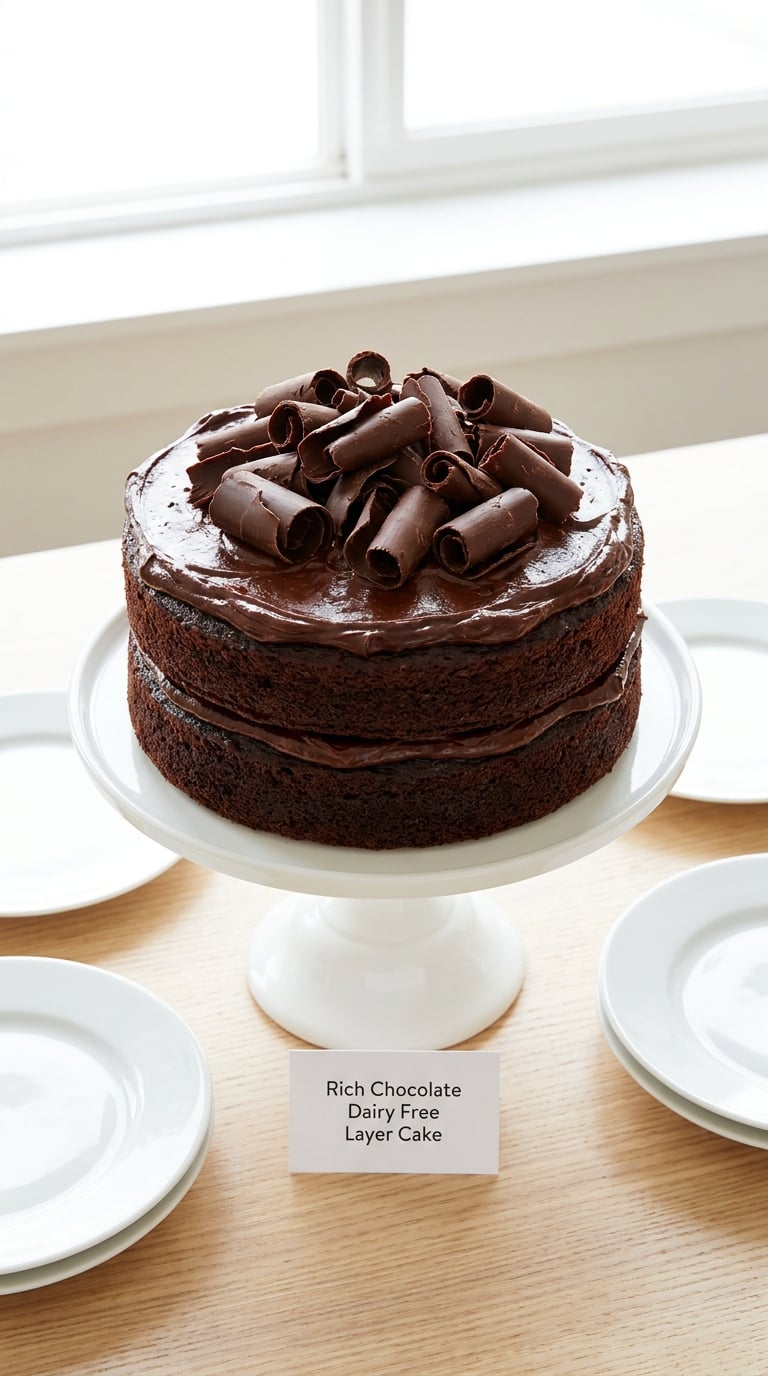
This is the one I bake when the birthday candle matters. Cocoa powder and hot coffee give real chocolate depth, and plant butter plus cold oat milk keep the crumb tender for days without the shortening flavor.
Yield: 12 slices · Prep: 25 min · Cook: 32 min · Total: about 1 hr 20 min · Difficulty: Medium
Ingredients
- For the cake:
- 1 3/4 cups all-purpose flour (220 g)
- 3/4 cup unsweetened cocoa powder (65 g)
- 1 3/4 cups granulated sugar (350 g)
- 1 teaspoon baking soda
- 1 teaspoon fine salt
- 2 large eggs
- 3/4 cup unsweetened oat milk (180 ml), plus more for brushing
- 1/2 cup neutral oil (120 ml)
- 2 teaspoons vanilla extract
- 1 cup hot strong coffee or hot water (240 ml)
- For the cocoa frosting:
- 170 g dairy-free dark chocolate, chopped
- 1/2 cup coconut cream, chilled (120 ml)
- 1/4 cup powdered maple syrup (60 ml)
- 1 teaspoon vanilla extract
- Pinch of salt
Instructions
- Heat the oven to 350F (175C) and line two 8-inch round pans with parchment.
- Whisk the flour, cocoa, baking soda and salt in a large bowl until no cocoa streaks remain.
- In a second bowl, whisk the sugar, eggs, oat milk, oil and vanilla for about 2 minutes, until pale and slightly thickened.
- Pour the wet mixture into the dry ingredients and stir just until the batter comes together. Do not overmix.
- Stir in the hot coffee. The batter will be thin, which is exactly right.
- Divide between the pans and bake 28 to 32 minutes, until the tops spring back lightly and a skewer comes out with a few moist crumbs.
- Cool in the pans 12 minutes, then turn out onto a rack and cool completely.
- Warm the chopped chocolate with the coconut cream in 15-second microwave bursts, stirring each time, until glossy. Cool 5 minutes.
- Beat the coconut cream for 2 minutes until it holds soft peaks, then whip in the warm chocolate, maple syrup, vanilla and salt for 2 minutes more.
- Spread a thin crumb coat on the first layer, stack the second cake on top, then frost the top and sides and chill 20 minutes before slicing.
Tip: Hot coffee, not milk, is what makes the chocolate taste deep. Never let the batter sit more than 15 minutes once the coffee goes in, or the cocoa will react with the alkaline coffee and turn grey.
Swap it: For a nut-free cake, use sunflower seed butter or extra coconut cream in the frosting. For an egg-free version, use two flax eggs mixed with 6 tablespoons of water and rested 10 minutes.
Storage: Covered at room temperature for 3 days, or freeze layers uniced for 2 months. Frost the day before serving.
2. Fudgy Dairy Free Brownies
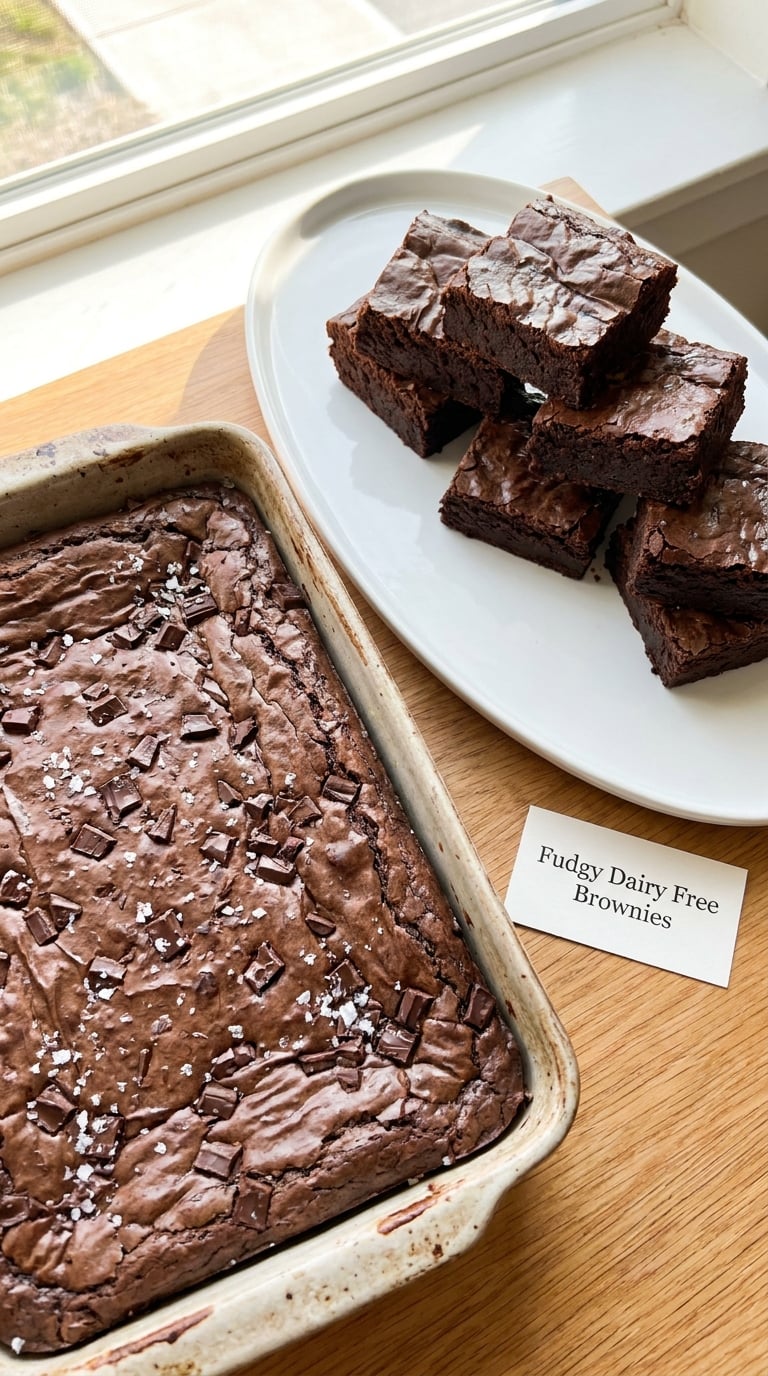
Brownies are where I send anyone who says they cannot cook dessert. One bowl, one pan, forty-five minutes, and a fair chance the guests who eat dairy will go back for seconds.
Yield: 16 squares · Prep: 15 min · Cook: 28 min · Total: 45 min · Difficulty: Easy
Ingredients
- 170 g dairy-free dark chocolate or semisweet chocolate, chopped
- 115 g plant butter or solid coconut oil
- 1 cup packed light brown sugar (200 g)
- 2 large eggs
- 1 teaspoon vanilla extract
- 3/4 cup all-purpose flour (90 g)
- 1/4 cup unsweetened cocoa powder (22 g)
- 1/2 teaspoon fine salt
- 1 cup dairy-free chocolate chips (170 g)
- Flaky sea salt, for the top
Instructions
- Heat the oven to 350F (175C) and line an 8-inch square pan with parchment, leaving an overhang.
- Melt the chopped chocolate and butter in a saucepan over low heat, stirring until smooth, then cool 5 minutes.
- Whisk the sugar, eggs and vanilla into the warm chocolate. The mixture will look curdled, which is fine.
- Stir in the flour, cocoa and salt until no dry patches remain.
- Spread the batter in the pan and scatter the chocolate chips over the top.
- Bake 24 to 28 minutes, until the top is shiny with a thin crack and a tester comes out with wet, sticky crumbs.
- Cool in the pan 20 minutes, lift out by the parchment and cool completely before cutting into 16 squares.
- Finish with a light scatter of flaky salt just before serving.
Tip: Pull them while the tester still looks messy. Brownies that pass the clean-skewer test bake into cake, and cake does not travel as well as fudge.
Swap it: Use 1/2 cup white chocolate chips and 1/2 cup dried cranberries for a holiday table, or fold in 3/4 cup chopped toasted walnuts at the chocolate stage.
Storage: Airtight at room temperature for 4 days, and they do not need refrigeration. Freeze cut squares in a single layer for 3 months and thaw at room temperature.
3. Vanilla Dairy Free Cupcakes with Berry Swirl
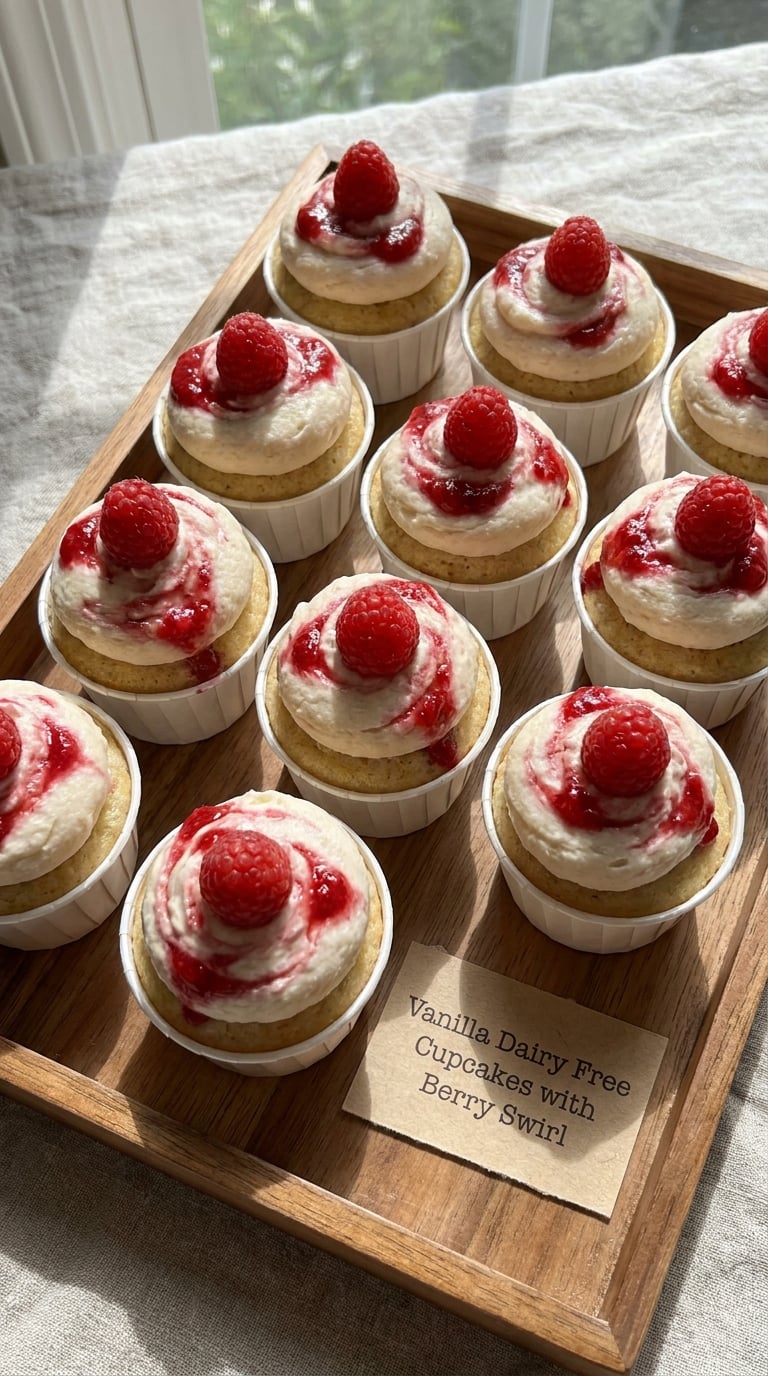
Cupcakes are the practical choice for a party: everyone gets an identical portion, they sit on a platter without a knife, and nobody has to negotiate the last slice.
Yield: 12 cupcakes · Prep: 20 min · Cook: 20 min · Total: 55 min · Difficulty: Easy
Ingredients
- For the cupcakes:
- 1 1/2 cups all-purpose flour (190 g)
- 1 1/4 cups granulated sugar (250 g)
- 2 teaspoons baking powder
- 1/2 teaspoon baking soda
- 1/2 teaspoon fine salt
- 1/2 cup neutral oil (120 ml)
- 3/4 cup unsweetened almond milk (180 ml)
- 2 large eggs
- 2 teaspoons vanilla extract
- For the raspberry filling:
- 1/2 cup frozen raspberries (75 g)
- 2 tablespoons granulated sugar
- 1 tablespoon cornstarch
- For the frosting:
- 1/2 cup plant butter, softened (115 g)
- 3 1/2 cups powdered sugar (420 g)
- 2 tablespoons unsweetened almond milk, plus more as needed
- 1 teaspoon vanilla extract
Instructions
- Heat the oven to 350F (175C) and line a 12-cup muffin tin with paper liners.
- Whisk the flour, sugar, baking powder, baking soda and salt in one bowl.
- Whisk the oil, almond milk, eggs and vanilla in a second bowl, then fold it into the dry ingredients until just combined.
- Divide the batter evenly between the cups, filling each about two-thirds full.
- Bake 18 to 20 minutes, until the tops spring back and a skewer comes out clean.
- Warm the raspberries, sugar and cornstarch in a small pan for 4 minutes until thick and jammy. Cool completely.
- Beat the softened plant butter until fluffy, then beat in the powdered sugar, 1 tablespoon almond milk and the vanilla, adding the second tablespoon only if the frosting looks stiff.
- When the cupcakes are cool, cut a small core from the centre of each and fill the hole with a spoonful of raspberry jam.
- Swirl the frosting on top and finish with a fresh berry.
Tip: The filling goes in only after the cupcakes are completely cool, or the jam runs down the sides and stains the liners.
Swap it: Use the same method with chopped fresh strawberries plus a teaspoon of lemon juice in warm weather, or with a dairy-free lemon curd.
Storage: Frosted cupcakes keep 2 days at cool room temperature in a covered box. Unfrosted baked cupcakes freeze 2 months.
4. Dairy Free Chocolate Chip Party Cookies
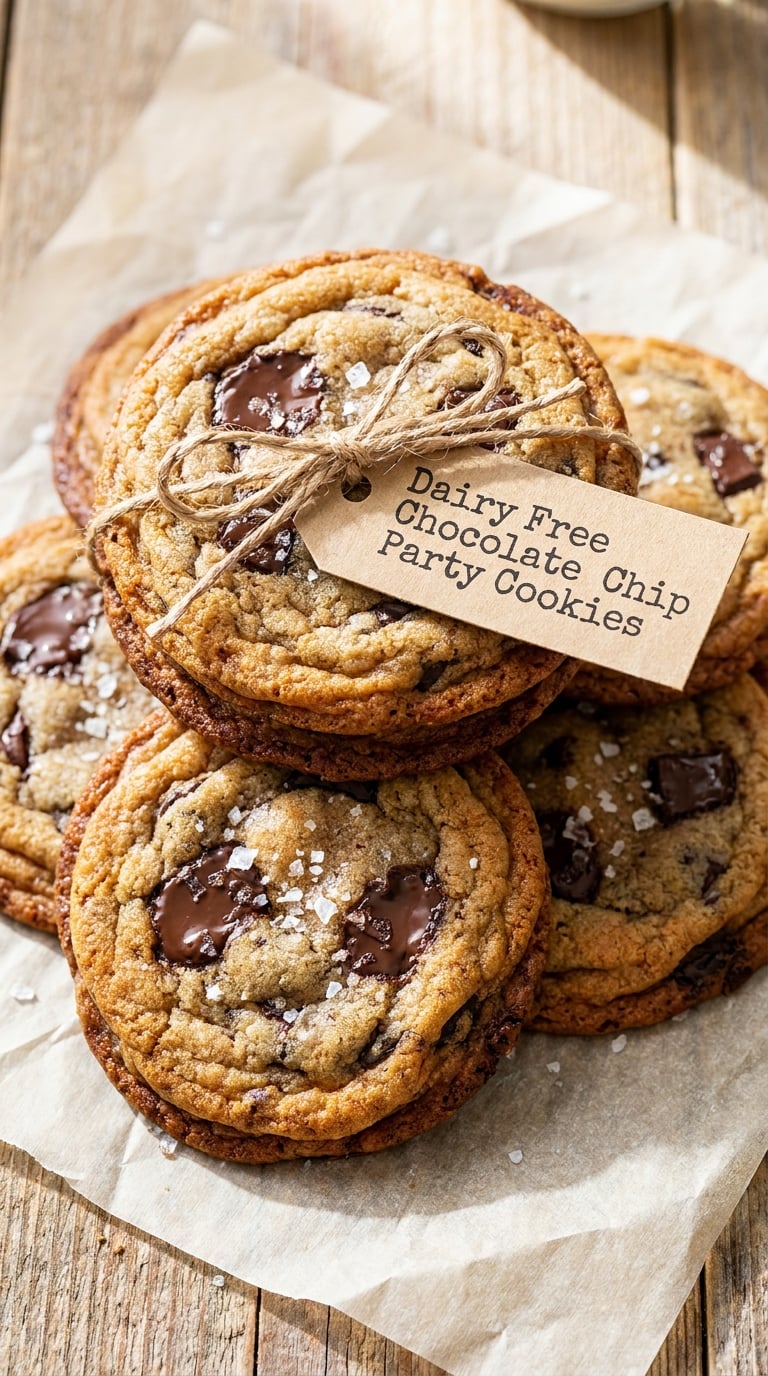
Chewy in the middle, crisp around the edge, sturdy enough to survive a school-room party or a long drive across town. Resting the dough overnight is the difference between good and the ones people ask about.
Yield: 24 cookies · Prep: 20 min plus overnight rest · Cook: 12 min · Total: 40 min plus rest · Difficulty: Easy
Ingredients
- 170 g plant butter or solid coconut oil, softened but not melted
- 1 cup packed light brown sugar (200 g)
- 1/2 cup granulated sugar (100 g)
- 1 flax egg (1 tablespoon ground flaxseed plus 3 tablespoons water, rested 10 minutes)
- 1 teaspoon vanilla extract
- 1 3/4 cups all-purpose flour (220 g)
- 1 teaspoon baking soda
- 1/2 teaspoon fine salt
- 1 1/2 cups dairy-free chocolate chips (255 g)
- Flaky sea salt, for the tops
Instructions
- Beat the softened butter, brown sugar and granulated sugar for 2 minutes until pale and fluffy.
- Add the flax egg and vanilla and beat for another 30 seconds.
- Fold in the flour, baking soda and salt, then the chocolate chips, mixing only until the streaks disappear.
- Cover and refrigerate the dough at least 8 hours and up to 3 days.
- Heat the oven to 350F (175C) and line two sheet pans with parchment.
- Roll 2 tablespoons of dough per cookie into 1 3/4-inch balls, about 2 inches apart.
- Bake 10 to 12 minutes, until the edges are set and golden and the centres still look underdone.
- Add a few chips and a pinch of flaky salt to each cookie straight from the oven, then cool 5 minutes on the pan.
Tip: Poking extra chips into the hot cookies is not fussiness, it is how you get a bakery look without leaving the dough out of shape.
Swap it: Swap half the chocolate chips for chopped dairy-free toffee bits or 1/2 cup chopped dates for a caramel version.
Storage: Keep in a cookie tin for up to 5 days. Dough balls freeze 3 months; bake straight from frozen, adding 2 minutes to the bake time.
5. Lemon Dairy Free Bars with Shortbread Crust
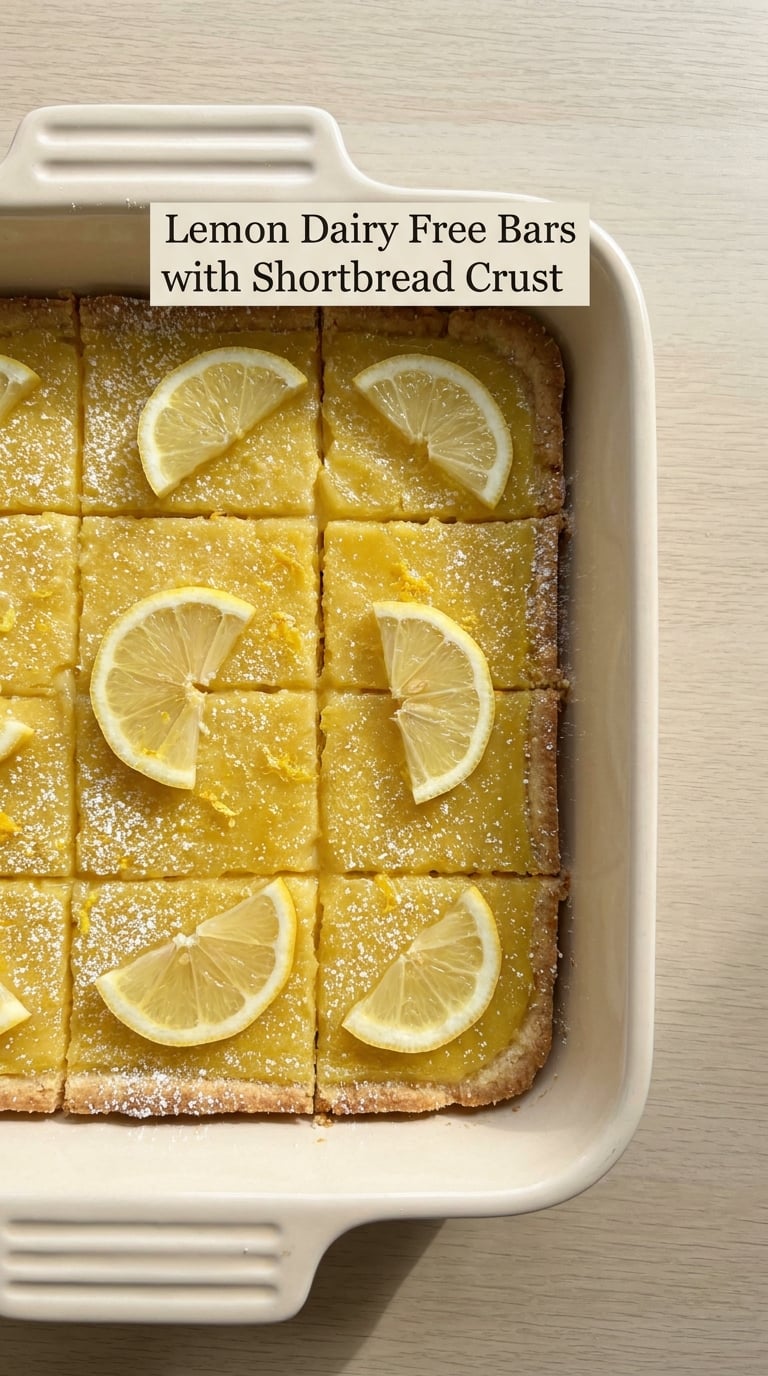
Tangy, bright and made in one pan, which makes these the right call when a crowd is coming and the oven is already occupied by dinner.
Yield: 16 squares · Prep: 20 min · Cook: 35 min · Total: 55 min · Difficulty: Medium
Ingredients
- For the shortbread base:
- 1 1/2 cups all-purpose flour (190 g)
- 1/3 cup powdered sugar (45 g)
- 1/4 teaspoon fine salt
- 115 g cold plant butter, cubed
- 1 teaspoon vanilla extract
- For the lemon filling:
- 3 large eggs
- 1 cup granulated sugar (200 g)
- 2/3 cup fresh lemon juice (160 ml), about 4 lemons
- 2 tablespoons cornstarch
- 2 tablespoons unsweetened almond milk
- 1 teaspoon vanilla extract
- Thin lemon slices and mint, to decorate
Instructions
- Heat the oven to 325F (165C) and line an 8-inch square pan with parchment.
- Whisk the flour, powdered sugar and salt in a bowl, then rub in the cold plant butter with your fingers until the mixture looks like coarse breadcrumbs with a few pea-sized pieces.
- Stir in the vanilla and press the dough firmly and evenly into the pan, including the edges.
- Bake 18 to 20 minutes, until the base is pale gold all the way through.
- Whisk the eggs, sugar, lemon juice, cornstarch, almond milk and vanilla together until smooth.
- Pour the filling over the hot base and bake 14 to 16 minutes, until the edges are set and the centre still wobbles slightly when you nudge the pan.
- Cool completely on a rack, then refrigerate 2 hours before cutting into 16 squares.
- Top with thin lemon slices just before serving so they do not weep.
Tip: Cut the bars cold with a long knife wiped between slices, and use a hot dry knife for clean edges. Wiping the blade is what stops the lemon layer smearing onto the crust.
Swap it: Use lime or a mix of lemon and lime for the filling, or swap powdered sugar in the base for maple syrup and add 2 tablespoons finely ground almonds for a less sweet crust.
Storage: Refrigerate in a covered pan for up to 4 days. Store the lemon slices separately so the tops stay dry.
6. Strawberry Shortcake Trifle
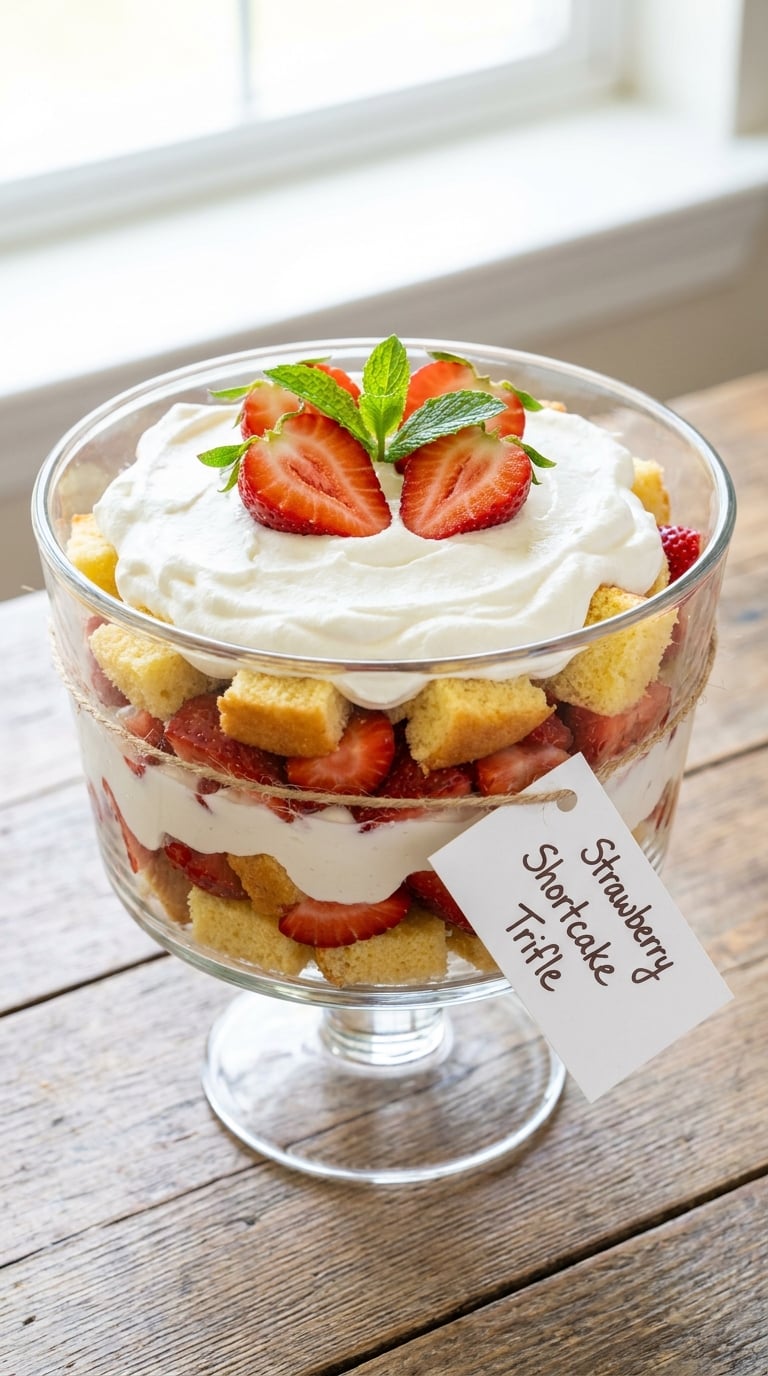
A trifle is the dessert to build the night before. It needs no baking, it looks like you did far more work than you did, and it feeds a crowd from one bowl.
Yield: 12 generous servings · Prep: 30 min · Cook: 0 · Total: 30 min plus 4 hr chill · Difficulty: Easy
Ingredients
- 1 pound fresh strawberries, hulled and quartered (450 g)
- 1/3 cup granulated sugar (70 g)
- 2 tablespoons cornstarch
- 2 cups unsweetened oat milk (480 ml)
- 1/2 cup granulated sugar (100 g)
- 2 tablespoons cornstarch
- 1 teaspoon vanilla extract
- 6 thick slices dairy-free pound cake or vanilla cake, cubed
- 1 1/2 cups dairy-free whipped cream (360 ml)
- 1/2 cup dairy-free vanilla ice cream, softened
- Fresh strawberry halves and mint, to top
Instructions
- Toss the quartered strawberries with 1/3 cup sugar and leave at room temperature for 20 minutes until juicy.
- Simmer the berries and their juice for 4 minutes, then stir in 2 tablespoons cornstarch and cook 1 minute more. Cool and chill.
- In a saucepan, whisk the oat milk, remaining sugar and 2 tablespoons cornstarch over medium heat until it thickens enough to coat a spoon, about 5 minutes.
- Remove from the heat, stir in the vanilla and chill completely, stirring once or two to prevent a skin forming.
- Whip the plant cream with the softened dairy-free ice cream for 3 minutes until thick and spreadable.
- Layer half the cake cubes in a large glass bowl, spoon over half the custard, add the rest of the cake, then the rest of the custard.
- Spoon the berry mixture over the top and cover with the whipped mixture in soft dollops.
- Chill at least 4 hours, then top with strawberry halves and mint shortly before serving.
Tip: Chill the custard and the whipped topping separately before layering. A warm custard melts the topping and the whole bowl turns soupy in the first twenty minutes.
Swap it: Replace the cake with torn angel food cake or chopped vegan pound cake for a lighter version, or use sliced peaches in place of strawberries in late summer.
Storage: Refrigerate at 40F (4C) or below and eat within 24 hours. Keep the topping covered so it does not absorb fridge smells.
7. Coconut Cream Party Pie
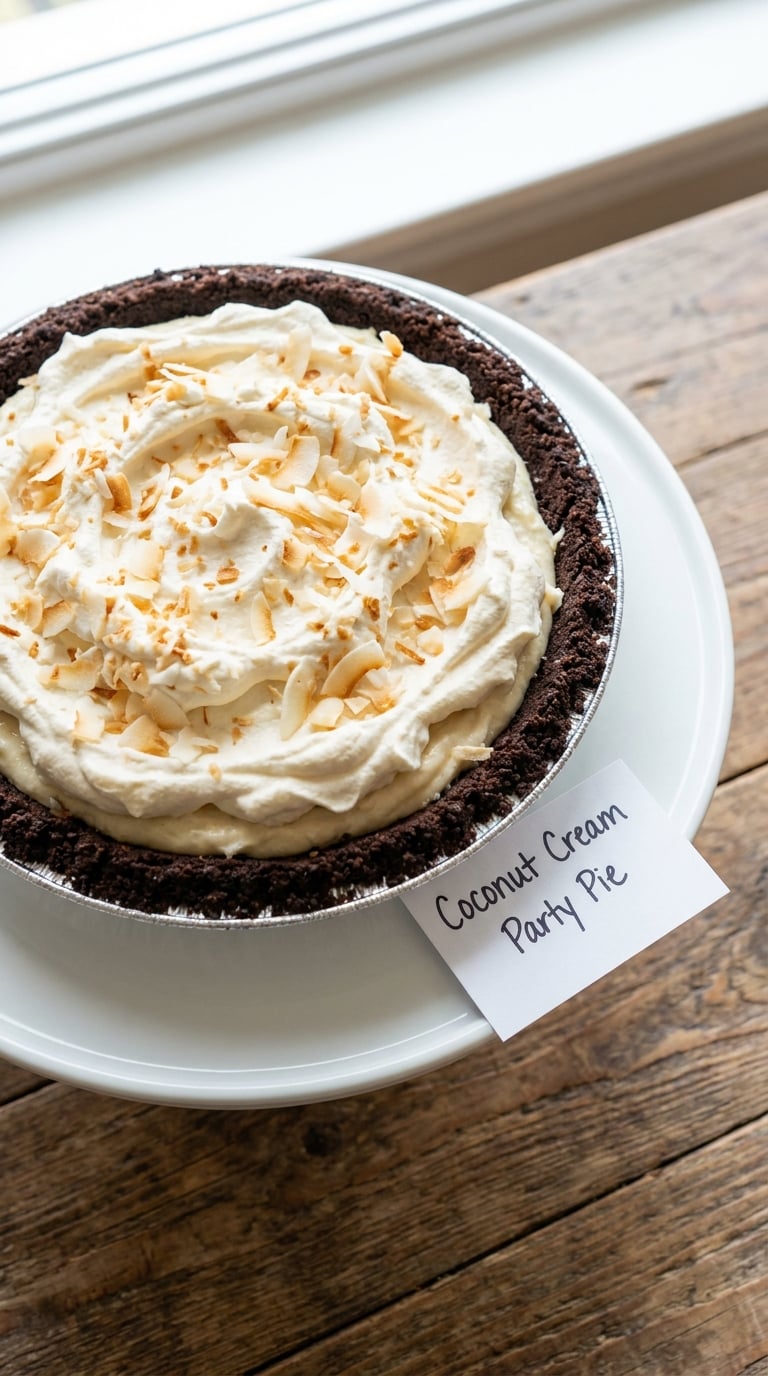
A no-bake pie that holds its shape on a warm counter and slices like a bakery. Using coconut cream, which is the solid cream at the top of a chilled can, is what makes it set without gelatin or eggs.
Yield: 10 slices · Prep: 25 min · Cook: 0 · Total: 25 min plus 5 hr chill · Difficulty: Easy
Ingredients
- For the chocolate crumb crust:
- 1 1/4 cups dairy-free chocolate sandwich cookies, finely crushed (about 30 cookies)
- 6 tablespoons melted coconut oil or vegan butter (90 ml)
- 2 tablespoons unsweetened almond milk
- 1/4 teaspoon fine salt
- For the coconut filling:
- 3 full cans chilled coconut milk (800 g total)
- 1/2 cup powdered sugar (60 g)
- 1 teaspoon vanilla extract
- 1 tablespoon agar-agar powder
- 1 cup water
- 1 teaspoon fine salt
- Toasted coconut flakes, to finish
Instructions
- Mix the crushed cookies, melted coconut oil, almond milk and salt in a 9-inch pie pan.
- Press the mixture firmly across the base and up the sides, then freeze for 15 minutes while you make the filling.
- Open the cans without shaking and scoop the solid cream from the top of each into a bowl. Chill again.
- Whisk the coconut cream, powdered sugar, vanilla and salt for 2 minutes until it holds stiff peaks.
- In a small pan whisk the agar-agar powder with the water, then bring to a boil and simmer for 2 minutes.
- Let the agar cool for 1 minute, then pour it in a thin stream into the whipped cream while beating on high.
- Beat for 2 minutes more, spread into the chilled crust, and smooth the top with an offset spatula.
- Chill at least 5 hours until firm, then finish with toasted coconut flakes just before serving.
Tip: Chill the cans upright for at least 12 hours and open them at the sink. If the can separates into liquid, the coconut cream will not whip and the filling will stay loose.
Swap it: Use a dairy-free ginger snap or shortbread cookie for a spiced crust, or fold 1/2 cup dairy-free white chocolate chips into the filling for a sweeter pie.
Storage: Keep refrigerated and serve within 3 days. Hold the room at or below 70F (21C) and return it to the fridge if the house warms up.
8. Dairy Free Banana Pudding
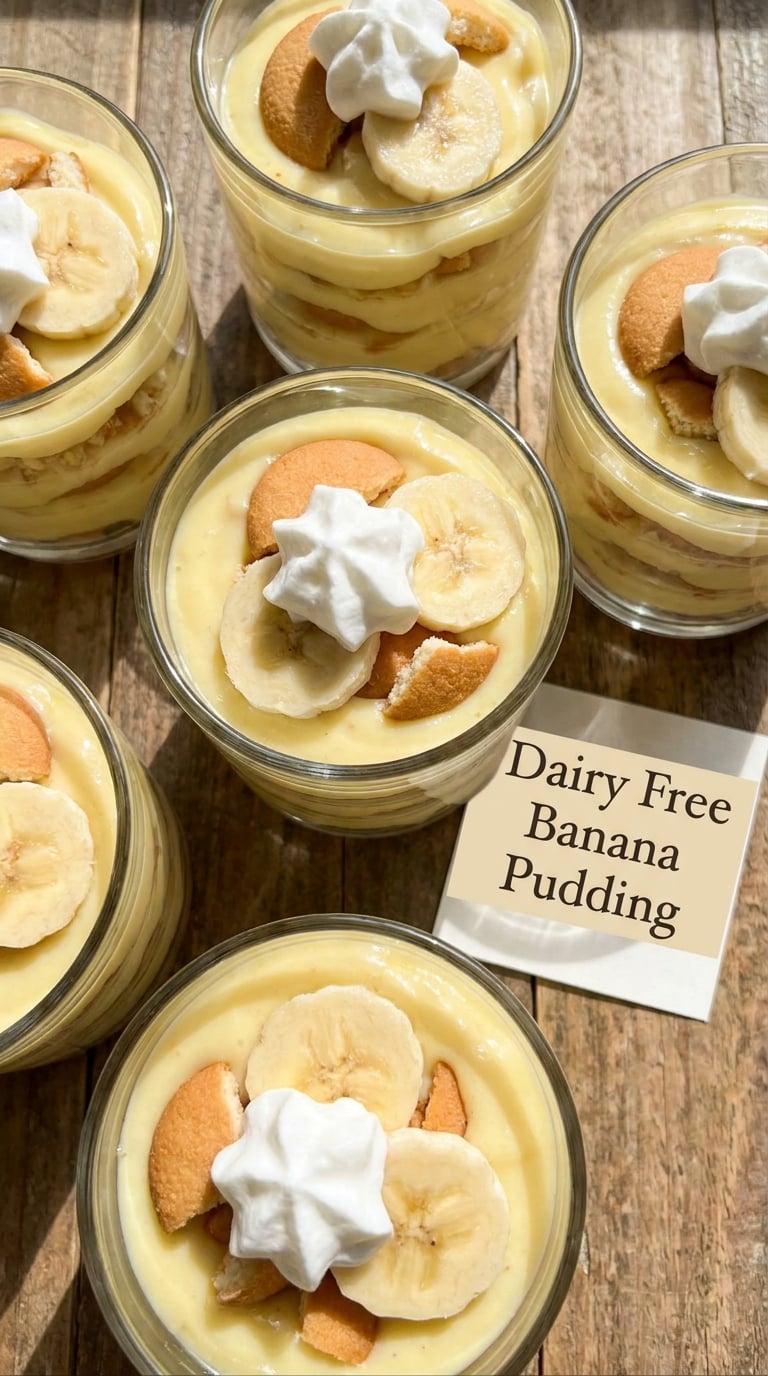
Banana pudding is a make-ahead recipe in costume. Almost all of the work is stirring, and layering it in clear cups means it travels without a single spoon being unpacked.
Yield: 8 cups, about 1 cup each · Prep: 25 min · Cook: 0 · Total: 25 min plus 4 hr chill · Difficulty: Easy
Ingredients
- 3/4 cup dairy-free vanilla pudding mix (about 50 g)
- 2 cups cold unsweetened almond or oat milk
- 2/3 cup unsweetened coconut milk (160 ml)
- 1/3 cup maple syrup
- 1 teaspoon vanilla extract
- 1 tablespoon chia seeds
- 1 teaspoon ground cinnamon
- 3 bananas, sliced just before layering
- 200 g dairy-free vanilla wafer or shortbread cookies, roughly broken
- Dairy-free whipped cream, for topping
Instructions
- Whisk the pudding mix with the cold plant milk in a bowl for 2 minutes until thick and smooth.
- Stir in the coconut milk, maple syrup, vanilla and cinnamon, then mix in the chia seeds.
- Rest the mixture 10 minutes and stir again, then refrigerate for 2 hours until it firms up to a spoonable, pudding-like texture.
- Line the bottom of each clear cup with a few cookie pieces.
- Add a layer of banana slices, then spoon over a thick layer of pudding.
- Repeat the cookie, banana and pudding layers until the cups are full, finishing with pudding so the top layer looks clean.
- Cover and chill at least 4 hours, then add a small swirl of whipped cream and a pinch of cinnamon just before serving.
Tip: Slice the bananas no earlier than you need them. Toss the slices with a teaspoon of lemon juice to keep them bright, and add them as the final touch rather than during assembly.
Swap it: Leave out the chia seeds for a looser, creamier texture, or use a thick store-bought dairy-free vanilla pudding and skip steps one through three entirely.
Storage: Refrigerate at 40F (4C) or below and eat within 3 days. Do not freeze, as the plant milk separates and goes grainy.
9. Salted Caramel Dairy Free Fruit Tart
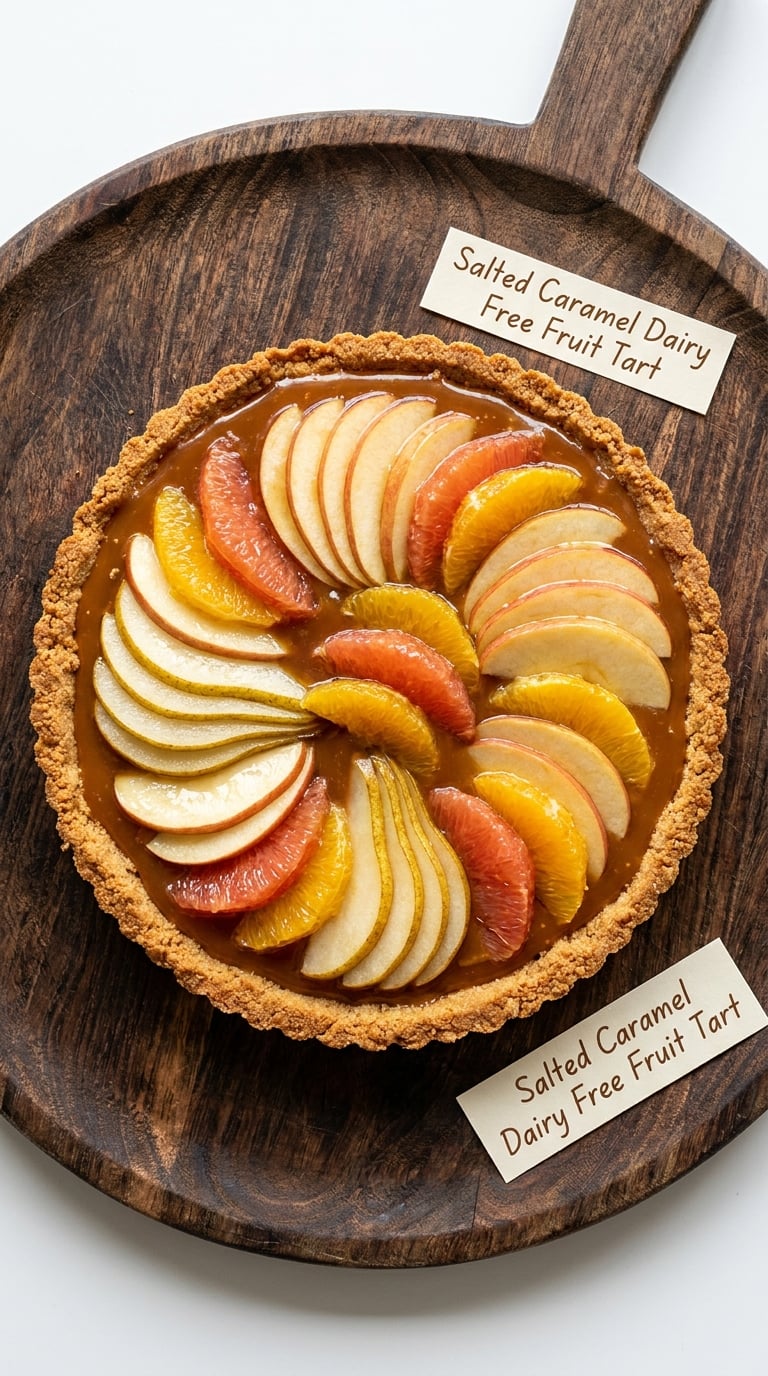
The most elegant thing in this list, and the least forgiving if you rush it. Every component is bought or made ahead, so the tart itself is mostly assembly, and the fruit can be swapped for whatever is in season.
Yield: 10 slices · Prep: 45 min · Cook: 0 · Total: 45 min plus 2 hr chill · Difficulty: Medium
Ingredients
- For the crust:
- 1 1/4 cups all-purpose flour (155 g)
- 1/4 cup powdered sugar (30 g)
- 1/4 teaspoon fine salt
- 8 tablespoons cold plant butter, cubed (115 g)
- 2-3 tablespoons ice water
- For the salted caramel:
- 1/2 cup dairy-free butterscotch or caramel sauce
- 1 tablespoon coconut oil
- 1 teaspoon flaky sea salt, divided
- For the fruit:
- 2 firm pears or apples, thinly sliced
- 2 oranges, peeled and sliced
- 2 tablespoons fresh orange juice
- 1 tablespoon maple syrup
- 1/4 cup toasted flaked almonds, toasted in a dry pan
- Dairy-free vanilla whipped cream, to serve
Instructions
- Whisk the flour, powdered sugar and salt, then cut in the cold plant butter until the pieces are the size of peas.
- Add ice water one tablespoon at a time, just until the dough holds together when squeezed.
- Press two-thirds of the dough into a 9-inch tart pan. Refrigerate 30 minutes.
- Bake the shell at 350F (175C) for 18 to 22 minutes, until dry-looking and pale gold all the way to the base.
- Cool completely, then spread the caramel sauce mixed with the coconut oil across the shell and scatter with half the flaky salt.
- Toss the sliced fruit with the orange juice and maple syrup.
- Arrange the fruit in overlapping rows over the caramel, working from the outside in.
- Finish with the remaining salt and the toasted almonds, then chill 2 hours. Serve with dairy-free whipped cream.
Tip: Use a firm fruit rather than a ripe one, and toss the slices in lemon or orange juice as you cut them. Sliced pears brown in about ten minutes, and that brown line will be visible under the caramel.
Swap it: For a nut-free version, skip the almonds and scatter toasted coconut flakes or chopped dairy-free chocolate instead. Fresh figs or quartered figs work in place of citrus in late summer.
Storage: Refrigerate and serve within 2 days so the fruit stays crisp. The shell can be baked 2 days ahead and stored airtight at room temperature.
10. Dairy Free S’mores Party Bars
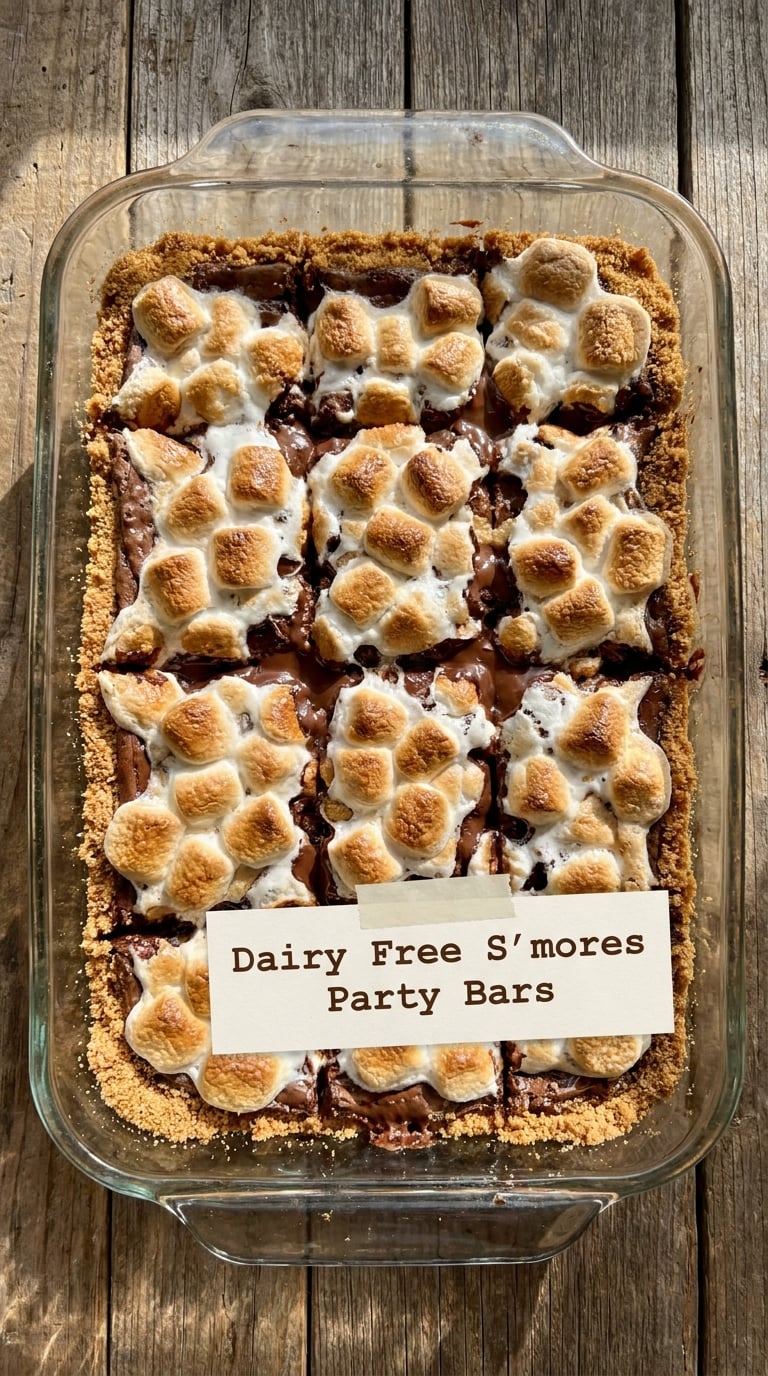
The easiest dessert here to scale for forty people, and the one that disappears fastest. Cut them into squares rather than bars, put them on a platter, and they do the work of carrying dessert across a room.
Yield: 16 squares · Prep: 15 min · Cook: 20 min · Total: 35 min · Difficulty: Easy
Ingredients
- 170 g dairy-free graham crackers or chocolate cereal, roughly crushed
- 6 tablespoons melted coconut oil
- 1/3 cup maple syrup
- 1/2 cup dairy-free chocolate chips
- 10 ounces dairy-free marshmallows
- 1/4 cup cold water
- 1/2 teaspoon fine salt
- 1/4 cup mini dairy-free chocolate chips, for the top
Instructions
- Heat the oven to 350F (175C) and line an 8-inch square pan with parchment.
- Mix the crushed crackers, melted coconut oil, 1/4 cup maple syrup and half the chocolate chips in a bowl, press into the pan and bake 8 minutes.
- Scatter the marshmallows evenly over the crust and bake 6 to 8 minutes more, until they melt into a glossy, puffed layer. Watch them, they go from done to burnt fast.
- Mix the cold water with the remaining chocolate chips and 1/2 teaspoon salt, then pour over the hot marshmallow layer.
- Leave the pan undisturbed for 2 minutes, then scatter the mini chips over the top while the chocolate is still soft.
- Cool 2 hours at room temperature, then lift out by the parchment and cut into 16 squares with a hot dry knife.
Tip: Milk chocolate plus a wet topping goes grainy, so use semisweet or dark chocolate chips. The water in the drizzle is what loosens the chips enough to spread without a double boiler.
Swap it: Replace the graham crust with 1 1/2 cups crushed dairy-free vanilla wafers, or add a thin layer of peanut butter between the crust and the marshmallows if nut allergies are not a concern.
Storage: Store airtight at room temperature for 3 days. Squares freeze up to 3 months and thaw in about 15 minutes, though the marshmallow layer turns a little matte.
Tips for Making These
Dairy Free Dessert Recipes for Parties: What to Know
- Pick recipes written as dairy-free, not adapted ones. Swapping dairy out of a favorite recipe one for one is the most common way these fail. A cake that asks for sour cream has structure coming from that acidity, and a cup of milk is not a cup of any plant milk. These ten were built without dairy, so the ratios hold.
- Read every label, and read it twice. Dark chocolate, graham crackers, vanilla extract, marshmallows and plant butter are the usual hidden-dairy spots. Brands change formulations without notice, so check the specific package in your hands rather than what the recipe says.
- Keep chocolate away from water and steam. Any drop of water in melting chocolate seizes it into a grainy paste. Use dry bowls, dry spatulas, and melt in 15-second microwave bursts.
- Work backward from the serving time. Bake bars and cookies two days ahead, refrigerate the pie and pudding up to two days ahead, and keep trifles, tarts and the layer cake to a maximum of 12 hours ahead so fruit and frosting stay fresh.
- Pack for transport in tiers. Cakes, tarts and pies go on a flat board covered with a tea towel; cupcakes, bars and cookies travel in a single layer in a rigid container with parchment between. Never stack brownies cold and soft, or the bottom ones disappear.
- Plan for guests beyond dairy. The cake and brownie recipes are the easiest to make nut-free, gluten-free or egg-free with the swaps given, and a single well-labelled tray serves an allergy at a party better than a full spread. If you are also avoiding refined sugar, the lemon bars and the trifle take maple or date sugar with no change to the method.
I also like to run one quick party idea past my sugar free dessert recipes list when there is a diabetic guest at the table, and the diabetic dessert recipe ideas hold up to the same make-ahead standard. For a longer table, the holiday dessert recipe ideas are worth borrowing a technique from even outside the season.
Frequently Asked Questions
What can I use instead of milk and butter in dairy free desserts?
For milk, use unsweetened oat or almond milk at the same volume; they are the least sweet and brown least when baked. For butter, use plant butter one for one for creaming, or solid coconut oil where you want flakiness. Coconut cream replaces heavy cream, aquafaba or whipped coconut cream whips like egg white, and silken tofu blends smooth into mousses. Sweetened condensed milk is the hardest swap: use the same volume of sweetened plant milk reduced on the stove with a tablespoon of date syrup.
Are dairy free chocolate desserts suitable for a party?
Yes, and chocolate is actually the easiest dessert to make dairy free without a texture compromise. Dairy fat adds very little to brownies or chocolate cake, so the flavor comes from cocoa and good dark chocolate rather than butter. Check that the chocolate itself is dairy free, since a few brands still carry milk, and use plant butter in the frosting. A chocolate cake or tray of brownies is my pick for a group with mixed dietary needs.
Which dairy free dessert is best for a large group?
For 25 to 40 guests, make the fudgy brownies or the s’mores bars in a second pan. Both are one-bowl, cut into clean squares, travel at room temperature and hold for days, and a batch of 16 easily doubles without changing the bake time at a deeper pan size. Layer cake and pie look impressive but need slicing at the table, and chilled trifles and puddings are the most comfortable made in two smaller dishes rather than one huge bowl.
Can I make dairy free party desserts ahead of time?
Most of them, yes, and several are better a day old. Bars and cookies keep 2 to 4 days airtight, the coconut cream pie and banana pudding keep 3 days refrigerated, and brownies are fine for 4 days at room temperature. Keep the layer cake to 12 hours ahead so the frosting stays firm, and add trifle toppings and fresh fruit on the day. Cover everything airtight, and refrigerate anything perishable within two hours.
How do I avoid cross-contamination when serving food without dairy?
For a genuine milk allergy, set the dessert aside on a separate tray and use separate serving utensils, plates and a clean cutting board, so a guest with an allergy never uses a utensil that touched a buttery dish. Wash surfaces and wash hands between the dairy and dairy-free items. When baking, keep the dairy-free bowls, spoons and pans stored away from regular butter and use a new sheet of parchment. Check labels each time, because formulations change between products and over time.
Can dairy free cakes, cookies and bars be frozen?
Yes, and most freeze better than they refrigerate. Unfrosted cake layers, baked cupcakes, cookie dough balls, cut brownies, s’mores squares and the baked tart shell all freeze well for 2 to 3 months, wrapped tightly in layers of parchment and foil. Thaw cake layers in the fridge overnight or at room temperature wrapped in a towel, and bake frozen cookie dough balls with 2 extra minutes. Do not freeze puddings or anything made with plant milk and cornstarch, which turns grainy as it thaws.
Which Dairy Free Dessert Should You Make First?
Make the fudgy brownies. They are one bowl, they need nothing from the fridge, they improve after a day, and in my experience nobody at a party asks a single question about a square of brownie. Doubling the batch in a second pan is also the least stressful way to feed twice as many people.
Book the coconut cream pie or the banana pudding if you want most of the work finished three days out, and save the trifle and the chocolate layer cake for the day before. Whichever you pick, the recipes in this roundup of dairy free dessert recipes for parties all hold, travel and serve well, which is the whole job.