
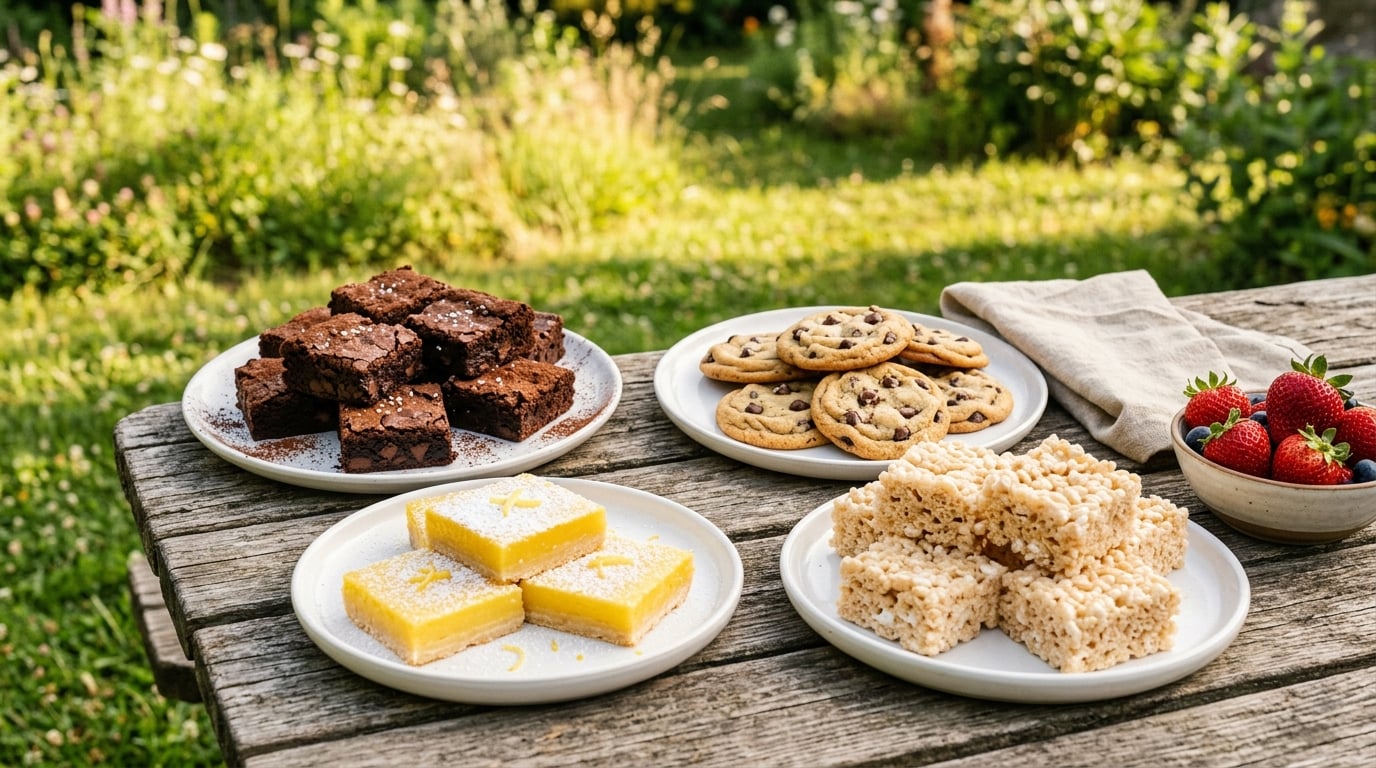
These 15 easy picnic dessert ideas that travel well are sturdy bars, cookies, no-bake treats and fruit cups that keep their shape through the drive and taste just as good sitting on a blanket at 85°F. Nothing in this list needs a fork, a plate, or an oven at the picnic site, and every recipe tells you how far ahead you can make it.
I’m the kind of cook who has ruined more picnics than I’d like to admit. I’ve carried a whipped-cream cake across a park in June and watched it slide off the platter onto the grass, packed lemon bars in a jar that leaked, and served a soggy fruit tray to six very disappointed children. So these are the ones I actually bring now: approachable recipes, mostly under an hour of active work, each picked because it survives the trip. A few need a cooler, most don’t. The table below tells you which is which before you pick.
Table of Contents
15 Easy Picnic Dessert Ideas That Travel Well at a Glance
Time is total hands-on plus bake time. The cooler column is the one that decides your packing plan.
| Recipe | Total Time | Difficulty | Needs a Cooler? | Best For |
|---|---|---|---|---|
| 1. Fudgy Chocolate Brownies | 40 min | Easy | No | Big group, chocolate lovers |
| 2. Classic Lemon Dessert Bars | 55 min | Easy | Yes | Bright, not-too-sweet finish |
| 3. Chocolate Chip Chocolate Chunk Cookies | 35 min | Easy | No | Kids, one-hand eating |
| 4. Vanilla Cupcakes with Simple Buttercream | 45 min | Easy | Yes | Birthdays, no plates needed |
| 5. Strawberry Shortcake Trifle | 35 min + chill | Easy | Yes | Summer, serve standing up |
| 6. Chocolate Chip Cookie Sandwiches | 45 min | Medium | Yes | Individual portions, no forks |
| 7. Rice Krispie Treats | 15 min | No bake | No | Last-minute, nut-free, kids |
| 8. Brown Butter Pecan Sandies | 40 min | Easy | No | Adults, coffee, potluck table |
| 9. Fresh Fruit Pizza | 30 min | Easy | Yes | Colorful centerpiece |
| 10. Easy Cheesecake Bars | 1 hr 10 min | Easy | Yes | Make-ahead showstopper |
| 11. Mini Fruit Tartlets | 50 min | Medium | Yes | Handheld, elegant, portioned |
| 12. Individual Apple Crisp Cups | 55 min | Easy | Yes | Warm-weather cozy, no pan to carry |
| 13. S’mores Dessert Cups | 20 min | No bake | Yes | Campfire flavour, no grill |
| 14. Frozen Yogurt Berry Bites | 20 min + freeze | Easy | Yes | Beach day, cooling treat |
| 15. Coconut Macaroons | 30 min | Medium | No | Sturdy, gluten-free option |
Eight of these fifteen need no refrigeration at all. If you’re packing a car with no room for a cooler, or you just don’t want the fuss of ice packs, head straight for the brownies, the cookies, the Rice Krispie treats, the sandies and the macaroons.
1. Fudgy Chocolate Brownies
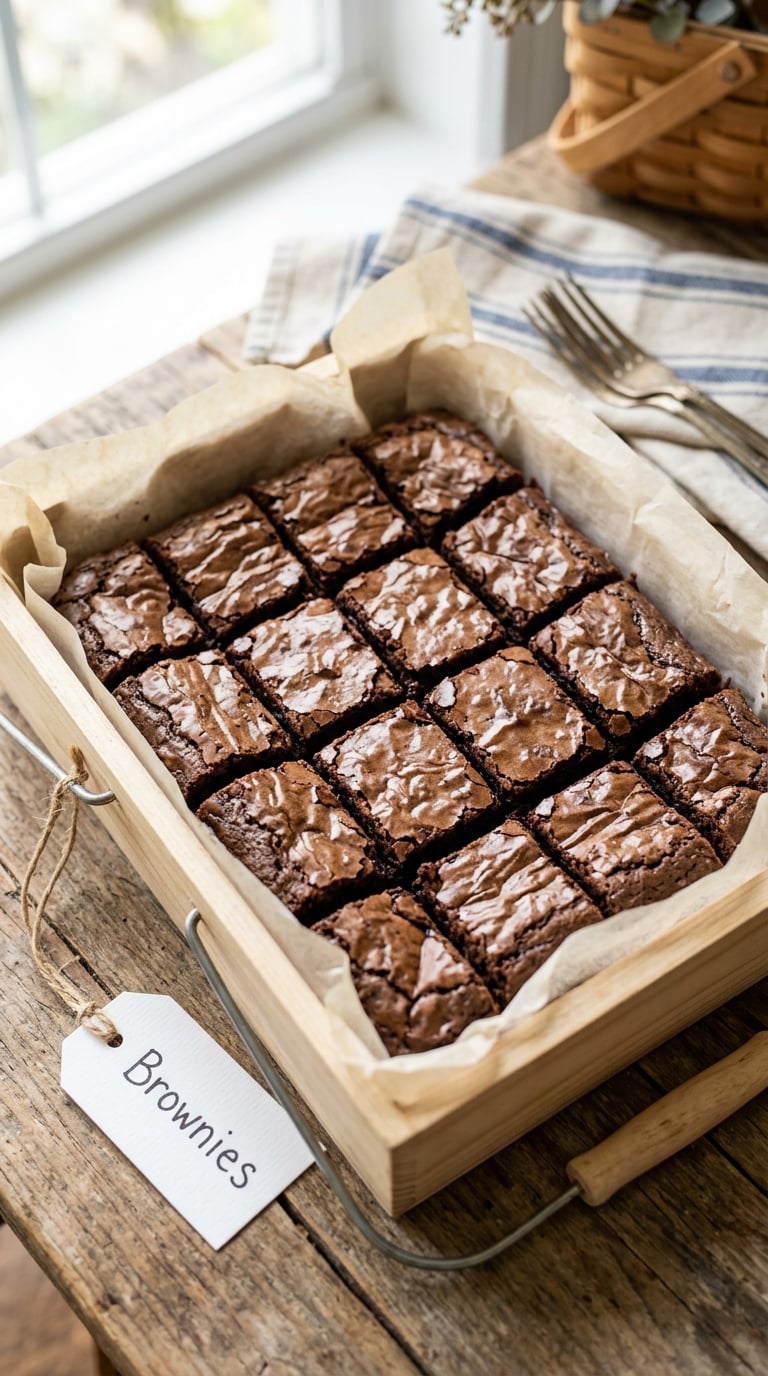
Brownies are the first thing I pack for a picnic now. A dense, fudgy square is structurally boring in the best possible way, it stacks, it doesn’t need refrigeration, and it survives a gravel parking lot better than anything with frosting.
Yield: 16 squares · Prep: 15 min · Cook: 25 min · Total: 40 min · Difficulty: Easy
Ingredients
- 10 tablespoons unsalted butter, melted and cooled slightly (142 g)
- 1 cup granulated sugar (200 g)
- 3/4 cup cocoa powder, natural or Dutch-process (64 g)
- 1/2 teaspoon salt
- 2 large eggs
- 1 teaspoon vanilla extract
- 1/2 cup all-purpose flour (65 g)
- 3/4 cup semisweet chocolate chips (110 g)
Instructions
- Heat the oven to 350°F (175°C) and line an 8-inch square pan with parchment, leaving an overhang on two sides.
- Whisk the melted butter, sugar, cocoa and salt in a large bowl until no dry streaks remain.
- Add the eggs one at a time, whisking briskly after each, then stir in the vanilla.
- Sift in the flour and fold with a spatula just until the last streak of white disappears.
- Fold in the chocolate chips and scrape the batter into the pan.
- Bake 22 to 25 minutes, until the top is shiny and a tester skewer comes out with moist crumbs, not wet batter.
- Cool in the pan for 20 minutes, then lift out using the parchment and cool completely on a rack.
- Cut into 16 squares with a sharp knife and pack in layers, with parchment between the layers.
Tip: The under-bake on purpose. Pull them two minutes earlier than feels right and let the carryover set the center; a pan that looks slightly underdone when it leaves the oven is a pan that is fudgy when it cools.
Swap it: Swap 1/2 cup of the flour for 1/2 cup almond flour for a gluten-free version, and check that your cocoa and chocolate chips are certified gluten-free, since cross-contact is common.
Storage: Airtight at room temperature for up to 4 days, and it only improves on day two. Freeze in a single layer for up to 3 months and pack the whole frozen pan in a cooler with ice packs.
2. Classic Lemon Dessert Bars
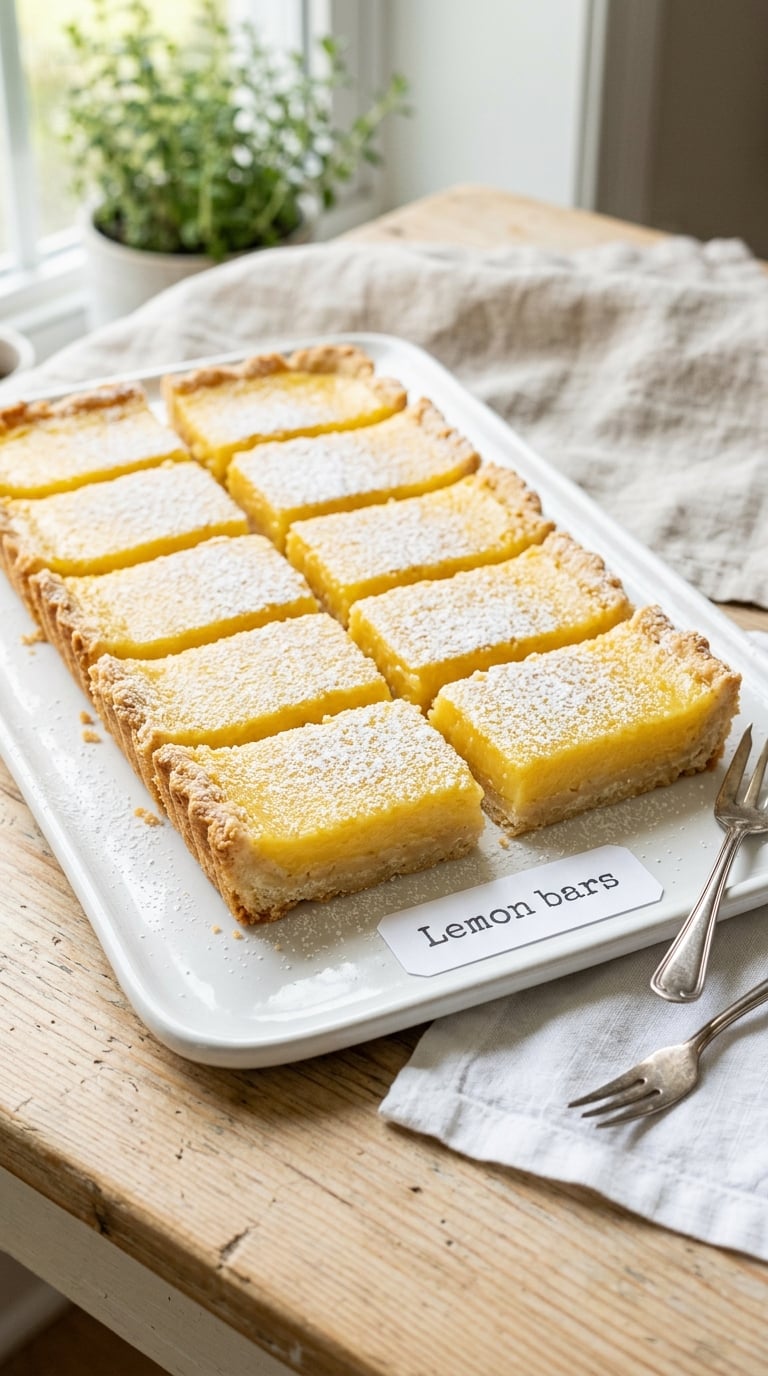
These are the answer to a picnic that already has brownies and cookies on it. A short, buttery crust keeps them from shattering, and the lemon filling stays tangy and firm rather than weepy, which is exactly what you want in a sealed container.
Yield: 9 bars · Prep: 20 min · Cook: 35 min · Total: 55 min · Difficulty: Easy
Ingredients
For the crust:
- 1 1/4 cups all-purpose flour (160 g)
- 1/3 cup powdered sugar (43 g)
- 1/2 teaspoon salt
- 8 tablespoons cold unsalted butter, cubed (113 g)
For the filling:
- 4 large eggs
- 1 cup granulated sugar (200 g)
- 1/2 cup fresh lemon juice (about 3 lemons)
- 1 teaspoon lemon zest
- 1/2 cup unsalted butter, melted (113 g)
Instructions
- Heat the oven to 350°F (175°C). Pulse the flour, powdered sugar and salt in a food processor, then add the cold butter and pulse until it looks like coarse sand with a few pea-sized pieces.
- Press the crumb mix into an 8-inch square pan in an even layer and bake 12 to 15 minutes, until the edges are lightly golden.
- Whisk the eggs, sugar, lemon juice and zest in a bowl until smooth, then pour in the melted butter and whisk again.
- Pour the filling over the hot crust and bake 18 to 22 minutes, until the edges are set and the center still wobbles very slightly when you nudge the pan.
- Cool on the counter for 15 minutes, then refrigerate until fully cold, about 2 hours.
- Cut into 9 bars with a thin knife dipped in hot water and wiped clean between cuts.
Tip: Pour the filling into the crust while the crust is still hot. It seals the layer underneath, which is the whole difference between a lemon bar and a pile of lemon crumbs in a container.
Swap it: Use a 1-for-1 cup-for-cup gluten-free all-purpose flour blend for the crust. Don’t swap the filling; lemon curd from a jar makes a fine filling but runs when it warms, so pack it in a cooler.
Storage: Refrigerate in an airtight container for up to 4 days. They must be carried cold and kept cold; a warm lemon bar is a sticky lemon bar.
3. Chocolate Chip Chocolate Chunk Cookies
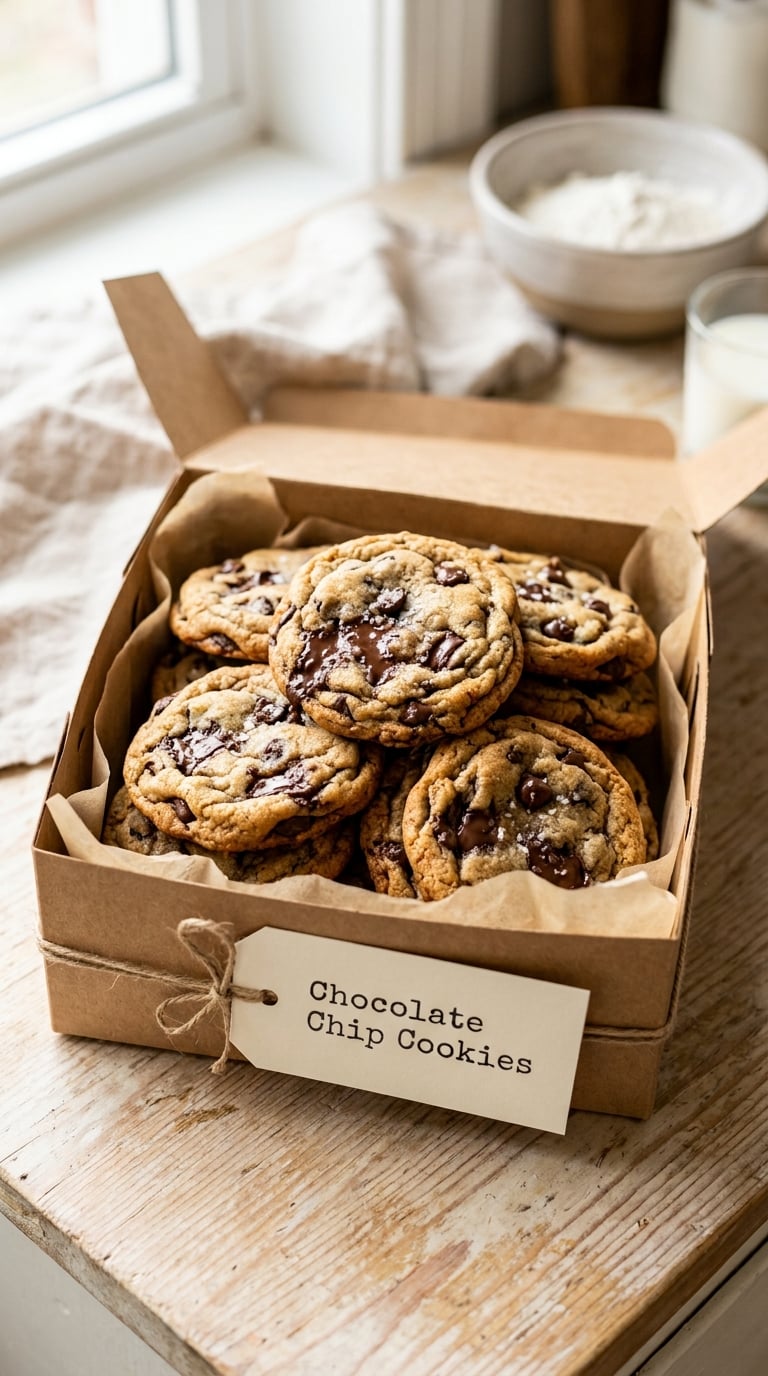
Soft-centered cookies that stay soft two days later are the most underestimated picnic dessert. Made properly, with a short chill before baking and a carryover heat in the middle, they come out thick, sturdy and chewy with no frosting to melt.
Yield: 18 large cookies · Prep: 20 min · Cool: 15 min · Total: 35 min · Difficulty: Easy
Ingredients
- 1 cup unsalted butter, softened (227 g)
- 1/2 cup dark brown sugar, packed (100 g)
- 1/2 cup granulated sugar (100 g)
- 1 large egg plus 1 egg yolk
- 1 teaspoon vanilla extract
- 1 teaspoon baking soda
- 1/2 teaspoon kosher salt
- 1 1/2 cups all-purpose flour (195 g)
- 1 cup semisweet chocolate chips (150 g)
- 1 cup chopped milk chocolate or dark chocolate chunks (150 g)
Instructions
- Heat the oven to 350°F (175°C) and line two baking sheets with parchment.
- Beat the butter, brown sugar and granulated sugar until creamy and pale, about 2 minutes.
- Beat in the egg, egg yolk and vanilla, then mix in the baking soda and salt.
- Mix in the flour just until combined, then fold through both chocolates.
- Chill the dough 15 minutes so the butter firms up and the cookies spread less.
- Scoop 3-tablespoon mounds onto the sheets, leaving 2 inches between each.
- Bake 11 to 13 minutes, until the edges are set and the centers still look slightly soft and underdone.
- Cool on the sheet 10 minutes before moving them, so the centers finish setting.
Tip: Pull them while the centers still look undone. The cookies keep baking on the hot sheet after the oven door shuts, and that ten-minute rest is what turns a crisp cookie into a chewy one.
Swap it: Use 1 cup chopped milk chocolate only, plus a pinch of flaky salt on top, for a simpler cookie. For a gluten-free version, use a 1-for-1 gluten-free flour blend and let the dough rest 20 minutes before scooping.
Storage: Airtight at room temperature for 5 days, and they stay soft. Freeze the baked cookies in layers for up to 3 months; pack frozen with a small towel between layers and let them come to room temperature in the container.
4. Vanilla Cupcakes with Simple Buttercream
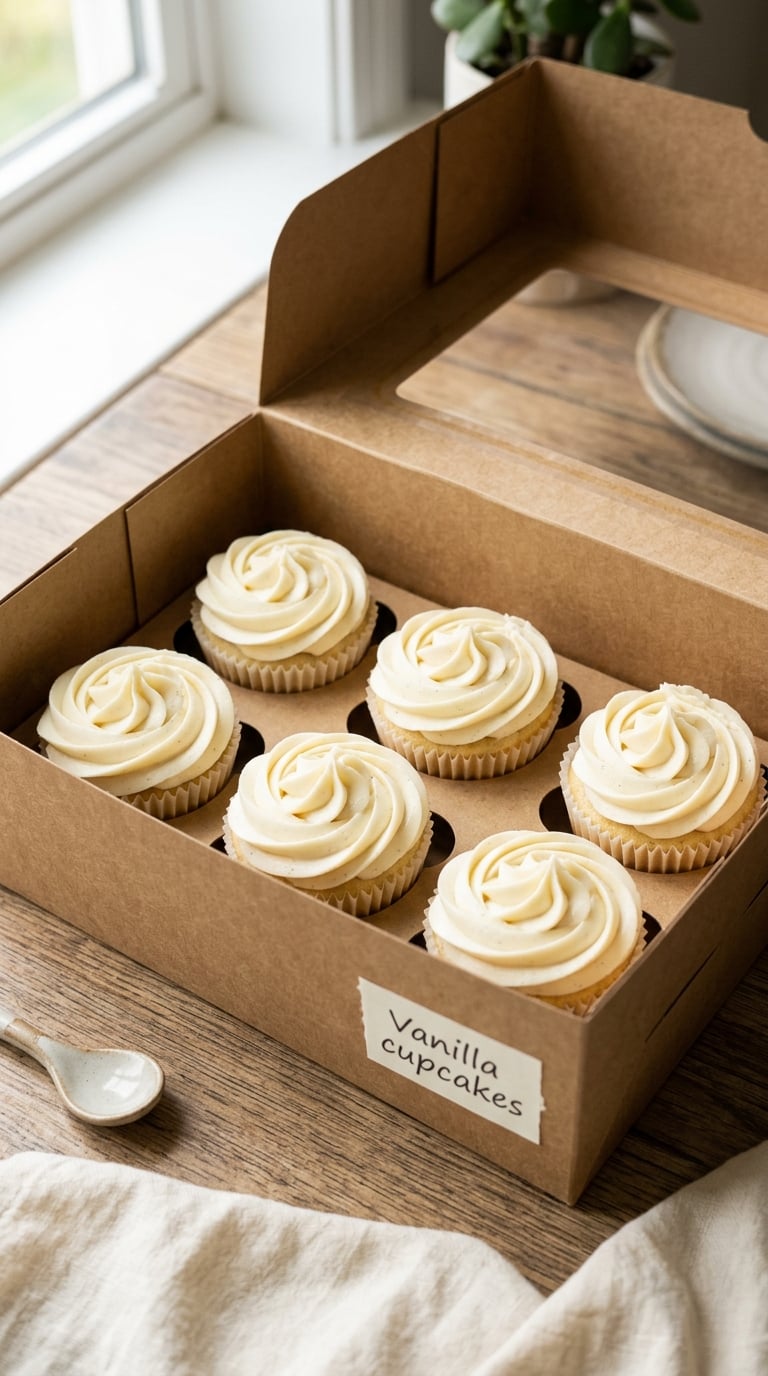
Cupcakes solve the plate problem. Nobody needs a fork, a knife, or a serving board, and a rigid muffin box carries twelve of them from the car to the picnic blanket without a tilt. The frosting is deliberately firm so it survives a warm car.
Yield: 12 cupcakes · Prep: 20 min · Cook: 18 min · Total: 45 min including cooling · Difficulty: Easy
Ingredients
For the cupcakes:
- 1 1/2 cups all-purpose flour (195 g)
- 2 teaspoons baking powder
- 1/4 teaspoon salt
- 1/2 cup unsalted butter, softened (113 g)
- 3/4 cup granulated sugar (150 g)
- 2 large eggs
- 1 teaspoon vanilla extract
- 1/2 cup buttermilk (120 ml)
For the buttercream:
- 1/2 cup unsalted butter, softened (113 g)
- 3 1/2 cups powdered sugar (440 g)
- 1 teaspoon vanilla extract
- 2 to 3 tablespoons heavy cream or milk
- Pinch of salt
Instructions
- Heat the oven to 350°F (175°C) and line a 12-cup muffin pan.
- Whisk the flour, baking powder and salt in a bowl.
- Beat the butter and sugar until pale and fluffy, about 2 minutes, then beat in the eggs one at a time and the vanilla.
- Add the dry ingredients in two additions, alternating with the buttermilk, and stir just until smooth.
- Fill the cups two-thirds full and bake 16 to 18 minutes, until a tester comes out clean and the tops spring back when pressed lightly.
- Cool in the pan 5 minutes, then turn out onto a rack to cool completely.
- Beat the butter, powdered sugar, vanilla, salt and enough cream to make a thick, spreadable frosting that holds a swirl.
- Frost the cooled cupcakes and chill them 15 minutes so the buttercream firms before you box them.
Tip: Measure the cream at the low end and add more a teaspoon at a time. A stiff buttercream holds a swirl and survives a 90°F car; a soft one slumps into a flat lid by noon.
Swap it: Fold 1/2 cup cocoa powder into the dry ingredients and use a simple chocolate buttercream for chocolate cupcakes. Cupcakes bake in about 17 minutes, so pull them two minutes early.
Storage: Frosted cupcakes keep 2 days at cool room temperature and 5 days refrigerated. Freeze undecorated cupcakes for up to 2 months, frost after thawing.
5. Strawberry Shortcake Trifle
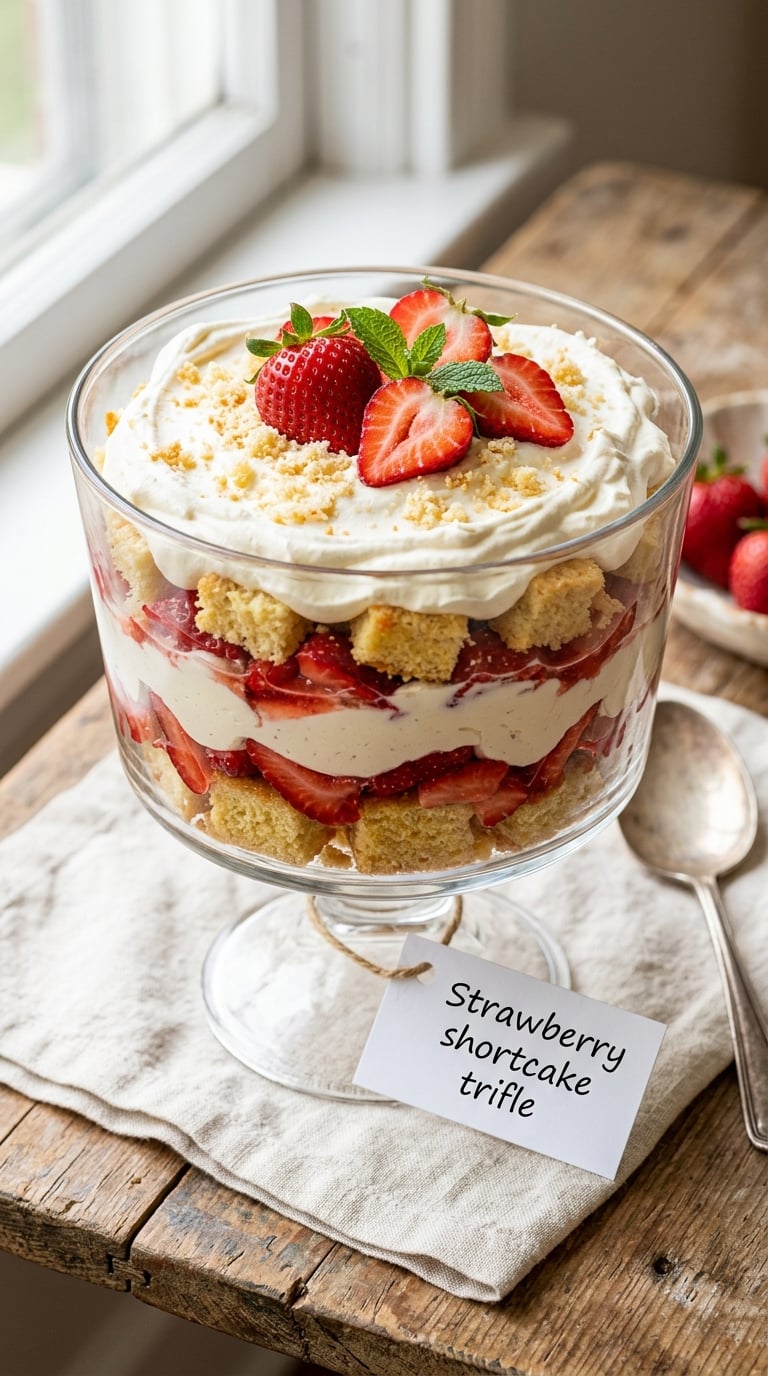
A trifle looks like effort and travels like a layered salad, so it is the right pick when you want a showpiece. Bring the bowl and the fruit separate and assemble it on site, or carry it fully built in a container with a tight lid if the drive is short.
Yield: 8 servings · Prep: 25 min · Cook: 5 min · Chill: 2 hours · Total: 35 min plus chilling · Difficulty: Easy
Ingredients
For the cake layer:
- 1 package (9 ounces) plain pound cake or sponge cake
- 3/4 cup whole milk
- 2 tablespoons granulated sugar
For the cream and fruit:
- 2 cups heavy cream
- 1/3 cup granulated sugar
- 1 teaspoon vanilla extract
- 1 pound strawberries, hulled and sliced
- 2 tablespoons sliced almonds, toasted (optional)
Instructions
- Warm the milk with the sugar until the sugar dissolves, then cool it to warm.
- Cut the cake into 1-inch cubes, spread them in a single layer on a sheet pan and drizzle with the warm milk; let them soak 20 minutes.
- Whip the cream, sugar and vanilla to soft peaks; it should hold a soft point when you lift the beaters.
- Layer half the cake cubes in a trifle bowl or clear container, add half the strawberries and half the cream.
- Repeat the layers, then top with the last of the cream and a few strawberry slices arranged in a fan.
- Chill at least 2 hours before you pack it, so the layers set and the cake stops releasing juice.
Tip: Pat the strawberries dry with a paper towel before layering. Water on the berries is what turns the bottom layer into soup in a sealed box.
Swap it: Swap strawberries for blueberries, raspberries or diced peaches in summer, and use graham cracker crumbs in place of the cake for a faster version. Skip the almonds for a nut-free picnic.
Storage: Refrigerate and eat within 24 hours, ideally the same day. Keep the bowl below 40°F the entire time it’s out, and expect the cake to soften slightly in the first hour at room temperature.
6. Chocolate Chip Cookie Sandwiches
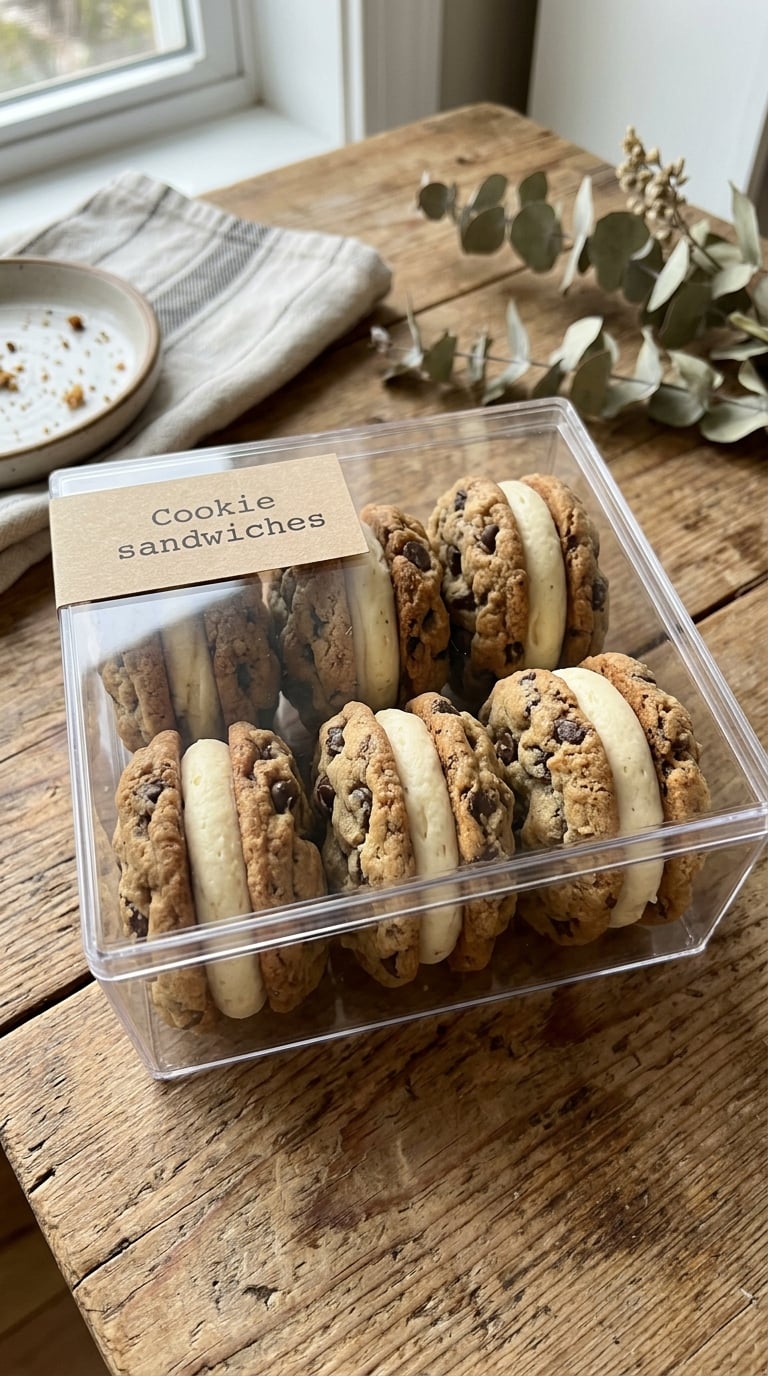
These are the dessert that ends the fork question entirely. Two sturdy cookies with a firm vanilla filling make a sandwich that a child can eat with both hands, and they pack twelve to a box in about fifteen minutes of assembly once the cookies are baked.
Yield: 12 sandwiches · Prep: 25 min · Cook: 12 min · Total: 45 min plus cooling · Difficulty: Medium
Ingredients
For the cookies:
- 1 cup unsalted butter, softened (227 g)
- 1 cup packed dark brown sugar (200 g)
- 1 large egg
- 1 teaspoon vanilla extract
- 1 1/2 cups all-purpose flour (195 g)
- 1/2 teaspoon baking soda
- 1/4 teaspoon salt
- 1 cup chocolate chips (150 g)
For the filling:
- 1/2 cup unsalted butter, softened (113 g)
- 2 cups powdered sugar (250 g)
- 1 teaspoon vanilla extract
- 2 tablespoons heavy cream
- 1/4 teaspoon salt
Instructions
- Heat the oven to 350°F (175°C) and line two baking sheets with parchment.
- Beat the butter and brown sugar until combined, then mix in the egg and vanilla.
- Mix in the flour, baking soda and salt, then fold through the chocolate chips.
- Roll the dough into 1 1/2-inch balls and flatten each to about 1/3 inch thick.
- Bake 11 to 12 minutes, until the edges are set and the centers still look soft; cool 10 minutes on the sheet.
- Beat the filling ingredients until thick and pipeable, about 2 minutes.
- Pipe a rounded tablespoon onto the flat side of half the cookies, press the remaining cookies on top with a gentle twist.
- Chill the assembled sandwiches 20 minutes so the filling firms, then box them in a single layer.
Tip: Use cookies baked a day ahead. A day-old cookie is drier and sturdier, holds its shape around the filling, and won’t crack when you press the sandwich together.
Swap it: Use a nut-free chocolate-hazelnut spread thinned with a tablespoon of cream for a no-cook version, or swap the filling for peanut butter mixed with powdered sugar for a nut-butter version. Always check labels for cross-contact before serving a nut-free picnic.
Storage: Refrigerate in an airtight container for up to 4 days, and serve cool but not ice-cold. Freeze in layers for up to 1 month.
7. Rice Krispie Treats
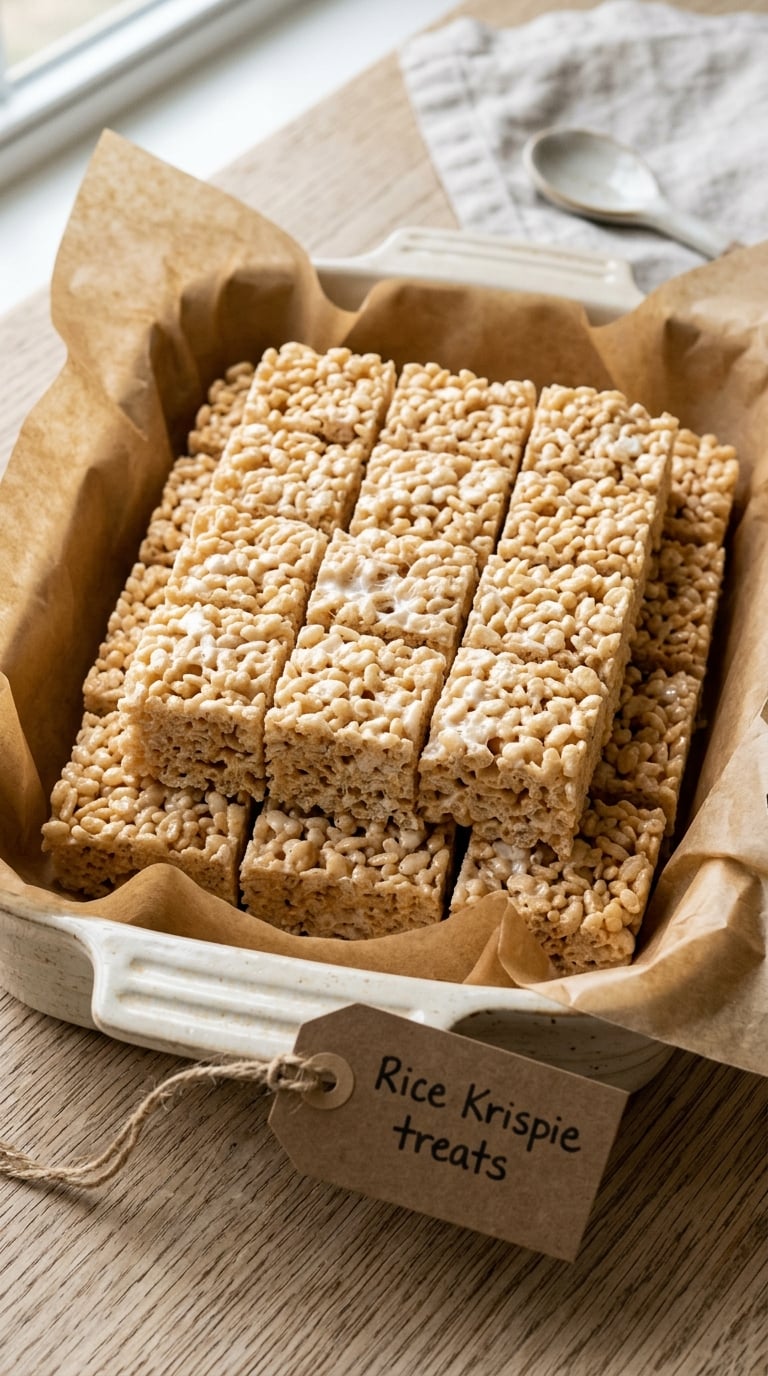
These take fifteen minutes, need no oven, and are the most forgiving thing on this list. If you are packing the car at 8 a.m. with coffee in one hand, this is the one you can still make.
Yield: 8 large squares · Prep: 5 min · Cook: 8 min · Total: 15 min plus 2 hours to set · Difficulty: No bake
Ingredients
- 3 tablespoons unsalted butter (42 g)
- 10 ounces marshmallows (about 50 large)
- 6 cups crispy rice cereal
- 1 teaspoon vanilla extract (optional)
- 1/4 teaspoon salt (optional)
Instructions
- Butter a 9 x 13 inch pan and line it with parchment, letting it overhang the edges.
- Melt the butter in a large saucepan over medium-low heat, then add the marshmallows and stir until mostly smooth, with a few lumps.
- Turn off the heat and stir in the vanilla, salt and cereal, folding until every piece is coated.
- Press the mixture into the pan with buttered hands or a buttered spatula, packing it firmly and level.
- Let it set at room temperature for 2 hours, then lift out using the parchment and cut into 8 squares with a sharp, oiled knife.
Tip: Press hard. A loosely packed square crumbles into crumbs halfway to the car, and the difference is entirely in how firmly you compress it in the pan. Let it set fully before cutting.
Swap it: Use a gluten-free crispy cereal for a gluten-free version, and check that your marshmallows are gelatin-free if that matters to you. Add 1/2 cup mini chocolate chips or a spoonful of peanut butter for a chocolate version.
Storage: Airtight at room temperature for 4 days. Never refrigerate them, since condensation makes them soggy. Freeze in layers with parchment for up to 2 months.
Want more no-cook options to round out the table? My 12 easy no-bake dessert recipes has plenty that pack just as well.
8. Brown Butter Pecan Sandies
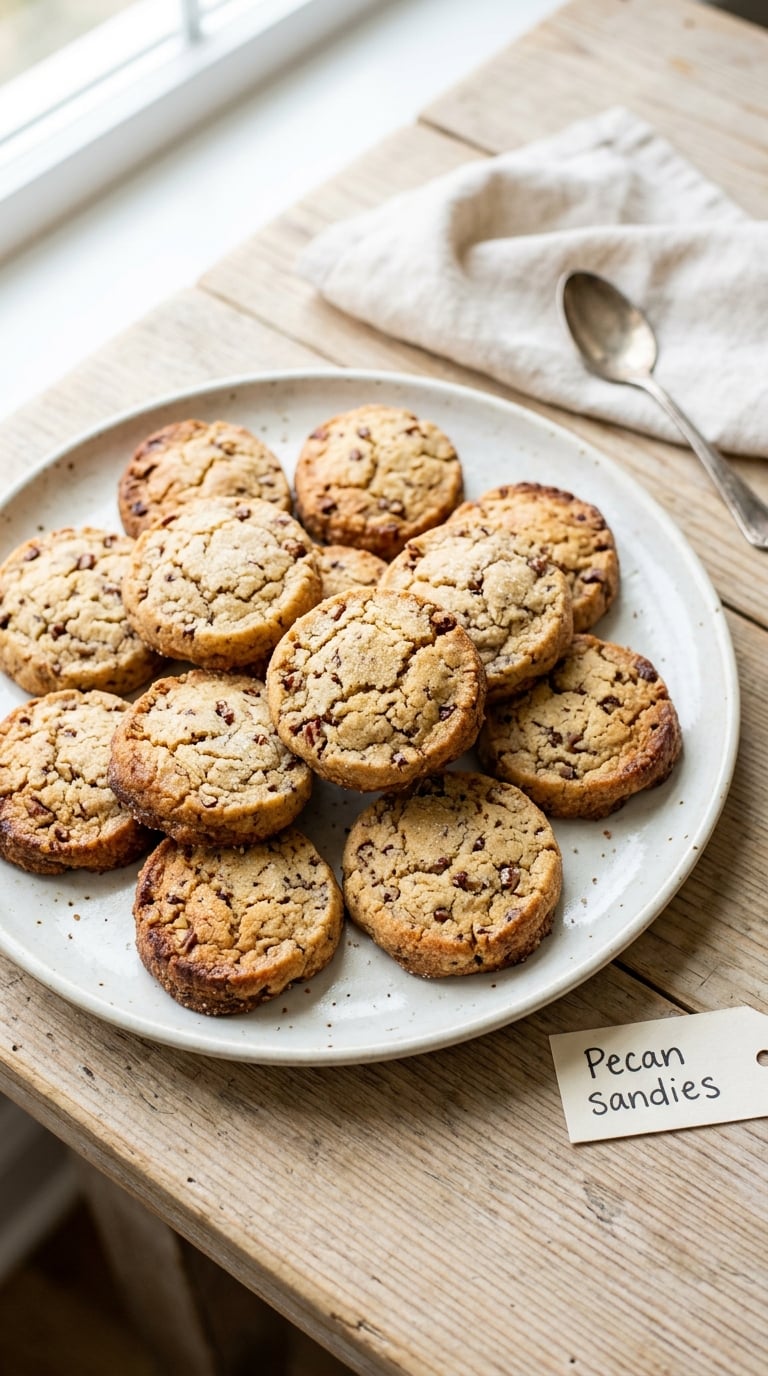
Brown butter and toasted pecans turn a plain shortbread cookie into something that tastes like a bakery. These are crumbly in the good way but hold together, they stack in a tin, and they look fancy enough to hand to a dessert table without a note explaining what they are.
Yield: 24 cookies · Prep: 15 min · Cook: 12 min · Total: 40 min · Difficulty: Easy
Ingredients
- 10 tablespoons unsalted butter (142 g)
- 1/3 cup granulated sugar (67 g)
- 1/3 cup packed light brown sugar (67 g)
- 1 large egg yolk
- 1 teaspoon vanilla extract
- 1 cup all-purpose flour (130 g)
- 1/2 teaspoon baking powder
- 1/4 teaspoon salt
- 3/4 cup pecans, finely chopped (about 90 g)
Instructions
- Heat the oven to 325°F (165°C) and line two baking sheets with parchment.
- Melt the butter in a light-colored saucepan over medium heat and keep cooking 3 to 4 minutes past the foaming stage, swirling, until the milk solids turn amber and it smells like toasted nuts.
- Pour the brown butter into a bowl and cool it 10 minutes; it will be liquid and darker than you expect.
- Whisk in both sugars, the egg yolk and vanilla, then fold in the flour, baking powder, salt and 1/2 cup of the chopped pecans.
- Chill the dough 20 minutes so it firms up and spreads less.
- Scoop 2-tablespoon mounds onto the sheets, flatten to 1 1/4 inches and press the remaining pecans on top.
- Bake 11 to 12 minutes, until the edges are golden brown and the centers still look pale and slightly underdone.
- Cool 5 minutes on the sheet, then move to a rack to cool completely.
Tip: Watch the butter the whole time. It goes from nutty to burnt in about thirty seconds, and a black fleck in the pan ruins the whole batch. Pull it when the foam looks like it’s dying back and the color reads hazelnut.
Swap it: Walnuts or pecans both work; use 3/4 cup chopped walnuts for a more bitter edge. For a nut-free picnic, swap the nuts for 3/4 cup rolled oats and reduce the flour to 3/4 cup.
Storage: Airtight at room temperature for 5 days, and they soften nicely after day one. Freeze in layers for up to 3 months.
9. Fresh Fruit Pizza
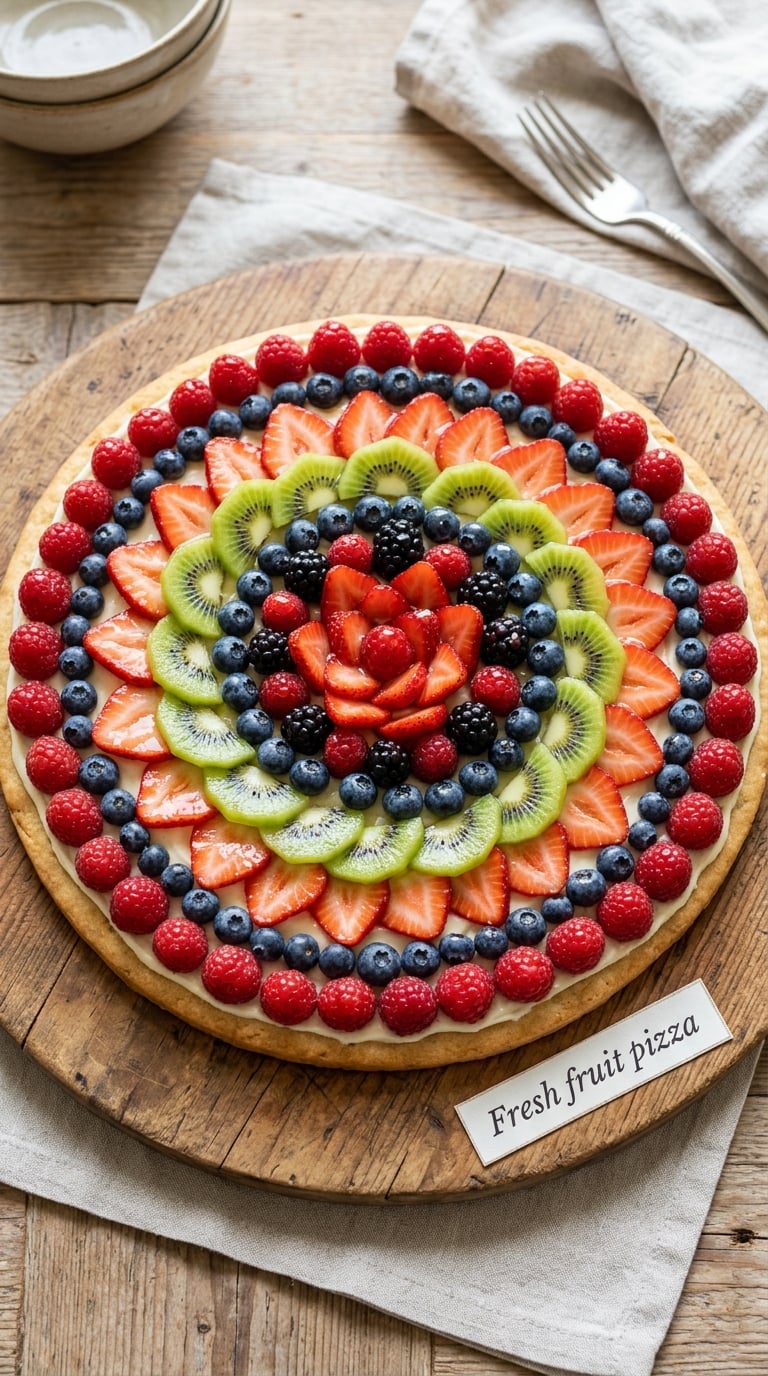
A fruit pizza is the dessert people photograph, and it works as a picnic centerpiece because it is meant to be cut into wedges and picked at. Keep the fruit on the drier side and add the glaze only at the picnic site, and it will not turn to juice.
Yield: 10 wedges · Prep: 20 min · Cook: 12 min · Total: 30 min · Difficulty: Easy
Ingredients
For the crust:
- 1 1/2 cups all-purpose flour (195 g)
- 1/3 cup granulated sugar (67 g)
- 1/2 teaspoon baking powder
- 1/4 teaspoon salt
- 6 tablespoons cold unsalted butter, cubed (85 g)
- 3 tablespoons milk
For the topping:
- 8 ounces cream cheese, softened (227 g)
- 1/3 cup granulated sugar (67 g)
- 1 teaspoon vanilla extract
- 1 cup fresh strawberries, sliced
- 1 cup fresh blueberries
- 1 kiwi, peeled and sliced thin
- 2 tablespoons apricot preserves, warmed and strained, for glazing
Instructions
- Heat the oven to 400°F (200°C).
- Pulse the flour, sugar, baking powder, salt and cold butter until the mixture looks like coarse crumbs.
- Add the milk a tablespoon at a time, pulsing until the dough holds together when pinched; it will still look shaggy.
- Press the dough into a 14-inch pizza pan or rimmed baking sheet, flattening the edges to 1/4 inch thick.
- Prick the surface all over with a fork and bake 11 to 12 minutes, until the edges are golden and the center looks dry.
- Cool completely on the pan, then beat the cream cheese, sugar and vanilla and spread it over the cooled crust.
- Arrange the fruit in rows or rings, starting at the edge and working inward.
- Pack the unglazed pizza, and bring the warmed preserves in a small jar to brush on at the picnic.
Tip: Never glaze before packing. Apricot preserves brushed on at home makes a syrup that runs to the center of the pizza in the box, and the middle of a fruit pizza is the part everyone wants.
Swap it: Use a store-bought sugar cookie dough disc for a shortcut crust, and swap cream cheese for whipped ricotta if you want it lighter. Raspberries, blackberries and mandarin segments all hold up well.
Storage: Refrigerate and serve within 24 hours. Keep it level in the car, and hold the slices with a cake server rather than tipping the whole tray.
10. Easy Cheesecake Bars
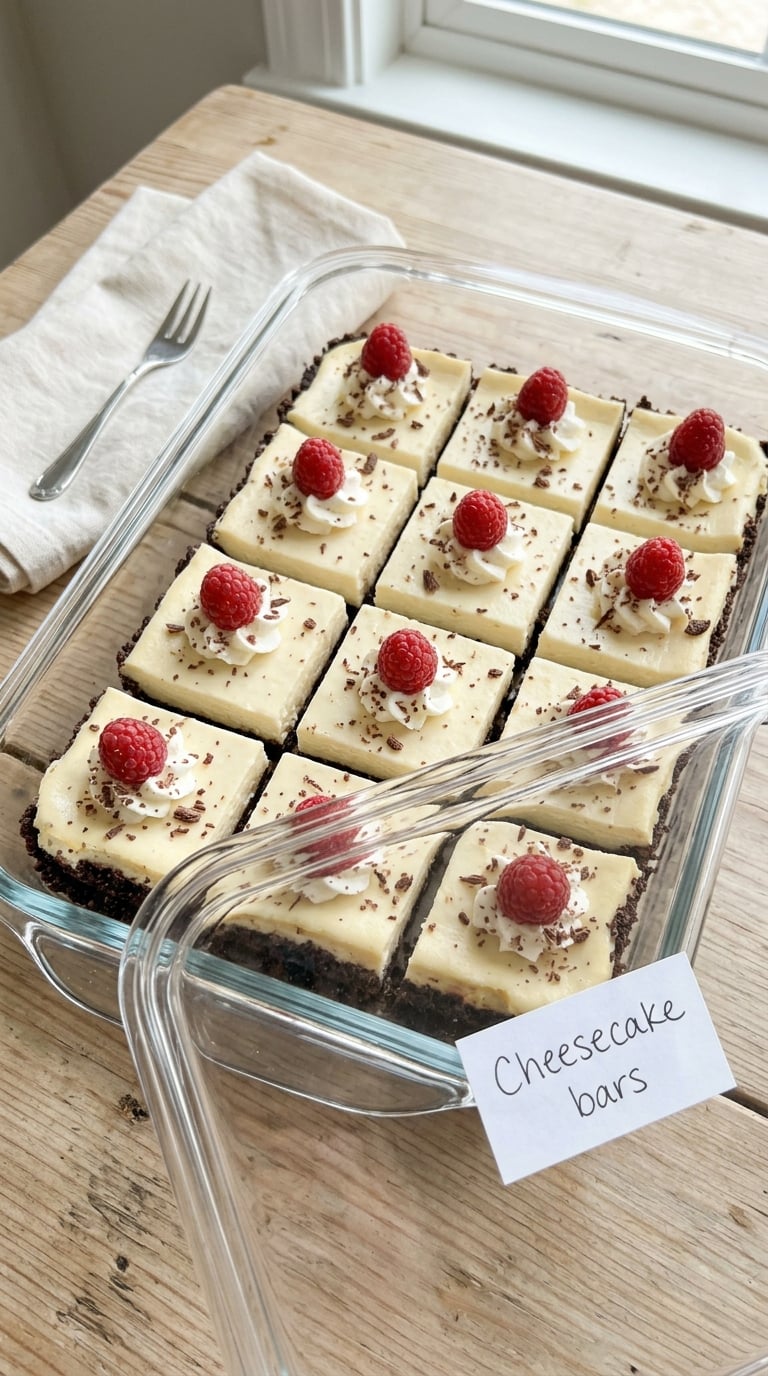
Cheesecake bars look like a bakery gift and are secretly one bowl of filling on a cookie base. They need refrigeration, so they belong in the cooler with the sandwiches and the tartlets, but they slice cleanly and stack without a crumb coat.
Yield: 9 bars · Prep: 15 min · Cook: 30 min · Total: 1 hour 10 min including cooling · Difficulty: Easy
Ingredients
For the crust:
- 1 1/2 cups graham cracker crumbs (about 24 crackers)
- 3 tablespoons granulated sugar
- 6 tablespoons melted unsalted butter (85 g)
- 1/4 teaspoon salt
For the filling:
- 16 ounces cream cheese, softened (450 g)
- 1 cup granulated sugar (200 g)
- 2 teaspoons vanilla extract
- 3 large eggs
- 1/3 cup sour cream (80 g)
- 1/2 teaspoon salt
Instructions
- Heat the oven to 325°F (165°C) and line an 8-inch square pan with parchment.
- Mix the crumbs, sugar, salt and melted butter, then press firmly into the pan in an even layer.
- Bake the crust 8 to 10 minutes, then cool it while you mix the filling.
- Beat the cream cheese, sugar and vanilla on medium speed until completely smooth, scraping the bowl twice.
- Add the eggs one at a time, beating on low just until each disappears; overbeating is what causes cracks.
- Beat in the sour cream and salt, pour over the crust and bake 28 to 32 minutes, until the edges are set and the center wobbles like gelatin when you shake the pan.
- Cool on the counter for 1 hour, then refrigerate at least 3 hours or overnight.
- Lift out with the parchment and cut into 9 bars using a hot, wiped knife between each cut.
Tip: The center should still jiggle when the baking time is up. It sets from the residual heat and the sour cream, and an over-baked cheesecake bar is dense and cracked straight down the middle.
Swap it: Use a chocolate cookie crust and swap the sugar for 1/2 cup brown sugar for a chocolate version. For a nut-free and gluten-free base, use a certified GF nut-free cookie crumb mix.
Storage: Refrigerate for up to 4 days in an airtight container. Cheesecake does not freeze well unbaked-in-a-pan, so if you freeze it, expect a softer, crumbly texture when thawed.
For a bigger chocolate spread, my 15 easy chocolate dessert recipes has a few more that pack well.
11. Mini Fruit Tartlets
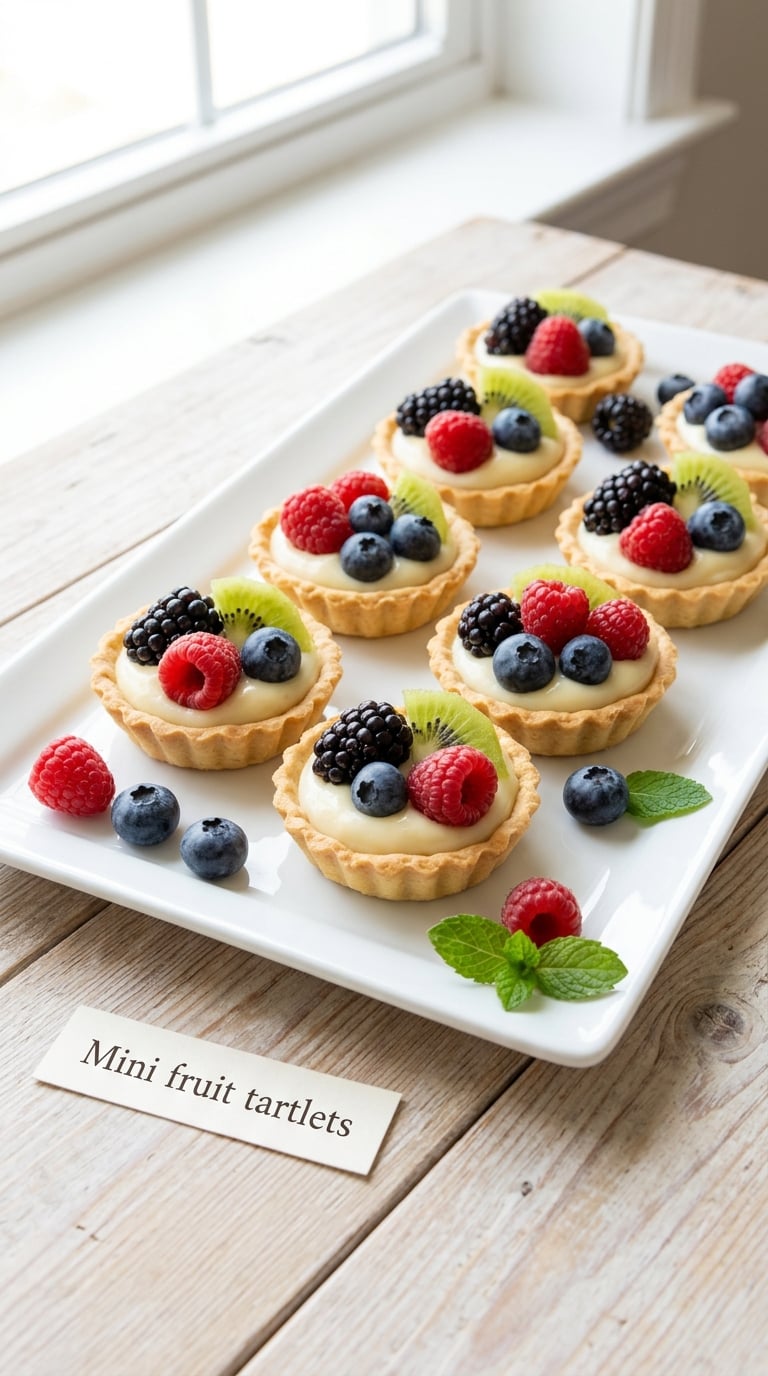
Individual tartlets are the most elegant item here, and the shell means each one travels as its own portion. A muffin pan gives you a sturdy shell with no rolling at all, which is the version I’d actually make on a picnic weekend.
Yield: 12 tartlets · Prep: 25 min · Cook: 20 min · Total: 50 min plus chilling · Difficulty: Medium
Ingredients
For the shells:
- 1 1/4 cups all-purpose flour (160 g)
- 2 tablespoons granulated sugar
- 1/4 teaspoon salt
- 8 tablespoons cold unsalted butter, cubed (113 g)
- 3 tablespoons ice water
For the pastry cream:
- 2 large eggs plus 2 yolks
- 3/4 cup granulated sugar (150 g)
- 2 cups whole milk (480 ml)
- 1 teaspoon vanilla extract
- 3 tablespoons unsalted butter (42 g)
- 1/4 teaspoon salt
For the topping:
- Fresh berries, sliced kiwi, or 1/2 cup mini marshmallows
Instructions
- Whisk the flour, sugar and salt, cut in the cold butter until crumbly, then add the ice water one tablespoon at a time until the dough just holds.
- Flatten the dough into a disk, wrap it and chill 30 minutes.
- Roll it to 1/8 inch thick and press a round piece into each cup of a 12-cup muffin pan, letting the corners rise above the rim.
- Chill the shells 15 minutes, then bake at 400°F (200°C) for 18 to 20 minutes, until golden at the edges and dry to the touch.
- Whisk the eggs, yolks, sugar and salt in a saucepan, whisk in the milk, and cook over medium-low heat, stirring constantly, until it coats the back of a spoon, 175°F (80°C).
- Strain the cream, stir in the vanilla and butter, and chill 2 hours with a film touching the surface.
- Spoon the cold cream into the cooled shells and top each with fruit just before serving.
Tip: Fill the shells no more than two-thirds full and add the fruit at the picnic site. Pastry cream sweats under a pile of berries, and a puddle in the shell is what makes a tartlet soggy by the second hour.
Swap it: Swap the shells for a store-bought all-butter pie dough, rolled and pressed the same way, for a shortcut. For a dairy-free cream, use full-fat coconut milk and skip the butter.
Storage: Shells keep 3 days in an airtight tin at room temperature. Store the filled tartlets refrigerated in a single layer for up to 2 days, and do not freeze them once filled.
12. Individual Apple Crisp Cups
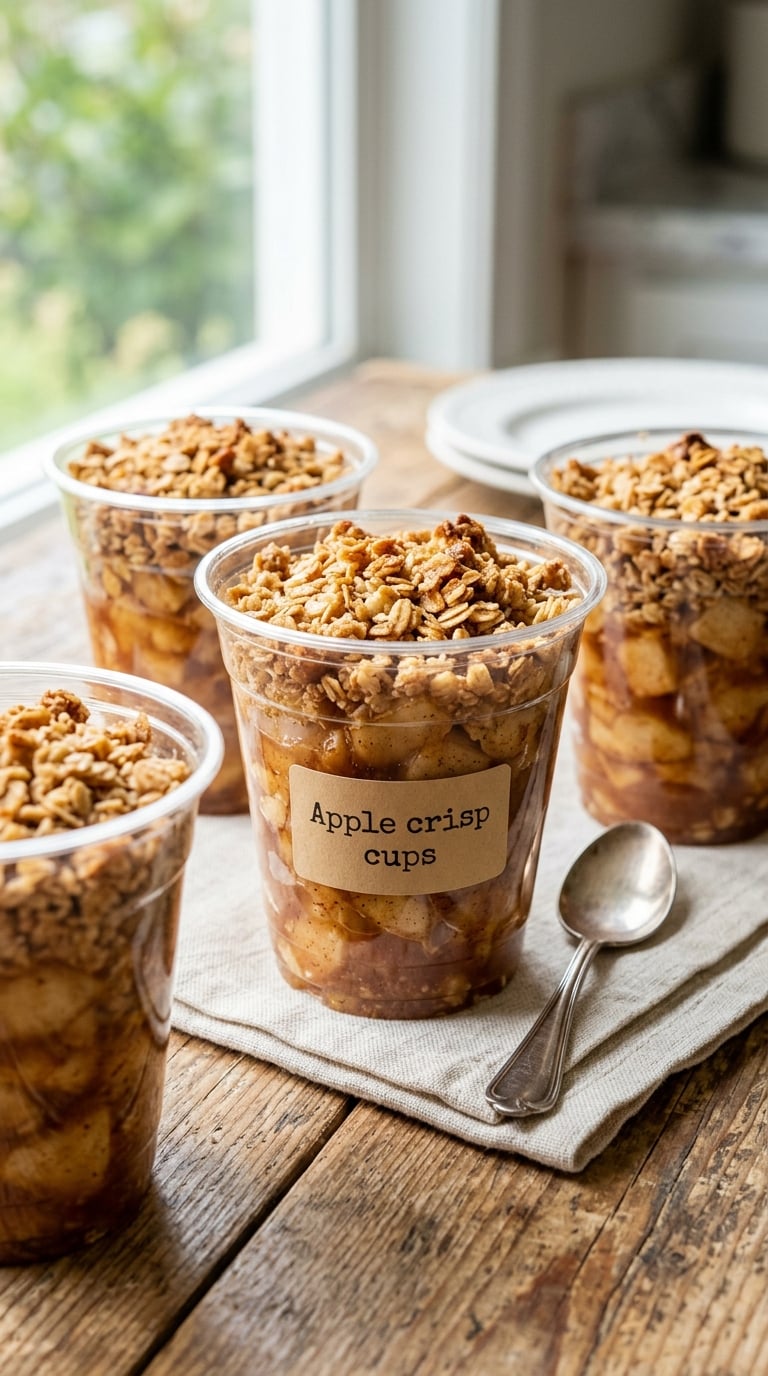
Apple crisp is the comfort answer, and individual cups mean you carry six servings in a stack instead of a heavy glass dish. The oat topping goes on right before serving so it stays crunchy instead of turning to paste in the container.
Yield: 6 cups · Prep: 20 min · Cook: 30 min · Total: 55 min · Difficulty: Easy
Ingredients
For the apple filling:
- 4 medium apples, peeled and diced into 1/2-inch pieces
- 3 tablespoons granulated sugar
- 1 tablespoon lemon juice
- 1/2 teaspoon ground cinnamon
- 1/4 teaspoon salt
For the oat topping:
- 3/4 cup rolled oats
- 1/2 cup all-purpose flour (65 g)
- 1/2 cup packed brown sugar (100 g)
- 6 tablespoons cold unsalted butter, cubed (85 g)
- 1 teaspoon cinnamon
- 1/4 teaspoon salt
Instructions
- Heat the oven to 350°F (175°C) and set six heatproof 12-ounce cups or ramekins on a baking sheet.
- Toss the diced apples with the sugar, lemon juice, cinnamon and salt and divide them between the cups.
- Rub the cold butter into the flour, oats, brown sugar, cinnamon and salt until the mixture holds together in coarse crumbs.
- Divide the topping between the cups, pressing it lightly so it sits in an even layer.
- Bake 28 to 32 minutes, until the apple juices bubble at the edges and the topping is deep golden brown.
- Let the cups stand 15 minutes before serving, which sets the filling and cuts the steam that would soften the crumbs.
- Pack the crumbs loose in a small separate bag if you’re travelling more than an hour, and spoon them on at the picnic.
Tip: Dice the apples small and firm. Granny Smith or Honeycrisp hold their shape through the bake; a soft baking apple dissolves into jam and the cup turns to soup in a sealed lid.
Swap it: Use pears instead of apples, or a can of drained diced peaches for a 10-minute version. For gluten-free, replace the flour with 1/2 cup certified GF oat flour and keep the same quantities.
Storage: Refrigerate for up to 4 days and reheat in a microwave for 90 seconds, or serve cold, which is honestly just as good. Cooled crisp still tastes like autumn.
13. S’mores Dessert Cups
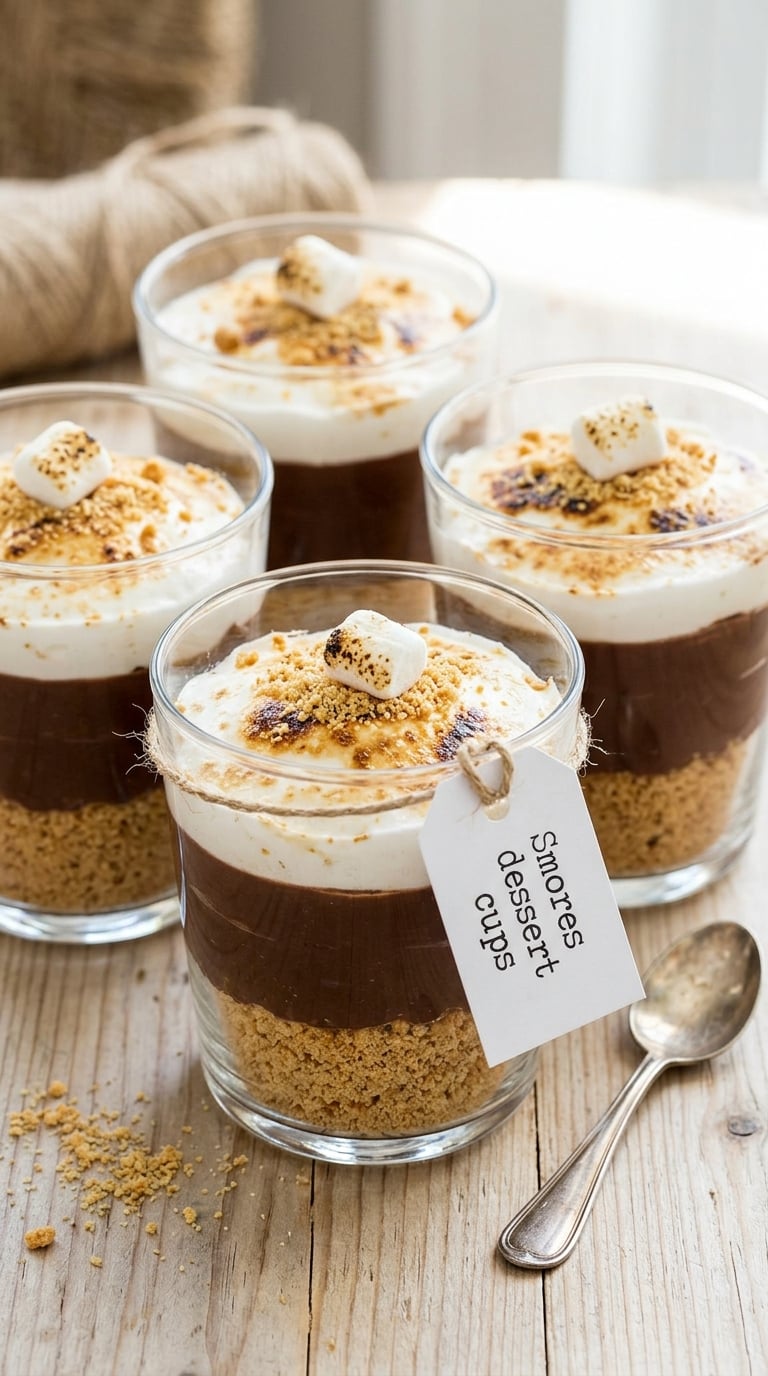
This is the campfire dessert without the campfire. Layering chocolate pudding, marshmallow fluff and graham crumbs in clear cups gets you every flavor of a s’mores, and each person gets their own so nobody is fighting over the last roasted marshmallow.
Yield: 8 cups · Prep: 15 min · Cook: 5 min · Total: 20 min plus 1 hour to chill · Difficulty: No bake
Ingredients
- 1 3/4 cups chocolate pudding mix, prepared and chilled
- 1 1/2 cups marshmallow fluff
- 12 full-size graham crackers (about 150 g), crushed into coarse crumbs
- 1 tablespoon unsalted butter, melted
- 1 teaspoon vanilla extract
- Pinch of salt
Instructions
- Heat the oven to 350°F (175°C) and spread 1/3 of the graham crumbs on a lined sheet pan.
- Drizzle the melted butter over the crumbs, sprinkle with the pinch of salt and toast 5 to 6 minutes, stirring once, until sandy and fragrant.
- Let the crumbs cool completely, then reserve 3 tablespoons for the tops and keep the rest for layering.
- Whip the marshmallow fluff with the vanilla until it’s slightly stiffened, about 1 minute.
- Layer in eight clear cups: half the pudding, the toasted crumbs, the rest of the pudding, then marshmallow fluff.
- Sprinkle the reserved crumbs over the top and chill the cups at least 1 hour before packing.
Tip: Toast the graham crumbs dry first. The butter only carries the salt through; it’s the heat that makes them taste like the inside of a s’mores instead of like cardboard dust.
Swap it: Use a graham cracker crust and skip the cups for a no-frosting version. For a dairy-free option, use a chocolate pudding made on coconut milk and a vegan marshmallow fluff.
Storage: Refrigerate for up to 2 days. The graham crumbs soften in the fridge, so hold the reserved topping in a separate little bag and spoon it on as people are ready to eat.
14. Frozen Yogurt Berry Bites
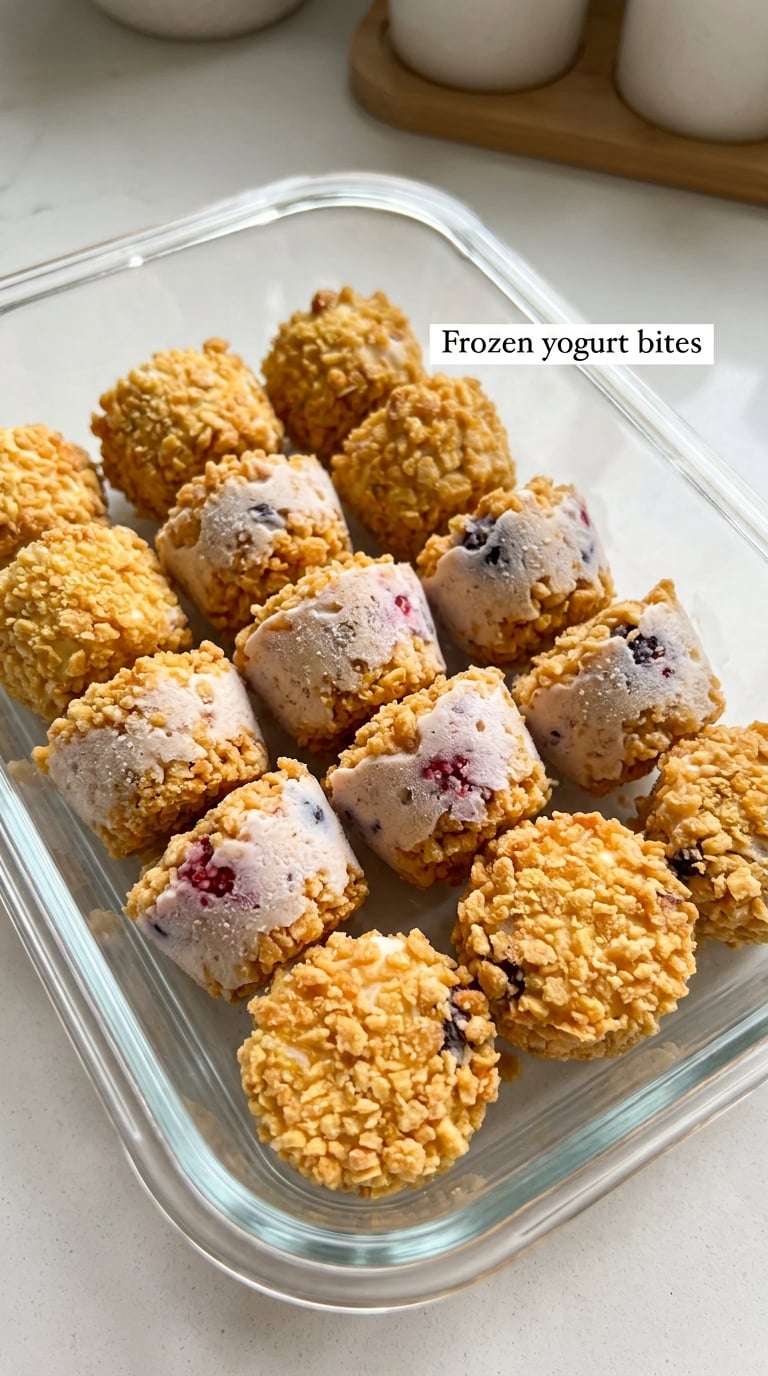
When the forecast says 95°F, this is the dessert that is actually helping your picnic guests cool down. They freeze solid, they survive a hot car, and they are small enough that nobody is asking you for a second serving.
Yield: 18 bites · Prep: 20 min · Freeze: 3 hours · Total: 20 min plus freezing · Difficulty: Easy
Ingredients
- 2 cups vanilla Greek yogurt (440 g)
- 1/2 cup honey or maple syrup
- 1 teaspoon vanilla extract
- 3/4 cup mixed berries, roughly chopped
- 1 1/2 cups panko breadcrumbs or granola clusters (about 100 g)
- 1/3 cup melted chocolate or coconut oil, for drizzling
Instructions
- Line a baking sheet with parchment and freeze it for 10 minutes so the bites set fast later.
- Stir the yogurt, honey and vanilla together in a bowl until smooth and thick.
- Fold in 1/2 cup of the chopped berries, saving the rest for rolling.
- Scoop 2-tablespoon mounds onto the cold sheet and flatten each to a 1-inch disk with wet hands.
- Freeze 2 hours until solid, then roll each bite in the remaining chopped berries, pressing gently.
- Roll in the panko or granola until coated on all sides and press to stick.
- Drizzle with melted chocolate or coconut oil, freeze 30 minutes to set, and transfer to a frosted container.
Tip: Use Greek yogurt, not regular. Regular yogurt carries too much water and the bites go soft and smeary in the first ten minutes out of the freezer; the thick one holds its shape and the coating clings.
Swap it: Use chopped strawberries in place of berries and swap the panko for crushed graham crackers for a s’mores version. Coconut flakes roll on well and make the bites dairy-light.
Storage: Keep frozen in an airtight container for up to 1 month. Pack them in a cooler with ice packs and hand them out as needed, since they soften after about 20 minutes in the heat.
15. Coconut Macaroons
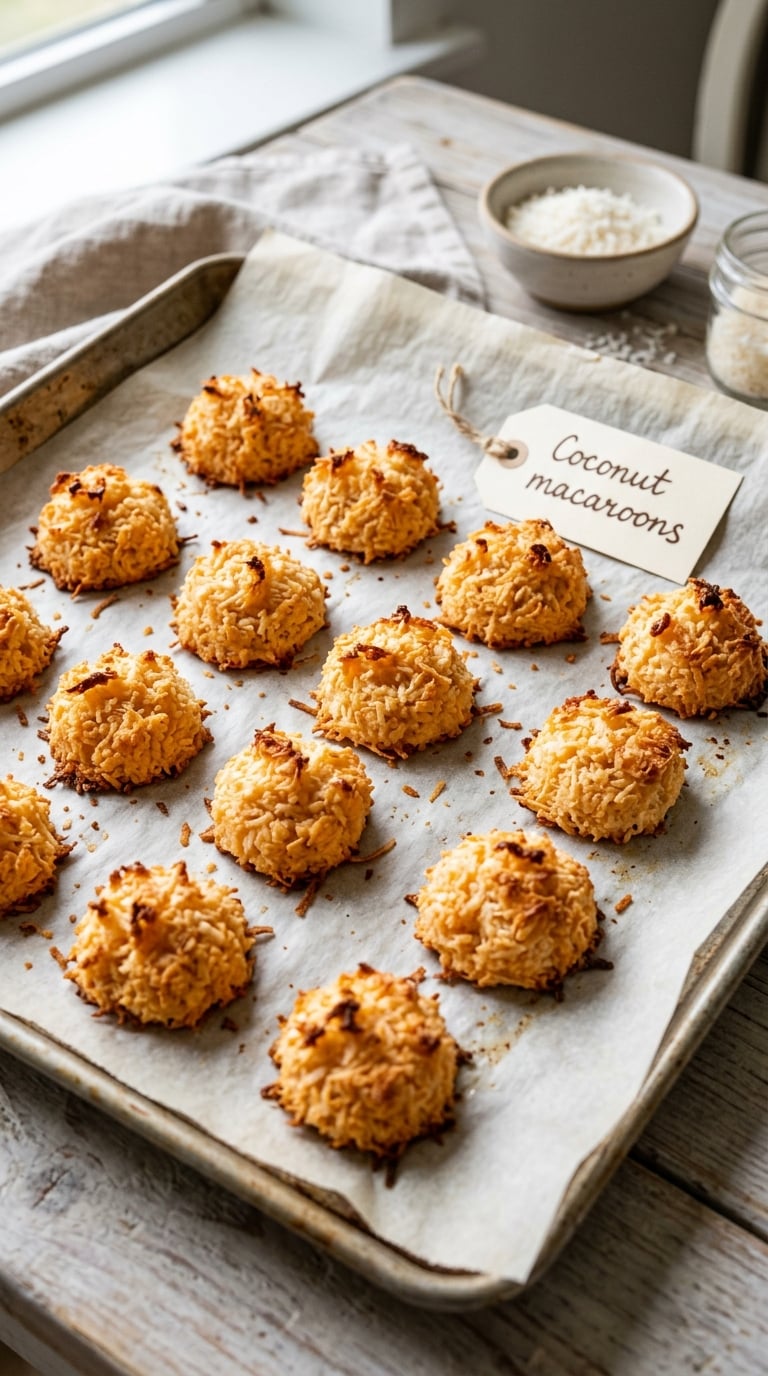
Macaroons are the dessert for a picnic where the napkins are already a casualty. They are sturdy, they are egg-and-coconut rather than dairy, and they hold their shape whether you pack them in a hatbox or a plastic container with a rubber band on it.
Yield: 18 macaroons · Prep: 15 min · Cook: 12 min · Total: 30 min · Difficulty: Medium
Ingredients
- 3 large egg whites (about 1/3 cup)
- 1/4 teaspoon cream of tartar
- 3/4 cup granulated sugar (150 g)
- 1 teaspoon vanilla extract
- 1/2 teaspoon almond extract
- 3 cups unsweetened shredded coconut (about 285 g)
- Pinch of salt
Instructions
- Heat the oven to 325°F (165°C) and line two baking sheets with parchment.
- Beat the egg whites and cream of tartar on high speed to stiff peaks, about 3 minutes.
- With the mixer running, add the sugar a spoonful at a time, then the vanilla, almond extract and salt.
- Fold in the coconut gently in two additions, keeping some texture in the mixture.
- Scoop 2-tablespoon mounds onto the sheets and push a few extra flakes of coconut onto the tops.
- Bake 11 to 12 minutes, until the edges are deep golden and the tops look dry to the touch.
- Cool on the sheet for 5 minutes before moving them, then cool completely on a rack.
Tip: They bake in about eleven minutes, and one extra minute turns them from moist to dry cardboard. Pull them at the first sign of color on the edges and trust the carryover.
Swap it: Use unsweetened coconut only; sweetened coconut adds sugar and the macaroons spread. For chocolate-dipped ones, melt 4 ounces dark chocolate and dip half of each macaroon, then set them on parchment for 15 minutes.
Storage: Airtight at room temperature for 5 days, and they keep a crisp exterior the whole time. Freeze in a single layer for up to 3 months, though they’re rarely needed that long.
Macaroons are egg-based, so flag that on any shared picnic with a young child at the table, and check the label on sweetened varieties that may carry dairy or gluten.
Tips for Making These
Every one of these recipes is more forgiving than a layer cake, but a few habits decide whether it arrives looking good.
- Cool completely before you close the lid. Warm brownies steam, and steam trapped in a container makes crisp cookies soft and pastry cream weep. Give everything a full hour on a rack, then pack. Bars, cookies and macaroons actually benefit from being made a day ahead.
- Chill anything with dairy, egg custard, cream or fresh fruit. Cheesecake bars, the trifle, the tartlets, the cookie sandwiches, the fruit pizza, the apple crisp, the s’mores cups, the frozen bites, the lemon bars and the frosted cupcakes all need a cooler with ice packs. Everything else travels at room temperature.
- Keep perishable desserts under 40°F and under two hours in the heat. The USDA’s rule is two hours at normal temperatures and one hour once the air temperature is above 90°F (32°C), and that clock starts the moment the cooler comes out of the car, not when someone takes the first bite.
- Layer, don’t toss. Sandwich cookies between layers of parchment, stand cupcakes upright in the muffin box, pack brownie squares in a single layer, and add a small towel between layers of anything frozen. Fill a rigid container completely so pieces don’t shuffle in the corners.
- Keep toppings separate until the picnic. The oat crumb on the apple crisp, the apricot glaze on the fruit pizza, and the reserved graham crumbs on the s’mores cups all go on at the site. Transporting them pre-applied is the difference between crisp and soggy.
- Pack for allergies, not just appetites. Macaroons are egg, the sandies and frozen bites carry nuts, and most cookie and brownie recipes contain wheat, dairy and egg. Label containers with masking tape and a Sharpie, and choose the Rice Krispie treats or the macaroons for a school picnic when you cannot control the cross-contact.
Frequently Asked Questions
Which dessert travels best for a picnic?
Rice Krispie treats, brownies and sturdy cookies such as chocolate chip or shortbread are the best-travelling options, because they are stable at room temperature, hold their shape in a sealed container, and are eaten by hand. Bars and slices can be stacked with parchment between layers, so a bumpy drive will not crush them. Avoid custards, meringues and whipped-cream cakes, which melt, weep or need forks.
How long can homemade picnic desserts be stored before serving?
Most baked cookies, bars and macaroons keep at room temperature in an airtight container for four to five days, and brownies improve on day two. Anything with cream cheese, whipped cream, custard or pastry cream, such as cheesecake bars, trifles, tartlets and frosted cupcakes, keeps refrigerated for two to four days. Frozen yogurt bites stay good in the freezer for a month if you packed them cold.
What desserts can I make the night before a picnic?
Brownies, chocolate chip cookies, sandies, macaroons, Rice Krispie treats and cheesecake bars are all better after a night of rest. Cheesecake bars especially need at least three hours of chilling, and a night makes them slice cleanly. Hold the trifle’s fruit and the fruit pizza’s glaze back until the day of, and bake the Rice Krispie treats the same morning so the squares stay crisp.
How do I keep frosting and fruit from getting damaged in transit?
Frost cupcakes with a stiff buttercream, keep them upright in a rigid muffin box, and chill them 15 minutes so the frosting firms before the lid goes on. For fruit, pat berries dry before topping anything, arrange the fruit in a single layer, and glaze only at the picnic. Slice nothing until the cake or bar is completely cold, because warm buttercream slumps and warm cake tears.
What food safety precautions should I take when bringing desserts outdoors?
Carry perishable desserts in a cooler with ice packs and keep them at or below 40°F (4°C). Do not leave dairy, egg custard or cream desserts in the danger zone between 40°F and 140°F (4°C to 60°C) for more than two hours, or one hour when the outdoor temperature is above 90°F (32°C). Discard anything perishable that has sat in the heat past that window, and pack separate serving utensils for each dish.
15 Easy Picnic Dessert Ideas That Travel Well: Final Picks
If you’re making one recipe to start, make the fudgy chocolate brownies. They take 40 minutes, need no refrigeration, stack in a container, and are the dessert most people ask about afterwards. If you have a cooler and a little more time, the easy cheesecake bars are the one I’d make next — they look like a gift and slice like a dream the morning after.
Pick your recipes by the trip, not by the photo: brownies, cookies, sandies, macaroons and Rice Krispie treats for a no-cooler afternoon, anything with cream or custard for a cooler-packed day. That’s the whole idea behind these 15 easy picnic dessert ideas that travel well — choose the treat that matches the drive and the weather, and it will still taste good when the box opens on a picnic blanket. If you need even simpler options, my 4-ingredient dessert recipes keep the same transport rules with shorter ingredient lists.