
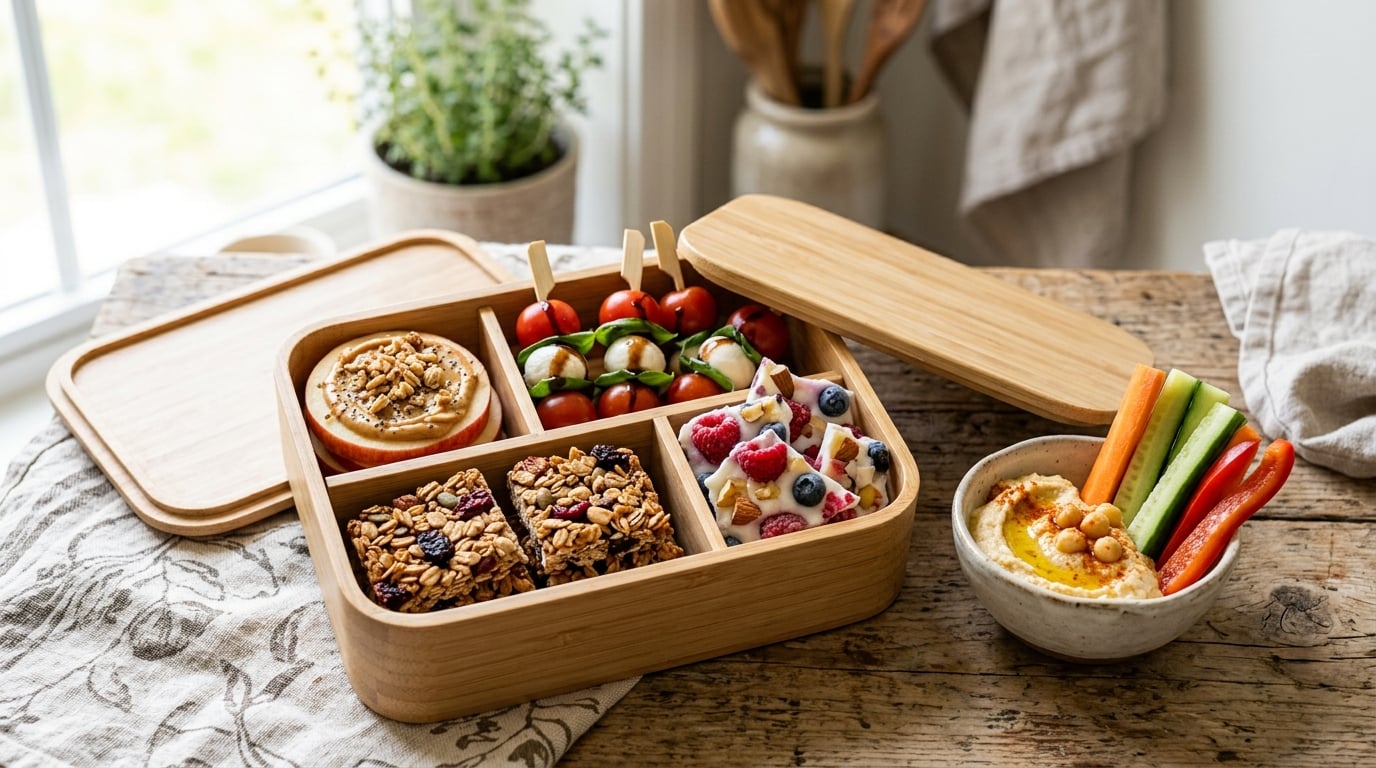
15 easy lunchbox snack ideas for school, all of them packable in under ten minutes and most of them needing no cooking at all. Back-to-school packing starts early in October, and by the second week of term the same five snacks start coming home untouched. These fifteen are built to survive a full morning in a bag, a lunch table and a car ride home.
I pack for two kids, one of whom will only eat food he recognises and the other of whom eats anything put in front of her. Everything here is easy lunchbox snack material rather than a formal lunch: most of these are no-cook, several freeze well, and every one is written to be nut-free or to carry a one-for-one nut swap, so they clear a nut-free classroom without a second thought.
Table of Contents
15 Easy Lunchbox Snack Ideas for School at a Glance
Here is the short version so you can pick before you shop. Times are active hands-on time, not including cooling or chilling.
| Recipe | Time | Difficulty | Best for |
|---|---|---|---|
| Mini Caprese Skewers | 10 min | Easy | Fresh, no-cook, adds colour |
| Peanut Butter Apple Nachos | 5 min | Easy | Five-minute mornings |
| Crispy Rice Treats | 20 min + set | Easy | Make-ahead batch |
| Mini Veggie Muffins | 25 min + bake | Easy | Savoury snack fans |
| Chocolate Energy Bites | 15 min + chill | Easy | After-school fuel |
| Yogurt Berry Parfaits | 8 min | Easy | Fruit plus protein |
| Pumpkin Spice Yogurt Bites | 10 min + freeze | Easy | Autumn and Halloween |
| Cheddar Pretzel Twists | 20 min + bake | Medium | Crunchy savoury |
| Fruit Salad Melts | 10 min + freeze | Easy | Hot-day cooling snack |
| Trail Mix Snack Mix | 10 min | Easy | Shelf-stable, no fridge |
| Mini Pizza Lunchbox Cups | 15 min + bake | Medium | Kids who want pizza |
| Hummus and Veggie Cups | 10 min | Easy | Veggies that get eaten |
| Apple Cinnamon Oat Bites | 15 min + bake | Easy | Soft-baked, shareable |
| Frozen Berry Yogurt Bark | 10 min + freeze | Easy | No sugar added |
| Cheesy Granola Bars | 20 min + bake | Medium | Filling savoury bar |
If you also need a main course, my easy back to school lunch box ideas covers the sandwiches and bento boxes that go with these snacks.
1. Mini Caprese Skewers
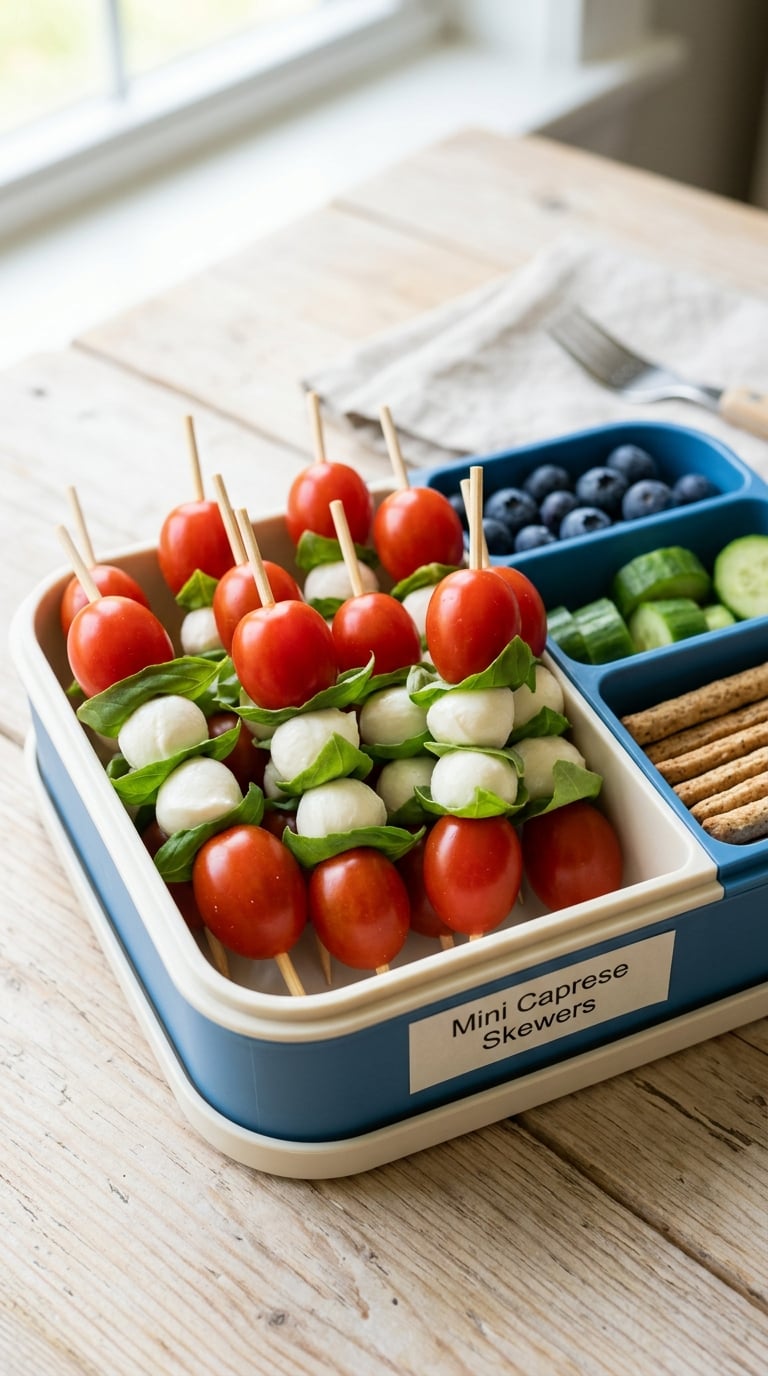
These are the snack that makes a lunchbox look like someone tried, and they never need a fridge if you use mozzarella pearls instead of fresh slices.
Yield: 24 skewers (about 4 skewers per child) · Prep: 10 minutes · Cook: 0 minutes · Total: 10 minutes · Difficulty: Easy
Ingredients
- 1 pint (about 2 cups) red grape tomatoes
- 8 oz (225 g) small mozzarella pearls, drained
- 15 to 20 fresh basil leaves
- 1 tablespoon extra-virgin olive oil
- 1 teaspoon balsamic vinegar
- 1/4 teaspoon flaky salt
- Bamboo skewers, 6 inch, 24 of them
Instructions
- Wash the tomatoes and basil and pat everything completely dry.
- Halve any tomato larger than a grape so the skewer stays balanced.
- Tear the basil leaves into rough pieces about the size of a mozzarella pearl.
- Drizzle the tomatoes and basil with the olive oil and balsamic, then toss gently with your hands.
- Thread tomato, basil, mozzarella, tomato, basil onto each skewer, alternating.
- Finish every skewer with a tomato so the ends look even.
- Sprinkle with flaky salt and pack into a divided container, napkin underneath.
Tip: Salt the tomatoes in the bowl, not on the skewer, and let them sit five minutes. Too long and they go watery and the box ends up damp.
Swap it: Mozzarella pearls carry milk, so use cubed avocado and cucumber for a dairy-free, vegan version. Keep the balsamic drizzle at the same level.
Storage: Best eaten the same day. Keep the dressed skewers in a sealed container in the fridge and eat within 24 hours. Thread the skewers the night before and dress them in the morning so nothing goes soft.
2. Peanut Butter Apple Nachos
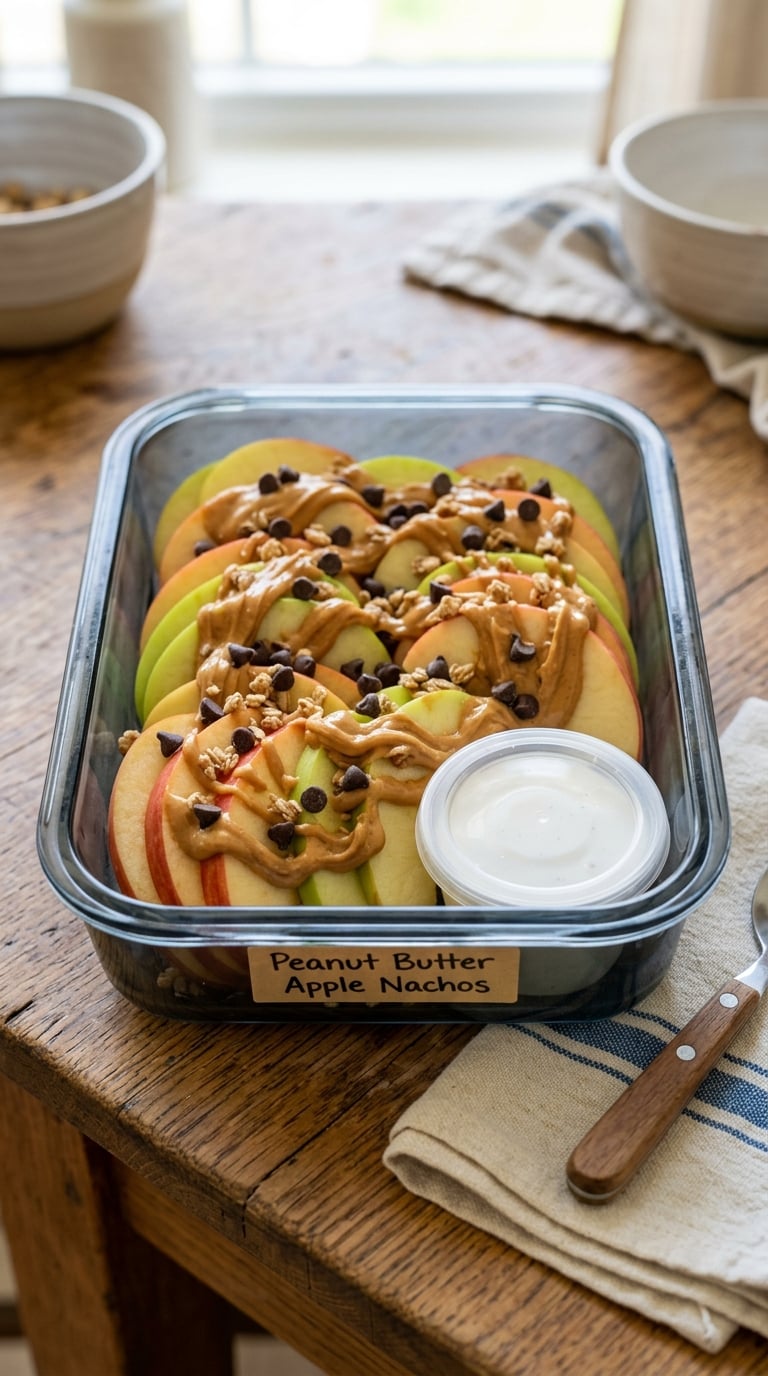
Kids eat apples with peanut butter every day and never get bored, because it looks different every time. This version turns the same two ingredients into something that reads as a treat.
Yield: 2 snack portions · Prep: 5 minutes · Cook: 0 minutes · Total: 5 minutes · Difficulty: Easy
Ingredients
- 1 crisp apple, cored and cut into thin rounds
- 2 tablespoons creamy peanut butter, thinned with a teaspoon of warm water
- 1 tablespoon mini chocolate chips
- 2 tablespoons plain Greek yogurt for dipping
- 1 teaspoon honey or maple syrup, plus a few chopped peanuts or sunflower seeds for the top
Instructions
- Slice the apple into rounds about a quarter inch thick, no thicker.
- Arrange the rounds in a fan or a loose circle in a shallow container.
- Loosen the peanut butter with warm water so it drizzles rather than tears the apple.
- Drizzle the peanut butter in a back-and-forth pattern over the apple.
- Scatter the chocolate chips and the chopped peanuts or sunflower seeds over the top.
- Add the yogurt to a small lidded cup and pack it in the same compartment.
Tip: Toss the apple rounds in a squeeze of lemon water before arranging them. It keeps the edges pink and the slices crisp through a long morning.
Swap it: For a nut-free classroom, use sunflower seed butter in exactly the same quantity. It behaves the same way once thinned, and it is made in facilities that handle no tree nuts or peanuts.
Storage: Pack within an hour of making, or the apple browns and the toppings go soft. The dressed apple keeps 4 hours in a sealed container. The yogurt cup needs a cold pack in summer.
3. Crispy Rice Treats
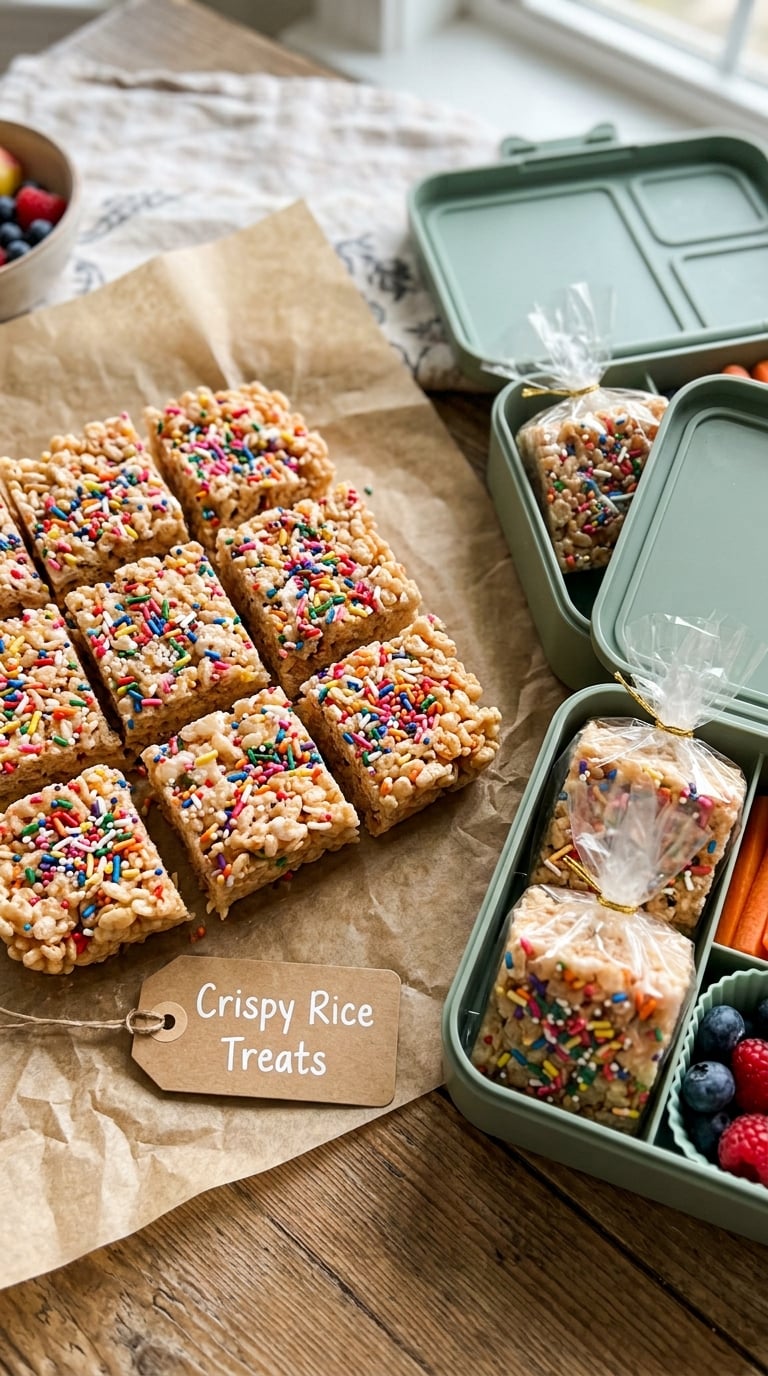
The batch recipe. Make it once on a Sunday and you have a portable snack for the rest of the week without touching a pan again.
Yield: 16 squares, 4 to 5 per child · Prep: 5 minutes · Cook: 8 minutes · Total: 30 minutes including setting · Difficulty: Easy
Ingredients
- 4 tablespoons (60 g) unsalted butter
- 2 large marshmallows, about 10 oz (280 g)
- 1 teaspoon vanilla extract
- 6 cups (180 g) crisp rice cereal
- 1/4 cup sprinkles, plus more for the top
Instructions
- Line a 9 by 13 inch pan with parchment paper, letting it hang over the edges.
- Melt the butter in a wide saucepan over medium-low heat until it foams and smells nutty.
- Add the marshmallows and stir constantly until completely smooth, about 3 minutes.
- Stir in the vanilla, then take the pan off the heat.
- Pour in the cereal and the 1/4 cup sprinkles while stirring, then let the mixture sit 1 minute so the cereal softens.
- Press it into the pan with buttered hands, pressing hard so the squares are dense rather than crumbly.
- Scatter the remaining sprinkles over the top and press them in lightly.
- Cool at room temperature for 2 hours, then cut into 16 squares with a sharp knife.
Tip: Pressing is the whole recipe. A loosely packed tray crumbles into crumbs in a lunchbox by 11:30, and every parent learns this the same way.
Swap it: For a nut-free version, swap the sprinkles for mini dried fruit or crushed pretzels. A drizzle of melted chocolate instead of sprinkles sets firm and travels well.
Storage: Wrapped individually in parchment or wax paper squares, they keep 5 days at room temperature in an airtight container, and about a month in the freezer. Wrap each one in plastic for the freezer so the squares do not fuse together.
4. Mini Veggie Muffins
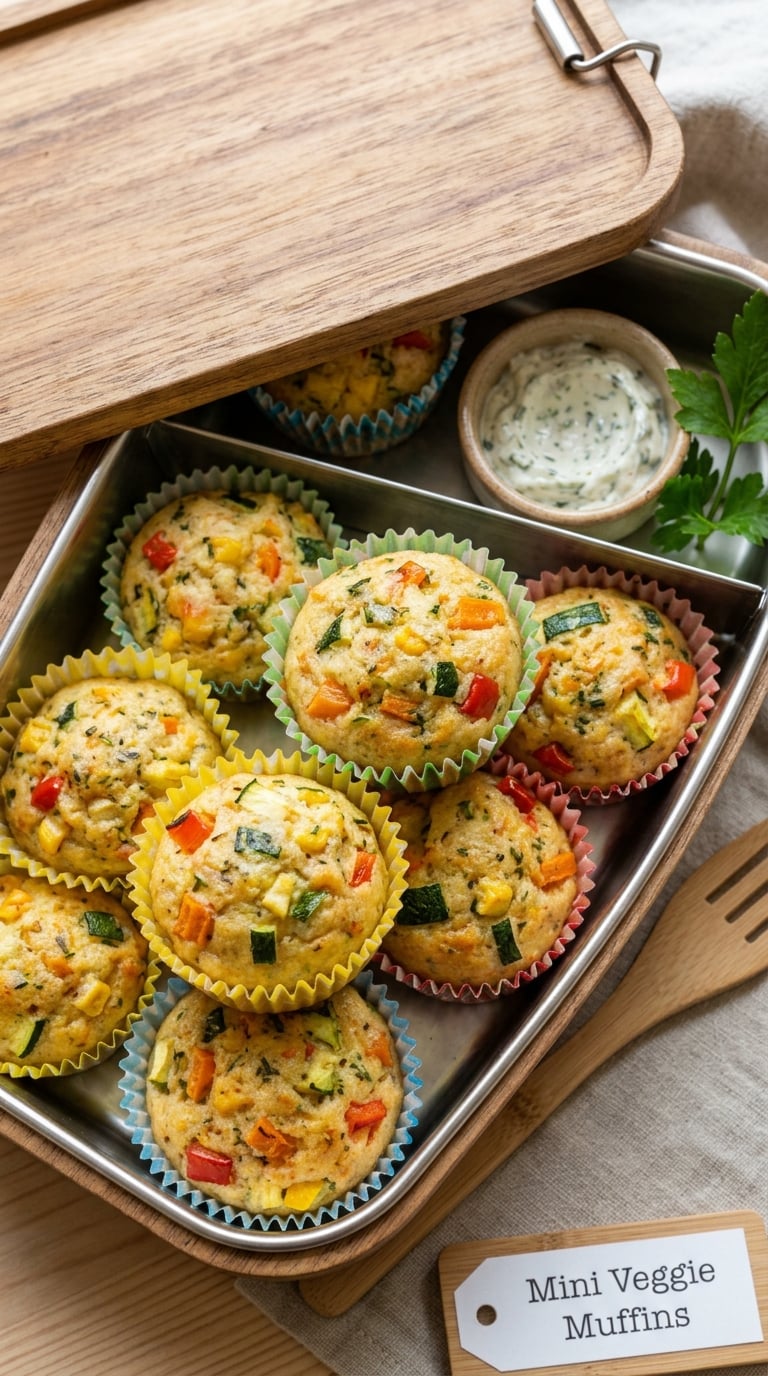
When a child says they do not want vegetables, try putting the vegetables in something they already eat. These mini muffins are soft, hold a full day, and eat neatly with two hands.
Yield: 12 mini muffins · Prep: 15 minutes · Cook: 20 minutes at 400°F (205°C) · Total: 35 minutes · Difficulty: Easy
Ingredients
- 1 cup (120 g) grated cheddar, plus 2 tablespoons for the tops
- 1/2 cup (65 g) grated zucchini, squeezed dry
- 1/4 cup (40 g) finely diced red pepper
- 1/4 cup (25 g) grated onion
- 1 cup (125 g) all-purpose flour
- 1 teaspoon baking powder
- 1/2 teaspoon baking soda
- 1/2 teaspoon salt
- 2 large eggs, lightly beaten
- 3/4 cup (180 ml) buttermilk
- 1/2 cup (65 g) cornmeal
Instructions
- Heat the oven to 400°F (205°C) and line a 12-cup mini muffin tin with paper liners.
- Squeeze the grated zucchini firmly in a clean cloth to remove as much water as you can.
- Whisk the flour, cornmeal, baking powder, baking soda and salt in a large bowl.
- Stir the zucchini, pepper, onion and 1 cup of the cheddar into the dry ingredients.
- Pour in the beaten eggs and buttermilk and stir only until the flour disappears. A few lumps are fine.
- Divide the batter between the 12 cups, filling each about three-quarters of the way.
- Sprinkle the remaining 2 tablespoons of cheese on top and bake 20 minutes.
- Cool 5 minutes in the tin, then lift out and cool completely on a rack before packing.
Tip: The doneness cue is a springy top and a toothpick that comes out with a few moist crumbs. Pull them out the moment the edges pull away from the liner, or they dry out by morning.
Swap it: For a dairy-free version, use a plant-based shredded cheddar and swap buttermilk for unsweetened plant milk plus a teaspoon of lemon juice. Egg-free works with 1/2 cup of thick aquafaba.
Storage: Cool fully, then store in an airtight container in the fridge for up to 4 days. They freeze beautifully for 2 months; move them straight from freezer to lunchbox in a sealed container so they thaw by morning.
5. Chocolate Energy Bites
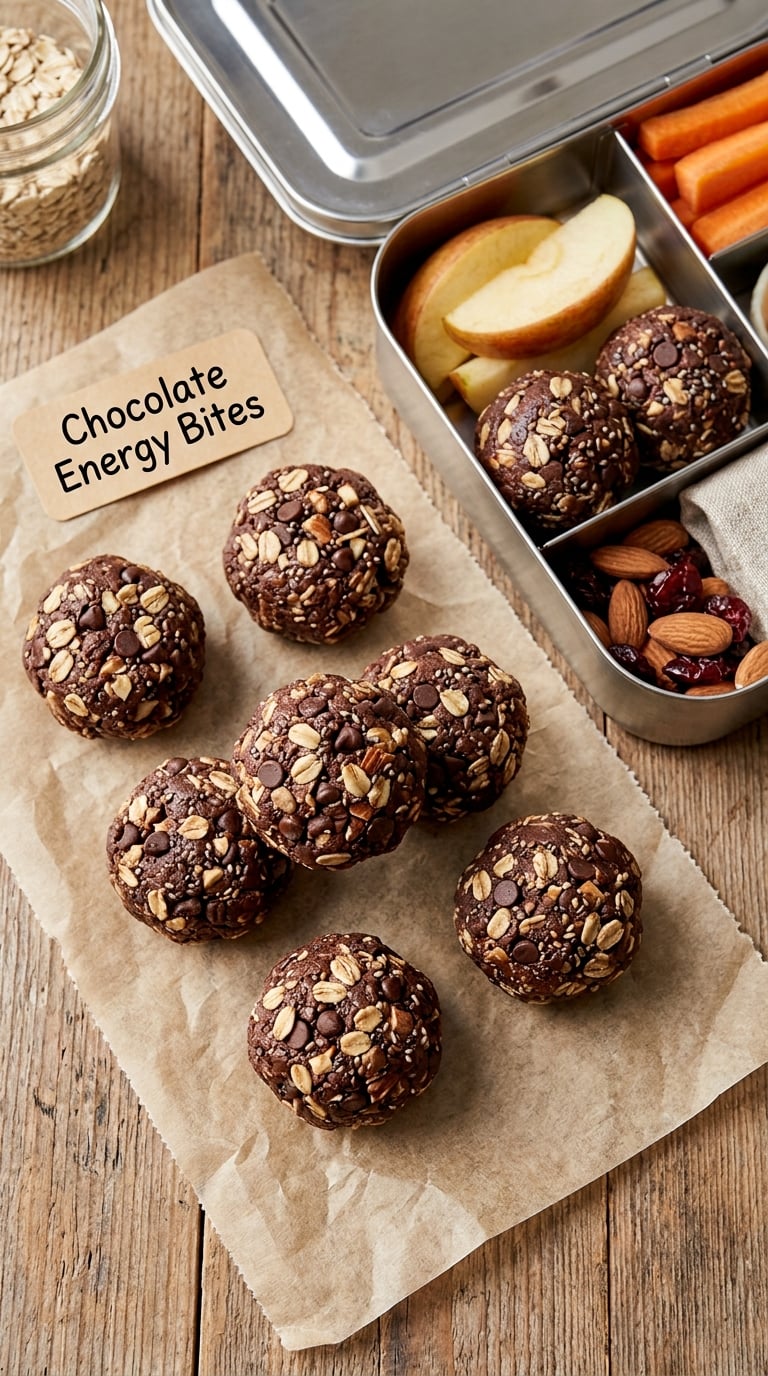
Rolled oats, one nut butter, a drizzle of chocolate and fifteen minutes of work. This is the one my oldest asks for by name when the school week gets long.
Yield: 18 bites, about 3 per child · Prep: 15 minutes · Cook: 0 minutes · Total: 15 minutes plus 30 minutes chilling · Difficulty: Easy
Ingredients
- 1 1/2 cups (150 g) rolled oats
- 1/2 cup (120 g) almond butter or sunflower seed butter
- 1/3 cup (80 ml) honey or maple syrup
- 1/4 cup (40 g) mini chocolate chips, plus extra for rolling
- 1 teaspoon vanilla extract
- 1/4 teaspoon salt
- 2 tablespoons ground flaxseed
Instructions
- Stir the oats, nut butter, honey, 1/4 cup of chocolate chips, vanilla, salt and flaxseed together in a bowl.
- Mix with a sturdy spoon until the mixture comes together and holds when squeezed.
- If it crumbles, add a teaspoon of honey. If it is sticky, add a tablespoon of oats.
- Cover the bowl and chill 30 minutes so the oats swell and firm up.
- Roll into 18 balls, wetting your hands so they do not stick.
- Roll each ball in the extra chocolate chips or sprinkles.
- Refrigerate 15 minutes to firm up, then pack in a container lined with parchment.
Tip: Weigh the mixture in 30 g portions. Uniform bites mean a fair portion for everyone and no child sending home the largest one every day.
Swap it: Sunflower seed butter makes these nut-free and school-safe, and pumpkin seed butter works too. For dairy-free chocolate chips, use a dairy-free brand. Oats can be replaced with certified gluten-free oats for a gluten-free box.
Storage: Refrigerated in an airtight container they keep 7 days. Unrefrigerated on a counter they are good for 2 days, which is fine for a lunchbox. They also freeze for 3 months on a tray before being bagged.
6. Yogurt Berry Parfaits
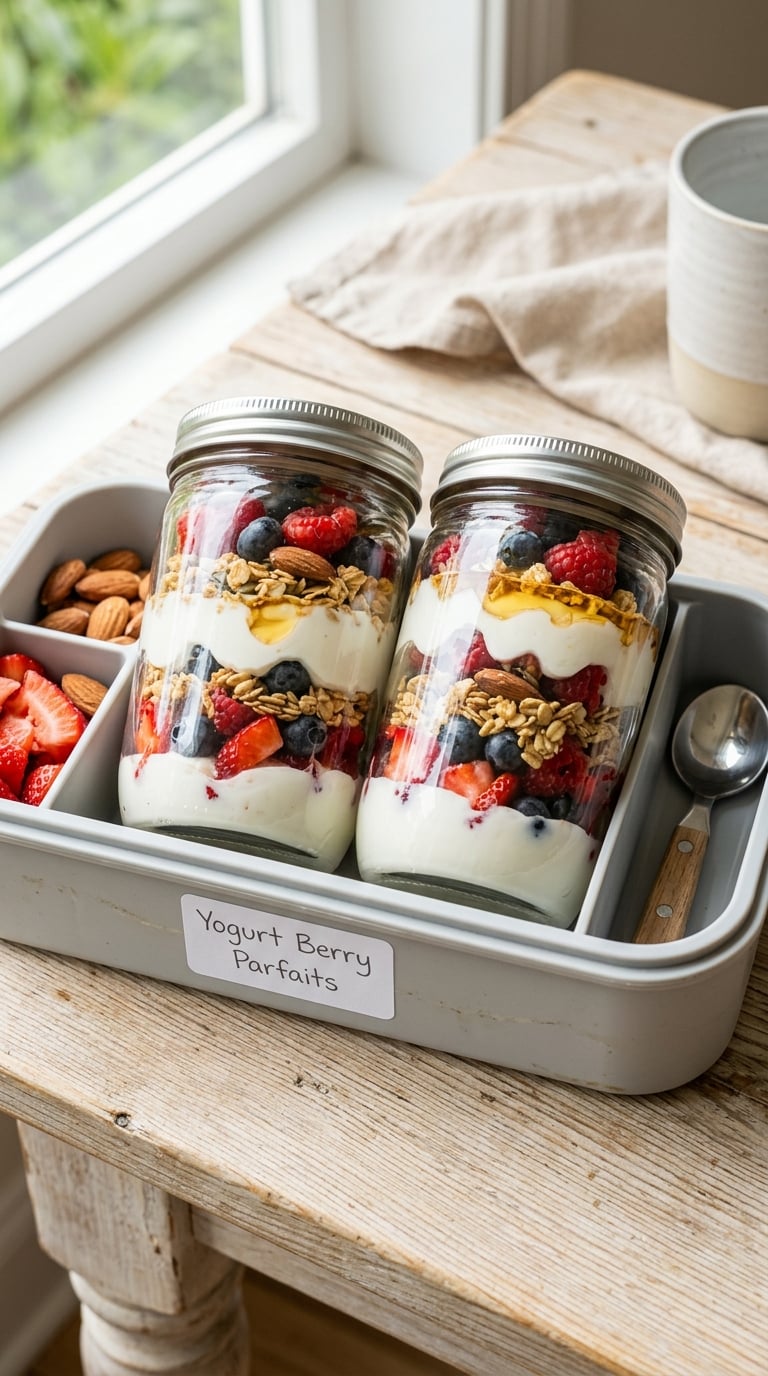
Layered in the right order and packed in a clear cup, this looks like something from a cafe and assembles in the time it takes to find a lid.
Yield: 2 parfaits · Prep: 8 minutes · Cook: 0 minutes · Total: 8 minutes · Difficulty: Easy
Ingredients
- 1 cup (240 g) plain Greek yogurt or vanilla yogurt
- 1/2 cup (75 g) fresh blueberries, halved if large
- 1/2 cup (40 g) granola
- 1 tablespoon honey or maple syrup
- 1 teaspoon vanilla or a little grated lemon zest
Instructions
- Stir the honey or maple into the yogurt with the vanilla until smooth.
- Put half the yogurt in the bottom of each clear cup, about a third of the way up.
- Add a layer of berries, then the remaining yogurt.
- Top each cup with granola and a few more berries.
- Refrigerate if you have more than two hours before packing.
- Pack the granola in a small separate pot if the parfait may sit for a long morning.
Tip: Wet fruit on top of yogurt is what makes a parfait go flat by lunchtime. Add the berries just before you close the lid, and keep the granola packed separately if there is any doubt.
Swap it: Use any berry that holds its shape. Frozen raspberries are firmer than fresh and travel well if you pack them frozen. For dairy-free, use a thick coconut or soy yogurt and a granola made without dairy.
Storage: Eat within 24 hours of assembly, kept cold. These must travel with a frozen cold pack, and dairy foods should not sit unrefrigerated for more than 2 hours, or 1 hour on a day above 90°F (32°C).
7. Pumpkin Spice Yogurt Bites
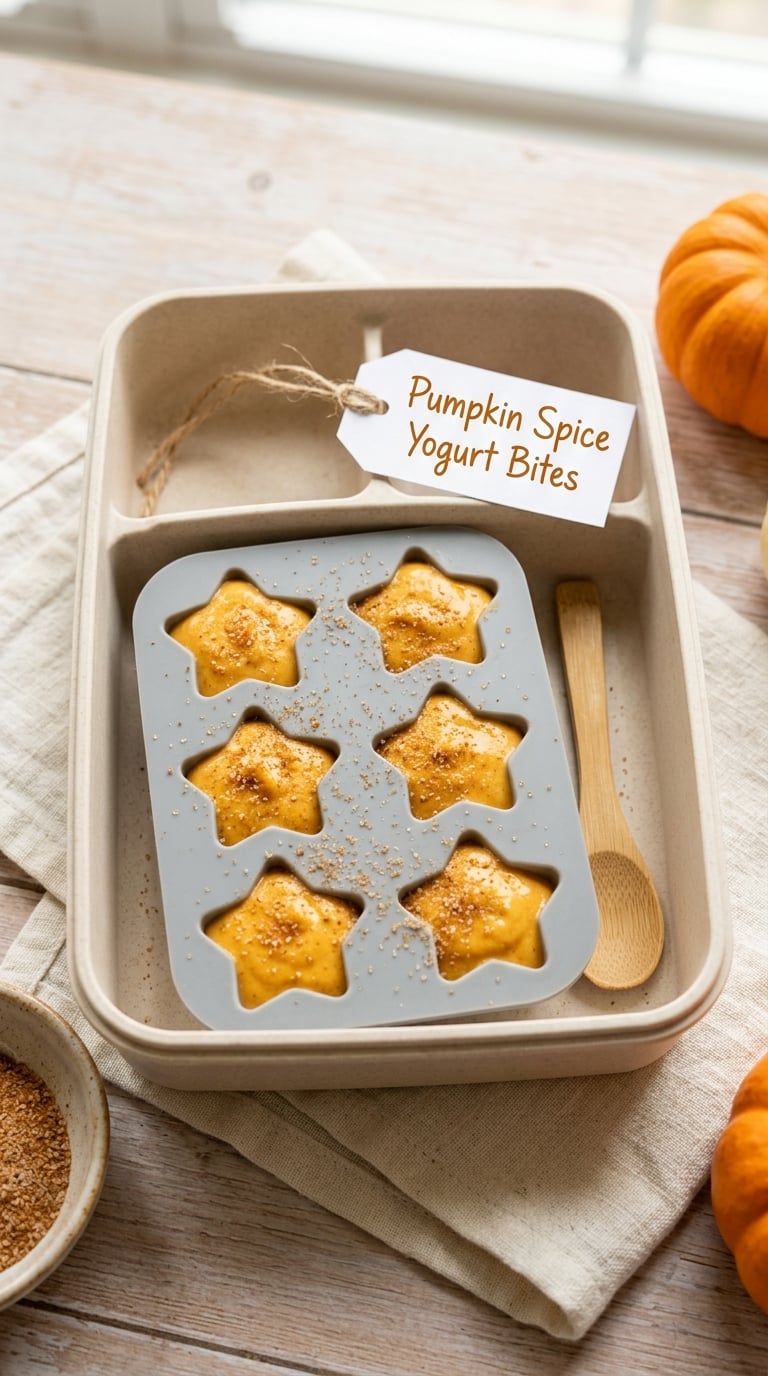
These come out orange, faintly spiced and just firm enough to eat with fingers. They are the seasonal one on this list and they only go into the box for a few weeks a year.
Yield: 20 bites · Prep: 10 minutes · Cook: 0 minutes · Total: 10 minutes plus at least 4 hours freezing · Difficulty: Easy
Ingredients
- 1 1/2 cups (360 g) plain Greek yogurt
- 1/2 cup (120 g) pumpkin puree, not pie filling
- 2 tablespoons (25 g) honey or maple syrup
- 1/2 teaspoon ground cinnamon
- 1/8 teaspoon ground ginger
- Pinch of nutmeg and a pinch of salt
- 1 teaspoon vanilla extract
Instructions
- Stir all the ingredients together in a bowl until completely smooth.
- Taste it. The mixture should be slightly sweeter than you expect, because freezing dulls sweetness.
- Spoon it into a silicone star or mini muffin mould, filling each about three-quarters full.
- Tap the mould on the counter to release air bubbles.
- Freeze on a flat surface for at least 4 hours, ideally overnight, until solid.
- Pop the bites out of the mould and store them in a freezer container with parchment between the layers.
Tip: Greek yogurt is essential. Regular yogurt sets soft and the bites slump into each other in the freezer bag.
Swap it: Make this year-round by swapping the pumpkin for mashed banana and a teaspoon of lemon zest, which gives a caramelised bite that freezes just as well.
Storage: Keep frozen at 0°F (-18°C) or below for up to 2 months. To pack, put the bites straight from the freezer into a small insulated container with a cold pack and let them thaw during the morning, like a frozen granola bar.
8. Cheddar Pretzel Twists
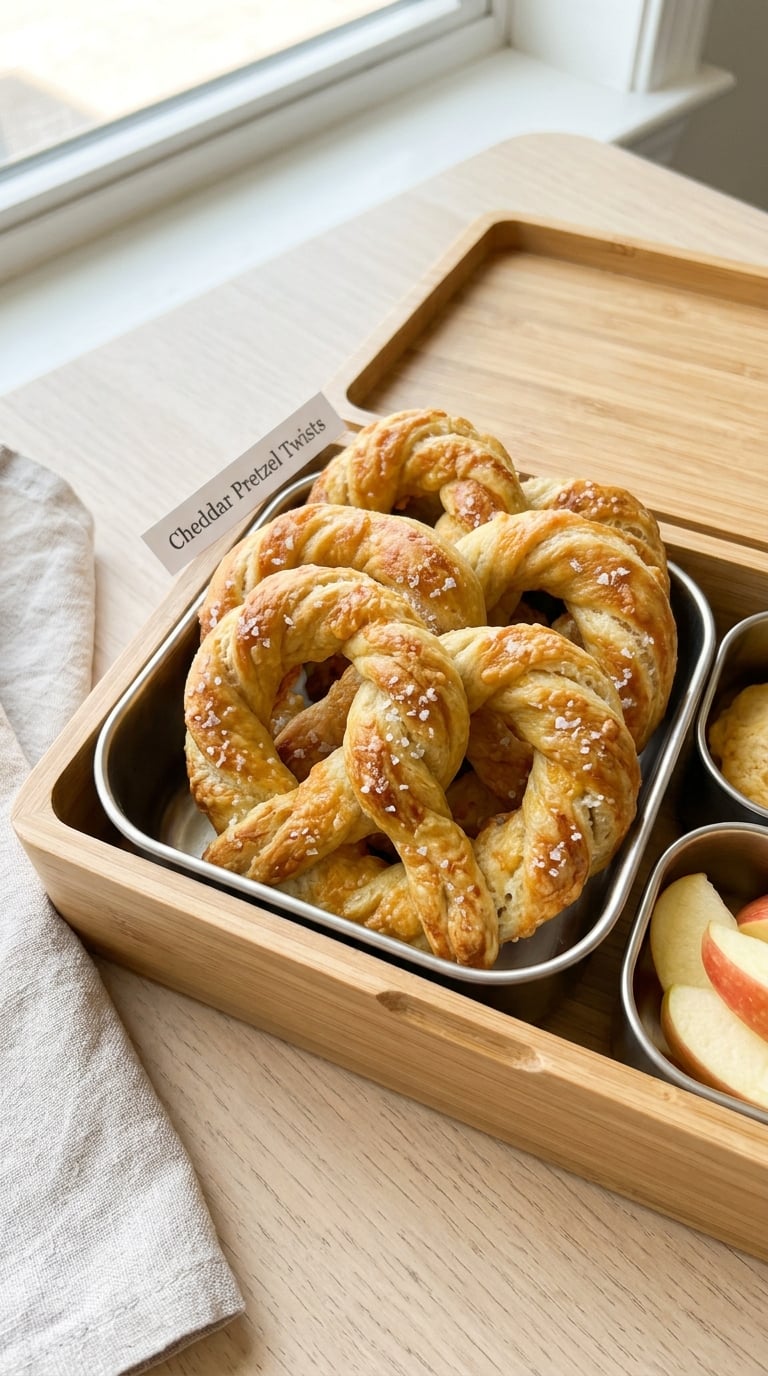
Homemade pretzel twists beat the bagged ones, and the dough keeps for weeks in the freezer. If you have never worked with yeast dough, this is a gentle place to start.
Yield: about 30 twists · Prep: 20 minutes plus 30 minutes rising · Cook: 15 minutes at 425°F (220°C) · Total: 1 hour 20 minutes · Difficulty: Medium
Ingredients
- 2 1/4 teaspoons (7 g) instant yeast
- 1 cup warm water, 105 to 115°F (41 to 46°C)
- 2 tablespoons (30 g) granulated sugar
- 1 tablespoon kosher salt, divided
- 3 cups (375 g) all-purpose flour
- 1/2 cup (60 g) unsalted butter, softened
- 1 large egg, beaten
- 3/4 cup (90 g) shredded sharp cheddar
- 1 tablespoon coarse salt for the tops
Instructions
- Whisk the yeast, warm water, sugar and 1 teaspoon of the salt. Wait 10 minutes until a foamy layer sits on top.
- Mix in the flour, softened butter, egg and 3/4 cup of the cheese, then knead 8 minutes until smooth and elastic.
- Cover the bowl and let the dough rise until doubled, about 30 to 45 minutes.
- Heat the oven to 425°F (220°C) with a baking sheet inside so it is already hot.
- Roll the dough into a long rope, divide it in half, and let each half rest 10 minutes.
- Twist each rope into long spirals, then cut into 3 inch pieces and space them on the hot sheet.
- Brush with the remaining beaten egg, sprinkle with the last of the cheese and the coarse salt.
- Bake 12 to 15 minutes until deep golden brown, then cool on the sheet for 5 minutes.
Tip: Baking on a preheated sheet is what gives pretzels their shiny bottom and cooked-through centre. A cold sheet is the single most common reason homemade pretzels turn out pale and doughy underneath.
Swap it: For a dairy-free batch, leave out the butter and cheese, brush with olive oil instead of egg, and finish with a little nutritional yeast and salt.
Storage: Fully cool and airtight at room temperature, they stay soft for 3 days. They freeze for 2 months and reheat in a 350°F (175°C) oven for 8 minutes straight from frozen, which is the best way to pack them.
9. Fruit Salad Melts
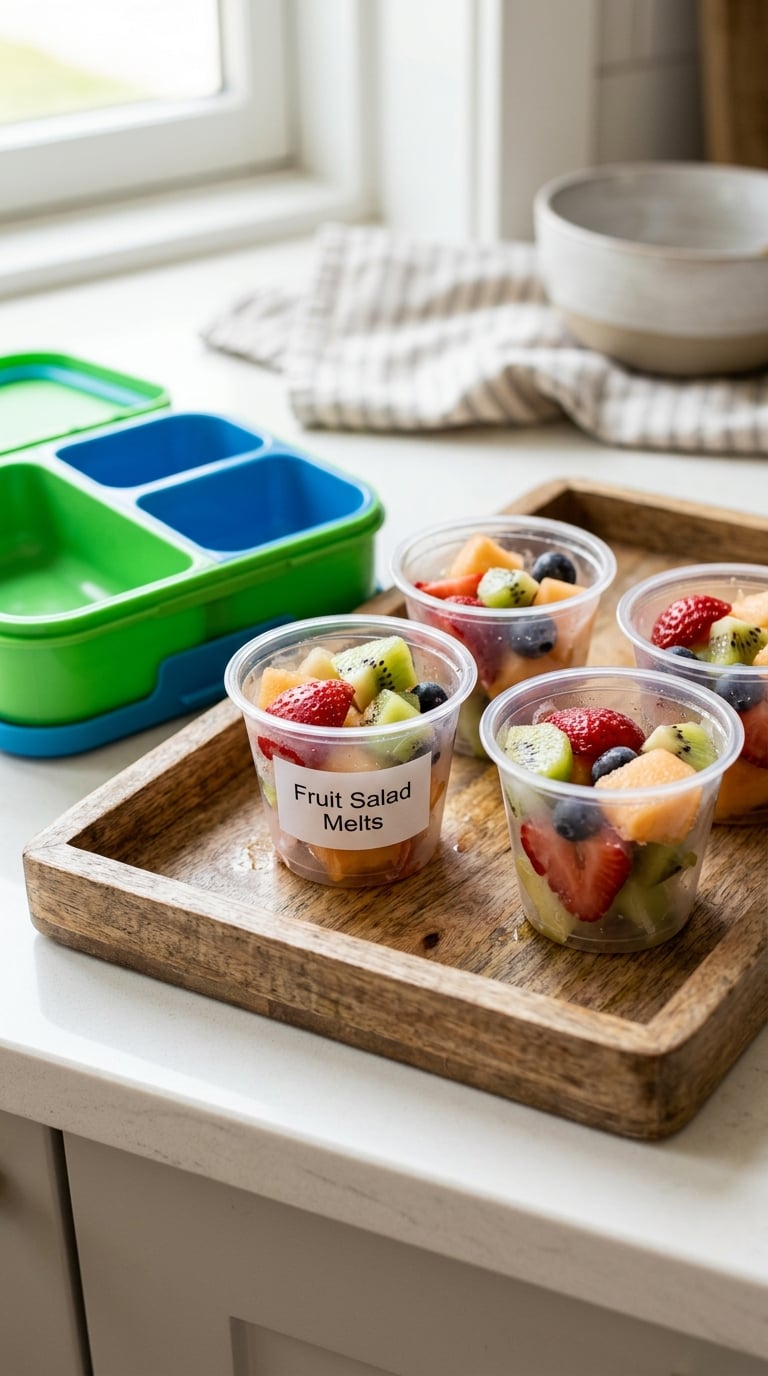
Blended fruit poured into small cups and frozen does what fresh fruit cannot: it is a genuinely refreshing item in a hot lunchbox, and it melts to a soft spoonful right around lunchtime.
Yield: 8 small cups · Prep: 10 minutes · Cook: 0 minutes · Total: 10 minutes plus 3 hours freezing · Difficulty: Easy
Ingredients
- 1 cup (150 g) strawberries, hulled and chopped
- 1 cup (150 g) mango, chopped
- 1/2 cup (75 g) fresh or frozen blueberries
- 1 small banana, sliced
- 1/2 cup (120 ml) orange juice
- 1 tablespoon honey, only if the fruit is not very ripe
Instructions
- Put all the fruit and the orange juice in a blender.
- Blend 30 seconds, leaving small lumps of fruit rather than a smooth purée.
- Taste and add honey only if the mixture is sharp.
- Pour into 8 small silicone or paper cups, filling each about three-quarters full.
- Insert a small stick or a reusable wooden spoon in each cup if the child is under five.
- Freeze upright on a flat tray for at least 3 hours until solid.
- Pop the frozen discs out and stack them inside a small insulated container.
Tip: Leave real chunks in the mix. A fully smooth purée turns to slush in a warm bag by the time the lunch bell rings.
Swap it: Any soft fruit works, and frozen mango or peaches save money. Swap the orange juice for water or coconut water to lower the sugar, and skip the juice entirely for a whole-fruit version.
Storage: Frozen, they keep 2 months at 0°F (-18°C). Always pack them with a cold pack in a sealed container, and give them to the child early in the lunch period because melting is the entire point.
10. Trail Mix Snack Mix
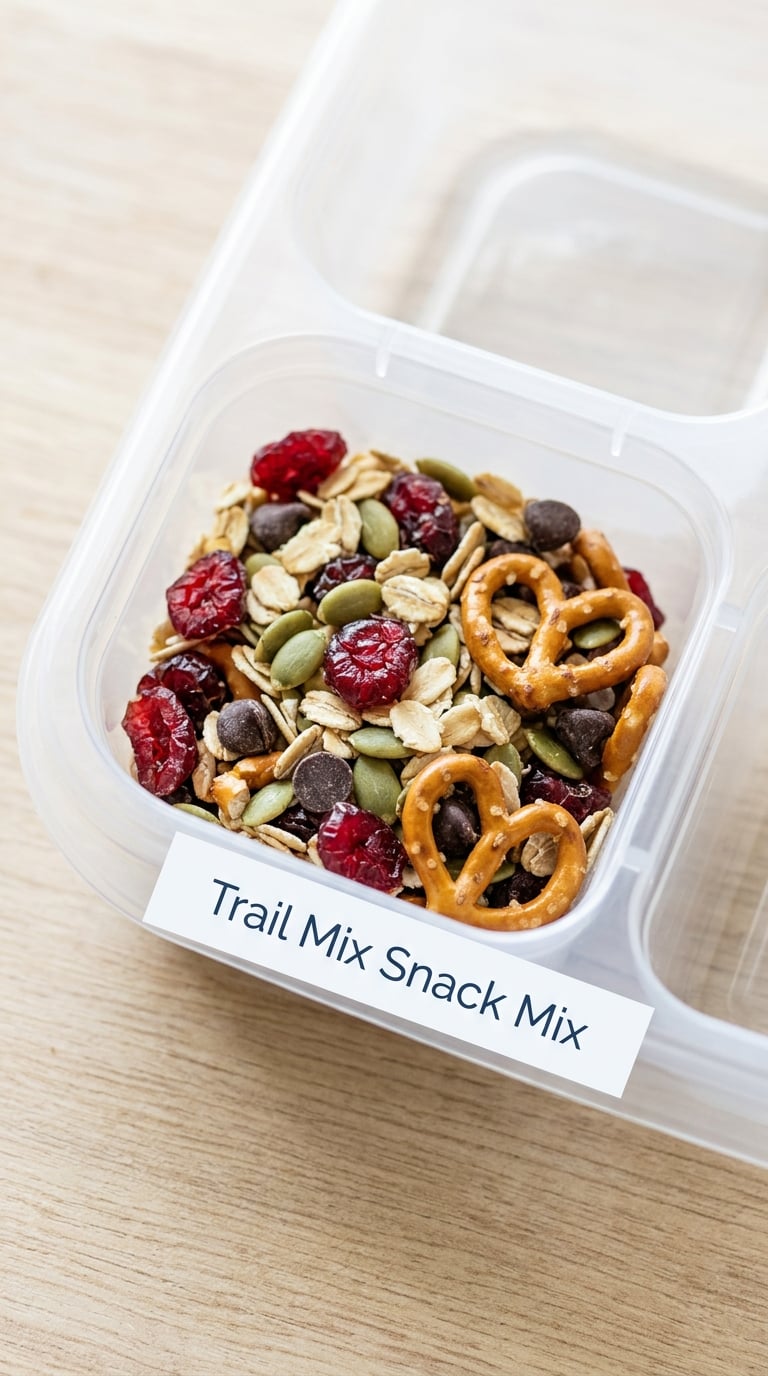
Dry, crunchy, shelf-stable and endless in variation. This is the one snack on the list that does not care whether the school has a fridge, and it doubles as an after-school handful.
Yield: 8 servings of 1/2 cup · Prep: 10 minutes · Cook: 0 minutes · Total: 10 minutes · Difficulty: Easy
Ingredients
- 1 cup (80 g) rolled oats
- 1/2 cup (70 g) pumpkin seeds
- 1/2 cup (70 g) sunflower seeds
- 1/2 cup (45 g) dried cranberries or raisins
- 3/4 cup (45 g) small pretzel pieces
- 1/3 cup (40 g) mini chocolate chips or butterscotch chips
- 1 tablespoon sesame seeds
- 1/2 teaspoon cinnamon or a pinch of pumpkin spice
Instructions
- Combine the oats, pumpkin seeds, sunflower seeds and sesame seeds in the largest bowl you own.
- Add the dried fruit, pretzel pieces and chocolate chips.
- Sprinkle the cinnamon over the top and toss everything with your hands for 30 seconds.
- Taste one handful and adjust the sweet to savoury ratio for your child.
- Divide into 1/2 cup portions so everyone gets the same amount.
- Pack each portion in a small jar or a clip-lid pot rather than a bag, so nothing ends up crushed in a backpack.
Tip: Make two versions in the same batch, one with chocolate and one without, before you start portioning. Kids who reject raisins will happily eat the rest.
Swap it: Check the dried fruit and the sesame seeds for a nut-free facility. Sunbutter-style pretzel bites and roasted chickpea pieces both stand in for nuts and add the protein most sweet trail mixes lack.
Storage: Airtight at room temperature this keeps 3 weeks, which is long enough to cover a chunk of the month. Store it away from the stove and out of sunlight, and skip the oil-heavy roasted varieties if it will sit in a hot car.
11. Mini Pizza Lunchbox Cups
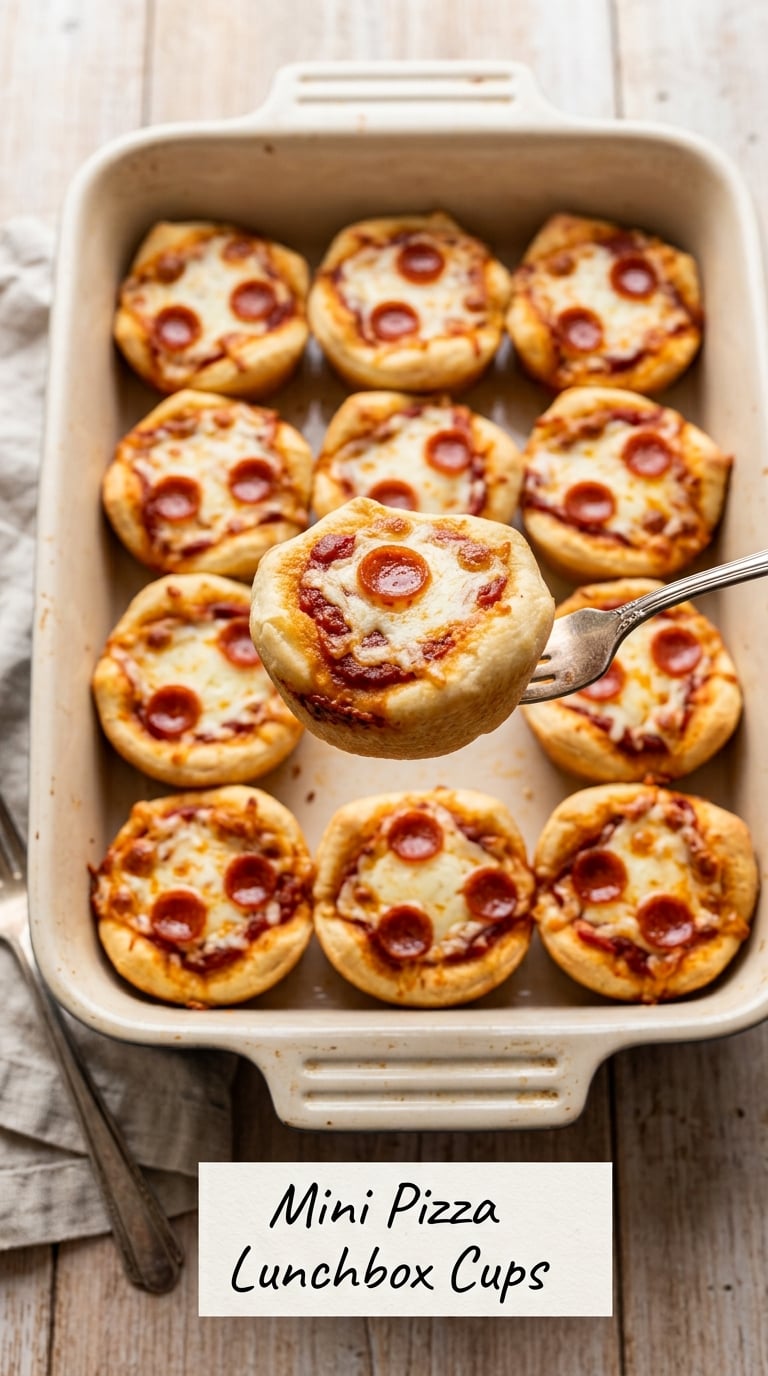
Soft, cheesy and reheatable in a microwave if the school has one, and perfectly good cold if it does not. These are the snack that solves the pizza craving without a whole slice going cold and rubbery in a bag.
Yield: 12 pizza cups · Prep: 15 minutes · Cook: 14 minutes at 425°F (220°C) · Total: 29 minutes · Difficulty: Medium
Ingredients
- 1 1/2 cups (190 g) all-purpose flour
- 1 teaspoon instant yeast
- 1/2 teaspoon salt
- 1/3 cup (80 ml) warm milk, 105 to 115°F (41 to 46°C)
- 1 tablespoon olive oil
- 1/2 cup (125 ml) tomato passata
- 3/4 cup (90 g) shredded mozzarella
- 12 slices turkey or pepperoni, about 1/2 slice each
- Dried oregano for the tops
Instructions
- Mix the flour, yeast, salt, warm milk and olive oil into a soft dough and knead 5 minutes.
- Cover and let it rise 15 minutes while you preheat the oven to 425°F (220°C).
- Punch the dough down and press it into a greased 12-cup muffin tin, pushing it up the sides to make a little edible cup.
- Spoon 1 tablespoon of passata into each cup and swirl it up the sides.
- Fill each cup with 1 tablespoon of mozzarella and half a slice of topping, torn to fit.
- Sprinkle with oregano and bake 14 minutes until the edges are golden and the cheese bubbles.
- Cool 5 minutes in the tin before lifting out, or the cheese strings and the cup cases break apart.
Tip: Do not fill the cases past two-thirds. They rise in the oven, and an over-filled cup collapses into a saucer of sauce on the sheet.
Swap it: Skip the meat entirely for a vegetarian version and add a few sliced olives or strips of roasted red pepper. For a wheat-free version, use a cup-for-cup gluten-free flour blend and press the dough thinner.
Storage: Cool completely, then refrigerate up to 4 days and freeze up to 2 months. Reheat at school on high for 40 seconds, or reheat at home at 425°F (220°C) for 6 minutes. Bring refrigerated pizza cups to 165°F (74°C) before serving if you are reheating leftovers.
12. Hummus and Veggie Cups
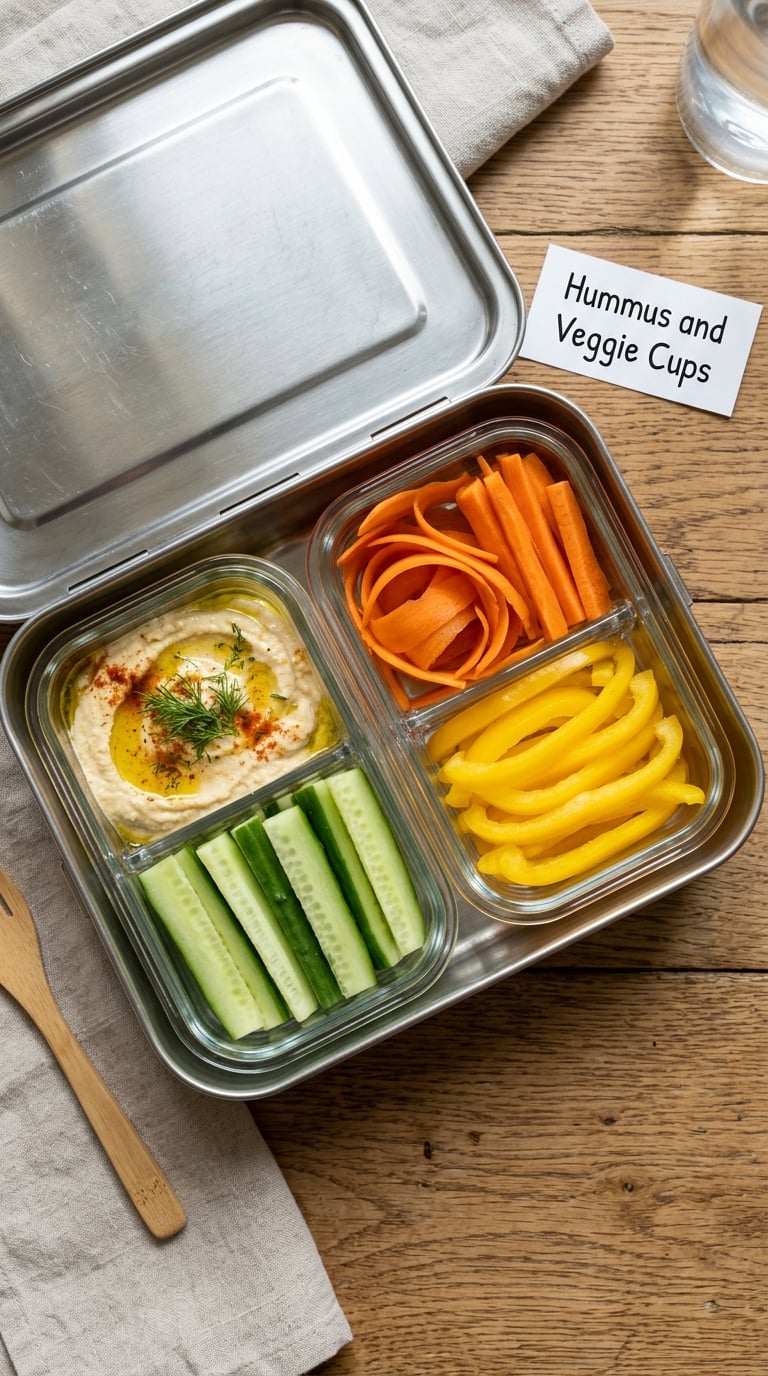
Vegetables get eaten when they are the thing being dipped rather than the thing sitting beside a sandwich. Blended hummus in a sealed pot is the lowest-effort way to do that.
Yield: 4 packed cups · Prep: 10 minutes · Cook: 0 minutes · Total: 10 minutes · Difficulty: Easy
Ingredients
- 1 can (15 oz / 425 g) chickpeas, drained
- 1/4 cup (60 ml) tahini
- 2 tablespoons (30 ml) lemon juice
- 1 small garlic clove
- 2 tablespoons (30 ml) olive oil, plus more for the top
- 1/2 cup (120 ml) ice water
- 1/2 teaspoon ground cumin and a pinch of salt
- 1 cucumber, 1 carrot, 1 yellow bell pepper, cut into short sticks
Instructions
- Put the chickpeas, tahini, lemon juice, garlic, cumin, salt and 2 tablespoons of oil into a blender.
- Blend 30 seconds, then stream in the ice water with the motor running until it turns pale and glossy.
- Taste for salt and lemon. Hummus that tastes flat at home tastes flat in a lunchbox too.
- Spread the hummus 1/2 inch thick in a small pot and press plastic wrap directly onto the surface.
- Pack the vegetable sticks upright in a divided cup so they do not roll into the dip.
- Add a folded napkin or a tiny fork pack, and seal the cup.
Tip: Press the plastic wrap onto the surface of the hummus. Without it, a skim of oil forms overnight and the child is left eating a lid of grease before the dip.
Swap it: Roast the chickpeas 20 minutes at 425°F (220°C) for a crunchier, nut-free version that travels without a fridge. Sunflower seeds can replace tahini for a sesame-free box.
Storage: Homemade hummus keeps 4 days in the fridge and 2 months in the freezer in small pots. Always pack it with a cold pack. Cut vegetables go brown within hours, so cut them the night before, pat them dry and store them submerged in a little water in an airtight tub.
13. Apple Cinnamon Oat Bites
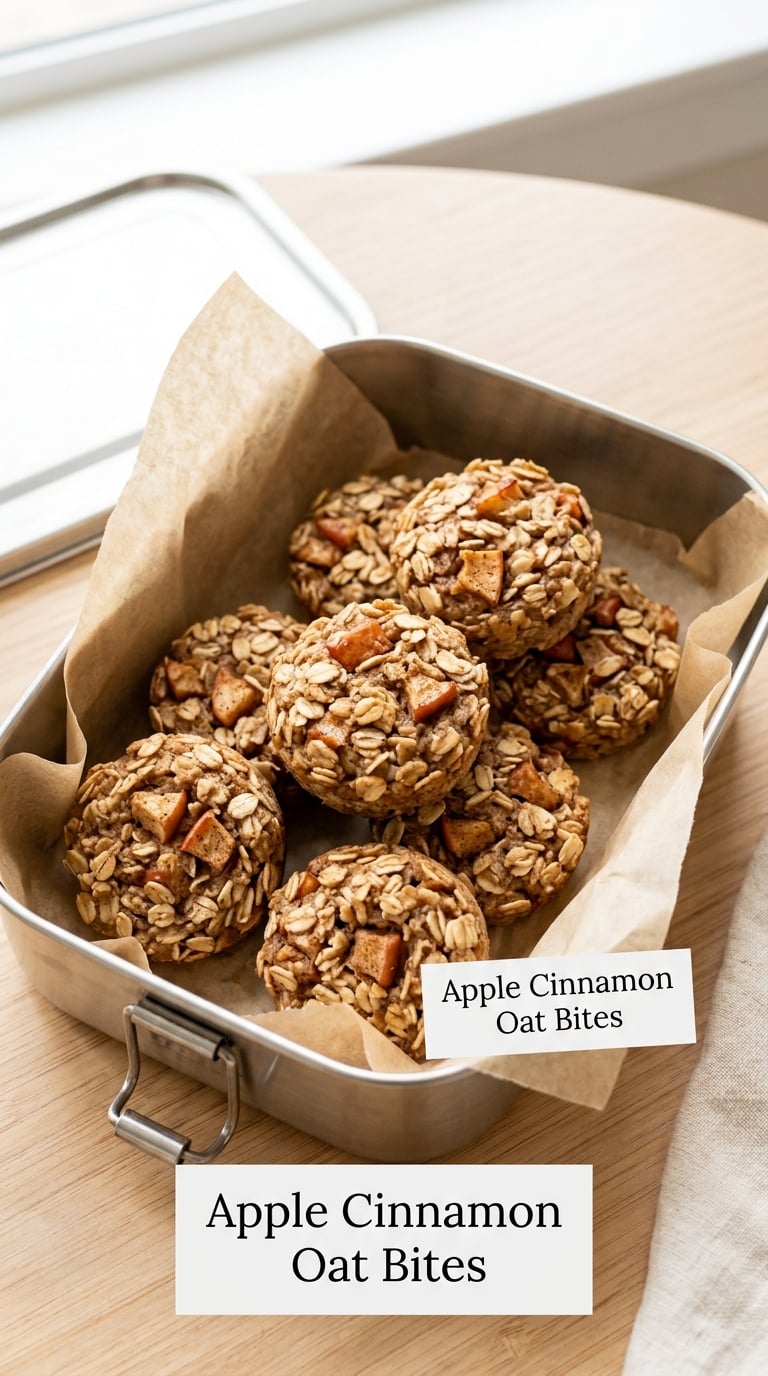
Soft, chewy and only mildly sweet, which is usually the right target for a snack that has to be eaten at 11:30 when nobody is hungry. They bake in one tray and cut into whatever number of pieces you need.
Yield: 18 bites · Prep: 15 minutes · Cook: 12 minutes at 350°F (175°C) · Total: 30 minutes including cooling · Difficulty: Easy
Ingredients
- 1 cup (100 g) old-fashioned rolled oats
- 1 cup (125 g) all-purpose flour
- 1/2 cup (85 g) brown sugar, plus 1 tablespoon for the tops
- 1 teaspoon baking powder
- 1 teaspoon ground cinnamon
- 1/2 teaspoon salt
- 1/2 cup (115 g) unsalted butter, melted and cooled slightly
- 1 large egg
- 1 medium apple, grated, about 1 cup
- 1/2 cup (60 ml) milk
- 1 teaspoon vanilla extract
Instructions
- Heat the oven to 350°F (175°C) and line a baking sheet with parchment.
- Mix the oats, flour, baking powder, cinnamon and salt in a bowl.
- Stir the brown sugar into the grated apple and leave it for 10 minutes, then squeeze out the extra juice with your hands.
- Whisk the melted butter, egg, milk and vanilla together in a second bowl.
- Pour the wet bowl into the dry and stir with a spatula until no dry oats are visible. Rest the dough 10 minutes so the oats hydrate.
- Drop 18 heaped tablespoons onto the sheet, spaced well apart, and flatten each to about 3/4 inch thick.
- Sprinkle with the extra brown sugar and bake 12 minutes until the edges are set and the centres still look slightly soft.
- Cool 10 minutes on the sheet before moving, or they break apart.
Tip: Do not overbake them. These are meant to be soft and slightly tacky in the middle, and ten minutes of extra heat turns them into hard little discs.
Swap it: Use a finely grated pear in place of the apple, or add 1/2 cup of mini chocolate chips for a sweeter version. A gluten-free flour blend works one for one here.
Storage: Soft and chewy in an airtight container for 4 days at room temperature. They freeze for 2 months; pack the frozen bites in a sealed container and let them soften on the way to school.
14. Frozen Berry Yogurt Bark
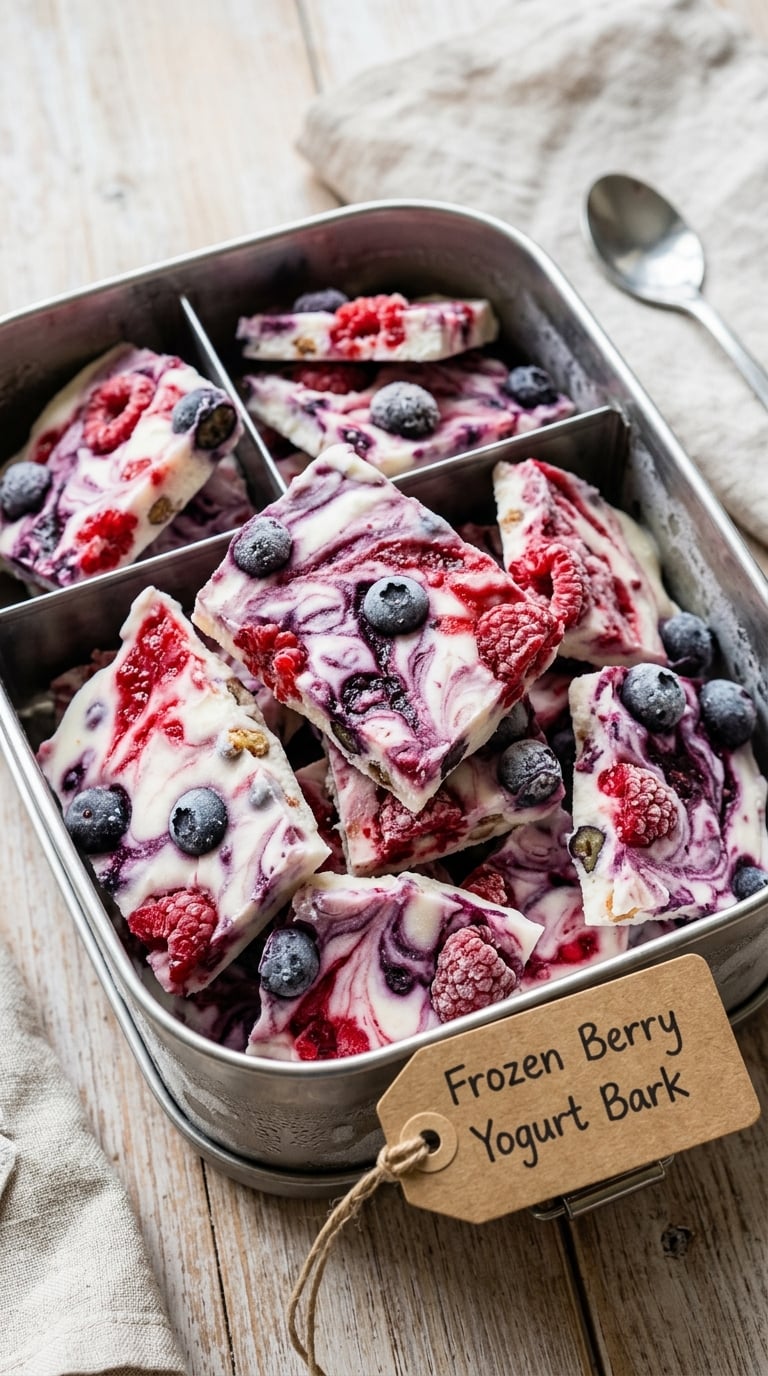
A whole batch of frozen yogurt with fruit in it, broken into pieces. No added sugar is needed because the fruit does the sweetening and the yogurt does the freezing.
Yield: about 20 pieces · Prep: 10 minutes · Cook: 0 minutes · Total: 10 minutes plus 4 hours freezing · Difficulty: Easy
Ingredients
- 3 cups (720 g) plain Greek yogurt
- 1 cup (150 g) mixed berries, fresh or frozen
- 1/3 cup (70 g) honey, divided
- 1 teaspoon vanilla extract
- 1/2 cup (60 g) granola or chopped toasted nuts, for the top
- 1/2 teaspoon lemon juice
Instructions
- Line a baking sheet with parchment, letting it hang over the edges for easy lifting.
- Stir the vanilla and 2 tablespoons of the honey through the yogurt.
- Spread it 1/2 inch thick across the parchment, smoothing the top with the back of a spoon.
- Dollop half the berries across the surface and swirl them through with a fork.
- Drizzle with the rest of the honey and scatter the granola or chopped nuts over the top.
- Freeze flat for at least 4 hours, until solid all the way through.
- Lift the sheet out and snap it into pieces roughly the size of a deck of card, then store in a flat container.
Tip: Add the granola only once the yogurt has been in the freezer for two hours. Add it at the start and the cereal softens and disappears into the slab.
Swap it: For a nut-free and gluten-free bark, top with sunflower seeds or coconut flakes. For a dairy-free version, use a thick coconut yogurt, which sets slightly softer so freeze a little longer.
Storage: Keep frozen at 0°F (-18°C) or below for up to 2 months. Pack the pieces in a thin layer inside a small insulated container with a cold pack, and put the container on top so the weight of everything else does not crush the bark.
15. Cheesy Granola Bars
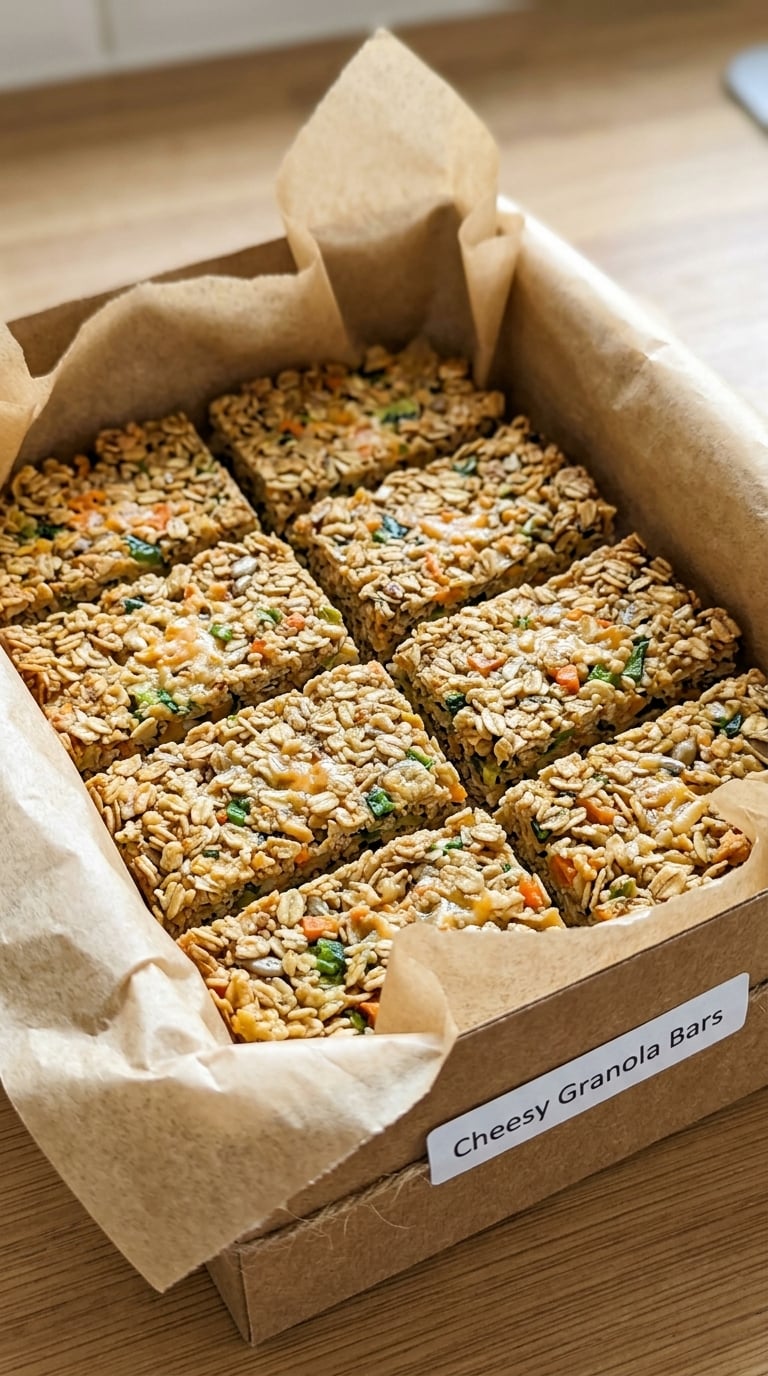
A savoury bar for the child who is done with sweet ones. Cheese, oats and a little grated vegetable pressed into a tray, cut into squares and wrapped like a bought bar but far denser.
Yield: 16 bars · Prep: 20 minutes · Cook: 22 minutes at 350°F (175°C) · Total: 50 minutes including cooling · Difficulty: Medium
Ingredients
- 2 cups (200 g) rolled oats
- 3/4 cup (90 g) shredded cheddar, plus 1/4 cup for the top
- 1/2 cup (50 g) chopped pumpkin seeds
- 1/2 cup (45 g) small pretzel pieces, roughly broken
- 1/4 cup (35 g) grated carrot or zucchini, squeezed dry
- 2 large eggs
- 1/2 cup (120 ml) milk or buttermilk
- 1 tablespoon olive oil
- 1 teaspoon garlic powder and 1/2 teaspoon dried oregano
- 1/2 teaspoon salt and 1/4 teaspoon black pepper
Instructions
- Heat the oven to 350°F (175°C) and line an 8 by 8 inch pan, leaving an overhang.
- Squeeze the grated carrot or zucchini dry in a clean cloth.
- Mix the oats, seeds, broken pretzels, squeezed vegetable, garlic powder, oregano, salt and pepper in a large bowl.
- Whisk the eggs, milk and olive oil together, then pour it over the dry bowl and mix thoroughly.
- Leave the mixture to sit 10 minutes so the oats drink up the liquid and the bars bind.
- Press it firmly and evenly into the pan, then scatter the extra 1/4 cup of cheese on top.
- Bake 22 minutes until the top is golden and the edges pull slightly away from the pan.
- Cool completely in the pan, then lift out by the parchment and cut into 16 bars with a serrated knife.
Tip: Press this one hard, harder than feels natural, and let it cool in the pan before cutting. A light press gives you crumbs, and cutting warm gives you ragged edges that crumble further in a lunchbox.
Swap it: A dairy-free version swaps the cheese for nutritional yeast plus two tablespoons of tahini mixed into the wet ingredients. Pumpkin seeds can become sunflower seeds if seed allergies are a concern at the school.
Storage: Wrapped individually in wax paper and kept airtight, these stay good for 4 days at room temperature. They freeze for 2 months and are better for it, so pack the frozen bars with a cold pack in a sealed container.
Tips for Making These
- Batch on a Sunday, not on a weekday. Crispy rice treats, energy bites, apple cinnamon oat bites, chewy granola bars and pizza cups all freeze well, so make the five in one session, cut them into portions and freeze them flat in a single layer. Then a weekday morning is a two-minute job.
- Portion before you store, not before you pack. Weigh or measure snacks into their own pots on a Sunday, label the lid with the day, and grab two on Wednesday without thinking about it.
- Keep every component in its own compartment. A yogurt, a granola and a berry in one box turns into a wet sandwich by 12:30. The bento and divided container sets are the single best investment for school snacks.
- Follow the two-hour rule and use a cold pack. Perishable foods, including yogurt, cut fruit, hummus, egg and cooked pizza cups, should not sit unrefrigerated for more than 2 hours, or 1 hour on a day above 90°F (32°C). A frozen solid water bottle in an insulated bag does the same job as an ice pack and ends up drinkable.
- Read the school allergy policy and label what you pack. Nearly every school is nut-free, and a good number of them are also peanut-free facilities or have a no-egg rule. Put the ingredient list and the day on a small strip of tape on every container, and use sunflower seed butter where the recipe calls for peanut butter.
- Match the texture to the commute. Dry, crunchy, individually wrapped items like trail mix, pretzel twists and granola bars survive a bag thrown in a car. Soft and frozen things need an insulated container, and anything wet needs a pot that actually seals.
Once you have the hang of it, the same staples can carry the whole week. My high-protein snack ideas round up is the place to go when you need something filling for a long school day or a sports practice, and these after-school ideas in quick after-school snack ideas cover the three o’clock gap.
Frequently Asked Questions
Which of these lunchbox snacks can be made the night before?
Most of them. The no-cook ones, including Caprese skewers, apple nachos, yogurt parfaits, hummus cups and trail mix, are actually better assembled the night before because you have time rather than pressure. The frozen ones, including pumpkin yogurt bites, fruit melts and yogurt bark, need to be made several days ahead and stay in the freezer until the morning they are packed. Baked items such as rice treats, oat bites, pretzel twists and pizza cups cool completely overnight and wrap well.
What can I use instead of peanut butter for a nut-free lunchbox?
Sunflower seed butter is the direct answer and the one most nut-free households already use. It thins and spreads exactly like peanut butter, so it drops into the apple nachos and the energy bites with no other change. Pumpkin seed butter works in the same places, and tahini is a good option when you are also avoiding tree nuts. Check the seed butter label for a made-in-nut-free facility, and do the same for any dried fruit, chocolate chips or seed-based crackers.
How do I keep frozen yogurt and fruit snacks from melting?
Pack them with a cold pack and give them to the child early. A frozen water bottle is the best substitute for an ice pack because it ends up as a drink instead of a puddle in the bag. Put the frozen items on top of everything else so nothing crushes or insulates them, and use a container with a close seal. Frozen items go into the lunchbox straight from the freezer in the morning, not the night before.
Are these snack recipes suitable for a school with common food allergies?
They are written to be nut-free or to carry a one-for-one nut swap, which covers the most common classroom rule. Before cooking anything, check the school policy, because some schools ban peanuts only while others exclude all tree nuts, and some restrict egg or sesame as well. The recipes that centre milk or egg, including yogurt parfaits, veggie muffins, pizza cups, cheddar pretzel twists and cheesy granola bars, each carry a swap below them. Every packaged item, from chocolate chips to dried cranberries, needs a label check.
How long do homemade lunchbox snacks stay fresh?
Most of the baked and no-cook snacks keep 3 to 5 days, which covers a normal school week if you make them on a Sunday. Hummus keeps 4 days in the fridge and cut vegetables start to brown after a day or two, so pack those in separate containers. Anything with dairy, egg or cooked tomato needs a cold pack and should be finished within the 2-hour rule, or 1 hour on a hot day above 90u0026deg;F (32u0026deg;C).
What is the best way to pack dips and vegetables without making a mess?
Use a pot with a snap-on or screw-on lid rather than a small tub with a loose lid, and pack the vegetables upright in a divided cup so they are not lying in the dip. Press plastic wrap directly onto the surface of the hummus to stop an oil film forming overnight. For anything thicker than hummus, run the spoon across the top of the pot so nothing is left mopping up at lunchtime.
Easy Lunchbox Snacks to Start With
Start with the peanut butter apple nachos and the trail mix snack mix. Neither needs heat, both travel at room temperature, and together they take about ten minutes on a Tuesday evening. If the school has no fridge at all, those two plus the cheddar pretzel twists will get you through the week.
Once the morning scramble settles, swap in one baked batch on a Sunday. These 15 easy lunchbox snack ideas for school are designed to overlap so the same two ingredients turn into a different snack rather than the same one five days running, and so you can stop buying the boxed version. If you need the rest of the day sorted too, the easy back to school dinner ideas keep the evening easy as well.