
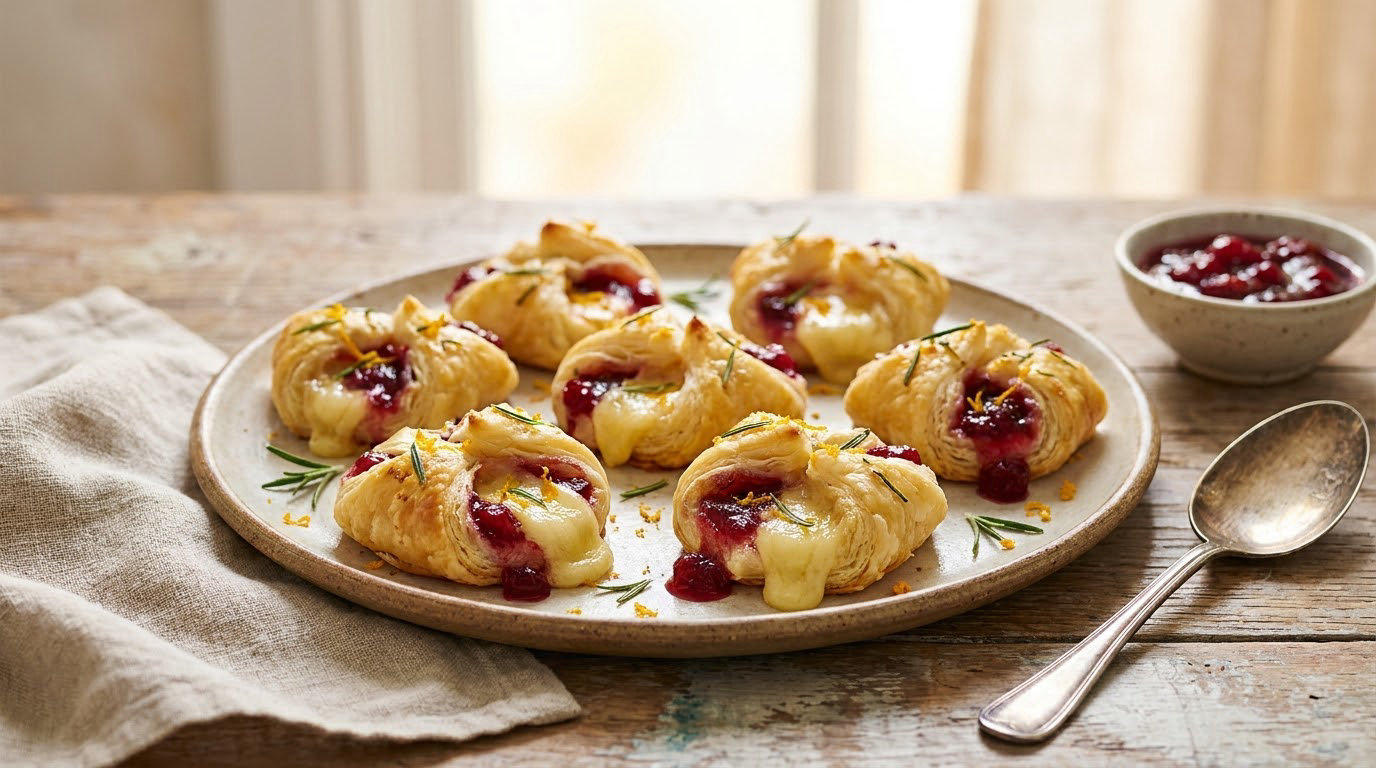
If you are hosting this year, these 15 easy New Year’s Eve appetizer ideas are the ones I actually make, because every single one can be finished ahead, travels well to a friend’s door, and still tastes good at midnight when nobody is paying attention. Most take 30 minutes or less, and none of them need a sit-down dinner to work.
I have run this party for two people and for fourteen, and the food changes very little between those two extremes. Choose four or five dishes, put them out early, and let the room do the rest. If you need more ideas, my game day appetizer roundup has the same one-hand, low-mess approach.
Table of Contents
15 Easy New Year’s Eve Appetizer Ideas at a Glance
Here is the short version before the recipes. Total time includes prep and baking but not chilling or resting.
| Recipe | Total Time | Difficulty | Best For |
|---|---|---|---|
| Garlic Herb Cocktail Shrimp | 25 min + chill | Easy | No-cook hosts, seafood lovers |
| Baked Parmesan Chicken Bites | 35 min | Easy | Big crowds, dipping sauces |
| Bacon-Wrapped Stuffed Chicken Rolls | 55 min | Medium | Make-ahead centrepieces |
| Classic Caprese Appetizer Skewers | 5 min + soak | Easy | Vegetarians, last-minute nights |
| Mini Brie and Cranberry Bites | 25 min | Easy | Elegant-looking, picky eaters |
| Mini Pepperoni Pizza Bites | 18 min | Easy | Kids and teenagers |
| Baked Parmesan Meatballs | 35 min | Easy | Crowd-pleaser, freezer stash |
| Sausage and Cheddar Pinwheels | 30 min | Easy | Breakfast-style spread, brunch next day |
| Crispy Air Fryer Mozzarella Sticks | 25 min | Easy | No-oven hosts, fast service |
| Stuffed Mushroom Appetizer | 40 min | Easy | Vegetarians, gluten-free |
| Deviled Eggs with Herb Filling | 25 min + chill | Easy | Make-ahead, brunch topper |
| Smoked Salmon Cucumber Bites | 10 min | Easy | Low-effort, elegant, no oven |
| Spicy Chicken Taquito Bites | 45 min | Medium | Salsa drinkers, leftover bites |
| Cranberry Cream Cheese Cheeseball Bites | 10 min + chill | Easy | Chilled boards, nut-free option |
| No-Cook Summer Rolls with Dipping Sauce | 30 min | Medium | Gluten-free, fresh, light |
The recipes run roughly from cold and no-cook (#4, #12, #14, #15) through oven-baked (#2, #5, #6, #7, #8, #10, #11, #13) and air-fryer (#9). If your oven is already full, take the first group and skip the rest.
1. Garlic Herb Cocktail Shrimp
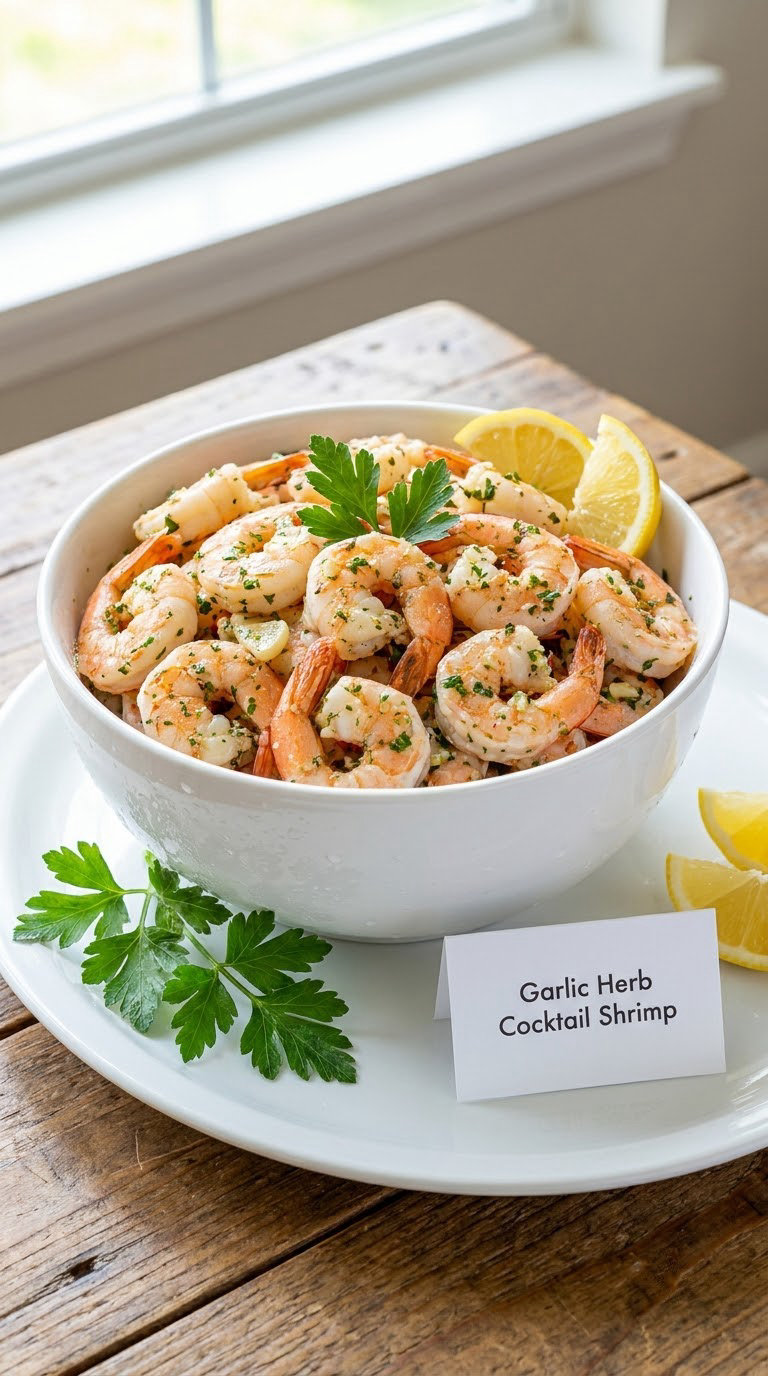
This is the appetizer I make first, every year. It looks like effort, takes half an hour, and it is the single most requested thing on my table.
Yield: 24 pieces · Prep: 10 min · Cook: 6 min · Total: 25 min plus 30 min chilling · Difficulty: Easy
Ingredients
- 1 lb (450 g) large raw shrimp, peeled and deveined
- 2 quarts (2 L) water
- 1 lemon, halved
- 1 bay leaf
- 1 tsp Old Bay seasoning
For the lemon-herb garlic sauce
- 1/2 cup (120 g) mayonnaise
- 1 tbsp Dijon mustard
- 1 tsp prepared horseradish
- 1 tbsp fresh lemon juice plus the zest of one lemon
- 1 garlic clove, finely grated
- 1 tbsp chopped fresh parsley
- 1/4 tsp hot sauce
Instructions
- Bring the water, one lemon half, the bay leaf and the Old Bay to a rolling boil in a large pot.
- Add the shrimp in one layer. Cook for 2 to 3 minutes, until the flesh turns opaque and curls into a loose C.
- Transfer the shrimp straight into a bowl of ice water and sit them there for 5 minutes to stop the cooking.
- Drain the shrimp, remove the tails if you prefer, and pat them dry on a towel.
- Whisk the mayonnaise, Dijon, horseradish, lemon juice, lemon zest, garlic, parsley and hot sauce together in a small bowl.
- Spoon the sauce onto a chilled platter and nestle the shrimp into it in a ring.
- Chill for 30 minutes, then finish with the parsley and a squeeze of the second lemon half.
Tip: The ice bath is the step people skip, and it is the whole reason the shrimp stay springy instead of rubbery. Cook to 145°F (63°C) at the thickest part.
Swap it: Use already-cooked, peeled shrimp from the seafood counter and skip the pot entirely. You lose ten minutes, not the look.
Storage: Keep the platter on ice and no more than 2 hours at room temperature. Covered in the fridge, the shrimp and sauce keep 2 days. Contains shellfish, eggs and dairy.
2. Baked Parmesan Chicken Bites
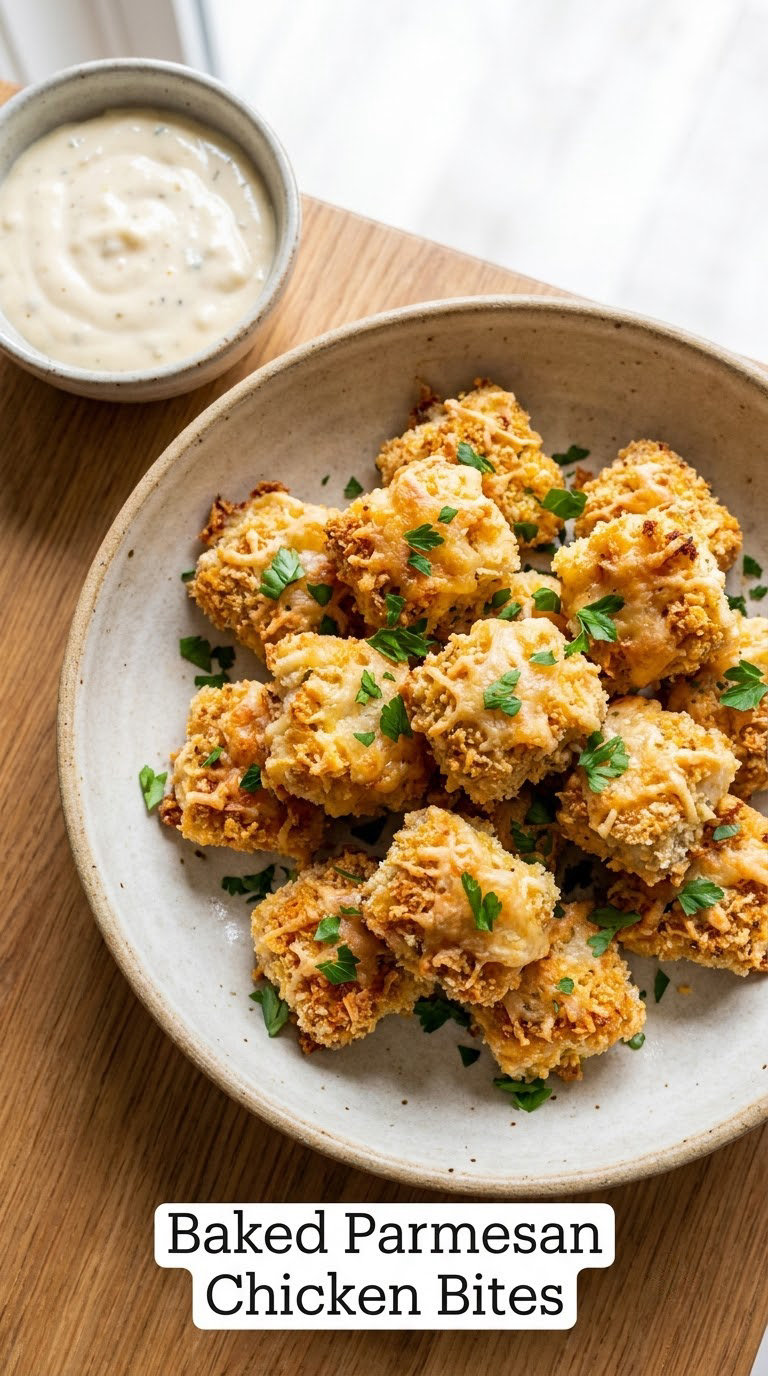
The workhorse. Chicken, crumbs, hot oven, done, and they hold in the oven while you are out of the kitchen greeting people.
Yield: 30 bites · Prep: 15 min · Cook: 20 min · Total: 35 min · Difficulty: Easy
Ingredients
- 1 1/2 lb (680 g) boneless, skinless chicken breasts, cut into 1 1/2-inch chunks
- 1 cup (110 g) panko breadcrumbs
- 1/2 cup (55 g) grated Parmesan
- 2 tbsp (16 g) all-purpose flour
- 1 tsp garlic powder
- 1/2 tsp smoked paprika
- 1/2 tsp salt and 1/4 tsp black pepper
- 1 large egg beaten with 2 tbsp milk
- 2 tbsp olive oil
For dipping
- 1 cup (240 ml) marinara sauce, warmed
- 2 tbsp grated Parmesan, stirred through the warm sauce
Instructions
- Heat the oven to 400°F (205°C) and line a rimmed sheet pan with parchment.
- Mix the panko, Parmesan, flour, garlic powder, paprika, salt and pepper in a wide shallow bowl.
- Toss the chicken chunks in the beaten egg, then roll them in the crumb mixture, pressing the crumbs on firmly.
- Spread the coated bites on the pan so none of them touch, then drizzle with the olive oil.
- Bake for 18 to 20 minutes, flipping once at the halfway mark, until the crumb is deep gold and the thickest bite reads 165°F (74°C).
- Rest on the pan for 5 minutes so the juices settle, then move to a warm platter with the marinara alongside.
Tip: Space them out. Chicken touching chicken steams instead of crisps, and a crowded pan is the single most common reason these come out pale.
Swap it: Use ground turkey for a lighter bite and drop the bake to 20 to 22 minutes, checking for 165°F (74°C).
Storage: Refrigerate in a sealed container for up to 3 days. Reheat at 375°F (190°C) for 8 to 10 minutes on a sheet pan so the crust comes back. Freeze unbreaded chicken up to 3 months, bread and bake from frozen at 425°F (220°C) for 22 to 25 minutes. Contains dairy, eggs and gluten.
3. Bacon-Wrapped Stuffed Chicken Rolls
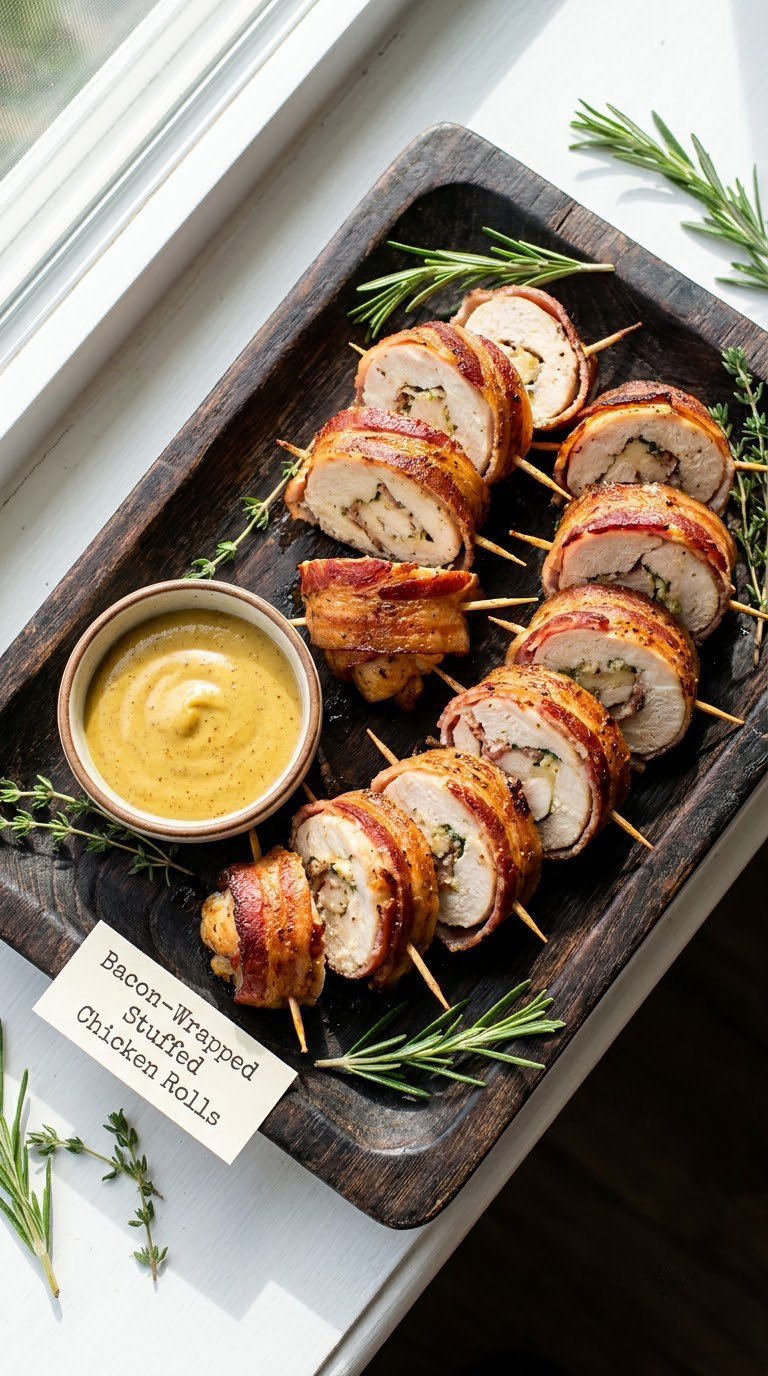
These look like the dish you bought from a caterer and they can be built a full day ahead, unbaked, sitting in the pan under plastic wrap. That is why they are number three on my list and first on the day-before list.
Yield: 16 pieces · Prep: 20 min · Cook: 35 min · Total: 55 min · Difficulty: Medium
Ingredients
- 4 (6 oz / 170 g each) boneless, skinless chicken breasts, flattened to 1/4-inch thick
- 8 oz (225 g) cream cheese, softened
- 1 cup (60 g) frozen spinach, thawed, squeezed dry and chopped
- 1/2 cup (55 g) shredded cheddar
- 1/2 tsp garlic powder and 1/4 tsp black pepper
- 8 strips thick-cut bacon
- 2 tbsp yellow mustard for serving
Instructions
- Heat the oven to 375°F (190°C). Line a rimmed sheet pan with parchment.
- Mix the cream cheese, spinach, cheddar, garlic powder and pepper into a thick paste.
- Spoon about 2 tablespoons of the mixture onto the centre of each flattened breast, leaving a 1-inch border of bare chicken all around.
- Roll each breast into a tight log, seam side down.
- Wrap two bacon strips around each roll, spiralling them so the meat is fully covered, and pinch the seam to hold it.
- Set the rolls on the pan, seam side down, and bake for 30 to 35 minutes until the bacon is crisp and the thickest roll reads 165°F (74°C) inside.
- Rest for 8 minutes, then slice each roll into three bites, secure with wooden picks, and serve with mustard.
Tip: Flatten the chicken to an even 1/4-inch and keep the filling away from the edges, or the cream cheese leaks onto the pan and the bacon never grips.
Swap it: Leave out the bacon and finish the rolls with a honey-mustard glaze in the last 8 minutes. They stay just as make-ahead friendly and they suit a mixed-age crowd better.
Storage: Refrigerate the unbaked rolls in the pan, covered, for up to 24 hours. After baking, they keep 3 days; reheat at 350°F (175°C) for 15 minutes so the bacon crisps. Freeze unbaked up to 2 months. Contains dairy, eggs and, with the bacon, pork.
4. Classic Caprese Appetizer Skewers
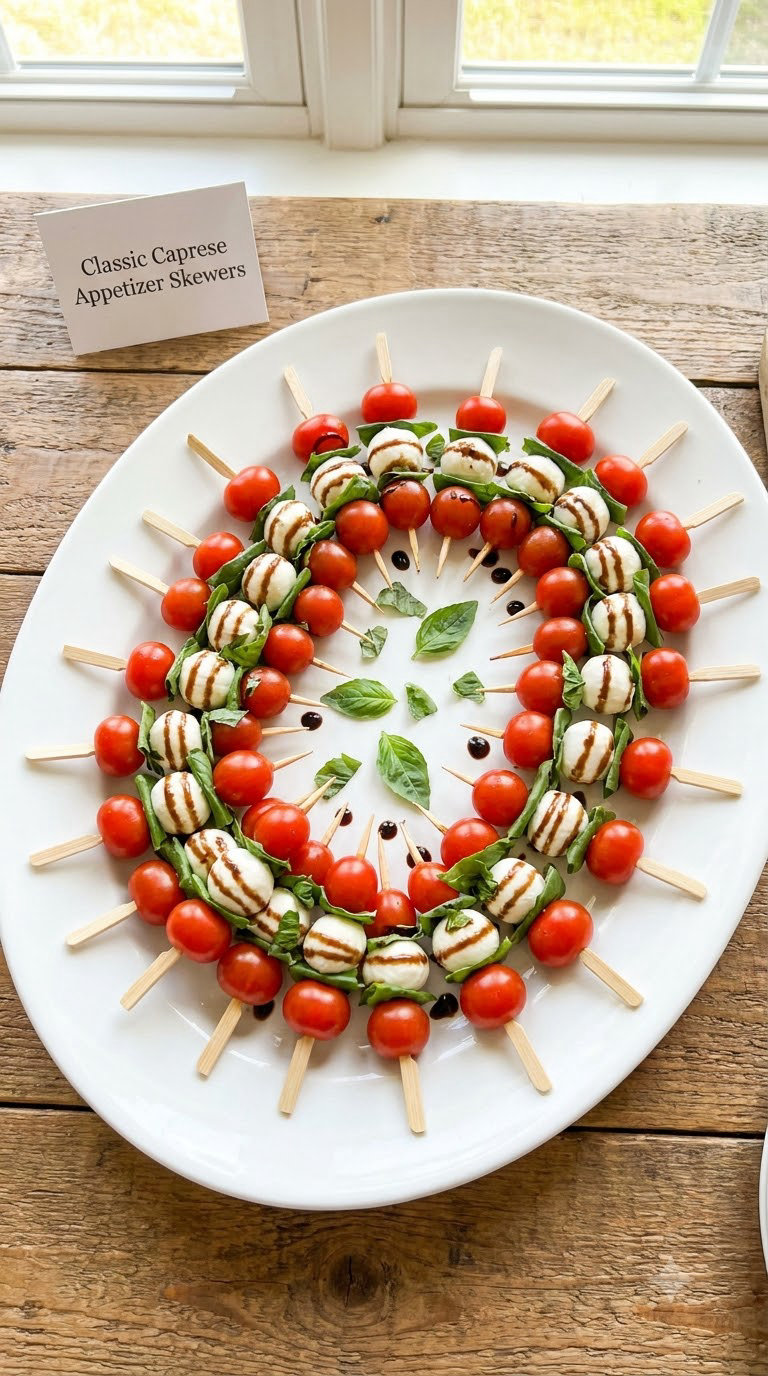
Five minutes of work, no heat, nothing to watch. When the oven is spoken for, this is what I put out, and it vanishes just as fast.
Yield: 24 skewers (6 servings) · Prep: 5 min · Cook: 0 min · Total: 5 min plus 20 min soaking · Difficulty: Easy
Ingredients
- 24 (1 oz / 28 g each) mini mozzarella pearls, drained
- 24 cherry tomatoes, about 1 1/2 inches across, halved
- 1 large bunch fresh basil, about 24 small leaves
- 2 tbsp extra-virgin olive oil
- 1 tbsp balsamic vinegar
- 1/2 tsp flaky salt and a few grinds of black pepper
- 2 tbsp balsamic glaze for drizzling
- 24 short cocktail picks or 8-inch wooden skewers
Instructions
- Whisk the olive oil, balsamic vinegar, salt and pepper in a small bowl.
- Add the tomato halves and let them sit in the dressing for 20 minutes so they lose some of their water and pick up flavour.
- Pat the tomatoes and mozzarella dry, then thread one tomato half, one mozzarella pearl and one basil leaf onto each pick.
- Repeat the pattern once more on half the picks for a taller, more dramatic look.
- Line a platter, stand the skewers in rows, and drizzle with the balsamic glaze just before serving.
Tip: Drain the mozzarella properly and blot the tomatoes after they dress. Any water on the platter turns the balsamic into a grey puddle by midnight.
Swap it: Use larger mozzarella cut into 1-inch chunks, or swap basil for arugula and the balsamic vinegar for lemon. Sun-dried tomato pieces soaked in oil work in place of fresh if it is the middle of winter.
Storage: Refrigerate dressed and unassembled in a container for up to 2 days, then skewer on the day. Once skewered, eat within 24 hours and keep under 40°F (4°C) until the party. Contains dairy.
5. Mini Brie and Cranberry Bites
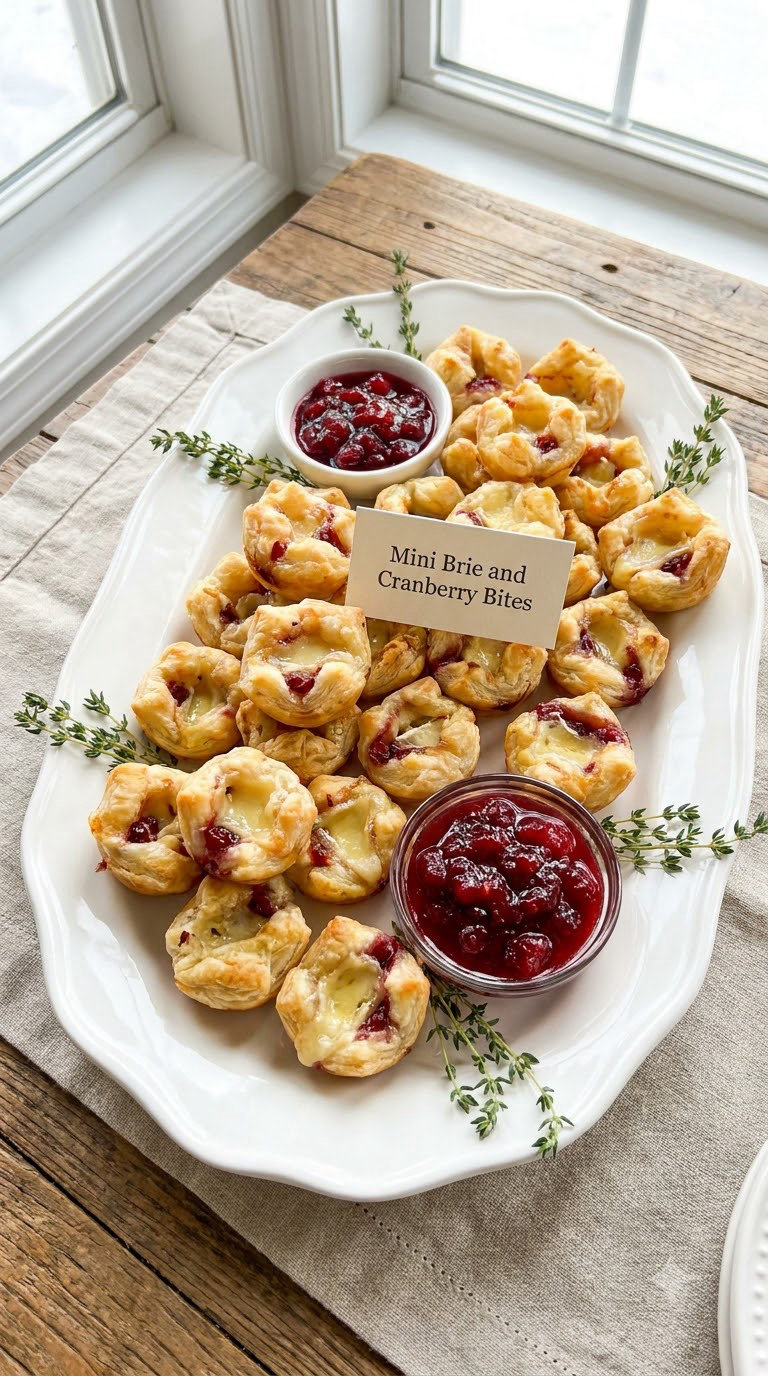
Holiday-looking food that costs about the same as a coffee run, because you buy the pastry and do the rest. The sweet-sharp cranberry against the brie is why people eat three without noticing.
Yield: 24 bites · Prep: 10 min · Cook: 15 min · Total: 25 min · Difficulty: Easy
Ingredients
- 2 (9 1/2 by 14-inch) sheets all-butter puff pastry, thawed
- 1/2 lb (225 g) brie, rind included, cut into 24 small pieces
- 1/3 cup (85 g) whole berry cranberry sauce or chutney
- 1/4 cup (15 g) chopped fresh thyme leaves
- 1 large egg beaten with 1 tbsp heavy cream, for brushing
- 1/4 tsp ground black pepper
Instructions
- Heat the oven to 400°F (205°C) and line two sheet pans with parchment.
- Lay one pastry sheet on a work surface and cut it into a 3 by 4 grid of 12 rectangles, about 3 by 4 1/2 inches.
- Place a piece of brie and a teaspoon of cranberry sauce in the centre of each rectangle, staying about 1/2-inch from the edges.
- Sprinkle with a few thyme leaves and a pinch of pepper, then fold the nearest corner down over the filling like a little envelope.
- Repeat with the second sheet, giving you 12 bites per tray.
- Brush the pastry with the egg and cream wash, leaving some of the top surface bare so the filling shows.
- Bake for 14 to 16 minutes until the pastry is puffed, deep golden and the cheese is completely melted.
- Cool on the pan for 5 minutes, then transfer to a wire rack so the bottoms do not steam.
Tip: Cool them on a rack, not on the tray. Brie holds a surprising amount of steam and a soggy bottom is the only thing that can go wrong with this recipe.
Swap it: Camembert or goat cheese both work. Swap the cranberry for fig jam, apple chutney, or a spoon of caramelized onion for a less wintry version.
Storage: Baked bites keep 3 days in the fridge in a loose layer, uncovered, so the pastry does not soften. Reheat at 350°F (175°C) for 6 to 8 minutes. The unbaked bundles freeze for up to 2 months; bake from frozen at 400°F (205°C) for 22 to 24 minutes. Contains dairy, egg and gluten.
6. Mini Pepperoni Pizza Bites
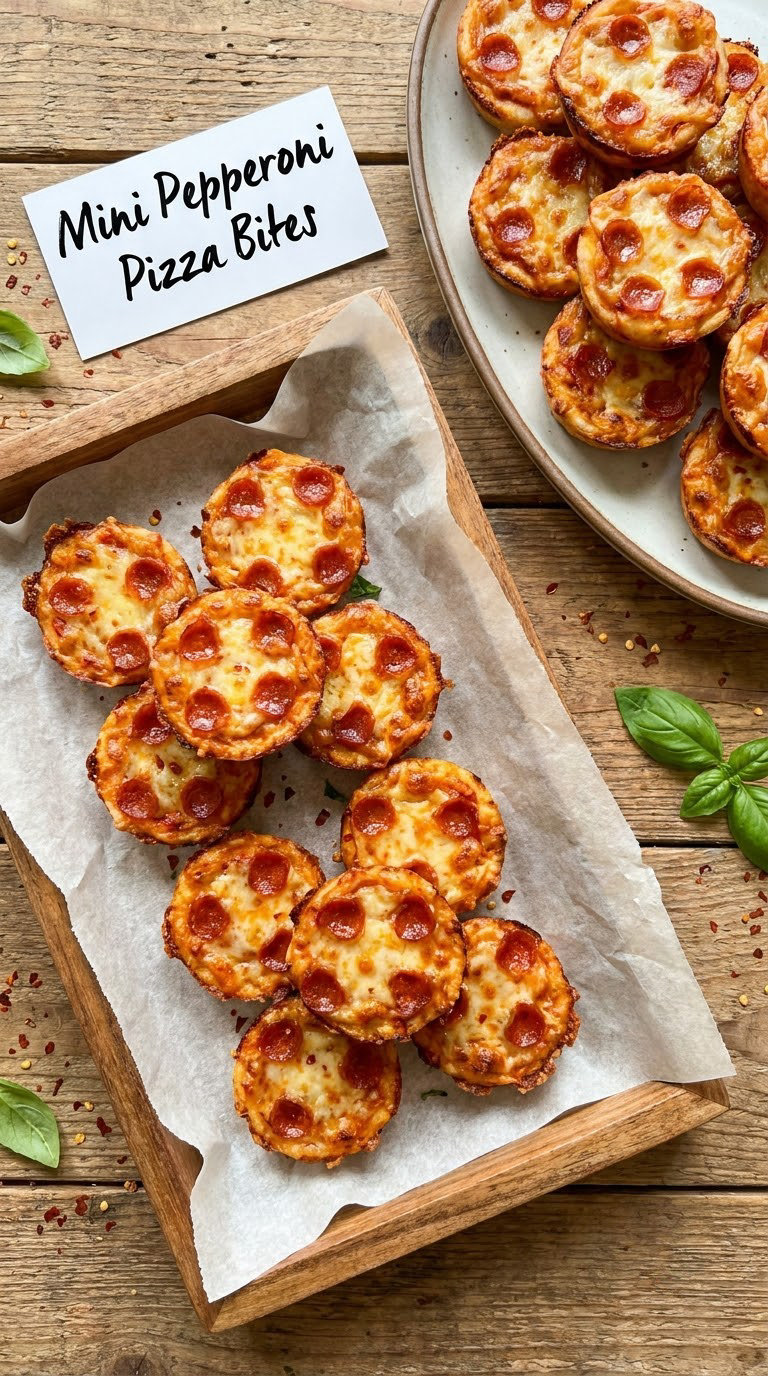
The teenagers will eat these before the adults sit down, which is exactly the outcome I want on New Year’s Eve. The dough is the shortcut: nothing to mix, proof or shape.
Yield: 20 bites · Prep: 5 min · Cook: 13 min · Total: 18 min · Difficulty: Easy
Ingredients
- 1 roll (about 14 oz) refrigerated pizza dough, or 2 tubes crescent roll dough, unrolled and joined
- 1/2 cup (120 ml) marinara sauce
- 1 cup (110 g) shredded mozzarella
- 1/2 cup (55 g) sliced pepperoni
- 1/4 cup (35 g) sliced black olives, optional
- 1/2 tsp dried oregano
- 1 tbsp olive oil
Instructions
- Heat the oven to 425°F (220°C). Line a sheet pan with parchment.
- Roll the dough into a 14 by 10-inch rectangle, roughly 1/4-inch thick. If using crescent dough, pinch the seam where the two tubes meet so it holds together.
- Spread the marinara over the dough, leaving a 1/2-inch border all round.
- Scatter the mozzarella first, then the pepperoni and olives, and finish with the oregano.
- Slice the rectangle into 4 rows and 5 columns, cutting all the way through the crust.
- Drizzle the bites with olive oil and slide the pan into the oven.
- Bake for 11 to 13 minutes until the edges are crisp and deep golden and the cheese is bubbling in spots.
- Rest 3 minutes on the pan, then serve warm, straight from the parchment.
Tip: Cut all the way through the crust. The bites separate and crisp properly only when the cuts run edge to edge, and a blunt pizza wheel does it cleaner than a knife.
Swap it: For a vegetarian board, skip the pepperoni and use sliced mushrooms, diced bell pepper, red onion and a handful of spinach. A thin layer of pesto under the mozzarella is a good change-up.
Storage: Best eaten within 2 hours of baking. Refrigerate up to 3 days and reheat at 375°F (190°C) for 8 minutes to bring the crust back. Contains dairy and gluten.
7. Baked Parmesan Meatballs
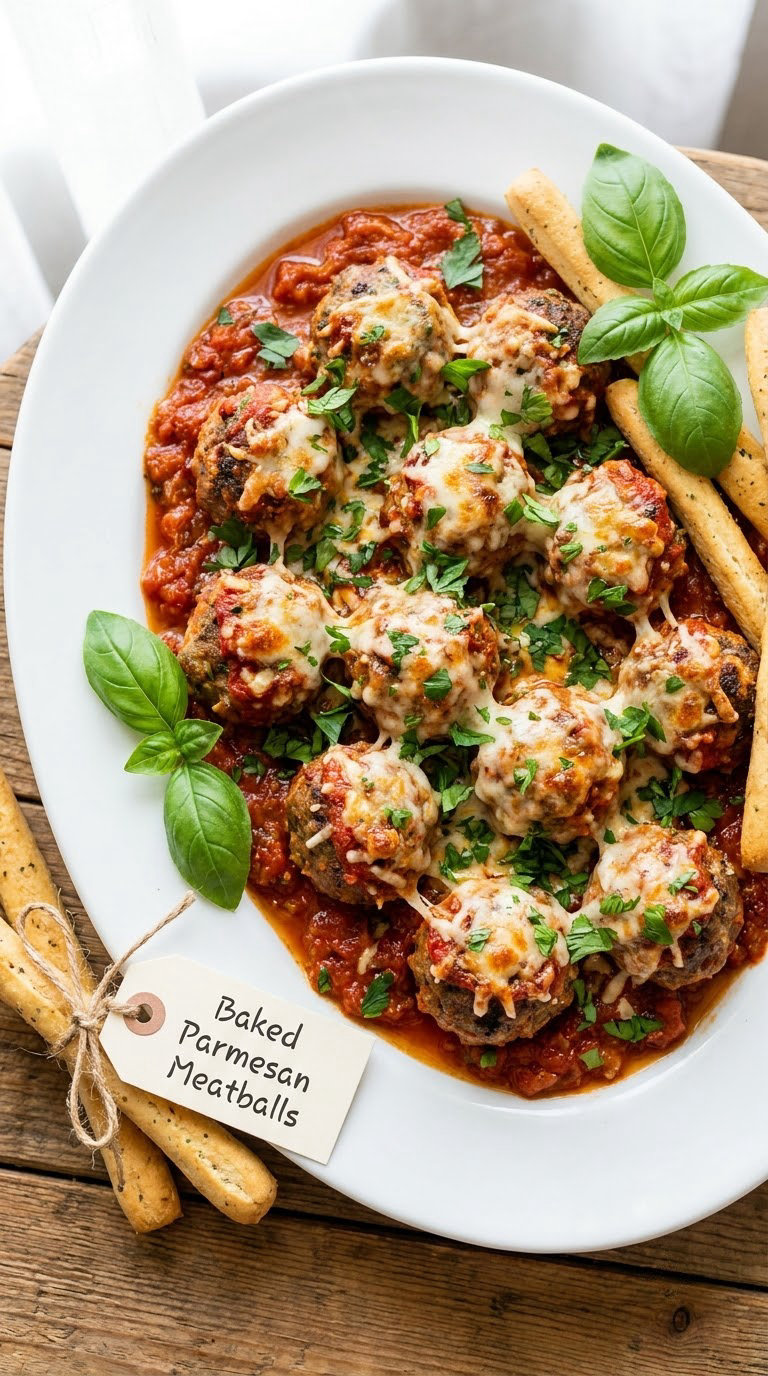
Meatballs are the answer when someone asks for a crowd-pleasing appetizer that actually feeds people. These bake rather than simmer, so the marinara stays bright and you skip a pot of oil.
Yield: 32 meatballs · Prep: 15 min · Cook: 20 min · Total: 35 min · Difficulty: Easy
Ingredients
- 1 lb (450 g) ground beef, 80% lean
- 1/2 cup (35 g) panko breadcrumbs
- 1/4 cup (30 g) grated Parmesan
- 1 large egg
- 2 garlic cloves, minced
- 2 tbsp chopped fresh parsley
- 1 tsp Italian seasoning
- 1/2 tsp salt and 1/4 tsp black pepper
- 1/4 cup (60 ml) olive oil
To serve
- 1 jar (24 oz / 680 g) marinara sauce, warmed in a wide bowl
- 1/2 cup (55 g) extra grated Parmesan
- Warm breadsticks or toasted baguette rounds
Instructions
- Heat the oven to 400°F (205°C) and line a rimmed sheet pan with parchment.
- Mix the beef, panko, Parmesan, egg, garlic, parsley, Italian seasoning, salt and pepper with a light hand until just combined.
- Roll into 32 balls a bit larger than a walnut, wetting your palms if they catch.
- Space the meatballs on the pan and drizzle the olive oil over the tops and sides of each one.
- Bake for 18 to 20 minutes, until the outsides are deeply browned and the thickest meatball reads 160°F (71°C) on an instant-read thermometer.
- Tip the meatballs into the warmed marinara, roll them to coat, and scatter the extra Parmesan and a few torn basil leaves over the top.
- Serve with breadsticks for mopping the sauce.
Tip: Do not pack the mixture. Overworked meatballs turn out dense and bouncy, and that is the whole difference between good ones and great ones.
Swap it: Ground turkey and a handful of chopped dates give you a lighter, slightly sweet meatball that also reaches 160°F (71°C). Lentil and walnut patties work if you are feeding a vegetarian crowd, and they freeze the same way.
Storage: Refrigerate 3 to 4 days in sauce. Freeze cooked meatballs on a tray until solid, then bag them for up to 3 months; reheat from frozen in sauce at 350°F (175°C) for 25 minutes. Unbaked raw meatballs also freeze, on a tray first, for 3 months. Contains dairy and, with panko, gluten.
8. Sausage and Cheddar Pinwheels
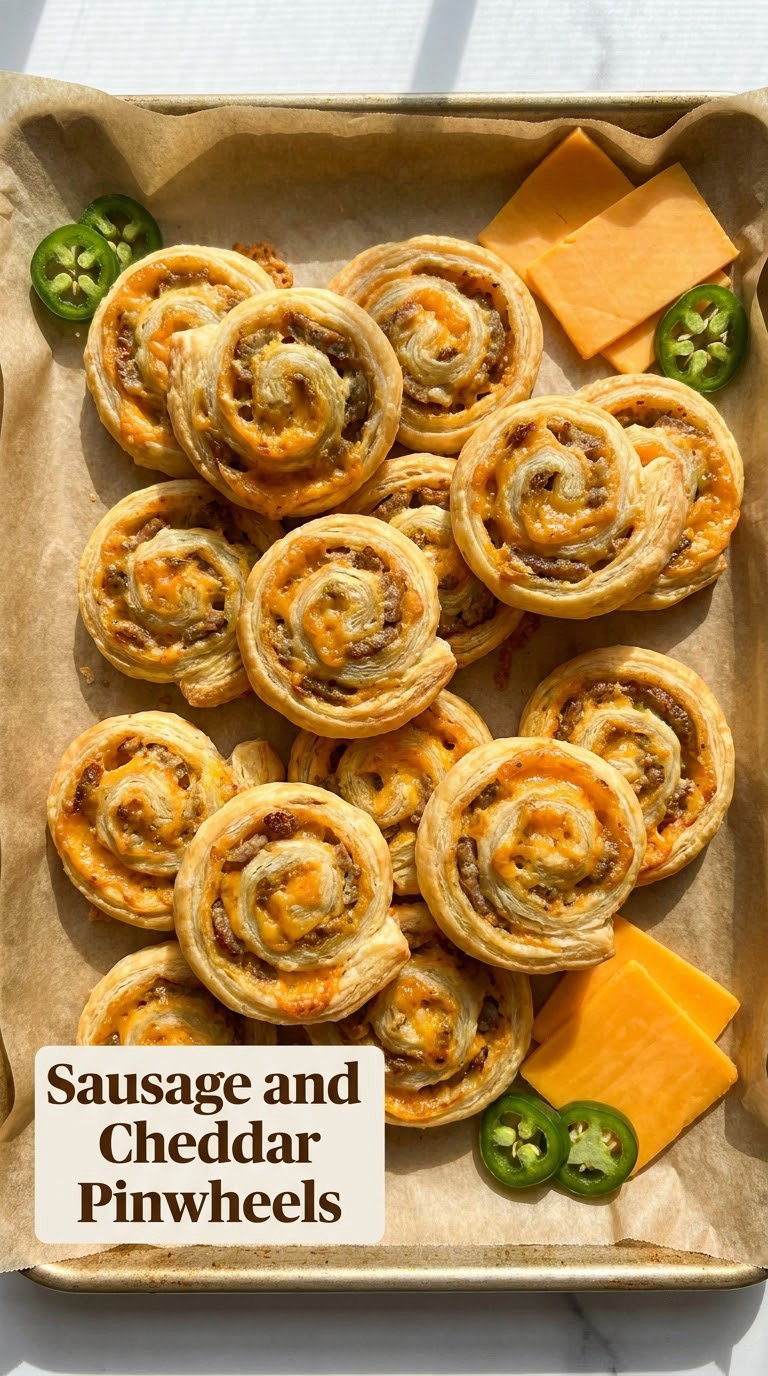
A savoury pinwheel, built from two tubes of crescent dough, that goes into a hot oven and comes out in fifteen minutes. Make the double batch, because half of them are gone before the first toast.
Yield: 24 pinwheels · Prep: 15 min · Cook: 15 min · Total: 30 min · Difficulty: Easy
Ingredients
- 2 (8 oz / 226 g) tubes refrigerated crescent roll dough, unrolled
- 1 lb (450 g) breakfast sausage, casings removed, cooked and crumbled
- 1 1/2 cups (170 g) sharp cheddar, grated
- 1 jalapeño, seeded and thinly sliced, optional
- 1/2 tsp black pepper
- 1 tsp dried oregano or Italian seasoning
- 1 tbsp yellow mustard, for the glaze
Instructions
- Heat the oven to 375°F (190°C) and line a sheet pan with parchment.
- Place the two unrolled dough rectangles seam side down and press them together along the shared edge to make one long sheet.
- Brush the dough with the mustard, leaving a 1/2-inch border.
- Scatter the cheddar over the surface, then the cooked sausage, the jalapeño and the seasonings.
- Starting along a long edge, roll the dough up tightly, pressing as you go to keep the filling inside.
- Slice the log into 24 even rounds with a sharp serrated knife.
- Stand the rounds on the pan, cut side up, about 1 inch apart, and bake for 13 to 15 minutes until puffed and golden brown.
- Cool for 4 minutes, then arrange in a spiral on a platter so the swirl is visible.
Tip: Cook the sausage first. Raw sausage under the cheese adds grease and water, and the bottoms of the pinwheels turn soggy and pale instead of crisp.
Swap it: Turkey sausage lowers the fat and cuts the salt. For a night without meat, use roasted red pepper strips and smoked cheddar with a few chopped mushrooms.
Storage: Refrigerate 3 days and reheat at 350°F (175°C) for 8 minutes. The unbaked log freezes for up to 2 months; slice it, freeze the rounds flat on a tray, then bake from frozen at 375°F (190°C) for 16 to 18 minutes. Heat the cooked sausage to 160°F (71°C). Contains dairy, wheat and soy.
9. Crispy Air Fryer Mozzarella Sticks
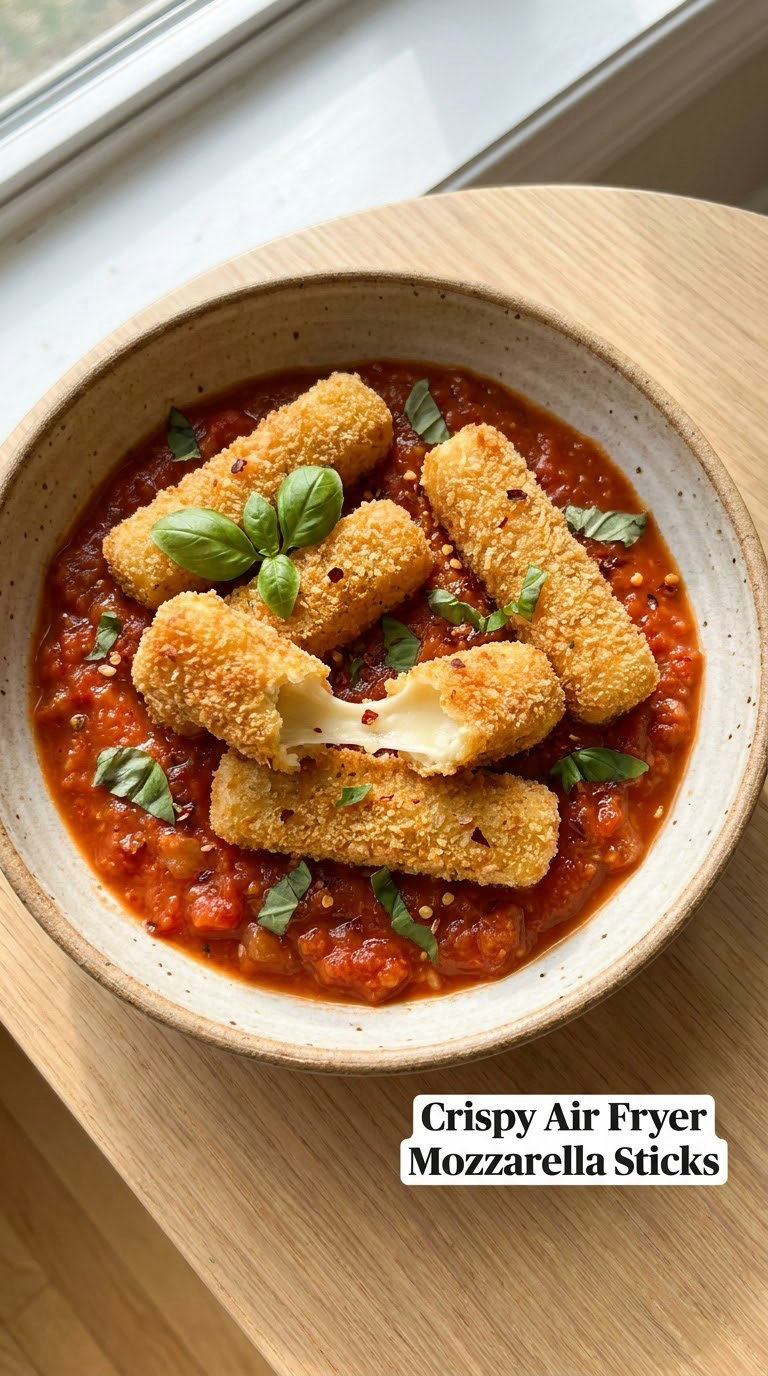
The air fryer is the best appliance you can own for a party, because it cooks in a fraction of the oven time and does not heat up your kitchen. I often start these while guests are still arriving and the oven is finishing something else.
Yield: 10 sticks, about 30 bites when cut · Prep: 10 min · Cook: 8 min · Total: 25 min including rest · Difficulty: Easy
Ingredients
- 10 breaded or plain mozzarella sticks
- 1/2 cup (65 g) all-purpose flour
- 1 large egg, beaten
- 1 cup (105 g) panko breadcrumbs
- 1/2 tsp garlic powder, 1/2 tsp dried oregano and a pinch of salt
- 2 tsp olive oil
For the dipping sauce
- 1/2 cup (120 ml) marinara sauce
- 2 tbsp chopped fresh basil
- A pinch of red pepper flakes
Instructions
- Set up three shallow bowls in the order flour, then beaten egg, then the panko mixed with the seasonings.
- Set the air fryer to 400°F (205°C) and let it preheat for 3 minutes.
- Toss a stick in the flour and shake off the excess, then coat it in egg, then press it firmly into the panko so the crumbs grip all the way around.
- Repeat with the remaining sticks and place them in the basket in a single layer, leaving room between each. Do not let them touch, or they steam.
- Lightly oil the basket, close the fryer and cook for 8 minutes.
- Open carefully, turn the sticks, and cook for 1 to 2 more minutes until the crumb is deep gold and no raw panko is visible at the ends.
- Rest on a rack for 2 minutes so the cheese stops running, then serve with the warmed marinara.
Tip: Freeze the sticks for 15 minutes before breading if your cheese is very wet. Firm cheese holds its shape; soft cheese slides out into the basket.
Swap it: Breaded chicken tenders and mozzarella sticks share the same coating, so a box of tenders cooked the same way gives you a hot savoury option alongside the cheese ones.
Storage: Cooked sticks keep 3 days in the fridge. Reheat in the air fryer at 375°F (190°C) for 5 minutes, not in the microwave, so the crust stays crisp. Freeze uncooked, breaded sticks on a tray for up to 2 months. Contains dairy, egg and wheat.
10. Stuffed Mushroom Appetizer
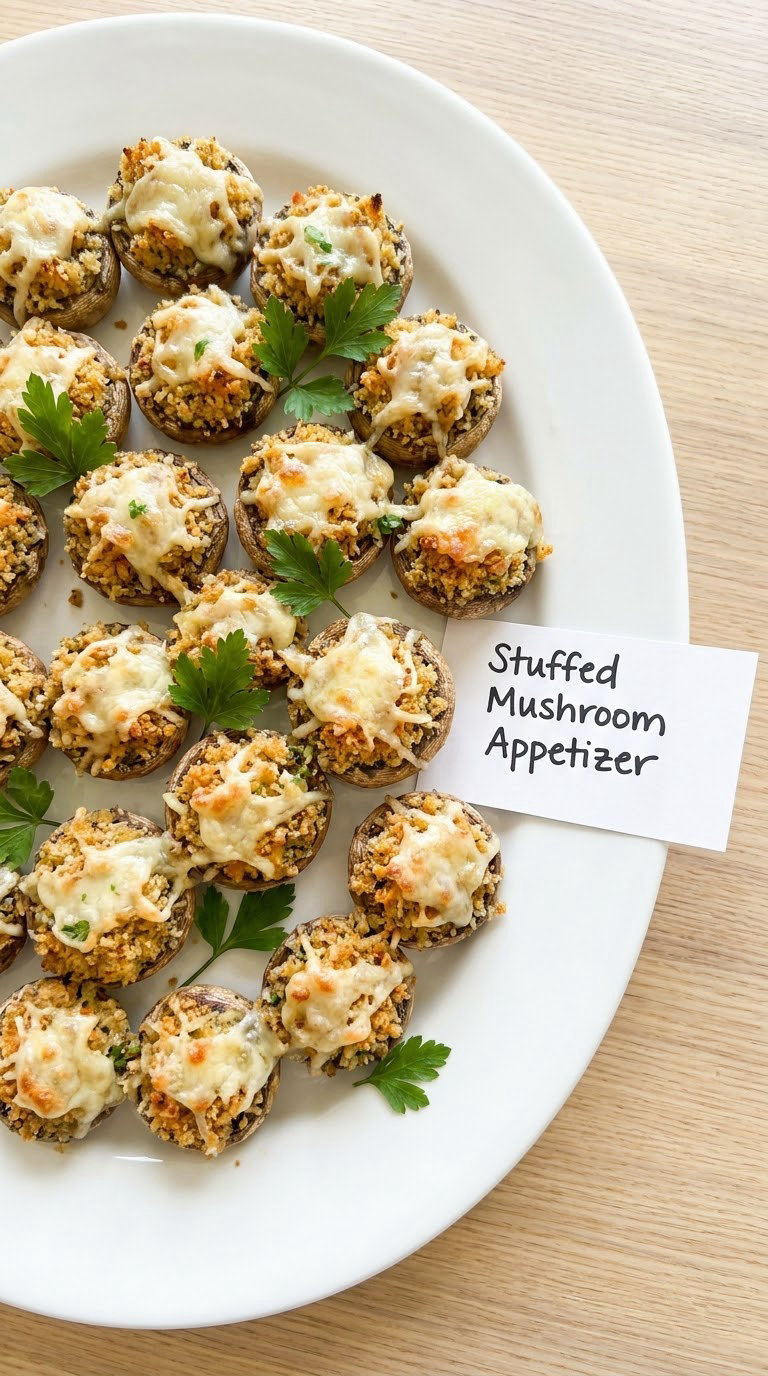
Mushrooms cook down to almost nothing, which is why a tray that looks full gives you only a dozen bites. Buy two punnets and double the filling. This one is naturally vegetarian and easy to make gluten-free.
Yield: 24 stuffed caps · Prep: 20 min · Cook: 20 min · Total: 40 min · Difficulty: Easy
Ingredients
- 24 medium cremini or white button mushrooms, 1 1/2 to 2 inches wide
- 3 tbsp butter
- 2 garlic cloves, minced
- 1/2 cup (55 g) breadcrumbs, or certified gluten-free crumbs
- 1/3 cup (38 g) grated Parmesan
- 1/2 cup (25 g) shredded mozzarella
- 1 tbsp chopped fresh parsley
- 1 tbsp chopped fresh thyme leaves
- 1/2 tsp salt and 1/4 tsp black pepper
- 2 tbsp olive oil
Instructions
- Heat the oven to 400°F (205°C) and line a sheet pan with parchment.
- Wipe the mushrooms clean with a damp cloth and snap the stems off. Chop the stems finely and discard the woody ends.
- Melt the butter in a skillet over medium heat and cook the chopped stems for 4 minutes, until they collapse and turn brown.
- Add the garlic and cook 30 seconds more, then take the pan off the heat.
- Stir in the breadcrumbs, Parmesan, parsley, thyme, salt and pepper while the pan is still warm, so the crumbs toast slightly in the butter.
- Fill each mushroom cap generously and mounded. Sit them cap side up on the pan and drizzle with olive oil.
- Scatter the mozzarella over the tops and bake for 18 to 20 minutes until the filling is browned on top and the cheese has melted and blistered.
- Rest 5 minutes on the pan, then move to a warm platter and finish with a little more parsley.
Tip: Cook the filling separately instead of piling it into raw caps. Skipping that step is the reason the stuffing goes soggy and grey in the oven.
Swap it: Add crumbled feta and a handful of spinach to the filling for a stronger flavour. For a vegan version, use olive oil in place of the butter and skip the cheese on top.
Storage: Refrigerate 3 days, covered loosely so the crumbs do not steam. Reheat at 350°F (175°C) for 10 minutes. Freeze filled, unbaked caps up to 2 months; bake from frozen at 400°F (205°C) for 25 to 30 minutes. Contains dairy, and gluten unless you use gluten-free crumbs.
11. Deviled Eggs with Herb Filling
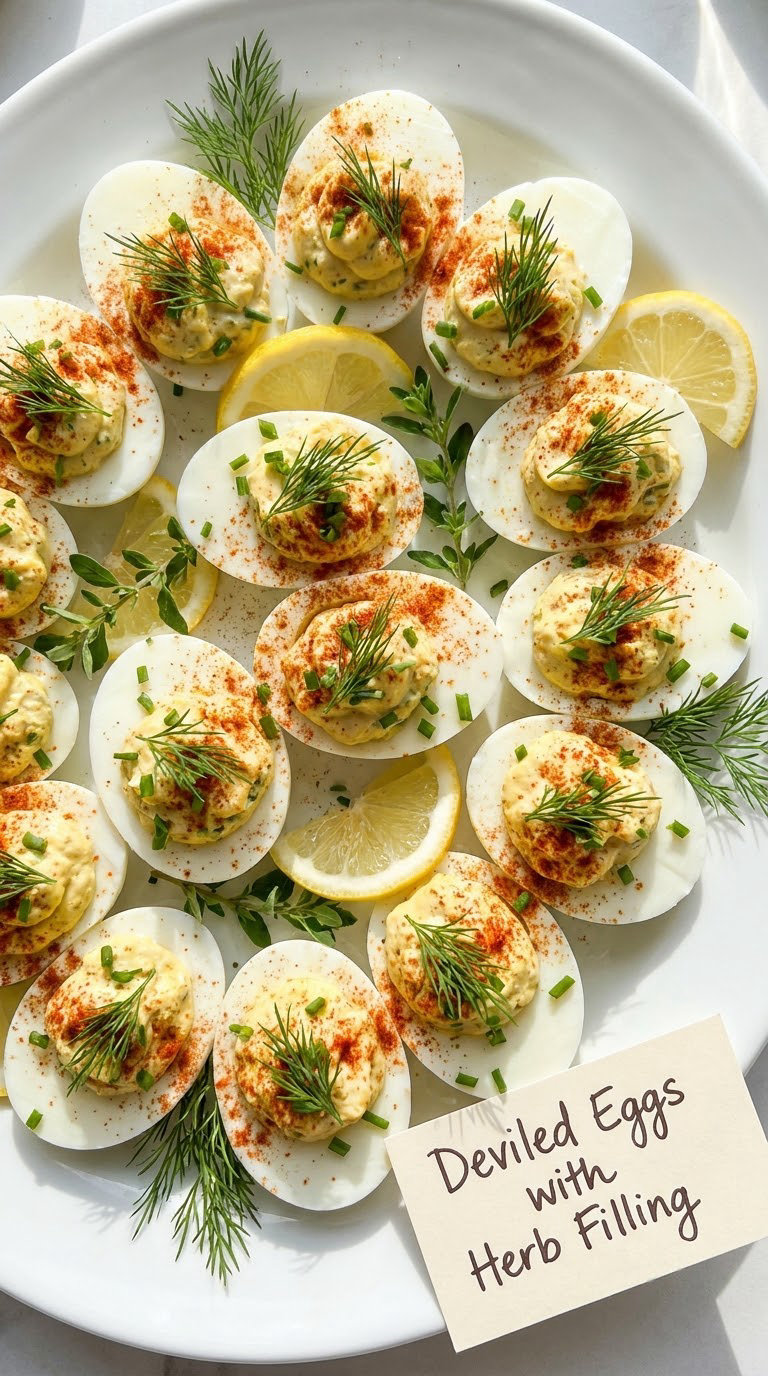
The most requested bring-along on my list, and the reason is simple: they are the first thing to go and the last thing anyone notices missing. Assemble them the morning of the party and nobody in the room has to touch a utensil.
Yield: 24 halves, 12 whole eggs’ worth · Prep: 15 min · Cook: 10 min · Total: 25 min plus 30 min chilling · Difficulty: Easy
Ingredients
- 12 large eggs, or 24 pasteurised liquid eggs
- 1/3 cup (80 g) mayonnaise
- 2 tsp Dijon mustard
- 2 tsp pickle relish, drained, plus 1 tsp pickle brine
- 1 tbsp chopped fresh dill plus 1 tbsp chopped fresh chives
- 1/2 tsp salt and 1/4 tsp black pepper
- Smoked paprika, for dusting
- 1 lemon, cut into wedges
Instructions
- Lower the eggs into a pot of cold water, add a teaspoon of salt, and bring to a rolling boil over high heat.
- Take the pot off the heat, cover it, and let the eggs sit for 10 minutes.
- Move the eggs to ice water for 5 minutes so they stop cooking and the shells slip off cleanly.
- Peel the eggs, halve them lengthways, and scoop the yolks into a bowl. Chop the whites in half and pat them dry.
- Mash the yolks with the mayonnaise, Dijon, relish, pickle brine, dill, chives, salt and pepper until smooth and thick enough to hold a shape.
- Spoon the mixture into a piping bag fitted with a star tip and pipe a swirl into each white half.
- Chill for 30 minutes to firm the filling, then dust with smoked paprika, add the chives and serve with lemon wedges.
Tip: Pat the chopped whites dry before filling them. Any moisture on the surface makes the filling slide out when a guest picks one up off a low table.
Swap it: Use pasteurised liquid eggs for a completely hands-off route: bake at 325°F (165°C) for 18 minutes, then cool and chill. For a lighter filling, swap the mayonnaise for Greek yogurt and add a little more lemon.
Storage: Keep refrigerated and no more than 2 hours at room temperature, which on party night is a real concern once the midnight rush starts. Covered in the fridge they keep 2 days. Contains eggs; mayonnaise usually adds a trace of egg too.
12. Smoked Salmon Cucumber Bites
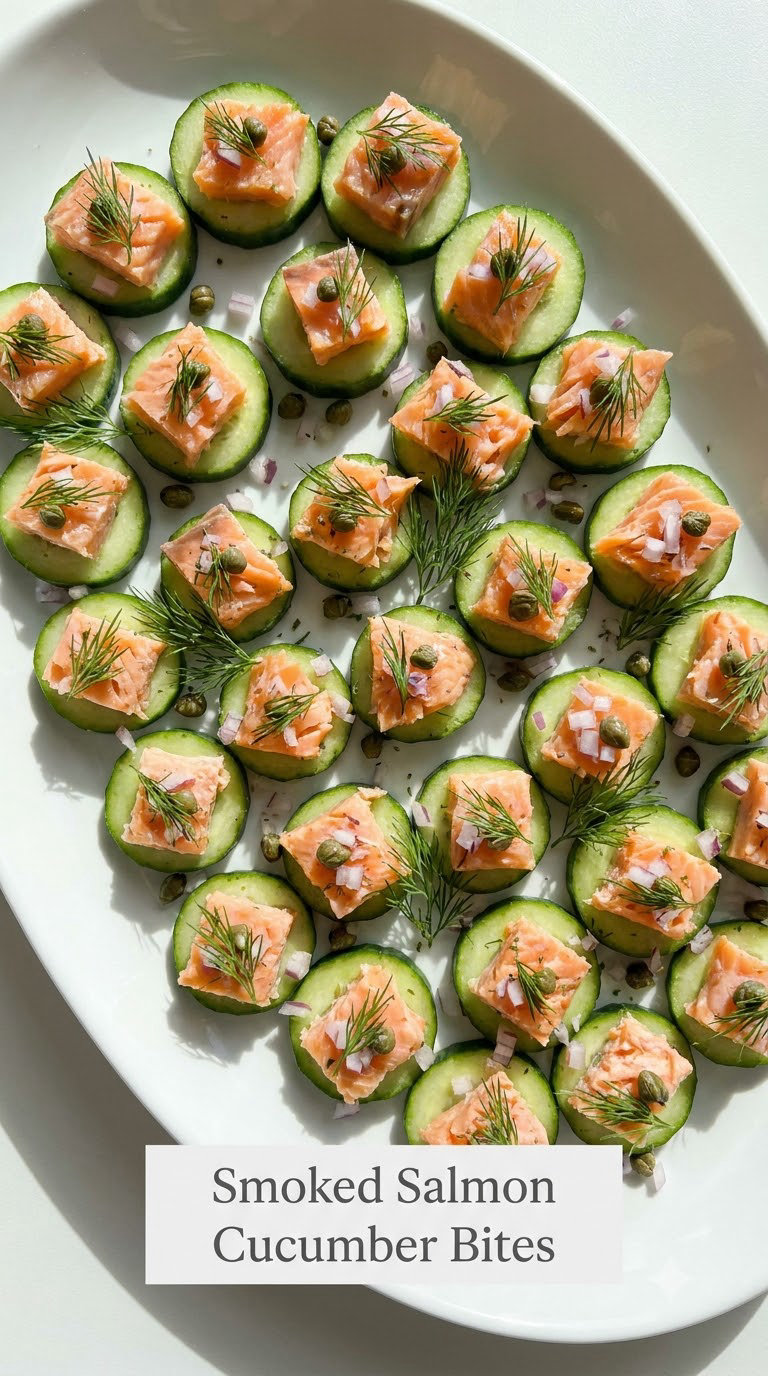
Ten minutes, one board, no heat, and it looks like you bought it from a deli. This is the appetizer I make for the two-person celebration, when the whole idea of a hot oven feels like too much.
Yield: 24 bites · Prep: 10 min · Cook: 0 min · Total: 10 min · Difficulty: Easy
Ingredients
- 1 English cucumber, cut into 1/4-inch rounds
- 8 oz (225 g) smoked salmon, sliced into 1-inch pieces
- 4 oz (115 g) cream cheese, softened
- 2 tbsp chopped fresh dill
- 1 tbsp capers, roughly chopped
- 1/4 cup (40 g) red onion, very thinly sliced, soaked in cold water for 5 minutes and drained
- 1 lemon, for squeezing
- 1 tbsp finely chopped chives
Instructions
- Slice the cucumber into rounds and blot them dry on a towel.
- Mash together the cream cheese, half the dill and a squeeze of lemon until smooth and spreadable.
- Spread a thin layer of cream cheese on the flesh side of each cucumber round.
- Fold a piece of smoked salmon over the cream cheese, keeping the folds loose and irregular for a handmade look.
- Top each bite with a few pieces of capers, a curl of drained red onion and a sprinkle of chives and dill.
- Chill for 15 minutes before arranging so the cream cheese sets and the bites hold together when lifted.
- Set out on a chilled platter with lemon wedges and let guests use small forks or cocktail picks.
Tip: Chill everything, including the plate, for 15 minutes. Warm cream cheese slides off the cucumber and you end up serving salmon on a cucumber on a slice of bread.
Swap it: Smoked trout or smoked mackerel work equally well. For a dairy-free version, use a thick slice of ripe avocado in place of the cream cheese.
Storage: Assemble the bites the day of and refrigerate under 40°F (4°C) until 30 minutes before guests arrive. Keep no more than 2 hours on the table. Smoked salmon is uncooked and cold-cured, so treat it as a perishable food and keep it cold throughout. Contains fish and dairy.
13. Spicy Chicken Taquito Bites
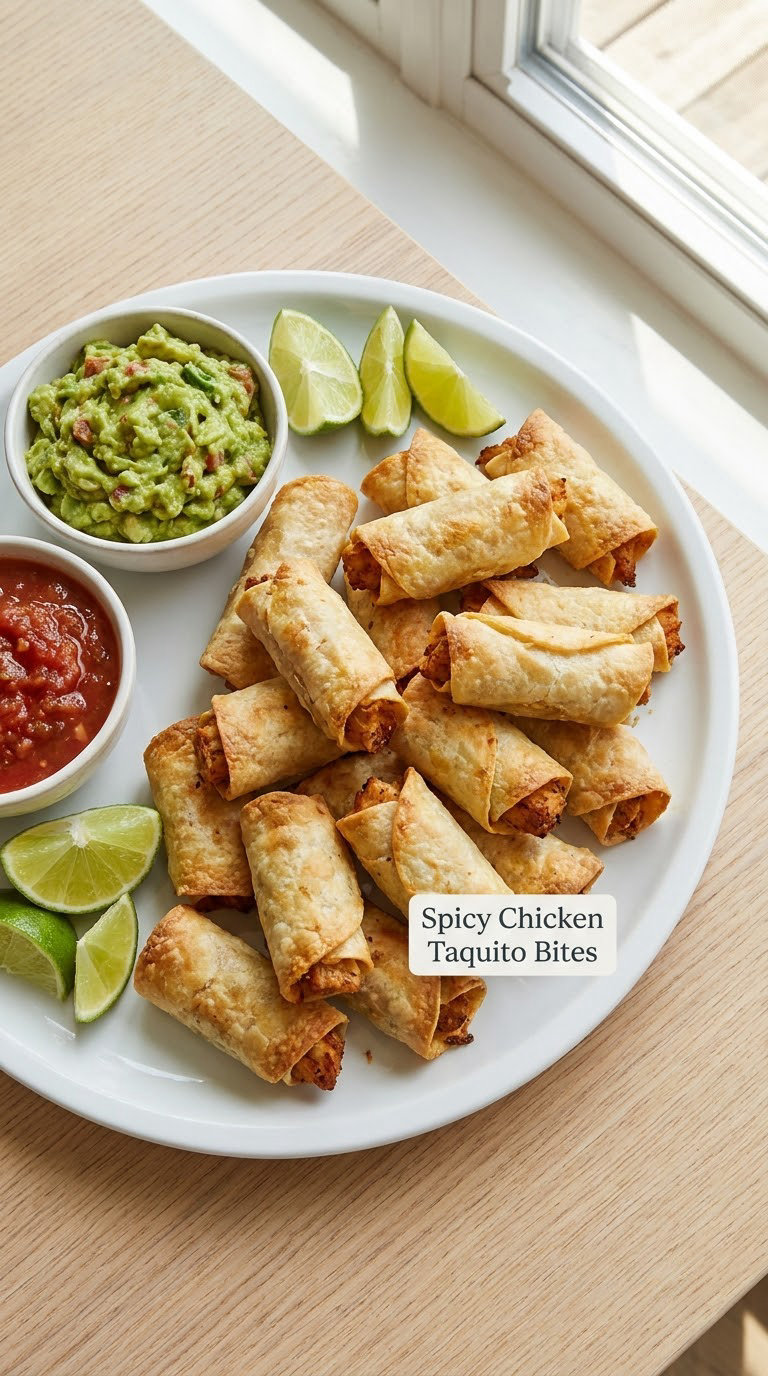
Cut taquitos into short sections and they stop being a main-course fuss and become something people pick up with two fingers. A rotisserie chicken makes this a genuinely quick one to put together.
Yield: 24 bites, from 8 small taquitos · Prep: 20 min · Cook: 20 min · Total: 45 min · Difficulty: Medium
Ingredients
- 3 cups (425 g) shredded cooked chicken, from a rotisserie or a pot
- 1/4 cup (60 ml) salsa verde or mild salsa
- 1 tsp ground cumin
- 1/2 tsp chili powder
- 1/2 tsp garlic powder
- 1/2 cup (55 g) shredded cheddar
- 1/4 cup (30 g) shredded Monterey Jack
- 8 (6-inch) flour or corn tortillas
- 2 tbsp vegetable oil
To serve
- 1 cup (240 ml) salsa
- 1 cup (240 g) guacamole
- 1 lime, cut into wedges
Instructions
- Heat the oven to 425°F (220°C) and line a rimmed sheet pan with parchment.
- Toss the shredded chicken with the salsa verde, cumin, chili powder, garlic powder and a pinch of salt.
- Warm the tortillas for 15 seconds in a dry skillet or a few seconds in the microwave so they roll without cracking.
- Fill each tortilla with about 1/3 cup of the chicken mixture, roll it tightly and press the seam closed.
- Place the taquitos seam side down on the pan, brush or drizzle lightly with the oil, and bake for 18 to 20 minutes, turning once, until the tortillas are crisp and blistered.
- Scatter the cheddar and Monterey Jack over the top in the last 3 minutes so they melt and brown slightly.
- Let them cool for 5 minutes, then cut each taquito into 3 short sections with a serrated knife.
- Stand the pieces upright on a platter and serve with salsa, guacamole and lime wedges.
Tip: Cut with a serrated knife and only after the filling has cooled for five minutes. A straight knife smushes the seam and hot filling squeezes out of the ends.
Swap it: Black beans and corn make a vegetarian version that shortens the bake to 15 minutes. Corn tortillas keep the bites gluten-free but need a shorter cook and a little more cheese for browning.
Storage: Refrigerate 3 to 4 days. Reheat at 375°F (190°C) for 10 minutes so the tortillas re-crisp. Freeze cut, cooked bites for up to 2 months and bake from frozen at 425°F (220°C) for 15 minutes. Heat any leftover chicken to 165°F (74°C). Contains dairy; wheat if you use flour tortillas.
14. Cranberry Cream Cheese Cheeseball Bites
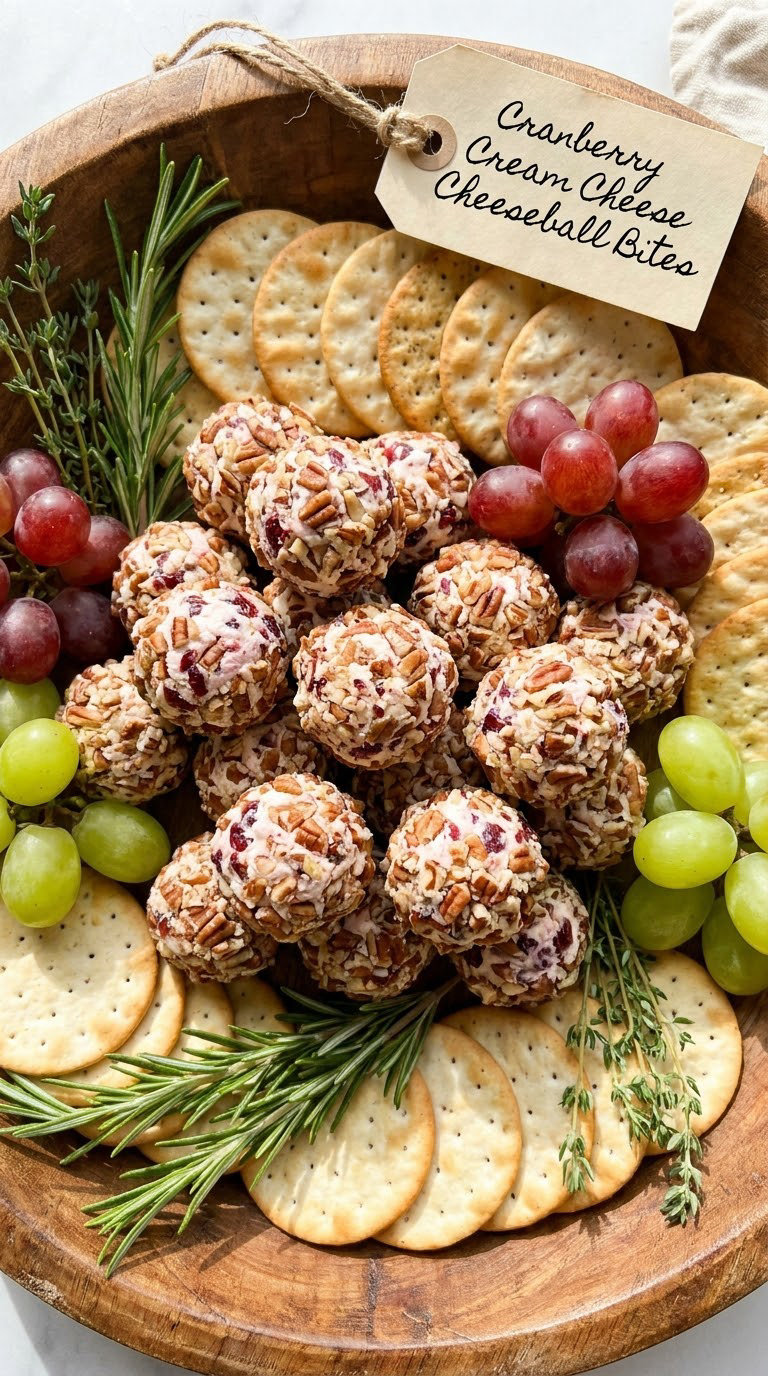
A cheese ball rolled into bite-size pieces so nobody has to commit to a wedge with a knife at midnight. This one is the nut-free option on the table, and it is the easiest recipe in the whole roundup.
Yield: 28 bites · Prep: 10 min · Cook: 0 min · Total: 10 min plus 45 min chilling · Difficulty: Easy
Ingredients
- 16 oz (450 g) cream cheese, softened to room temperature
- 1 cup (140 g) dried cranberries, roughly chopped
- 1/4 cup (60 ml) orange juice
- 1 tbsp honey
- 1 tsp dried cranberry seasoning or orange zest
- 1/2 cup (20 g) finely chopped green onion
- 1/2 tsp salt and 1/4 tsp black pepper
- 1/2 cup (65 g) pecans, finely chopped, for rolling
- Crackers, pretzel thins, grapes and fresh herbs, for serving
Instructions
- Soften the cream cheese on the counter for 30 minutes, then beat it until completely smooth with no lumps.
- Stir in the chopped cranberries, orange juice, honey, cranberry seasoning, green onion, salt and pepper.
- Cover and chill for 45 minutes, until the mixture is firm enough to handle without sticking to your palms.
- Roll it into 28 balls about 1 inch across, then roll each one in the chopped pecans, pressing them on lightly.
- Chill the finished bites for 15 minutes to set the coating before transferring them to a serving platter.
- Surround the bites with crackers, pretzel thins and grapes, and tuck a few dill or parsley sprigs around the edge.
Tip: Do not skip the 45-minute chill. Loose mixture will not hold a round shape, and the orange juice keeps it softer than a plain cheese ball.
Swap it: Skip the pecans and roll the balls in crushed graham cracker crumbs, mini marshmallows, or toasted coconut. Dried apricots with a little honey also work instead of cranberries and are milder for guests who find cranberry sharp.
Storage: Refrigerate up to 4 days and keep the bites on the coldest part of the table, under 40°F (4°C). Soften them at room temperature for 15 minutes before serving if they have been in the fridge all day. Contains dairy and, in the pecan version, nuts.
15. No-Cook Summer Rolls with Dipping Sauce
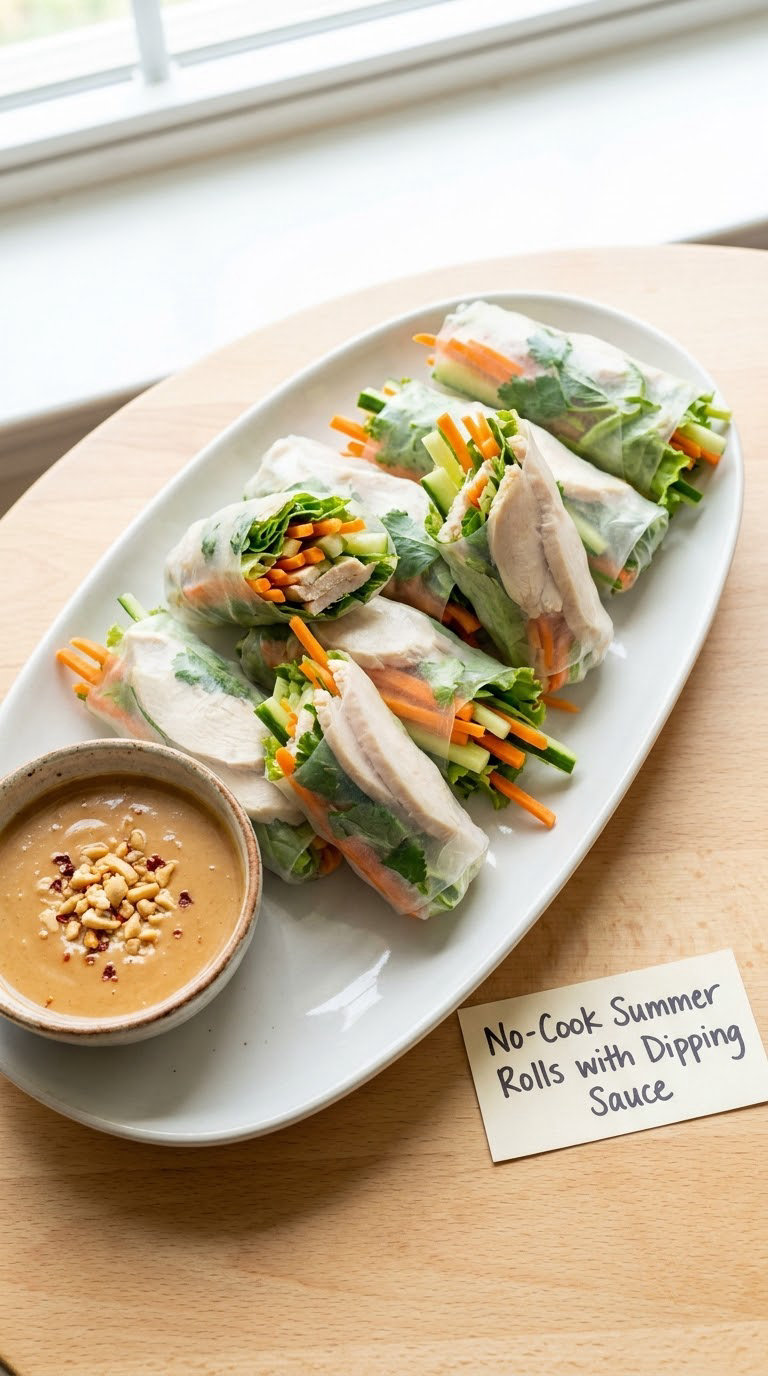
My one gluten-free, fresh-from-the-vegetable-aisle option, and the only recipe here that benefits from you using pasteurized or cooked ingredients rather than raw ones. Summer rolls are about the dipping sauce, so do not rush that part.
Yield: 16 rolls, 8 servings · Prep: 30 min · Cook: 0 min · Total: 30 min · Difficulty: Medium
Ingredients
- 8 rice paper wrappers, 8-inch square
- 4 oz (115 g) rice noodles, cooked according to the packet and cooled
- 8 oz (225 g) shredded cooked chicken, cooled to room temperature
- 1/2 carrot, cut into matchsticks
- 1/2 cucumber, cut into matchsticks
- 1 avocado, sliced thinly
- 8 Thai basil leaves or cilantro sprigs
- 1 tbsp hoisin sauce
For the peanut dipping sauce
- 3 tbsp (45 g) peanut butter
- 1 tbsp hoisin sauce
- 2 tbsp fresh lime juice
- 3 tbsp water, or as needed
- 1 tsp sriracha or chili garlic sauce
Instructions
- Whisk the peanut butter, hoisin, lime juice and sriracha together, adding the water a spoonful at a time until it is thick enough to coat a spoon yet still pourable.
- Prepare every filling before you wet a single wrapper: noodles, chicken, carrot, cucumber, avocado and herbs, all in neat piles within reach.
- Fill a shallow bowl with warm water and dip one rice paper wrapper for 15 to 20 seconds, until it is soft and pliable with no dry patches.
- Lay the wrapper flat on a damp cutting board, then add a small nest of noodles, a few strips of carrot and cucumber, two slices of avocado, a little chicken, a basil leaf and a thin line of hoisin.
- Fold in the two sides, roll tightly into a cylinder and place seam side down on the parchment.
- Keep the finished rolls covered with a damp towel so the wrappers do not dry out, and repeat until all 16 are rolled.
- Chill for 15 minutes to firm them up, then slice each roll in half on a bias, or serve them whole, with the peanut sauce in a small bowl.
Tip: Use a damp cutting board and keep a towel over the rolls as you go. Dry rice paper tears, and one torn roll means the filling rolls out onto the board.
Swap it: Skip the chicken and add shredded tofu, cooked shrimp or edamame for a vegetarian or vegan roll. Thinly sliced mango and a squeeze of lime make a fruit-only version for the kids.
Storage: Refrigerate in a sealed container with a damp towel for up to 24 hours. Do not freeze, the wrappers go stiff and tear. Use pasteurized sprouts and cooked chicken rather than raw, and keep the platter cold, under 40°F (4°C). Contains peanuts, soy and, with most wrappers, wheat; use rice paper wrappers labelled gluten-free if that matters to you.
Tips for Making These
Balance the spread instead of cooking five of one thing
Pick two cold, two hot and one thing that is easy to eat with a cocktail in the other hand, and you have a complete board. A skewer, a deviled egg and a cheese bite work standing up between two conversations, which most party food does not.
Label anything with a common allergen. Small folded cards next to each platter with four words on them, “contains nuts” or “gluten-free”, save somebody the awkward conversation at the buffet line.
The make-ahead timeline for 15 easy New Year’s Eve appetizer ideas
- Two days out: Pick your five dishes and buy the two ingredients you cannot get on the day, usually a big tray of shrimp and a specific cheese. Make the meatball mixture and shape the raw rolls, and let the dough components go in the freezer.
- One day out: Bake everything that keeps best baked. Puff pastry bites, meatballs, stuffed mushrooms, taquito bites, chicken bites and sausage pinwheels all reheat well and can be made ahead. Cool them fully, then refrigerate uncovered so nothing steams.
- Party morning: Hard boil the eggs, blend the deviled filling, chop and dress the Caprese tomatoes, roll the cheese bites, mix the peanut sauce, and cook the noodles for the summer rolls. This is the only day that should involve real chopping.
- Two hours before: Set out the cold items first, since they can sit, and put the hot items in the oven or air fryer with enough time to finish. Fill slow cookers or covered chafing dishes with anything that needs holding warm.
- Fifteen minutes before: Take the cold platters out so they lose the fridge chill, warm the sauces, and light whatever candles you own. Then stop cooking and stay in the room.
How much food to make per guest
Count on 3 to 4 bite-size pieces per guest for a 3 to 4 hour party, so roughly 20 small bites for every 6 people. If dinner is being served later, drop that to 2 to 3 pieces each. If appetizers are the whole event, go to 5 or 6 per guest and add a few more substantial bites, like the taquito sections or stuffed mushrooms.
Add 10 percent more than the number suggests. Nobody minds leftovers at midnight, and leftovers go straight into breakfast, while running out of food at 11:40 is a thing you cannot fix.
Holding hot and cold food safely through midnight
Set out cold items in small batches and refill them as they empty, so nothing sits out for long. Keep anything with raw egg, dairy, fish, meat or cooked rice on ice or on a chilled platter, and follow the two-hour rule: if a food is in the danger zone between 40°F and 140°F (4°C and 60°C) for more than two hours, it goes in the bin. If your party runs four hours, that means cold platters need active replacing, not a single set-out at 8pm.
For hot food, hold anything you will not serve within an hour at 140°F (60°C) or warmer, then turn the heat down. Bites like the chicken, meatballs and pinwheels re-crish better than they hold, so latecomers get them straight from a hot oven. My summer appetizer roundup has more no-cook options for the same reason.
One last practical thing: put out more toothpicks and cocktail picks than you think anyone needs, and put a small garbage bowl near the spread. My Thanksgiving welcome bites roundup runs the same way when the crowd is bigger.
Frequently Asked Questions
What are the easiest New Year’s Eve appetizers to make ahead?
The most make-ahead friendly options on this list are the baked bites: puff pastry brie bites, sausage pinwheels, baked Parmesan meatballs, stuffed mushrooms, taquito bites and chicken bites. Cook them a day ahead, cool them uncovered in the fridge, then reheat at 375°F (190°C) on the day. Cold items like deviled eggs, Caprese skewers and cheese bites are even simpler, since they need a day of chilling and no cooking at all.
How much appetizer food should I make for a New Year’s Eve party?
Plan on 3 to 4 bite-size pieces per guest for a 3 to 4 hour party, which is about 20 small bites for every 6 people. Drop to 2 to 3 pieces each if a main course follows, and increase to 5 or 6 if the appetizers are the entire evening. Make roughly 10 percent more than the math suggests, because an empty platter at 11:40 cannot be fixed and leftovers go into breakfast.
Which appetizers can I keep warm without drying them out?
Sausage pinwheels, meatballs, taquito bites, stuffed mushrooms and baked chicken bites all hold at 140°F (60°C) or warmer without drying out, and most actually crisp back up. Cold items do not belong in a chafing dish, so keep your deviled eggs, Caprese skewers, cheese bites and salmon cucumber bites on ice. Fried food such as the mozzarella sticks is the exception, since it goes soft within about 30 minutes.
What can I serve instead of fried appetizers?
There are plenty of oven and no-cook stand-ins here. Caprese skewers, smoked salmon cucumber bites, cranberry cheese bites and summer rolls need no heat at all, and they travel well to a friend’s door. Brie and cranberry puff pastry bites, baked Parmesan chicken bites and stuffed mushrooms give you the same crisp-and-cheesy satisfaction from the oven. For a gluten-free plate, choose the stuffed mushrooms or the summer rolls.
How do I keep appetizers safe when guests arrive late?
Serve cold food in small batches on chilled platters and refill them from the fridge as they empty, rather than setting out everything at once. Anything containing meat, fish, dairy, eggs or cooked rice should not sit out past two hours, and a four-hour party is exactly where that limit bites. Keep hot food at 140°F (60°C) or warmer and pull only small trays into the oven at a time so the rest stays hot.
Can I prepare these appetizers the day before?
Yes, and it is the best way to host. Every baked recipe here reheat well, and the cold ones need the day ahead anyway: deviled eggs, Caprese skewers, cranberry cheese bites and peanut dipping sauce all hold for 24 hours refrigerated. Do not freeze the puff pastry bites unbaked, freeze shrimp, or dress the Caprese tomatoes more than a few hours ahead of time.
A Simple New Year’s Eve Appetizer Plan
Start with the garlic herb cocktail shrimp, then add the bacon-wrapped stuffed chicken rolls, the brie and cranberry bites, a platter of Caprese skewers and a bowl of cranberry cheese bites. That is cold, hot, vegetarian, a little bit fancy and completely doable, and it scales from two people to a dozen without a second thought.
Pick five of these 15 easy New Year’s Eve appetizer ideas, do the baking a day ahead, and spend the last hour before midnight in the room with your guests instead of the kitchen. Happy 2026, and may the platter still have something on it when the clock strikes.