
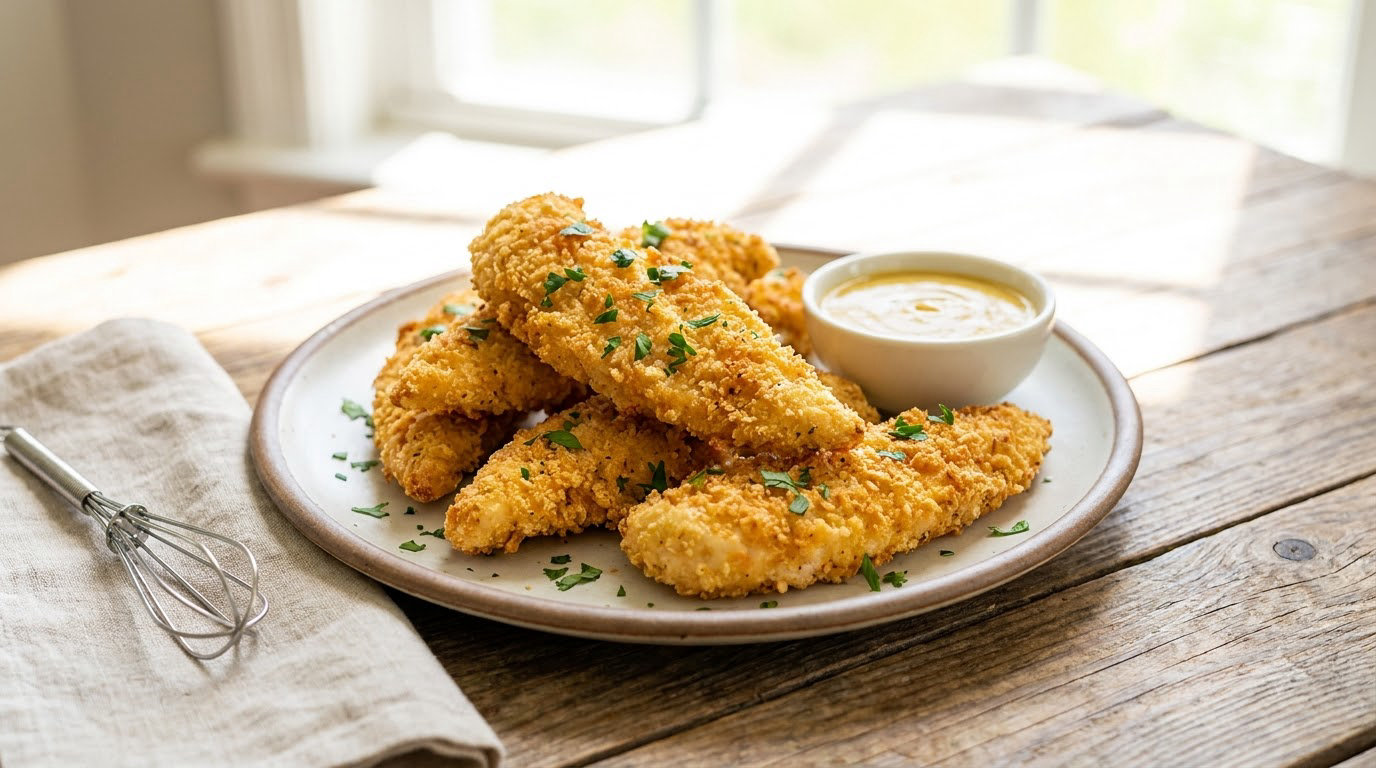
Chicken tenders cook fast, taste mild and come in a shape small hands can manage, which makes them the most reliable weeknight dinner in most houses. These easy chicken tender recipes for kids cover ten genuinely different flavours, from a plain baked version that picky eaters accept to skillet dishes with a sweet glaze, and every one is written out as a full recipe with quantities, times and doneness cues.
They are built for a Tuesday when everyone is hungry and nobody is patient. Most take 30 minutes from cutting board to plate, and each one tells you how to scale the flavour down for a toddler who will not touch anything green or spicy. Scroll to the table first if you want to pick, or start with the baked tenders and get a feel for the rest.
Table of Contents
Easy Chicken Tender Recipes for Kids at a Glance
| Recipe | Time | Difficulty | Best for |
|---|---|---|---|
| 1. Crispy Baked Chicken Tenders | 30 min | Easy | Pickiest eaters and first-time cooks |
| 2. Honey Garlic Chicken Tenders | 22 min | Easy | Kids who like sweet and savoury |
| 3. Parmesan Herb Chicken Tenders | 33 min | Easy | Cheese lovers and picky eaters who want crunch |
| 4. Buffalo-Style Chicken Tenders | 25 min | Easy | Older kids who want a dip-worthy sauce |
| 5. BBQ Chicken Tenders | 38 min | Easy | Sheet-pan dinners and leftovers |
| 6. Lemon Pepper Chicken Tenders | 22 min | Easy | Bright, light flavours and lunches |
| 7. Chicken Tenders with Applesauce | 25 min | Easy | Toddlers and mildest palates |
| 8. Mexican-Style Chicken Tenders | 32 min | Easy | Rice nights and mild taco fans |
| 9. Stuffed Chicken Tenders | 42 min | Medium | Kids who like cheese pulls and pinwheels |
| 10. One-Pan Teriyaki Chicken Tenders | 27 min | Easy | Busy nights with one pan to wash |
1. Crispy Baked Chicken Tenders
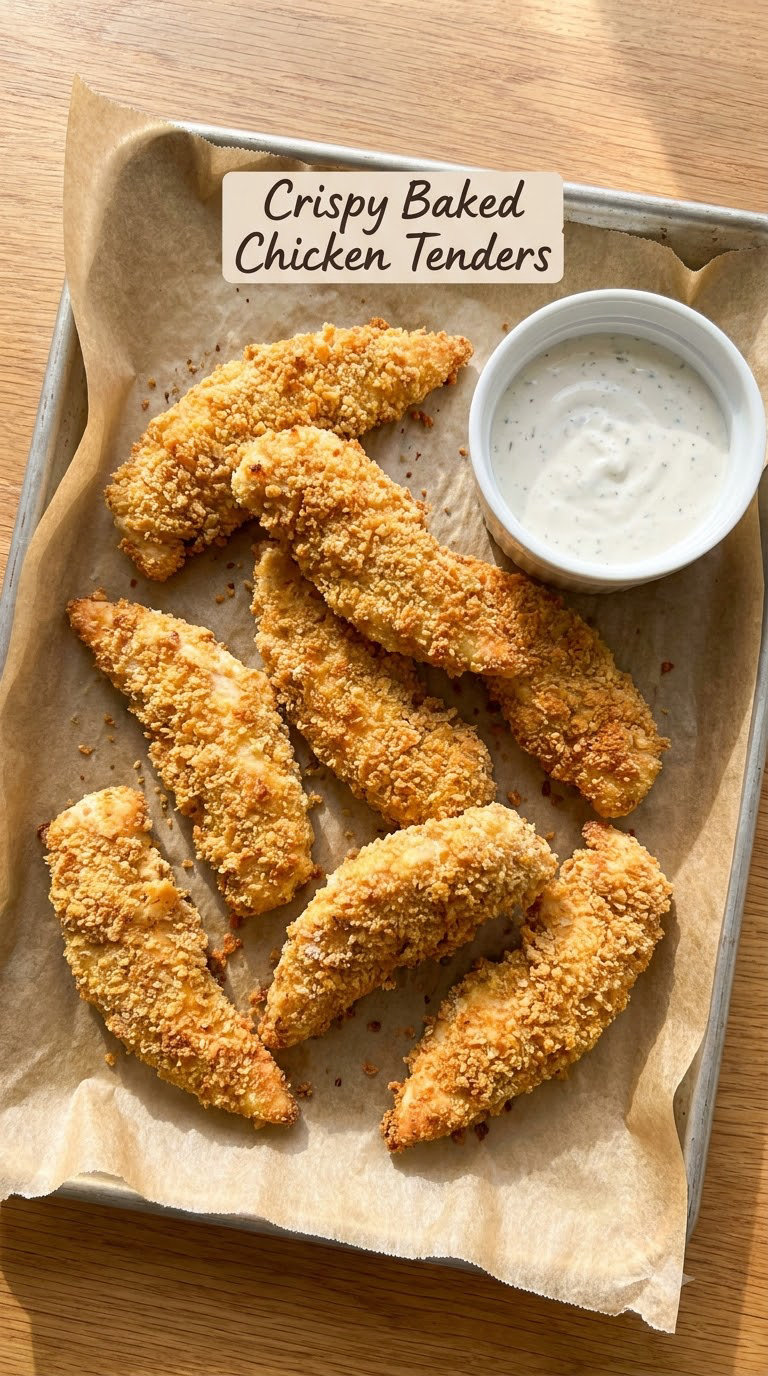
This is the one I make most often. It is the version that works for a child who has strong opinions about what food is allowed on the plate, and it teaches the basic breading method the other nine recipes build on.
Yield: 4 servings · Prep: 15 min · Cook: 15-18 min · Total: 30 min · Difficulty: Easy
Ingredients
- 1.5 lb (680 g) chicken tenderloins
- 1 cup (120 g) all-purpose flour
- 1 tsp (6 g) fine salt, divided
- 1/2 tsp (3 g) black pepper
- 2 large eggs, beaten
- 1/2 cup (120 ml) milk
- 1.5 cups (180 g) panko breadcrumbs
- 1/2 tsp (2 g) garlic powder
- 2 tbsp (30 ml) olive oil or avocado oil
Instructions
- Heat the oven to 425°F (220°C) and line a rimmed baking sheet with parchment paper or foil.
- Set out three shallow bowls in a row: flour with half the salt and the pepper, beaten eggs with the milk, and panko mixed with the remaining salt, garlic powder and 1 tbsp of oil.
- Lay the tenderloins out and pat them dry with paper towels.
- Dredge each tender in the flour, turning to coat both sides, and shake off the excess.
- Move the floured tenders into the egg bowl, then into the panko, pressing the crumbs on with your fingertips so every side is covered.
- Arrange the tenders on the sheet in a single layer with a finger’s width between them, then drizzle with the remaining oil.
- Bake for 15 to 18 minutes, until the crumbs are deep golden and the thickest tender reads 165°F (74°C) on an instant-read thermometer.
- Rest on the sheet for 3 minutes before serving so the juices settle.
Tip: Parchment plus a light oil drizzle is what keeps the bottoms from going soft. Use a wire rack set over the sheet if you want maximum crunch on both sides.
Swap it: For a plain version, leave the garlic powder out of the panko and season the flour with salt only. That is the version my youngest will eat without negotiating.
Storage: Keeps 3 to 4 days in the fridge in a single layer or sealed container. Freeze up to 3 months on a tray first, then transfer to a bag. Reheat at 400°F (205°C) for 8 to 10 minutes so the crust comes back.
1.1 Keep the Tenders Crisp and Kid-Friendly
Seasoning is where most kid-friendly tender recipes either win or lose. Garlic powder, dried parsley and a little paprika read as savoury without reading as hot, and children tend to accept flavours they can name.
Pound the chicken to an even 3/4 inch thickness with a rolling pin before breading. Even thickness means even cooking, which stops the thin ends from drying out before the middle is done.
Watch the pan rather than the clock for the last three minutes. The crumbs go from pale to golden in about a minute once they start, and anything past deep gold is past what most kids want.
2. Honey Garlic Chicken Tenders
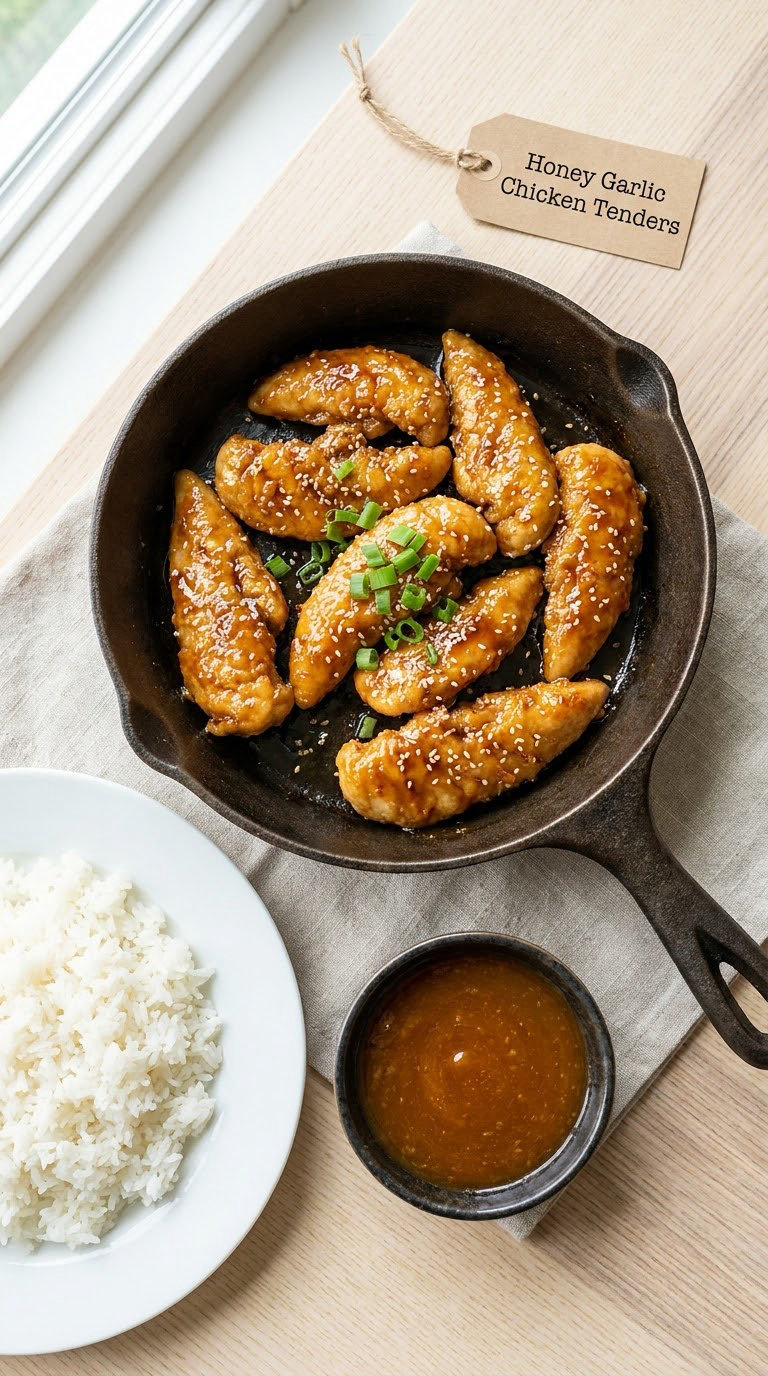
A sticky, lightly garlicky glaze that forms in the pan while the chicken cooks, so there is no breading to dry out in the oven. It is a skillet recipe from start to finish and the sauce doubles as a dip.
Yield: 4 servings · Prep: 10 min · Cook: 12 min · Total: 22 min · Difficulty: Easy
Ingredients
- 1.5 lb (680 g) chicken tenderloins
- 2 tbsp (30 ml) olive oil
- 1/2 tsp (3 g) fine salt
- 1/4 tsp (1.5 g) black pepper
- 3 cloves garlic, thinly sliced
- 1/3 cup (80 ml) honey
- 2 tbsp (30 ml) low-sodium soy sauce
- 1 tbsp (15 ml) apple cider vinegar
- 1 tsp (5 ml) cornstarch mixed with 1 tbsp water
Instructions
- Pat the tenders dry and season both sides with the salt and pepper.
- Heat the oil in a large skillet over medium-high heat until it shimmers.
- Lay the tenders in the pan in a single layer and cook undisturbed for 3 minutes, until the underside is browned.
- Turn the tenders and cook for 2 minutes on the second side.
- Push the chicken to the edges of the pan and add the garlic for 30 seconds, until fragrant.
- Pour in the honey, soy sauce and vinegar and let it bubble for 1 minute.
- Stir the cornstarch slurry and pour it in, swirling the pan, until the sauce thickens to a light glaze.
- Return the tenders to the middle, coat them in the sauce, and cook until the thickest piece reads 165°F (74°C) on a thermometer.
- Rest for 3 minutes off the heat so the glaze sets instead of running off.
Tip: Balance the sweetness by holding back 1 tbsp of honey at first. Add it at the end if the glaze needs more body for dipping.
Swap it: For a dairy-free, gluten-free version, use tamari instead of soy sauce and skip the cornstarch. The glaze loosens as it cools, which suits a younger child better.
Storage: Refrigerate 3 to 4 days with the tenders sitting in the sauce. Freeze in a single layer up to 2 months. Reheat gently in a covered skillet over low heat so the sauce does not scorch.
3. Parmesan Herb Chicken Tenders
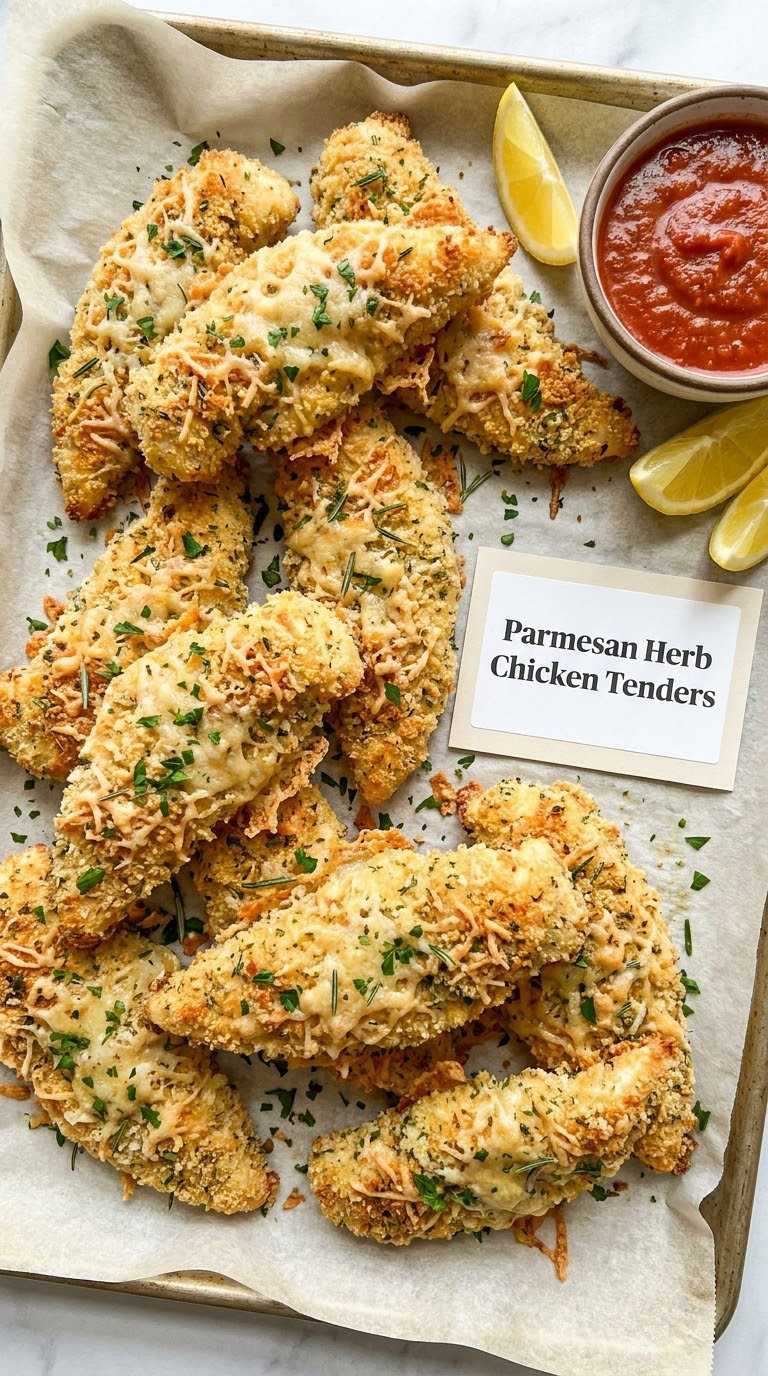
The coating for this one is mixed directly into the breadcrumbs, so there is no separate Parmesan step and nothing to fall off in the oven. Children who refuse plain breaded chicken often accept it because the cheese reads as a different food.
Yield: 4 servings · Prep: 15 min · Cook: 18 min · Total: 33 min · Difficulty: Easy
Ingredients
- 1.5 lb (680 g) chicken tenderloins
- 1/2 cup (65 g) all-purpose flour
- 1 tsp (6 g) fine salt
- 2 large eggs, beaten with 1 tbsp water
- 1.5 cups (150 g) panko breadcrumbs
- 3/4 cup (75 g) grated Parmesan, divided
- 2 tbsp (8 g) dried parsley or Italian seasoning
- 1/2 tsp (1.5 g) garlic powder
- 2 tbsp (30 ml) olive oil
Instructions
- Heat the oven to 425°F (220°C) and line a baking sheet.
- Combine the panko, 1/2 cup of the Parmesan, the parsley, garlic powder and half the salt in a bowl.
- Put the flour and remaining salt in a second bowl and the beaten eggs in a third.
- Pound the tenders to an even thickness, then flour, egg and crumb them in that order.
- Arrange on the sheet, drizzle with the olive oil, and scatter the remaining 1/4 cup Parmesan over the tops.
- Bake for 16 to 18 minutes, until the coating is deep golden and firm to the touch.
- Check the thickest tender for 165°F (74°C) and rest the tray for 3 minutes before serving.
Tip: Grate the Parmesan yourself if you can. Pre-shredded cheese has anti-caking powder in it, which melts into a gritty patch instead of a golden crust.
Swap it: Swap half the Parmesan for finely crushed panko-style crackers for a crunchier, less salty crust, or use 1 cup (90 g) shredded mozzarella for a milder cheese pull. Both contain dairy.
Storage: Best the same day. Refrigerate leftovers 3 to 4 days in a single layer, and freeze up to 2 months. Reheat on a rack at 400°F (205°C) for 8 minutes.
4. Buffalo-Style Chicken Tenders
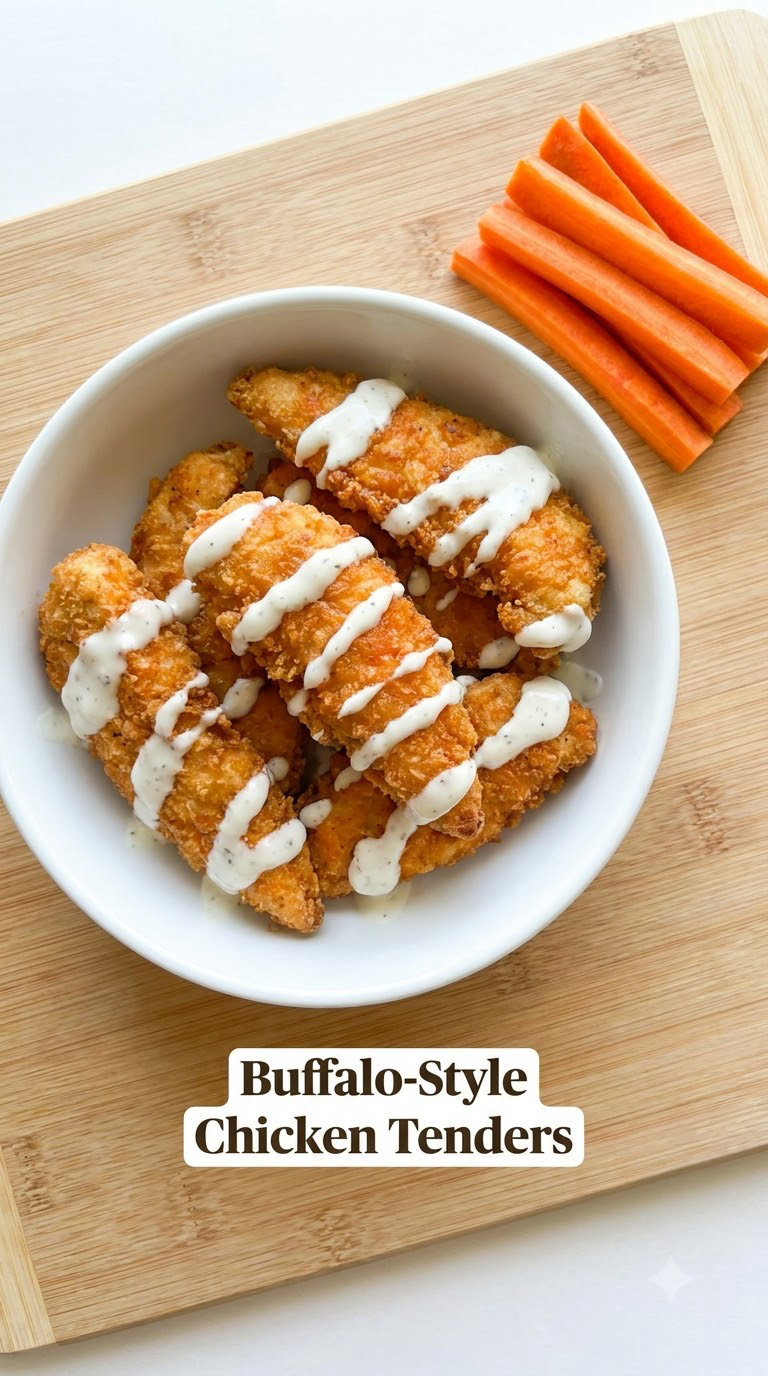
Kids call this one sauced tenders, and the version here has no capsaicin at all. The buffalo flavour comes from vinegar, garlic and a little Worcestershire, so younger children can eat it while older kids still get the tang.
Yield: 4 servings · Prep: 10 min · Cook: 15 min · Total: 25 min · Difficulty: Easy
Ingredients
- 1.5 lb (680 g) chicken tenderloins
- 1 tsp (6 g) fine salt
- 1/4 tsp (1.5 g) black pepper
- 2 tbsp (30 ml) olive oil
- 4 tbsp (60 ml) unsalted butter
- 1/4 cup (60 ml) mild hot sauce, a no-heat kind for young children
- 1 tsp (5 ml) Worcestershire sauce
- 1/2 tsp (2 g) garlic powder
- 1 tsp (5 ml) white vinegar
Instructions
- Season the tenders with the salt and pepper and let them sit for 5 minutes while the oven heats to 425°F (220°C).
- Heat the oil in a large oven-safe skillet over medium-high heat.
- Sear the tenders 3 minutes per side, until browned on both sides but not cooked through.
- Tip the pan and discard the excess oil.
- Add the butter and let it melt without browning, then stir in the hot sauce, Worcestershire, garlic powder and vinegar.
- Spoon the sauce over the chicken and turn each tender once to coat.
- Transfer the skillet to the oven and bake for 6 to 8 minutes, until the thickest tender reads 165°F (74°C).
- Let the tenders rest in the pan for 2 minutes so the sauce thickens slightly.
Tip: Serve a cup of plain ranch or blue cheese dressing alongside rather than pouring it over. The cooling element lets kids taste the sauce on their own terms.
Swap it: Use 1/2 cup (120 ml) mild barbecue sauce with 1 tbsp of the vinegar instead of hot sauce for a sweet version that suits a child who reacts to any pepper at all. Both swaps pull in dairy if you serve ranch, so check labels for a dairy-free dressing.
Storage: Refrigerate 3 to 4 days, sauce included. Freezing dulls the sauce, so keep it for same-day leftovers. Reheat in a covered skillet on low for 5 to 6 minutes.
5. BBQ Chicken Tenders
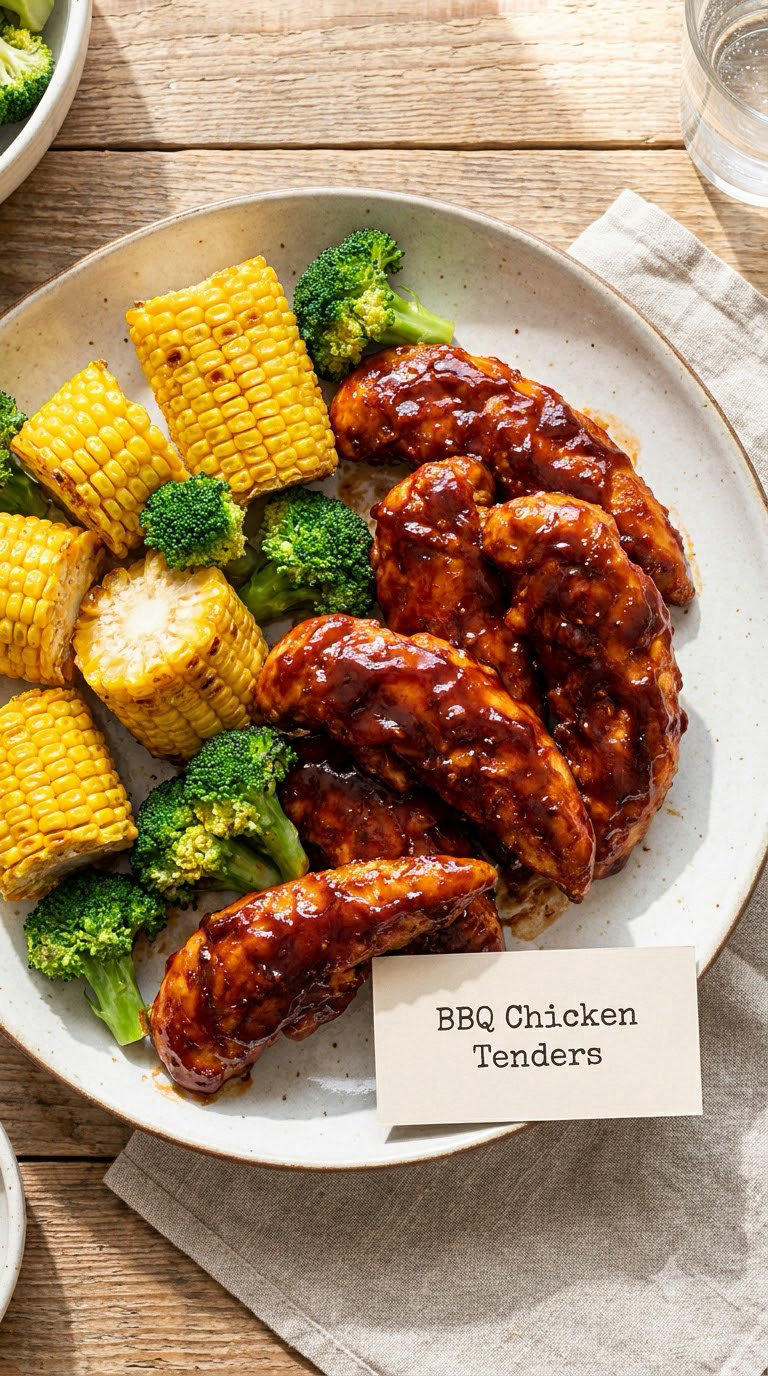
The slowest of the ten and the one that leaves the kitchen tidiest, because it all happens on one sheet pan with vegetables. It holds up well in a lunchbox, which makes it a useful Sunday cook. If you like the one-pan idea, my chicken and sweet potato recipes use the same method with a sweeter vegetable.
Yield: 4 servings · Prep: 10 min · Cook: 28 min · Total: 38 min · Difficulty: Easy
Ingredients
- 1.5 lb (680 g) chicken tenderloins
- 1 cup (120 g) all-purpose flour
- 1 tsp (6 g) fine salt
- 1/2 tsp (3 g) black pepper
- 1 large egg, beaten
- 1/2 cup (75 ml) milk
- 1.5 cups (180 g) panko breadcrumbs
- 1/2 cup (120 ml) barbecue sauce, divided
- 2 cups (300 g) corn kernels or broccoli florets
- 1 tbsp (15 ml) olive oil
Instructions
- Heat the oven to 425°F (220°C) and line a large sheet pan.
- Set up the flour, beaten egg with milk, and panko seasoned with salt and pepper.
- Bread the tenders and lay them on one half of the pan, leaving the other half clear.
- Toss the corn or broccoli with the olive oil and spread it on the empty side.
- Bake for 12 minutes without any sauce on the chicken.
- Brush the tenders with 1/3 cup (80 ml) of the barbecue sauce and return the pan to the oven.
- Bake for 8 to 10 minutes more, basting once, until the chicken reads 165°F (74°C) and the edges of the sauce look darkened.
- Drizzle the vegetables with the remaining barbecue sauce and rest everything for 3 minutes before serving.
Tip: Adding the sauce in two stages is what stops it burning. Most barbecue sauce has sugar in it, and a single thick glaze in a hot oven goes from lacquered to black in under a minute.
Swap it: For a gluten-free plate, skip the flour and panko and brush the tenders with the barbecue sauce straight from the jar. For a plain version, use the sauce on the vegetables only and leave the chicken unsauced.
Storage: Refrigerate 3 to 4 days; the vegetables dry out first, so store them separately. Freeze the chicken alone for up to 3 months. Reheat at 400°F (205°C) for 8 to 10 minutes.
6. Lemon Pepper Chicken Tenders
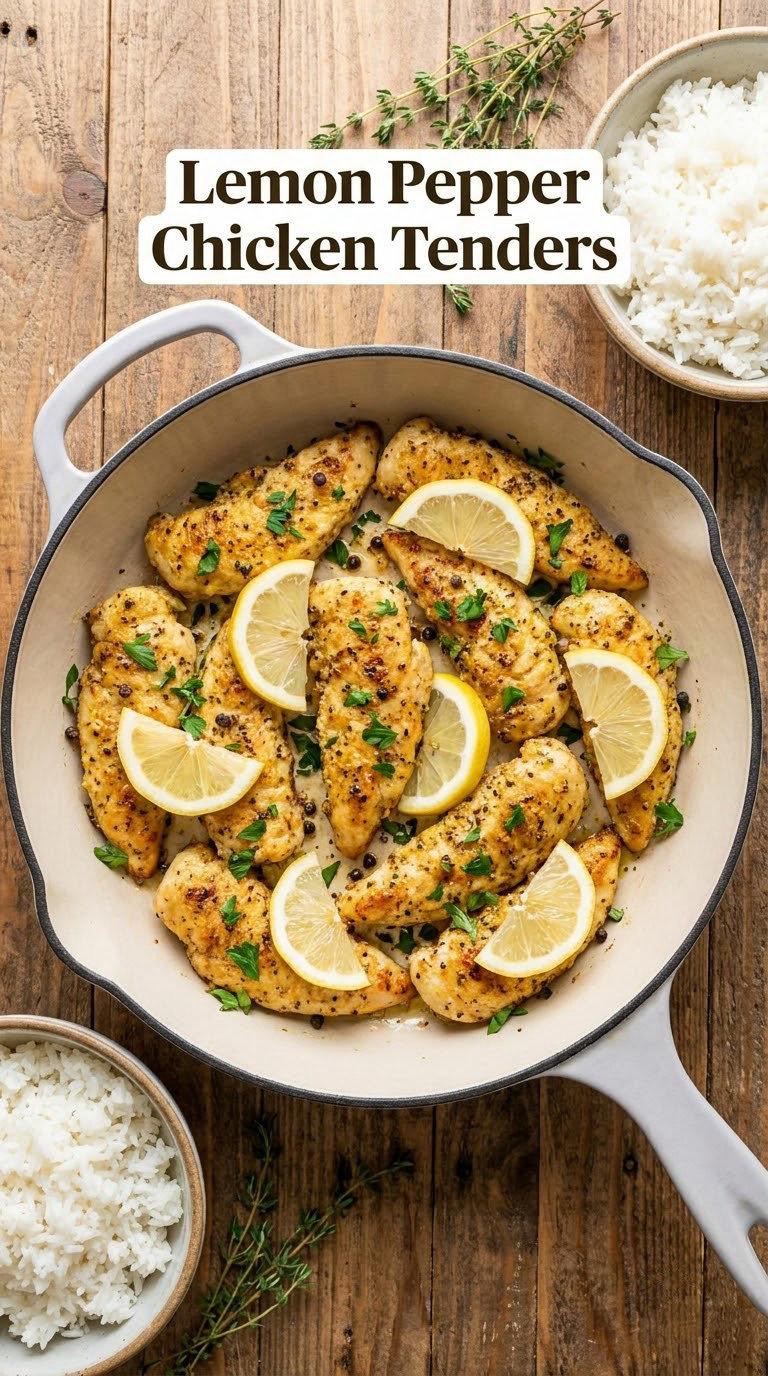
The lightest recipe here and the one that cooks fastest. There is no breading, so it suits a family split between breaded and unbreaded eaters, and it reheats without losing anything.
Yield: 4 servings · Prep: 10 min · Cook: 12 min · Total: 22 min · Difficulty: Easy
Ingredients
- 1.5 lb (680 g) chicken tenderloins
- 2 tbsp (30 ml) olive oil
- 1 tsp (6 g) fine salt
- 1 tsp (3 g) black pepper
- 2 tbsp (30 ml) fresh lemon juice
- 1 clove garlic, minced
- 1 tbsp (8 g) unsalted butter
- 2 tbsp (8 g) chopped parsley
Instructions
- Pat the tenders dry and season with the salt and pepper.
- Heat the oil in a large skillet over medium-high heat until it shimmers.
- Lay the tenders in a single layer and cook 3 minutes on the first side without moving them.
- Turn and cook 2 to 3 minutes more, until both sides are opaque at the edges.
- Push the tenders aside and lower the heat to medium.
- Add the lemon juice and garlic to the empty part of the pan and let it bubble for 30 seconds.
- Stir in the butter and parsley, then spoon the pan sauce over the chicken.
- Cook 1 minute more, until the thickest tender reads 165°F (74°C) and the sauce has turned cloudy and glossy.
Tip: Cut the lemon in half and squeeze it in yourself before the juice goes in. Squeezing over the hot pan keeps the oil emulsified and the sauce shiny instead of separated.
Swap it: For a slightly sweeter finish, add 1 tsp honey with the butter. Skip the parsley and add chopped basil for a summer version, or use lime juice for a more citrus-forward change.
Storage: Refrigerate 3 to 4 days, spooning the pan sauce over the chicken. Freezes well for up to 2 months. Reheat in a covered skillet on low for 4 to 5 minutes and add a splash of water if it looks dry.
7. Chicken Tenders with Applesauce
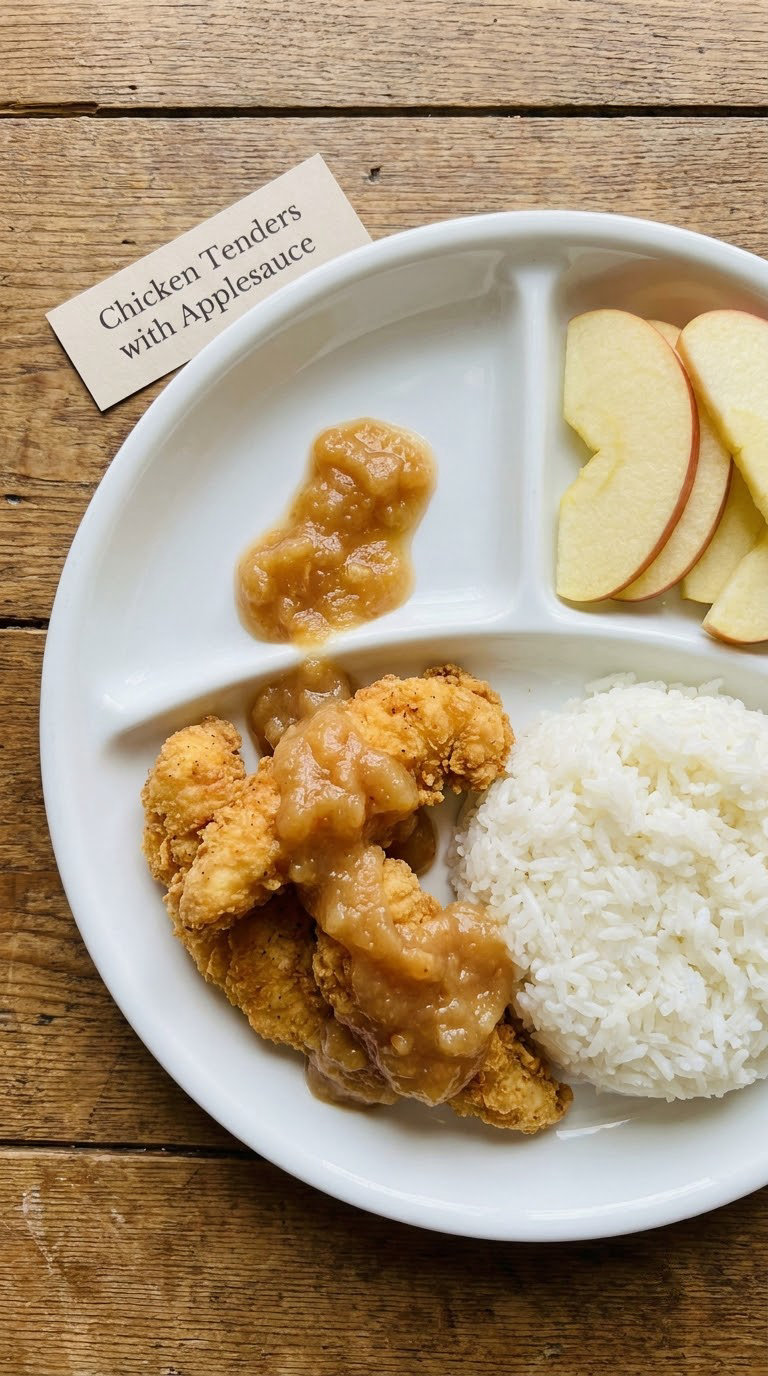
This is the recipe I make for anyone under four. No salt, no pepper and no breading, just tender chicken and a naturally sweet sauce that comes together while the chicken simmers.
Yield: 4 servings · Prep: 5 min · Cook: 20 min · Total: 25 min · Difficulty: Easy
Ingredients
- 1.5 lb (680 g) chicken tenderloins, sliced into 1 inch pieces
- 1.5 cups (355 ml) unsweetened applesauce
- 1/2 cup (120 ml) water or low-sodium chicken stock
- 1 tsp (2 g) ground cinnamon, divided
- 1/2 tsp ground ginger
- 1 tbsp (15 ml) honey, optional
Instructions
- Put the tenders in a large skillet with a splash of water and bring to a simmer over medium heat.
- Cover and cook for 8 minutes, until the pieces are no longer pink at the edges.
- Add the applesauce, water or stock, half the cinnamon and the ginger.
- Stir, bring back to a gentle bubble, then lower the heat and simmer partially covered for 10 minutes.
- Stir every few minutes and stir in the honey if the sauce tastes flat.
- Break the chicken apart with a spoon and check that the thickest piece reads 165°F (74°C).
- Stir in the remaining cinnamon and thin with a little water if the sauce is thicker than you want.
Tip: Stir the sauce often during the last five minutes. Applesauce catches on the bottom of a skillet long before it catches in a pot, and the fond behind it turns bitter.
Swap it: For a dairy-free, gluten-free version it is already both. Use pear sauce or unsweetened berry applesauce in place of plain applesauce, or add 1/4 cup of finely grated carrot for extra vegetables.
Storage: Refrigerate 3 to 4 days and reheat with a splash of water on the stove. This one also freezes well for up to 2 months, though the sauce separates slightly and just needs stirring.
8. Mexican-Style Chicken Tenders
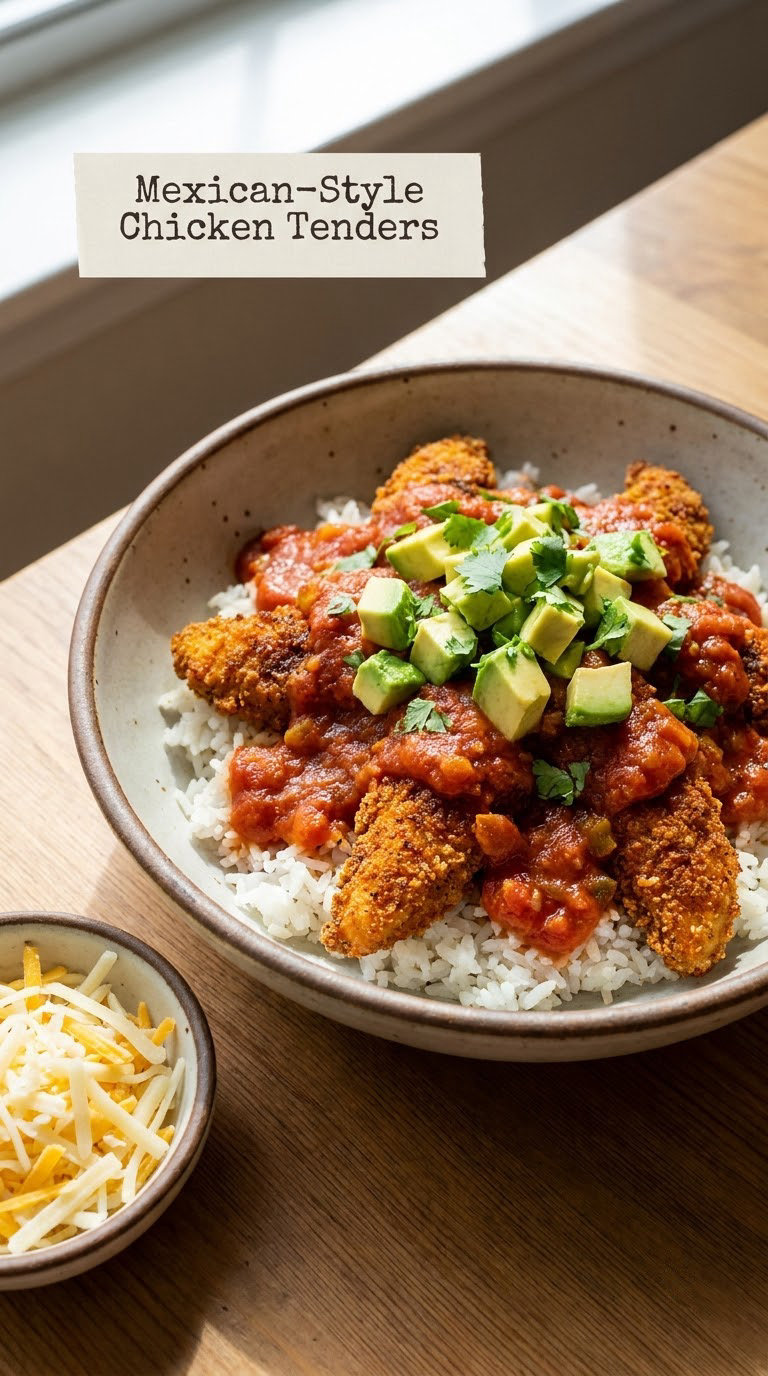
A baked dish with a mild tomato sauce poured over the top, the kind of plate a child will eat with a spoon and a piece of corn on the side. Serve it over rice and it becomes a complete dinner. My chicken thigh and rice recipes go the same route with a slower-cooking cut.
Yield: 4 servings · Prep: 12 min · Cook: 20 min · Total: 32 min · Difficulty: Easy
Ingredients
- 1.5 lb (680 g) chicken tenderloins
- 1 tsp (6 g) fine salt
- 1/2 tsp (3 g) black pepper
- 1/2 tsp (2 g) ground cumin
- 1/2 tsp (1.5 g) chili powder, mild
- 1 cup (240 ml) mild salsa
- 1/2 cup (120 ml) tomato sauce
- 1/4 cup (60 ml) low-sodium chicken stock
- 1 cup (185 g) cooked white or brown rice
- 1/4 cup (30 g) shredded cheddar, optional
Instructions
- Heat the oven to 400°F (205°C) and lightly oil a 9×13 inch baking dish.
- Season the tenders with the salt, pepper, cumin and chili powder.
- Whisk the salsa, tomato sauce and stock together in a separate bowl.
- Arrange the seasoned tenders in the dish and pour the sauce around them, not over them, so the top of each piece stays visible.
- Bake uncovered for 18 to 20 minutes, until the chicken reads 165°F (74°C) and the sauce bubbles thickly at the edges.
- Stir the sauce and check the thickest tender with a thermometer before serving.
- Serve over the rice with the shredded cheddar, plus avocado and corn if the table wants them.
Tip: Pouring the sauce around the chicken rather than over it keeps the surfaces from steaming. You get a slightly thickened, faintly caramelised top instead of a wet one.
Swap it: For a no-heat version, leave out the chili powder and use mild salsa with no pepper in it. For dairy-free, skip the cheddar and add avocado and cilantro instead. For gluten-free, serve with corn tortillas rather than flour tortillas on the side.
Storage: Refrigerate 3 to 4 days with the rice stored separately. Freeze the chicken and sauce together for up to 2 months and reheat covered in the microwave until steaming, giving it a stir halfway through.
9. Stuffed Chicken Tenders
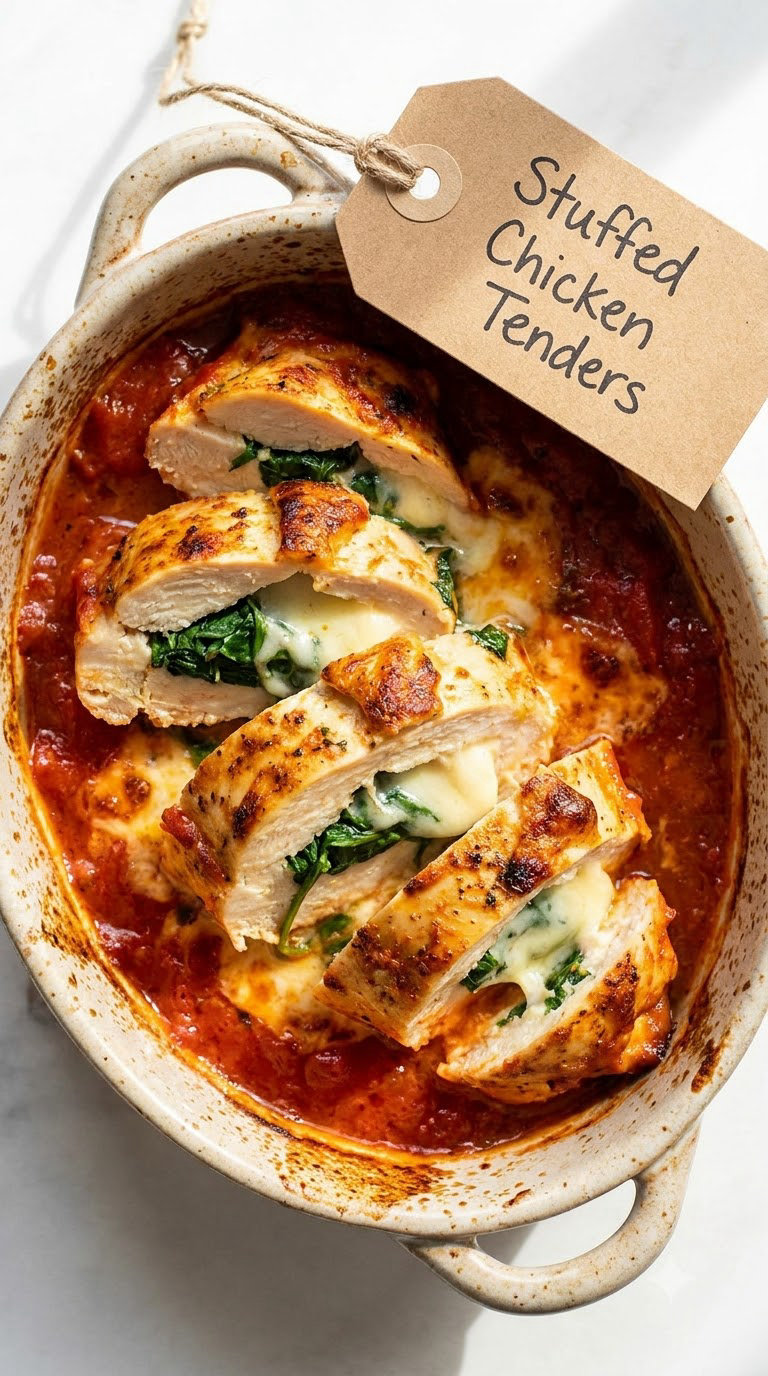
The only recipe here with a fiddly step, and it is worth it. Pound the chicken wide, roll it around spinach and cheese, and bake it until the filling turns into a molten centre that a child can see when you slice it.
Yield: 4 servings · Prep: 20 min · Cook: 22 min · Total: 42 min · Difficulty: Medium
Ingredients
- 1.5 lb (680 g) chicken tenderloins
- 1 tsp (6 g) fine salt
- 1/4 tsp (1.5 g) black pepper
- 1 cup (140 g) shredded mozzarella
- 1 cup (30 g) fresh baby spinach, chopped
- 2 tbsp (30 ml) cream cheese
- 1/2 tsp (2 g) garlic powder
- 1 cup (240 ml) marinara sauce
Instructions
- Heat the oven to 375°F (190°C) and spread the marinara in a 9×13 inch baking dish.
- Place the chicken between two sheets of plastic wrap and pound to an even 1/4 inch thickness, working from the centre out.
- Mix the cream cheese, garlic powder and a pinch of the salt, then spread a thin layer over each flattened tender.
- Scatter the spinach and mozzarella down the middle of each piece, leaving a 1 inch border at the far end.
- Roll each tender tightly from the narrow end and lay it seam-side down in the dish.
- Bake covered with foil for 14 minutes, then uncover and bake 6 to 8 minutes more.
- Check the thickest roll for 165°F (74°C) and let it rest 4 minutes before slicing into two or three pieces each.
Tip: Pin the closed end with a toothpick if the roll springs open in the oven, and take the toothpicks out before serving.
Swap it: Use chopped broccoli and cheddar in place of the spinach and mozzarella, or leave the cheese out entirely for a dairy-free roll. This recipe contains dairy, so it is not suitable for a milk allergy without a substitute.
Storage: Refrigerate 3 to 4 days and reheat in the marinara, covered, for 5 minutes at 350°F (175°C). Freezes up to 2 months if you freeze them unbaked and bake from frozen at 375°F (190°C) for 30 minutes.
10. One-Pan Teriyaki Chicken Tenders
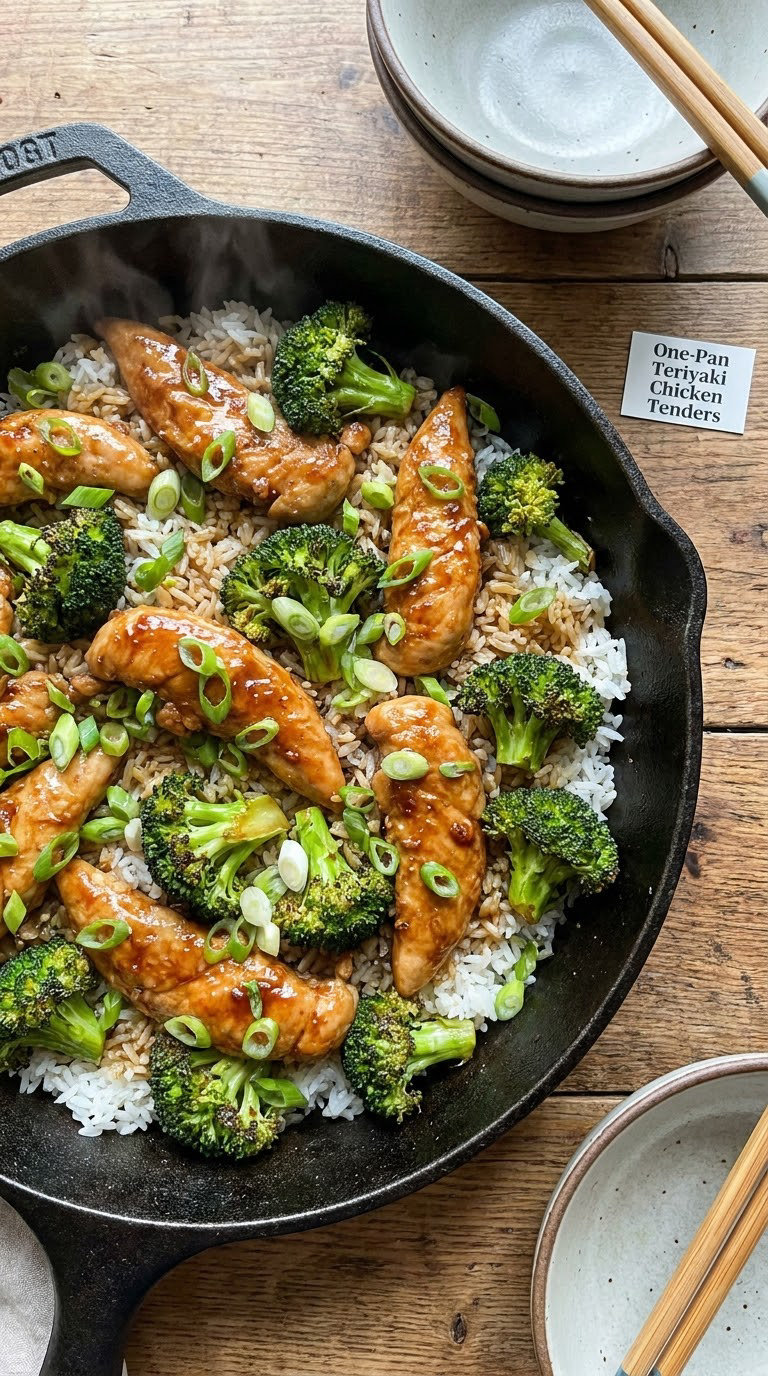
Everything cooks in the same skillet, and the sauce is thickened on the heat rather than with flour, so nothing extra to wash. The version here is a lower-sugar glaze that does not scorch, which matters with kids watching.
Yield: 4 servings · Prep: 12 min · Cook: 15 min · Total: 27 min · Difficulty: Easy
Ingredients
- 1.5 lb (680 g) chicken tenderloins
- 2 tbsp (30 ml) neutral oil, divided
- 1 tsp (6 g) fine salt
- 1/3 cup (80 ml) low-sodium soy sauce
- 2 tbsp (30 ml) rice vinegar
- 2 tbsp (30 ml) honey
- 1 tbsp (15 ml) grated fresh ginger
- 1 tsp (5 ml) toasted sesame oil
- 2 cups (180 g) broccoli florets
- 2 cups (360 g) cooked rice, for serving
- 2 scallions, thinly sliced
Instructions
- Pat the tenders dry and season with the salt.
- Heat 1 tbsp of the oil in a large skillet over medium-high heat and sear the tenders 3 minutes per side, until browned.
- Transfer the chicken to a plate. Do not crowd the pan.
- Lower the heat to medium and add the remaining oil with the broccoli.
- Cook the broccoli 4 minutes, stirring, until the stems are tender and the florets are still bright green.
- Whisk the soy sauce, vinegar, honey and ginger together and pour it into the skillet around the broccoli.
- Let the sauce bubble for 2 minutes, then return the chicken to the pan and spoon the sauce over it.
- Cover and cook 3 to 4 minutes more, until the thickest tender reads 165°F (74°C) and the sauce coats the back of a spoon.
- Take the pan off the heat, stir in the sesame oil and scatter the scallions over the top.
Tip: Take the pan off the heat before adding the sesame oil. It is thin and it burns quickly, and a bitter note in the sauce is hard to fix afterwards.
Swap it: For a lower-sugar version, use 1 tbsp honey with an extra 1 tbsp rice vinegar, or swap the honey entirely for mirin. For gluten-free, use gluten-free tamari and check that the ginger is pure grated ginger rather than a sauce.
Storage: Refrigerate 3 to 4 days with the rice kept separate. The sauced chicken freezes for up to 2 months. Reheat in a covered skillet on low, adding a tablespoon of water if the sauce has gone thick.
Tips for Making These
- Pound to an even thickness. Chicken tenderloins vary a lot in thickness. An even 3/4 inch cooks through at the same rate as it browns, which is what stops the dry ends.
- Use a thermometer, not the clock. Poultry is safe at 165°F (74°C) measured at the thickest point. Most tenders are done a minute or two before the recipe’s upper time limit, and that difference matters for texture.
- Leave space on the sheet pan. Crowding drops the pan temperature and traps steam, which is the main reason breaded tenders turn pale and soft underneath.
- Control sweetness at the sauce stage. Hold back a tablespoon of honey or barbecue sauce, taste the sauce, then add more. It is much easier to fix a thin sauce than a burnt one.
- Season the flour, not the finished tenders. Salt applied before baking works its way into the meat. Salt sprinkled on top sits on the crust and makes it feel too salty for a child.
- Reheat on a rack. A wire rack in a 400°F (205°C) oven keeps the underside crisp. A plate catches steam and puts you back where you started with a soggy bottom.
If you are just starting out, my air fryer chicken breast recipes use the same seasoning logic in a smaller appliance, which is useful if you want tender flavour without a deep coating.
Frequently Asked Questions
What is the easiest chicken tender recipe for kids?
The crispy baked chicken tenders at number one are the easiest: three bowls, one sheet pan, and 15 minutes of oven time with no stirring. There is only one real decision, which is how heavily you season the flour. Start with salt only for a very young child and add garlic powder and pepper for an older one. Everything else happens in the oven while you clear the table.
Can I use frozen chicken tenders for these recipes?
Yes, and it is a good shortcut on a busy weeknight. Thaw them in the fridge overnight, then pat them very dry before cooking, because surface water is the main reason reheated tenders go soft and pale. Fully cooked frozen tenders only need 10 to 12 minutes in a 400°F (205°C) oven, so check them early and take them out the moment they read 165°F (74°C).
How do I keep chicken tenders from getting soggy?
Three things do most of the work. Bake on a wire rack set over a sheet pan so hot air reaches the underside, leave a finger’s width between pieces, and finish with a light drizzle of oil rather than a pour. For sauced versions, brush the sauce on in the last ten minutes instead of at the start, since sauce applied early sits in water and softens the crumb underneath it.
What internal temperature should chicken tenders reach?
Chicken is safe to eat at 165°F (74°C) measured in the thickest part, and that is the number every recipe here is built around. Tenderloins are thin, so check the biggest piece in the pan rather than the one at the edge. Insert the probe from the side and keep it still until it beeps, and note that the meat continues cooking after it leaves the heat.
Which chicken tender recipe is best for a very picky eater?
The applesauce version at number seven is the safest bet for the youngest eaters, since it has no salt, no breading and no strong seasoning. For a child who will eat breaded chicken but nothing else, the baked tenders with plain flour and panko is the one that works. Whichever you choose, serve the sauce on the side so nobody is forced to try it mixed in.
A First Recipe for Busy Family Dinners
Start with the crispy baked chicken tenders. One sheet pan, three bowls, no sauce to scorch while the chicken is resting, and a result most children accept on the first serving, which is the hardest thing to engineer in a weeknight dinner.
From there, the rest of these easy chicken tender recipes for kids are variations on the same idea rather than a whole new set of skills. Cook it once, learn how long your oven takes, and the honey garlic skillet or the teriyaki one-pan becomes an equal effort after that.