
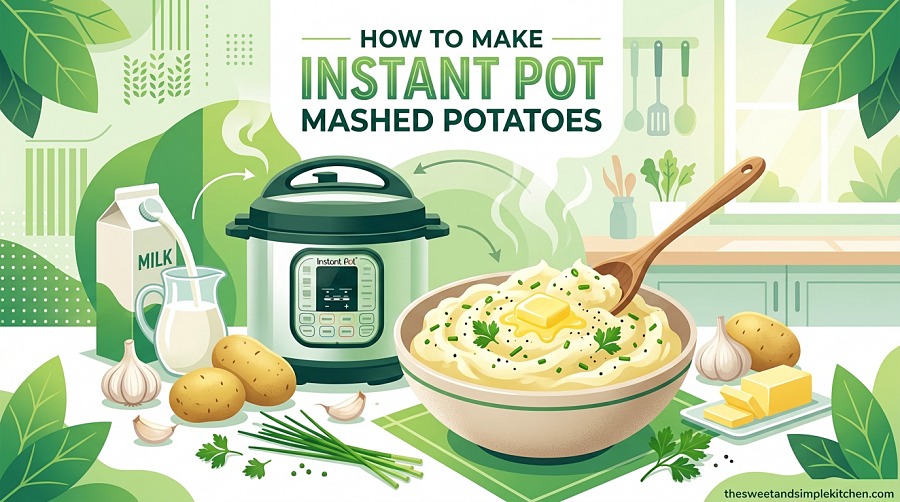
If you have ever stood over a boiling pot of potatoes, watching and waiting, you are going to love learning how to make Instant Pot mashed potatoes. The pressure cooker does all the work in a fraction of the time, and the results are every bit as creamy and buttery as the stovetop version your grandmother made. I have been making mashed potatoes this way for years now, and honestly, I will never go back to the old method.
The biggest advantage? It frees up your stovetop. That matters enormously when you are cooking a big holiday dinner or just trying to get a weeknight meal on the table without juggling four burners at once. You can serve these mashed potatoes alongside our best pork chop recipes or any main dish you love, and they will be ready with barely any hands-on effort.
This guide covers everything: the exact ingredients, step-by-step pressure cooking instructions, troubleshooting for common problems (yes, I am looking at you, gummy potatoes), and plenty of tips I have picked up from our community of home cooks. Let me show you exactly how to make Instant Pot mashed potatoes that turn out fluffy, rich, and perfect every single time.
Table of Contents
Why You Will Love Making Mashed Potatoes in the Instant Pot
The Instant Pot is not just convenient for mashed potatoes — it actually produces a better result for a few key reasons:
- Hands-off cooking: Once you set the pressure, you walk away. No watching for boil-overs or adjusting the heat.
- Frees up stove space: During Thanksgiving or a big Sunday dinner, every burner counts. This keeps one free for gravy, green beans, or whatever else you need.
- Even cooking: Pressure cooking penetrates the potato pieces evenly, so you do not get those annoying half-tender chunks mixed with mushy ones.
- Keep warm setting: Your potatoes stay warm for up to 10 hours without drying out. Perfect for potlucks and holiday timing.
- Less water absorption: Unlike boiling, where potatoes soak up water and get waterlogged, pressure steaming keeps the potato flavor concentrated.
I originally tried pressure cooker mashed potatoes as an experiment, not expecting much. But that first batch was so fluffy and flavorful that I was converted on the spot. Now it is the only method I use, whether I am cooking for two people or making a full Thanksgiving spread.
Ingredients You Will Need
One of the things I love about this recipe is that the ingredient list is short and straightforward. You probably have most of these in your kitchen right now.
Main Ingredients
- 3 pounds russet potatoes (about 6-7 medium potatoes) — Russets are the gold standard for mashed potatoes because of their high starch content and low moisture. If you want to understand why russets make the best mashed potatoes, the food scientists at America’s Test Kitchen have a great breakdown. The short version: their fluffy, dry texture absorbs butter and cream beautifully without turning gummy.
- 1 teaspoon kosher salt — for cooking water
- 4 cups cold water — enough to cover the potatoes by about 1 inch
- 1/2 cup (1 stick) unsalted butter — softened to room temperature
- 1/2 cup warm whole milk — warmed gently so it does not shock the starches
- 1/2 teaspoon kosher salt — for seasoning after mashing (adjust to taste)
- 1/4 teaspoon black pepper — freshly cracked is best
Optional Add-Ins (Pick Your Favorites)
- 1/4 cup sour cream for tanginess
- 1/4 cup cream cheese for extra richness
- 1 teaspoon garlic powder or 2 minced garlic cloves
- 2 tablespoons fresh chives, chopped
- 1 tablespoon fresh parsley, minced
A Note on Potato Selection
Stick with russets for the fluffiest results. Yukon Golds work too and give a slightly denser, creamier texture, but they behave differently under pressure. Red potatoes and waxy varieties are not ideal for mashing — save those for roasting or potato salad. If you do use Yukon Golds, reduce the pressure cooking time to 8 minutes since they cook a bit faster.
How to Make Instant Pot Mashed Potatoes (Step-by-Step)
This is the full recipe with every detail you need. I have included timing notes and tips at each step so nothing is left to guesswork.
Step 1: Prep the Potatoes
Peel the potatoes and cut them into even 1-1/2 inch cubes. Uniform size is really important here — it ensures every piece cooks at the same rate under pressure. If some cubes are twice the size of others, you will end up with a mix of undercooked chunks and disintegrated mush. Take the extra 30 seconds to make them consistent.
Rinse the cut potatoes under cold water to remove excess surface starch. This helps prevent foaming inside the pressure cooker.
Step 2: Load the Instant Pot
Place the cut potatoes into the inner pot of your Instant Pot. Add 4 cups of cold water — the potatoes should be covered by about 1 inch of water. Sprinkle in 1 teaspoon of kosher salt and give it a gentle stir.
If you are using a 6-quart Instant Pot, 4 cups of water is perfect for 3 pounds of potatoes. For an 8-quart pot, you may need an extra cup to ensure the minimum liquid requirement is met and the potatoes cook evenly.
Step 3: Set the Pressure
Secure the lid on the Instant Pot and make sure the steam release valve is set to the Seal position. This is critical — if the valve is open, the pot will never build pressure.
Press the Pressure Cook button (or Manual on older models). Set the timer to 10 minutes on HIGH pressure. The display will show “On” while the pot comes to pressure, which takes about 8-10 minutes.
Cooking time guide: 8 minutes for small cubes or Yukon Golds, 10 minutes for standard 1-1/2 inch russet cubes, and 12 minutes for larger chunks or a completely full pot.
Step 4: Release the Pressure
When the cooking cycle finishes, the Instant Pot will beep. You have two options here, and I have tested both extensively:
Quick Release (my go-to): Carefully turn the steam release valve to the Vent position using a long spoon or kitchen towel to protect your hand from the hot steam. The pressure releases in about 2-3 minutes. This method keeps the potatoes from overcooking while they sit in the hot environment.
Natural Release for 5-10 minutes: Let the pressure come down on its own for 5-10 minutes, then quick release any remaining pressure. This gives slightly softer, more tender potatoes but can push them toward overdone if you cook for the full 12 minutes.
I recommend quick release for most situations, especially if you are using the 10-minute cook time.
Step 5: Drain the Potatoes
Open the lid carefully, tilting it away from you to avoid the steam. Check that the potatoes are fork-tender by inserting a fork into the largest piece — it should slide in and out with zero resistance.
Drain the potatoes in a colander set in the sink. Give them a few gentle shakes to remove excess water. You want them fairly dry before mashing so the butter and cream can do their job without being diluted.
Step 6: Add Butter and Milk
Return the drained potatoes to the Instant Pot inner pot (or transfer to a large mixing bowl if you prefer). Add the room-temperature butter cubes and let them sit on the hot potatoes for about 1 minute to soften and melt.
Pour in the warm milk gradually — do not dump it all in at once. The key to creamy texture is adding liquid slowly while you mash. Cold milk will shock the hot starches and can make the potatoes seize up and get sticky.
Step 7: Mash to Perfection
Using a standard potato masher, press down and fold gently. Work in a rhythmic press-and-turn motion, and stop when the potatoes look smooth. This is the single most important step in the entire process.
Over-mashing is the number one cause of gummy, paste-like mashed potatoes. When you mash too aggressively or too long, you break down the starch granules, which release a gluey substance that ruins the texture. Stop while you are ahead — a few small lumps are infinitely better than a bowl of wallpaper paste.
Season with 1/2 teaspoon kosher salt and 1/4 teaspoon black pepper. Taste and adjust. Transfer to a serving bowl, top with an extra pat of butter and fresh chives if you like, and serve immediately.
Quick Release vs Natural Release: Which Should You Use?
This question comes up constantly in Instant Pot communities, and almost no recipe addresses it clearly. After testing both methods side by side many times, here is what I have found.
Quick Release stops the cooking process almost immediately after the timer goes off. The potatoes come out with a bit more structure and bite to them. This is ideal if you like your mashed potatoes fluffy with distinct body rather than ultra-smooth. It is also faster — you get from raw potatoes to the table about 5-10 minutes sooner.
Natural Release lets the potatoes continue cooking gently in the residual heat and pressure. If you cook for 8 minutes and then natural release for 10, the potatoes end up softer and more tender. This can be nice for an ultra-smooth mash, but you run the risk of overcooking if you started with a longer timer.
My recommendation: use 10 minutes on HIGH pressure with a quick release as your default. This is the sweet spot that gives you fully cooked, fluffy potatoes with no risk of them turning to mush.
If you want to try the method shared by community member Denise, who I found in the Instant Pot forums, she pressure cooks a full 5-pound bag with skins on for 8 minutes using just 3/4 cup of chicken broth, then does a 10-minute natural release. Her method produces intensely flavored potatoes because there is almost no water to drain — you mash right in the pot. It is a fantastic technique, though it takes some practice to get the liquid ratio right for mashing.
7 Tips for the Best Instant Pot Mashed Potatoes
These tips come from years of making this recipe, plus the best advice I have gathered from our Instant Pot cooking community. Every single one makes a real difference.
- Cut potatoes into uniform pieces. I know I already said this, but it bears repeating. Uneven pieces mean uneven cooking. Aim for 1-1/2 inch cubes across the board. It takes an extra minute and saves you from picking out hard chunks later.
- Use room-temperature butter and warm milk. Cold dairy is the enemy of smooth mashed potatoes. When cold butter hits hot potatoes, it firms up into little clumps instead of blending smoothly. Cold milk makes the starches seize. Take the butter out of the fridge 30 minutes before you start, and warm the milk in the microwave for about 30 seconds.
- Do not over-mash. I cannot stress this enough. A potato masher is your best tool here. Resist the urge to use a hand mixer or stand mixer unless you want gummy potatoes. Mash just until smooth and then stop immediately.
- Dry the potatoes well after draining. Excess water dilutes the butter and cream, giving you watery, bland potatoes. After draining, let the potatoes sit in the colander for a minute, then give them a gentle shake. Some cooks even return them to the warm pot for 30 seconds to evaporate remaining moisture.
- Season in layers. Add salt to the cooking water (1 teaspoon), add salt after mashing (1/2 teaspoon), and always taste before serving. Layered seasoning builds more complex flavor than dumping all the salt in at the end.
- Scale the water, not just the potatoes. If you are doubling the recipe for a crowd, you do not need to double the water. The potatoes just need to be covered by about 1 inch. For a doubled batch in an 8-quart pot, 6 cups of water is usually plenty. Too much water means more draining and potentially waterlogged potatoes.
- Use the Keep Warm setting wisely. If your potatoes are done before the rest of the meal, transfer them to a slow cooker on the warm setting, or keep them in the Instant Pot on Keep Warm. Cover the surface with a layer of butter or plastic wrap directly on the potatoes to prevent a skin from forming. They will stay good for up to 2 hours this way.
Troubleshooting: Why Are My Mashed Potatoes Gummy?
If your mashed potatoes turned out gluey, pasty, or stretchy instead of fluffy, you are not alone. This is the single most common complaint from Instant Pot users, and it is completely preventable once you understand what causes it.
The science: Potatoes contain two types of starch — amylose and amylopectin. When you mash potatoes too aggressively or too long, you rupture the starch granules inside the potato cells. These ruptured granules release sticky starch paste into your potatoes, and that paste is what gives you that dreaded gummy texture. It is the same principle as over-kneading bread dough — there is a point of no return.
What causes it:
- Using an electric mixer (hand mixer, stand mixer, or immersion blender)
- Mashing for too long, even with a manual masher
- Adding cold dairy that causes starches to seize and clump
- Using a food processor (this is basically guaranteed to make paste)
How to prevent it: Use a manual potato masher and stop as soon as the potatoes reach your desired consistency. If you want ultra-smooth potatoes, invest in a potato ricer or food mill — these press the potatoes through small holes without activating the starches, so you get silkiness without gumminess.
Can you fix gummy potatoes? Honestly, not really. Once the starches have ruptured, there is no going back. Your best bet is to repurpose them into potato pancakes, potato soup, or shepherd’s pie topping where the texture matters less. Then try again with a lighter hand next time.
Delicious Variations and Add-Ins
Plain buttery mashed potatoes are perfect on their own, but sometimes you want to mix things up. These are the variations I come back to most often, and each one has been tested multiple times.
Garlic Mashed Potatoes: Add 2 minced garlic cloves to the Instant Pot with the raw potatoes before pressure cooking. The garlic softens and mellows during cooking, then mashes right into the potatoes. Alternatively, roast a whole head of garlic separately and squeeze the soft cloves into the finished mash.
Sour Cream and Chive: Reduce the milk to 1/4 cup and add 1/4 cup sour cream after mashing. Fold in 2 tablespoons of fresh chopped chives. This gives the potatoes a slight tang that pairs beautifully with roasted meats.
Loaded Baked Potato Mash: After mashing, fold in 1/2 cup shredded sharp cheddar cheese, 4 crumbled strips of cooked bacon, and 2 tablespoons chopped scallions. Top with extra cheese and sour cream. This is always a hit at potlucks.
Herb-Roasted Style: Add 1 tablespoon fresh rosemary (finely chopped) and 1 tablespoon fresh thyme leaves to the butter before adding it to the hot potatoes. The herbs bloom in the residual heat and fill the potatoes with an earthy aroma.
Buttermilk Mashed Potatoes: Replace the whole milk with 1/2 cup buttermilk for a tangy, Southern-style flavor. Make sure the buttermilk is at room temperature before adding it.
Make It Without Milk: Swap the milk for 1/2 cup warm chicken or vegetable broth. You still get creamy potatoes with a savory depth, and it works great for anyone avoiding dairy (use olive oil instead of butter too).
Storage, Reheating, and Make-Ahead Instructions
If you are cooking for a crowd or planning ahead for a holiday meal, here is everything you need to know about storing and reheating your Instant Pot mashed potatoes.
Refrigerator Storage
Let the mashed potatoes cool to room temperature, then transfer them to an airtight container. Press a sheet of plastic wrap directly against the surface of the potatoes before sealing the lid — this prevents a skin from forming. Store in the refrigerator for up to 4-5 days.
Freezer Storage
Mashed potatoes freeze surprisingly well. Portion them into freezer-safe containers or gallon zip-top bags (squeeze out the air). Flatten the bags for faster thawing. Frozen mashed potatoes keep for up to 2 months. Thaw overnight in the refrigerator before reheating.
Note: potatoes with higher fat content (more butter, cream cheese, or sour cream) freeze better than lean versions. The fat helps maintain the creamy texture after thawing.
Reheating Methods
Oven method (best for large batches): Transfer to a baking dish, dot with butter, cover with foil, and bake at 350 degrees F for 25-30 minutes until heated through. Stir once halfway through.
Stovetop method: Place in a saucepan over medium-low heat. Add a splash of milk or broth and stir gently until warmed through. Keep the heat low to prevent scorching the bottom.
Microwave method (quick but can dry them out): Transfer to a microwave-safe bowl, add a tablespoon of butter or splash of milk, cover with a damp paper towel, and heat in 1-minute intervals, stirring between each, until hot.
Make-Ahead for Holidays
You can make your Instant Pot mashed potatoes up to 2 days before Thanksgiving or any big dinner. Prepare them fully, let them cool, and store in the refrigerator. On the day of your dinner, reheat using the oven method above. Add an extra splash of warm milk and a pat of butter when reheating to bring back the creamy consistency. Honestly, most of my guests never notice the difference.
What to Serve With Instant Pot Mashed Potatoes
Creamy mashed potatoes are the ultimate side dish, and they pair with almost anything. Here are some of my favorite combinations:
- Pork chops with a pan sauce and these mashed potatoes on the side — simple weeknight perfection.
- Roasted chicken or turkey with gravy poured over the top.
- Beef pot roast, where the potatoes soak up all the rich braising liquid.
- Meatloaf with a tomato glaze — a comfort food classic.
- Grilled sausages with caramelized onions for an easy dinner.
For a complete holiday spread, these potatoes belong right next to green bean casserole, cranberry sauce, and dinner rolls. They are also a fantastic base for a weeknight bowl — top with roasted vegetables and a protein for a filling meal.
FAQ
How do you make mashed potatoes in the Instant Pot?
Place peeled and cubed potatoes in the Instant Pot with 4 cups cold water and 1 teaspoon kosher salt. Seal the lid, set the valve to Seal, and pressure cook on HIGH for 10 minutes. Quick release the pressure, drain the potatoes, then mash with room-temperature butter, warm milk, salt, and pepper.
How much water do you put in the Instant Pot for mashed potatoes?
Use 4 cups of cold water for 3 pounds of russet potatoes in a 6-quart Instant Pot. The water should cover the potatoes by about 1 inch. For an 8-quart pot, you may need 5 cups. The key is making sure the potatoes are submerged but not swimming in excess water, which can make them waterlogged.
How long does it take for potatoes to soften in an Instant Pot?
Potatoes soften in 8-12 minutes on HIGH pressure, depending on cube size. For standard 1-1/2 inch russet cubes, 10 minutes is perfect. Factor in an additional 8-10 minutes for the pot to come to pressure, making total time about 18-22 minutes from start to finish.
Why are my Instant Pot mashed potatoes gummy?
Gummy mashed potatoes are caused by over-mashing, which ruptures the starch granules and releases a sticky paste. To prevent this, use a manual potato masher instead of an electric mixer, stop mashing as soon as the potatoes reach your desired consistency, and always use room-temperature butter and warm milk so the starches do not seize up.
Can you make Instant Pot mashed potatoes without milk?
Yes. Replace the milk with 1/2 cup warm chicken or vegetable broth for a dairy-free version. You can also use unsweetened almond milk, oat milk, or simply increase the butter (or substitute olive oil) for richness. The potatoes will still be creamy and flavorful.
Should I use quick release or natural release for mashed potatoes?
Quick release is recommended for most situations because it stops the cooking process immediately and prevents the potatoes from overcooking. Natural release for 5-10 minutes can give slightly softer potatoes but increases the risk of overcooking. For standard 1-1/2 inch russet cubes cooked at 10 minutes, use quick release.
Final Thoughts
Learning how to make Instant Pot mashed potatoes has been one of the most practical cooking skills I have picked up in the kitchen. Whether it is a random Tuesday night dinner or the biggest cooking day of the year, this method delivers consistent, creamy, buttery results with almost no effort. Once you try it, I am confident it will become your go-to method too.
The recipe is forgiving, the steps are straightforward, and the Instant Pot does most of the heavy lifting. Cut your potatoes evenly, keep your butter at room temperature, warm your milk, and stop mashing before you think you need to. That is really all there is to it.
If you found this guide helpful, be sure to check out our other favorite dinner recipes to pair with these potatoes. Happy cooking!