
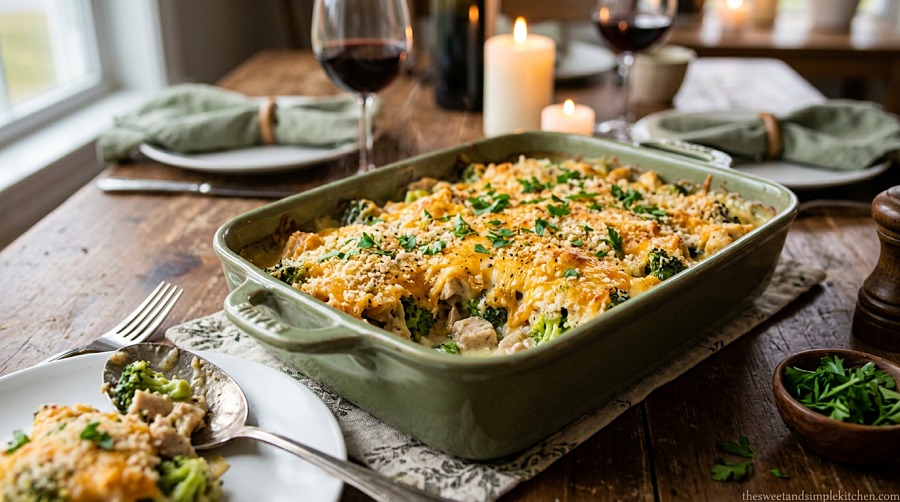
There’s something almost involuntary about the quiet that falls over a dinner table when a bubbling casserole comes out of the oven. The steam rises, the cheese has gone golden at the edges, and everyone leans in a little closer. I’ve been chasing that moment for years — testing, tweaking, and making every one of these dishes for my own family until they earned permanent spots in our weeknight rotation.
These are the best casserole recipes for dinner that my household actually requests by name. Not the ones that sound impressive on paper but create a pile of dishes or require ingredients you’ll never use again. These are the workhorses: creamy, hearty, make-ahead-friendly, and satisfying enough that my kids will fight over the last scoop.
| Recipe Name | Key Benefit | Difficulty | Main Ingredient |
|---|---|---|---|
| Million Dollar Chicken Casserole | Creamy and crowd-pleasing | Easy | Rotisserie chicken |
| John Wayne Casserole | Iconic layered depth | Medium | Ground beef |
| King Ranch Chicken Casserole | Tex-Mex comfort | Easy | Chicken + tortillas |
| Enchilada Casserole | Flexible, meal-prep ready | Easy | Ground beef or chicken |
| Tater Tot Casserole | Most-searched in the US | Easy | Ground beef + tots |
| Hamburger Potato Casserole | Budget stretcher | Easy | Ground beef + potatoes |
| Cheesy Broccoli Rice Casserole | Meatless, pantry-friendly | Easy | Broccoli + rice |
| Tuna Noodle Casserole | Under $10, total comfort | Easy | Canned tuna + noodles |
| Chicken and Stuffing Casserole | 10-minute hands-on prep | Easy | Rotisserie chicken |
| Green Bean Casserole (Main Dish) | Holiday leftovers hero | Easy | Ham + green beans |
Whether you need a Tuesday dump-and-bake or a Sunday dish for company, this list covers every situation. Each recipe below includes the full ingredient list, numbered steps, and the tips I’ve learned the hard way so you don’t have to.
Table of Contents
What Makes a Great Dinner Casserole
Before getting into the recipes, it helps to understand what separates a forgettable casserole from one your family will ask for again. After testing dozens of versions, I’ve landed on four non-negotiables.
A creamy, well-seasoned base. Cream of mushroom or cream of chicken soup is the classic shortcut — and there’s nothing wrong with it — but the sauce needs seasoning beyond what comes in the can. I always taste and adjust the base before layering. A splash of Worcestershire sauce, a pinch of garlic powder, or a tablespoon of sour cream can take a flat sauce somewhere interesting.
The right protein, cooked first. Rotisserie chicken is my secret weapon for busy nights. For beef casseroles, browning the meat in a skillet before it goes into the dish is non-negotiable — raw ground beef won’t develop the same depth, and it releases more grease as it cooks. Even five extra minutes of browning makes a noticeable difference in the final flavor.
A topping that actually stays crispy. Crushed Ritz crackers, panko breadcrumbs with melted butter, French’s fried onions — whatever you use, the method is the same. Cover the dish with foil for the first two-thirds of the baking time, then remove it for the final stretch. This lets the inside cook through without burning the top.
Make-ahead potential. The best dinner casseroles can be assembled the night before and refrigerated until you’re ready to bake. I’d argue this is the feature that makes casseroles irreplaceable for busy households. Most of the recipes below hold beautifully in the fridge for up to 24 hours unbaked.
Best Casserole Recipes for Dinner in 2026
Family-Favorite Casseroles
Million Dollar Chicken Casserole
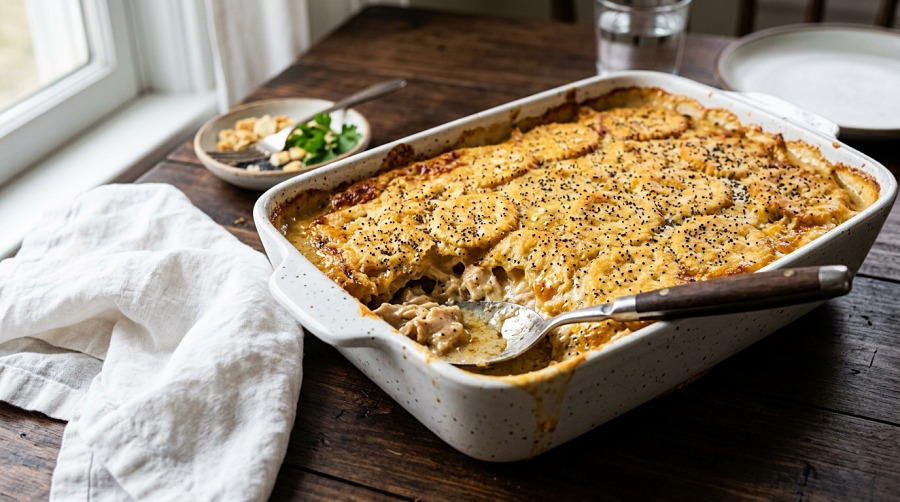
This is the casserole I make when I want to guarantee people ask for the recipe. The poppy seed–cracker topping adds something unexpected — a nuttiness and crunch that stays crispy even on day two. I assemble it on Sunday afternoon and bake it Monday evening, which means the actual Monday effort is turning on the oven.
Ingredients:
- 3 cups rotisserie chicken, shredded
- 8 oz cream cheese, softened to room temperature
- 1 cup sour cream
- 1 can (10.5 oz) cream of chicken soup
- 1 tsp garlic powder
- 1 tsp onion powder
- ½ tsp black pepper
- ½ tsp salt
- 1½ sleeves Ritz crackers, crushed (about 1½ cups)
- 1 tbsp poppy seeds
- 4 tbsp unsalted butter, melted
How to Make:
- Preheat oven to 350°F. Grease a 9×13 baking dish.
- In a large bowl, beat the softened cream cheese until smooth. Add the sour cream and cream of chicken soup and stir until fully combined.
- Add garlic powder, onion powder, salt, and pepper. Fold in the shredded chicken.
- Pour the mixture into the prepared dish and spread evenly.
- In a separate bowl, combine crushed Ritz crackers, poppy seeds, and melted butter. Toss until the crackers are evenly coated.
- Spread the cracker topping over the chicken layer in an even layer.
- Bake uncovered for 35–40 minutes, until the top is golden and the edges are bubbling. Let rest 5 minutes before serving.
Tips:
- Make sure the cream cheese is truly room temperature, or you’ll get lumps in the sauce that won’t cook out.
- Add ½ cup frozen peas to the chicken layer for a pop of color and sweetness.
- Reheat leftovers in a 325°F oven (not the microwave) to keep the topping crispy.
Why it’s here: This is the casserole that converts skeptics. It’s rich, fast to assemble, and feeds 6–8 people with a single rotisserie bird. Try it once and it’ll become your most-requested dish.
John Wayne Casserole
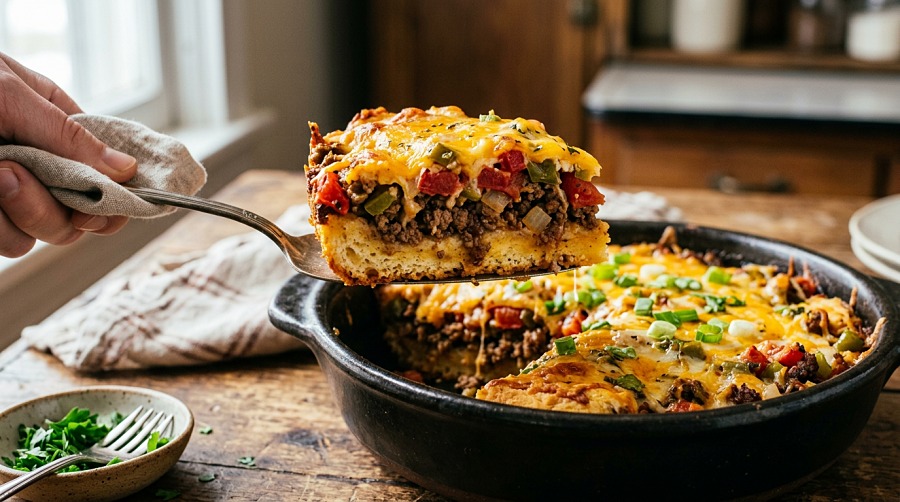
This layered casserole has a genuinely interesting origin. John Wayne contributed the recipe to a 1979 charity cookbook organized by a 10-year-old named Cara Connery to raise money for the American Cancer Society. The dish has been a classic ever since — and for good reason. The layered structure (biscuit base, seasoned beef, fresh vegetables, creamy layer, melted cheese) creates distinct textures in every bite. I prep the layers in the morning and assemble right before baking.
Ingredients:
- 1 lb ground beef (80/20)
- 1 packet (1 oz) taco seasoning
- 1 can (16.3 oz) refrigerated biscuits (Grands style)
- 1 cup sour cream
- ¼ cup mayonnaise
- 2 jalapeño peppers, sliced thin
- 2 medium roma tomatoes, diced
- 1 green bell pepper, diced
- 1 cup shredded sharp cheddar cheese
- ½ cup shredded Monterey Jack cheese
How to Make:
- Preheat oven to 350°F. Grease a 9×13 baking dish.
- Open the can of biscuits and press them into the bottom of the dish, stretching to form an even layer. Press the seams together.
- Brown the ground beef in a skillet over medium-high heat, breaking it up as it cooks. Drain excess fat. Add taco seasoning and 2 tbsp water, stir and cook 1 more minute.
- Spread the seasoned beef evenly over the biscuit layer.
- In a small bowl, mix the sour cream and mayonnaise. Drop spoonfuls across the beef layer and spread gently.
- Scatter the diced tomatoes, bell pepper, and jalapeño slices over the creamy layer.
- Sprinkle both cheeses over the top.
- Bake uncovered for 30–35 minutes, until the biscuit base is cooked through and the cheese is bubbly. Let rest 5 minutes.
Tips:
- Use a toothpick to check the biscuit layer — it should come out clean from the center before you pull it from the oven.
- For less heat, swap jalapeños for a mild poblano pepper or skip them entirely.
- The John Wayne Casserole is intentionally drier than creamy casseroles. If you want more moisture, add a small can of diced green chiles to the beef layer.
Why it’s here: The biscuit-based layer gives this casserole a uniqueness you won’t find elsewhere. It’s satisfying enough to feed hungry adults and versatile enough that you can dial the heat up or down.
King Ranch Chicken Casserole
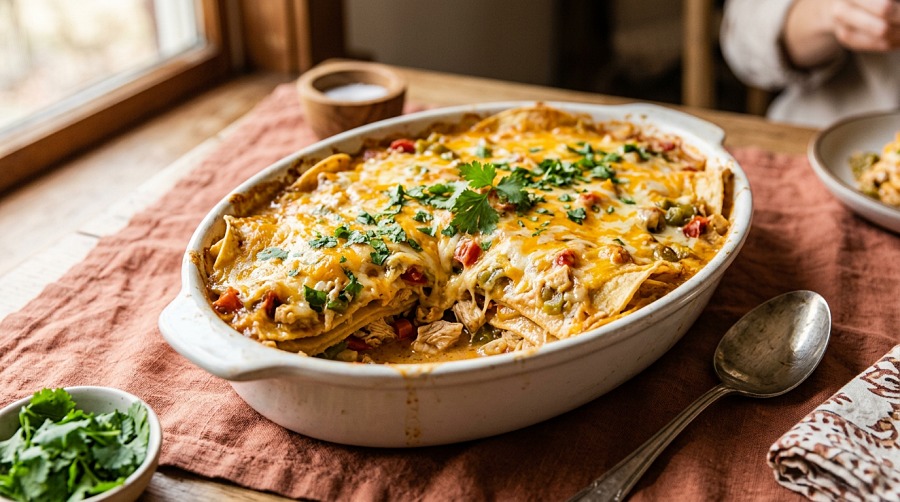
This Tex-Mex classic layers corn tortillas with shredded chicken, a creamy soup-based sauce spiked with Ro-Tel tomatoes, and a double cheese blend. Think of it as a deconstructed chicken enchilada that feeds a crowd without the individual rolling. The tortillas soften into the sauce as it bakes, absorbing all those cumin-and-chile-spiked flavors. This is my go-to for potlucks — it travels well in the dish and people always track me down for the recipe.
Ingredients:
- 3 cups cooked chicken, shredded (rotisserie works perfectly)
- 1 can (10 oz) Ro-Tel diced tomatoes and green chiles, drained
- 1 can (10.5 oz) cream of chicken soup
- 1 can (10.5 oz) cream of mushroom soup
- 1 cup chicken broth
- 8 corn tortillas, each cut into quarters
- 1 medium onion, diced
- 1 green bell pepper, diced
- 2 tbsp butter
- 1 tsp ground cumin
- 1 tsp chili powder
- 1 cup shredded cheddar cheese
- 1 cup shredded Monterey Jack cheese
- Fresh cilantro for serving
How to Make:
- Preheat oven to 350°F. Grease a 9×13 dish.
- Melt butter in a skillet over medium heat. Sauté the diced onion and bell pepper until softened, about 5 minutes. Season lightly with salt.
- In a large bowl, combine both soups, chicken broth, drained Ro-Tel, cumin, and chili powder. Stir well.
- Line the bottom of the dish with half the tortilla pieces, overlapping slightly.
- Layer half the chicken, half the onion-pepper mixture, half the soup mixture, and half the cheeses.
- Repeat with remaining tortillas, chicken, onion-pepper, soup, and cheese.
- Cover tightly with foil. Bake for 40–45 minutes. Remove foil and bake an additional 10–15 minutes until cheese is bubbling and slightly golden.
- Rest 5 minutes. Finish with fresh cilantro.
Tips:
- Warming the tortilla pieces in a dry skillet for 30 seconds per side before layering prevents them from turning mushy.
- The casserole serves 8–10 as a main, or up to 12 as part of a larger spread.
- Use pepper Jack cheese instead of Monterey Jack for more heat.
Why it’s here: King Ranch Chicken covers every base — it’s creamy, satisfying, Tex-Mex flavored, and genuinely feeds a crowd from a single 9×13 pan.
Enchilada Casserole
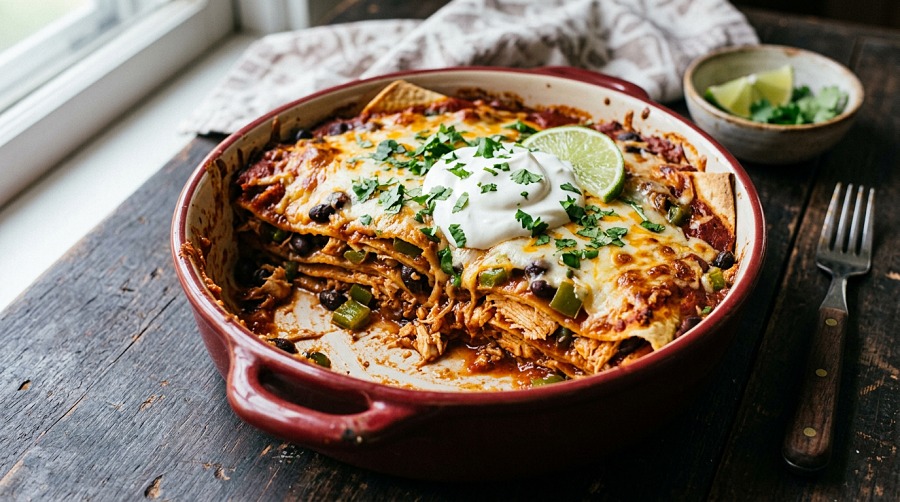
This one lives in the middle of my weeknight rotation. It pulls together in under 20 minutes of active work, reheats beautifully for four days, and satisfies both meat-eaters and anyone you swap in black beans for. The key is layering the enchilada sauce between each tortilla tier — not just on top — so every forkful has that deep, savory sauce flavor all the way through.
Ingredients:
- 1 lb ground beef (or 2 cups shredded chicken)
- 1 packet (1 oz) taco seasoning + ¼ cup water
- 1 can (19 oz) red enchilada sauce, divided
- 8 corn tortillas
- 1 can (15 oz) black beans, drained and rinsed
- 1 cup frozen corn, thawed
- 1 green bell pepper, diced
- 2 cups shredded Mexican cheese blend, divided
- Sour cream and fresh cilantro to serve
How to Make:
- Preheat oven to 375°F. Grease a 9×13 baking dish.
- Brown the ground beef over medium-high heat. Drain fat. Add taco seasoning and ¼ cup water. Stir and cook 2 minutes until absorbed.
- Spread ½ cup enchilada sauce across the bottom of the dish.
- Lay 4 tortillas over the sauce, tearing to fit as needed.
- Layer with half the beef, half the black beans, half the corn, half the peppers, and half the remaining enchilada sauce. Add ¾ cup cheese.
- Repeat with remaining tortillas, beef, beans, corn, peppers, and sauce. Top with remaining cheese.
- Bake uncovered for 25–30 minutes until cheese is melted and edges are bubbly.
- Rest 5 minutes. Serve with sour cream and cilantro.
Tips:
- Use flour tortillas if you prefer a softer texture throughout, or corn tortillas for more structure and authentic flavor.
- Make it vegetarian by doubling the black beans and adding a second can of corn.
- For meal prep, this casserole reheats best covered with foil at 325°F for 15 minutes.
Why it’s here: It’s the most flexible recipe in the lineup. Switch the protein, adjust the heat, add extra vegetables — the structure holds regardless of what you put in it.
Kid-Friendly Casseroles
Tater Tot Casserole
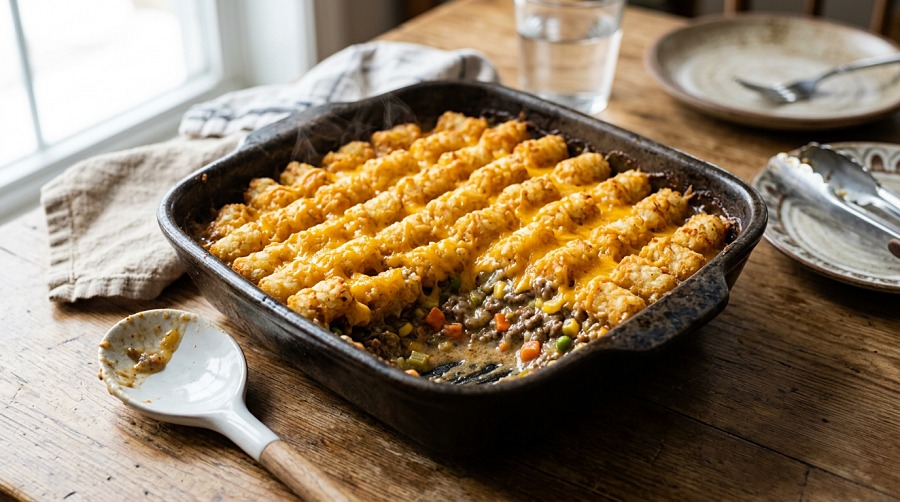
According to Google Trends data, this is the most searched casserole recipe in the United States, and it’s easy to understand why: crispy tots, creamy beef filling, bubbling cheese on top. My kids start circling the kitchen the minute they smell it. The trick to getting the tots genuinely crispy — not soggy — is arranging them frozen (not thawed) directly on top of the filling for the first 30 minutes, then adding the cheese only at the end.
Ingredients:
- 1.5 lbs ground beef (80/20)
- 1 tsp garlic powder
- 1 tsp onion powder
- Salt and pepper to taste
- 1 can (10.5 oz) cream of mushroom soup
- 1 cup sour cream
- 1 cup frozen mixed vegetables, thawed and drained
- 1 bag (32 oz) frozen tater tots
- 1.5 cups shredded cheddar cheese
How to Make:
- Preheat oven to 375°F. Grease a 9×13 baking dish.
- Brown ground beef in a skillet over medium-high heat. Season with garlic powder, onion powder, salt, and pepper. Drain fat completely.
- Remove from heat. Stir in cream of mushroom soup, sour cream, and thawed mixed vegetables.
- Pour beef mixture into the prepared dish. Spread in an even layer.
- Arrange frozen tater tots in a single layer on top, standing them upright or laying flat.
- Bake uncovered for 30 minutes.
- Remove from oven. Sprinkle shredded cheddar evenly over the tots.
- Return to oven for 12–15 minutes until cheese is melted and tots are crispy and golden.
- Rest 5 minutes before serving.
Tips:
- Never thaw the tots before baking. Frozen tots go crispier than thawed ones because they dehydrate as they cook instead of releasing steam.
- Add ½ tsp smoked paprika to the beef filling for a more complex, slightly smoky flavor.
- For a one-pot shortcut, you can mix raw (well-drained) ground beef directly into the sauce — but browning first gives noticeably deeper flavor and removes excess grease.
Why it’s here: It is, without question, the easiest win in this lineup for feeding picky eaters. Two steps, one pan, zero complaints.
Hamburger Potato Casserole
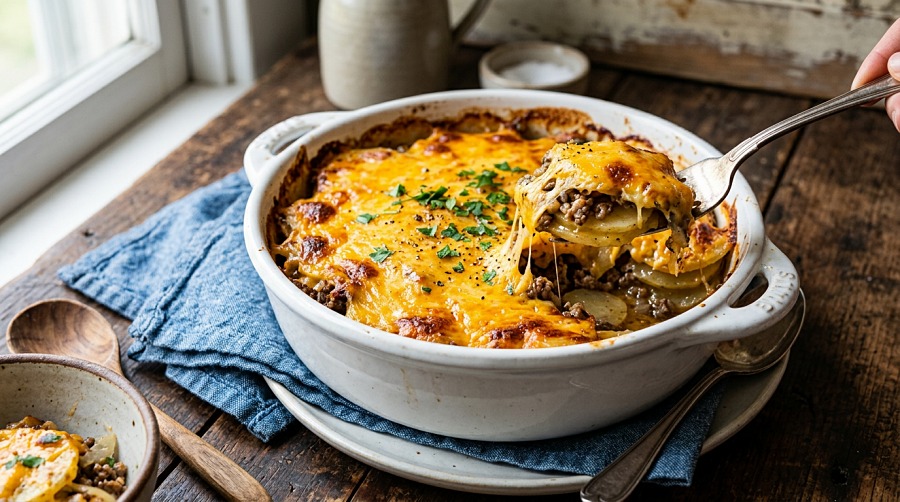
Thinly sliced potatoes layered with seasoned ground beef and a creamy cheddar sauce — it’s a deconstructed cheeseburger meets scalloped potatoes, and it’s the recipe my husband requests most. The secret to potatoes that cook through without the cheese sauce breaking is a quick 5-minute microwave head start on the sliced potatoes. Sharp cheddar is non-negotiable here; mild cheddar disappears against the beef.
Ingredients:
- 1 lb ground beef (80/20)
- 4 medium russet potatoes, scrubbed and sliced ⅛-inch thin
- 1 medium onion, diced
- 2 cloves garlic, minced
- 1 can (10.5 oz) cream of mushroom soup
- ¾ cup whole milk
- 1 tsp Worcestershire sauce
- 1 tsp garlic powder
- Salt and pepper
- 1.5 cups shredded sharp cheddar cheese, divided
How to Make:
- Preheat oven to 350°F. Grease a 9×13 baking dish.
- Place the sliced potatoes in a microwave-safe bowl. Cover loosely and microwave on high for 5 minutes to par-cook. This step prevents the center from being underdone.
- In a skillet, brown the ground beef with the diced onion and garlic until beef is cooked through and onion is translucent, about 7 minutes. Drain fat. Season with salt and pepper.
- In a bowl, whisk together the cream of mushroom soup, milk, Worcestershire sauce, and garlic powder. Stir in 1 cup of the shredded cheddar.
- Layer half the par-cooked potato slices in the bottom of the dish, overlapping slightly. Add a thin layer of the cheese sauce.
- Layer all of the ground beef mixture. Add another thin layer of sauce.
- Layer remaining potato slices. Pour remaining sauce over the top. Sprinkle with remaining ½ cup cheddar.
- Cover tightly with foil. Bake for 45 minutes.
- Remove foil. Bake an additional 15 minutes until the top is golden and potatoes are fully tender when tested with a fork.
- Rest 10 minutes before serving — this helps the sauce set.
Tips:
- Use a mandoline for potatoes if you have one. Even ⅛-inch slices mean even cooking throughout.
- One pound of ground beef feeds 6–8 people when layered with potatoes, making this one of the most economical recipes here.
- Add a layer of sliced mushrooms between the beef and the potatoes for an earthier, richer flavor.
Why it’s here: This stretches one pound of beef to feed a crowd, costs under $12 to make, and satisfies the craving for something hearty and meaty without feeling heavy.
Budget-Friendly Casseroles
Cheesy Broccoli Rice Casserole
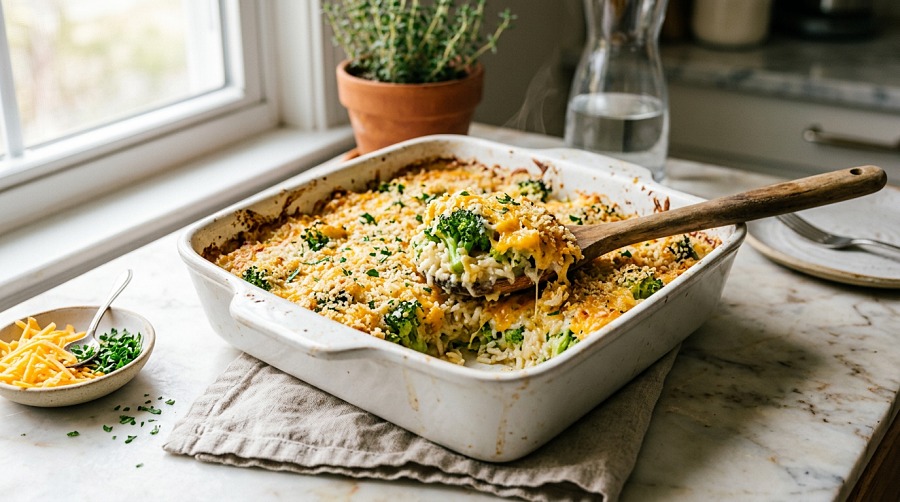
This meatless option uses ingredients that are probably already in your pantry and freezer, and it somehow still gets eaten faster than the beef casseroles at my table. The Worcestershire sauce addition is the move — just a teaspoon deepens the savory quality without being detectable as its own flavor. Sharp cheddar, not mild, is what gives this dish the punch it needs to stand alone as a main course.
Ingredients:
- 2 cups cooked white rice
- 3 cups frozen broccoli florets, thawed and well-drained
- 1 can (10.5 oz) cream of mushroom soup
- 1 cup whole milk
- 1 tsp Worcestershire sauce
- ½ tsp garlic powder
- Salt and pepper to taste
- 2 cups shredded sharp cheddar cheese, divided
- ½ cup panko breadcrumbs
- 2 tbsp unsalted butter, melted
How to Make:
- Preheat oven to 350°F. Grease a 2-quart or 9×11 baking dish.
- Squeeze any excess moisture from the thawed broccoli in a clean kitchen towel. This prevents a watery casserole.
- In a large bowl, combine the cream of mushroom soup, milk, Worcestershire sauce, and garlic powder. Season with salt and pepper.
- Fold in the cooked rice, broccoli, and 1.5 cups of the cheddar. Stir to combine.
- Pour into the prepared dish.
- Sprinkle remaining ½ cup cheddar over the top.
- Toss panko breadcrumbs with melted butter. Spread evenly over the cheese layer.
- Bake uncovered for 30–35 minutes until the edges are bubbling and the breadcrumb crust is golden brown.
- Rest 5 minutes before serving.
Tips:
- Squeezing the broccoli dry is the single most important step. Wet broccoli releases water into the sauce and you’ll end up with a soupy bottom layer.
- Add a can of drained white beans for protein if serving as a main dish.
- Leftovers keep well for 4 days in the fridge and reheat better with a splash of milk stirred in.
Why it’s here: At roughly $8 for the full dish, this feeds 6 generously. It works as a vegetarian main or a hearty side alongside our easy chicken breast recipes.
Tuna Noodle Casserole
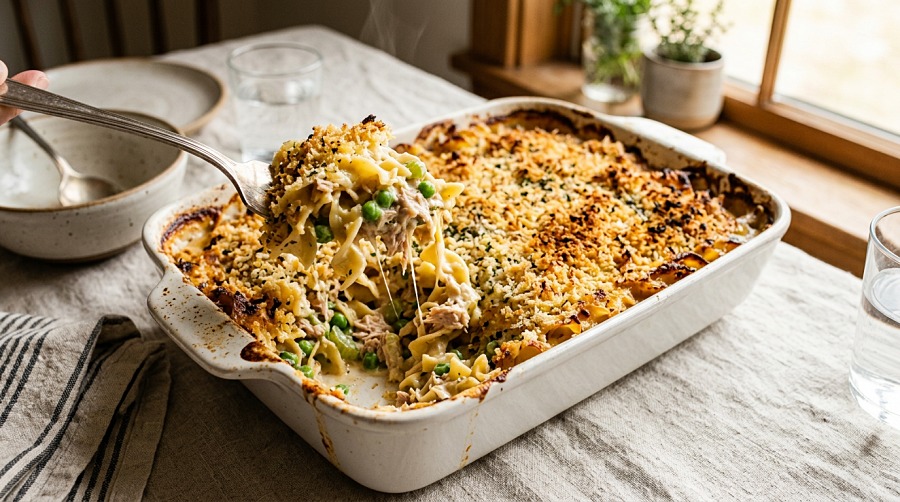
Tuna noodle casserole deserves its comeback. The version I make now is significantly better than the one I grew up with — solid white albacore tuna in water holds its shape better than chunk light, a squeeze of fresh lemon juice cuts through the richness, and panko mixed with Parmesan creates a topping that’s genuinely crunchy. Under $10 for a dish that feeds 6–8 people. The fresh lemon is the move nobody skips once they try it.
Ingredients:
- 12 oz wide egg noodles
- 2 cans (5 oz each) solid white albacore tuna, drained
- 1 can (10.5 oz) cream of mushroom soup
- 1 cup frozen peas, thawed
- ¾ cup whole milk
- 1 cup sour cream
- 1 tbsp fresh lemon juice
- 1 tsp onion powder
- Salt and black pepper
- 1 cup panko breadcrumbs
- 3 tbsp unsalted butter, melted
- ¼ cup grated Parmesan cheese
How to Make:
- Preheat oven to 375°F. Grease a 9×13 baking dish.
- Cook egg noodles in salted boiling water for 2 minutes less than package directions (they’ll finish in the oven). Drain and set aside.
- In a large bowl, whisk together cream of mushroom soup, milk, sour cream, lemon juice, and onion powder. Season well with salt and pepper.
- Fold in the cooked noodles, drained tuna, and thawed peas.
- Pour into the prepared dish and spread evenly.
- In a small bowl, combine panko, melted butter, and Parmesan. Toss until evenly coated.
- Spread the panko topping over the noodle mixture.
- Bake uncovered for 25–30 minutes until the top is deeply golden and the sauce is bubbling at the edges.
- Rest 5 minutes before serving.
Tips:
- Under-cooking the noodles is critical. Fully cooked noodles will turn mushy in the oven and the texture of the whole dish suffers.
- The USDA recommends reaching an internal temperature of 165°F for casseroles containing animal protein. A quick-read thermometer in the center is the only way to be sure.
- Skip canned tuna packed in oil — the oil can separate out during baking and make the sauce greasy.
Why it’s here: It’s the original budget-friendly comfort food, and the modern version is genuinely better than nostalgia suggests. Try pairing it with a simple green salad for a complete dinner under $12.
Fast-Prep Casseroles
Chicken and Stuffing Casserole
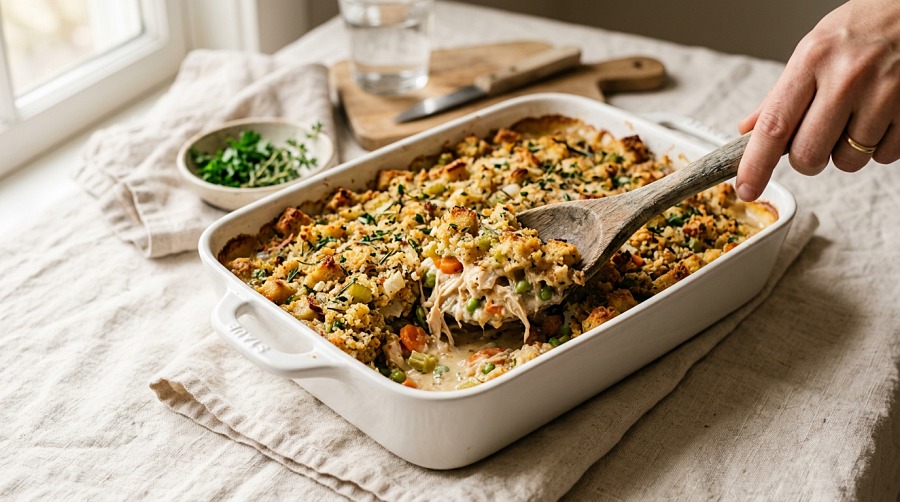
This shortcut casserole uses rotisserie chicken and boxed stuffing mix and still manages to taste like something your grandmother made from scratch — because sautéing the celery and onion first is the step that makes the difference. The aromatics fill the kitchen and make the stuffing topping taste genuinely homemade. Total active prep time is 10 minutes. Total time including baking is 45. This is the recipe I reach for on nights when I walk in the door at 6 PM.
Ingredients:
- 3 cups rotisserie chicken, shredded
- 1 box (6 oz) chicken-flavored stuffing mix, plus broth and butter per package directions
- 2 stalks celery, diced
- ½ medium onion, diced
- 2 tbsp butter
- 1 can (10.5 oz) cream of chicken soup
- 1 cup sour cream
- 1 cup frozen mixed vegetables, thawed and drained
How to Make:
- Preheat oven to 350°F. Grease a 9×13 baking dish.
- Melt butter in a skillet over medium heat. Sauté celery and onion until softened and translucent, about 4–5 minutes. Season with a pinch of salt.
- Prepare the stuffing mix according to package directions, stirring in the sautéed celery and onion.
- In a large bowl, combine the cream of chicken soup, sour cream, and thawed mixed vegetables. Fold in the shredded chicken.
- Spread the chicken mixture into the prepared dish in an even layer.
- Spoon the prepared stuffing over the top, spreading to the edges.
- Bake uncovered for 35–40 minutes until the stuffing is golden on top and the filling is heated through and bubbling at the edges.
- Rest 5 minutes before serving.
Tips:
- For extra richness, substitute cream of chicken soup with cream of celery soup.
- The stuffing layer can be made a day ahead and refrigerated separately; assemble and bake the evening you want to serve it.
- This pairs beautifully with our best 30 minute dinner sides for a complete weeknight spread.
Why it’s here: It’s the fastest complete dinner in this roundup. Ten minutes of real effort, 35 minutes of oven time, done.
Green Bean Casserole (Main Dish Version)
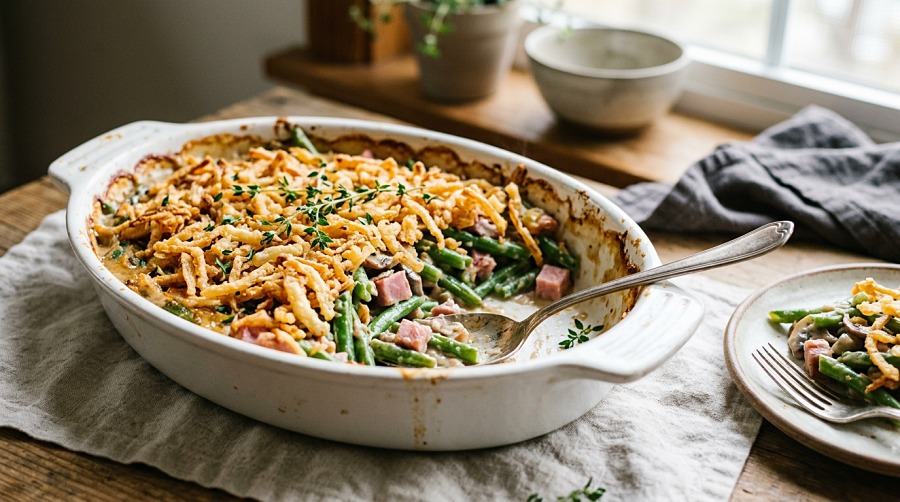
The traditional Thanksgiving side becomes a legitimate weeknight dinner with the addition of diced ham and extra mushrooms. I use fresh green beans when I have time — a 3-minute blanch keeps their color vivid — but frozen beans work perfectly well. The soy sauce in the base is a classic original recipe element that most people skip, but it’s the thing that keeps the sauce from tasting flat. French’s fried onions on top are, as always, not negotiable.
Ingredients:
- 1 lb fresh green beans, trimmed and cut into 2-inch pieces (or 2 bags (12 oz each) frozen cut green beans, thawed)
- 1.5 cups diced cooked ham
- 8 oz mushrooms, sliced
- 1 tbsp butter
- 1 can (10.5 oz) cream of mushroom soup
- ¾ cup whole milk
- 1 tsp soy sauce
- ½ tsp black pepper
- 1 cup French’s crispy fried onions, divided
How to Make:
- Preheat oven to 350°F. Grease a 2-quart baking dish.
- If using fresh green beans, blanch in boiling salted water for 3 minutes. Drain immediately and transfer to an ice bath to stop cooking. Pat dry.
- Melt butter in a skillet over medium-high heat. Sauté mushrooms until golden and most of their liquid has cooked off, about 5–6 minutes.
- In a large bowl, whisk together cream of mushroom soup, milk, soy sauce, and black pepper.
- Stir in the green beans, ham, sautéed mushrooms, and ½ cup of the fried onions.
- Pour into the prepared dish and spread evenly.
- Bake uncovered for 25 minutes, until the filling is bubbling.
- Scatter remaining ½ cup fried onions over the top. Return to oven for 5 minutes until the onions are golden and crispy.
- Serve immediately while the topping is still crunchy.
Tips:
- The fried onions go soft fast — serve this one right out of the oven if crispy topping matters to you.
- This is an ideal vehicle for leftover holiday ham. Keep a container in the freezer specifically for this purpose.
- Using fresh mushrooms instead of canned mushrooms makes a meaningful difference in flavor depth. The extra 5-minute sauté step is worth it.
Why it’s here: Most people have only ever eaten this as a side dish. The ham and mushroom additions make it a complete, satisfying dinner — and an ideal use for leftover ham that would otherwise sit forgotten in the fridge.
Organizing Your Casserole Menu
With 10 recipes to choose from, it helps to know which one fits the moment you’re cooking for.
For nights with leftover chicken or a rotisserie bird: Million Dollar Chicken Casserole, King Ranch Chicken, and Chicken and Stuffing Casserole are the best uses. These are my first calls whenever we buy a rotisserie chicken and don’t finish it. For more chicken dinner ideas, our easy chicken breast recipes covers more directions to go.
For ground beef nights: Tater Tot Casserole, John Wayne Casserole, Hamburger Potato Casserole, and Enchilada Casserole. All four start with browned ground beef. If ground beef is your main protein for the week, our easy ground beef dinner recipes has more options beyond casseroles.
For meatless nights: Cheesy Broccoli Rice Casserole works alone as a main — add white beans for protein. Green Bean Casserole can be made meatless by skipping the ham and adding a second layer of sautéed mushrooms.
For potlucks and feeding a crowd: King Ranch Chicken or Enchilada Casserole. They’re familiar enough to please everyone, hold well at a serving temperature, and portion evenly. When you need even faster options for a crowd, our sheet pan dinner recipes are worth bookmarking.
For Tuesday nights when you’re exhausted: Chicken and Stuffing Casserole (10 minutes prep), Tater Tot Casserole (dump and bake), or Tuna Noodle Casserole (pantry-only ingredients).
Tips for Perfect Casseroles Every Time
Avoid the Most Common Mistakes
Wrong pan size is mistake number one. A 9×13 is the standard for all 10 recipes in this article. An 8×8 will overflow; anything larger will spread the filling too thin and dry it out before the top browns.
Skipping the meat browning step is the second most common. Raw ground beef steams rather than sears in the oven, produces less flavor, and releases more grease into the sauce. Five extra minutes of browning is never wasted.
Adding frozen vegetables directly without thawing. Frozen vegetables release significant water as they heat. Thaw, then drain, and if possible, squeeze in a kitchen towel before adding. This single step prevents watery casserole.
Overbaking dries out the protein and breaks the sauce. According to food safety guidelines from the USDA, poultry casseroles need to reach 165°F internally. Most are done as soon as the edges bubble and the center reaches temperature — that’s usually well before the dish looks brown.
Master the Make-Ahead
Assemble any of these casseroles up to 24 hours ahead, cover tightly with plastic wrap, and refrigerate. When you’re ready to bake, remove the plastic, cover with foil, and add 10–15 minutes to the baking time since you’re starting from cold.
For freezing: assemble but don’t bake. Wrap in two layers of foil and freeze for up to 3 months. Thaw overnight in the refrigerator, then bake as directed. According to the FDA’s freezer storage guidelines, casseroles keep their quality best in the 1–3 month window.
Important: Undercook any pasta or rice by 2 minutes before freezing. They’ll finish cooking when reheated, rather than turning mushy from double cooking.
The Fresh Herb Finish
If you only make one change to improve your casseroles, add fresh herbs right before serving. A tablespoon of chopped parsley, chives, or thyme scattered over the top adds brightness and color that cuts through the richness of the sauce. I keep a small pot of flat-leaf parsley on my kitchen windowsill specifically for this purpose — it takes almost no care and it’s there whenever I need it. The difference between a casserole finished with herbs and one without is genuinely visible and tasteable.
Frequently Asked Questions
Can I make these casseroles ahead of time?
Most can be assembled up to 24 hours ahead and refrigerated unbaked. Cover tightly with plastic wrap. When ready to bake, remove the wrap, cover loosely with foil, and add 10–15 minutes to the stated baking time to account for starting from cold. Some, like Tater Tot Casserole, are best assembled day-of because the tots can absorb moisture from the filling overnight.
What temperature do you bake most casseroles at?
The recipes in this collection bake between 350°F and 375°F. A lower temperature (350°F) works better for denser, layered casseroles like John Wayne or Hamburger Potato where you need the heat to penetrate through multiple layers without burning the top. A slightly higher temperature (375°F) is better for faster-cooking casseroles like Tater Tot and Tuna Noodle where you want a crispier top and shorter baking window.
How do I keep the casserole topping from getting soggy?
Cover the dish tightly with foil for the first two-thirds of baking time, then uncover it for the final third. This lets the interior heat through while protecting the topping — which then has only a short window of dry oven heat needed to crisp up. For extra insurance, pre-toast your breadcrumbs with melted butter in a dry skillet for 2–3 minutes before adding them on top.
Can these casseroles be frozen?
Most freeze well unbaked. Assemble the casserole in a freezer-safe dish, wrap tightly in two layers of heavy-duty foil, and freeze for up to 3 months. Thaw overnight in the refrigerator before baking. The exception: avoid freezing casseroles with a potato layer (like Hamburger Potato Casserole) as potatoes turn grainy when frozen. Tater Tot Casserole also doesn’t freeze well unbaked — the tots absorb moisture and lose their crunch.
How long do leftover casseroles last?
Stored in an airtight container in the refrigerator, leftover casseroles keep for 3–4 days. Reheat covered with foil at 325°F for 15–20 minutes rather than using the microwave, which makes toppings go soft and unevenly heats the filling.
Why is my casserole watery?
The most common causes: frozen vegetables added without thawing and draining, covering the dish without removing the lid during the final baking phase, or starting with an overly wet sauce. Fix it by squeezing thawed vegetables in a kitchen towel before adding, making sure to bake uncovered for at least the last 15–20 minutes, and reducing the liquid in the sauce slightly if the casserole has been refrigerated overnight (sauces thicken as they rest).
What’s the best pan for casseroles?
A 9×13 glass or ceramic baking dish is the standard and what every recipe here is written for. Glass conducts heat more slowly and evenly than metal, which reduces the risk of the sauce scorching at the bottom edges. Ceramic looks better going to the table and holds heat longer after you remove it from the oven. Metal pans bake faster — if you use metal, start checking for doneness 5–10 minutes before the recipe suggests.
Best Casserole Recipes for Dinner: Your New Weeknight Foundation
These ten casserole recipes represent the best combination of ease, flavor, and practicality I’ve tested for my own family’s table. The best casserole recipes for dinner aren’t about impressing anyone — they’re about feeding people real, satisfying food without spending an hour in the kitchen every night.
Start with whichever one caught your eye first. If you’ve never made Million Dollar Chicken Casserole, that’s where I’d send any first-timer. If you have picky kids to feed tonight, the Tater Tot Casserole will not let you down. And if your freezer has a lonely container of leftover ham, the Green Bean Casserole Main Dish is exactly why you’ve been saving it.
Remember: brown the meat, dry the vegetables, cover then uncover, and finish with fresh herbs. Those four moves will make every casserole you cook better, starting tonight.
Made one of these? Leave a rating and a comment — I genuinely love hearing which recipe earned a spot in your rotation. And save this collection to Pinterest so it’s there when Tuesday night rolls around and you need a fast answer.