
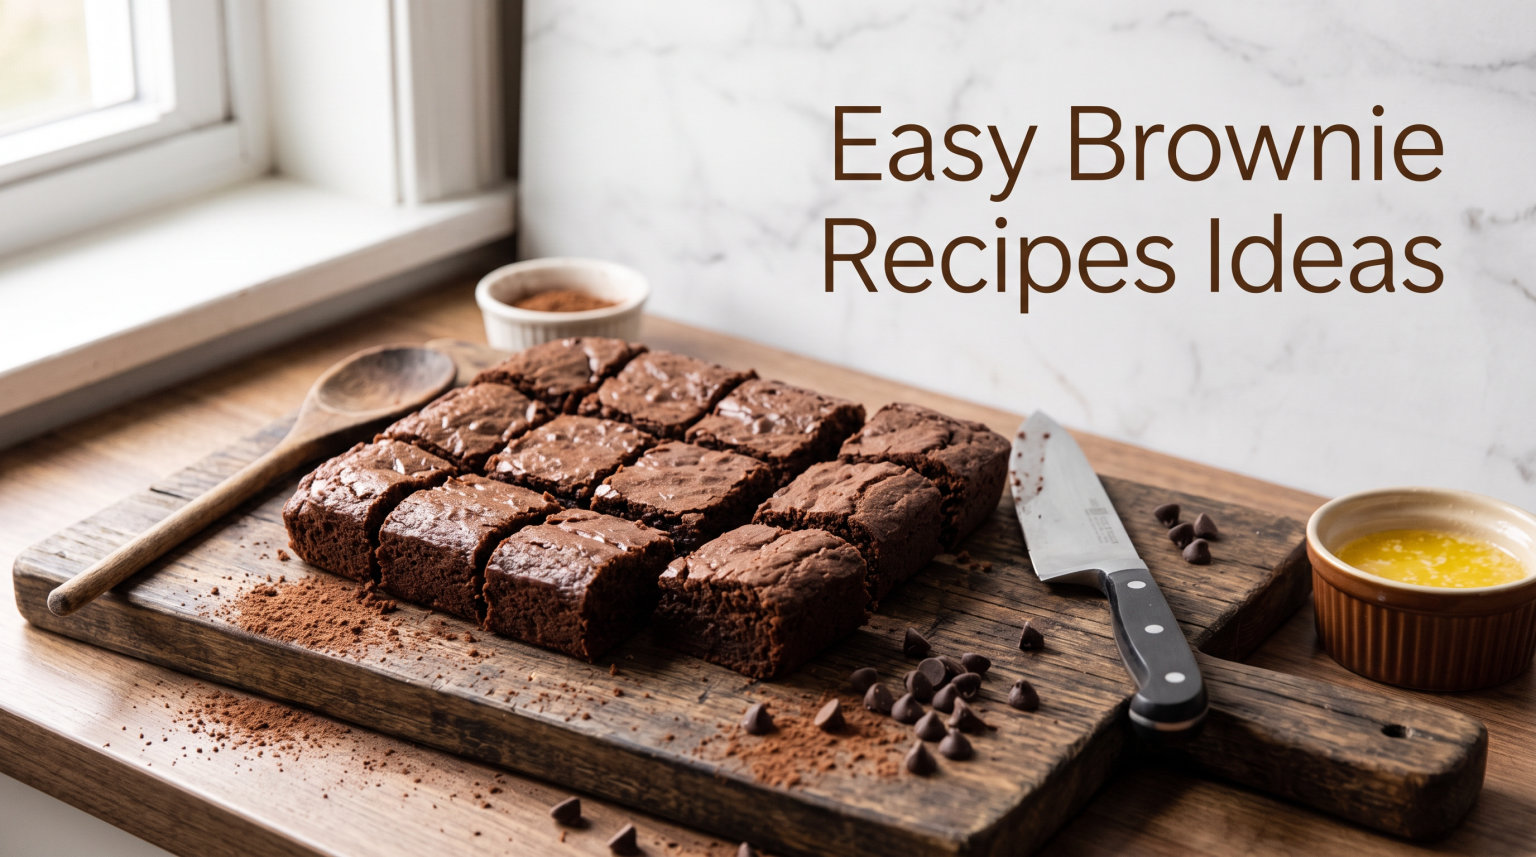
The right pan of brownies depends on the bite you want, which is why these easy brownie recipes ideas begin with texture rather than toppings. You will find a dense one-bowl brownie, a lighter cake-style version, a chewy crinkle-top batch, blondies, peanut butter swirls, and mint chocolate brownies.
All six recipes use an 8-inch square pan and include measured ingredients, ordered instructions, cooling time, and specific doneness cues. The guide after the recipes explains cocoa, fats, eggs, pan materials, storage, and the most common reasons brownies turn dry or underbaked.
Table of Contents
Pick Your Brownie Before You Preheat
-
Dense and fudgy: Start with the classic one-bowl recipe.
-
Light and cake-like: Choose the cake-style brownies with baking powder and milk.
-
Chewy with a shiny top: Use the crinkle-top method and whisk the sugar and eggs thoroughly.
-
Vanilla and brown sugar: Bake the butterscotch blondies.
-
Sweet-salty contrast: Add the peanut butter swirl.
-
Cool chocolate flavor: Make the mint version with or without frosting.
For more baking inspiration, visit the broader easy dessert recipe collection, the old-fashioned cake recipes, or these classic cookie ideas.
6 Easy Brownie Recipes Ideas
Choose by Brownie Texture
1. Classic One-Bowl Fudgy Brownies
Serves: 16 squares | Time: 3 hours including cooling | Method: Oven
This foundational recipe requires just one mixing bowl and creates the quintessential fudgy brownie experience. Dense, intensely chocolate, and requiring minimal cleanup, it represents everything that makes easy brownie recipes worthwhile.
Ingredients
-
1/2 cup unsalted butter
-
4 ounces unsweetened chocolate, chopped
-
1 1/4 cups granulated sugar
-
2 large eggs, room temperature
-
1 teaspoon vanilla
-
1/2 cup all-purpose flour
-
1/4 cup unsweetened cocoa powder
-
1/4 teaspoon salt
-
1/2 cup chocolate chips or walnuts, optional
Instructions
-
Preheat your oven to 350 degrees Fahrenheit. Line an 8×8-inch metal baking pan with parchment paper, leaving overhang on two sides for easy removal.
-
In a large microwave-safe bowl, combine the butter and chopped unsweetened chocolate. Microwave in 30-second intervals, stirring between each, until completely melted and smooth. This typically takes 1 to 2 minutes total. Alternatively, melt in a saucepan over low heat, stirring constantly.
-
Whisk the sugar into the melted chocolate mixture until fully combined. The mixture should look glossy and slightly thick. Add the eggs one at a time, whisking well after each addition. Stir in the vanilla extract.
-
Sift the flour, cocoa powder, and salt directly into the bowl. Using a rubber spatula or wooden spoon, fold the dry ingredients into the wet until just combined. Do not overmix, as this develops gluten and creates cakey rather than fudgy brownies. Fold in chocolate chips or nuts if using.
-
Spread the batter evenly in the prepared pan. It will be thick and may require some effort to reach the corners. Bake for 25 to 30 minutes, until a toothpick inserted into the center comes out with a few moist crumbs attached but no wet batter.
-
Allow the brownies to cool completely in the pan on a wire rack, about 2 hours. This cooling period is essential, the brownies continue cooking from residual heat and develop their final fudgy texture. Use the parchment overhang to lift the cooled brownies from the pan before cutting into 16 squares.
Texture cue: For extra fudgy results, err on the side of underbaking. The toothpick test should show moist crumbs rather than coming out completely clean. If the toothpick emerges with wet batter, continue baking in 3-minute increments.
Make-ahead note: Room temperature eggs incorporate more smoothly into the batter, preventing the cold eggs from seizing the melted chocolate mixture. If you forget to bring eggs to room temperature, place them in warm water for 10 minutes before using.
2. Perfect Cake-Style Brownies
Serves: 16 squares | Time: 50 minutes | Method: Oven
When you want a lighter brownie that holds its shape for neat cutting and clean eating, this cake-style recipe delivers. The increased flour and addition of baking powder create a tender crumb that bridges the gap between brownie and chocolate cake.
Ingredients
-
1/2 cup unsalted butter, softened
-
1 cup granulated sugar
-
2 large eggs, room temperature
-
1 teaspoon vanilla
-
1 cup all-purpose flour
-
1/3 cup unsweetened cocoa powder
-
1/2 teaspoon baking powder
-
1/4 teaspoon salt
-
1/4 cup milk
-
1/2 cup chocolate chips, optional
Instructions
-
Preheat your oven to 350 degrees Fahrenheit. Grease an 8×8-inch baking pan and line with parchment paper for easy removal.
-
In a large bowl, cream the softened butter and sugar together using an electric mixer or sturdy wooden spoon. Beat for 2 to 3 minutes until the mixture becomes light and fluffy. This creaming process incorporates air that helps create the cakey texture.
-
Add the eggs one at a time, beating well after each addition. Stir in the vanilla extract. The mixture should look smooth and pale.
-
In a separate bowl, whisk together the flour, cocoa powder, baking powder, and salt. Gradually add this dry mixture to the wet ingredients, alternating with the milk, beginning and ending with the flour mixture. Mix until just combined, being careful not to overbeat.
-
Fold in chocolate chips if using. Spread the batter evenly in the prepared pan. The batter will be thicker than cake batter but more fluid than fudgy brownie batter.
-
Bake for 28 to 32 minutes, until the top springs back when lightly touched and a toothpick inserted in the center comes out clean or with a few dry crumbs. Cool completely in the pan before cutting into squares.
Texture cue: These brownies pair beautifully with chocolate frosting, ganache, or a simple dusting of powdered sugar. Their sturdy structure makes them ideal for layering in ice cream sandwiches or crumbling into trifles.
Make-ahead note: For a richer flavor, substitute cooled brewed coffee for half the milk. Coffee enhances chocolate depth without adding noticeable coffee flavor.
3. Chewy Brownies with Crinkly Tops
Serves: 16 squares | Time: 50 minutes | Method: Oven
The glossy, crackled top on bakery-style brownies isn’t just for looks, it indicates a perfect chewy texture beneath. This recipe teaches the specific technique that creates this signature appearance while delivering dense, satisfying chewiness in every bite.
Ingredients
-
1/2 cup vegetable oil
-
1 cup granulated sugar
-
2 large eggs, room temperature
-
1 teaspoon vanilla
-
1/2 cup all-purpose flour
-
1/3 cup unsweetened cocoa powder
-
1/4 teaspoon baking powder
-
1/4 teaspoon salt
-
2 tablespoons water
-
1/2 cup chocolate chips, optional
Instructions
-
Preheat your oven to 350 degrees Fahrenheit. Line an 8×8-inch metal pan with parchment paper, leaving overhang for removal.
-
In a large bowl, combine the granulated sugar and eggs. Using a whisk or electric mixer, beat vigorously for 3 to 5 minutes until the mixture becomes pale, thick, and nearly doubles in volume. When you lift the whisk, the mixture should fall in a thick ribbon that folds back on itself. This step is crucial for the crinkly top.
-
Whisk in the vegetable oil until fully incorporated. The mixture should look glossy. Add the vanilla extract and water, mixing to combine.
-
Sift the flour, cocoa powder, baking powder, and salt over the wet ingredients. Using a spatula, fold gently until no dry streaks remain. Fold in chocolate chips if using.
-
Pour the batter into the prepared pan. The batter will be glossy and fluid. Bake for 24 to 28 minutes, until the top is shiny and crackled and a toothpick inserted in the center comes out with moist crumbs.
-
Cool completely before cutting. The crinkly top will firm up as the brownies cool, creating that satisfying crack when you bite.
Texture cue: Do not rush the egg and sugar beating step. This is where the magic happens. If you under-beat, you’ll still get good brownies, but they won’t have that signature crinkly surface.
Make-ahead note: Using oil rather than butter helps create chewiness. Oil coats flour proteins more completely than butter, limiting gluten development while maintaining structure. If you prefer butter flavor, you can use half melted butter and half oil.
Blondie and Flavored Brownie Variations
4. Butterscotch Blondies
Serves: 16 squares | Time: 45 minutes | Method: Oven
Blondies offer all the satisfaction of brownies without any chocolate, making them perfect for vanilla lovers or those seeking variety. This butterscotch-forward version showcases brown sugar and butter as the star flavors.
Ingredients
-
1/2 cup unsalted butter, melted
-
1 cup packed light brown sugar
-
1 large egg, room temperature
-
1 teaspoon vanilla
-
1 cup all-purpose flour
-
1/2 teaspoon baking powder
-
1/4 teaspoon salt
-
1/2 cup white chocolate or butterscotch chips
-
1/2 cup chopped pecans or walnuts, optional
Instructions
-
Preheat your oven to 350 degrees Fahrenheit. Line an 8×8-inch pan with parchment paper.
-
In a large bowl, whisk together the melted butter and brown sugar until well combined. The mixture will look like thin caramel.
-
Add the egg and vanilla extract, whisking until smooth and glossy.
-
Fold in the flour, baking powder, and salt until just combined. Stir in the chips and nuts if using. The batter will be thick.
-
Spread in the prepared pan and smooth the top. Bake for 25 to 30 minutes, until the top is golden brown and a toothpick inserted in the center comes out with a few moist crumbs. The edges should be pulling slightly away from the pan.
-
Cool completely before cutting. Blondies are even better the next day as the brown sugar flavor deepens.
Texture cue: For extra butterscotch intensity, use dark brown sugar instead of light. The additional molasses creates deeper caramel notes.
Make-ahead note: These blondies make an excellent base for sundaes. Warm a square slightly and top with vanilla ice cream and caramel sauce.
5. Peanut Butter Swirl Brownies
Serves: 16 squares | Time: 1 hour | Method: Oven
This recipe takes the classic fudgy brownie base and elevates it with ribbons of creamy peanut butter throughout. The marbled pattern looks impressive but requires only a simple swirling technique anyone can master.
Ingredients
-
1/2 cup unsalted butter
-
4 ounces unsweetened chocolate, chopped
-
1 1/4 cups granulated sugar
-
2 large eggs, room temperature
-
1 teaspoon vanilla
-
1/2 cup all-purpose flour
-
1/4 cup cocoa powder
-
1/4 teaspoon salt
-
1/2 cup creamy peanut butter
-
2 tablespoons powdered sugar
-
1 tablespoon melted butter
-
1/4 teaspoon vanilla for the swirl
Instructions
-
Preheat your oven to 350 degrees Fahrenheit. Line an 8×8-inch pan with parchment paper.
-
Prepare the brownie base following the instructions from Recipe 1. Before adding to the pan, make the peanut butter swirl mixture.
-
For the swirl mixture, stir together the peanut butter, powdered sugar, melted butter, and vanilla until smooth and pourable. If your peanut butter is very thick, microwave for 10 seconds to soften.
-
Spread half the brownie batter in the prepared pan. Drop half the peanut butter mixture by teaspoonfuls across the surface. Add the remaining brownie batter and spread gently. Drop the remaining peanut butter mixture on top.
-
Using a butter knife or skewer, drag through the batter in figure-eight motions to create swirls. Do not overmix, aim for 4 to 6 passes of the knife.
-
Bake for 28 to 32 minutes, until a toothpick inserted in the center comes out with moist crumbs. Cool completely before cutting to allow the swirl pattern to set.
Texture cue: Use standard creamy peanut butter rather than natural varieties that separate. The added stabilizers help maintain the swirl pattern during baking.
Make-ahead note: For a more dramatic contrast, you can add 2 tablespoons of cocoa powder to the brownie base while reducing the flour by 2 tablespoons, creating an even darker chocolate backdrop for the peanut butter ribbons.
6. Mint Chocolate Brownies
Serves: 16 squares | Time: 1 hour 30 minutes | Method: Oven
The combination of cool mint and rich chocolate has been a favorite for generations. These brownies incorporate mint extract directly into the batter and offer an optional mint frosting for those who want extra flavor impact.
Ingredients
-
1/2 cup unsalted butter
-
4 ounces unsweetened chocolate, chopped
-
1 1/4 cups granulated sugar
-
2 large eggs, room temperature
-
1/2 teaspoon peppermint extract
-
1/2 cup all-purpose flour
-
1/4 cup cocoa powder
-
1/4 teaspoon salt
-
1/2 cup chocolate chips
-
2 cups powdered sugar, optional frosting
-
1/4 cup softened butter, optional frosting
-
2 to 3 tablespoons milk, optional frosting
Instructions
-
Preheat your oven to 350 degrees Fahrenheit. Line an 8×8-inch pan with parchment paper.
-
Prepare the brownie batter following the method from Recipe 1, substituting peppermint extract for the vanilla. Fold in chocolate chips.
-
Spread in the prepared pan and bake for 25 to 30 minutes until a toothpick shows moist crumbs. Cool completely.
-
If using the frosting, beat together the powdered sugar, softened butter, 2 tablespoons milk, and peppermint extract until smooth. Add additional milk if needed for spreading consistency. Tint with food coloring if desired.
-
Frost the cooled brownies and allow the frosting to set for 30 minutes before cutting.
Texture cue: Andes mint baking chips make an excellent substitute for chocolate chips in this recipe, adding both mint flavor and visual appeal.
Make-ahead note: These brownies are especially popular during holiday seasons. Cut into small squares for cookie trays and gift boxes.
Essential Brownie Baking Tips for Perfect Results Every Time
Regardless of which easy brownie recipes you choose, certain universal principles apply. These foundational techniques separate good brownies from great ones.
Mastering the Toothpick Test
The toothpick test remains the most reliable way to check brownie doneness, but interpreting the results requires understanding what you want. For fudgy brownies, you want moist crumbs clinging to the toothpick. For cakey brownies, you want clean or nearly clean results.
If you’ve added chocolate chips to your batter, the toothpick may emerge with melted chocolate even when the brownie is fully baked. In this case, check multiple spots and look for the difference between wet batter and melted chocolate.
Visual cues matter too. The edges should look set and slightly pulled away from the pan. The center should no longer jiggle when you gently shake the pan. The surface should look matte rather than wet.
Pan Preparation Essentials
Proper pan lining prevents the heartbreak of brownies that stick and tear upon removal. Parchment paper creates the cleanest release. Cut a piece that covers the bottom and extends up two sides, creating handles for lifting.
If you don’t have parchment, grease the pan thoroughly with butter or baking spray, then dust with cocoa powder instead of flour. This prevents white flour residue on your chocolate brownies.
Metal pans generally produce better-edged brownies than glass or ceramic. Glass retains heat longer and can cause overbaking even after removal from the oven. If using glass, reduce the oven temperature by 25 degrees and check for doneness 5 minutes early.
The Importance of Cooling
Patience during cooling dramatically impacts final texture. Hot brownies are fragile and will crumble if cut too soon. As they cool, the structure sets and the starches retrograde, creating that perfect dense texture.
For the cleanest cuts, chill brownies completely in the refrigerator for 1 to 2 hours. Use a sharp knife, wiping clean between cuts. For warm brownies, accept that they will be messy and serve with a spoon rather than attempting neat squares.
The Complete Brownie Ingredient Guide
Understanding your ingredients helps you make informed substitutions and troubleshoot problems. Each component plays a specific role in the final brownie.
Choosing Your Cocoa Powder
Cocoa powder comes in two main varieties for baking: natural and Dutch-processed. Natural cocoa powder is lighter in color with a sharper, more acidic chocolate flavor. Dutch-processed cocoa has been treated with alkali, resulting in darker color and milder, more rounded flavor.
For most easy brownie recipes, natural cocoa powder works beautifully and is more widely available. Some recipes specifically call for Dutch-processed to achieve a darker color and specific flavor profile. Hershey’s Special Dark is a blend that offers some Dutch-processing benefits while remaining accessible.
Quality matters more than type. Choose a fresh, aromatic cocoa powder stored properly in a cool, dry place. Cocoa powder doesn’t spoil quickly but can absorb odors and lose potency over time.
Butter Versus Oil
Butter provides irreplaceable flavor that oil cannot match. It also contributes to structure through its water content, which creates steam during baking. However, butter can create drier brownies if overbaked, since its water evaporates.
Oil creates reliably moist brownies with excellent shelf life. Because oil is 100 percent fat with no water, it coats flour proteins more effectively, limiting gluten development and ensuring tenderness. Vegetable, canola, and light olive oil all work well.
For best results, some bakers use a combination: mostly butter for flavor with a tablespoon of oil for insurance moisture. This hybrid approach captures the benefits of both fats.
Egg Functions in Brownies
Eggs provide structure, richness, and moisture. The yolks contain fat that contributes to fudginess, while the whites provide protein that sets during baking to hold the brownie together.
Adding an extra egg to any brownie recipe increases the cakey quality. The additional protein creates more structure and lift. For fudgier brownies, stick to the recipe’s specified egg count or even reduce by one yolk.
Room temperature eggs incorporate more smoothly into batters. Cold eggs can cause melted chocolate to seize or create uneven mixing. If you forget to bring eggs to room temperature, place them in warm water for 10 minutes before cracking.
Flour Considerations
All-purpose flour serves most brownie recipes perfectly. Its moderate protein content, typically 10 to 12 percent, provides enough structure without creating toughness.
For gluten-free brownies, a one-to-one gluten-free baking blend works well as a direct substitute. Look for blends that include xanthan gum for binding. Almond flour creates dense, fudgy brownies with a nutty flavor that many enjoy, though the texture differs significantly from wheat flour versions.
When measuring flour, use the spoon-and-level method rather than scooping directly from the bag. Scooping compacts flour and can lead to using 20 percent more than intended, resulting in dry, cakey brownies.
Choosing the Right Pan: Size, Material, and Temperature Adjustments
Your choice of baking pan significantly affects both texture and baking time. Understanding these variables helps you adapt any recipe to the equipment you have.
Pan Size Conversions
Most easy brownie recipes specify an 8×8-inch square pan, creating brownies approximately 1 inch thick. If you only have a 9×9-inch pan, the batter will spread thinner and bake faster. Reduce baking time by 3 to 5 minutes and check early.
A 9×13-inch pan holds exactly double the batter of an 8×8. To scale any recipe up, simply double all ingredients and use a 9×13 pan. Baking time remains approximately the same since the thickness stays consistent.
For thicker, more fudgy brownies, use a loaf pan with the standard 8×8 recipe. The increased depth requires longer baking, typically 35 to 40 minutes, and creates brownie edges on all sides.
Material Matters
Metal pans, particularly aluminum, conduct heat efficiently and create brownies with well-defined edges and even baking. Dark nonstick metal pans absorb more heat and can cause overbrowning. With dark pans, reduce oven temperature by 25 degrees.
Glass and ceramic pans retain heat longer than metal, meaning your brownies continue cooking after removal from the oven. This can lead to overbaking if you’re not careful. Reduce oven temperature by 25 degrees when using glass, and check for doneness 5 minutes before the recipe suggests.
Silicone pans offer easy release but don’t conduct heat well, often resulting in pale, underbaked centers with overbaked edges. If using silicone, place it on a baking sheet for stability and extend baking time by 5 to 10 minutes.
Troubleshooting Common Brownie Problems
Even experienced bakers encounter brownie issues occasionally. Here’s how to identify and fix the most common problems.
Why Are My Brownies Dry?
Dry brownies almost always result from overbaking. Remember that brownies continue cooking from residual heat after removal from the oven. Pull them when the toothpick still shows moist crumbs rather than waiting for it to come out clean.
Incorrect flour measurement also causes dryness. Scooping flour directly from the bag compacts it, leading to using significantly more than intended. Always spoon flour into your measuring cup, then level with a knife.
Using a pan that’s too large spreads the batter thin, causing it to dry out quickly. Check that your pan matches the recipe specification.
Why Is the Center Underbaked?
If the edges are done but the center remains gooey, your oven temperature may be too high, causing the exterior to set before the interior cooks through. Invest in an oven thermometer to verify your oven’s accuracy.
Glass pans often cause this issue because the edges overbake while the center stays underdone. Switch to a metal pan, or reduce the oven temperature by 25 degrees and extend baking time.
Too much batter in too small a pan creates excessive depth that the heat cannot penetrate evenly. Use the pan size specified in the recipe.
Why Do Brownies Crack on Top?
Cracking on top indicates overbaking or excessive oven temperature. The surface dries and sets before the interior finishes expanding, causing the top to crack as the brownies rise.
While some cracking is normal and even desirable for that homemade look, extensive cracking suggests you should reduce baking time or temperature for the next batch.
Why Won’t My Brownies Come Out of the Pan?
Sticking usually results from insufficient pan preparation. For your next batch, use parchment paper with overhang, or grease thoroughly and dust with cocoa powder.
Attempting to remove brownies while warm also causes sticking and crumbling. Wait until completely cool, or even chill in the refrigerator for easier handling.
How to Store and Freeze Brownies
Proper storage maintains brownie freshness and texture for days or even months. These methods work for all the easy brownie recipes in this collection.
Room Temperature Storage
Store brownies in an airtight container at room temperature for up to 4 days. Place a sheet of parchment paper between layers if stacking to prevent sticking.
Do not refrigerate unfrosted brownies unless your kitchen is unusually warm. Refrigeration accelerates staling and creates a hard, unpleasant texture.
Frosted brownies should be refrigerated if the frosting contains perishable ingredients like cream cheese or whipped cream. Allow them to come to room temperature before serving for best flavor and texture.
Freezing Brownies
Brownies freeze exceptionally well, making them perfect for meal prep and advance party planning. Cool completely, then wrap individual squares tightly in plastic wrap, followed by aluminum foil. Place wrapped brownies in a freezer bag, removing as much air as possible.
Frozen brownies maintain quality for up to 3 months. Thaw at room temperature for 1 to 2 hours, or microwave individual brownies for 20 to 30 seconds for quick enjoyment.
You can also freeze the entire uncut slab. Wrap the cooled brownie block in plastic wrap and foil, freeze, then thaw and cut when needed. This method actually makes cutting cleaner, as cold brownies slice more neatly.
Creative Brownie Variations and Add-In Ideas
Once you master the base recipes, endless customization possibilities open up. Use these ideas to create signature brownies your friends and family will request by name.
Mix-In Ideas
Chocolate chips, nuts, and candy pieces fold easily into any brownie batter. Add up to 1 cup total of mix-ins without affecting baking. Popular combinations include walnuts with dark chocolate chips, pecans with butterscotch chips, and crushed peppermint candies for holiday treats.
Toffee bits add delightful crunch and caramel flavor. Dried cherries or cranberries provide tart contrast to sweet chocolate. Espresso powder enhances chocolate depth without adding coffee flavor, use 1 teaspoon per recipe.
For textural interest, reserve half your mix-ins to sprinkle on top of the batter before baking. This creates visual appeal and prevents all the goodies from sinking to the bottom.
Topping Suggestions
Simple toppings elevate brownies from everyday to special occasion. A dusting of powdered sugar creates elegance with minimal effort. Drizzled caramel or chocolate ganache adds decadence.
For dessert plating, serve warm brownies with vanilla ice cream and hot fudge sauce. Whipped cream and fresh berries balance the richness with lightness. Crushed cookies or cereal create fun textural contrast for kid-friendly presentations.
Flaky sea salt sprinkled on top before baking creates sophisticated salted chocolate brownies. The salt crystals draw out chocolate complexity and provide pleasant flavor bursts.
A Brownie Workflow That Prevents Last-Minute Mistakes
-
Check the pan: Use the size and material named in the recipe before mixing.
-
Line it first: Leave a parchment overhang on two sides for clean removal.
-
Measure dry ingredients: Spoon flour into the cup and level it, or weigh it.
-
Bring eggs toward room temperature: This helps them blend into melted chocolate or butter more smoothly.
-
Set an early timer: Begin checking before the maximum bake time because ovens and pans vary.
-
Plan the cooling window: A brownie that takes 30 minutes to bake may still need two hours before clean slicing.
Egg and Storage Safety
-
Raw batter: Do not taste batter made with raw eggs or untreated flour.
-
Egg handling: Keep eggs refrigerated and wash hands and tools after contact with raw egg.
-
Frosted brownies: Refrigerate versions topped with perishable dairy frosting.
-
Freezing: Wrap cooled, unfrosted brownies tightly and freeze in a labeled container.
-
Thawing: Thaw wrapped brownies so condensation forms on the wrapper rather than the surface.
Review the FDA egg-safety guidance and the federal cold-storage chart when adapting toppings or fillings.
Frequently Asked Questions
What makes brownies fudgy instead of cakey?
Fudgy brownies generally use more fat relative to flour and little or no chemical leavener. Cakey brownies use more flour, may include baking powder, and often incorporate more air during mixing.
How do I get a shiny, crinkly brownie top?
Dissolve the sugar well into the eggs and whisk thoroughly before folding in the dry ingredients. The thin sugar-and-egg layer rises and dries at the surface as the brownie bakes.
How can I tell when brownies are done?
Check the center with a toothpick. Fudgy brownies should leave moist crumbs but no liquid batter; cake-style brownies can show drier crumbs. The edges should look set and the center should not slosh when the pan moves.
Why did my brownies turn dry?
Common causes are too much flour, an oversized pan, a hot oven, or baking too long. Measure flour carefully, verify pan size, and begin checking several minutes before the stated maximum.
Can I use a glass pan for brownies?
You can, but glass holds heat differently from metal and may continue cooking the edges after removal. Reduce the oven temperature by 25°F when appropriate and begin checking early.
How do I cut clean brownie squares?
Cool the slab completely, lift it out with parchment, and use a sharp knife. Wipe the blade between cuts. Chilling briefly creates especially clean edges, though the texture will be firmer while cold.
Conclusion: Match Easy Brownie Recipes Ideas to the Texture You Love
These easy brownie recipes ideas all begin with familiar baking ingredients, but their ratios and mixing methods create six noticeably different results. Pick the texture first, follow the doneness cue for that recipe, and give the pan enough time to cool.
Once one base feels dependable, change a single variable—chips, nuts, a swirl, or frosting—rather than rewriting the entire formula. That is the simplest path from a good brownie to your favorite brownie.