
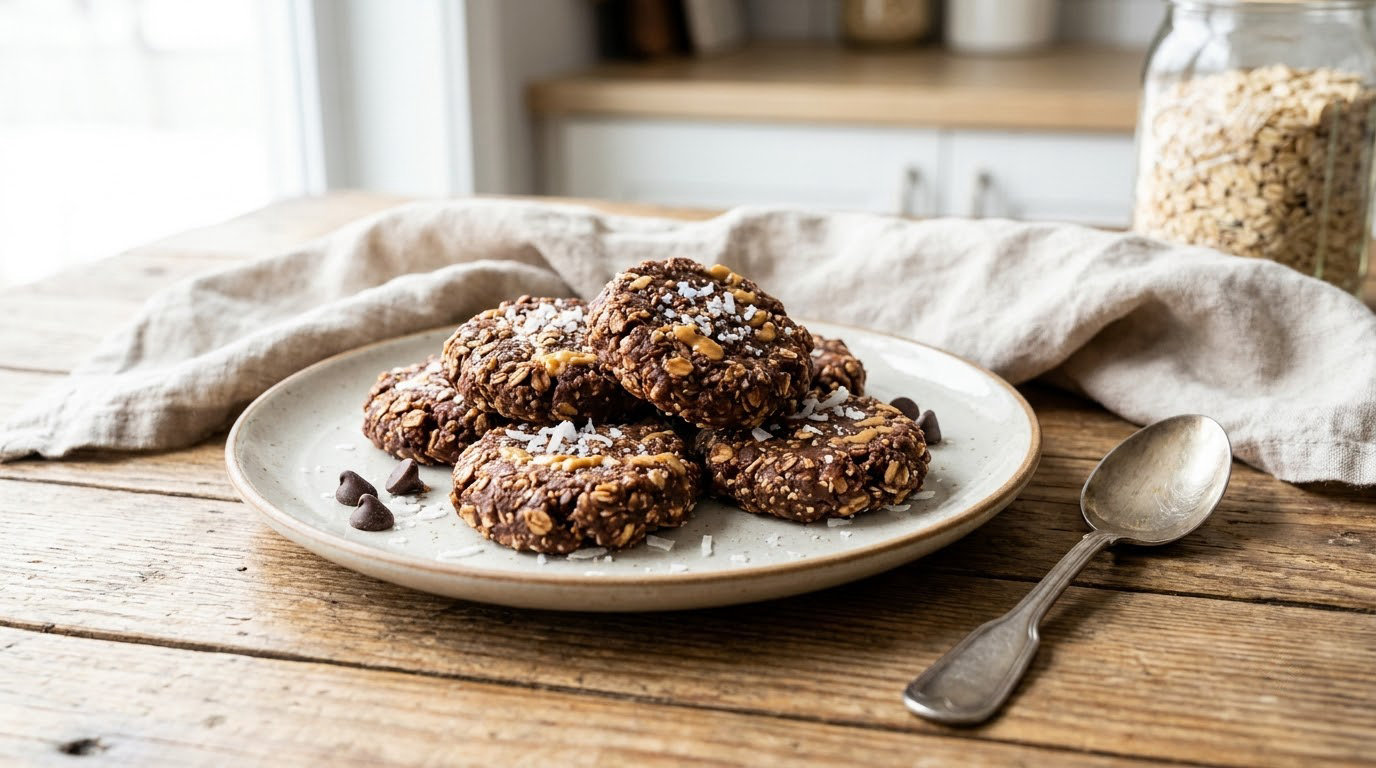
15 easy no bake cookie recipes that need no oven, no heat, and almost no cleanup. Every cookie below sets in the refrigerator or freezer, so you can mix a batch in ten minutes and bake nothing at all.
They suit beginners, families, packed lunches, last-minute treats, and warm-weather gatherings where switching the oven on feels like a punishment. What they share: simple ingredients from a normal pantry, short prep times, minimal equipment, and a forgiving texture that is hard to ruin. If you need something for a potluck, our cookie bars that travel well cover the same audience from the other direction.
Table of Contents
15 Easy No Bake Cookie Recipes at a Glance
The times below include chilling or setting, not just hands-on work. That is the number that matters when you are planning an afternoon of baking nothing.
| Recipe | Time | Difficulty | Best for |
|---|---|---|---|
| 1. Easy No Bake Chocolate Chip Cookies | 2 hr 15 min | Easy | Chocolate lovers, first-time bakers |
| 2. No Bake Peanut Butter Cookies | 1 hr 45 min | Easy | Peanut butter fans, lunchboxes |
| 3. No Bake Oatmeal Cookies | 2 hr 20 min | Easy | Chewy texture, packed lunches |
| 4. Coconut Thumbprint Cookies | 1 hr 30 min | Easy | Summer parties, kid decorating |
| 5. No Bake Chocolate Coconut Cookies | 2 hr 20 min | Easy | Rich fudgy chocolate, make-ahead |
| 6. No Bake Chocolate Covered Cookies | 1 hr 45 min | Medium | Cookie swaps, gifting |
| 7. No Bake Sugar Cookies | 1 hr 30 min | Medium | Decorating with kids, holidays |
| 8. No Bake Chocolate Haystack Cookies | 1 hr 30 min | Easy | Kids, parties, quick batches |
| 9. No Bake Oreo Cookie Pie | 4 hr 30 min | Easy | Dessert tables, make-ahead |
| 10. No Bake Energy Balls | 45 min | Easy | After-school snacks, on-the-go |
| 11. No Bake Meringue Cookies | 1 hr 45 min | Medium | Gluten-free, light and airy |
| 12. No Bake Chocolate Chip Cookie Dough Bites | 1 hr 20 min | Easy | Snacking, kids who eat dough |
| 13. No Bake Pumpkin Cookies | 2 hr 20 min | Easy | Autumn baking, cozy flavors |
| 14. No Bake Almond Flour Cookies | 1 hr 40 min | Easy | Gluten-free eating, nut-free swaps |
| 15. No Bake Raisin Cookies | 2 hr 20 min | Easy | Fruit-forward, old-fashioned flavor |
1. Easy No Bake Chocolate Chip Cookies
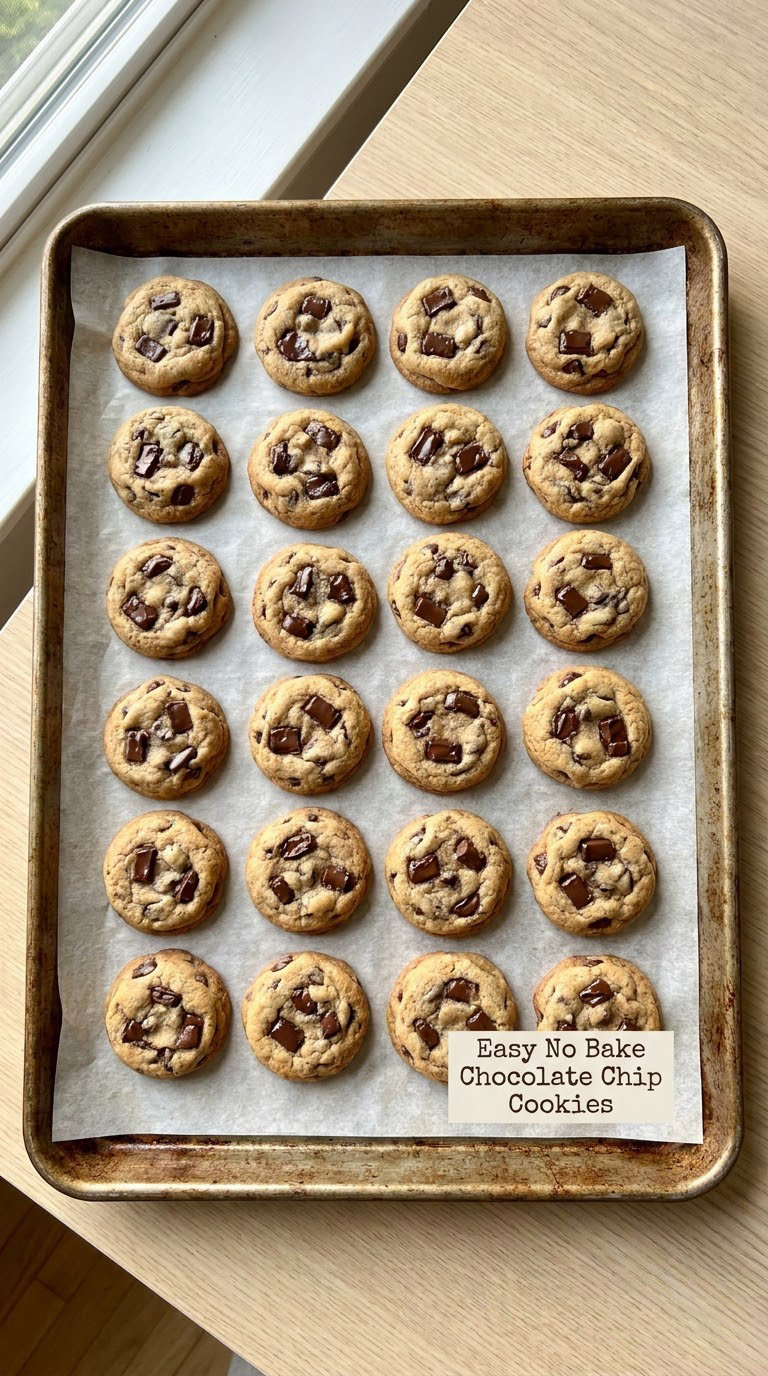
This is the cookie I hand to anyone who claims no-bake treats are complicated. The dough tastes like the real thing, presses easily, and forgives a slightly uneven scoop. Twenty-four medium cookies, ready in about two hours including chilling.
Yield: 24 medium cookies · Prep: 15 min · Cook: none, 2 hr chill · Total: 2 hr 15 min · Difficulty: Easy
Ingredients
- 1 cup (120 g) heat-treated all-purpose flour
- 1/2 cup (113 g) unsalted butter, softened, or a neutral spread
- 1/2 cup (110 g) packed light brown sugar
- 1/4 cup (50 g) granulated sugar
- 1 large pasteurized egg
- 1 teaspoon vanilla extract
- 1/4 teaspoon fine salt
- 1 cup (170 g) semisweet chocolate chips
- 1/2 cup optional mix-ins, such as chopped walnuts, mini marshmallows, or dried cranberries
Instructions
- Line a baking sheet with parchment and set a 2-tablespoon cookie scoop nearby.
- Beat the softened butter, brown sugar and granulated sugar for 1 to 2 minutes, until smooth and slightly lighter in color.
- Mix in the pasteurized egg and vanilla, then the flour and salt, stirring only until no dry patches remain.
- Fold in the chocolate chips and any mix-ins.
- Rest the dough 5 minutes so the flour hydrates, then scoop level mounds 2 inches apart on the sheet.
- Flatten each mound to about 1/2 inch thick with the back of a cup, pressing the edges round.
- Chill 2 hours, until firm to the touch and no longer shiny on top.
- Lift with a spatula; they firm further within an hour of leaving the fridge.
Tip: Press the tops flat before chilling, not after. Warm mounds slump during the chill, and you cannot reshape them once the butter firms.
Swap it: For a gluten-free version, use a cup-for-cup certified gluten-free all-purpose flour that is already heat-treated, and check that your chocolate chips are labeled gluten-free.
Storage: Airtight at the counter for 4 days, refrigerated for 2 weeks, freezer for 3 months. Thaw at room temperature in the closed container so the tops do not go chalky.
Allergens: milk, wheat, egg.
2. No Bake Peanut Butter Cookies
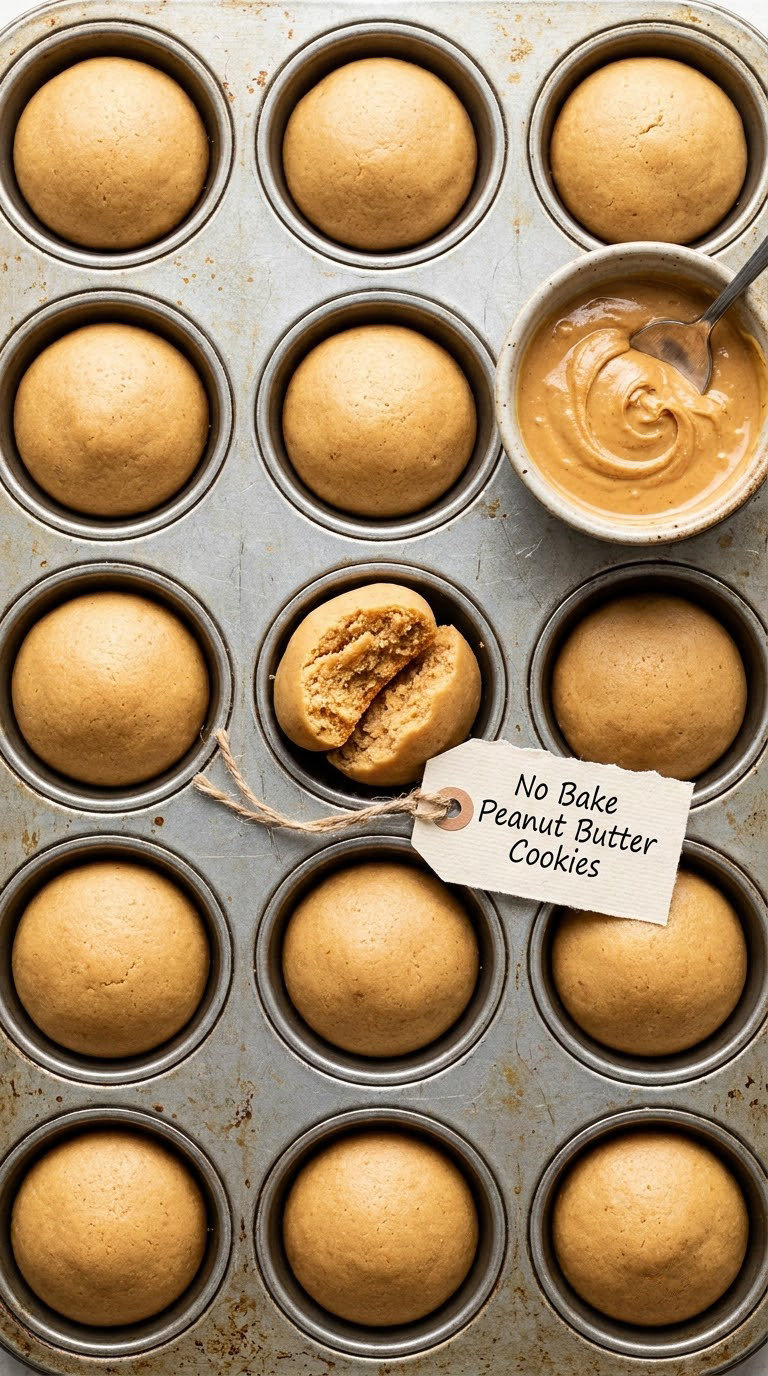
Peanut butter does the work of both fat and sweetener here, so the dough needs barely five ingredients. Pressed into muffin cups these turn into proper little domes rather than the sad flat discs most people end up with.
Yield: 18 cookies · Prep: 10 min · Cook: none, 90 min chill · Total: 1 hr 45 min · Difficulty: Easy
Ingredients
- 1 cup (240 g) creamy peanut butter, natural or smooth
- 1/4 cup (57 g) unsalted butter, softened
- 1/2 cup (110 g) packed light brown sugar
- 1 teaspoon vanilla extract
- 1/4 teaspoon fine salt
- 1/2 cup (40 g) rolled oats, or 1/3 cup (40 g) heat-treated flour for extra structure
Instructions
- Line a 12-cup muffin pan with paper liners and grease them lightly with butter.
- Beat the peanut butter, softened butter and brown sugar for 2 minutes, until glossy and combined.
- Stir in the vanilla and salt, then the oats or flour, mixing until the dough pulls away from the bowl.
- Divide the dough between the cups, about 2 tablespoons each, and press down firmly with the back of a spoon.
- Chill 90 minutes, until firm enough to lift out of the liners without bending.
- Turn out onto a wire rack and store airtight.
Tip: Grease the liners, and press each portion hard. Peanut butter dough sticks to paper more than any other, and a firm press keeps the domed top.
Swap it: Sunflower seed butter gives the same structure with no peanuts. For a gluten-free version use certified gluten-free rolled oats, or leave them out and add 1 tablespoon of oat flour for the body.
Storage: Counter in an airtight tin for 5 days, refrigerator for 2 weeks, freezer for 3 months. They freeze best sandwiched between layers of parchment.
Allergens: peanuts, milk, oats (may contain wheat).
3. No Bake Oatmeal Cookies
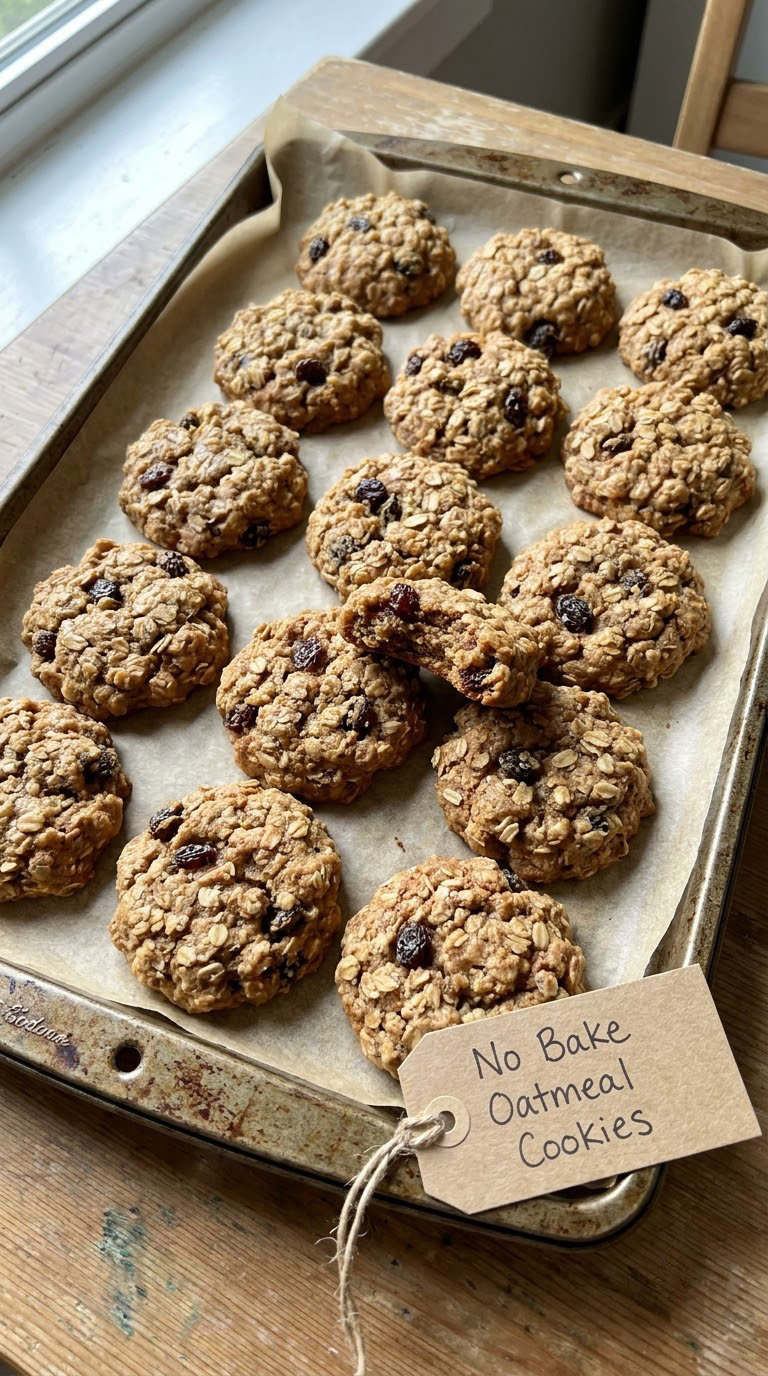
These are the chewy ones. Toasted oats and a little cinnamon give a flavor closer to a baked oatmeal cookie, and the texture stays soft for days. A proper 1/4-cup portion is the difference between a chewy cookie and a cake.
Yield: 20 cookies · Prep: 20 min · Cook: none, 2 hr chill · Total: 2 hr 20 min · Difficulty: Easy
Ingredients
- 1 1/2 cups (150 g) old-fashioned rolled oats
- 1 cup (120 g) heat-treated all-purpose flour
- 1/2 cup (113 g) unsalted butter, softened
- 3/4 cup (165 g) packed light brown sugar
- 1/4 cup (50 g) granulated sugar
- 1 large pasteurized egg
- 1 teaspoon ground cinnamon
- 2 teaspoons vanilla extract
- 1/2 teaspoon baking powder, optional, for a little lift
- 1/4 teaspoon fine salt
- 3/4 cup (100 g) raisins, or semisweet chocolate chips
Instructions
- Line a baking sheet with parchment and toast the oats in a dry pan over medium heat for 3 minutes, stirring, until nutty. Cool them.
- Beat the butter with both sugars for 2 minutes, then mix in the pasteurized egg, cinnamon and vanilla.
- Stir in the flour, baking powder and salt, then the cooled oats and raisins.
- Chill the dough 10 minutes so it firms enough to scoop.
- Portion 1/4-cup mounds 2 inches apart, then press each to about 1/2 inch thick.
- Chill 2 hours, until firm at the edges with a slight give in the center.
- Transfer to a rack; the centers finish setting as they come to room temperature.
Tip: Toast the oats before they go in. Skipping it costs you the nutty flavor that makes these taste baked rather than assembled.
Swap it: Sunflower seed butter plus extra oats replaces the butter for a nut-free version. Dried cranberries or chopped dried apricots work instead of raisins, and gluten-free readers should pick certified gluten-free oats and flour.
Storage: Airtight at the counter for 5 days, refrigerator for 10 days, freezer for 3 months. The texture is better from day two, so make these a day ahead.
Allergens: milk, wheat, egg, oats (may contain wheat), raisins may carry sulfites.
4. Coconut Thumbprint Cookies
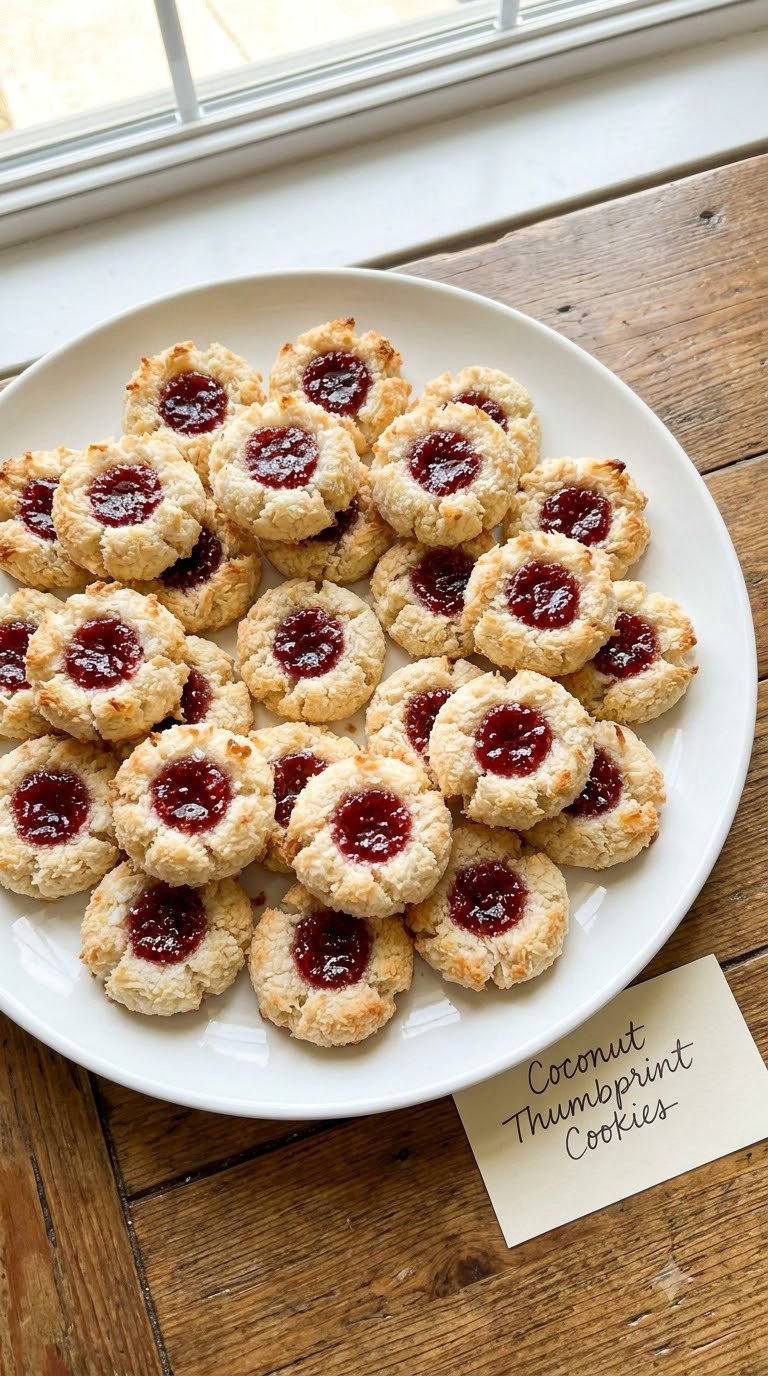
A buttery dough rolled in coconut, with a dent pressed in before chilling and jam dropped in afterwards. The indent is the whole trick, and it has to be made while the dough is still soft. Doing it later flattens the cookie.
Yield: 24 cookies · Prep: 20 min · Cook: none, 60 min chill plus setting · Total: 1 hr 30 min · Difficulty: Easy
Ingredients
- 1 1/4 cups (150 g) heat-treated all-purpose flour
- 1/2 cup (113 g) unsalted butter, softened
- 1/2 cup (100 g) granulated sugar
- 1 cup (90 g) unsweetened shredded coconut
- 1 teaspoon vanilla extract
- 1/4 teaspoon fine salt
- 1 large pasteurized egg for brushing
- 1/3 cup jam for the centers, plus extra for serving
Instructions
- Line a baking sheet with parchment and preheat nothing, because this is a refrigerator cookie.
- Beat the butter and sugar for 2 minutes until pale and smooth, then stir in the vanilla, salt, flour and half the coconut.
- Roll the dough into 24 balls using 1 tablespoon each, then roll each in the remaining coconut until craggy all over.
- Press a thumb into the center of each ball, indenting about 1/3 of the way down.
- Brush with a little of the pasteurized egg, then chill 60 minutes, until the dough holds its shape.
- Fill each dent with about 1/2 teaspoon of jam.
- Let the cookies sit at room temperature 30 minutes before serving so the jam sets rather than runs.
Tip: Press the dent before chilling, not after. A dent made in cold dough cracks the cookie in half, and a dent made at room temperature fills itself in.
Swap it: Any thick jam works, or use melted chocolate for a dairy-light center. For coconut-free cookies, dust the tops with fine sugar instead of rolling in coconut.
Storage: Refrigerate for up to 10 days, and keep the jam centers from weeping by storing the cookies in a single layer at first. They freeze for 3 months, though the jam texture softens on thawing.
Allergens: milk, wheat, egg, coconut.
5. No Bake Chocolate Coconut Cookies
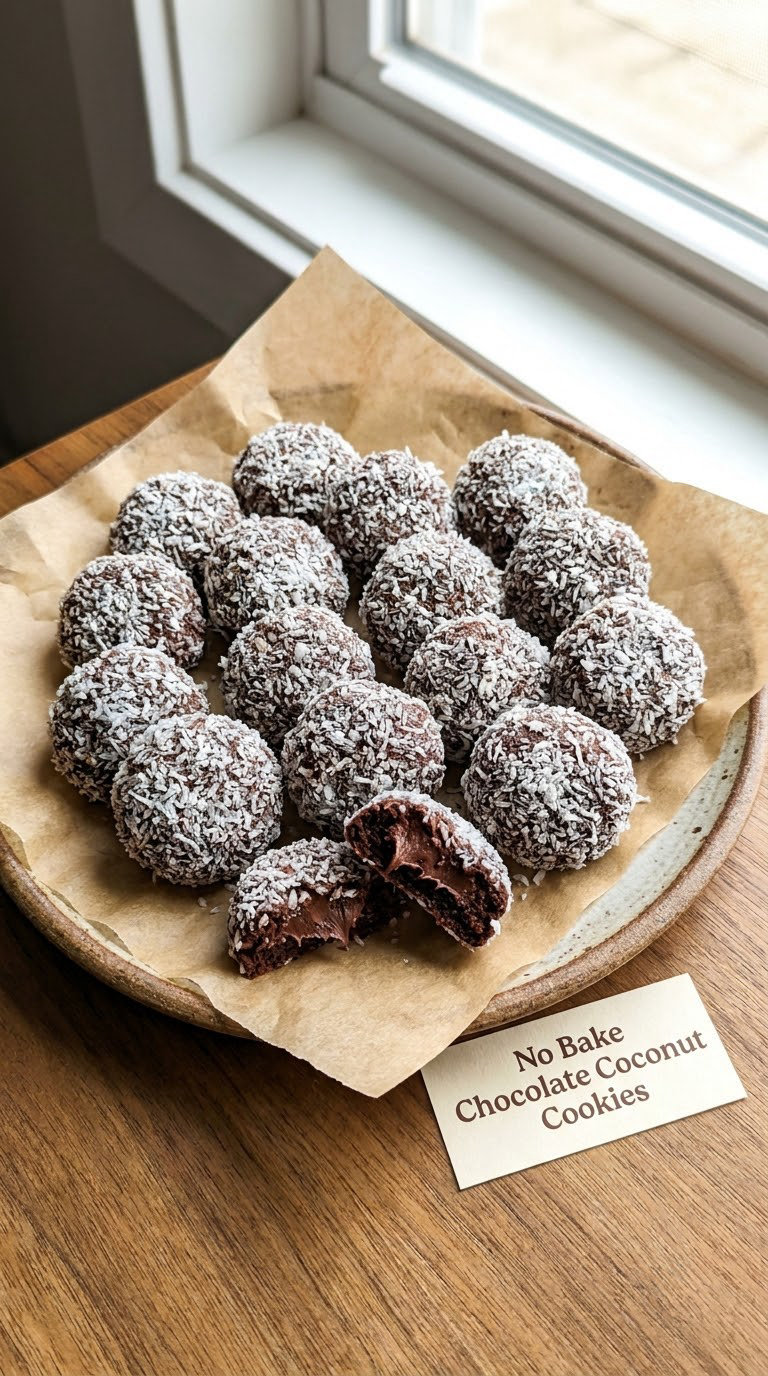
Cocoa powder and shredded coconut make a cookie that tastes like a brownie top and sets like a fudge square. It is the richest thing on this list that still needs nothing but a fridge and ten minutes of work.
Yield: 20 cookies · Prep: 15 min · Cook: none, 2 hr chill · Total: 2 hr 20 min · Difficulty: Easy
Ingredients
- 1/3 cup (45 g) unsweetened cocoa powder
- 1 cup (120 g) heat-treated all-purpose flour
- 1 cup (90 g) unsweetened shredded coconut
- 1/2 cup (113 g) unsalted butter, softened
- 3/4 cup (165 g) packed light brown sugar
- 1 large pasteurized egg
- 1 teaspoon vanilla extract
- 1/4 teaspoon fine salt
- 1/2 cup (85 g) mini chocolate chips, or 60 g dark chocolate melted for a drizzle
Instructions
- Line a baking sheet with parchment and stir the cocoa and salt together with the flour in a bowl.
- Beat the butter and brown sugar for 2 minutes, then mix in the pasteurized egg and vanilla.
- Add the dry ingredients in two additions, stirring until the dough is dense and holds together when squeezed.
- Fold in the coconut and the mini chocolate chips.
- Chill the dough 10 minutes, then scoop 2-tablespoon mounds 2 inches apart.
- Press each flat to 1/2 inch, then refrigerate 2 hours, until firm with no shine left on the surface.
Tip: Cocoa powder needs the salt. Without it the batch can taste flat and slightly bitter, and most people reach for more sugar instead of the teaspoon of salt.
Swap it: Dairy-free readers can use coconut oil in place of the butter and a flax egg (1 tablespoon ground flaxseed plus 3 tablespoons water, rested 10 minutes) in place of the egg. Sunflower seed butter plus extra chocolate chips makes a nut-free version.
Storage: Airtight at the counter for 5 days, refrigerator for 2 weeks, freezer for 3 months. Firm as fudge straight from the fridge, softer after an hour at room temperature.
Allergens: milk, wheat, egg, coconut, soy.
6. No Bake Chocolate Covered Cookies
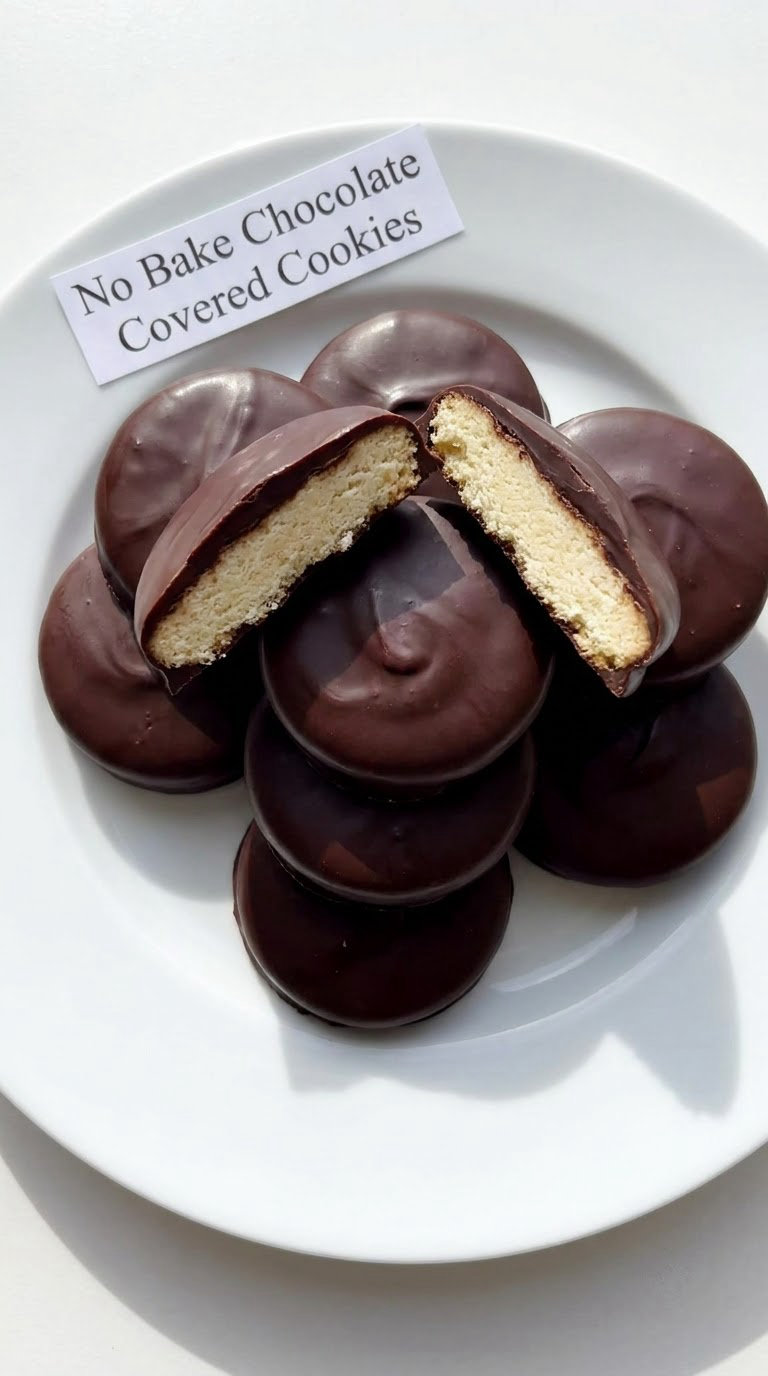
A tender vanilla base, chilled until solid, then dipped in dark chocolate set with a little coconut oil. It looks like a bakery job and behaves like one, because the coating needs the base to be completely set first.
Yield: 24 cookies · Prep: 25 min · Cook: none, 1 hr chill plus 20 min setting · Total: 1 hr 45 min · Difficulty: Medium
Ingredients
- 1/2 cup (113 g) unsalted butter, softened
- 1/3 cup (67 g) granulated sugar
- 1 large pasteurized egg
- 1 teaspoon vanilla extract
- 1 1/4 cups (150 g) heat-treated all-purpose flour
- 1/4 teaspoon fine salt
For the coating
- 8 ounces (225 g) dark or semisweet chocolate, chopped
- 1 tablespoon (15 g) coconut oil or unsalted butter
Instructions
- Line a baking sheet with parchment and stir the flour and salt together.
- Beat the butter, sugar, pasteurized egg and vanilla until creamy, then fold in the flour.
- Roll the dough into 24 balls of about 1.5 tablespoons, flatten to 3/4 inch thick rounds, and chill 1 hour until completely hard.
- Place the chocolate and coconut oil in a heatproof bowl and melt in 20-second microwave bursts, stirring between each, until smooth.
- Let the melted chocolate cool 5 minutes so it is warm rather than hot, then dip each cookie halfway, letting the excess drip off the fork.
- Lay the cookies on parchment, optionally add a pinch of sea salt, and set 20 minutes at room temperature.
- Store away from heat, because the coating softens above about 70°F (21°C).
Tip: Chill the base cookies until they are hard as a pebble before dipping. A warm base drags the chocolate off in streaks and leaves you with a lumpy shell.
Swap it: Milk chocolate sets softer and sweeter, so add an extra 10 minutes of setting time in the fridge. For an allergen-friendly coating, use a dairy-free chocolate brand and coconut oil rather than butter.
Storage: Store airtight at the counter for 4 days in a cool room, refrigerator for 2 weeks, freezer for 2 months. Bring them out 20 minutes before serving in hot weather, or the shell goes dull and soft.
Allergens: milk, wheat, egg, soy.
7. No Bake Sugar Cookies
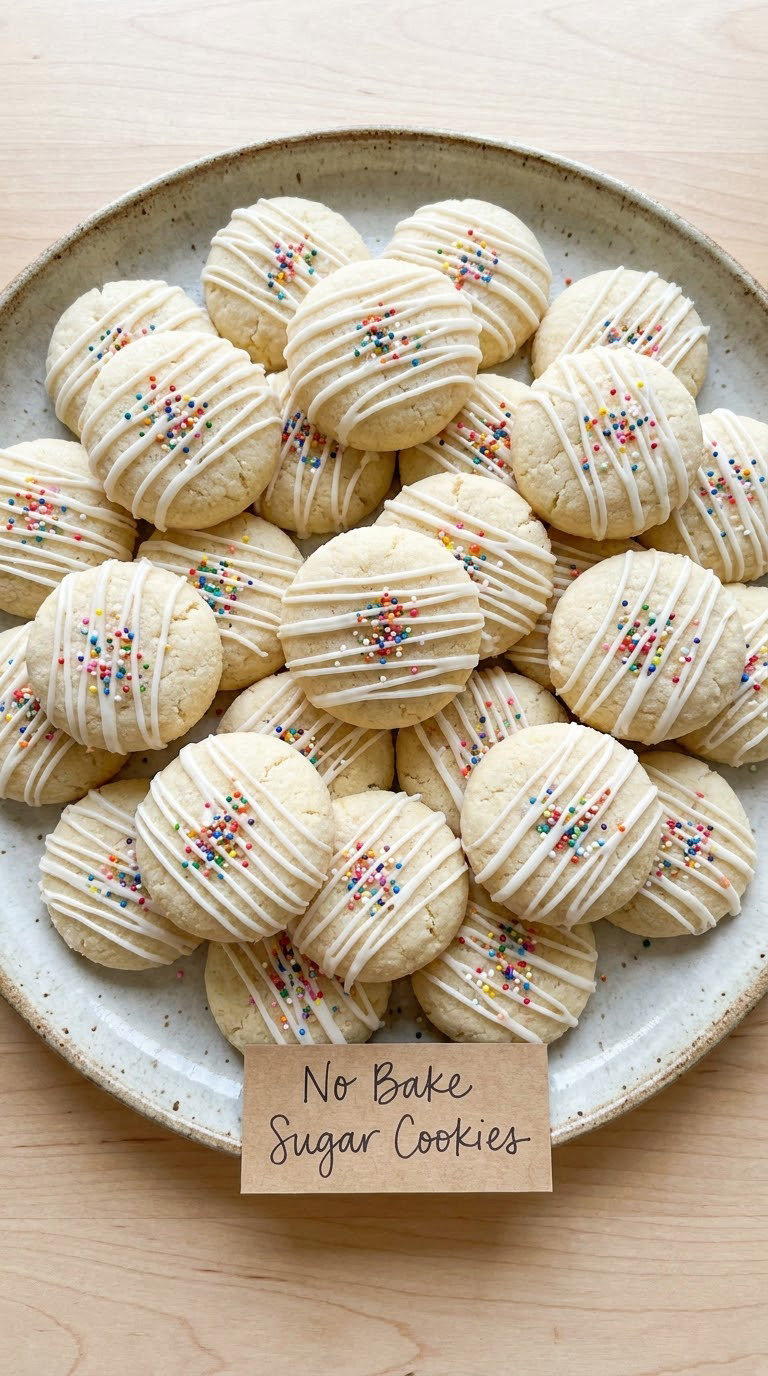
Roll-out sugar cookies without the oven. The dough is soft, presses cleanly between parchment, and takes royal icing or melted chocolate beautifully. Twenty-eight cookies, ready to decorate once the chill is done.
Yield: 28 cookies · Prep: 20 min · Cook: none, 60 min chill plus 15 min setting · Total: 1 hr 30 min · Difficulty: Medium
Ingredients
- 1/2 cup (113 g) unsalted butter, softened
- 3/8 cup (75 g) granulated sugar
- 1 large pasteurized egg
- 1 teaspoon vanilla extract
- 1 1/2 cups (180 g) heat-treated all-purpose flour
- 1/4 teaspoon fine salt
For decorating
- Melted white or dark chocolate, or a simple icing of 2 cups (240 g) powdered sugar, 2 tablespoons milk and 1 teaspoon vanilla
- Sprinkles, sanding sugar or chopped nuts
Instructions
- Line a baking sheet with parchment and cut two sheets of parchment for rolling.
- Beat the butter and sugar until pale, then mix in the pasteurized egg and vanilla.
- Add the flour and salt and knead the dough briefly with clean, dry hands until it holds together when pinched.
- Flatten the dough to 1/2 inch between the two parchment sheets, then lift off the top sheet and cut 2-inch rounds with a cutter or a clean glass.
- Peel each round off the parchment, transfer to the baking sheet, and chill 60 minutes until firm.
- Decorate straight from the fridge; iced cookies need 15 minutes to set, chocolate-coated ones need 20.
- Transfer the icing or chocolate to a piping bag or small jug for controlled lines and zigzags.
Tip: Roll between two sheets of parchment and chill the sheet, not the counter. Flour dusted on a worktop gets into the icing and dulls it, and it makes the dough sticky to handle.
Swap it: A natural sweetener version swaps 75 g of sugar for 60 g coconut sugar and adds 1 tablespoon more liquid, since coconut sugar is drier. Gluten-free readers use a cup-for-cup certified gluten-free all-purpose flour.
Storage: Undecorated cookies keep 4 days at the counter or 3 weeks refrigerated. Decorated cookies keep 3 days at the counter, 2 weeks refrigerated, and freeze for 2 months; freeze decorated and undecorated separately, layered with parchment.
Allergens: milk, wheat, egg.
8. No Bake Chocolate Haystack Cookies
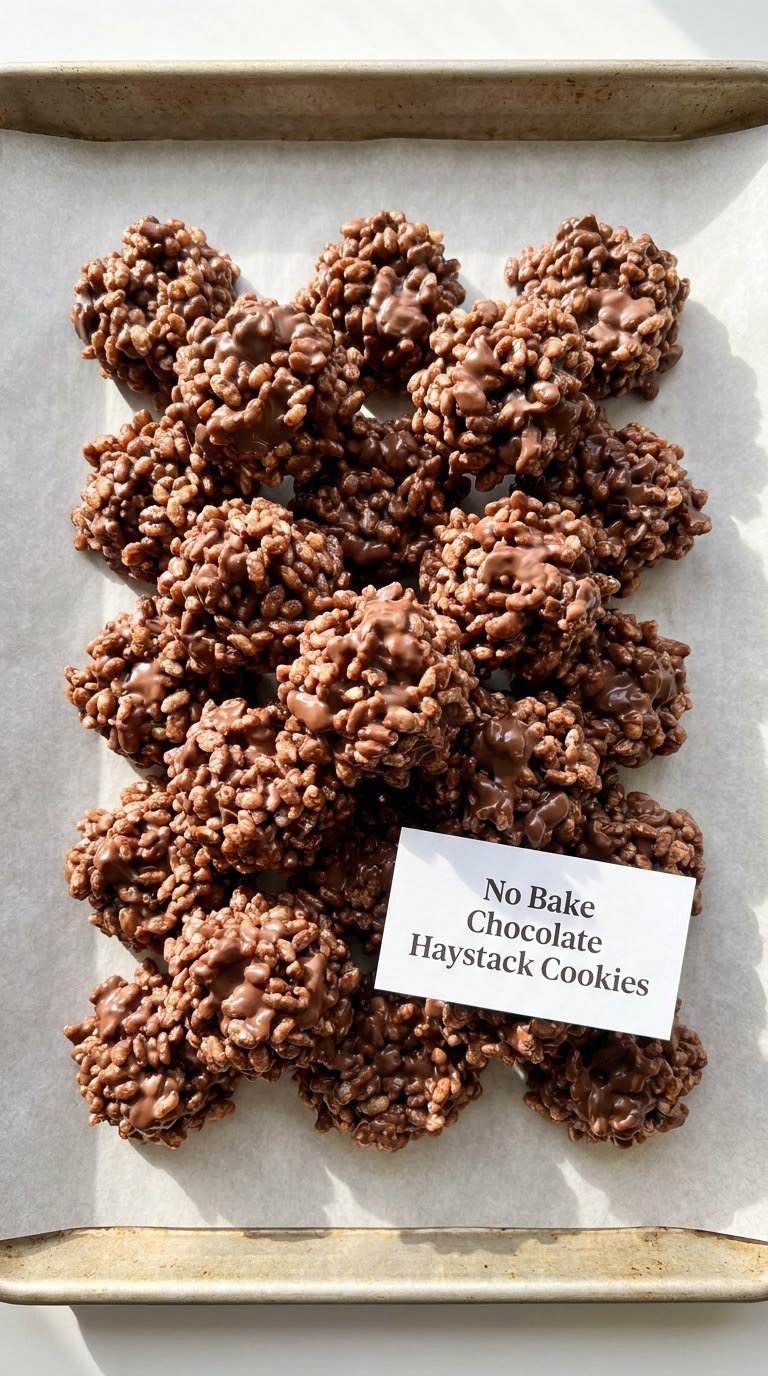
Six ingredients, ten minutes, and no oven. Haystacks are irregular by nature, so this is the easiest recipe on the list to make with a child helping. Pressed small they stay crunchy; pressed large they turn soft and chewy.
Yield: 20 cookies · Prep: 10 min · Cook: none, 90 min chill · Total: 1 hr 30 min · Difficulty: Easy
Ingredients
- 5 cups (150 g) crisp rice cereal
- 3/4 cup (140 g) butterscotch or semisweet chocolate chips
- 6 tablespoons (85 g) unsalted butter
- 1/2 cup (120 ml) sweetened condensed milk
- 1/2 teaspoon vanilla extract
- 1/4 teaspoon fine salt
Instructions
- Place the rice cereal in a large bowl, then measure the chocolate chips, butter, condensed milk, vanilla and salt into a saucepan.
- Heat over low heat and stir constantly until the chips and butter melt and the mixture is smooth, 4 to 5 minutes.
- Remove from the heat and stir for 30 seconds more, until glossy and slightly thickened.
- Pour the mixture over the cereal and fold gently with a spatula until every piece is coated.
- Pack 2-tablespoon mounds onto a parchment-lined sheet, using wet hands to squeeze each one into a compact pyramid about 2 inches tall.
- Refrigerate 90 minutes, until the chocolate shell is hard to the touch.
- Eat from the sheet, because half of them never make it to a container.
Tip: Squeeze each mound firmly with damp hands. Loose piles slump into flat blobs, and compact ones hold a clean pyramid shape that looks deliberate.
Swap it: Swap butterscotch chips for peanut butter chips plus a tablespoon of peanut butter for a peanut butter haystack, or use toasted coconut in place of half the cereal for a crunchier, nut-free version.
Storage: Airtight at the counter for 5 days, refrigerator for 2 weeks, freezer for 3 months. They soften after sitting out, so store the crunchiest ones on top.
Allergens: milk, wheat (rice cereal often contains wheat), soy.
9. No Bake Oreo Cookie Pie
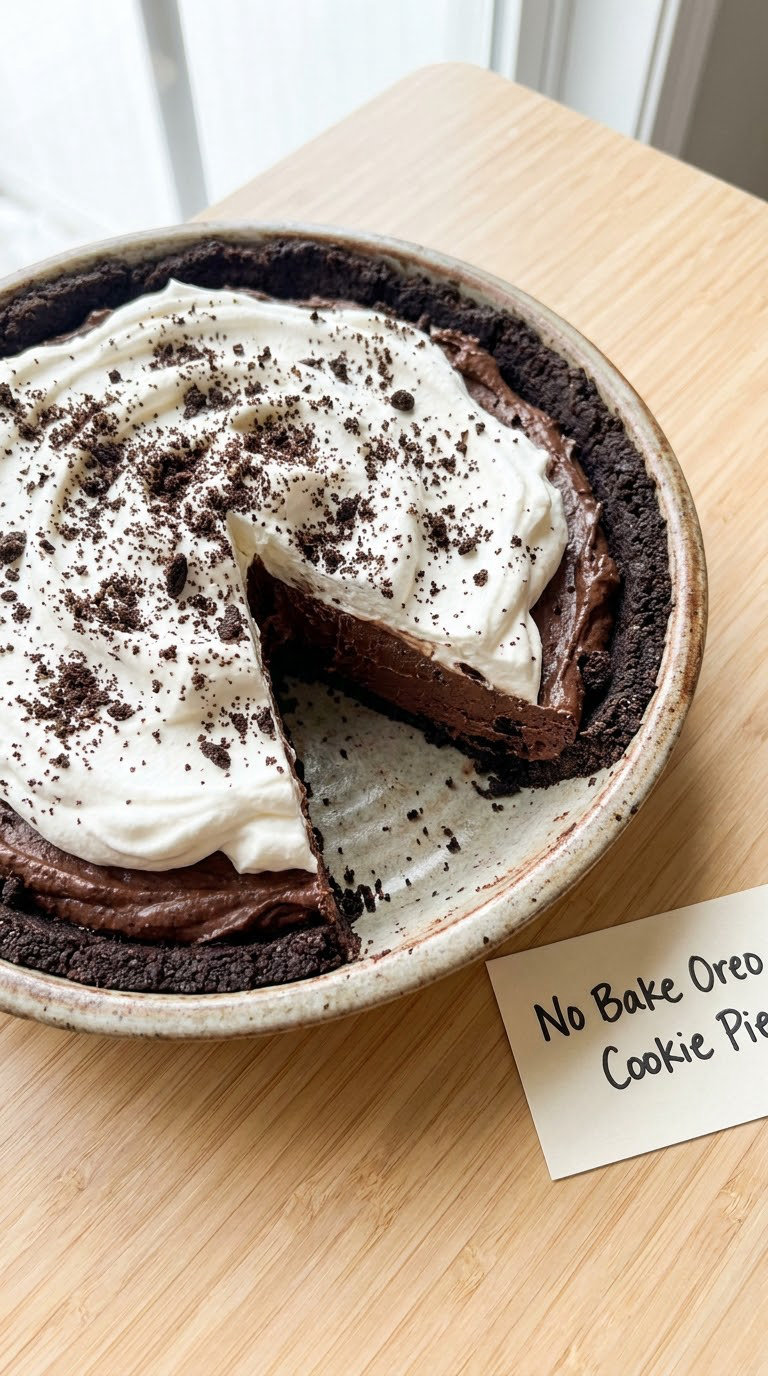
A dessert that looks like effort and mostly involves a food processor. The crust sets in the fridge, the filling sets in the pie, and it wants to be made the day before you serve it. Eight generous slices.
Yield: 8 servings · Prep: 20 min · Cook: none, 4 hr chill · Total: 4 hr 30 min · Difficulty: Easy
Ingredients
For the crust
- 1 3/4 cups (200 g) crushed sandwich cookies, plus 1/3 cup (40 g) more for the top
- 6 tablespoons (85 g) unsalted butter, melted and cooled
- 1 tablespoon (8 g) granulated sugar
For the filling
- 8 ounces (227 g) full-fat cream cheese, softened
- 1/2 cup (60 g) powdered sugar
- 1 teaspoon vanilla extract
- 1 cup (240 ml) whipped topping, thawed
- 1/2 cup (60 g) crushed sandwich cookies for layering
Instructions
- Mix the 200 g of crushed cookies, the melted butter and the sugar in a 9-inch pie plate.
- Press the mixture firmly and evenly into the base and up the sides, using the base of a glass for an even floor.
- Refrigerate the crust 1 hour, until solid enough to fill without slumping.
- Beat the softened cream cheese, powdered sugar and vanilla for 2 minutes until smooth and light.
- Fold in the whipped topping in two additions with a spatula, keeping the mixture airy.
- Spoon the filling into the chilled crust, smooth the top, and scatter over the 60 g of crushed cookies.
- Refrigerate 3 more hours, until set enough to cut cleanly with a warm knife.
- Top each slice with whipped cream just before serving.
Tip: Use full-fat cream cheese and fold the whipped topping in by hand. A handheld mixer turns this filling grainy and watery, and no amount of extra chilling fixes it.
Swap it: A gluten-free crust comes from the same amount of gluten-free crushed cookies and butter, pressed a little firmer. For a raw-egg-free filling, whipped topping alone works; for one without dairy, a thick coconut cream beaten with powdered sugar does the job, though it will not set as firmly.
Storage: Refrigerate for up to 4 days, covered loosely once the topping goes on. It does not freeze well as a pie, but the crust can be frozen for 3 months before filling.
Allergens: milk, wheat, soy.
10. No Bake Energy Balls
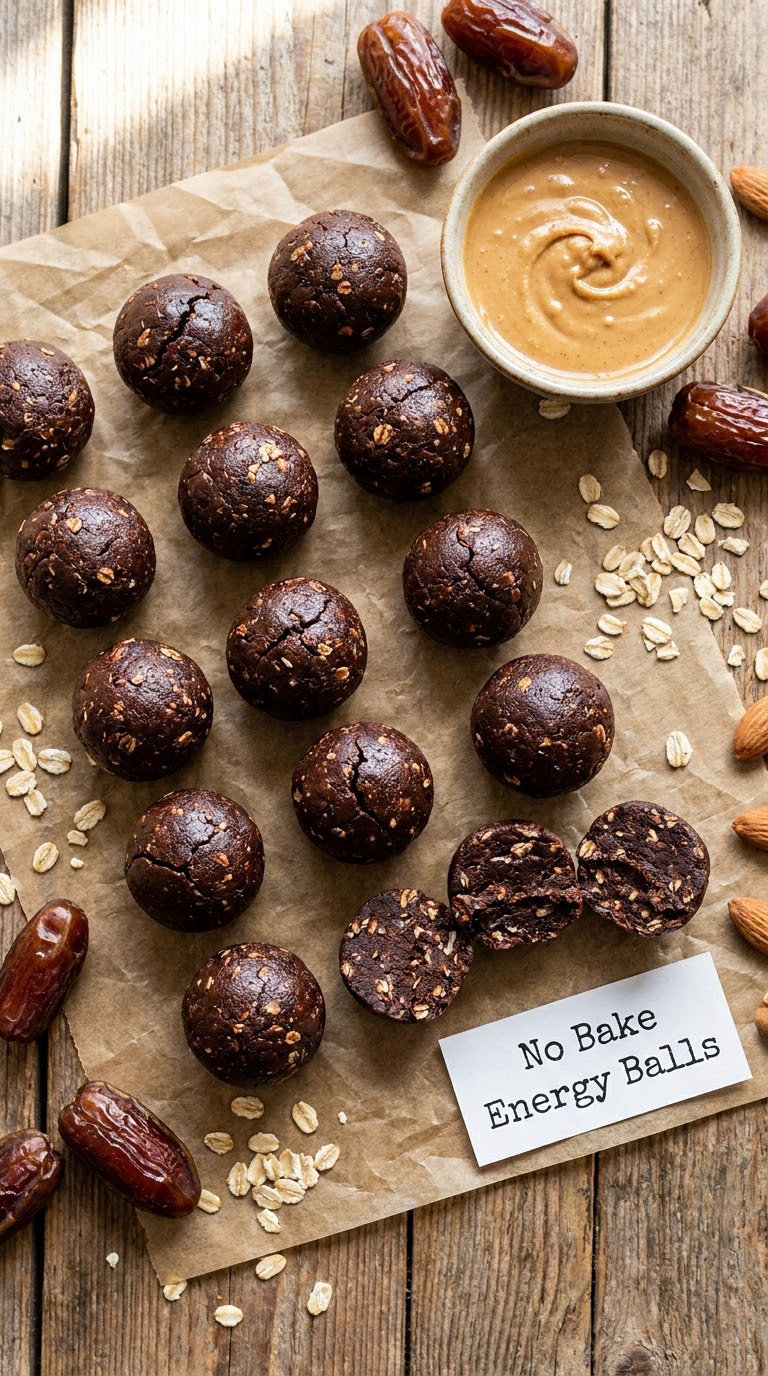
The fastest recipe here, and the only one you eat with your hands, standing up, out of the fridge. Dates bind everything, oats give it body, and cocoa keeps them from tasting like breakfast. Eighteen balls in about three quarters of an hour.
Yield: 18 balls · Prep: 20 min · Cook: none, 30 min chill · Total: 45 min · Difficulty: Easy
Ingredients
- 1 1/4 cups (200 g) pitted dates, packed, chopped
- 1 cup (100 g) rolled oats
- 1/2 cup (120 g) creamy peanut butter
- 3 tablespoons (25 g) unsweetened cocoa powder
- 1/4 cup (25 g) unsweetened shredded coconut, plus more for rolling
- 1/4 teaspoon fine salt
- 2 tablespoons (20 g) oat flour, only if the mixture is too sticky to roll
Instructions
- Chop the dates in a food processor for 10 seconds, then add the peanut butter, cocoa, salt and coconut and pulse until the mixture clumps when squeezed.
- Add the oats and pulse just 5 more times, until the mixture holds together but still has texture.
- Tip the mixture out and knead briefly with clean hands, adding the oat flour a tablespoon at a time only if it will not hold shape.
- Wet your hands and roll 18 tight 1-inch balls, packing each one firmly so no cracks show.
- Roll them in the extra coconut if you like, then chill 30 minutes, until firm enough to hold.
Tip: Sticky dates mean sticky hands, and sticky hands mean loose balls. Dip yours in water between batches, and pack each ball with the heel of your palm rather than your fingertips.
Swap it: Sunflower seed butter makes a nut-free version with the same texture. For a date-free ball, swap in 3/4 cup of honey plus 1/4 cup of warm water, and add 2 tablespoons more oats to compensate. Check that oats and cocoa are gluten-free for a gluten-free version.
Storage: Refrigerate in an airtight container for 2 weeks, or keep frozen for 3 months and move them to the fridge the night before you need them. They soften at room temperature within a couple of hours, which is fine for a lunchbox.
Allergens: peanuts, oats (may contain wheat). Dates and honey are not for children under one year old.
11. No Bake Meringue Cookies
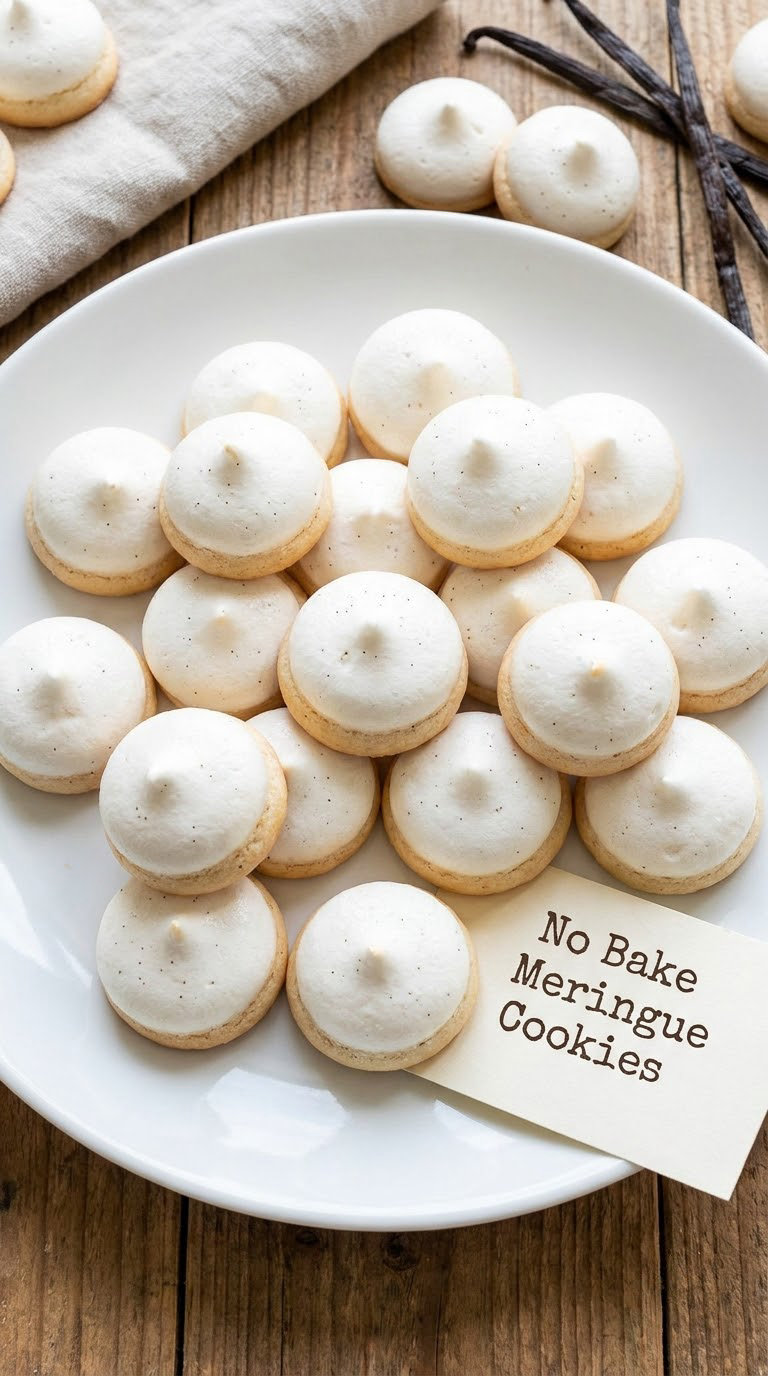
These are the exception on this list: no oven is wrong here, because meringue needs a low, slow oven to dry out and turn crisp. Baked at 200°F (93°C) rather than hard and fast, so they never brown. Call them the one that needs a little heat, and everything else on this page is truly heat-free.
Yield: 18 small cookies · Prep: 15 min · Cook: 1 hr 30 min at 200°F (93°C) · Total: 1 hr 45 min · Difficulty: Medium
Ingredients
- 4 large pasteurized egg whites, about 120 g, at room temperature
- 3/4 cup (150 g) granulated sugar
- 1/2 teaspoon vanilla extract
- 1/4 teaspoon cream of tartar, optional but it slows the egg whites from collapsing
Instructions
- Heat the oven to 200°F (93°C) and line a baking sheet with parchment. Do not grease the paper.
- Beat the egg whites on high until frothy and holding soft peaks, about 4 minutes, then add the cream of tartar.
- Add the sugar one tablespoon at a time, beating on high for 1 minute after each addition.
- Stop when the meringue is glossy, stiff, and the tips no longer curl when you lift the beaters; you should be able to turn the bowl upside down without incident.
- Fold in the vanilla with a spatula, cutting the mixture through to the bottom twice.
- Spoon 18 small dollops onto the sheet, about 1 tablespoon each, and swirl the peaks for a classic look.
- Bake 1 hour 30 minutes, then turn the oven off and leave the door cracked for a further hour.
Tip: The oven goes off with the meringue still inside. That extra hour in a cooling oven is what turns the outside crisp and the center soft, which is how you avoid chewy, shrunken meringue.
Swap it: Add 1 teaspoon of instant coffee powder to the dry sugar for a deeper almond flavor, or 1 teaspoon of cocoa powder for a chocolate meringue. Peppermint extract at 1/4 teaspoon turns them seasonal.
Storage: Store airtight at the counter in a cool, dry room for 4 days. Do not refrigerate them, which makes them weep and go soft. Meringues do not freeze well; they turn grainy and sticky as they thaw.
Allergens: egg.
12. No Bake Chocolate Chip Cookie Dough Bites
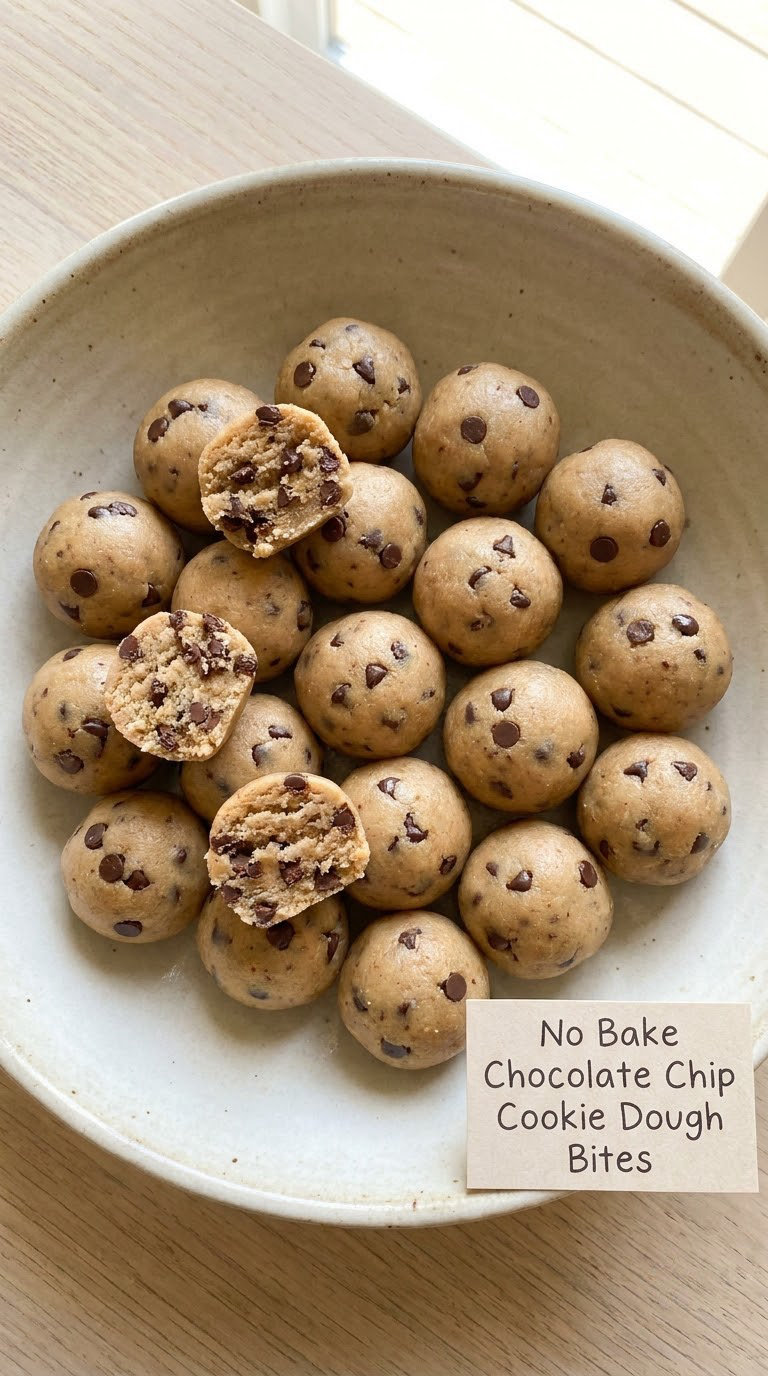
Safe to eat, and that is the whole appeal. Same dough as the classic chocolate chip cookie, portioned small, chilled until firm enough to bite without a fork. Twenty bites in about an hour and twenty minutes.
Yield: 20 bites · Prep: 15 min · Cook: none, 60 min chill · Total: 1 hr 20 min · Difficulty: Easy
Ingredients
- 1/2 cup (113 g) unsalted butter, softened
- 1/2 cup (110 g) packed light brown sugar
- 1 large pasteurized egg
- 1 teaspoon vanilla extract
- 1 1/4 cups (150 g) heat-treated all-purpose flour
- 1/2 cup (85 g) semisweet chocolate chips
- 1/4 teaspoon fine salt
Instructions
- Beat the softened butter and brown sugar for 2 minutes, until light and creamy.
- Mix in the pasteurized egg and vanilla, then beat for another 30 seconds.
- Stir in the flour, salt and chocolate chips until just combined; overmixing makes them tough.
- Cover and refrigerate the dough 30 minutes, until firm enough to handle without sticking to your palms.
- Roll 20 firm 1-tablespoon balls, packing each one tightly, and space them on a lined sheet.
- Refrigerate 30 more minutes, until the balls are solid to the touch and no longer dimpled from your fingers.
Tip: Heat-treated flour is not optional here. Raw flour is the one ingredient in a no-bake cookie that never gets cooked, and the treatment kills the raw-flour risk that makes uncooked dough unsuitable to eat.
Swap it: Replace the butter with sunflower seed butter for a nut-free version, and add 1 tablespoon of water to keep the dough soft. A certified gluten-free all-purpose flour works one-for-one; check that your chips are gluten-free too.
Storage: Refrigerate in an airtight container for up to 2 weeks, which keeps them firm enough to eat straight from the fridge. They freeze well for 3 months, and they soften in about 20 minutes at room temperature.
Allergens: milk, wheat, egg, soy.
13. No Bake Pumpkin Cookies
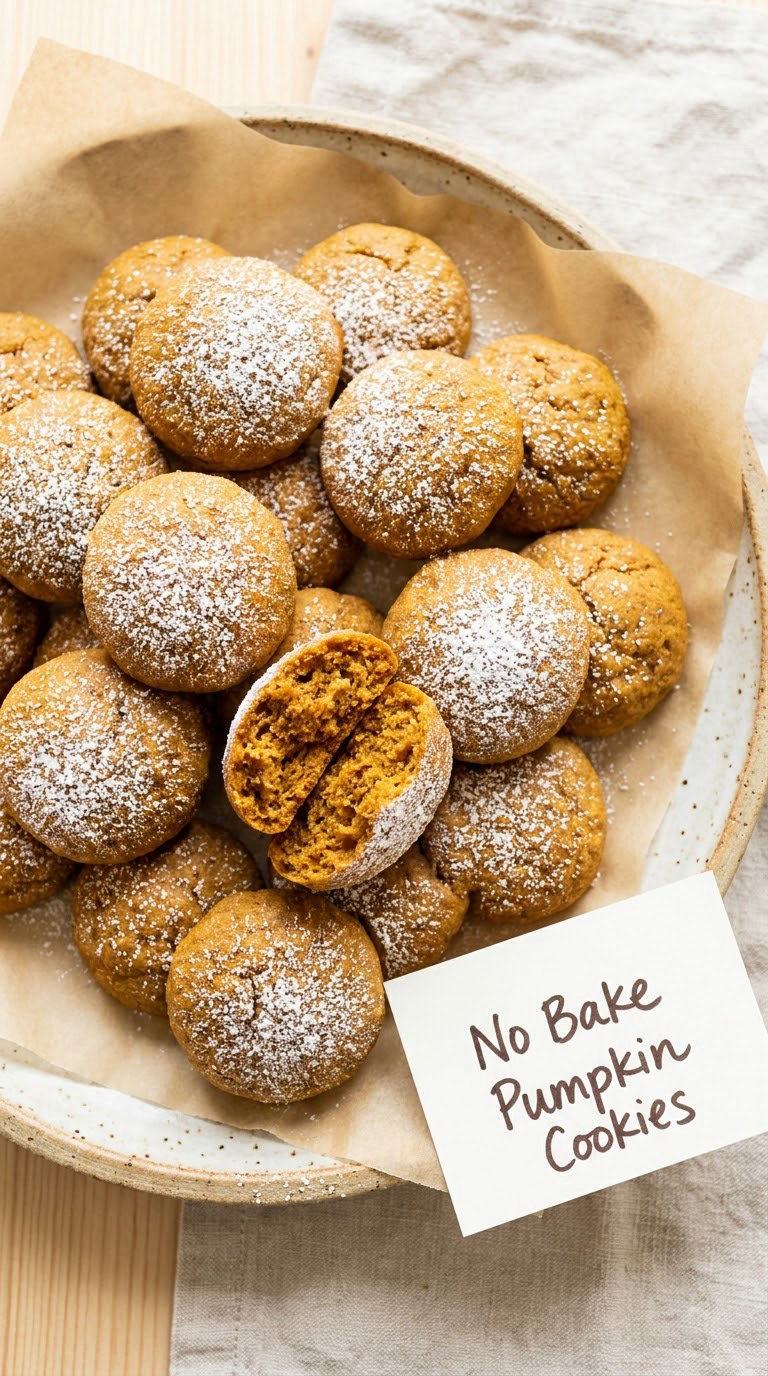
Spiced, soft, and nothing like the dry pumpkin biscuit you remember. The trick is the purée: use the thick canned variety, and strain it if it looks loose, or the cookies will spread and never firm up. Twenty cookies in about two hours.
Yield: 20 cookies · Prep: 20 min · Cook: none, 2 hr chill · Total: 2 hr 20 min · Difficulty: Easy
Ingredients
- 1/2 cup (120 g) pumpkin purée, well drained
- 1 cup (100 g) old-fashioned rolled oats, or 1 cup (120 g) heat-treated flour
- 1/2 cup (113 g) unsalted butter, softened
- 3/4 cup (165 g) packed light brown sugar
- 1 teaspoon ground cinnamon
- 1/2 teaspoon ground ginger
- 1/4 teaspoon ground nutmeg
- 1 teaspoon vanilla extract
- 1/2 teaspoon baking powder
- 1/4 teaspoon fine salt
- 1/2 cup (80 g) white chocolate chips, optional
Instructions
- Line a baking sheet with parchment and check your purée: if it slumps off a spoon in a ribbon, strain it through a sieve and press the solids dry.
- Beat the butter and brown sugar gently for 2 minutes; the goal is combined, not creamed, so the cookies stay tender.
- Mix in the pumpkin, spices, baking powder and vanilla, then the salt.
- Stir in the oats or flour, then the white chocolate chips, using a light hand until barely combined.
- Refrigerate the dough 30 minutes, until the oats take up the moisture and the mixture stops being tacky.
- Scoop 2-tablespoon portions 2 inches apart, flatten to 3/4 inch thick, and chill 2 hours, until firm with a matte surface.
Tip: Overmixing is what makes these turn out cakey or crumbly. Stir until you can just see the last streak of flour and stop, then let the 30-minute rest do the rest of the work.
Swap it: For a gluten-free version, use certified gluten-free oats and flour. A nut-free option swaps white chocolate chips for dark ones, and a chai-style version replaces the ginger and nutmeg with 1 teaspoon of chai spice blend.
Storage: Airtight at the counter for 4 days, refrigerator for 10 days, freezer for 3 months. Pumpkin cookies dry out faster than most, so press parchment between the layers when freezing them.
Allergens: milk, egg, oats (may contain wheat), soy.
14. No Bake Almond Flour Cookies
A single-ingredient flour, no gluten anywhere, and a cookie that snaps in half rather than bending. Almond flour dough is softer and wetter than wheat dough, so the shaping is different: press it between parchment and chill before you touch it.
Yield: 18 cookies · Prep: 15 min · Cook: none, 90 min chill · Total: 1 hr 40 min · Difficulty: Easy
Ingredients
- 1 1/4 cups (120 g) blanched almond flour
- 1/2 cup (113 g) unsalted butter, softened
- 3/4 cup (150 g) coconut sugar
- 1 large pasteurized egg
- 1 teaspoon vanilla extract
- 1/4 teaspoon fine salt
- 2 ounces (60 g) dark chocolate, chopped, optional
- 2 tablespoons sliced almonds, for the tops, optional
Instructions
- Line a baking sheet with parchment and cut two more sheets for shaping.
- Beat the butter and coconut sugar for 2 minutes until creamy, then mix in the pasteurized egg and vanilla.
- Add the almond flour and salt and stir just until a soft dough forms; it will be softer and more fragile than wheat dough.
- Fold in the dark chocolate, then tip the dough onto parchment and flatten to 1/2 inch thick with your palm.
- Chill 30 minutes, until firm enough to handle, then cut 2-inch rounds with a cutter or clean glass.
- Peel the rounds onto the baking sheet, press on a few sliced almonds, and chill 60 minutes, until hard with a slight give underneath.
Tip: Never roll almond flour dough with a pin straight onto a counter. It sticks, tears, and loses its shape. Press it between parchment, chill it, and cut cold.
Swap it: A nut-free version swaps the almond flour for sunflower seed flour in the same quantity; it behaves almost identically. Coconut sugar can be replaced with 3/4 cup of brown sugar for a more caramel flavor, or with 2/3 cup of maple syrup plus 2 tablespoons of extra butter for a sugar-free version.
Storage: Because these are crisp, keep them airtight with a slice of bread in the container, which stops the cookies going soft after two days. Counter for 5 days, refrigerator for 2 weeks, freezer for 3 months.
Allergens: tree nuts, milk, egg. Coconut sugar and the optional dark chocolate may add soy and coconut.
15. No Bake Raisin Cookies
Old-fashioned in the best sense: spiced, chewy, and full of plump raisins. The dough fights you a little because raisins release their own stickiness, so the trick is dusting your hands rather than washing flour into the dough.
Yield: 20 cookies · Prep: 15 min · Cook: none, 2 hr chill · Total: 2 hr 20 min · Difficulty: Easy
Ingredients
- 1/2 cup (113 g) unsalted butter, softened
- 3/4 cup (165 g) packed light brown sugar
- 1 large pasteurized egg
- 1 teaspoon vanilla extract
- 1 cup (120 g) heat-treated all-purpose flour
- 3/4 cup (100 g) raisins
- 1/3 cup (40 g) quick oats
- 1/2 teaspoon ground cinnamon
- 1/4 teaspoon fine salt
Instructions
- Line a baking sheet with parchment and, if your raisins are dry, soak them in hot water for 10 minutes, then drain and pat dry.
- Beat the butter and brown sugar for 2 minutes, then mix in the pasteurized egg, vanilla and cinnamon.
- Stir in the flour, salt and oats, then fold in the raisins, tossing the dough until they are evenly spread rather than clumped in one corner.
- If the dough looks sticky, dust your hands with a teaspoon of the flour and work it between your palms, adding more flour a teaspoon at a time only if it will not release from your fingers.
- Scoop 2-tablespoon portions 2 inches apart and flatten each to 1/2 inch thick, pressing the tops gently so the raisins stay in place.
- Chill 2 hours, until firm at the edges; the surface should look dry and matte rather than glossy.
Tip: Soak the raisins if you want them plump and chewy, and skip it if you want them to stay distinct and a little chewy-firm. Either way, drain them properly, or the dough goes sticky and the cookies spread.
Swap it: Dried cranberries or chopped dried dates make this a fruit-forward cookie in a different register, and semisweet chocolate chips turn it into an oatmeal raisin with chocolate. For gluten-free, use certified gluten-free flour and oats and check the raisins, which are often dusted with flour.
Storage: Airtight at the counter for 5 days, refrigerator for 10 days, freezer for 3 months. The cookies soften after a day, which suits most people; for firmer cookies, refrigerate them and warm at room temperature before serving.
Allergens: milk, wheat, egg, oats (may contain wheat). Raisins may carry sulfites.
Tips for Making These
Most no-bake cookies go wrong in one of five ways, and all five come down to measurement, temperature, or time. Here is what I have learned from making these on repeat, including the batches that ended up in the bin.
Measure flour and oats by weight, not volume. A cup of flour can vary by a quarter between brands, and in a cookie with no oven to set it, that difference shows up as cookies that spread flat or crumble apart. A kitchen scale costs very little and fixes the problem permanently. The gram weights in this roundup are the ones I use.
Use heat-treated flour and pasteurized eggs, always. In a no-bake recipe, nothing gets cooked. Raw flour carries risk from the grain itself, which is exactly why heat-treated flour exists. Pasteurized eggs are treated the same way. Every recipe above that calls for flour or egg names which one to buy.
Chill for the time I give, not until you feel like it. Most of these need a full 2 hours in the refrigerator, and 30 minutes in the freezer speeds things up when you have a deadline. What does not work is the fridge-early shortcut: chilling warm cookies sets the fat before the oats have taken up any moisture, and you get a chalky, dry cookie that crumbles when you lift it.
Press portions evenly and firmly. A scoop packed loosely chills up around a hollow center and snaps in half. Compress each portion with the heel of your hand before you move on to the next one, and keep the sizes consistent so everything sets at the same time.
Add mix-ins at the right stage. Chocolate chips and nuts go in with the dry ingredients so they are suspended through the dough. Rolled oats, coconut, and anything you want sitting on top go on after the dough comes together, so they stay visible. Pressing a few chips into the top after shaping is the one exception, and it makes a batch look deliberate.
Store by texture, and bring cold cookies to room temperature slowly. Frosted or chocolate-coated cookies belong in the refrigerator between layers of parchment; crisp cookies go in an airtight tin with a slice of bread to keep them from softening. Taking refrigerated cookies out of the container straight into warm air makes condensation bead on the surface, so leave the lid cracked on the bench for 20 minutes first.
If you are planning a whole dessert table rather than a single batch, our collection of no-bake dessert ideas covers the same no-oven logic with bars, parfaits and chilled puddings.
Frequently Asked Questions
Can I use raw flour in no bake cookies?
You can, but I would not. Nothing in a no-bake recipe reaches a temperature high enough to kill the bacteria raw flour can carry. Heat-treated all-purpose flour has been steam-treated for exactly this reason and swaps in cup for cup. It costs a little more and tastes the same. The same logic applies to raw eggs, which is why every recipe here calls for pasteurized eggs.
How long do no bake cookies keep in the refrigerator?
Most refrigerator cookies keep 7 to 10 days in an airtight container, and the chocolate-coated and pie recipes keep closer to 2 weeks. Frosted cookies dry out at the counter faster than people expect, so refrigerate them if the batch is for a school week. Energy balls last 2 weeks chilled, and meringues are the exception: they go soft and weep in the fridge, so keep them on a cool, dry shelf.
Can I freeze no bake cookies?
Yes, and most of them freeze better than they keep at the counter. Freeze in a single layer first, then move the cookies to a container with parchment between the layers, and use them within 3 months. Thaw them in the closed container on the counter so condensation forms on the lid instead of on the cookie. Meringues and jam-centered thumbprints are the two that do not freeze well.
Why is my no bake cookie dough so sticky?
Usually the ratio, not the recipe. Sticky dough means there is more fat or sweetener than flour and oats can absorb, or the dough was warmed. Chill it for 20 minutes and try again, and work it between your palms with floured or damp hands rather than adding a large amount of extra flour. If it is still sticky, add 2 tablespoons of flour or rolled oats at a time until it holds together in your hand.
How do I know my no bake cookies are properly set?
Press the top of one with your fingertip. A set cookie feels firm and springs back only slightly, with no shine on the surface, and it lifts off the parchment without bending or leaving a smear behind. A glossy surface means the fat or chocolate has not fully firmed, and it needs another 30 minutes or so in the refrigerator. Most of the cookies here need a full 2 hours, and 30 minutes in the freezer if you are in a hurry.
A Final Batch of Easy No Bake Cookies
Start with the chocolate chip cookies. The ingredients are already in your cupboard, the technique is one bowl and a scoop, and it is the hardest one here to ruin. If you want something plainer, the peanut butter cookies take five minutes of work and only one bowl to wash.
Pick your recipe, mix the dough, and give it the full chilling time before you serve it. For a party tray, the Oreo pie and the haystacks hold up on a table for hours; for lunchboxes, the energy balls and the dough bites travel best; for gluten-free or nut-free kitchens, the almond flour cookies and the sunflower seed butter swaps cover you. And when you have a weekend afternoon and an oven that actually works, our old fashioned cookie recipes are worth the oven time.