
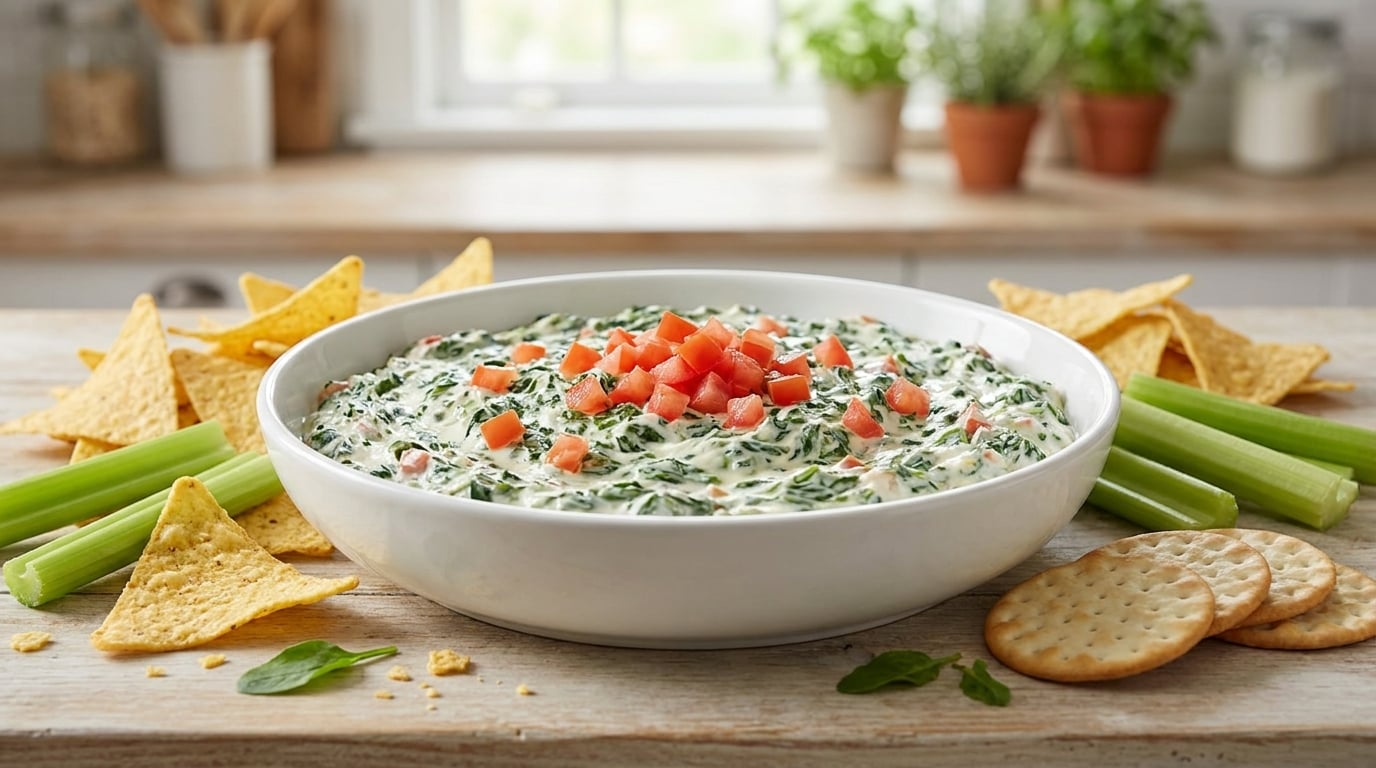
These 15 easy party dip recipes for a crowd are built for the way parties actually happen: you make them ahead, they hold their texture for a couple of hours on a table, and nobody needs a special technique. Every recipe below gives you an exact yield, a real ingredient list, and the timing that matters. If you want one dip to carry a room of twenty, start with number eight.
Ten of the fifteen here need no oven at all. The hot ones bake at a single temperature and finish in under half an hour. Each one tells you how it keeps, what to swap, and what to put next to it on the platter. I have made all of these for holiday open houses, Tuesday game nights, and one very long graduation party, and this is the list I still cook from.
Planning a game day spread? Our easy game day appetizer recipes cover the rest of the table.
Table of Contents
15 Easy Party Dip Recipes for a Crowd at a Glance
| Recipe | Time | Difficulty | Best for |
|---|---|---|---|
| Classic Creamy Spinach Dip | 15 min + chill | Easy | Cold table, make-ahead, vegetarian |
| Southwestern Layered Bean Dip | 20 min | Easy | Layered showpiece, meat-free |
| Easy Herbed Parmesan Bread Dip | 20 min | Easy | Warm starter with bread |
| Loaded Baked Potato Dip | 40 min | Easy | Hearty hot dip, feeds a crowd |
| Five-Ingredient Salsa Verde Bean Dip | 25 min | Easy | Green, tangy, weeknight |
| Hot Artichoke and Parmesan Dip | 35 min | Easy | Cheesy baked centerpiece |
| Cold Jalapeno Lime Ranch Dip | 10 min | Easy | No-cook veggie tray |
| Cheesy Buffalo Chicken Dip | 40 min | Easy | The reliable crowd-pleaser |
| Sweet Pepper and Feta Dip | 45 min | Easy | Roasted, Mediterranean style |
| Creamy Garlic White Bean Dip | 20 min | Easy | Garlic-heavy, pantry dips |
| Sweet Chili Meatball Dip | 35 min | Easy | Hot main-appetizer hybrid |
| Cheesy Corn and Jalapeno Dip | 35 min | Easy | Summer cookout, mild option |
| Smoky Black Bean and Corn Dip | 2 hr slow cooker | Easy | Frugal, freezer-friendly |
| Warm Cinnamon Fruit Dip for a Crowd | 20 min | Easy | Dessert table, holiday brunch |
| Easy Taco Party Dip | 45 min | Easy | Big tray, feeds twenty-plus |
1. Classic Creamy Spinach Dip
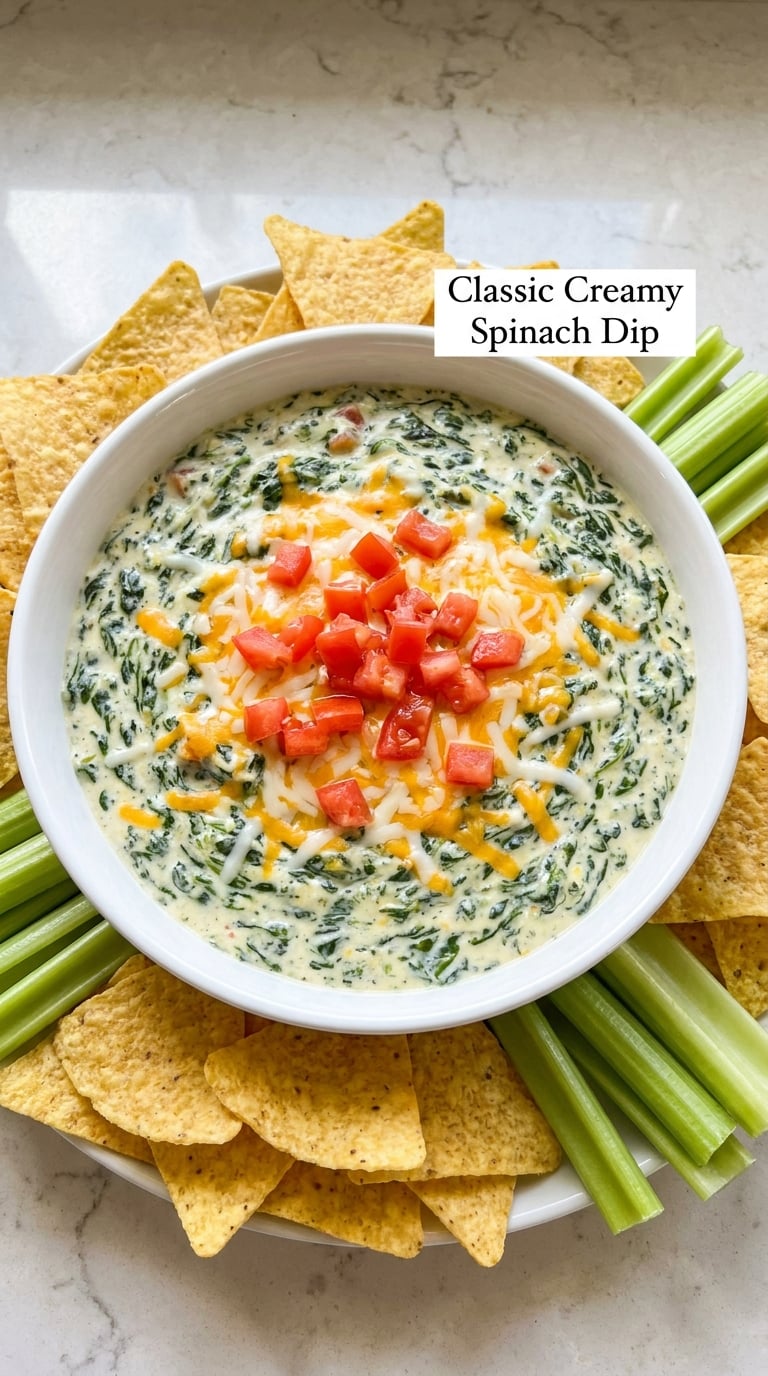
This is the dip I make first when guests are already on the way, because it needs no cooking and no last-minute decisions. Cold, thick, and faintly garlicky, it scoops cleanly and stays dippable for hours on a table.
Yield: 12 to 14 servings · Prep: 15 minutes · Cook: none · Total: 15 minutes plus 1 hour chilling · Difficulty: Easy
Ingredients
- 8 oz (227 g) cream cheese, softened
- 1/2 cup (120 ml) sour cream
- 1/4 cup (60 ml) mayonnaise made with pasteurized eggs
- 10 oz (280 g) frozen chopped spinach, thawed and squeezed dry
- 1/2 cup (75 g) drained water chestnuts, chopped
- 1/4 cup (40 g) finely chopped red onion
- 1 teaspoon garlic powder
- 1/2 teaspoon black pepper
- 1/2 teaspoon salt
- 1/2 cup (60 g) shredded sharp cheddar, plus more for topping
- 1/2 cup (85 g) diced tomato, for topping
Instructions
- Put the thawed spinach in a sieve over the sink and press it hard with the back of a spoon until it is dry. Wet spinach is the one thing that turns this dip watery.
- Beat the softened cream cheese in a large bowl until it has no lumps and looks glossy.
- Add the sour cream, mayonnaise, garlic powder, salt, and pepper. Beat for another full minute until the mixture is completely smooth.
- Fold in the spinach, water chestnuts, red onion, and half the shredded cheddar. Stir with a spatula until the flecks are evenly distributed.
- Cover and chill for at least 1 hour, or up to 2 days.
- Spread into a shallow bowl, cover the surface with the remaining cheddar, and dot with the tomato right before serving.
Tip: Beat the base alone before adding the spinach. A smooth base takes 60 seconds of beating; a chunky one takes five minutes and never fully comes together.
Swap it: Use well-drained artichoke hearts in place of half the water chestnuts, or blend in a small can of drained jalapenos for a hotter version.
Storage: Keeps in the refrigerator up to 2 days, covered. Keep it at or below 40°F (4°C) on the serving table and put the leftovers back in the fridge within 2 hours. Do not freeze it; the mayonnaise and sour cream separate.
2. Southwestern Layered Bean Dip
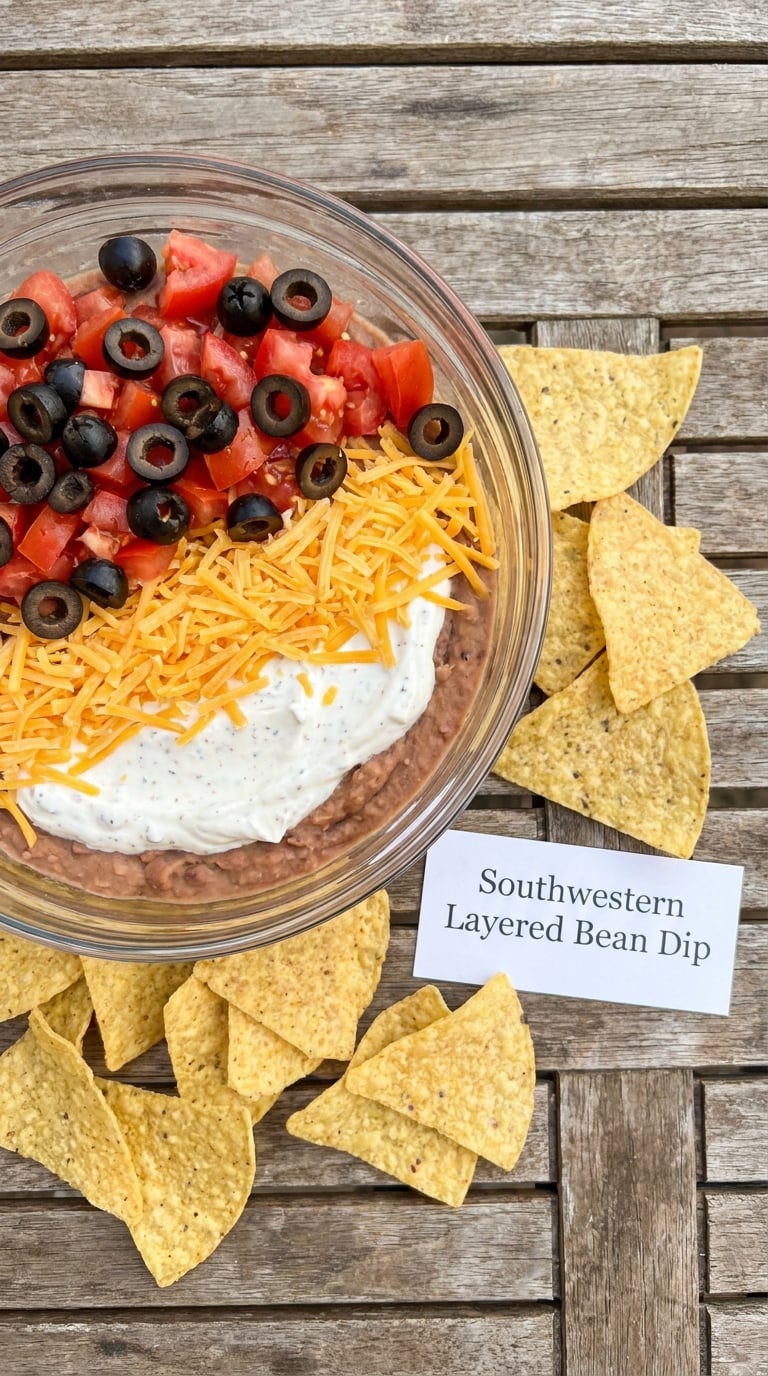
Layered dips look like you spent an hour, and this one takes about twenty. The trick is choosing a straight-sided glass bowl so the layers stay visible after guests start scooping.
Yield: 15 to 18 servings · Prep: 20 minutes · Cook: none · Total: 20 minutes · Difficulty: Easy
Ingredients
- 15 oz (425 g) can refried beans
- 1 cup (230 g) sour cream
- 1 packet (about 1.5 oz/43 g) taco seasoning
- 1 cup (240 ml) mild or medium salsa, drained of excess liquid
- 1 1/2 cups (170 g) Mexican blend shredded cheese
- 1 cup (150 g) diced tomato, patted dry
- 1/2 cup (75 g) sliced black olives
- 1/4 cup (25 g) sliced green onions
- 1 ripe avocado, diced, tossed with a squeeze of lime
Instructions
- Stir the taco seasoning into the sour cream in a small bowl until the color evens out.
- Spread the refried beans in the bottom of a straight-sided glass bowl, smoothing them into an even layer about 1 inch thick.
- Spoon the seasoned sour cream over the beans and spread it to the edges.
- Add the drained salsa in the next layer, then half the shredded cheese.
- Layer the diced tomato, the olives, and the remaining cheese on top.
- Garnish with the green onions and the lime-tossed avocado just before serving, so the avocado stays bright.
Tip: Drain the salsa in a sieve for five minutes. Waterlogged salsa is the reason layer dips turn into soup at the bottom of the bowl.
Swap it: Swap the refried beans for one can of drained black beans mashed with a tablespoon of lime juice, and the dish becomes lighter and higher in fiber.
Storage: Covered in the refrigerator, the dip keeps 3 to 4 days. Add the avocado and the green onions only when you serve it, and refrigerate anything left within 2 hours.
3. Easy Herbed Parmesan Bread Dip
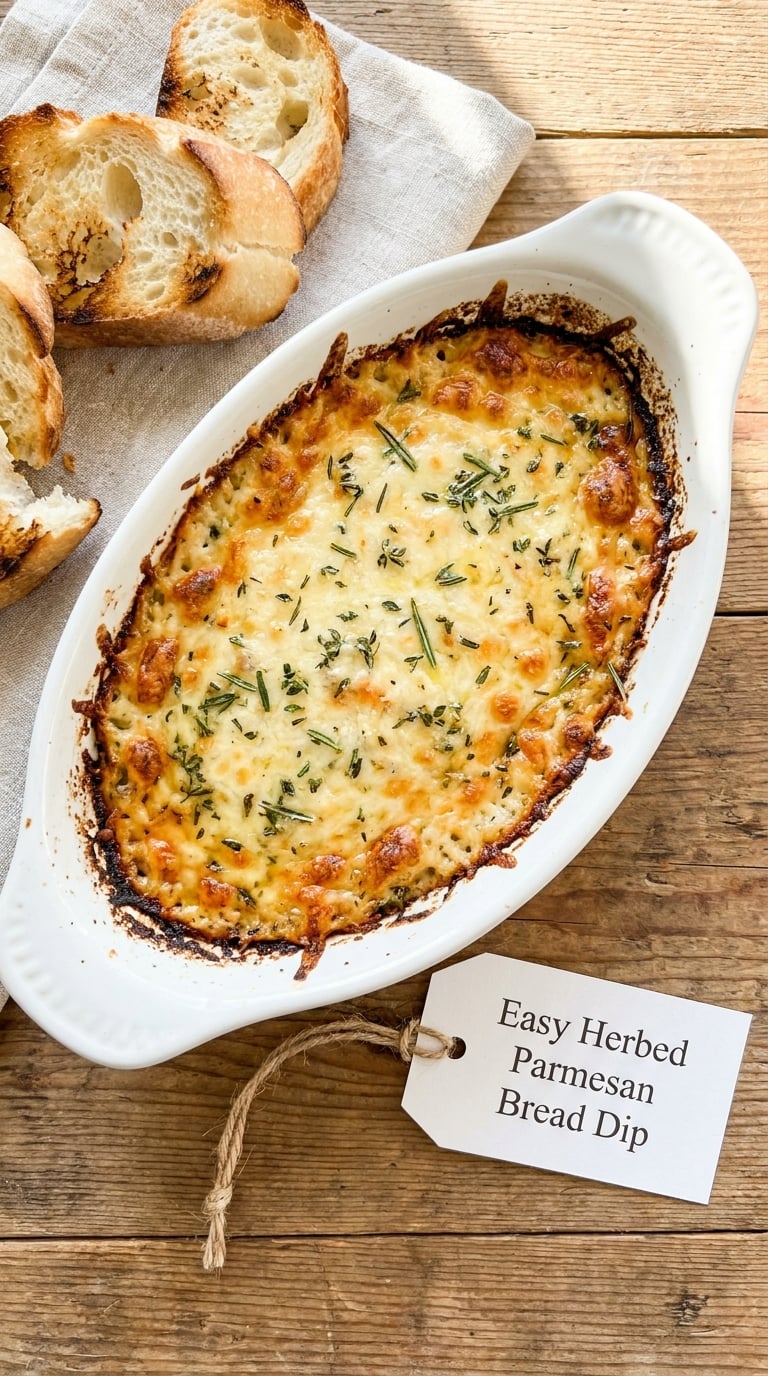
Warm, cheesy bread dip tastes like a restaurant appetizer and behaves like a fifteen-minute job. The bread goes in dry so the edges turn crunchy in the oven while the middle stays soft enough to scoop.
Yield: 10 to 12 servings · Prep: 5 minutes · Cook: 15 minutes · Total: 20 minutes · Difficulty: Easy
Ingredients
- 4 thick slices crusty sourdough or Italian bread, about 1 inch (2.5 cm) thick
- 1/2 cup (115 g) unsalted butter, softened
- 1 cup (100 g) grated Parmesan cheese, plus extra for dusting
- 1/2 teaspoon garlic powder
- 2 tablespoons chopped fresh parsley
- 2 tablespoons fresh thyme leaves, picked off the stems
- 1/4 teaspoon black pepper
Instructions
- Heat the oven to 375°F (190°C) and set a 9×13-inch (23×33 cm) baking dish inside to warm up.
- Mash the softened butter with the garlic powder, the parsley, the thyme, and the black pepper in a small bowl.
- Spread the herb butter over both sides of each bread slice, pressing it into the crust so it does not slide.
- Layer two slices in the warm dish, sprinkle with a third of the Parmesan, then repeat with the remaining slices and cheese.
- Dust the top with the extra Parmesan and bake for 15 minutes, until the cheese is bubbling and the edges of the bread are deep golden and crisp.
- Rest the dish 5 minutes on a heatproof surface before serving.
Tip: Watch for the bubbling and the browned edge, not the clock. Fresh Parmesan browns fast, and a dish that goes another five minutes turns from nutty to bitter.
Swap it: Sprinkle 1/2 cup (55 g) panko breadcrumbs over the top instead of the last layer of Parmesan for a crunchier, breadier crust.
Storage: Best served the moment it leaves the oven. Assembled cold, it keeps 2 days refrigerated and bakes at 375°F (190°C) for 20 minutes; set the bread in the dish, not in a sealed container, so it does not go soggy. Reheat leftovers at 350°F (175°C) for 10 minutes.
4. Loaded Baked Potato Dip
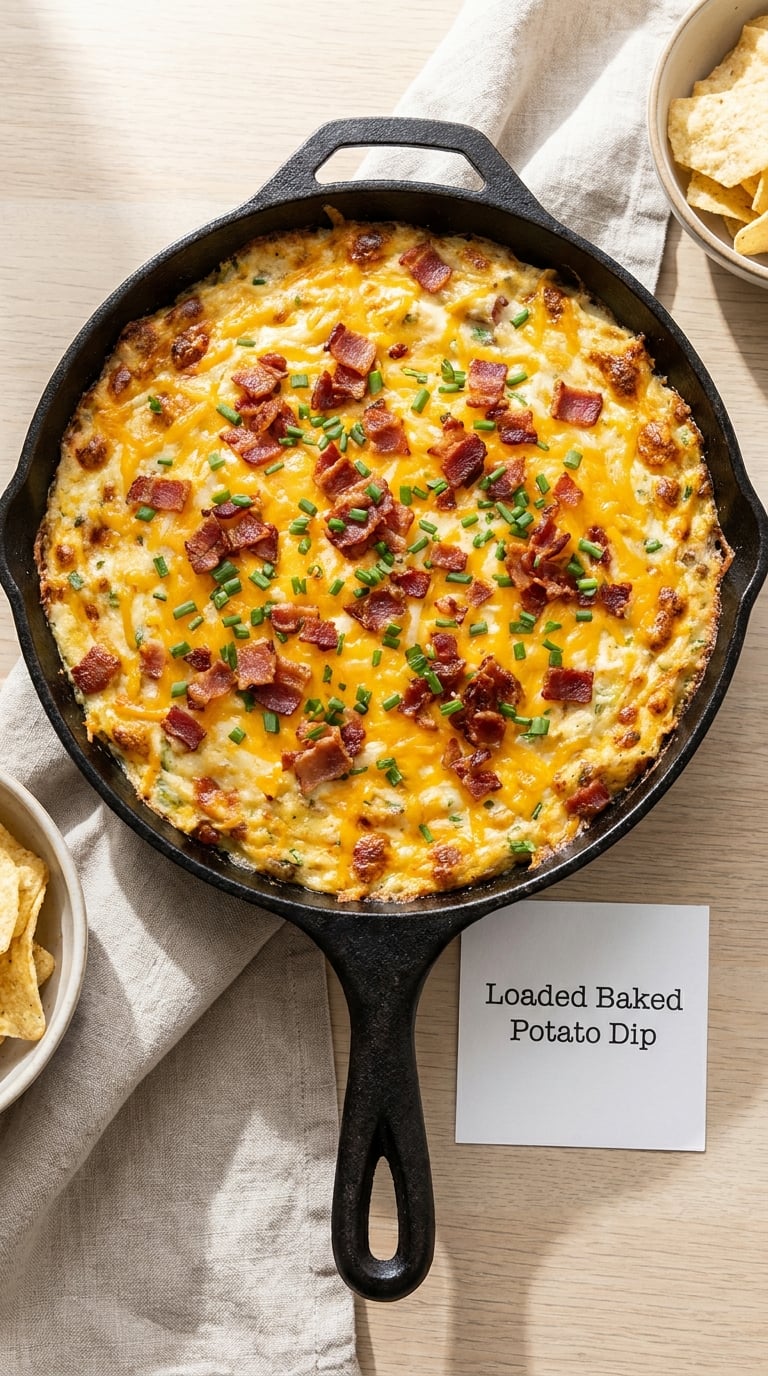
This is the dip that feeds twenty without doubling the work, since it goes straight from the skillet to the table. It is closer to a side dish than a dip, which is exactly why it disappears so fast at a holiday table.
Yield: 16 to 20 servings · Prep: 10 minutes · Cook: 30 minutes · Total: 40 minutes · Difficulty: Easy
Ingredients
- 2 lb (900 g) Yukon gold potatoes, peeled and cut into 1-inch (2.5 cm) cubes
- 3/4 cup (170 g) cream cheese, softened
- 1/2 cup (120 g) sour cream
- 1/4 cup (57 g) unsalted butter, softened
- 1 cup (110 g) shredded sharp cheddar
- 1/2 teaspoon garlic powder
- 1/2 teaspoon salt
- 1/2 teaspoon black pepper
- 1/2 cup (55 g) cooked bacon, crumbled, plus more to scatter on top
- 2 tablespoons sliced chives
Instructions
- Cover the potatoes with cold water in a large pot, add 1 teaspoon of salt, and bring to a boil.
- Boil for 10 to 12 minutes, until a knife slides into a cube with no resistance, then drain well.
- Return the potatoes to the warm pot over low heat for 2 minutes to steam off the surface water.
- Add the cream cheese, sour cream, butter, garlic powder, salt, and pepper and mash with a potato masher until smooth and fluffy.
- Fold in the bacon, then scrape the mixture into a buttered 9×13-inch (23×33 cm) baking dish and smooth the top.
- Scatter the remaining cheddar and bacon over the surface and bake at 400°F (205°C) for 12 to 15 minutes, until the top bubbles and browns lightly at the edges.
- Finish with the chives and serve straight from the dish.
Tip: Dry potatoes make a better dip than wet ones. That two-minute steaming in the emptied pot is the step that keeps the finished dish from turning gluey.
Swap it: Leave the bacon out and add 1/2 cup (75 g) chopped cooked broccoli or a handful of snipped chives, and you have a vegetarian version that is just as filling.
Storage: This is a dairy dip, so keep it at or below 40°F (4°C) when it is not being served and refrigerate it within 2 hours. Covered, it keeps 3 to 4 days; reheat covered at 350°F (175°C) for 20 minutes. Do not freeze it.
5. Five-Ingredient Salsa Verde Bean Dip
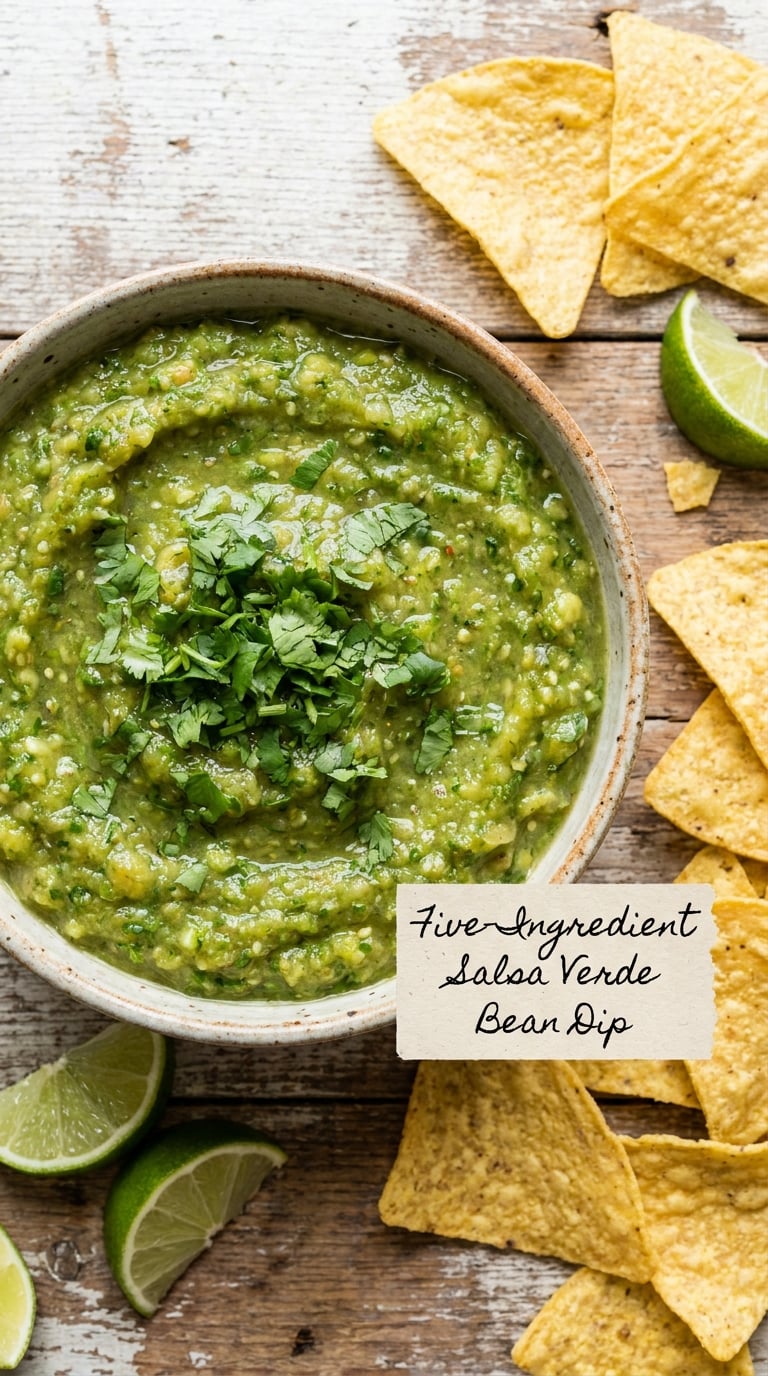
A bright green dip that tastes like it was simmered all afternoon, made in one pot in about twenty-five minutes. The beans go soft enough to collapse, then get blitzed, which is where the body comes from.
Yield: 10 to 12 servings · Prep: 10 minutes · Cook: 15 minutes · Total: 25 minutes · Difficulty: Easy
Ingredients
- 1 lb (450 g) fresh green beans, trimmed and cut in half
- 1 can (14 oz/400 g) whole tomatillos, drained
- 1/2 cup (80 g) diced yellow onion
- 1 garlic clove, minced
- 1 jalapeno, stemmed and seeded
- 1/2 cup (120 ml) chicken or vegetable broth
- 1/2 cup (120 g) sour cream, for serving
- Chopped cilantro and lime wedges, for serving
Instructions
- Heat 1 tablespoon of oil in a wide skillet over medium heat and soften the onion for 3 minutes, until translucent.
- Add the garlic and cook 30 seconds more, until fragrant but not browned.
- Add the green beans, the tomatillos, and the broth. Bring to a simmer and cook for 12 to 15 minutes, until the beans are completely limp and a fork slides through with no resistance.
- Add the jalapeno and simmer for 2 more minutes to take the edge off the raw pepper.
- Blend the mixture right in the skillet, or transfer it to a blender, until mostly smooth with flecks of green bean left.
- Spoon over sour cream, scatter with cilantro, and serve with lime wedges.
Tip:Taste a single bean before blending. If the beans still snap, give them another five minutes, because the dip is only as creamy as the beans underneath it.
Swap it: Use a cup of jarred green salsa and skip steps three and four, and the whole thing takes eight minutes. You can also blend in an avocado for a thicker, creamier version.
Storage: Keeps in the refrigerator 4 days in a sealed container. It also freezes well: portion it into a freezer bag, press the air out, and keep it 3 months. Thaw overnight in the fridge and stir before serving.
6. Hot Artichoke and Parmesan Dip
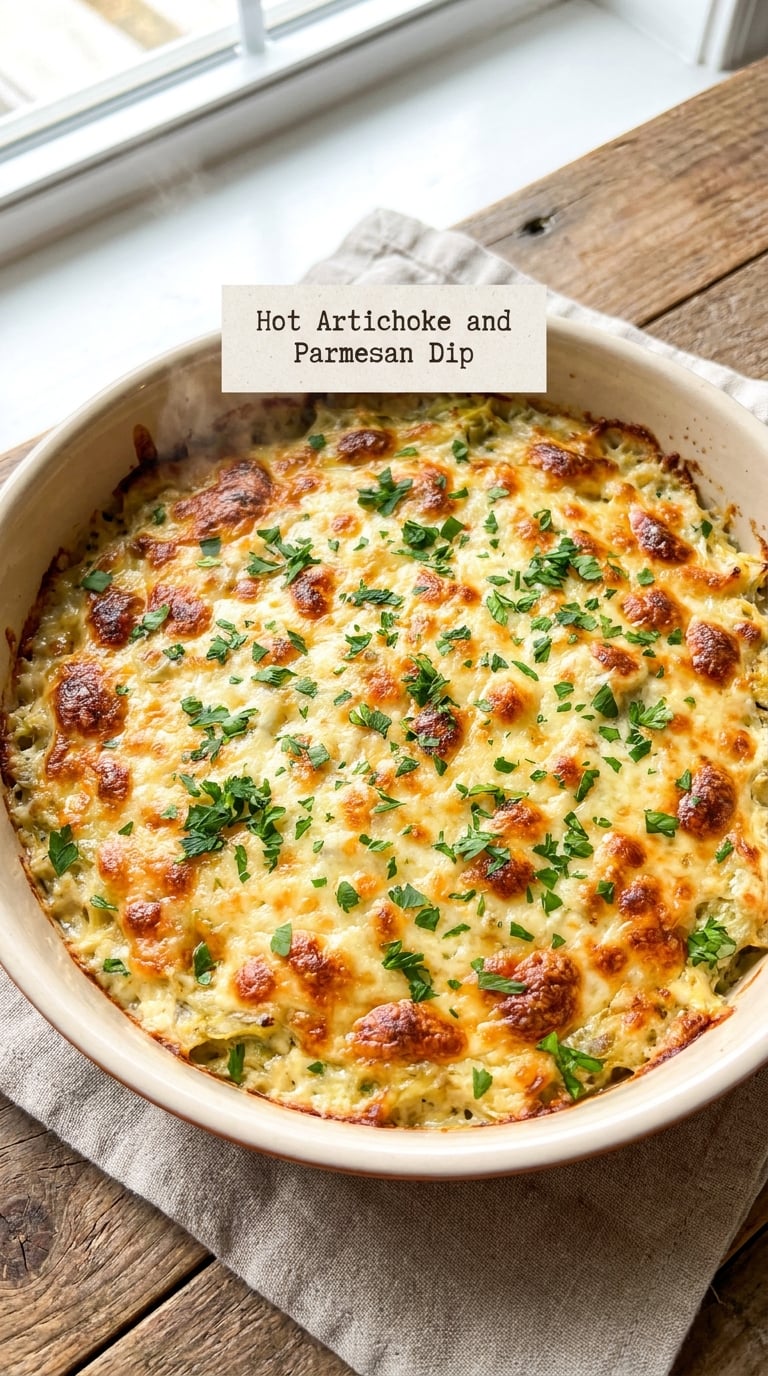
The dip that makes people think you went to a lot more trouble than you did. Everything goes in the same casserole, and the oven does the rest while you set out the chips.
Yield: 12 to 14 servings · Prep: 15 minutes · Cook: 25 minutes · Total: 40 minutes · Difficulty: Easy
Ingredients
- 14 oz (400 g) artichoke hearts, drained and chopped
- 8 oz (227 g) cream cheese, softened
- 1/2 cup (50 g) grated Parmesan
- 1/2 cup (50 g) shredded mozzarella
- 1/2 cup (120 g) sour cream
- 1/4 cup (60 ml) mayonnaise made with pasteurized eggs
- 2 garlic cloves, minced
- 1/4 cup (60 ml) reserved artichoke liquid
- 1/2 teaspoon salt and 1/4 teaspoon black pepper
- 1 tablespoon chopped parsley, for the top
Instructions
- Heat the oven to 375°F (190°C) and lightly butter a 2-quart baking dish.
- Stir the cream cheese, sour cream, mayonnaise, Parmesan, garlic, salt, and pepper together in a large bowl until smooth.
- Fold in the chopped artichoke hearts and the artichoke liquid.
- Scrape the mixture into the baking dish and spread it level.
- Cover with the mozzarella and sprinkle the parsley over the top.
- Bake for 22 to 25 minutes, until the top is bubbling everywhere and the cheese has browned in patches. If it browns before it bubbles, move the dish to the lower rack and add 5 minutes.
Tip: Use the liquid from the artichoke jar. It is starchy, it seasons the whole dish, and it is what keeps the dip from turning rubbery under the cheese.
Swap it: Add 1 cup (225 g) of chopped fresh spinach, squeezed dry, for a spinach-artichoke version. Reduce the mozzarella to 1/4 cup so the top still browns in 25 minutes.
Storage: Refrigerate covered for 3 days, dairy and all. To make it ahead, assemble the dish unbaked, cover, and chill; bake from cold at 375°F (190°C) for 30 minutes, giving it the extra five minutes a cold dish needs to heat through. Refrigerate leftovers within 2 hours.
7. Cold Jalapeno Lime Ranch Dip
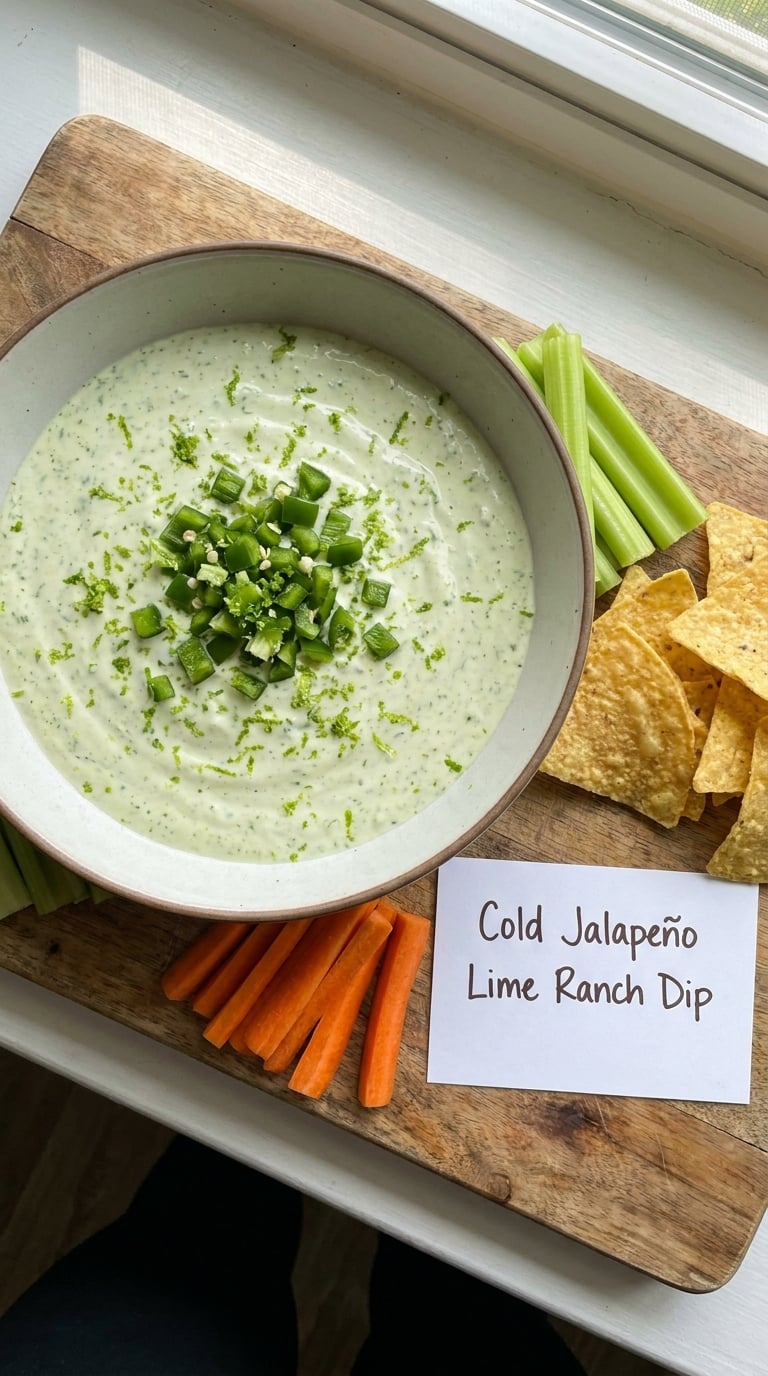
The ten-minute dip, and the reason the veggie tray never goes to waste. Lime keeps ranch dressing from tasting flat, and the fresh jalapeno gives it something to be instead of just a cold bowl of white.
Yield: 10 to 12 servings · Prep: 10 minutes · Cook: none · Total: 10 minutes plus 30 minutes chilling · Difficulty: Easy
Ingredients
- 16 oz (450 g) ranch dressing made with pasteurized eggs
- 1/2 cup (120 g) sour cream
- 1 small jalapeno, finely diced, seeds removed for less heat
- 1 lime, zested and juiced
- 1/2 teaspoon garlic powder
- 1/4 cup (8 g) chopped fresh cilantro
- 1/2 teaspoon salt
Instructions
- Stir the sour cream, lime zest, lime juice, garlic powder, and salt together in a bowl until smooth.
- Pour in the ranch dressing and stir again until the color and texture are completely even.
- Fold in the diced jalapeno and the cilantro.
- Cover and chill at least 30 minutes so the lime and pepper meld, up to 2 days.
- Spoon into a wide shallow bowl, top with a little more diced jalapeno and lime zest, and set out with raw vegetables.
Tip: Buy a ranch dressing made with pasteurized eggs. This is a no-cook dip, so anything with a raw egg in the mayo base is not safe to eat straight from the bowl.
Swap it: For a mild version, leave out the fresh jalapeno and add 1/4 cup (30 g) finely chopped drained pickled jalapeños instead. You get the same crunch with none of the heat.
Storage: Keeps in the refrigerator up to 3 days, covered, because it is dairy based. Keep the serving bowl over an ice tray if it will be out longer than an hour, and discard what has been above 40°F (4°C) for more than 2 hours.
8. Cheesy Buffalo Chicken Dip
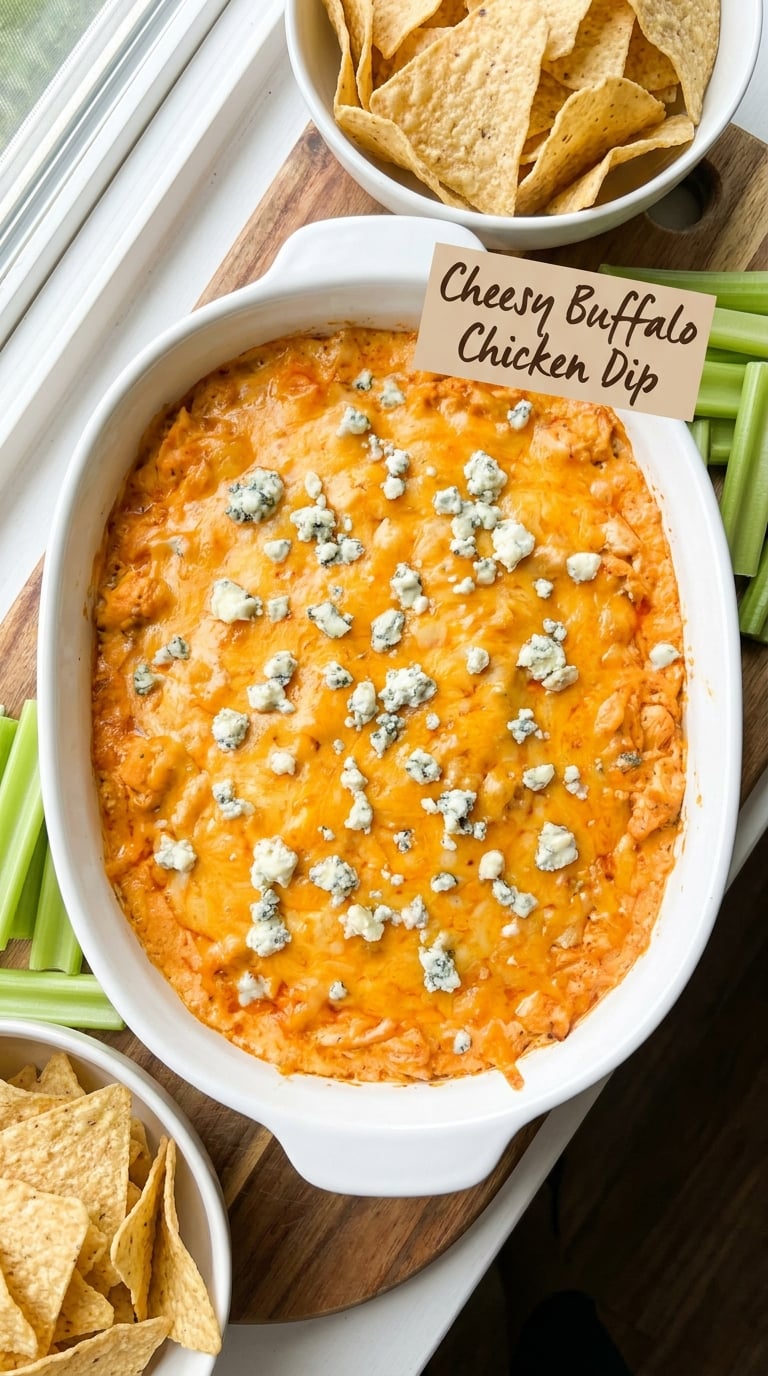
If you only make one dip on this list, make this one. It comes out of the oven bubbling, it feeds a room with one dish, and it is the one people go back to with a second chip. On our table it is the reason the bowl never lasts past the second quarter.
Yield: 16 to 20 servings · Prep: 15 minutes · Cook: 25 minutes · Total: 40 minutes · Difficulty: Easy
Ingredients
- 1 lb (450 g) boneless chicken breasts, cooked to 165°F (74°C) and shredded
- 8 oz (227 g) cream cheese, softened
- 1 cup (240 ml) buffalo wing sauce
- 1/2 cup (120 ml) ranch dressing made with pasteurized eggs
- 1 cup (110 g) shredded Monterey Jack or cheddar
- 1/2 cup (65 g) crumbled blue cheese, plus more for the top
- 1/2 cup (75 g) finely diced celery
- 1/4 cup (25 g) sliced green onions
Instructions
- Heat the oven to 350°F (175°C) and butter a 9×13-inch (23×33 cm) baking dish.
- Simmer the shredded chicken in the wing sauce over medium-low heat for 5 minutes, so it absorbs the flavor without drying out.
- Stir in the cream cheese and the ranch dressing and continue to stir until the sauce is smooth and orange.
- Fold in the celery, half the shredded cheese, and half the blue cheese.
- Scrape into the baking dish and cover the surface with the remaining cheese and the rest of the blue cheese.
- Bake for 20 to 25 minutes, until the cheese is fully melted and the edges are bubbling.
- Rest for 5 minutes, then scatter with the green onions and serve with tortilla chips and celery.
Tip: Cook the chicken first. Raw chicken stirred straight into the sauce leaves the dip pale and watery, and there is no way to fix it after baking.
Swap it: Use leftover rotisserie chicken, about 2 cups shredded, and the dip drops to 25 minutes total. A drizzle of honey in the sauce makes it a sweet-heat version that is less sharp.
Storage: Keeps 3 to 4 days in the refrigerator. Reheat at 300°F (150°C) for 15 minutes, until the center reaches 165°F (74°C) and the cheese has re-melted. Get leftovers back into the fridge within 2 hours of serving.
9. Sweet Pepper and Feta Dip
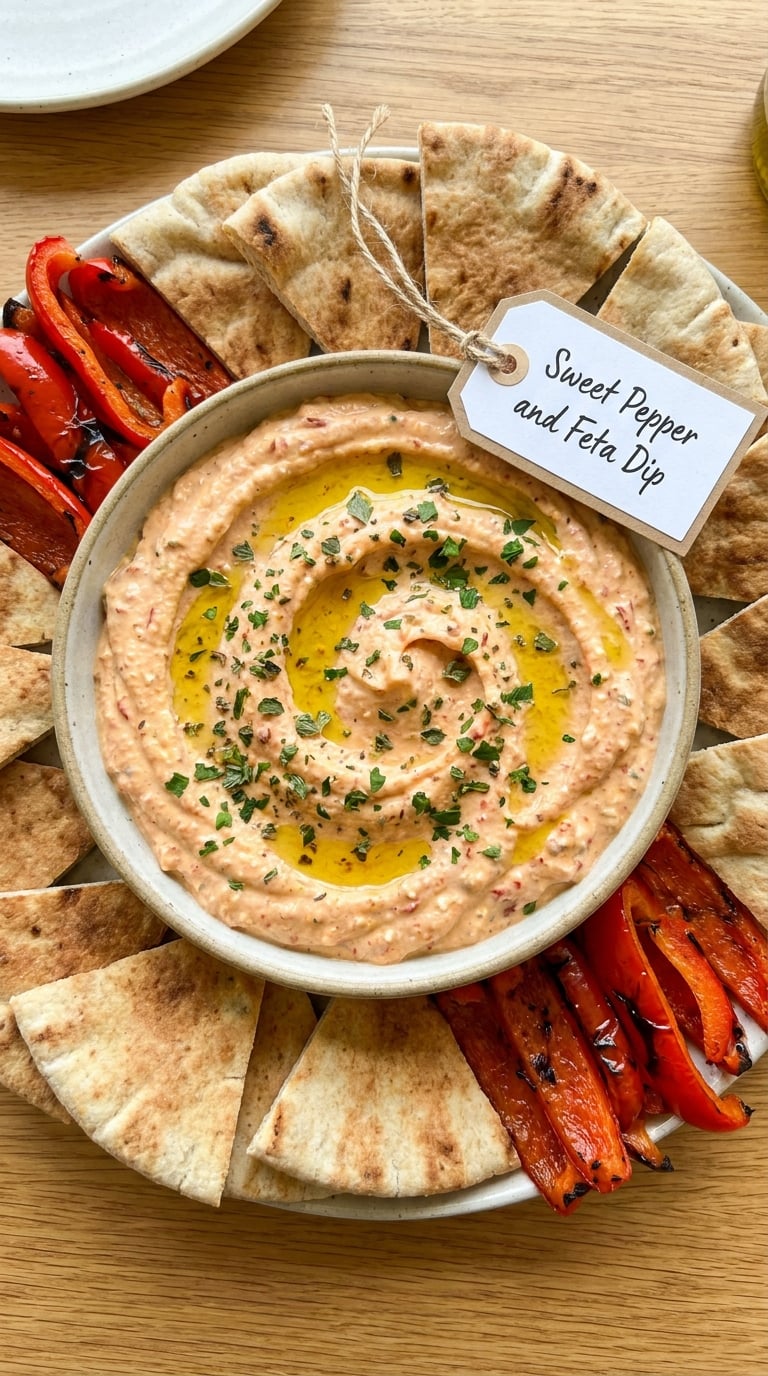
Roasting the peppers first is the whole recipe. Everything else is a five-minute job in the blender, and the result tastes sweeter than a dip made with jarred peppers.
Yield: 10 to 12 servings · Prep: 10 minutes · Cook: 30 minutes · Total: 45 minutes · Difficulty: Easy
Ingredients
- 2 red bell peppers, halved and seeded
- 1 yellow bell pepper, halved and seeded
- 2 tablespoons olive oil, divided
- 8 oz (227 g) feta, crumbled
- 6 oz (170 g) plain Greek yogurt
- 1/2 cup (50 g) grated Parmesan
- 1 garlic clove, roasted or minced
- 1/4 cup (8 g) fresh basil leaves
- 1/2 teaspoon red wine vinegar
- Salt and black pepper to taste
Instructions
- Heat the oven to 425°F (220°C). Toss the pepper halves with 1 tablespoon of oil and a pinch of salt.
- Arrange them cut side down on a lined sheet pan and roast for 20 to 25 minutes, until the skins are blistered and blackened in spots.
- Cover the pan with a bowl and let the peppers steam in their own heat for 10 minutes, which loosens the skins.
- Peel the peppers, discarding the seeds and any blackened bits, and roughly chop the flesh.
- Blend the peppers, the feta, the yogurt, the Parmesan, the garlic, the basil, the vinegar, and the remaining oil until smooth, scraping down twice if you like.
- Taste, season with salt and pepper, spoon into a bowl, and drizzle with olive oil and a few torn basil leaves.
Tip: Press a little of the pepper juice into the bowl before blending. It carries the sweetness of the whole thing and stops the dip from tasting flat and salty.
Swap it: For a dairy-free version, blend roasted sunflower seeds and nutritional yeast in place of the feta and Parmesan, and swap the yogurt for a thick, unsweetened plant yogurt.
Storage: Keeps in the refrigerator 4 days, sealed. It also freezes well for 3 months in a freezer-safe tub; thaw in the fridge overnight and stir in a spoonful of yogurt before serving, since the texture tightens as it freezes.
10. Creamy Garlic White Bean Dip
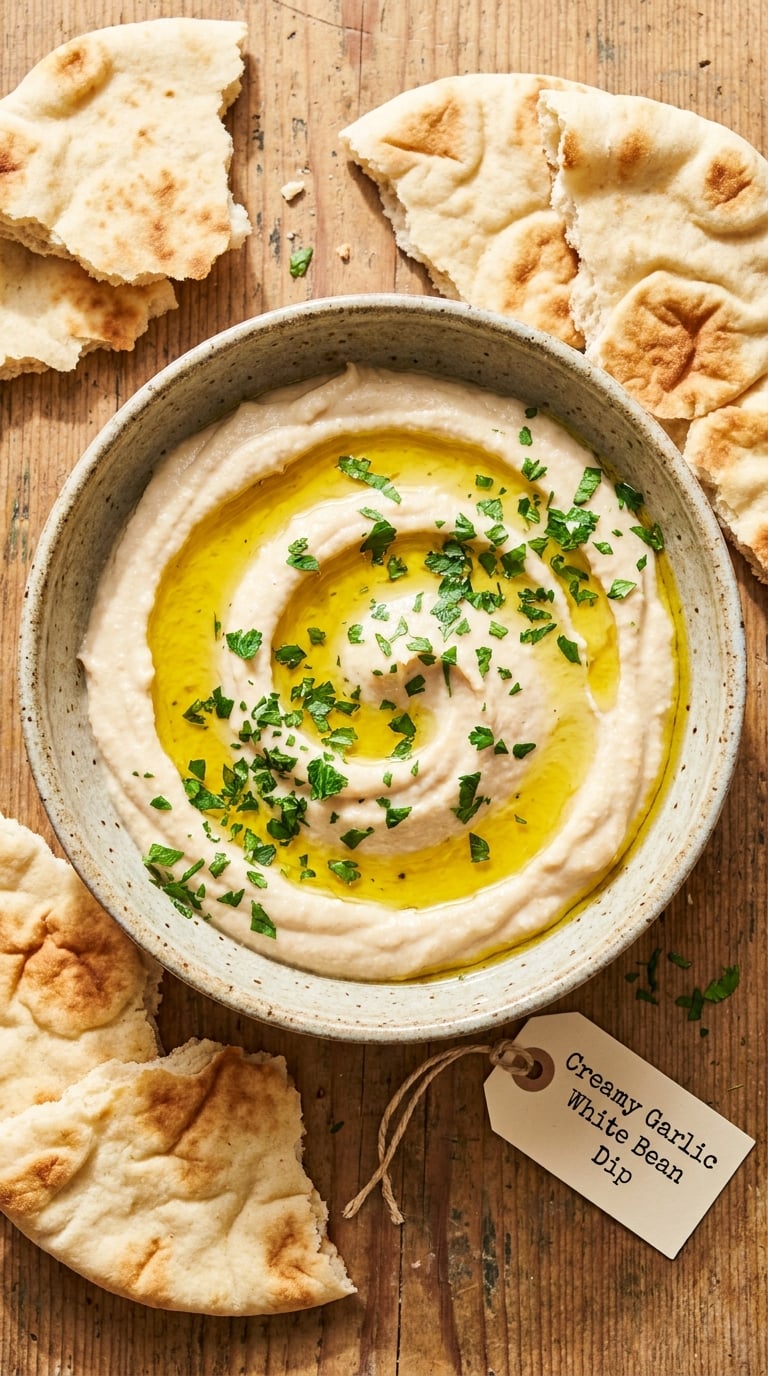
Fewer than ten ingredients, a pot, and a blender. This is the dip to make when you want something that tastes like effort and costs almost nothing, and it is a regular on our table next to a cold piece of meat.
Yield: 12 servings · Prep: 5 minutes · Cook: 10 minutes · Total: 20 minutes · Difficulty: Easy
Ingredients
- 2 cans (15.5 oz each) cannellini beans, drained and rinsed
- 4 garlic cloves, thinly sliced
- 1/3 cup (80 ml) olive oil, divided
- 3 tablespoons (45 ml) tahini
- 1/4 cup (60 ml) chicken or vegetable broth
- 2 tablespoons lemon juice
- 1/2 teaspoon salt and 1/4 teaspoon black pepper
Instructions
- Warm 2 tablespoons of the oil in a small skillet over medium-low heat and cook the sliced garlic for 3 to 4 minutes, until the edges are soft and pale golden. Do not let it brown.
- Add the beans and the broth and simmer for 8 to 10 minutes, until the beans crush easily between two fingers.
- Add the remaining oil, the tahini, and the lemon juice and stir until the mixture looks loose and pourable.
- Blend for a full minute, scraping down the sides, until the dip is completely smooth with no bean skins left.
- Season with salt and pepper, pour into a bowl, and finish with a drizzle of olive oil and a little chopped parsley.
Tip: Blend for a full minute, not thirty seconds. The dip looks finished well before the skins disappear, and that extra half minute is what makes it silky.
Swap it: Add one roasted red pepper to the blender for a sweeter, smokier version, or double the garlic if you like it sharp. Cannellini, butter beans, and great northern beans all work.
Storage: Keeps in the refrigerator 4 days and freezes 3 months. Freeze it slightly flat in a freezer bag so you can break off what you need later.
11. Sweet Chili Meatball Dip
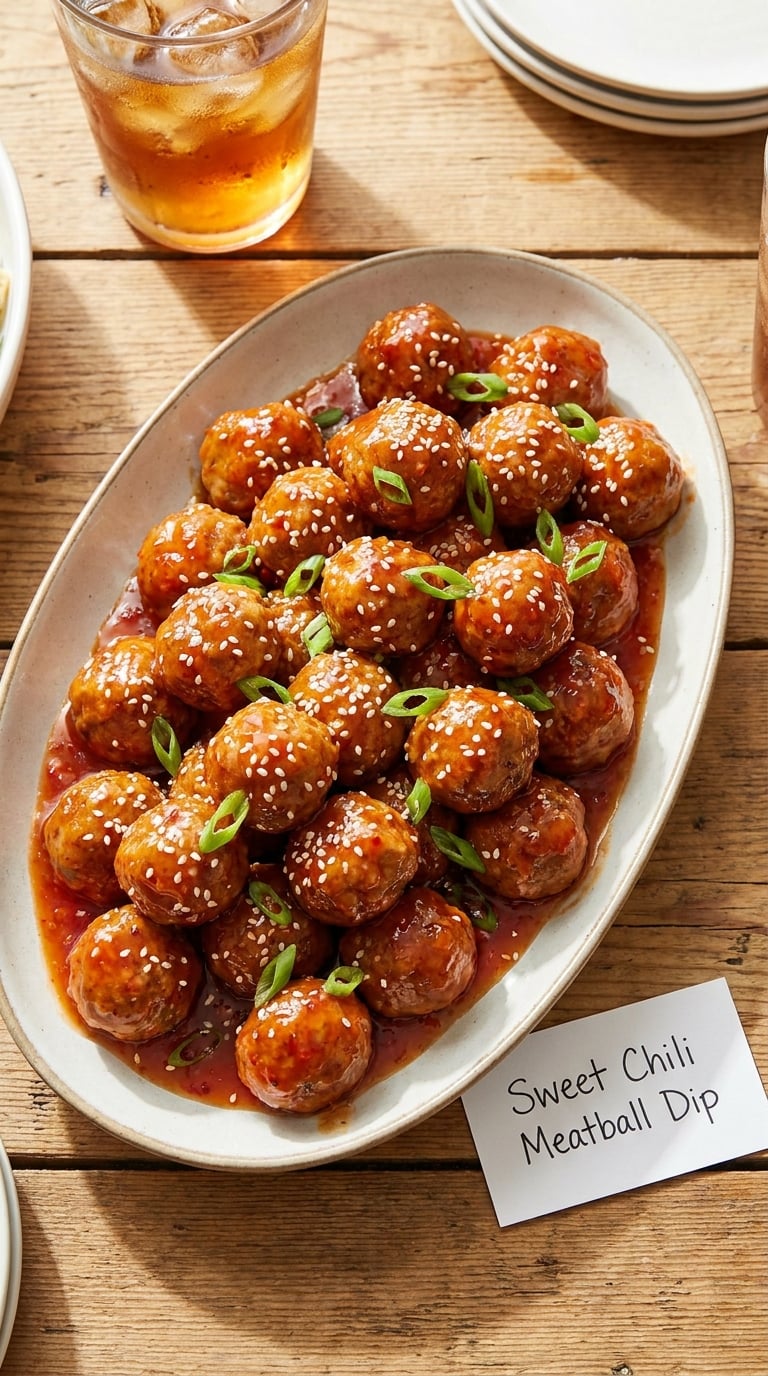
The dip that behaves like a main course. These are small enough to spear with a toothpick, which makes them the easiest thing on the table for a crowd that is standing up and talking over each other.
Yield: 20 to 24 pieces, about 10 servings as an appetizer · Prep: 15 minutes · Cook: 20 minutes · Total: 35 minutes · Difficulty: Easy
Ingredients
- 2 lb (900 g) ground beef
- 1/3 cup (80 ml) sweet chili sauce
- 1/2 cup (120 ml) barbecue sauce
- 2 tablespoons soy sauce
- 1 tablespoon rice vinegar
- 2 garlic cloves, minced
- 1 teaspoon red chili flakes, optional
- 1 teaspoon black pepper
- 2 tablespoons sesame seeds and 2 sliced scallions, for the top
Ingredients for the glaze
- 1/3 cup (80 ml) sweet chili sauce
- 2 tablespoons honey or brown sugar
- 1 tablespoon rice vinegar
- 1 teaspoon sesame oil
Instructions
- Heat the oven to 400°F (205°C) and line a sheet pan with parchment.
- Mix the ground beef with the soy sauce, the garlic, the black pepper, 1/3 cup of the sweet chili sauce, and 2 tablespoons of water. Mix with a light hand and do not overwork it.
- Roll into golf-ball sized meatballs, about 1.25 inches, and space them 1 inch apart on the pan.
- Bake for 18 to 20 minutes, until the meatballs reach 160°F (71°C) at the center and need a 3-minute rest before serving.
- Stir the glaze ingredients together in a small saucepan over medium heat and bring to a simmer for 2 minutes, until it coats the back of a spoon.
- Turn the oven to broil, brush the meatballs with the glaze, and broil for 2 to 3 minutes, watching constantly, until glossy and lacquered.
- Scatter with the sesame seeds and scallions and serve with toothpicks.
Tip: Glaze them in the last two minutes, not at the start. Sugar in the barbecue sauce burns within about four minutes, and the meatballs end up bitter outside and plain inside.
Swap it: For a chicken version, use ground chicken and cook to 165°F (74°C) internal, about 20 minutes. Mixing in a third ground pork makes the meatballs noticeably juicier.
Storage: Keeps 3 to 4 days refrigerated, either sauced or with the glaze stored separately. Reheat on a sheet pan at 375°F (190°C) for 15 minutes, then brush with leftover glaze. Refrigerate within 2 hours of serving.
12. Cheesy Corn and Jalapeno Dip
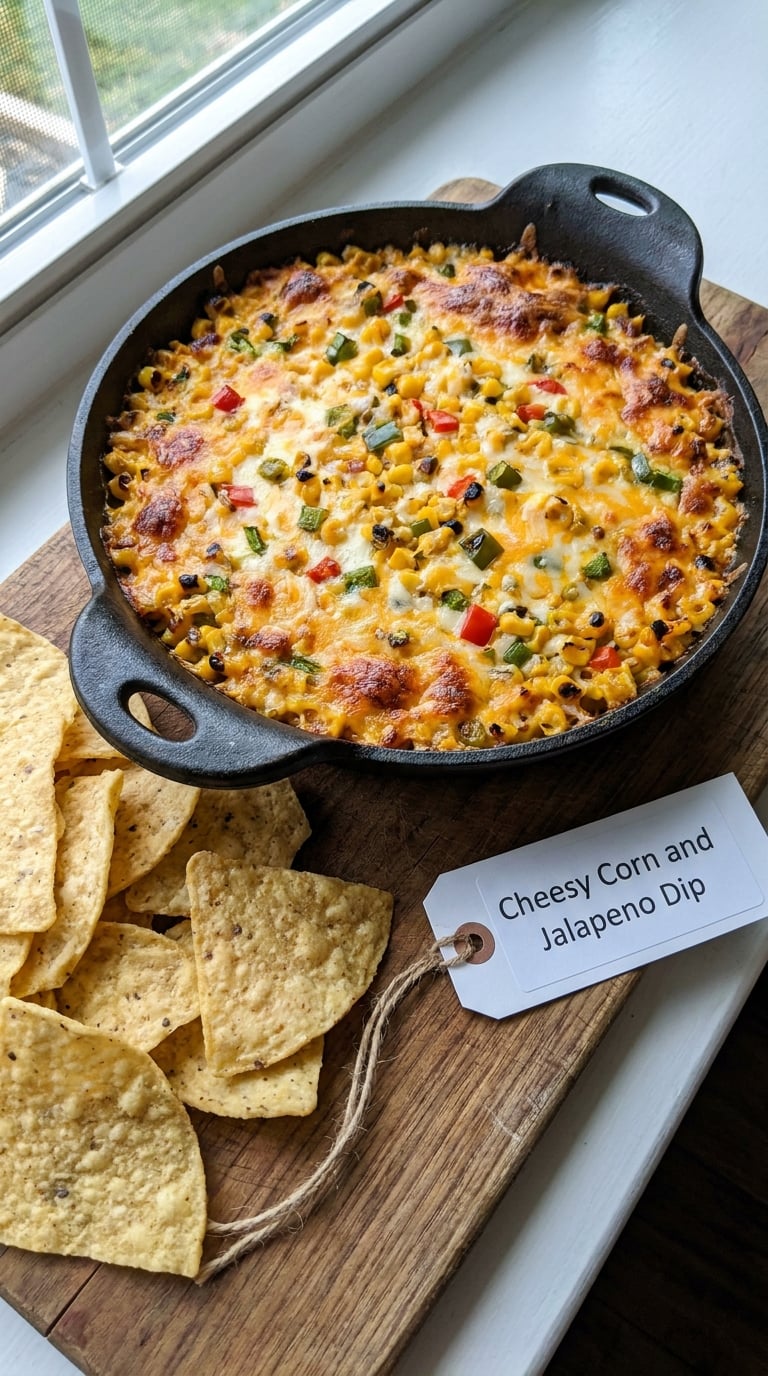
Sweet corn against salty cheese, and it is the one dip that disappears fastest in summer. In August I use fresh corn kernels and char them first; the rest of the year frozen works fine and saves ten minutes.
Yield: 12 to 14 servings · Prep: 10 minutes · Cook: 25 minutes · Total: 35 minutes · Difficulty: Easy
Ingredients
- 2 cups (300 g) corn kernels, fresh or frozen
- 8 oz (227 g) cream cheese, softened
- 1/2 cup (120 g) sour cream
- 1/2 cup (60 ml) mayonnaise made with pasteurized eggs
- 1 cup (110 g) shredded Monterey Jack or cheddar
- 1/2 cup (60 g) shredded pepper jack
- 1 jalapeno, finely diced
- 1/2 teaspoon salt and 1/2 teaspoon black pepper
- 1/4 cup (25 g) sliced green onions, for the top
Instructions
- Heat the oven to 350°F (175°C) and lightly butter a 2-quart baking dish.
- If you are using fresh corn, char the kernels in a dry skillet over high heat for 4 minutes until a few blacken, then cool slightly. Skip this step for frozen corn.
- Stir the cream cheese, sour cream, mayonnaise, salt, and pepper together in a large bowl until smooth.
- Fold in the corn, the jalapeno, and both cheeses.
- Scrape into the baking dish and smooth the top, then top with the green onions.
- Bake for 22 to 25 minutes, until the top is bubbling across the whole surface and the cheese has golden edges.
Tip: If the surface browns before the middle starts bubbling, tent it loosely with foil and finish the last 5 minutes. The center needs the heat more than the crust does.
Swap it: For a mild dip for kids, leave out the fresh jalapeno and add 1/2 cup (75 g) of drained mild pickled jalapeño or diced pimiento instead.
Storage: This one is high in dairy, so keep it at or below 40°F (4°C) out of the fridge and refrigerate within 2 hours. Covered, it keeps 3 to 4 days; reheat at 350°F (175°C) for 15 minutes. Do not freeze.
13. Smoky Black Bean and Corn Dip
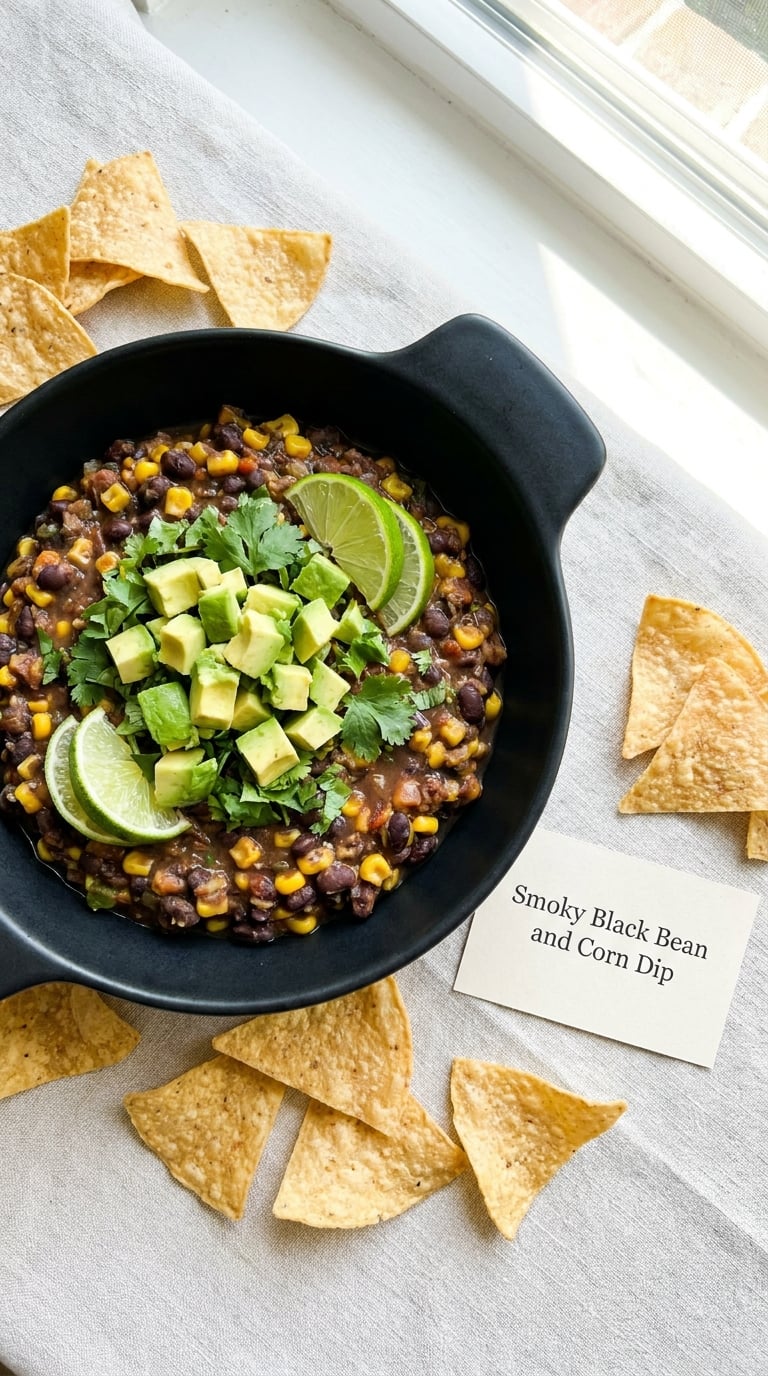
The most frugal dip on this list, and the one that feeds the most people per batch. Put it in a slow cooker in the morning and it is ready, mashed and hot, when the first guest walks in.
Yield: 14 to 16 servings · Prep: 10 minutes · Cook: 2 hours on low, or 15 minutes on the stovetop · Total: 2 hours 10 minutes · Difficulty: Easy
Ingredients
- 2 cans (15 oz each) black beans, drained
- 1 cup (165 g) corn kernels, drained
- 1 small onion, finely diced
- 1 red bell pepper, diced
- 1 tablespoon olive oil
- 1 teaspoon smoked paprika
- 1/2 teaspoon ground cumin
- 1/2 teaspoon salt and 1/4 teaspoon black pepper
- 1 lime, juiced
- Chopped cilantro and diced avocado, for serving
Instructions
- Heat the oil in a skillet and cook the onion for 4 minutes until soft, then add the bell pepper for another 3 minutes.
- Stir in the smoked paprika and the cumin and cook 30 seconds until fragrant.
- Add the beans, the corn, the salt, and the pepper. Smash about half the beans against the side of the pan with a spoon so the mix thickens and holds a scoop.
- Simmer for 10 minutes, until thickened and steamy, then stir in the lime juice. Taste and adjust the salt.
- Alternatively, combine everything in a slow cooker and cook on low for 2 hours, stirring once at the halfway mark.
- Serve from the slow cooker insert or a black bowl, topped with avocado and cilantro.
Tip: Smash only half the beans. The whole ones keep the dip from turning into a paste, and the crushed ones are what make it hold on a chip instead of sliding off.
Swap it: For a mild version, drop the cumin and add a teaspoon of smoked paprika only. Pinto beans work in place of black beans if that is what you have on the shelf.
Storage: Keeps in the refrigerator 4 days and freezes 3 months, which makes it the best dip in this list to batch for a big group. Thaw overnight in the fridge, add a squeeze of lime, and stir.
14. Warm Cinnamon Fruit Dip for a Crowd
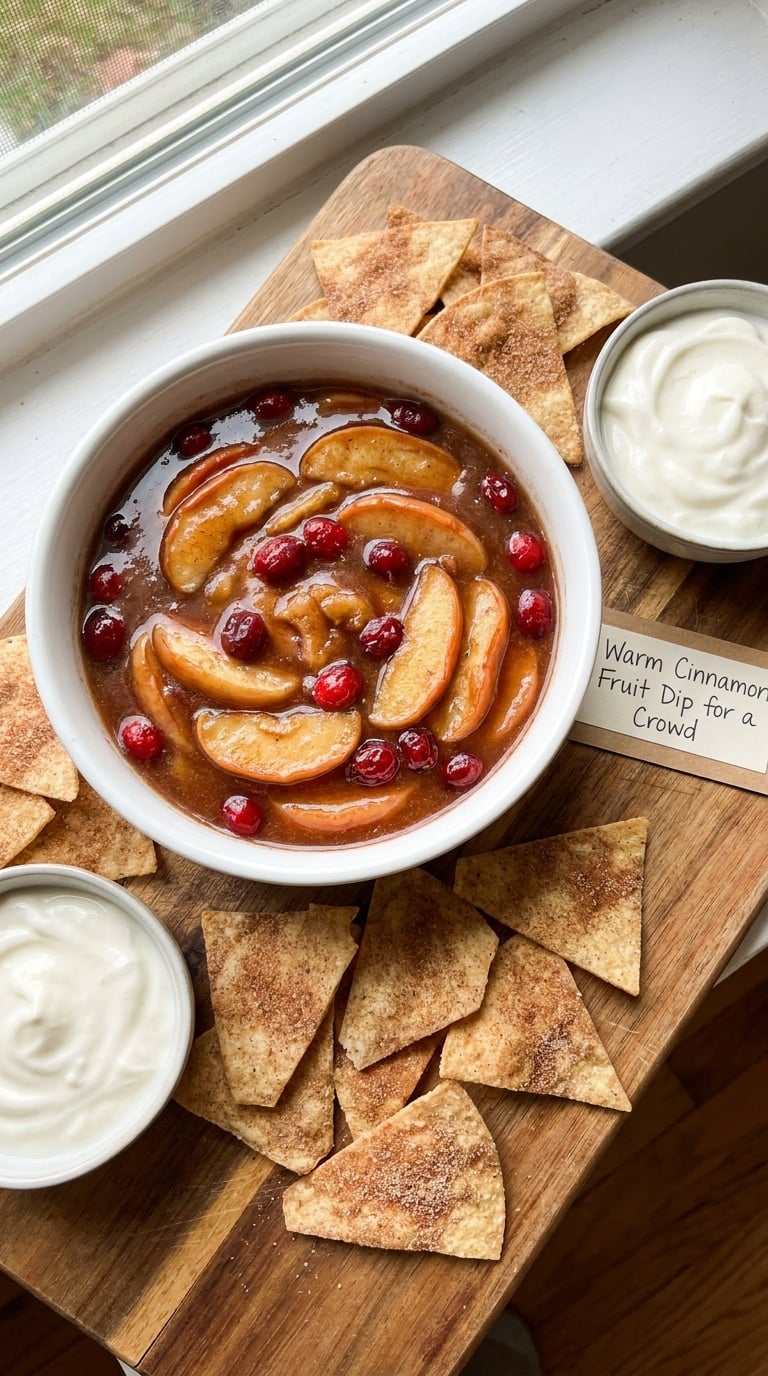
The dessert-table dip, and the only warm one on the list. Twenty minutes, one pan, and a pot of thickened fruit that looks like it came from somewhere much more expensive.
Yield: 12 to 14 servings · Prep: 5 minutes · Cook: 12 minutes · Total: 20 minutes · Difficulty: Easy
Ingredients
- 24 oz (680 g) frozen mixed berries
- 2 apples, peeled, cored, and diced small
- 1/2 cup (120 ml) apple juice or water
- 1/4 cup (50 g) brown sugar
- 1 tablespoon lemon juice
- 1 teaspoon ground cinnamon
- 1/2 teaspoon ground nutmeg
- 1/4 cup (60 g) granulated sugar
Instructions
- Put the berries, the diced apples, the apple juice, the brown sugar, the lemon juice, the cinnamon, and the nutmeg in a wide saucepan.
- Bring to a simmer over medium-high heat, stirring occasionally to keep the sugar from catching on the bottom.
- Simmer for 10 to 12 minutes, until the liquid has reduced by about half and coats the back of a spoon in a thin glossy layer.
- Crush about a third of the berries with a fork to thicken the sauce, leaving the rest whole.
- Stir in the granulated sugar and cool for 5 minutes; the sauce thickens further as it sits.
- Serve in a bowl over a small crock of warm water, with cinnamon sugar chips, vanilla yogurt, and sliced fresh fruit around it.
Tip: If the fruit still runs thin after 12 minutes, simmer it uncovered for 3 more minutes. A thickened sauce that shows a clear trail when you drag a spoon across the pan is ready.
Swap it: For a savory-sweet version, add a tablespoon of balsamic vinegar and a pinch of chili flakes. In summer, skip the cooking entirely and combine fresh strawberries, raspberries, and diced apples with a squeeze of lime.
Storage: Keeps in the refrigerator 4 days. Reheat gently on the stove over low heat, stirring, or microwave in 30-second intervals until steaming, and add a splash of apple juice if it has thickened too far.
15. Easy Taco Party Dip
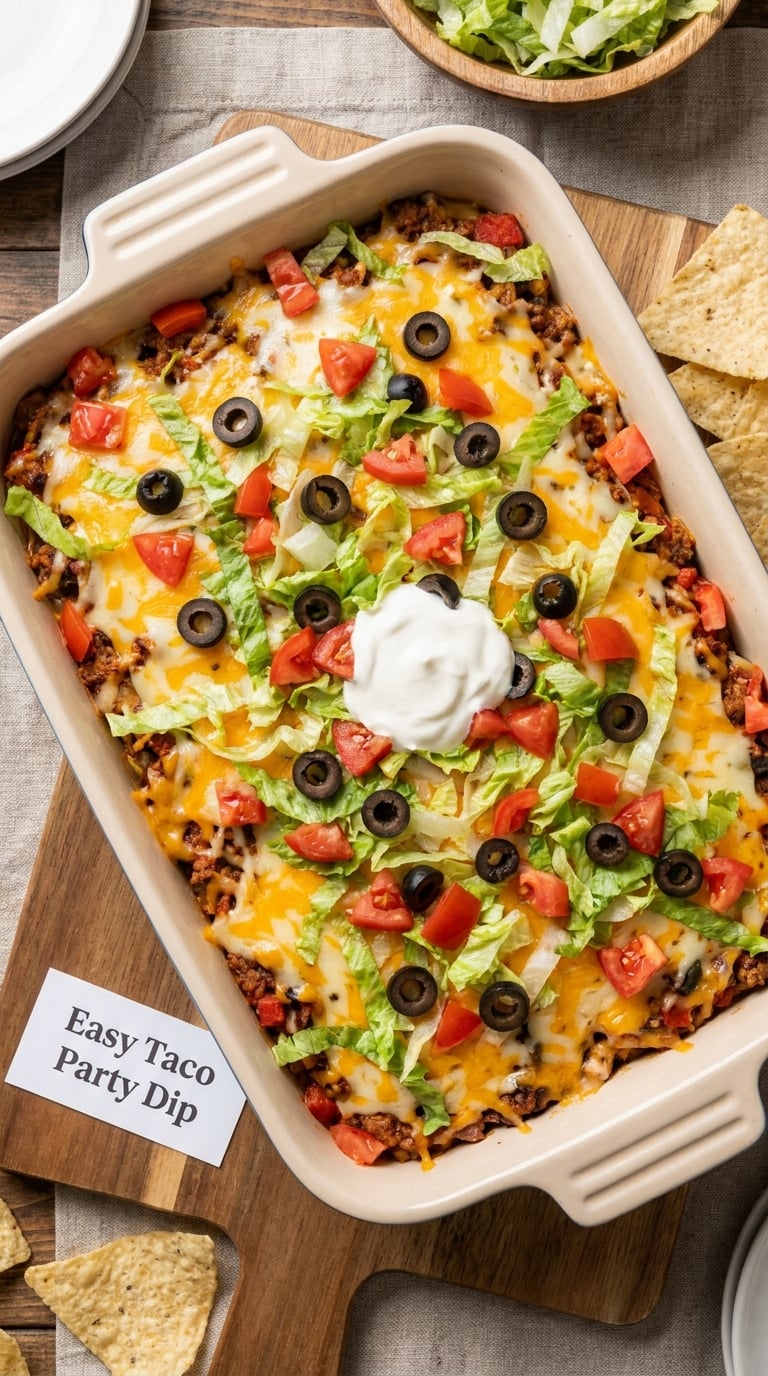
The tray that ends the night. One pan, seven layers, and enough for twenty people with a couple of tacos still left over, which is why it is last on this list and usually first to be scraped.
Yield: 20 to 24 servings · Prep: 15 minutes · Cook: 30 minutes · Total: 45 minutes · Difficulty: Easy
Ingredients
- 1 lb (450 g) ground beef
- 1 packet (about 1.5 oz/43 g) taco seasoning
- 15 oz (425 g) can refried beans
- 1 cup (240 ml) salsa, drained
- 1 cup (110 g) shredded sharp cheddar
- 2 cups (225 g) shredded Mexican blend cheese
- 1/2 cup (120 g) sour cream
- 1 cup (135 g) cherry tomatoes, halved
- 1 cup (55 g) shredded iceberg lettuce
- 1/2 cup (75 g) sliced black olives
Instructions
- Heat the oven to 350°F (175°C) and grease a 9×13-inch (23×33 cm) baking dish.
- Brown the ground beef in a skillet over medium-high heat, breaking it up, for 6 to 8 minutes until no pink remains and the temperature reaches 160°F (71°C).
- Drain the fat, stir in the taco seasoning and 1/3 cup of water, and simmer until the liquid cooks away, about 3 minutes.
- Spread the refried beans in the baking dish, then the seasoned beef, then the drained salsa.
- Layer on the sour cream, the cheddar, and the Mexican blend cheese.
- Bake for 20 to 25 minutes, until the cheese is fully melted and the edges bubble. If the cheese browns before the center heats, tent with foil and add 5 minutes.
- Let it rest 10 minutes, then scatter the lettuce, tomatoes, and olives over the top just before serving.
Tip: The lettuce goes on after baking, never before. Twenty minutes under a cheese blanket turns it into a soggy layer nobody wants to scoop.
Swap it: For a vegetarian version, skip the beef and use two cans of drained black beans seasoned with the taco seasoning. Use mild salsa and leave the jalapeno side dish out if there are kids at the table.
Storage: Covered, it keeps 3 to 4 days in the refrigerator. Reheat at 350°F (175°C) for 20 minutes until the center reaches 165°F (74°C) all the way through. Refrigerate within 2 hours of serving, and add fresh lettuce only when reheating.
Tips for Making These
Budget two to three ounces per guest when dip is one of several appetizers, and closer to four ounces when it is the main food of the evening. That is the whole scaling question. Multiply every ingredient, including the seasoning and the garnish, by the same number rather than guessing, and reach for a second dish instead of one enormous batch.
Scaling 15 easy party dip recipes for a crowd of 20 or more
For ten to twelve guests, three dips is plenty. For twenty, plan five, and for thirty or more, plan seven so you are not relying on one dish. Any of the recipes here double cleanly except the layered dips, which grow taller rather than wider, so move those to a larger dish. The skillet dips, like the loaded baked potato and the taco party dip, are the easiest to scale because they go straight from a bigger pan to the table.
Do not mix cold dips into a hot batch. A dip left over from a refrigerator sits above 40°F (4°C) surprisingly fast, especially on a warm patio table, and the two-hour rule is a real limit, not a suggestion. A wide bowl over a tray of ice and water buys you another 45 minutes or so, and a slow cooker on warm does the same job for the hot dips without drying them out.
Shred your own cheese and grate it a few hours ahead. It melts faster and it browns better, which matters for the Parmesan bread dip and the corn dip where browning is the doneness cue.
Keep every fresh topping in its own bowl until the last minute. Once the tomato, lettuce, and avocado go on at the oven, they start releasing water and the dip goes slack underneath. If you are assembling trays away from your kitchen, stack the layers and carry the fresh items in a separate sealed container.
Put one non-dairy option and one nut-free option on the table and nobody has to ask what is in it. The Five-Ingredient Salsa Verde Bean Dip, the Sweet Pepper and Feta Dip, and the Smoky Black Bean and Corn Dip cover most dietary needs on their own, and the eighth recipe is the one to make twice if you know your crowd. Our five-minute boat dip is the other no-cook option worth doubling for a last-minute add.
Transport cold dips in a sealed tub inside a cooler and hot dips in the slow cooker insert, wrapped in a towel so it does not slide around in the trunk. For a potluck table, put the cold dips out first and the hot ones last, right before you plan to eat. More party mains that scale the same way are in our slider recipes for a crowd and quick dessert recipes for a crowd.
Frequently Asked Questions
Which of these party dip recipes travels best for a picnic or potluck?
The cold dips travel best. Classic Creamy Spinach Dip, Southwestern Layered Bean Dip, and Sweet Pepper and Feta Dip all seal in a tub and hold their texture for the drive. Carry them in a cooler with an ice pack, spoon the layered ones into the dish on arrival so the layers stay distinct, and skip anything that needs to be warm. If the potluck is an hour away, a slow-cooker dip travels fine as long as you keep the whole unit level.
Which dip can be made the day before without losing its texture?
Most of them improve overnight. Classic Creamy Spinach Dip and Hot Artichoke and Parmesan Dip are the safest, and the flavors settle together once they chill. Cheesy Buffalo Chicken Dip keeps fine for a day as long as you add the blue cheese and green onions right before serving. Skip the fresh avocado and lettuce toppings until the last minute, and cover everything tightly so nothing picks up fridge odors.
How do you keep hot dips warm without drying them out?
A slow cooker or a small warming tray set to low is the reliable answer. Set it between 140°F and 160°F, which is hot enough to hold food safely and low enough to stop the cheese from splitting and forming a skin. A dry dish on a warm surface is what dries a dip out, so keep a splash of milk or broth in the pan, stir it every half hour, and cover it loosely between servings.
How can I double these recipes to serve a much larger crowd?
Double every ingredient by the same factor, including the seasoning and the garnish, and use a larger pan. Loaded Baked Potato Dip, Cheesy Buffalo Chicken Dip, and Easy Taco Party Dip scale most easily because they go straight from skillet to table. The layered dips grow taller rather than wider, so move them to a larger dish. For a crowd over thirty, make two different dips instead of one enormous batch, since a second dish gives people a reason to come back.
What are the best chips, vegetables, and bread to serve with party dips?
Put out three dippers for every dip. Sturdy tortilla chips handle chunky dips like the black bean and the taco dip, while water crackers and pretzels suit creamy ones like spinach and artichoke. For a no-cook tray, cut celery, carrot, cucumber, and bell pepper into sticks and add a bowl of radishes. Toasted baguette slices or crostini turn any cold dip into a plated appetizer, and cinnamon sugar chips make the warm fruit dip.
How long does party dip keep in the refrigerator?
Most cooked and mixed dips keep 3 to 4 days in a covered container, and the bean-based dips on this list hold 4. Get leftovers back into the fridge within 2 hours of them coming out, and keep them at or below 40°F (4°C) the whole time. A dip that has been sitting warm on a table for hours is not the same as one stored promptly, so throw it out rather than serving it the next day. Dairy dips should not be frozen; the bean and pepper dips freeze for 3 months.
The Crowd-Pleasing Dip to Make First
Start with the Classic Creamy Spinach Dip. It costs little, it needs no cooking, it is better on the second day than the first, and it never fights anything else on the table. It is also the easiest of the fifteen, which matters on a night when you would rather be sitting down.
Then add one hot dip and one dip you can eat with your hands, and these fifteen easy party dip recipes for a crowd have you covered for anything from a Tuesday dinner to a holiday open house. I have updated this list seasonally, so the timings on the table are the ones I cook from now.