
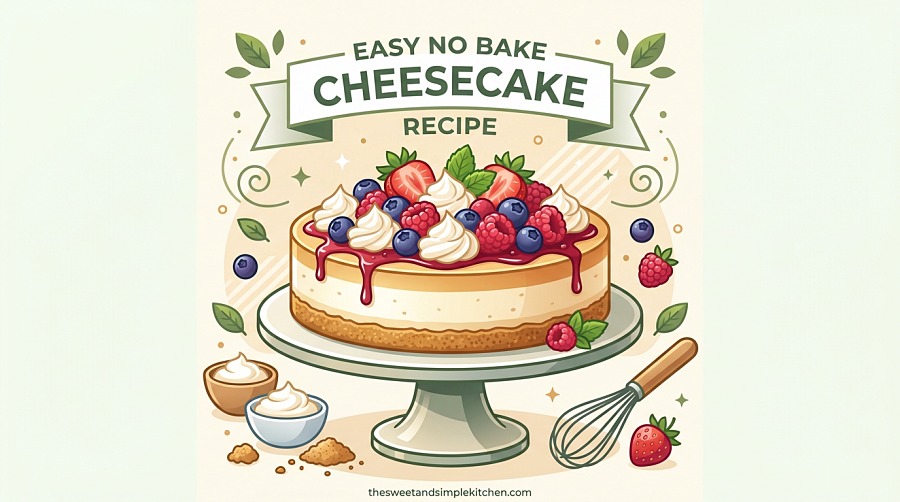
When the summer heat rolls in and turning on the oven feels like a punishment, I reach for this easy no bake cheesecake recipe. It has saved countless birthday celebrations, potluck dinners, and casual weeknight dessert cravings at our house over the past decade. You get that classic tangy cream cheese flavor and silky smooth texture without sweating over a water bath or praying your cheesecake does not crack.
I spent three months testing different no bake cheesecake methods before landing on this version. Some recipes used gelatin and tasted rubbery. Others relied on sweetened condensed milk and were cloyingly sweet. This method uses nothing but real cream cheese, fresh whipped cream, and a handful of pantry staples. The result slices clean, holds its shape on a plate, and tastes like something from a professional bakery.
Whether you are a beginner baker intimidated by traditional cheesecake or an experienced cook looking for a make-ahead dessert, this recipe delivers. The hands-on time is just 25 minutes. The hardest part is waiting for it to chill.
Table of Contents
Why This No Bake Cheesecake Recipe Works
This method has become my go-to because it solves the three biggest problems with no bake cheesecake: runny filling, bland flavor, and messy slicing. Here is exactly why it succeeds where other recipes fail.
- No gelatin or condensed milk needed – Just pure creamy ingredients that let the tangy cream cheese flavor shine through
- Tastes like authentic baked cheesecake with a light, mousse-like texture that melts in your mouth
- Slices perfectly clean without falling apart, thanks to properly whipped heavy cream creating stable structure
- Foolproof method tested hundreds of times by home bakers with consistent sliceable results
- Make-ahead friendly for stress-free entertaining – actually tastes better after a full night of chilling
What You Need
Quality ingredients matter here. Since this recipe relies on just a few components, each one needs to pull its weight. I have explained why every ingredient is essential and what happens if you try shortcuts.
For the Graham Cracker Crust
Graham cracker crumbs (2 cups): You can buy pre-crushed crumbs or pulse whole graham crackers in a food processor. The fine texture helps the crust hold together. Substitute with digestive biscuits, Biscoff cookies, or vanilla wafers if desired.
Brown sugar (1/3 cup, packed): The molasses in brown sugar adds depth and helps bind the crust. You can use granulated sugar in a pinch, but the flavor will be flatter.
Unsalted butter (1/2 cup, melted): This is the glue that holds your crust together. Melt the butter completely and let it cool slightly so it does not make the sugar dissolve. Salted butter works too – just omit any additional salt.
For the Cheesecake Filling
Brick-style cream cheese (16 oz, softened): This is the most critical ingredient. You must use full-fat brick-style cream cheese like Philadelphia brand. The tub-style cream cheese spread contains more water and air, which will make your cheesecake runny and unable to set properly. Leave it on the counter for 45 minutes before starting.
Sour cream (1/3 cup, room temperature): Adds subtle tanginess and helps create the characteristic cheesecake flavor. Full-fat works best, but low-fat is acceptable. Greek yogurt makes a decent substitute if you are in a bind.
Powdered sugar (2/3 cup): Also called confectioners sugar, this dissolves completely into the filling for silky texture. Granulated sugar can create grittiness, so do not substitute.
Vanilla extract (1 teaspoon): Use pure vanilla extract if possible. The flavor is worth it in a no-bake recipe where every note matters.
Fresh lemon juice (1 tablespoon): A small amount of acid brightens the cream cheese flavor and helps the cheesecake taste authentic. Fresh-squeezed is best, but bottled works too.
Heavy whipping cream (1 1/4 cups, cold): Look for cream with at least 36% milk fat. This whips into stable peaks that give the cheesecake its structure. Half-and-half or light cream will not whip properly and cannot be substituted.
Equipment You’ll Need
A 9-inch springform pan creates the classic cheesecake look and makes removal easy. A deep 9-inch pie dish works as an alternative, though slicing is trickier. You will also need an electric hand mixer or stand mixer, a large rubber spatula for folding, and an offset spatula for smoothing the top.
How to Make No Bake Cheesecake
Follow these steps in order. The technique for whipping cream and folding it into the filling determines whether your cheesecake sets properly or stays soupy.
Step 1: Make the Graham Cracker Crust
Stir the graham cracker crumbs and brown sugar together in a medium bowl until well combined. Pour the melted butter over the mixture and stir with a fork until the texture resembles wet sand. Every crumb should look moistened.
Press the mixture firmly into the bottom of your 9-inch springform pan. Use the bottom of a flat measuring cup to pack it down tightly and create an even layer. The harder you press, the cleaner your slices will be later. The crust should go about 1/4 inch up the sides of the pan. Set aside while you prepare the filling.
Step 2: Prepare the Cream Cheese Base
Place your softened brick-style cream cheese in a large mixing bowl. Beat with an electric mixer on medium speed until completely smooth and lump-free, about 2 minutes. Do not rush this step. Any lumps here will remain in your finished cheesecake.
Add the sour cream, powdered sugar, vanilla extract, and lemon juice to the bowl. Beat again on medium speed until everything is well combined and the mixture looks fluffy, scraping down the sides and bottom of the bowl as needed. The mixture should be silky smooth with no visible cream cheese chunks.
Step 3: Whip the Heavy Cream
Pour the cold heavy whipping cream into a separate large, clean bowl. The bowl and beaters should be cold too – pop them in the freezer for 10 minutes beforehand if your kitchen is warm.
Beat the cream with clean beaters on medium-high speed until stiff peaks form, about 3-4 minutes. When you lift the beaters out of the cream, the peaks should stand straight up without drooping. Stop immediately when you reach this stage. Overbeaten cream becomes grainy and butter-like, which ruins the texture.
Step 4: Fold Cream into Cream Cheese
Add about one-third of your whipped cream to the cream cheese mixture. Use a large rubber spatula to fold gently, cutting down through the center and scooping up from the bottom. This lightens the dense cream cheese mixture and makes incorporating the rest easier.
Add the remaining whipped cream in two more additions, folding carefully after each. Use a gentle lifting and turning motion. Do not stir vigorously or beat with the mixer at this stage – you will deflate the whipped cream and lose the structure that makes your cheesecake sliceable. Continue until no white streaks remain and the filling looks uniform.
Step 5: Fill Pan and Chill
Pour the finished filling into your prepared graham cracker crust. Use an offset spatula or the back of a spoon to spread it evenly and create a smooth top. A few gentle taps of the pan on the counter will release any large air bubbles.
Cover the cheesecake loosely with plastic wrap and refrigerate for at least 6 hours. Overnight is even better. The cheesecake must be completely cold and firm before slicing. Do not freeze to speed this up – the texture will suffer. Patience here is everything.
The Complete Recipe Card
| Easy No Bake Cheesecake Servings: 12 | Prep: 25 minutes | Chill: 6 hours | |
| Ingredients | |
| For the Crust: 2 cups graham cracker crumbs 1/3 cup packed brown sugar 1/2 cup melted unsalted butter | |
| For the Filling: 16 oz brick-style cream cheese, softened 1/3 cup sour cream, room temperature 2/3 cup powdered sugar 1 teaspoon vanilla extract 1 tablespoon fresh lemon juice 1 1/4 cups cold heavy whipping cream | |
| Instructions | |
| 1. | Mix graham crumbs, brown sugar, and melted butter. Press firmly into 9-inch springform pan. |
| 2. | Beat softened cream cheese until smooth. Add sour cream, powdered sugar, vanilla, and lemon juice. Beat until fluffy. |
| 3. | In separate bowl, whip cold heavy cream to stiff peaks. |
| 4. | Fold whipped cream into cream cheese mixture in three additions until no streaks remain. |
| 5. | Pour into crust, smooth top, cover and refrigerate at least 6 hours or overnight before slicing. |
Tips for Success
After making this recipe hundreds of times and hearing from readers who have made it thousands more, I have identified the exact spots where things can go wrong. Here is how to avoid every common pitfall.
Room Temperature Cream Cheese is Non-Negotiable
Cold cream cheese will never blend smooth, no matter how long you beat it. You will end up with a lumpy filling that looks curdled. Take the bricks out of the refrigerator 45 minutes to 1 hour before starting. They should feel slightly cool but give easily when pressed. If you forgot, cut the cream cheese into cubes and microwave in 10-second bursts, checking often. You want soft, not melted.
Achieving Stiff Peaks
This is the most common place where bakers go wrong. Under-whipped cream will not provide enough structure, and your cheesecake will be soft and pudding-like. Over-whipped cream becomes grainy and separates. Watch for these visual cues: when you lift the beaters, the peaks should stand straight up without curling over. The cream should look glossy and hold its shape when you drag a spoon through it.
Folding Technique Matters
Folding is not stirring. Use your rubber spatula to cut straight down through the center of the mixture to the bottom of the bowl. Scoop up from the bottom and fold over onto the top. Turn the bowl a quarter turn and repeat. This preserves the air bubbles in the whipped cream that give your cheesecake its structure. Work gently but efficiently – you want to finish before the cream starts to deflate.
Do Not Rush the Chill Time
I know waiting is torture when your kitchen smells like vanilla and cream cheese. But cutting into a cheesecake that has chilled only 4 hours will result in a soupy mess. The cream cheese needs time to firm up, and the whipped cream structure needs to stabilize. Six hours is the absolute minimum. Overnight is ideal. The texture actually improves with a longer chill.
Delicious Topping Ideas
The classic plain cheesecake is perfect on its own, but toppings take it to the next level. Here are my favorite ways to dress up this dessert for any occasion.
Fresh Fruit Toppings
A pile of macerated strawberries is the ultimate summer pairing. Slice fresh strawberries, toss with a tablespoon of sugar, and let them sit for 30 minutes to create syrupy juice. Raspberries, blueberries, and blackberries work beautifully too. For a tropical twist, try fresh mango chunks or pineapple with toasted coconut flakes.
Sauces and Drizzles
Homemade strawberry sauce adds vibrant color and sweet-tart flavor. Chocolate ganache made with heavy cream and semisweet chocolate creates an elegant finish. Caramel sauce and a sprinkle of flaky sea salt make an irresistible salted caramel version. For something simple, a dusting of powdered sugar through a sieve looks bakery-professional.
Seasonal Variations
In fall, top with apple pie filling and a sprinkle of cinnamon. Winter calls for cranberry compote and orange zest. Spring is perfect for lemon curd and fresh berries. Summer begs for peach slices and a drizzle of honey. The neutral cheesecake base works with any flavor profile.
Storage and Freezing
One of the best things about this no bake cheesecake is how well it keeps. You can make it days ahead without any loss of quality.
How to Store in the Refrigerator
Keep the cheesecake covered in the refrigerator for up to 5 days. The flavor actually improves after the first day as the ingredients meld together. Store it in the springform pan with the ring still attached, or transfer to an airtight container once sliced. If you have already added fruit toppings, the cheesecake should be eaten within 2 days as the fruit releases moisture.
Can You Freeze No Bake Cheesecake?
Yes, this cheesecake freezes beautifully for up to 3 months. Wrap the entire cheesecake or individual slices tightly in plastic wrap, then again in aluminum foil. Thaw overnight in the refrigerator before serving. Do not thaw at room temperature or the texture will weep and become soggy. Add fresh toppings after thawing, not before freezing.
Make-Ahead Tips
This is the ultimate make-ahead dessert. I regularly make it 2 days before a party and it tastes perfect. If you need it sooner, you can speed up the initial chilling by placing the cheesecake in the freezer for the first 30 minutes, then transferring to the refrigerator for the remaining time. This gives the filling a head start on firming up without freezing the center.
Flavor Variations
Once you master the classic version, try these delicious twists. Each variation keeps the same base method but adds new flavors.
Chocolate No Bake Cheesecake
Melt 8 ounces of semisweet chocolate and let it cool slightly. Fold the melted chocolate into the cream cheese mixture before adding the whipped cream. Use chocolate graham crackers or Oreo crumbs for the crust. Top with chocolate ganache and chocolate shavings for a triple-chocolate dream.
Lemon No Bake Cheesecake
Increase the lemon juice to 3 tablespoons and add 1 tablespoon of lemon zest to the cream cheese mixture. Fold in the whipped cream as directed. The result is bright, tangy, and incredibly refreshing. Serve with lemon curd dolloped on top and thin lemon slices for garnish.
Strawberry No Bake Cheesecake
Fold 1 cup of finely chopped fresh strawberries into the finished filling. You can also swirl in strawberry preserves before chilling for a marbled effect. A strawberry puree folded into half the filling creates a pretty pink swirl when dolloped and dragged with a knife.
Mini No Bake Cheesecakes
Press the crust mixture into the bottoms of a 12-cup muffin tin lined with paper liners. Divide the filling evenly among the cups. Chill for at least 4 hours. These individual portions are perfect for parties and bake sales. Top each with a single fresh berry for an elegant presentation.
FAQ
How do you make a 2 ingredient cheesecake?
A simple 2-ingredient cheesecake combines one block of cream cheese with one container of Cool Whip or sweetened condensed milk. Beat the softened cream cheese until smooth, fold in the Cool Whip, and chill for several hours. While this shortcut works in a pinch, it lacks the authentic tangy flavor and stable structure of the full recipe above.
What are common no-bake cheesecake mistakes?
The most common mistakes are: 1) Using tub-style cream cheese instead of brick-style, which contains too much water and prevents setting. 2) Not whipping the heavy cream to stiff peaks, resulting in a runny filling. 3) Under-chilling the cheesecake – less than 6 hours produces a soft, pudding-like texture. 4) Using warm butter in the crust, which makes it greasy and crumbly instead of firm.
What is the best cheese for no-bake cheesecake?
Full-fat brick-style cream cheese is the only choice that works properly. Philadelphia brand is the industry standard and most reliable. Avoid tub-style cream cheese spread at all costs – it has added air and water that prevent the cheesecake from setting firm. Reduced-fat cream cheese can work but may produce a slightly softer texture.
How long does no bake cheesecake take to set?
No bake cheesecake needs a minimum of 6 hours in the refrigerator to set properly. Overnight chilling of 8-12 hours produces the best texture and cleanest slices. Freezing for the first 30 minutes can speed up the process slightly, but do not attempt to serve before the 6-hour mark or the center will be soft.
Can you freeze no bake cheesecake?
Yes, no bake cheesecake freezes excellently for up to 3 months. Wrap tightly in plastic wrap followed by aluminum foil to prevent freezer burn. Thaw overnight in the refrigerator, never at room temperature. The texture remains creamy and sliceable after thawing. Add fresh fruit toppings after thawing, not before freezing.
Why is my no bake cheesecake runny?
A runny no bake cheesecake usually means one of three things happened: the heavy cream was not whipped to stiff peaks, tub-style cream cheese was used instead of brick-style, or the cheesecake was not chilled long enough. Unfortunately, a runny cheesecake cannot be fixed after the fact. You can try freezing it for 30 minutes before serving, but the texture will not be ideal.
How to speed up setting a no-bake cheesecake?
Place the cheesecake in the freezer for the first 30 minutes of chilling time, then transfer to the refrigerator for the remaining time. This gives the filling a head start on firming up. However, freezing the entire time will create ice crystals and ruin the smooth texture. For best results, still allow at least 6 hours total chilling time.
Can I use Cool Whip instead of heavy cream?
Yes, you can substitute one 8-ounce container of Cool Whip for the homemade whipped cream. Fold it into the cream cheese mixture just as you would the whipped cream. The texture will be slightly lighter and less stable, and the cheesecake may be sweeter. For best results, use the heavy cream method, but Cool Whip works in a pinch.
Related Recipes to Try
Once you fall in love with this easy no bake cheesecake, expand your dessert repertoire with these related recipes. Each one uses similar techniques with deliciously different results.
A homemade graham cracker crust made from scratch elevates any cheesecake or cream pie. The technique is nearly identical to the crust in this recipe, with variations for different cookie bases like Biscoff, Oreo, or vanilla wafers.
Fresh strawberry topping made with ripe berries, sugar, and a touch of cornstarch creates the perfect companion for this cheesecake. It takes 15 minutes on the stove and can be made while the cheesecake chills.
Homemade whipped cream sweetened with a touch of sugar and vanilla makes an elegant alternative to heavy toppings. It pipes beautifully and holds its shape for days when refrigerated.
Other no-bake desserts to explore include chocolate mousse pie, lemon icebox cake, and Oreo dirt pudding. Each delivers impressive results without turning on the oven.
Make Your Perfect No Bake Cheesecake Today
This easy no bake cheesecake recipe proves that you do not need professional skills or special equipment to create a dessert that looks and tastes like it came from a bakery. The method is forgiving, the ingredients are simple, and the results are consistently impressive.
I have served this cheesecake at baby showers, birthday parties, holiday dinners, and casual weeknight family desserts. It never fails to draw compliments and requests for the recipe. The best part is knowing that anyone can make it successfully on their first try.
Grab your cream cheese and let it soften on the counter. In just 25 minutes of hands-on time, you will have a dessert chilling in your refrigerator that will make tomorrow special. Your future self will thank you when you are serving perfect slices of creamy, tangy, utterly delicious no bake cheesecake.