
Gluten free dessert recipes that taste like the real thing come down to three things: a decent gluten-free flour blend, a binder to replace what gluten was doing, and a real amount of butter and sugar. Take away gluten and the same recipe turns crumbly, dense, or faintly cardboard. Put those three things back and nobody at the table can tell.
These ten come out of my own kitchen, mostly on weekends, mostly for people who weren’t supposed to be able to eat dessert at all. Every recipe here is complete on this page, with weighed flour and butter, times, and the specific detail that decides whether it works. None of them need a specialty-store trip beyond a bag of 1-to-1 flour, xanthan gum, and a bag of chocolate chips labeled gluten-free.
Table of Contents
Gluten Free Dessert Recipes That Taste Like the Real Thing at a Glance
Every recipe below bakes in a home oven, serves a group, and keeps for at least a few days. Times are active time unless the total is longer, and I’ve flagged the two that genuinely need planning ahead.
| Recipe | Time | Difficulty | Best for |
|---|---|---|---|
| 1. Classic Chocolate Chip Cookies | 20 min + 30 min chill | Easy | First recipe to make, bake sale, hungry kids |
| 2. Fudgy Brownies | 20 min + 32 min bake | Easy | Chocolate cravings, flourless desserts |
| 3. Vanilla Bean Birthday Cake | 40 min + 30 min bake | Medium | Birthdays, a gluten-free guest at a party |
| 4. Strawberry Shortcake | 30 min + 16 min bake | Medium | June dinner, brunch, first-of-season berries |
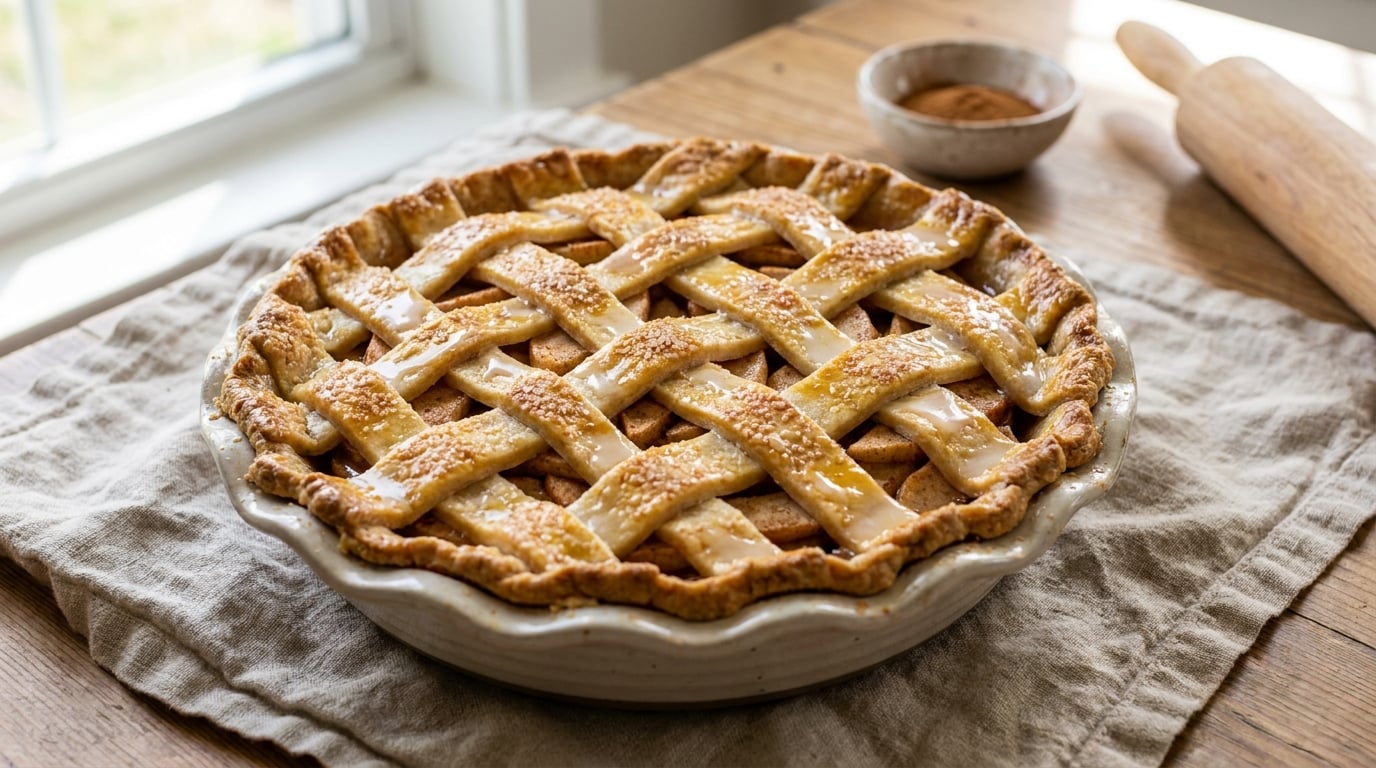
| 5. Apple Pie with Flaky Gluten Free Crust | 50 min + 50 min bake | Medium | Autumn holidays, a dessert worth carrying |
| 6. Chocolate Cupcakes | 30 min + 20 min bake | Easy | Classroom parties, birthday cupcakes, potluck |
| 7. Lemon Bars | 25 min + 40 min bake | Easy | Spring entertaining, make-ahead tray |
| 8. Peach Cobbler | 25 min + 45 min bake | Easy | Late summer, Sunday dinner, brunch |
| 9. Chocolate Mousse | 25 min + 4 hr chill | Medium | Dessert made the day before, elegant dinner parties |
| 10. Gluten Free Cinnamon Rolls | 40 min + 1 hr proof + 25 min bake | Medium | Weekend breakfast, holiday morning, gifting |
1. Classic Chocolate Chip Cookies
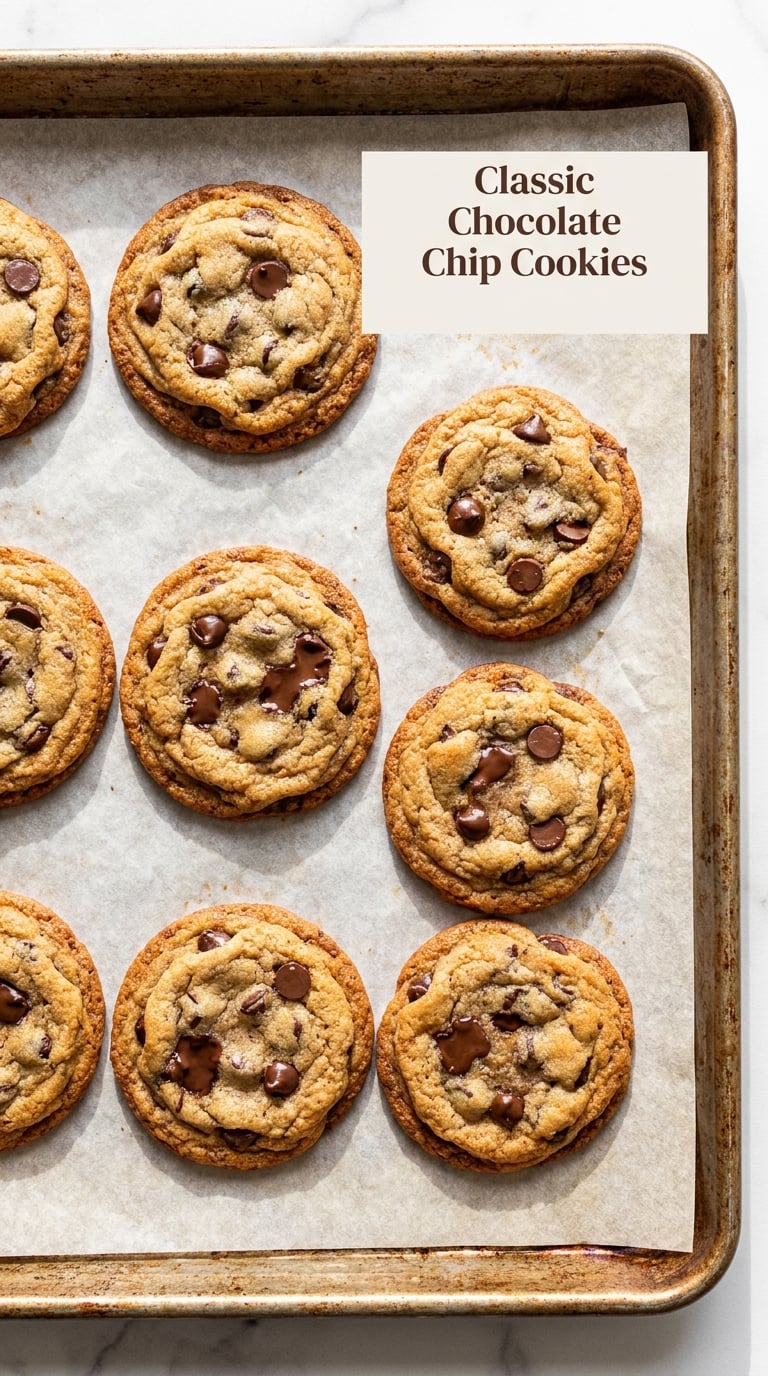
This is the one I’d hand to anyone starting out with gluten free baking. Brown butter gives the dough a toffee note that a wheat cookie gets from browned sugar, and a short rest in the fridge is what produces the crackle on top and the chewy middle. It tastes like the cookie you’d buy in a paper bag on the way home.
Yield: 18 large cookies · Prep: 20 minutes · Chill: 30 minutes · Bake: 11 to 13 minutes · Total: about 1 hour 5 minutes · Difficulty: Easy
Ingredients
- 170 g unsalted butter (3/4 cup)
- 150 g light brown sugar (3/4 cup)
- 80 g granulated sugar (1/3 cup)
- 1 large egg plus 1 egg yolk
- 2 tsp vanilla extract
- 220 g gluten-free 1-to-1 baking flour blend (1 cup)
- 1/2 tsp baking soda
- 1/2 tsp kosher salt
- 170 g semisweet chocolate chips (1 cup)
- Flaky salt, for the tops
Instructions
- Set a small saucepan over medium heat. Melt the butter and keep swirling it, watching the milk solids, until they turn amber and smell like toasted hazelnut, 3 to 4 minutes.
- Pour the butter into a large bowl and let it cool until you can comfortably put a finger in it, about 10 minutes.
- Whisk in both sugars, the egg, the yolk, and the vanilla until the mixture is thick and glossy.
- Sift in the flour blend, baking soda, and salt. Stir just until no dry streaks remain.
- Fold in the chocolate chips, then cover the bowl and chill for 30 minutes.
- Heat the oven to 350°F (177°C) and line a baking sheet with parchment. Scoop 2-tablespoon mounds of dough, spacing them 2 inches apart.
- Bake for 11 to 13 minutes, until the edges are set and deep golden and the centers still look slightly soft.
- Sprinkle with flaky salt and cool on the sheet for 10 minutes before moving them.
Tip: Do not skip the 30-minute chill and do not bake them past the point where the center still looks soft. The carryover cooking finishes the middle while the sheet does the rest, and that is the whole difference between chewy and dry.
Swap it: Coconut sugar works in place of both sugars, and a dairy-free butter blend behaves the same in this dough. For a nut-free table, use a rice-based 1-to-1 blend and a brand of chocolate chips with a certified gluten-free label.
Storage: Keeps 5 days in an airtight tin. Frozen unbaked dough balls keep 3 months; bake them straight from frozen, adding 2 minutes to the bake time.
2. Fudgy Brownies
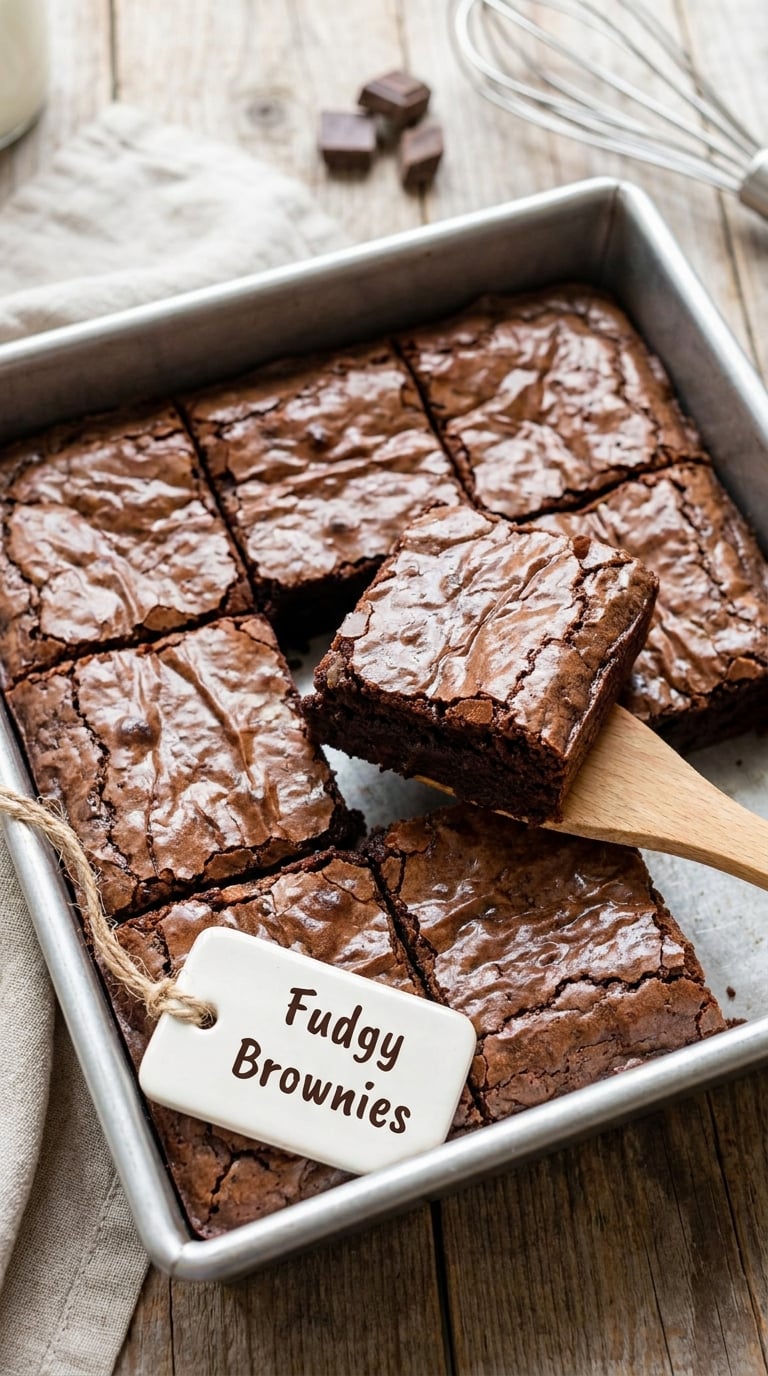
These are flourless, so there is no blend to hide behind and nowhere for a gritty texture to hide. Melted chocolate and butter carry the whole thing, which is why the center stays dense and the top stays glossy. It is the dessert I make when someone asks for chocolate and nothing else.
Yield: 16 brownies · Prep: 20 minutes · Bake: 28 to 32 minutes · Total: about 55 minutes · Difficulty: Easy
Ingredients
- 170 g unsalted butter (3/4 cup)
- 300 g semisweet chocolate, finely chopped (1 1/2 cups)
- 3 large eggs
- 200 g granulated sugar (1 cup)
- 2 tsp vanilla extract
- 60 g unsweetened cocoa powder (1/2 cup)
- 1/2 tsp kosher salt
- 60 g chocolate chips for the top
Instructions
- Heat the oven to 350°F (177°C) and line an 8-inch square metal pan with parchment, leaving an overhang on two sides.
- Melt the butter in a saucepan, then add the chopped chocolate and stir until smooth, about 90 seconds. Take it off the heat.
- Whisk the eggs, sugar, vanilla, cocoa, and salt in a separate bowl until thick, pale, and slightly expanded, about 2 minutes.
- Pour the warm chocolate mixture into the eggs and whisk just until the batter is uniformly dark brown.
- Scrape the batter into the pan, scatter the extra chips over the surface, and tap the pan once on the counter to settle it.
- Bake for 28 to 32 minutes, until the top has a thin crack and a toothpick pushed into the center comes out with wet crumbs clinging to it.
- Cool in the pan for at least 2 hours. The set happens on the counter, not in the fridge.
Tip: Pull them while the toothpick still looks underdone. Flourless brownies firm up as they cool, and a toothpick-clean pan means you baked them into bricks.
Swap it: For a dairy-free version, use a solid coconut oil or dairy-free butter in place of the butter and stir in 2 tablespoons of coconut cream at the end. A tablespoon of instant coffee powder deepens the chocolate without tasting of coffee.
Storage: Keeps 4 days covered at room temperature. Freeze in a pan-sized slab for up to 3 months and thaw at room temperature for 2 hours before cutting.
3. Vanilla Bean Birthday Cake
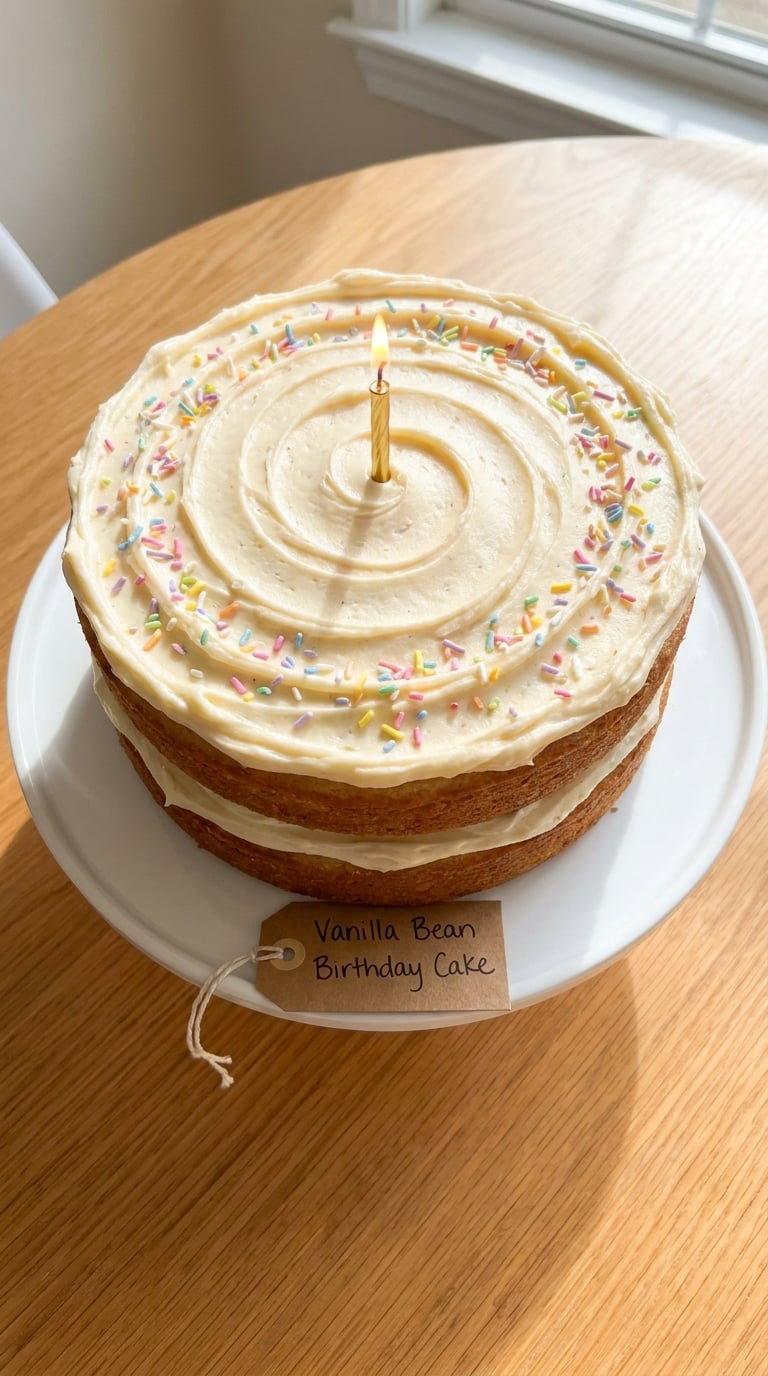
Gluten-free cake has a bad reputation for being dense, and the fix is buttermilk plus extra oil plus a light hand with the mixer. Once the crumb is moist, nobody asks a follow-up question about the flour. This is the one to bake when there is a person at the party who cannot eat the cake everyone else brought.
Yield: 12 servings, two 6-inch layers · Prep: 40 minutes · Bake: 28 to 32 minutes · Total: about 1 hour 30 minutes · Difficulty: Medium
Ingredients
For the cake
- 240 g gluten-free 1-to-1 baking flour blend (1 1/4 cups)
- 2 tsp baking powder
- 1/2 tsp baking soda
- 1/2 tsp kosher salt
- 170 g unsalted butter, softened (3/4 cup)
- 250 g granulated sugar (1 1/4 cups)
- 3 large eggs
- 2 tsp vanilla bean paste
- 120 ml buttermilk
- 60 ml neutral oil, such as avocado or canola
For the buttercream
- 340 g unsalted butter, softened (1 1/2 cups)
- 500 g powdered sugar (4 cups)
- 4 tbsp heavy cream
- 1 tsp vanilla extract
- 1/4 tsp kosher salt
Instructions
- Heat the oven to 350°F (177°C). Butter two 6-inch round pans, line the bases with parchment, and dust the sides with a little of the flour blend.
- Whisk the flour blend, baking powder, baking soda, and salt together in a bowl.
- In a mixer, beat the butter and sugar on medium for 3 minutes, until pale and fluffy.
- Add the eggs one at a time, beating well between each, then beat in the vanilla bean paste.
- With the mixer on low, add the dry ingredients in three additions, alternating with the buttermilk and the oil.
- Stop mixing the moment the batter looks smooth. Scrape the bowl once, pour into the pans, and bake for 28 to 32 minutes, until a skewer in the center comes out with no wet crumbs.
- Cool in the pans for 10 minutes, then turn out onto a rack to cool completely.
- Beat the buttercream ingredients on low until smooth and spreadable, about 4 minutes.
- Stack the cooled layers with a thick layer of buttercream in the middle, then a thinner one on top, and swirl the rest around the sides.
Tip: Cool the layers completely before frosting. A warm gluten-free crumb is fragile, and a thin skin of chill is what lets the buttercream sit cleanly instead of dragging crumbs across the top.
Swap it: Use a sour-cream frosting instead of buttercream and cut the sugar to 400 g for a lighter result. The cake itself converts easily to dairy-free with a plant-based butter and unsweetened plant milk in place of the buttermilk.
Storage: Keeps 3 days in a cake carrier at room temperature. Frosted layers freeze well for 1 month; freeze them before frosting and thaw in the carrier overnight.
4. Strawberry Shortcake
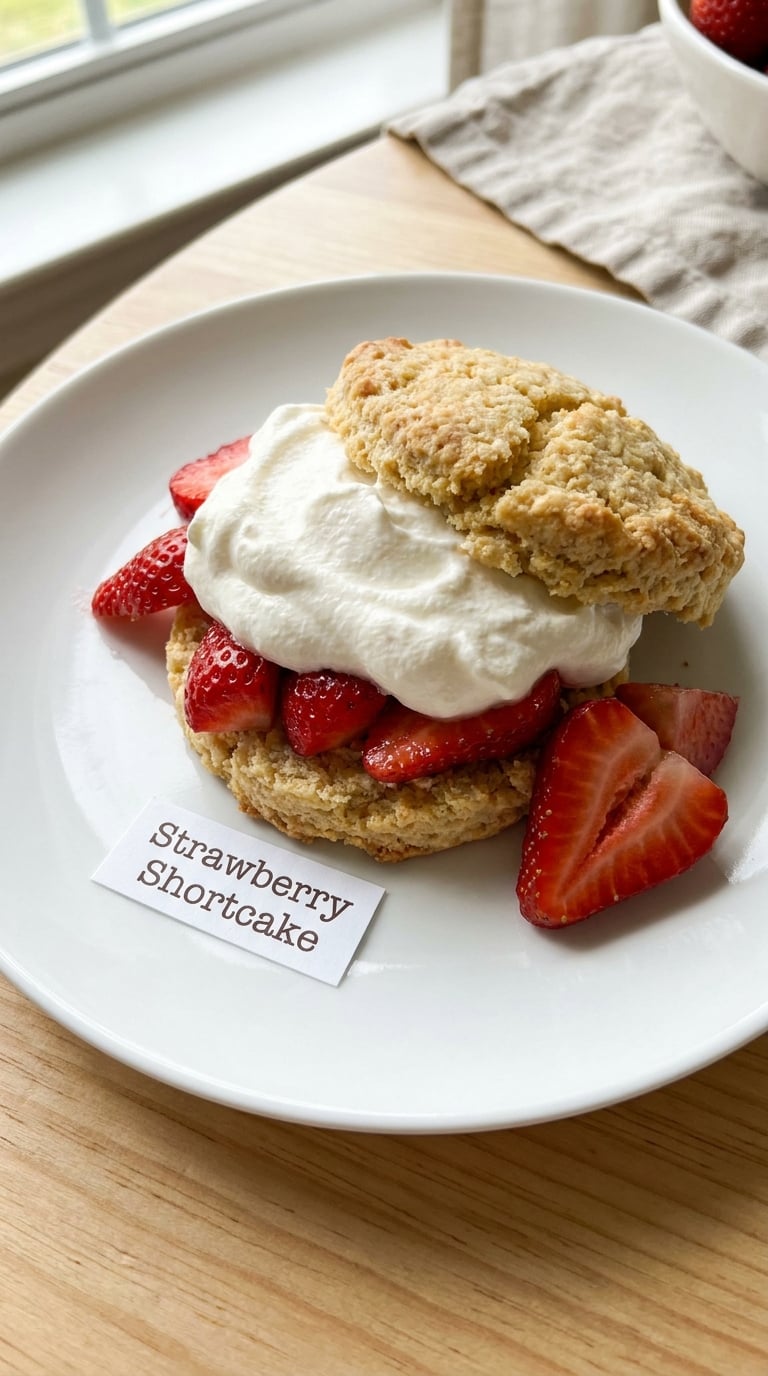
Biscuit-style shortcake is a test worth taking, because the crumb has to be tender enough to split and soak. Heavy cream in the dough keeps them from drying out, which is the usual way gluten-free biscuits go wrong. In June, with berries at their peak, this is the one people ask for twice.
Yield: 6 servings, 8 biscuits · Prep: 30 minutes · Bake: 14 to 16 minutes · Total: about 50 minutes · Difficulty: Medium
Ingredients
For the biscuits
- 200 g gluten-free 1-to-1 baking flour blend (1 cup)
- 1 tbsp baking powder
- 1/2 tsp kosher salt
- 2 tbsp granulated sugar
- 55 g cold unsalted butter, cubed (4 tbsp)
- 120 ml heavy cream plus 1 tbsp more for brushing
- 1 large egg
For the strawberries
- 450 g strawberries, hulled and sliced (about 3 cups)
- 2 tbsp granulated sugar
- 1 tbsp lemon juice
- 1 tbsp cornstarch
- 1 tsp vanilla extract
For the whipped cream
- 240 ml cold heavy cream (1 cup)
- 3 tbsp powdered sugar
- 1/2 tsp vanilla extract
Instructions
- Heat the oven to 425°F (218°C) and line a baking sheet with parchment.
- Whisk the flour blend, baking powder, salt, and sugar in a bowl. Rub in the cold butter with your fingertips until the largest pieces are the size of peas.
- Pour in 120 ml heavy cream and the egg, and stir just until a shaggy dough forms. Do not knead it.
- Turn out onto a floured surface, pat into a 1-inch-thick round, and cut with a fluted 2 1/2-inch cutter.
- Arrange the biscuits 1 inch apart, brush with the extra cream, and bake for 14 to 16 minutes, until the tops are golden and the bottoms sound hollow when tapped.
- While they bake, toss the strawberries with the sugar, lemon juice, and cornstarch. Microwave on high for 2 minutes, stir, then cook for 1 more minute, until the juices thicken and clear.
- Stir the vanilla into the berries and set aside.
- Whip the cold cream, powdered sugar, and vanilla to soft peaks, about 90 seconds.
- Split each biscuit, layer with berries and cream, and serve right away.
Tip: Mix the biscuit dough with a fork, not a stand mixer. A mixer turns the cream and gluten-free blend into a rubbery paste, and there is no way to bake that back.
Swap it: Fillets of frozen peaches or a handful of blueberries work in place of the strawberries with no change to the method. To keep it dairy-free, whip the cream from a chilled tin of coconut cream and use coconut milk in the dough.
Storage: Biscuits keep 2 days in a covered tin and reheat at 325°F (163°C) for 5 minutes. The strawberries keep 4 days in the fridge and are best used within 2 days, before the fruit softens.
5. Apple Pie with Flaky Gluten Free Crust
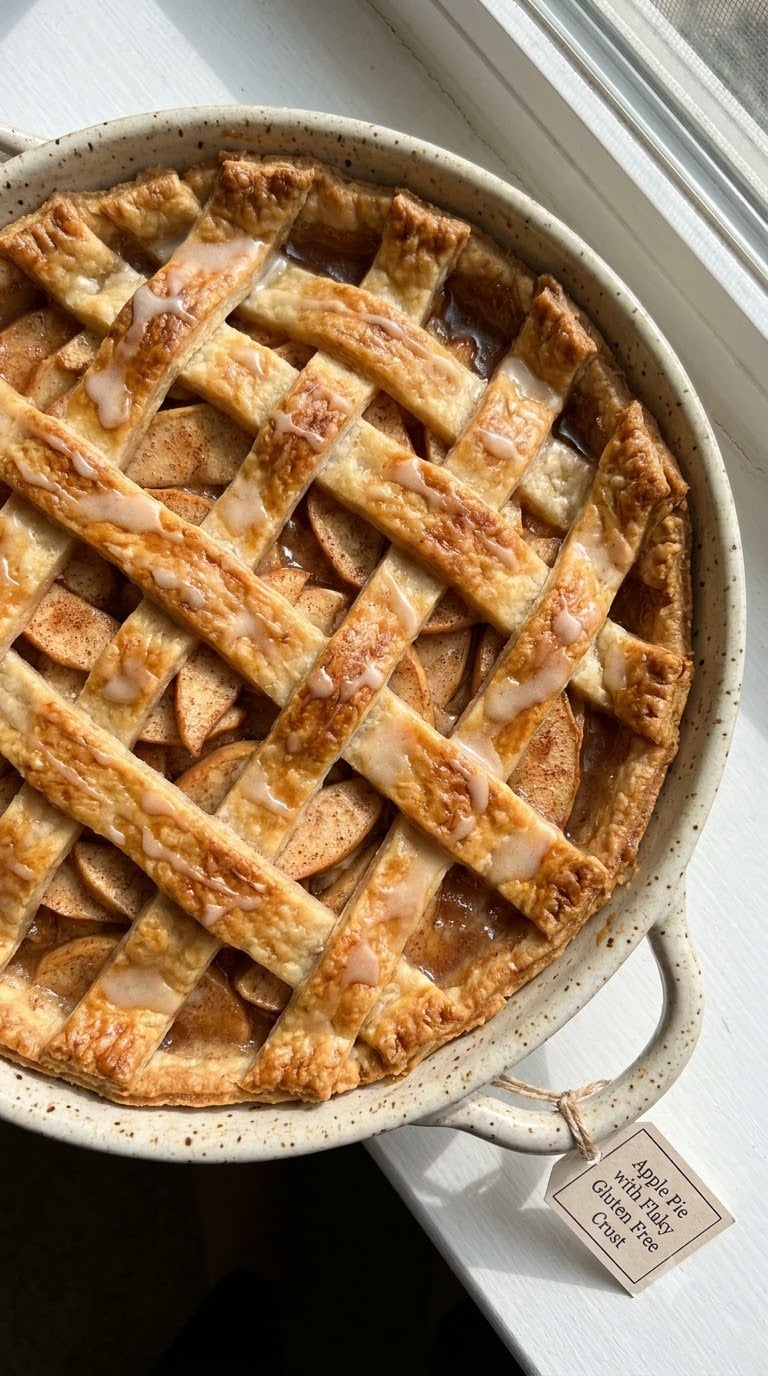
A gluten-free crust gets flaky from cold butter and a little extra water, not from kneading. Keeping the fat in visible pea-sized pieces is what makes it flake, and chilling the assembled pie twice gives you a shell that holds its shape instead of slumping into the filling. It is the most demanding recipe on this list and worth the afternoon.
Yield: 8 servings, one 9-inch pie · Prep: 50 minutes · Bake: 45 to 55 minutes · Total: about 1 hour 45 minutes · Difficulty: Medium
Ingredients
For the crust
- 280 g gluten-free 1-to-1 baking flour blend (1 1/2 cups)
- 1 tsp xanthan gum, only if your blend does not already contain it
- 150 g cold unsalted butter, cubed (10 tbsp)
- 1 tsp kosher salt
- 60 ml ice water, plus more as needed
For the filling
- 6 firm apples, about 1.1 kg, peeled and sliced 1/4 inch thick
- 150 g granulated sugar (3/4 cup)
- 2 tbsp cornstarch
- 2 tsp ground cinnamon
- 1/2 tsp ground nutmeg
- 1 tbsp lemon juice
- 1 tsp vanilla extract
- 30 g unsalted butter, cut into small pieces
- 1 egg white, beaten, for brushing
- 2 tbsp coarse sugar for the lattice
Instructions
- Toss the apple slices with the lemon juice right away so they stay pale.
- Whisk the flour blend, xanthan if needed, and salt in a bowl. Rub in the cold butter until the pieces are pea-sized with a few pea-sized-in-half pieces among them.
- Drizzle in the ice water and stir with a fork until the dough clumps. Add another teaspoon of water only if it will not hold together.
- Flatten into a disc, wrap, and chill for 30 minutes.
- Heat the oven to 375°F (190°C). Roll two-thirds of the dough into a 12-inch round and ease it into the pie plate.
- Mix the sliced apples with the sugar, cornstarch, cinnamon, nutmeg, and vanilla. Pile them into the shell and dot with the 30 g of butter.
- Roll the rest of the dough into a 12-inch round. Cut it into 7 strips and weave a lattice over the top, trimming the ends against the rim.
- Crimp the lattice edges into the bottom crust, brush the whole pie with egg white, and scatter the coarse sugar.
- Chill the assembled pie for 15 minutes, then bake for 45 to 55 minutes, until the filling bubbles thickly through the lattice and the crust is deep golden.
- Cool for at least 3 hours before slicing so the filling sets.
Tip: The two chills are not optional. A warm crust goes soft and the lattice slumps into the apples, and no amount of trimming fixes the shape afterwards.
Swap it: Pears, or a mix of apples and pears, take the same amounts and bake the same way. For a quick shortcut, use a well-chilled store-bought gluten-free crust, and press the filling into it a little fuller to compensate for the thinner shell.
Storage: Keeps 3 days at room temperature covered, or 5 days refrigerated. A whole unbaked pie freezes for 3 months; bake it from frozen at 375°F (190°C) for 60 to 70 minutes. If you want to read more about autumn baking, I collected [11 Thanksgiving dessert recipes](https://thesweetandsimplekitchen.com/best-thanksgiving-dessert-recipes-ideas/) that work for a bigger table.
6. Chocolate Cupcakes
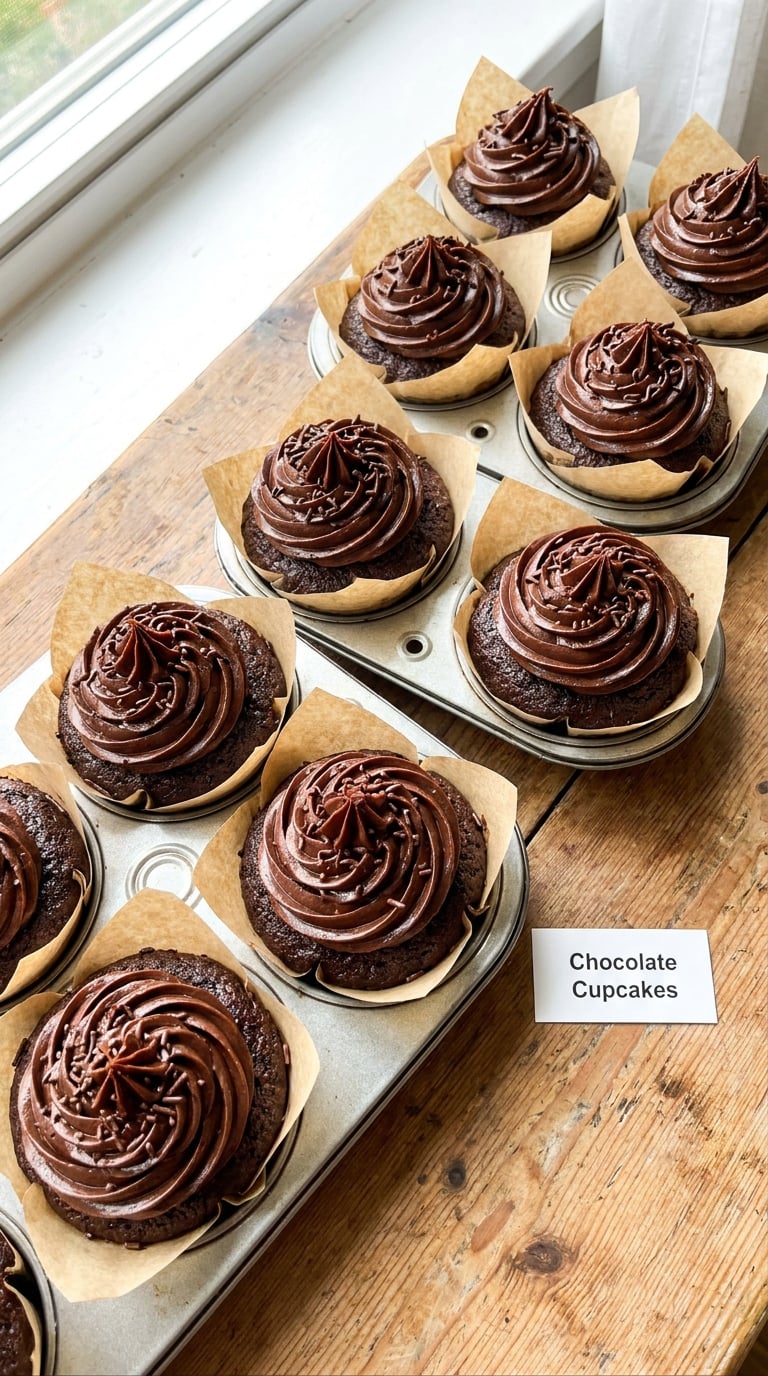
Gluten-free cupcakes fail at the top, not the bottom. Sinking middles and domed, cracked peaks come from overmixing a batter that has no gluten to develop. This one is mixed with a light hand, baked slightly cooler than a wheat cake, and finished with a chocolate ganache frosting that hides any uneven surface.
Yield: 12 cupcakes · Prep: 30 minutes · Bake: 18 to 20 minutes · Total: about 55 minutes · Difficulty: Easy
Ingredients
For the cupcakes
- 180 g gluten-free 1-to-1 baking flour blend (1 cup)
- 60 g unsweetened cocoa powder (1/2 cup)
- 1 tsp baking soda
- 1/2 tsp baking powder
- 1/2 tsp kosher salt
- 60 g unsalted butter, softened (1/4 cup)
- 200 g granulated sugar (1 cup)
- 2 large eggs
- 1 tsp vanilla extract
- 180 ml buttermilk
For the frosting
- 170 g unsalted butter, softened (3/4 cup)
- 300 g semisweet chocolate
- 4 tbsp heavy cream
- 200 g powdered sugar (1 2/3 cups)
- 1 tsp vanilla extract
Instructions
- Heat the oven to 325°F (163°C) and line a 12-cup muffin pan with liners.
- Whisk the flour blend, cocoa, baking soda, baking powder, and salt together.
- Beat the butter and sugar for 2 minutes, then add the eggs one at a time followed by the vanilla.
- Add the dry ingredients in two additions, alternating with the buttermilk, and stop mixing as soon as the last streak of flour disappears.
- Fill the liners two-thirds full and bake for 18 to 20 minutes, until a toothpick comes out with a few moist crumbs.
- Cool for 10 minutes in the pan, then turn out onto a rack.
- Warm the cream until it just steams, pour it over the 300 g of chopped chocolate, and let it sit 2 minutes before stirring smooth.
- Beat the butter until pale, then beat in the powdered sugar, the cooled chocolate mixture, and the vanilla until glossy.
- Scoop or pipe the frosting onto the cooled cupcakes and finish with sprinkles.
Tip: The cooler oven is the whole trick. A 325°F bake lets the crumb set before the top has time to set and crack, which is the difference between a flat, frosted top and a split one.
Swap it: Make it dairy-free with a plant-based butter and unsweetened plant milk, and use dairy-free chocolate in the frosting. For a lighter finish, fill the liners only halfway and cut the bake to 15 minutes.
Storage: Keeps 3 days covered, and the frosting holds a full day before it needs the fridge. Freeze the baked, unfrosted cupcakes for 2 months and frost them after thawing.
7. Lemon Bars
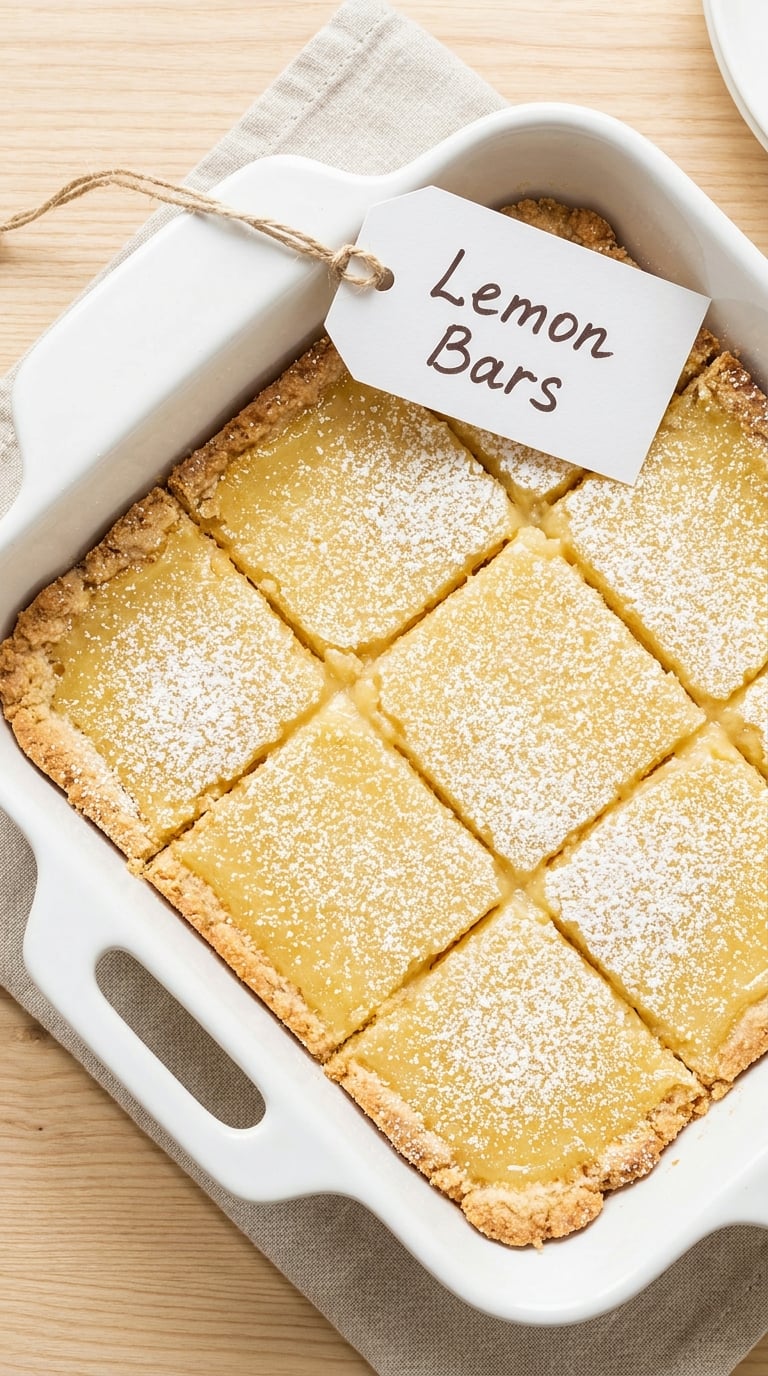
A shortbread-style base and a custard filling meet in one pan here, so there is only one bake and one dish to wash. The filling is cooked on the stovetop first, which is what keeps it glossy and sliceable instead of grainy and set like a raw egg custard. They are the easiest thing on this list to bring to a table where you know nobody else has made dessert.
Yield: 16 bars · Prep: 25 minutes · Bake: 40 minutes · Total: about 1 hour 10 minutes · Difficulty: Easy
Ingredients
For the crust
- 200 g gluten-free 1-to-1 baking flour blend (1 cup)
- 170 g unsalted butter, softened (3/4 cup)
- 60 g granulated sugar (1/4 cup)
- 1/4 tsp kosher salt
For the filling
- 4 large eggs
- 300 g granulated sugar (1 1/2 cups)
- 120 ml fresh lemon juice (1/2 cup)
- Zest of 2 lemons
- 115 g unsalted butter (1/2 cup)
- 2 tbsp gluten-free baking flour blend or cornstarch
Instructions
- Heat the oven to 350°F (177°C) and line an 8-inch square pan with parchment.
- Mix the crust ingredients and press them into the pan in an even layer. Prick the surface all over with a fork.
- Bake for 15 to 18 minutes, until the crust is golden at the edges and set in the center. Cool for 10 minutes.
- Whisk the eggs, sugar, lemon juice, and zest in a saucepan over low heat.
- Add the butter and the flour blend, and stir constantly for 4 to 5 minutes, until the mixture thickens enough to coat the back of a spoon.
- Pour the filling over the warm crust and return the pan to the oven.
- Bake for 20 to 24 minutes, until the center jiggles very slightly when you tap the pan and the top no longer looks wet.
- Cool fully in the pan, about 2 hours, then dust with powdered sugar and cut into 16 squares.
Tip: Pour the filling while the crust is still warm. A cold crust rejects the custard and you get a gap at the bottom of every square.
Swap it: Add 1 tablespoon of finely chopped fresh mint to the filling at the end, or use lime juice and zest for a key lime version that takes the same time. A dairy-free butter works in both the crust and the filling here.
Storage: Keeps 4 days in the fridge, and the slices cleanest straight from cold. They freeze for 2 months between layers of parchment; dust the powdered sugar on after thawing so it stays visible.
8. Peach Cobbler
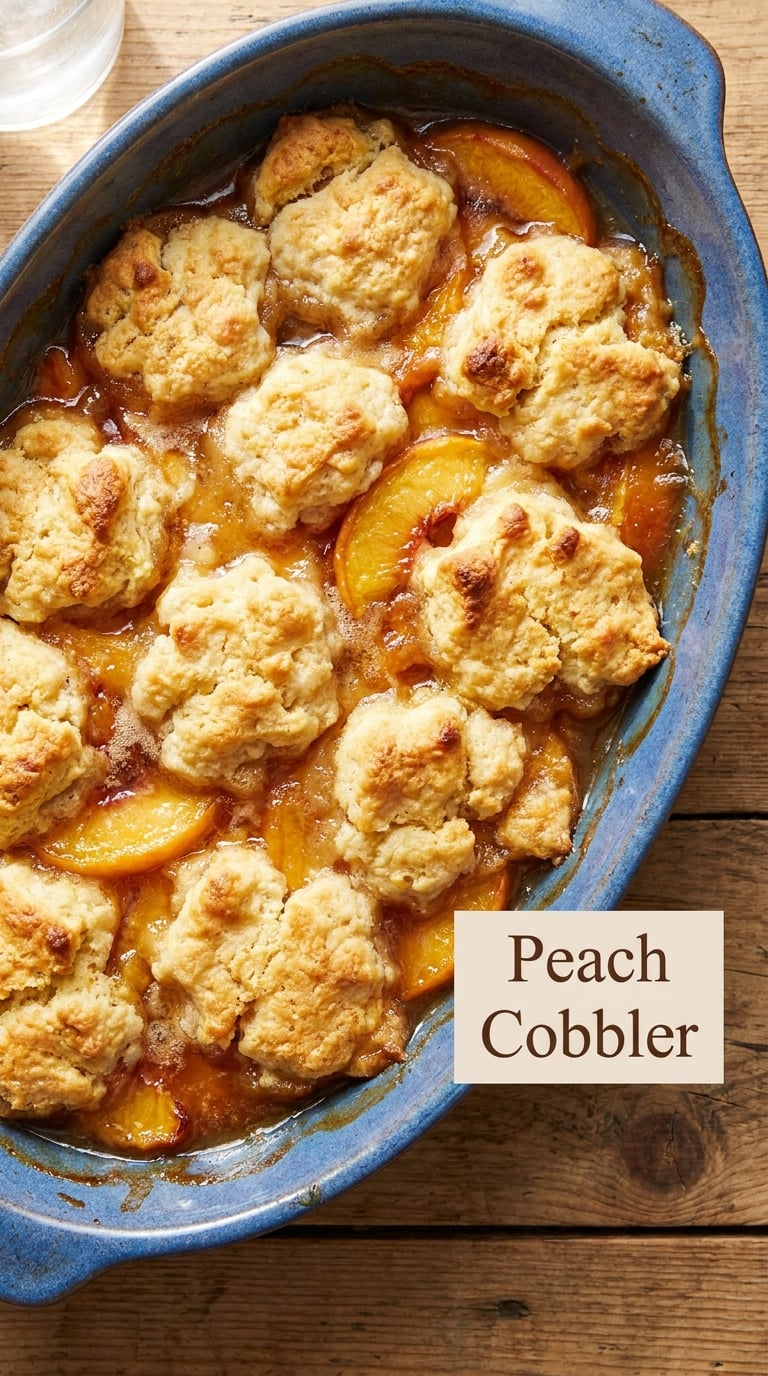
Cobblers are forgiving, and this one leans into the fruit instead of hiding behind it. A little cornstarch thickens the juices so the bottom of the dish is a sauce rather than a puddle, and the topping is a drop biscuit rather than a poured batter, which keeps it lumpy and golden. If you like peach desserts generally, there are more in my [fresh peach dessert recipes roundup](https://thesweetandsimplekitchen.com/fresh-peach-dessert-recipes-ideas/).
Yield: 8 servings · Prep: 25 minutes · Bake: 40 to 45 minutes · Total: about 1 hour 15 minutes · Difficulty: Easy
Ingredients
For the fruit
- 1.1 kg ripe peaches, peeled and sliced (about 8 cups)
- 100 g granulated sugar (1/2 cup)
- 2 tbsp cornstarch
- 2 tbsp lemon juice
- 1 tsp ground cinnamon
- Pinch of kosher salt
- 10 g unsalted butter, cut into small pieces
For the topping
- 170 g gluten-free 1-to-1 baking flour blend (3/4 cup)
- 85 g granulated sugar (1/3 cup)
- 1 tbsp baking powder
- 85 g cold unsalted butter, cubed (6 tbsp)
- 120 ml milk
- 1 large egg
- 1 tsp vanilla extract
- 1 tsp ground cinnamon
Instructions
- Heat the oven to 375°F (190°C) and butter a 9-inch baking dish.
- Toss the peaches with the sugar, cornstarch, lemon juice, cinnamon, and salt, then spread them in the dish with the 10 g of butter on top.
- Whisk the flour blend, sugar, and baking powder in a bowl.
- Rub in the cold butter with your fingers until crumbly, then stir in the milk, egg, and vanilla to make a soft, sticky dough.
- Drop the dough over the fruit in rough spoonfuls, leaving a few gaps so the juices can bubble up.
- Sprinkle the extra cinnamon over the top and bake for 40 to 45 minutes, until the topping is deep golden and the juices are thick and bubbling.
- Rest for 20 minutes before serving so the filling stops running.
Tip: Let the fruit sit in the sugar for 10 minutes before it goes in the dish, then stir it once. The juice that draws out is what stops the cobbler from turning into sweet soup at the bottom.
Swap it: Blackberries, plums, or a mixed berry filling all use the same amounts and bake in about 35 minutes. If you are watching sugar, cut it to 60 g in the fruit and add a tablespoon of lemon juice; the berries do not need it as much as peaches do. I have more low-sugar direction in these [diabetic dessert recipes ideas](https://thesweetandsimplekitchen.com/best-diabetic-dessert-recipes-ideas/).
Storage: Keeps 3 days covered, and reheats well with 5 minutes in a 350°F (177°C) oven. The filling also freezes for 3 months in a sealed container; thaw it in the fridge overnight and reheat before serving.
9. Chocolate Mousse
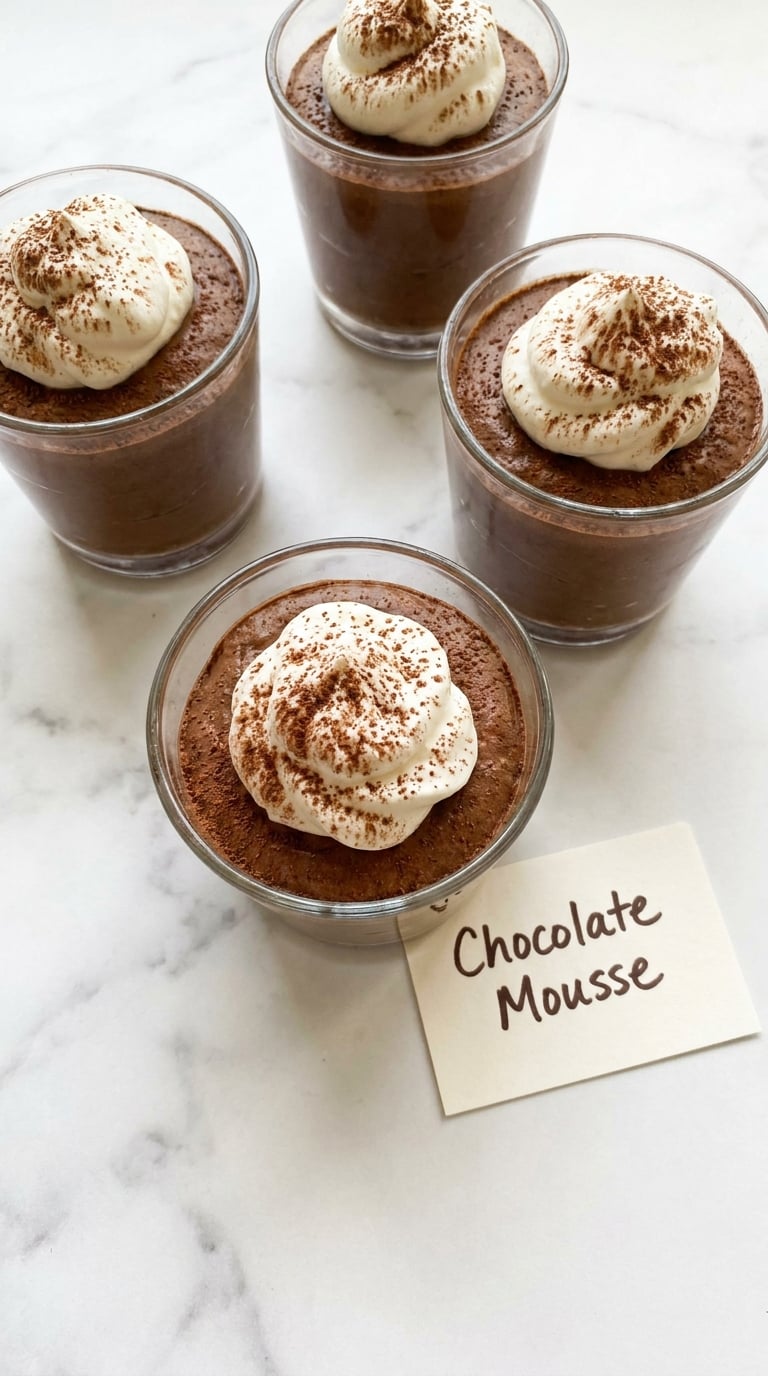
This is the recipe that proves a gluten-free dessert has no business being sad. There is no flour in it at all, so texture is entirely down to how far you whip the eggs, and the whole thing is made a day ahead. Set it out right before dinner and it looks like you did much more than stir a bowl.
Yield: 6 glasses · Prep: 25 minutes · Chill: 4 hours · Total: about 4 hours 25 minutes · Difficulty: Medium
Ingredients
- 170 g semisweet chocolate, finely chopped (1 cup)
- 60 g unsalted butter (1/4 cup)
- 4 large eggs, separated
- 100 g granulated sugar (1/2 cup)
- 120 ml water
- 1 tsp vanilla extract
- 1/4 tsp kosher salt
- 120 ml cold heavy cream (1/2 cup)
- Cocoa powder and whipped cream, for serving
Instructions
- Set a bowl over barely simmering water. Add the chocolate and butter and stir until smooth, then take the bowl off the heat and let it cool for 5 minutes.
- Combine the sugar and water in a small saucepan and bring to a boil. Continue boiling to 240°F (116°C), about 4 minutes.
- Whisk the egg yolks in a bowl. Pour the hot syrup into them in a thin stream, whisking constantly, until the mixture is thick and pale. The hot syrup cooks the yolks, which is what makes the mousse safe to eat without a bake.
- Whisk the chocolate mixture into the yolks, then stir in the vanilla and salt.
- In a clean, cold bowl, whip the egg whites to stiff peaks with no sugar added.
- Whip the cold heavy cream to soft peaks in a separate bowl.
- Fold a third of the whites into the chocolate to slacken it, then fold in the cream, then the rest of the whites. Stop folding while streaks of white are still visible.
- Divide between six glasses, cover, and chill for at least 4 hours. Top with whipped cream and cocoa powder just before serving.
Tip: Folding is the only step that matters, and the streaks you see while you stop are exactly the streaks that make it airy. Stirring instead of folding is what turns mousse into pudding.
Swap it: For a dairy-free mousse, whip the whites to stiff peaks and fold in 240 ml of chilled coconut cream in place of the heavy cream. Any good dark chocolate works; a bar above 70% cocoa will set firmer and a sweeter bar will need less sugar in the syrup.
Storage: Keeps 3 days in the fridge. It will not freeze, because the whipped egg whites collapse when they thaw, so make it fresh instead.
10. Gluten Free Cinnamon Rolls
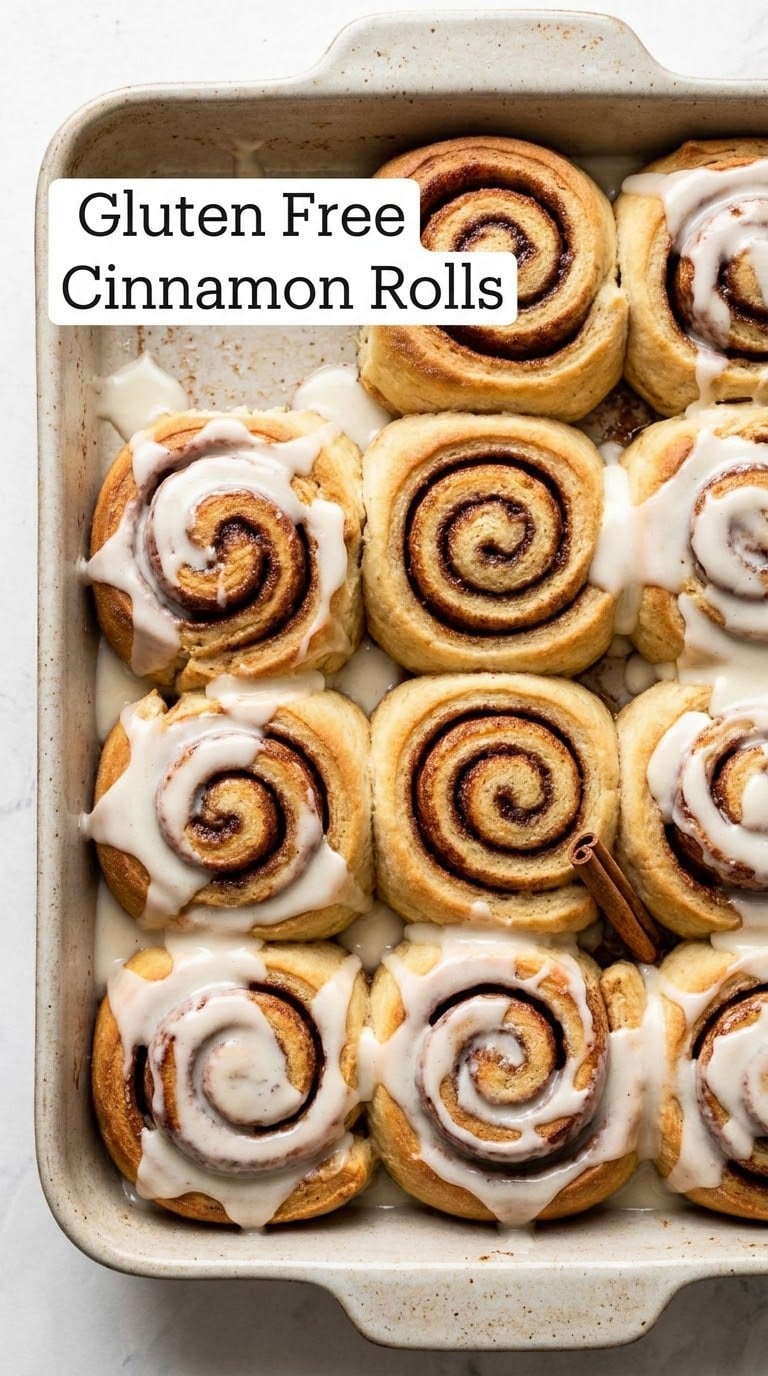
Yeasted gluten-free dough is the fussiest thing on this list, and the trick is a short, warm proof rather than a long one. Once the dough passes the poke test it should feel tight and elastic, not slack, because there is no gluten to stretch. Do them as a weekend project and they beat a bakery on texture as well as taste.
Yield: 9 large rolls · Prep: 40 minutes · Proof: 60 minutes · Bake: 22 to 26 minutes · Total: about 2 hours 20 minutes · Difficulty: Medium
Ingredients
For the dough
- 350 g gluten-free 1-to-1 baking flour blend (1 3/4 cups)
- 1/2 tsp xanthan gum, only if your blend does not already contain it
- 2 tsp instant yeast
- 50 g granulated sugar (1/4 cup)
- 1 tsp kosher salt
- 1 large egg
- 120 ml milk, warmed to 100°F (38°C)
- 60 ml neutral oil
- 55 g unsalted butter, softened (1/4 cup)
For the filling
- 85 g unsalted butter, softened (1/3 cup)
- 90 g light brown sugar (1/2 cup)
- 1 tbsp ground cinnamon
For the glaze
- 115 g cream cheese (1/2 cup)
- 60 g unsalted butter, softened (1/4 cup)
- 110 g powdered sugar (3/4 cup plus more for dusting)
- 1 tsp vanilla extract
- 1 to 2 tbsp milk
Instructions
- Mix the flour blend, xanthan if needed, yeast, sugar, and salt in a mixer bowl.
- Add the warm milk, oil, and egg, and mix on medium for 2 minutes, then add the softened butter and mix for 2 minutes more, until a soft dough forms.
- Cover and proof in a warm spot for 60 minutes, until the dough has nearly doubled and feels tight when you poke it.
- Mix the filling ingredients into a thick paste.
- Turn the dough onto a floured surface, roll into a 12 by 16-inch rectangle, and spread the filling over it, leaving a 1-inch border.
- Fold the long edges in, then roll the dough up from a long side and cut it into 9 equal pieces with unflavored dental floss or a sharp serrated knife.
- Arrange the rolls cut-side up in a greased 9-inch square pan and proof for 25 minutes, until puffy.
- Heat the oven to 400°F (204°C) and bake for 22 to 26 minutes, until the tops are golden and the center roll springs back when pressed.
- Turn the oven up to 425°F (218°C) and bake for 4 more minutes for a deeper color.
- Cool for 10 minutes while you beat the cream cheese, butter, powdered sugar, vanilla, and enough milk to make a pourable glaze, then drizzle it over the warm rolls.
Tip: Pour the glaze on while the rolls are still warm. It melts into the swirls instead of sitting on top in a hard white layer, which is the difference between a bakery look and a school bake sale.
Swap it: Swap the cinnamon for 2 tablespoons of instant coffee powder and a pinch of salt for a cardamom-coffee swirl. A dairy-free cream cheese and plant-based butter work well in the glaze with the same texture.
Storage: Keeps 3 days wrapped, and they are best rewarmed at 325°F (163°C) for 8 minutes. Bake the rolls and freeze them without glaze for up to 2 months; add the glaze after reheating from thawed.
Tips for Making These
These ten recipes use the same handful of techniques, and once you have them the variety stops being a challenge. Each one comes from something that went wrong first, usually mine.
- Weigh your flour, do not scoop it. Gluten-free blends are light and fluffy, so a cup you pack on the spoon can carry 20% more dry material than a cup you scoop and level. A kitchen scale removes the whole variable, and it is the cheapest tool in this article.
- Buy a 1-to-1 blend for nine of these ten. Baking soda and cornstarch-based blends are reliable; blends made only of rice, sorghum, or tapioca starch need a binder added separately and bake differently from package to package.
- Treat xanthan gum as a precise dose, not a pinch. For most cakes and cookies, 1/4 teaspoon per cup of flour is right. Cookies need the lower end, chewy cakes the higher end, and anything above 1/2 teaspoon per cup is where cakiness starts.
- Do not overmix any batter. Wheat batters need minutes of mixing to develop gluten. Gluten-free batters are hurt by it, which is why these recipes say to stop as soon as the last streak of flour disappears.
- Let batters rest before baking. Ten minutes of rest gives the flour time to hydrate and takes the raw edge off the flavor. It costs nothing and it is the difference between a cake that tastes baked and one that tastes faintly pasty.
- Add a pinch of salt to sweet bakes. Without the salt in a wheat recipe, gluten-free desserts read flat. Half a teaspoon of kosher salt in a two-layer cake is not a detectable flavor on its own; it just makes the sugar taste like sugar.
How to Keep Gluten Free Desserts Moist and Tender
Dryness is the most common complaint about gluten free baking, and it comes down to three levers. First, fat: without gluten there is less protein holding onto moisture, so add a tablespoon more oil or butter than the wheat recipe calls for, and use butter rather than shortening where the flavor can carry it.
Second, sugar. Sugar holds water, and a dessert that is under-sweetened by even a couple of tablespoons also tastes dry. Third, time in the oven, which is where most people go wrong. Pull cakes when a skewer shows a few moist crumbs rather than waiting for a clean skewer, and pull cookies when the centers still look underdone in the middle of the pan.
The one habit that helps more than all three: cool the cake in the pan for the full 10 minutes before turning it out. Gluten-free crumbs are fragile when hot, and a rushed turn-out pulls moisture out of the cake as crumbs tear loose. I have more on the sugar side in my [16 sugar free dessert recipes](https://thesweetandsimplekitchen.com/sugar-free-dessert-recipes-ideas/) if you are cutting it back.
How to Make Gluten Free Dessert Recipes Taste Like the Real Thing
The honest answer is that flavor lives in the fat, the sugar, the vanilla, and the browning, none of which involve gluten. A dessert that bakes to a deeper color tastes richer, and gluten-free batters lack the proteins that drive browning, so you have to help it along.
- Brown your butter for cookies and cakes. Five minutes of swirling turns milk solids toffee-flavored, which does the work that caramelized sugar did in the original wheat recipe.
- Use real vanilla, and use more of it. Alcohol-based extracts hold up in baking; water-based ones fade, and gluten-free batters have less to trap the aroma.
- Salt everything, including the fruit. A pinch of salt in peach filling and in lemon curd is what stops them reading as pure sugar.
- Make one thing without flour at all. The brownies and the mousse here use chocolate and eggs instead, and they are the two recipes nobody identifies as gluten free.
- Serve in a crowd and let nobody label it. The reason a dessert gets noticed as the gluten-free one is usually that it is announced. Cut these into ordinary squares, put them on the same plate as everything else, and the conversation is about the flavor.
And if you are baking for someone with celiac disease rather than someone who simply prefers to avoid gluten, check the small print before you start. Certified gluten-free oats, vanilla extract, chocolate chips, and baking powder all carry cross-contact risk, and a blend that is gluten free by ingredient list is not the same as one tested below 20 parts per million. I use the [13 heart shaped dessert recipes](https://thesweetandsimplekitchen.com/heart-shaped-dessert-recipes-ideas/) roundup for Valentine’s Day, which is the one time a labeled dessert actually works in our favor.
Frequently Asked Questions
Why do gluten free desserts taste grainy or cardboard-like?
Two reasons, and both are fixable. Ground almond and coconut flour are made from whole nuts, so the fine grit does not dissolve the way wheat starch does, and the result reads as sandiness. Without gluten there is no protein network holding sugar and fat together, so the crumb can also collapse into something dense and dry. Sifting the flour, using a fine-blended 1-to-1 mix, adding a little extra fat, and pulling the bake while the center still looks slightly underdone takes care of both.
Does gluten free cake still taste good?
Yes, when the recipe is built for it rather than converted from a wheat one. A good gluten free cake leans on buttermilk, oil or butter, and a light hand with the mixer, none of which depend on gluten. The flour contributes almost no flavor of its own, so the taste comes from the butter, the vanilla, and how deeply the top browns. Most people who eat a slice without being told what is in it will not notice a difference.
What are the most common gluten free dessert mistakes?
Overmixing the batter is the first and most common mistake, and it is the one people make most often. Measuring flour by volume instead of weight is a close second, and it usually adds too much dry material. Beyond that: too much xanthan gum, which gives a gummy texture; not resting the batter, so the flour has not hydrated; baking past the point of doneness; and using cross-contact-unsafe chocolate chips, vanilla, or oats without checking the label. Each of these has a specific fix, and all five are avoidable.
How do I convert a regular dessert recipe to gluten free?
Swap the wheat flour for a 1-to-1 baking blend at the same weight, not the same volume, and add 1/4 teaspoon of xanthan gum per cup of flour if the blend does not already include it. Reduce the liquid by about a quarter cup per cup of flour, because blends absorb more. Expect to bake about 10 to 15 percent less time and check for doneness early. Cakes, cookies, and biscuits all need slightly different handling, so convert one recipe at a time and note what changes.
Can I make these gluten free desserts ahead of time?
Most of them, and the timing is better than you would expect. The mousse needs 4 hours or overnight in the fridge, the lemon bars and peach cobbler are better the next day, and the cinnamon rolls can be shaped and proofed overnight in the fridge before baking the next morning. The chocolate chip cookie dough balls freeze unbaked for 3 months, which is the best make-ahead option on the list. The birthday cake is the one to bake the same day, though the frosted layers freeze for a month.
Is gluten free baking safe for someone with celiac disease?
Only with attention to labels. Being free of gluten ingredients is not the same as being tested for cross-contact, and celiac disease reacts to trace amounts. Look for a certified gluten-free label on oats, vanilla extract, chocolate chips, and baking powder, and check whether your flour blend is tested below 20 parts per million. Keep a separate scoop and a dedicated toaster for shared kitchens, and avoid flour dust, which is the most common way a safe kitchen gets contaminated.
Conclusion
If you make one thing from this list, make the chocolate chip cookies. They need one bowl, one saucepan, and about an hour, they do not care what your oven is like, and the brown butter does the heavy lifting that gluten would normally do. They are also the version that disappears fastest, which is its own kind of review.
Everything else on this list builds on the same idea, which is worth remembering once you have baked a few of them: gluten free dessert recipes that taste like the real thing are not about what you left out. They are about the fat, the sugar, the salt, and the bake time, all of which you control completely.