

If you have ever ended up with a sticky, gummy mess at the bottom of your pressure cooker, you are not alone. Learning how to cook Instant Pot rice changed my weeknight dinner game completely. No babysitting a pot on the stove, no scorched grains, no guessing if the water has absorbed. Just perfectly fluffy rice every single time in under 15 minutes of hands-off cooking.
I have tested this method dozens of times with every rice variety I could find at my grocery store. White, jasmine, basmati, brown, and even sushi rice. After burning more batches than I care to admit, I landed on a foolproof process that works every time. This guide covers the exact ratio, the step-by-step method, and every troubleshooting trick I wish I had when I started.
Once you master this basic technique, Instant Pot rice becomes the easiest side dish in your rotation. Serve it with any of our 30-minute dinner recipes and you have a complete meal on the table fast.
Table of Contents
How to Cook Instant Pot Rice: The Quick Answer
Before we get into the details, here are the three golden rules for perfect Instant Pot rice:
- Use a 1:1 ratio — 1 cup water to 1 cup rice (measured with a standard measuring cup, not the Instant Pot rice cup).
- Cook on High Pressure for 3 minutes — for standard long-grain white rice.
- Allow Natural Release for 10 minutes — then switch the valve to release any remaining pressure.
That is it. Rinse, measure, pressure cook, wait, fluff. If you remember nothing else from this article, those three numbers will give you great rice.
Why Cook Rice in an Instant Pot?
I used to make rice on the stovetop for years. It worked most of the time, but I always had to watch the pot, adjust the heat, and hope I did not scorch the bottom. The Instant Pot eliminates all of that. You set it, walk away, and come back to perfectly cooked grains.
Here is why I now reach for the pressure cooker every time:
- No babysitting required. Seal the lid, press the button, and go chop vegetables for the rest of your meal.
- No burned bottom. The sealed environment prevents the rice from scorching, which was my biggest stovetop problem.
- Consistent results. Every batch turns out the same. No more guessing if the heat was too high or too low.
- Great for meal prep. Cook a large batch on Sunday and portion it out for the week.
Pair your freshly cooked rice with these easy chicken breast recipes for a dinner that practically cooks itself.
The Perfect Instant Pot Rice Ratio
The single most important thing to know about pressure cooker rice is that the water ratio is different from stovetop cooking. On the stove, you typically use 2 cups of water for every 1 cup of rice because a lot of water evaporates during cooking. The Instant Pot is sealed, so almost no steam escapes. That means you need less water.
For Instant Pot white rice, use a 1:1 ratio — equal parts water and rice by volume. One cup of rice gets one cup of water. Two cups of rice gets two cups of water.
Important: Which Measuring Cup to Use
This trips up a lot of people. The small plastic cup that comes with your Instant Pot holds 180 ml, not the standard 240 ml (1 cup) that a regular measuring cup holds. If you use the Instant Pot cup for rice and a regular measuring cup for water, your ratio will be off.
My recommendation: use the same standard dry measuring cup for both the rice and the water. That way your 1:1 ratio is accurate every time.
Quick Measurement Reference
| Rice (cups) | Water (cups) | Servings | Min Pot Size |
|---|---|---|---|
| 1 cup | 1 cup | 2-3 | 3-quart |
| 2 cups | 2 cups | 4-6 | 6-quart |
| 3 cups | 3 cups | 6-8 | 6-quart |
| 4 cups | 4 cups | 8-10 | 8-quart |
One more note: you need at least 1 cup of liquid in the Instant Pot for it to come to pressure. So if you are cooking less than 1 cup of rice, add enough extra water to reach that minimum.
How to Cook Instant Pot Rice (Step-by-Step)
This is the method I use for standard long-grain white rice. It takes about 15 minutes from start to finish, and most of that time is hands-off. Here is exactly how to cook instant pot rice for foolproof, fluffy results.

Step 1: Rinse the Rice
Place your rice in a fine-mesh strainer and rinse it under cold running water. Swirl the rice around with your hand and keep rinsing until the water runs mostly clear. This usually takes 30 to 60 seconds.
Rinsing removes excess surface starch that makes rice gummy and sticky. This step is not optional if you want fluffy, separated grains. I skip it only when I am using parboiled rice (the kind with added vitamins that stays slightly golden).
After rinsing, give the strainer a few shakes to remove excess water. You do not need to dry the rice completely.
Step 2: Add Rice and Water to the Instant Pot
Transfer the rinsed rice to the inner pot of your Instant Pot. Add the water using the same measuring cup you used for the rice. If you want to add salt, butter, or oil, now is the time. I usually add a pinch of salt and a half teaspoon of butter for flavor.
Give the pot a gentle shake to level the rice. Do not stir it. The rice should be in an even layer at the bottom.
Step 3: Seal the Lid
Close the Instant Pot lid and make sure the pressure release valve is set to the Sealing position (pointing straight up or toward the back, depending on your model). If the valve is set to Venting, steam will escape and the pot will never come to pressure.
Double-check that the silicone sealing ring is properly seated in the lid. A loose ring will prevent the pot from sealing.
Step 4: Pressure Cook on High for 3 Minutes
Press the Manual or Pressure Cook button on your Instant Pot. Set the time to 3 minutes on High Pressure.
Why not use the Rice button? On most Instant Pot models, the Rice program cooks on Low Pressure and uses an automatic sensor to determine when the rice is done. The problem is that the results are inconsistent. The sensor can be fooled by the amount of starch in the water, the type of rice, and how full the pot is. Manual pressure cooking at 3 minutes on High Pressure gives you reliable, repeatable results every single time.
The pot will take about 5 to 8 minutes to come to pressure before the 3-minute countdown begins. This is normal and does not affect the cooking time.
Step 5: Natural Release for 10 Minutes
When the timer beeps, do nothing. Leave the pot alone for 10 minutes and let the pressure release naturally. This is called Natural Release.
During these 10 minutes, the rice continues to gently cook in the residual heat and steam. The grains finish absorbing the water without getting agitated by a sudden rush of escaping steam. This resting period is the secret to fluffy rice that does not spatter starch all over your kitchen.
After 10 minutes, carefully move the pressure release valve to the Venting position to release any remaining pressure. Wait until the float valve drops completely before opening the lid.
Step 6: Fluff and Serve
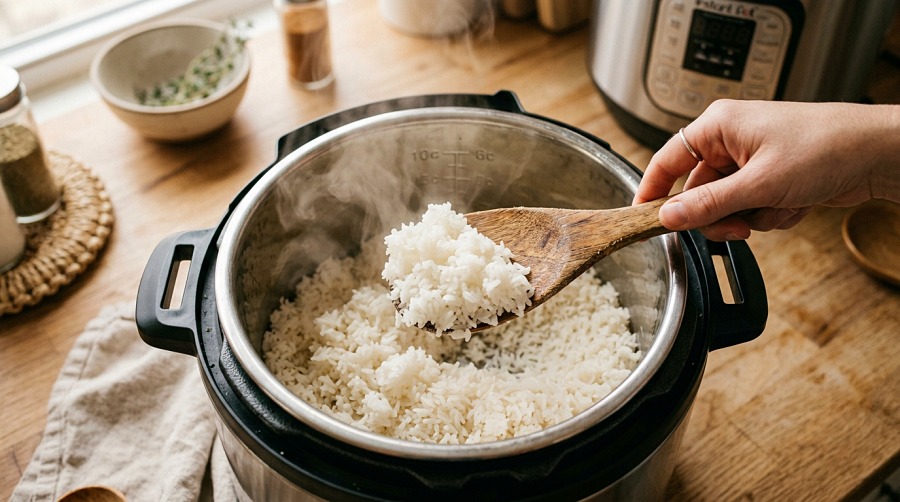
Open the lid away from you to avoid the steam. Use a rice paddle or fork to gently fluff the rice, working from the edges toward the center. Serve immediately, or leave the lid loosely on top to keep it warm.
That is all there is to it. Perfect Instant Pot rice in six simple steps.
Instant Pot Rice Cooking Times by Variety
Not all rice cooks the same way. Brown rice needs more time and more water. Jasmine and basmati cook faster than standard long-grain white. Below is my tested reference chart for the most common rice varieties in the Instant Pot.
| Rice Variety | Water Ratio | Pressure Time | Release Method | Pressure Level |
|---|---|---|---|---|
| Long-Grain White | 1:1 | 3 minutes | Natural Release 10 min | High |
| Jasmine | 1:1 | 3 minutes | Natural Release 10 min | High |
| Basmati | 1:1 | 4 minutes | Natural Release 10 min | High |
| Short-Grain White (Sushi) | 1:1.1 | 4 minutes | Natural Release 10 min | High |
| Brown Rice | 1:1.25 | 20 minutes | Natural Release 10 min | High |
| Parboiled (Converted) | 1:1 | 5 minutes | Natural Release 5 min | High |
| Wild Rice Blend | 1:1.25 | 22 minutes | Natural Release 10 min | High |
A few notes on specific varieties. Jasmine rice will come out slightly softer and more fragrant than standard white rice, which makes it perfect for Thai curries. Basmati grains stay longer and more separate, which is ideal for Indian dishes. Sushi rice needs just a touch more water (1.1 parts water to 1 part rice) to get that slightly sticky texture needed for rolling. Brown rice takes significantly longer because the bran layer is still intact.
I tested each of these at least three times with consistent results. If your altitude is above 3,000 feet, you may need to add 1 to 2 extra minutes of pressure cooking time because water boils at a lower temperature at higher elevations.
Natural Release vs Quick Release for Rice
This question comes up constantly in Instant Pot forums, and for good reason. Understanding the difference between natural release and quick release is critical for getting good rice.
What Is Natural Release?
Natural Release means you leave the pressure release valve alone after cooking finishes. The pot slowly loses pressure on its own as the steam escapes through the built-in pressure release mechanism. This typically takes 10 to 15 minutes for rice.
During natural release, the temperature inside the pot gradually decreases. The rice continues to cook very gently in the residual heat, absorbing the last bit of moisture without being disturbed. Think of it like resting a steak after searing it.
What Is Quick Release?
Quick Release means you immediately turn the pressure valve to Venting after the timer goes off. The steam rushes out rapidly, and the pot depressurizes in about 1 to 2 minutes.
Why Natural Release Is Better for Rice
If you quick release rice, the sudden change in pressure can cause the starchy liquid to bubble up and spatter out of the valve. This makes a mess on your counter and can also cause the rice to cook unevenly. The grains on top may end up underdone while the ones at the bottom are mushy.
Natural release prevents all of this. The gradual pressure drop keeps the starch calm and gives the rice a chance to finish cooking gently. I always use natural release for at least 10 minutes before venting any remaining pressure.
The Float Valve Explained
The small metal pin next to the pressure valve is the float valve. When it pops up, the pot is pressurized. When it drops back down, the pressure has fully released and it is safe to open the lid. Never force the lid open while the float valve is up.
Troubleshooting Common Instant Pot Rice Problems
Even with the right ratio and timing, things can go wrong. Here are the five most common problems people run into and exactly how to fix each one.
Problem: Rice Is Sticky and Clumpy
Cause: Excess surface starch on the rice. You either skipped rinsing or did not rinse long enough.
Fix: Rinse the rice under cold running water for at least 30 to 60 seconds, swirling it with your hand, until the water runs mostly clear. This is the number one fix for sticky rice. If you are already dealing with a sticky batch, try spreading it on a baking sheet to dry out slightly, or use it for fried rice where stickiness is less noticeable.
Problem: Rice Is Mushy and Watery
Cause: Too much water. You may have used a 2:1 stovetop ratio instead of the 1:1 pressure cooker ratio, or you used the Instant Pot rice cup for the rice but a standard cup for the water.
Fix: Double-check that you are using equal parts water and rice measured with the same cup. If your rice is already mushy, spread it on a baking sheet and bake at 300 degrees F for 5 to 10 minutes to dry it out. You can also turn it into rice pudding or congee.
Problem: Rice Is Undercooked and Crunchy
Cause: Not enough water, not enough cooking time, or the pot did not fully come to pressure.
Fix: Add 2 tablespoons of water, seal the lid, and pressure cook for 1 to 2 additional minutes on High Pressure. Let it natural release for 5 minutes. Going forward, make sure the sealing ring is properly in place and the valve is set to Sealing so the pot reaches full pressure.
Problem: Rice Burned on the Bottom
Cause: Not enough liquid, or something sugary was added that caused the burn notice to trigger.
Fix: Make sure you have at least 1 cup of liquid in the pot. Do not add sauces, tomatoes, or sugar directly to the rice before cooking. If you want flavored rice, use broth instead of water rather than adding thick sauces. Use the pot-in-pot method for cooking rice with other ingredients.
Problem: Rice Is Watery and Separated
Cause: You used quick release instead of natural release. The rapid pressure change disturbed the rice before it finished absorbing the water.
Fix: Always use natural release for at least 10 minutes. If your rice is already watery from quick release, seal the lid back on and let it sit on the Keep Warm setting for 5 to 10 minutes. The residual heat will help absorb the excess moisture.
Serve your perfectly cooked rice alongside these pork chop recipes for a comforting dinner that the whole family will love.
Easy Flavor Variations for Instant Pot Rice
Plain white rice is great, but sometimes you want a little more flavor with almost zero extra effort. Here are my favorite ways to upgrade Instant Pot rice without changing the cooking method.
Broth Instead of Water
Swap the water for chicken broth, vegetable broth, or beef broth. Use the same 1:1 ratio. The rice absorbs the broth flavor as it cooks and comes out savory and rich. This is my go-to upgrade for dinner rice.
Garlic Butter Rice
Add 1 tablespoon of butter and 2 minced garlic cloves to the pot along with the rice and water. The garlic infuses into the rice during pressure cooking. Top with fresh parsley after fluffing. This pairs beautifully with grilled meats and roasted vegetables.
Cilantro Lime Rice
Add the juice of half a lime and a pinch of cumin to the pot before cooking. After fluffing, stir in a quarter cup of chopped fresh cilantro. This is the classic Chipotle-style rice that works in burritos, bowls, and tacos.
Coconut Rice
Replace half the water with full-fat coconut milk. So for 1 cup of rice, use half a cup of water and half a cup of coconut milk. Add a pinch of sugar and salt. The result is creamy, slightly sweet rice that is wonderful with Thai curries or grilled seafood.
Herbed Rice
Toss in a bay leaf, a sprig of thyme, or a tablespoon of dried herbs (parsley, dill, or herbes de Provence) before pressure cooking. Remove the bay leaf or herb sprigs before serving. This simple addition makes the rice taste like it took much more effort than it did.
Finish your meal on a sweet note with these 3-ingredient desserts that are almost as easy as this rice recipe.
The Pot-in-Pot Method for Instant Pot Rice
If you want to cook rice at the same time as another dish (like chicken, meatballs, or a curry), the pot-in-pot method is a game changer. Instead of cooking the rice directly in the inner pot, you cook it in a separate heatproof container that sits on a trivet inside the Instant Pot.
How to Do It
- Add 1 cup of water to the bottom of the Instant Pot inner pot (this creates the steam).
- Place the metal trivet in the pot.
- In a heatproof bowl or pan (at least 2 inches deep), combine 1 cup rinsed rice and 1 cup water.
- Place the bowl on the trivet.
- Close the lid and cook on High Pressure for the time listed in the variety chart above.
- Natural release for 10 minutes.
The advantage here is that you can cook your main dish below the rice or cook rice alongside any recipe that uses the pot-in-pot setup. The rice will not absorb flavors from the dish below it, keeping it clean and fluffy.
Printable Instant Pot White Rice Recipe
Here is your quick-reference recipe card for basic long-grain white rice. Print it, screenshot it, or bookmark this page for easy access.
Instant Pot White Rice
Perfectly fluffy white rice in under 15 minutes.
Prep Time: 2 minutes | Cook Time: 3 minutes (plus 10 min natural release) | Servings: 4-6
Ingredients:
- 2 cups long-grain white rice
- 2 cups water
- 1/2 teaspoon salt (optional)
- 1/2 teaspoon butter (optional)
Instructions:
- Rinse rice in a fine-mesh strainer under cold water until water runs clear (about 30-60 seconds).
- Add rinsed rice, water, salt, and butter to the Instant Pot inner pot.
- Close lid and set pressure valve to Sealing.
- Press Pressure Cook (or Manual) and set to 3 minutes on High Pressure.
- When timer beeps, allow Natural Release for 10 minutes.
- Move valve to Venting to release remaining pressure. Wait for float valve to drop.
- Open lid and fluff rice with a paddle or fork. Serve immediately.
Notes:
- Use the same measuring cup for rice and water to keep the 1:1 ratio accurate.
- The Instant Pot rice cup holds 180ml, not 240ml like a standard US cup.
- See the rice variety chart above for jasmine, basmati, brown, and sushi rice times.
- Leftover rice can be stored in an airtight container in the refrigerator for up to 4 days, or frozen for up to 3 months.
Nutrition per serving (approximate): 205 calories, 4.5g protein, 45g carbohydrates, 0.4g fat. Source: USDA FoodData Central.
Storage and Reheating Tips
Cooked rice stores well, which makes it perfect for meal prep. Here is how I handle leftovers.
Refrigerator Storage
Let the rice cool to room temperature (but do not leave it out for more than 2 hours). Transfer to an airtight container and refrigerate for up to 4 days. I like to portion it into single-serving containers for easy grab-and-go lunches.
Freezer Storage
Spread the cooked rice on a baking sheet to cool quickly, then transfer to freezer bags. Squeeze out the air, flatten the bags for easy stacking, and freeze for up to 3 months. Frozen rice reheats surprisingly well and is great for busy weeknights.
Reheating Methods
- Microwave: Add a splash of water, cover with a damp paper towel, and microwave for 1 to 2 minutes.
- Stovetop: Add a tablespoon of water to a pan, add the rice, cover, and heat on low for 3 to 5 minutes.
- Steamer: Place in a steamer basket over boiling water for 3 to 5 minutes. This gives the fluffiest reheat results.
FAQ
How many cups of water for 1 cup of rice in an Instant Pot?
Use a 1:1 ratio — 1 cup of water for every 1 cup of rinsed white rice. This is different from stovetop cooking, which typically uses a 2:1 ratio. The Instant Pot is sealed, so very little water evaporates during cooking. Measure both the rice and water with the same standard measuring cup for accuracy.
How long does white rice go in the Instant Pot?
White rice cooks on High Pressure for 3 minutes in the Instant Pot, followed by a 10-minute natural release. The total time from pressing the button to opening the lid is about 18 to 20 minutes when you include the time it takes for the pot to come to pressure (about 5 to 8 minutes).
Why does my rice come out sticky in my Instant Pot?
Sticky rice is almost always caused by excess surface starch. Rinse the rice in a fine-mesh strainer under cold water for 30 to 60 seconds until the water runs mostly clear. This removes the starch coating that causes grains to clump together. Also make sure you are using the correct 1:1 water ratio — too much water can also make rice gummy.
What is the 123 rule for rice?
The 123 rule for Instant Pot rice refers to a simplified ratio: 1 cup rice, 2 cups water, 3 minutes pressure cook time. However, this is actually the stovetop ratio adapted for the pressure cooker. For truly fluffy Instant Pot rice, I recommend using a 1:1 ratio instead (1 cup rice to 1 cup water) with 3 minutes on High Pressure and 10 minutes natural release.
Should I use the Rice button on my Instant Pot?
I recommend avoiding the Rice button and using Manual/Pressure Cook on High Pressure for 3 minutes instead. The Rice program uses Low Pressure and relies on a sensor to determine doneness, which produces inconsistent results. Manual pressure cooking gives you exact control over the time and pressure level for reliable, repeatable outcomes.
How to get perfect rice in Instant Pot every time?
Follow these five rules: (1) Rinse rice until water runs clear to remove excess starch. (2) Use a 1:1 water-to-rice ratio measured with the same cup. (3) Cook on High Pressure for 3 minutes (not the Rice button). (4) Allow natural release for 10 minutes before venting. (5) Fluff gently with a rice paddle or fork, never stir vigorously. Consistent tools and timing give consistent results.
Final Thoughts on How to Cook Instant Pot Rice
Learning how to cook Instant Pot rice is one of those small kitchen skills that pays off every single week. The 1:1 ratio, 3 minutes of pressure cooking, and 10 minutes of natural release is all you need to remember. Once you have that rhythm down, you can branch out into jasmine rice, basmati, brown rice, and all the flavor variations we covered.
The biggest mistake I see is people using the stovetop water ratio in their pressure cooker and ending up with mush. Remember: the Instant Pot is sealed, so you need less water than you think. The second biggest mistake is skipping the rinse. Those 30 seconds under running water are the difference between fluffy, separated grains and a gummy clump.
Keep this page bookmarked for the rice variety chart and troubleshooting guide, and check out our full collection of 30-minute dinner recipes to pair with your perfectly cooked rice. Happy cooking!