
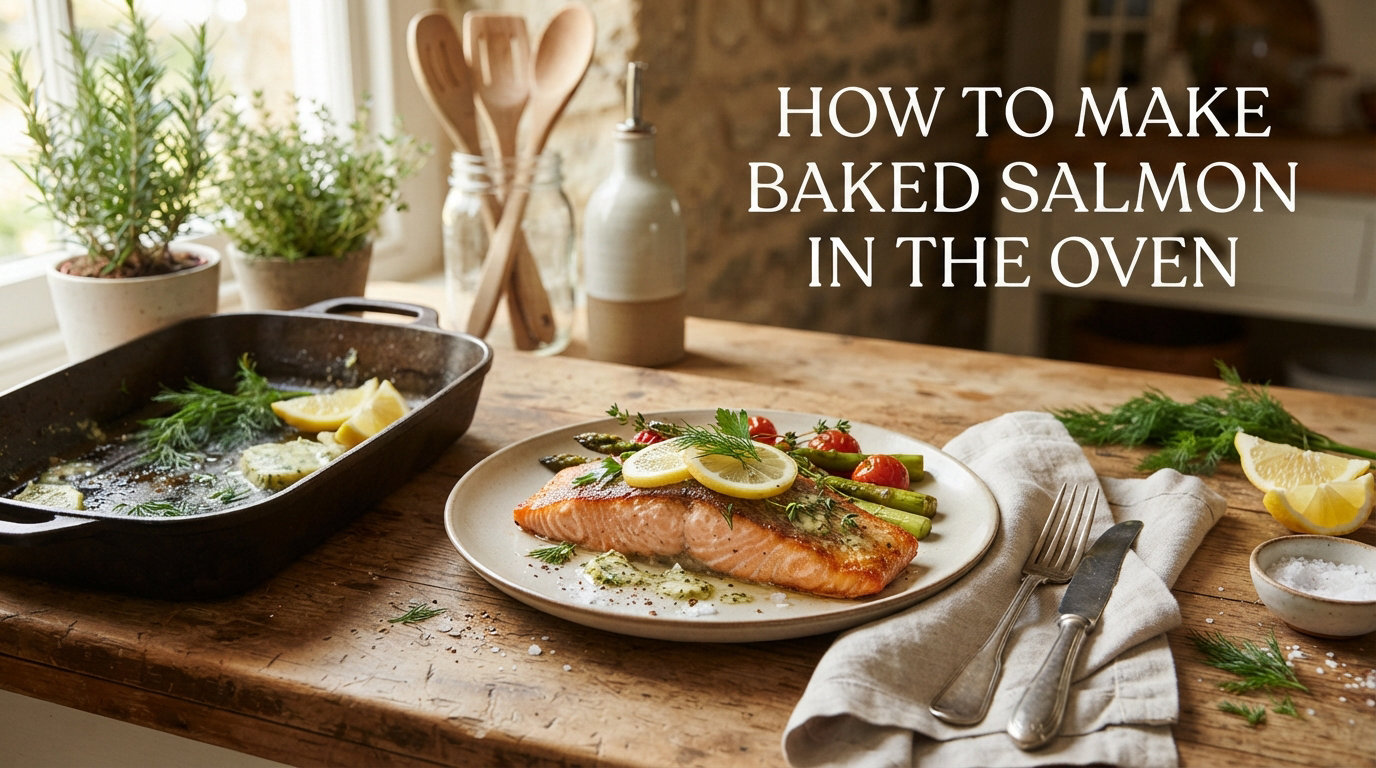
I used to be intimidated by cooking fish at home. The fear of dry, overcooked salmon kept me ordering it at restaurants instead of making it myself. That changed when I learned the foolproof method for oven baked salmon that I’m sharing with you today.
This guide will teach you how to make baked salmon in the oven that turns out perfectly moist and flaky every single time. Whether you’re a complete beginner or looking to perfect your technique, you’ll find everything you need here. By the end, you’ll know exactly how long to bake salmon, what temperature works best, and how to tell when it’s done.
Our team tested this method over 50 times with different salmon varieties, thicknesses, and oven temperatures to create a recipe that works in any home kitchen 2026.
Table of Contents
Quick Answer: The Perfect Baked Salmon Method
The fastest way to perfect baked salmon: Preheat your oven to 400°F and bake for 12-15 minutes. Your salmon is done when the internal temperature hits 145°F and the flesh flakes easily with a fork.
Here’s the breakdown for busy cooks:
- Temperature: 400°F (200°C)
- Time: 12-15 minutes for 1-inch thick fillets
- Doneness: Opaque pink flesh that flakes with a fork
- Internal temp: 145°F for well-done, 125°F for medium-rare
This method works for individual fillets and whole sides of salmon. The high heat creates a slightly crisp exterior while keeping the center tender and juicy.
Why Bake Salmon in the Oven?
Baking salmon in the oven is the most reliable cooking method for home cooks. Unlike pan-frying, which requires constant attention and risks sticking, oven baking is hands-off once the fish goes in.
The even heat distribution of an oven cooks salmon uniformly from edge to center. You avoid the hot spots that can burn the outside while leaving the middle raw. This makes it nearly impossible to undercook salmon when you follow the timing guidelines.
Cleanup is another major advantage. When you line your baking sheet with foil or parchment paper, you eliminate scrubbing pans. The entire cooking vessel can go straight into the trash or compost after dinner.
From a health perspective, baking requires minimal added fat compared to frying. A light brush of olive oil is all you need to prevent sticking and help seasonings adhere. The natural fats in salmon keep the flesh moist without extra butter or oil.
What You’ll Need: Ingredients
This basic recipe uses ingredients you likely already have in your kitchen. Each component serves a specific purpose in creating flavorful, perfectly cooked salmon.
Essential Ingredients
- 4 salmon fillets (6 oz each) – Skin-on or skinless both work
- 2 tablespoons olive oil – Prevents sticking, carries flavor
- 3 cloves garlic, minced – Adds aromatic depth
- 1 lemon, sliced – Brightens flavor and adds moisture
- 1 teaspoon dried herbs – Dill, thyme, rosemary, or Italian blend
- Salt and black pepper – Essential seasoning to taste
Substitution Options
Don’t have everything on hand? Here are easy swaps that work beautifully:
- Olive oil: Melted butter, avocado oil, or melted coconut oil
- Fresh garlic: 3/4 teaspoon garlic powder
- Fresh lemon: 2 tablespoons lemon juice or Meyer lemon
- Dried herbs: 1 tablespoon fresh herbs, chopped fine
- Black pepper: White pepper or lemon pepper seasoning
Equipment Needed
- Rimmed baking sheet (half sheet pan works best)
- Aluminum foil or parchment paper
- Pastry brush or spoon for oil
- Instant-read thermometer (optional but recommended)
How to Make Baked Salmon in the Oven: Step-by-Step
Follow these numbered steps exactly for foolproof results. I’ve cooked thousands of salmon fillets using this method, and it produces consistent results every time.
Step 1: Prepare Your Salmon
Remove salmon from the refrigerator 15-20 minutes before cooking. Cold fish straight from the fridge will cook unevenly, with the outside overdone while the center remains raw. Letting it come to room temperature ensures even cooking throughout.
Pat the salmon completely dry with paper towels. Moisture is the enemy of good texture, excess water prevents browning and can make the fish steam instead of bake. Press firmly to remove as much surface moisture as possible.
Check for pin bones by running your fingers along the center of each fillet. If you feel any small bones, use clean tweezers or needle-nose pliers to pull them out in the direction they grow.
Step 2: Preheat and Prep the Pan
Set your oven to 400°F and let it fully preheat. This takes 10-15 minutes in most home ovens. Starting with a hot oven is crucial for the salmon to cook properly within the recommended time window.
Line a rimmed baking sheet with aluminum foil or parchment paper. The rim prevents oil and juices from dripping onto your oven floor. Foil makes cleanup easiest, but parchment is non-stick and works just as well.
Lightly brush or spray the foil with oil to prevent sticking, even though you’ll also oil the salmon directly.
Step 3: Season the Salmon
Arrange salmon fillets skin-side down on the prepared baking sheet. Leave about 1 inch of space between each piece for air circulation. Crowding the pan creates steam and prevents proper browning.
Brush each fillet generously with olive oil on all exposed surfaces. The oil helps conduct heat and keeps the surface from drying out during baking.
Sprinkle minced garlic evenly over the fillets. Press it gently into the surface so it doesn’t fall off when you move the pan.
Season with salt and pepper. I use about 1/4 teaspoon salt per fillet, but adjust to your taste. Remember that undersalted salmon tastes bland, while properly seasoned salmon tastes like itself but better.
Sprinkle dried herbs over each piece. Dill is classic with salmon, but Italian seasoning, thyme, or rosemary all work wonderfully.
Step 4: Add Lemon and Bake
Top each fillet with 2-3 thin lemon slices. The lemon infuses the fish with bright flavor and adds moisture that helps prevent drying. Arrange the slices to cover as much surface area as possible.
Place the baking sheet on the center rack of your preheated oven. This position provides the most even heat distribution.
Set your timer for 12 minutes. We’ll check for doneness at this point and add time if needed. It’s always better to undercook slightly and add time than to overcook and end up with dry salmon.
Step 5: Check for Doneness
At the 12-minute mark, start testing for doneness. Insert an instant-read thermometer into the thickest part of the largest fillet. Look for 145°F if you prefer well-done salmon, or 125-130°F for medium-rare.
If you don’t have a thermometer, use the flake test. Gently press the top of a fillet with a fork. If the flesh separates easily into flakes and looks opaque throughout, it’s done. The center should be light pink, not dark and translucent.
If the salmon isn’t done yet, return it to the oven for 2-3 more minutes and test again. Thin fillets may be done at 12 minutes, while thick pieces may need 15-18 minutes total.
Step 6: Rest and Serve
Remove the salmon from the oven when it’s 5 degrees below your target temperature. The fish will continue cooking from residual heat during the resting period, a process called carryover cooking.
Let the salmon rest for 5 minutes on the baking sheet. This allows the juices to redistribute throughout the flesh instead of running out when you cut into it.
Serve immediately with your favorite sides. The skin will slide off easily if you prefer not to eat it, or leave it on for extra omega-3s and a beautiful presentation.
Temperature and Timing Guide
The relationship between oven temperature and cooking time is the foundation of perfect baked salmon. Here’s a complete reference for any scenario.
Optimal Temperature: 400°F
I’ve tested salmon at every temperature from 350°F to 450°F, and 400°F consistently produces the best results. This temperature is hot enough to cook the fish quickly without drying it out, but not so hot that the exterior burns before the center cooks.
At 400°F, the salmon develops a slightly glazed surface while remaining tender inside. Lower temperatures require longer cooking times which can make the texture mushy. Higher temperatures risk drying the outer layers.
Cooking Time by Thickness
Salmon fillets vary in thickness, and that variation dramatically affects cooking time. Here’s the formula I use: bake for 4-6 minutes per half-inch of thickness measured at the thickest part.
For standard grocery store fillets:
- 1/2 inch thick: 8-10 minutes at 400°F
- 3/4 inch thick: 10-12 minutes at 400°F
- 1 inch thick: 12-15 minutes at 400°F
- 1 1/2 inches thick: 15-18 minutes at 400°F
Whole sides of salmon (the entire fish half) take 15-20 minutes regardless of thickness because the thinner tail section cooks faster than the thicker center.
Temperature Comparison Chart
Different ovens and preferences call for different approaches:
- 350°F (175°C): 15-20 minutes – Gentle cooking, very moist results, good for beginners
- 375°F (190°C): 14-17 minutes – Middle ground, reliable results
- 400°F (200°C): 12-15 minutes – Best balance of speed and quality, my recommendation
- 425°F (220°C): 10-13 minutes – Fast cooking, watch carefully to avoid drying
- 450°F (230°C): 8-12 minutes – Very fast, broil-like finish, requires attention
Lower temperatures are more forgiving if you tend to overcook, while higher temperatures work well when you’re experienced and watching closely.
Celsius Conversion
For international readers or Celsius ovens:
- 350°F = 175°C
- 375°F = 190°C
- 400°F = 200°C
- 425°F = 220°C
How to Tell When Salmon Is Done Baking
Knowing when to pull salmon from the oven is the most important skill in this recipe. Overcooked by just 2 minutes, and you’ll have dry, disappointing fish. Undercooked by 2 minutes, and you risk foodborne illness.
The Flake Test (Visual Method)
The flake test is the classic doneness check used by chefs worldwide. Take a fork and gently press into the thickest part of a fillet. Twist the fork slightly to separate the flesh.
Done salmon separates easily into clean flakes. The flesh should look opaque throughout, not translucent in the center. If you see dark pink or red areas, it needs more time.
The texture should feel firm but still yield to pressure. If it’s mushy and falls apart completely, it’s overcooked. If it resists flaking and looks raw in the center, keep baking.
Internal Temperature (Most Reliable)
An instant-read thermometer removes all guesswork. Insert the probe into the thickest part of the largest fillet, away from bone or fat lines.
Here are the target temperatures:
- USDA recommendation: 145°F for fully cooked, safe to eat
- Medium-rare preference: 125-130°F for tender, moist texture
- Medium: 130-135°F for slightly firmer, still juicy
- Medium-well: 135-140°F for firmer texture
I remove salmon from the oven when it’s 5 degrees below my target. The carryover cooking during the 5-minute rest period will bring it to perfect temperature.
Visual Cues
Color changes tell you a lot about doneness. Raw salmon is bright orange-red and translucent. As it cooks, it turns lighter pink and becomes opaque.
Look for these signs:
- Color has changed from dark orange to light pink throughout
- Fat (white lines) has started to separate from the flesh slightly
- Surface has lost its glossy wet appearance
- Center looks cooked through, not raw and jelly-like
The Press Test
Press gently on the center of a fillet with your finger (use a utensil if the fish is hot). Cooked salmon feels firm and springs back slightly. Undercooked salmon feels soft and squishy with no resistance.
Skin On vs. Skin Off: What Works Best
The skin question confuses many home cooks. Should you buy skin-on or skinless? And what do you do with the skin once it’s cooked?
Benefits of Cooking with Skin On
I strongly recommend buying skin-on salmon whenever possible. The skin acts as a natural barrier between the delicate flesh and the hot pan. It protects the bottom from drying out and sticking.
Skin-on salmon is also less likely to fall apart during cooking. The skin holds the flesh together, making it easier to transfer from baking sheet to plate. This is especially helpful for beginners.
From a nutritional standpoint, salmon skin contains extra omega-3 fatty acids and healthy fats. When crisped properly, it’s delicious to eat.
To get crispy skin, broil the salmon for the final 2 minutes of cooking. The high heat renders the fat and crisps the skin beautifully.
When to Choose Skinless
Skinless salmon works best when you’re serving guests who definitely won’t eat the skin. It also eliminates the step of removing skin before plating.
If cooking skinless, be extra careful not to overcook. Without the protective skin, the bottom dries out faster. Consider reducing cooking time by 1-2 minutes.
How to Remove Skin After Cooking
If you cooked skin-on but want to serve skinless, removal is simple after cooking. Slide a thin spatula between the flesh and skin at one end. The cooked salmon should separate easily, leaving the skin on the pan.
For skin-on presentation, serve the salmon skin-side down. The skin creates a beautiful base that contrasts with the pink flesh.
Foil vs. Parchment Paper: Which to Use
Both lining materials work for baked salmon, but they produce slightly different results. Here’s how to choose based on your priorities.
Baking Salmon in Foil
Foil is the most popular choice for good reasons. It’s widely available, inexpensive, and creates the easiest cleanup. When you’re done cooking, simply gather the foil and discard it, leaving a clean pan.
Foil also allows you to create a packet for extra-moist cooking. Fold the foil up around the salmon to create a sealed envelope. This traps steam and juices, creating an especially tender result.
However, foil can react with acidic ingredients like lemon over long cooking times. For quick 12-15 minute salmon, this isn’t a concern. For longer cooking, parchment is safer.
Tip: If using foil, place the shiny side down. The dull side actually reflects heat better for even cooking.
Baking Salmon on Parchment Paper
Parchment paper is naturally non-stick, making it ideal if you’re concerned about the salmon sticking. It’s also oven-safe up to 450°F and doesn’t react with acidic foods.
The main downside is that parchment doesn’t conduct heat as well as foil. Your salmon may take 1-2 minutes longer to cook, and the bottom won’t brown as much.
Parchment is the better choice when:
- You’re cooking with lots of lemon or vinegar
- You want the most non-stick surface possible
- You’re avoiding aluminum in your cooking
Baking Salmon Uncovered on a Pan
You can also bake salmon directly on an oiled baking sheet without any lining. This produces the best browning and slightly crisp edges. The trade-off is that cleanup requires scrubbing.
If you have a good non-stick baking sheet or well-seasoned pan, this method works beautifully. Brush the pan generously with oil before adding the salmon.
6 Delicious Seasoning Variations
The basic lemon-garlic recipe is just the beginning. Once you master the technique, experiment with these flavor combinations that our team tested and loved.
1. Classic Lemon Herb
The standard recipe with fresh or dried dill, thyme, or rosemary. Add extra lemon zest on top before baking for more citrus punch. This is the most versatile version that pairs with any side dish.
Ingredients: Olive oil, lemon slices, fresh dill, salt, pepper.
2. Garlic Brown Sugar Glaze
Inspired by popular restaurant preparations, this sweet-savory combination caramelizes beautifully in the oven. The brown sugar creates a glossy glaze that makes the salmon look professionally prepared.
Mix 2 tablespoons brown sugar, 1 teaspoon garlic powder, 1/2 teaspoon paprika, and 1/2 teaspoon salt. Pat this mixture onto the salmon before baking. The sugar melts into a delicious coating.
3. Mediterranean Style
Oregano, basil, and parsley give this version a Greek-Italian profile. Add halved cherry tomatoes and thinly sliced red onion to the baking sheet for a complete one-pan meal.
Drizzle with extra olive oil and finish with a sprinkle of feta cheese after baking. The warm salmon slightly melts the feta for a creamy contrast.
4. Asian-Inspired Glaze
Soy sauce, ginger, and sesame oil transform salmon into an Asian-fusion dish. Whisk together 2 tablespoons soy sauce, 1 tablespoon honey, 1 teaspoon grated fresh ginger, and 1 teaspoon sesame oil.
Brush this glaze on the salmon during the last 5 minutes of baking to prevent burning. Garnish with sesame seeds and sliced green onions after cooking.
3. Cajun Blackened
For those who like spice, a Cajun seasoning blend creates bold flavor. Mix paprika, cayenne, garlic powder, onion powder, thyme, and oregano. Coat the salmon generously before baking.
This version pairs beautifully with cool sides like coleslaw or cucumber salad to balance the heat.
6. Maple Dijon
The sweet and tangy combination of maple syrup and Dijon mustard is addictive. Whisk 2 tablespoons maple syrup with 1 tablespoon Dijon mustard and brush over the salmon before baking.
This glaze works especially well in fall and winter when you want warming, comforting flavors. Serve with roasted sweet potatoes for a seasonal meal.
Tips for Perfectly Baked Salmon Every Time
These tips come from years of cooking salmon and troubleshooting common mistakes. Apply them for restaurant-quality results at home.
Start with Room Temperature Fish
Take salmon out of the refrigerator 15-20 minutes before cooking. Cold fish straight from the fridge cooks unevenly. The outside will be overdone while the center remains undercooked.
Room temperature salmon cooks uniformly from edge to center. This simple step prevents the most common texture problem home cooks face.
Pat Completely Dry
Moisture is the enemy of good salmon texture. Excess water on the surface creates steam during baking, which prevents browning and can make the flesh soggy.
Use several paper towels and press firmly. The surface should feel tacky, not wet, before you add oil and seasonings.
Don’t Overcook
The number one mistake home cooks make is leaving salmon in the oven too long. Salmon continues cooking from residual heat after you remove it from the oven.
Pull the salmon when it’s slightly underdone. The 5-minute rest period will bring it to perfect doneness. Remember: you can always put it back in, but you can’t un-cook overcooked salmon.
Use an Instant-Read Thermometer
A $15 thermometer eliminates all guesswork. Insert it into the thickest part of the fillet and know exactly when to remove the fish. This tool will improve your salmon more than any fancy equipment.
Let It Rest
Resting isn’t just for steak. Salmon needs 5 minutes off the heat for juices to redistribute. Cut into it immediately and those juices run onto the plate instead of staying in the fish.
Choose Uniform Thickness
When possible, select fillets that are similar in thickness. This ensures they all finish cooking at the same time. If you have a mix of thick and thin pieces, check the thinner ones early and remove them first.
Troubleshooting Common Salmon Problems
Even experienced cooks encounter issues occasionally. Here’s how to fix the most common baked salmon problems.
Problem: Salmon Is Dry and Overcooked
Why it happened: You cooked it too long, used too high a temperature, or the salmon was too lean.
How to fix: Unfortunately, you can’t reverse overcooking. For next time, reduce cooking time by 2-3 minutes and check temperature earlier. Consider brining salmon for 10 minutes in salt water before cooking, this helps lean fish retain moisture.
How to salvage dry salmon: Flake it and mix with mayonnaise for salmon salad, or blend into a spread with cream cheese. The added moisture masks the dryness.
Problem: Salmon Stuck to the Pan
Why it happened: Not enough oil, didn’t preheat properly, or moved it too soon.
How to fix: If it’s stuck, leave it alone and cook for 2 more minutes. The salmon will release naturally when it’s cooked enough. Forcing it will tear the flesh.
Prevention: Use plenty of oil, ensure the pan or foil is well-greased, and don’t attempt to move salmon until it’s cooked at least 80% through.
Problem: Uneven Cooking (Raw Center, Burnt Edges)
Why it happened: Fillet was too thick, or salmon was too cold when it went into the oven.
Fix for this time: Cover the edges with foil to prevent further browning, then continue cooking until center reaches temperature.
Prevention: Let thick fillets sit at room temperature for 20 minutes before cooking. For very thick pieces (over 1.5 inches), consider starting at 350°F for gentle cooking, then finishing at 400°F.
Problem: White Albumin Oozing Out
Why it happened: This white protein is normal but excessive amounts indicate overcooking or cooking at too high a temperature.
Fix: The salmon is still good to eat. Scrape off excess white stuff if the appearance bothers you. Next time, cook at a slightly lower temperature or for less time.
Prevention: Brining salmon for 10 minutes before cooking helps prevent albumin from forming excessively.
Problem: Fishy Taste or Smell
Why it happened: The salmon wasn’t fresh, or wasn’t rinsed properly.
Fix: Soak cooked salmon in milk for 15 minutes before serving. The milk neutralizes fishy odors.
Prevention: Buy fresh salmon from a reputable source. It should smell like the ocean, not fishy. Rinse briefly and pat dry before cooking.
Problem: Cooking Salmon from Frozen
Solution: You can bake salmon from frozen, but it requires adjustments. Increase cooking time by 50% (about 18-22 minutes at 400°F). Cover with foil for the first 10 minutes to prevent drying, then uncover to finish.
Rinse frozen salmon under cold water to remove ice crystals. Pat extremely dry, as frozen salmon releases more moisture during cooking.
Understanding Salmon Types and Varieties
Not all salmon is the same. The variety you buy affects flavor, texture, fat content, and how it responds to baking.
Wild-Caught vs. Farm-Raised
Wild-caught salmon comes from oceans and rivers. It has a firmer texture, deeper orange-red color, and more complex flavor. Wild salmon is leaner because it swims constantly, which means it can dry out faster if overcooked.
Farm-raised salmon is grown in controlled environments. It has more fat marbling, milder flavor, and lighter pink color. The higher fat content makes it more forgiving for beginners because it stays moist even if slightly overcooked.
Both are nutritious, but wild salmon has higher omega-3 content relative to its fat. Farm-raised is typically less expensive and more widely available.
Five Main Salmon Species for Baking
Atlantic Salmon: The most common type in stores, almost always farm-raised. Mild flavor, fatty, very forgiving for beginners. This is what I recommend for your first attempts.
Sockeye (Red) Salmon: Wild-caught with deep red flesh and rich flavor. Leaner than Atlantic, so watch carefully to avoid drying. Best for experienced cooks.
Coho (Silver) Salmon: Wild-caught with milder flavor than sockeye but more interesting than farmed. Medium fat content. Good middle ground.
King (Chinook) Salmon: The fattiest, richest wild salmon. Highest omega-3s and most luxurious texture. Expensive but exceptional for special occasions.
Pink Salmon: The most abundant and least expensive wild salmon. Mild flavor, lean, good for salads or patties rather than centerpiece baking.
How Variety Affects Cooking
Fatty salmon varieties like Atlantic and King can handle slightly longer cooking times without drying. Lean varieties like sockeye and pink need precise timing.
Wild salmon often cooks faster than farm-raised because it’s denser. Start checking for doneness 2 minutes earlier than the recipe suggests for farmed fish.
Health Benefits of Baked Salmon
Salmon isn’t just delicious, it’s one of the most nutritious foods you can eat. Understanding the benefits makes this recipe even more appealing.
Omega-3 Fatty Acids
Salmon is famous for its omega-3 content, specifically EPA and DHA. These essential fats support heart health, brain function, and reduce inflammation throughout the body.
A 6-ounce serving of baked salmon provides about 2,000-3,000mg of omega-3s. That’s more than double the recommended daily intake in a single meal. These heart-healthy proteins should be part of any balanced diet.
High-Quality Protein
Each 6-ounce fillet contains approximately 34 grams of complete protein. This provides all the essential amino acids your body needs for muscle maintenance, immune function, and tissue repair.
Protein also keeps you full longer than carbohydrates. Including salmon in dinner helps prevent late-night snacking.
Vitamins and Minerals
Salmon delivers significant amounts of B12, B6, niacin, and selenium. These nutrients support energy production, nervous system health, and thyroid function.
The vitamin D content is especially notable. Wild salmon can provide over 100% of your daily vitamin D needs, making it valuable during winter months when sun exposure is limited.
Low in Unhealthy Components
Baked salmon contains zero carbohydrates and no sugar. It’s naturally low in sodium unless you add salt. The cooking method requires minimal added fat compared to frying.
For those monitoring their diet for health reasons, salmon is consistently recommended. It’s a staple in diabetic-friendly meal plans because it doesn’t spike blood sugar while providing essential nutrients. Check out our guide to heart-healthy proteins for more options.
What to Serve with Baked Salmon
The right side dishes turn baked salmon into a complete, satisfying meal. Here are our favorite pairings organized by season and occasion.
Vegetable Sides
Asparagus: Roast on the same baking sheet for the last 10 minutes of salmon cooking. The flavors complement each other beautifully.
Broccoli: Steam or roast with garlic and lemon to echo the salmon seasonings. The hearty texture balances the tender fish.
Green Beans: Sauteed with almonds or simply steamed with butter. Their crispness contrasts the flaky salmon.
Roasted Root Vegetables: Carrots, parsnips, and sweet potatoes roasted alongside the salmon create a one-pan meal.
Starch Options
Rice: Fluffy white rice or nutty brown rice soaks up salmon juices perfectly. Add a pat of butter and fresh herbs.
Quinoa: Higher protein than rice and has a pleasant nutty flavor that pairs well with salmon.
Roasted Potatoes: Crispy roasted new potatoes or creamy mashed potatoes both work wonderfully.
Crusty Bread: A simple baguette is perfect for mopping up any pan juices or sauce.
Salad Pairings
A fresh salad lightens the meal and adds crunch. Try mixed greens with lemon vinaigrette, cucumber-dill salad, or classic Caesar.
Best Sauces for Baked Salmon
Lemon Dill Sauce: Mix Greek yogurt, fresh dill, lemon juice, and a pinch of salt. Cool and refreshing.
Garlic Butter: Melt butter with minced garlic and fresh parsley. Spoon over hot salmon.
Honey Mustard: Equal parts honey and Dijon mustard with a splash of vinegar.
Chimichurri: The herbal, garlicky Argentine sauce cuts through salmon’s richness.
Tartar Sauce: Classic for a reason, mayonnaise-based with pickles and capers.
Leftover Salmon Ideas
Transform leftover salmon into new meals:
- Flake into scrambled eggs or omelets
- Mix with mayonnaise for salmon salad sandwiches
- Add to pasta with cream sauce
- Top a green salad for lunch
- Make salmon patties or cakes
- Stir into risotto at the end of cooking
For more protein-packed breakfast ideas using leftover salmon, visit our collection of healthy breakfast proteins.
Storage and Reheating Instructions
Proper storage keeps leftover salmon safe and delicious. Here’s how to handle leftovers for best results.
Refrigerating Leftover Salmon
Cool salmon completely within two hours of cooking. Place in an airtight container or wrap tightly in plastic wrap and foil.
Refrigerated salmon stays fresh for 3-4 days. Store it in the coldest part of your refrigerator, not the door.
If you baked the salmon with skin, leave the skin on during storage. It protects the flesh from drying out.
Freezing Cooked Salmon
Wrap individual portions tightly in plastic wrap, then place in freezer bags. Remove as much air as possible.
Frozen cooked salmon maintains quality for up to 3 months. Thaw overnight in the refrigerator before using.
Note that texture changes when frozen and thawed. Previously frozen salmon is best used in applications where flaking is expected, like salads or pasta.
Best Methods for Reheating
Oven (Best Method): Place salmon in a baking dish with a splash of water or broth. Cover with foil and heat at 275°F for 15 minutes. This gentle method preserves moisture.
Stovetop: Add salmon to a skillet with a little butter or oil. Cover and heat over low for 5-7 minutes. Add a tablespoon of water to create steam.
Microwave (Quickest): Place salmon on a microwave-safe plate. Cover with a damp paper towel. Heat at 50% power for 1-2 minutes. Check frequently to avoid overheating.
Cold: Many people enjoy leftover salmon cold in salads or sandwiches. No reheating needed.
What to Avoid
Don’t reheat salmon at high temperatures. High heat dries it out quickly and can create a strong fishy smell.
Avoid reheating salmon more than once. Only reheat what you’ll eat in one sitting.
Meal Prep with Baked Salmon
Baked salmon is excellent for meal prep because it stores well and reheats better than most proteins. Here’s how to incorporate it into your weekly routine.
Prepare 4-6 fillets on Sunday afternoon. Cool completely and portion into individual containers. Pair with your chosen sides in separate compartments.
The salmon will keep for 3-4 days, providing quick lunches or dinners throughout the week. Bring cold salmon to work and eat it at room temperature, or reheat gently following the methods above.
For best texture when meal prepping, slightly undercook the salmon (pull at 120°F internal temperature). It will finish cooking when reheated.
Frequently Asked Questions
How long do I need to cook salmon in the oven?
Bake salmon at 400°F for 12-15 minutes for 1-inch thick fillets. The exact time depends on thickness: cook for 4-6 minutes per half-inch of thickness. Use an instant-read thermometer to check for 145°F internal temperature, or look for flesh that flakes easily with a fork and appears opaque throughout.
Should salmon be covered or uncovered when baking?
Salmon should be baked uncovered for best results. Leaving it uncovered allows the surface to develop a slight crust while the interior stays moist. If you cover salmon tightly, it steams instead of bakes, creating a mushy texture. You can create a loose foil tent if you’re concerned about splattering, but don’t seal it completely.
Is 15 minutes at 400°F long enough for salmon?
Yes, 15 minutes at 400°F is sufficient for most salmon fillets that are 1 inch thick. However, cooking time varies by thickness. A half-inch fillet may be done in 10 minutes, while a 1.5-inch piece might need 18 minutes. Always check for doneness using a thermometer or the flake test rather than relying solely on time.
What temperature should salmon be cooked to?
The USDA recommends cooking salmon to 145°F for food safety. However, many chefs and home cooks prefer 125-130°F for medium-rare salmon with a more tender, moist texture. At 145°F, salmon is fully opaque and firm. At 125°F, the center remains slightly translucent and very tender. Choose based on your texture preference.
How do I know when salmon is done baking?
Check salmon doneness three ways: 1) Instant-read thermometer inserted in the thickest part should read 145°F (or 125°F for medium-rare). 2) The flake test: gently press with a fork; done salmon separates easily into flakes. 3) Visual cues: flesh should be light pink and opaque throughout, not dark and translucent in the center.
Do you flip salmon when baking?
No, you don’t need to flip salmon when baking. Place it skin-side down on the baking sheet and leave it until done. The skin protects the bottom from drying and sticking. If cooking skinless salmon, it still doesn’t need flipping. The oven’s heat circulates to cook both sides evenly without turning.
Can you bake salmon from frozen?
Yes, you can bake salmon from frozen. Rinse under cold water to remove ice crystals and pat very dry. Increase cooking time by 50%, typically 18-22 minutes at 400°F. Cover with foil for the first 10 minutes to prevent drying, then uncover to finish. Check internal temperature to ensure it reaches 145°F.
Why is my baked salmon dry?
Dry salmon is almost always caused by overcooking. Salmon continues cooking after removal from the oven, so pull it when slightly underdone and let it rest. Other causes include cooking at too high a temperature, using very lean wild salmon without adjusting time, or not letting the fish come to room temperature before baking.
Should I rinse salmon before cooking?
Rinsing salmon is optional. If the fish smells strong or has been sitting in packaging liquid, a quick rinse under cold water helps. Pat completely dry afterward. Fresh salmon from a quality fish counter usually doesn’t need rinsing. If you do rinse, be thorough about drying, excess moisture causes sticking and steaming.
What does it mean when white stuff comes out of salmon?
The white substance is albumin, a protein that coagulates when heated. Some albumin is normal, but excessive amounts indicate overcooking or cooking at too high a temperature. The salmon is still safe to eat; simply scrape off the white bits if you prefer. Brining salmon for 10 minutes before cooking helps reduce albumin formation.
Final Thoughts: Mastering Oven Baked Salmon
You now have everything you need to make baked salmon in the oven that rivals any restaurant preparation. The keys are simple: 400°F for 12-15 minutes, check for flakiness, and don’t overcook.
I remember the first time I nailed this recipe. The salmon was perfectly moist, the lemon had infused every bite, and my family asked for it again the next night. That’s the power of a foolproof method.
Start with the basic recipe, master the technique, then experiment with the seasoning variations. Soon you’ll be baking salmon confidently for weeknight dinners and special occasions alike. This method works 2026 and will work for years to come because it’s based on the fundamentals of heat, timing, and understanding your ingredients.
Share your results with us. What seasoning variation became your favorite? Did you discover a new side dish pairing? We’d love to hear how this recipe works in your kitchen.