
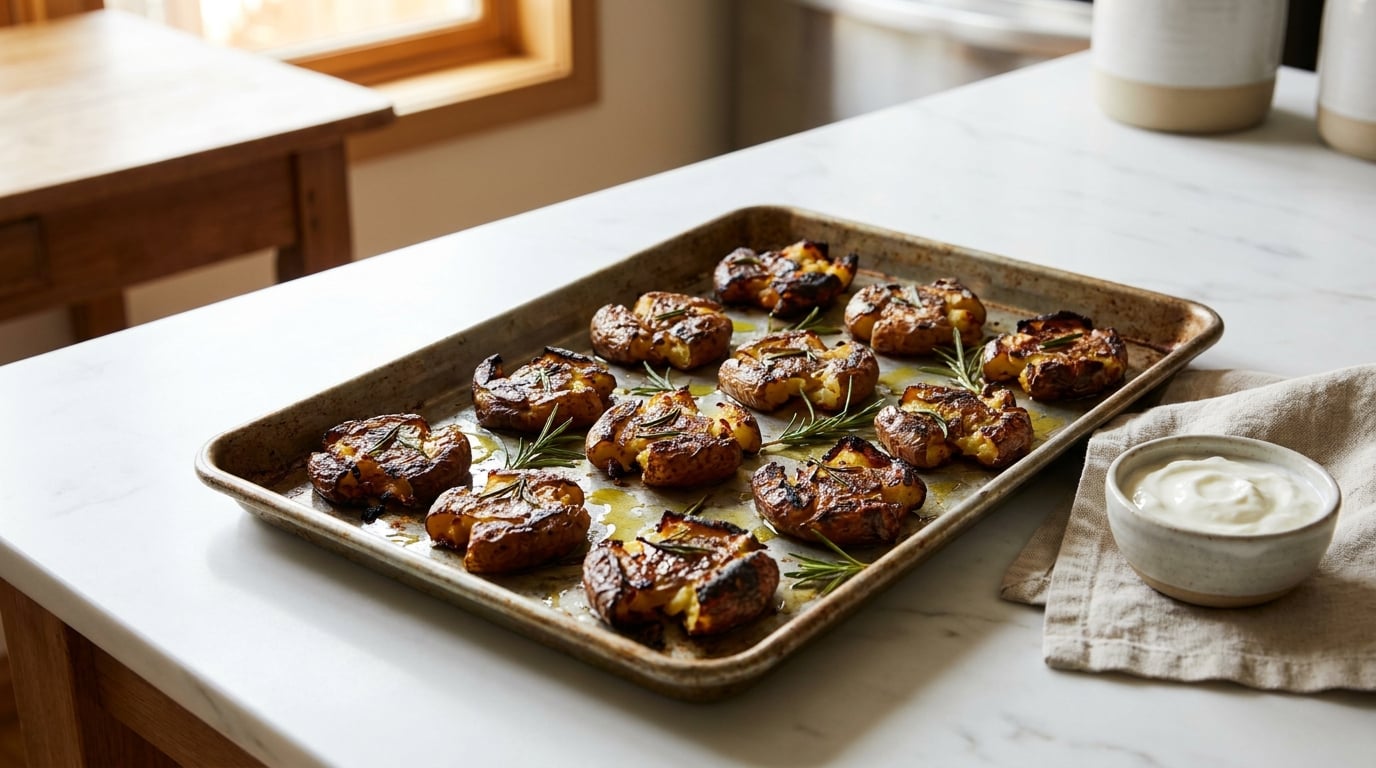
Easy roasted vegetable recipes for dinner sides all run on the same four ingredients: a hot oven, a sheet pan with room to spare, olive oil, and salt. Swap the seasoning and the same method gives you a plate of caramelized carrots, crisp broccoli, or bronzed potatoes in 30 to 45 minutes with one pan to wash.
These ten are written for the weeknight, when you need a side that holds up next to roast chicken or salmon but doesn’t need babysitting. Every recipe below has exact times, a doneness cue you can see rather than guess, a swap for the picky eater or the dairy-free night, and storage notes for the next lunch. September is a good month for it: squash, peppers, and late-summer zucchini are all at their best right now, and root vegetables are coming into season over the next few weeks.
Table of Contents
Easy Roasted Vegetable Recipes for Dinner Sides at a Glance
| Recipe | Total Time | Difficulty | Best For |
|---|---|---|---|
| 1. Crispy Smashed Roasted Potatoes | 55 min | Easy | Big family dinners, picky eaters |
| 2. Honey-Glazed Roasted Carrots | 30 min | Easy | Holiday tables, fish dinners |
| 3. Garlic-Parmesan Roasted Broccoli | 28 min | Easy | Meat-and-potatoes nights, kids |
| 4. Paprika Roasted Cauliflower | 40 min | Easy | Sides that need mild seasoning |
| 5. Balsamic Roasted Brussels Sprouts | 30 min | Medium | Crispiest side of the night |
| 6. Chili-Lime Roasted Sweet Potatoes | 45 min | Easy | Tacos, grain bowls, weeknights |
| 7. Herb-Roasted Zucchini and Yellow Squash | 25 min | Easy | Fastest side on the list |
| 8. Sesame-Roasted Green Beans | 25 min | Easy | Grain bowls, make-ahead lunches |
| 9. Italian Herb-Roasted Tomatoes and Peppers | 40 min | Easy | Pasta night, grilled meat |
| 10. Maple-Dijon Roasted Winter Vegetables | 55 min | Medium | Thanksgiving, cozy dinners |
1. Crispy Smashed Roasted Potatoes
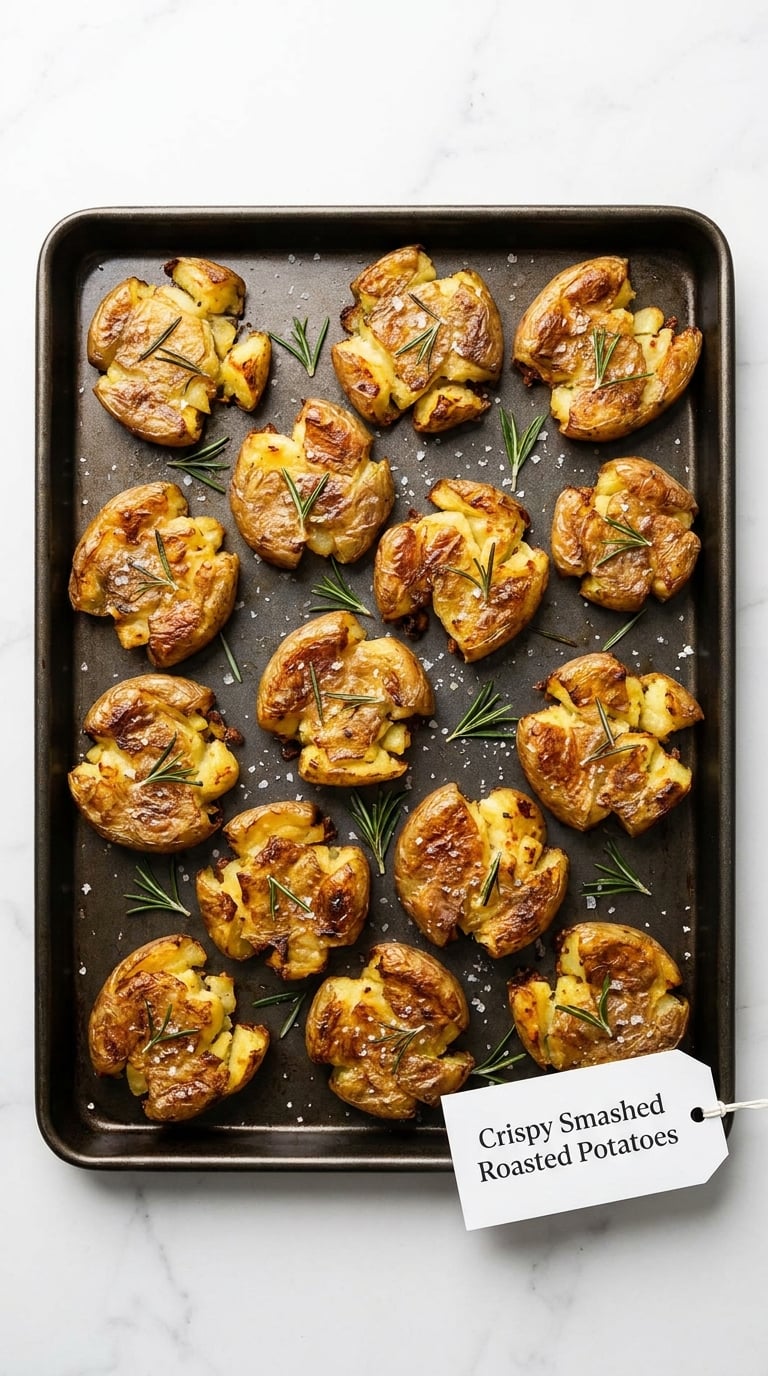
These are the potatoes that convinced me a sheet pan beats a frying pan for a side dish. Boiling first, then smashing, gives you craggy edges that catch heat and turn genuinely crunchy while the middle stays fluffy.
Yield: 4 servings · Prep: 15 min · Cook: 40 min · Total: 55 min · Difficulty: Easy
Ingredients
- 2 pounds small gold or baby red potatoes, scrubbed
- 2 tablespoons olive oil
- 1 tablespoon melted butter
- 1 teaspoon kosher salt, plus more to taste
- 1/2 teaspoon black pepper
- 2 sprigs fresh rosemary, leaves finely chopped
- 4 cloves garlic, lightly crushed
Instructions
- Preheat the oven to 425°F (220°C) and put the empty sheet pan inside to heat up.
- Put the potatoes in a large pot, cover with cold water by an inch, add a teaspoon of salt, and bring to a boil.
- Boil for 12 to 14 minutes, until a knife slides into the center with no resistance.
- Drain the potatoes well and let them steam-dry on a towel for 5 minutes so the skins set.
- Toss each potato once with the back of a cup to flatten it to about 3/4 inch thick.
- Toss the smashed potatoes with the olive oil, melted butter, salt, pepper, rosemary, and the crushed garlic directly on the hot pan.
- Roast for 25 minutes without touching them, then turn with a spatula and roast 12 to 15 minutes more, until the edges are deep golden and a knife slides in with no resistance.
- Serve straight from the pan, with a small bowl of yogurt or sour cream on the side.
Tip: The preheated pan is the difference between roasted and baked. Hot metal starts crisping the underside the moment the potatoes land, so you get browning on the flat face instead of a slow pale cook.
Swap it: Use beef tallow or bacon fat in place of the olive oil and butter for a richer flavor, and swap rosemary for thyme or smoked paprika. Sweet potatoes work the same way, just reduce the roast to 30 minutes.
Storage: Keeps in the fridge 3 to 4 days in a sealed container. Re-crisp in a 450°F (232°C) oven for 8 minutes rather than microwaving, which softens the crust. You can boil and smash the potatoes a day ahead, refrigerate them, and oil and roast on the day.
2. Honey-Glazed Roasted Carrots
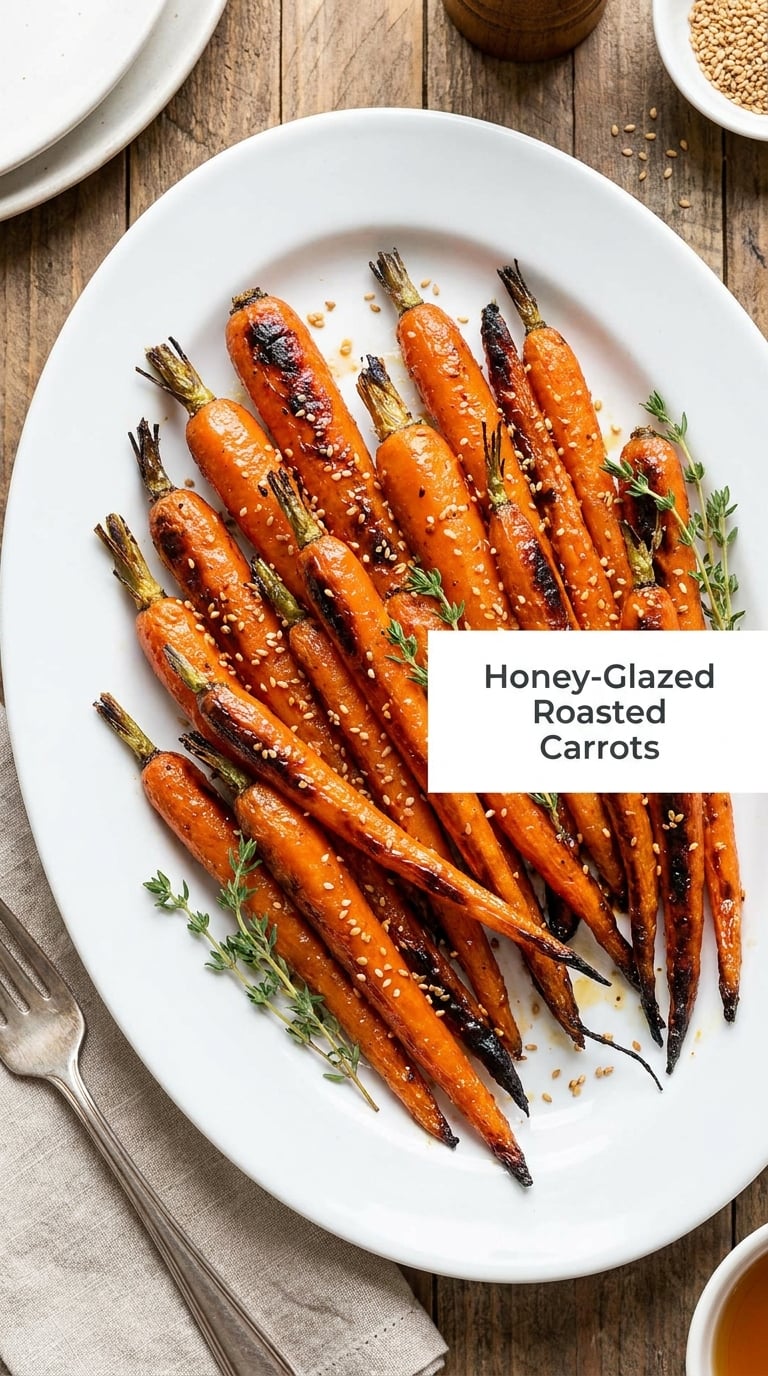
Carrots roast faster than most people expect, which makes them the reliable vegetable for a weeknight when you forgot to defrost anything. The honey glaze caramelizes in the last ten minutes and gives you a lacquered shine that looks like more work than it is.
Yield: 4 servings · Prep: 10 min · Cook: 20 min · Total: 30 min · Difficulty: Easy
Ingredients
- 2 pounds carrots, scrubbed and trimmed
- 2 tablespoons olive oil
- 1 tablespoon honey
- 1 teaspoon ground cinnamon
- 1/2 teaspoon ground cumin
- 3/4 teaspoon kosher salt
- 1 tablespoon toasted sesame seeds, for serving
Instructions
- Preheat the oven to 425°F (220°C).
- Cut the carrots into 2-inch lengths and roll the pieces between your hands to smooth the rough edges.
- Toss the carrots with the olive oil, salt, and cumin on a large sheet pan.
- Roast for 15 minutes, then turn with a spatula.
- Whisk the honey with the cinnamon and spoon it over the carrots, coating the top faces.
- Roast for 5 to 8 minutes more, until the carrots are fork-tender and the edges are dark and sticky.
- Scatter with sesame seeds just before serving.
Tip: Glaze in the last five minutes, not the first. Honey added at the start burns long before the carrots cook through, and you end up with bitter, blackened bits.
Swap it: For a savory version, skip the honey and cinnamon and use harissa or gochujang in their place, finishing with lime juice. Parsnips roast the same way and take the glaze well.
Storage: Keeps 4 days refrigerated. The glaze softens in the fridge, so warm the tray in a hot oven for 6 minutes before serving. You can cut the carrots and mix the dry seasoning a day ahead; add the oil right before they go in.
3. Garlic-Parmesan Roasted Broccoli
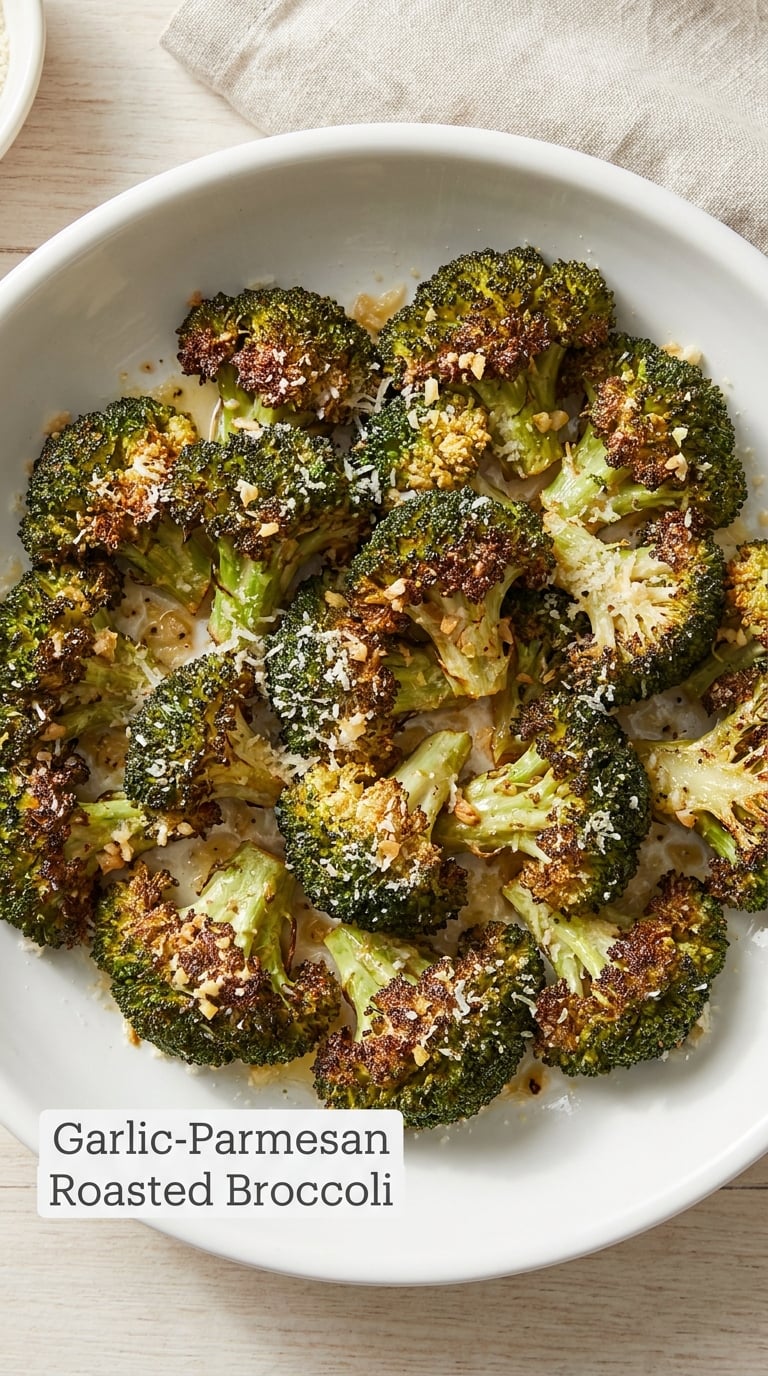
Broccoli roasts faster than cauliflower and forgives a crowded pan better than most vegetables, which makes it the one I cook when I am tired. Dry florets, a hot pan, and enough oil to coat every crown give you crisp tops instead of boiled stems.
Yield: 4 servings · Prep: 8 min · Cook: 20 min · Total: 28 min · Difficulty: Easy
Ingredients
- 1.5 pounds broccoli florets, cut into even 1.5-inch pieces
- 2 tablespoons olive oil
- 3 cloves garlic, minced
- 1/2 teaspoon red pepper flakes
- 3/4 teaspoon kosher salt
- 1/3 cup finely grated Parmesan
- 1 tablespoon chopped parsley
Instructions
- Preheat the oven to 425°F (220°C).
- Pat the broccoli dry with a clean towel, then trim the woody ends off the stems so everything is roughly the same size.
- Toss with the olive oil, garlic, red pepper flakes, and salt on a rimmed sheet pan.
- Spread cut-side down in a single layer and roast for 12 minutes.
- Turn the florets with a spatula and sprinkle the Parmesan over the crowns.
- Roast for 8 to 10 minutes more, until the crowns are browned on top and a knife slides into a stem with no resistance.
- Finish with parsley and a squeeze of lemon.
Tip: Dry your broccoli. Water trapped in the florets steams first and softens everything, so blot the pieces firmly with a towel before they hit the oil.
Swap it: For a dairy-free version, use nutritional yeast in place of the Parmesan and add lemon zest. Chopped sun-dried tomatoes also work, added at the end so they stay chewy rather than turning leathery.
Storage: Keeps 3 to 4 days in the fridge. It also freezes well: spread the cooked florets on a tray to freeze individually, then bag them for up to 3 months. Reheat from frozen at 425°F (220°C) for 12 minutes so the edges re-crisp.
4. Paprika Roasted Cauliflower
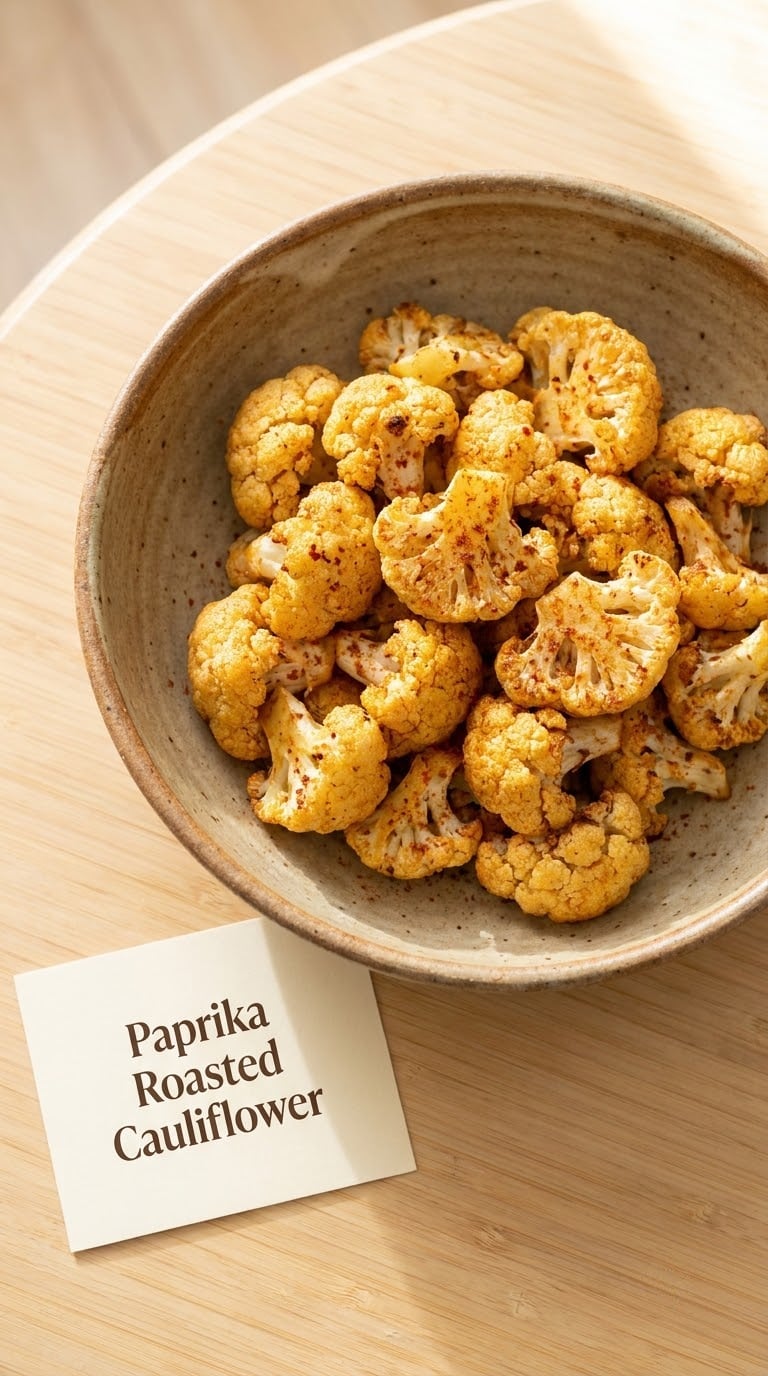
This is the side to make for anyone who says they don’t like cauliflower. No strong seasoning, just browned edges and enough sweetness from the pan to win over a skeptical kid or a picky partner.
Yield: 4 servings · Prep: 10 min · Cook: 30 min · Total: 40 min · Difficulty: Easy
Ingredients
- 1 head cauliflower (about 2 pounds), cut into 1.5-inch florets
- 3 tablespoons olive oil
- 2 teaspoons smoked paprika
- 1 teaspoon garlic powder
- 1/2 teaspoon ground cumin
- 3/4 teaspoon kosher salt
- 2 tablespoons chopped parsley
- 1/4 cup crumbled feta (optional)
Instructions
- Preheat the oven to 425°F (220°C).
- Cut the cauliflower into even florets, keeping the core pieces small so they cook at the same rate as the rest.
- Toss the florets with the olive oil, paprika, garlic powder, cumin, and salt.
- Spread in a single layer with the flat faces down and roast for 12 minutes.
- Turn the pieces and roast for 18 to 20 minutes more, until the edges are deep golden and a knife slides through the stem with no resistance.
- Scatter with parsley and feta just before serving.
Tip: Give the pan more room than you think you need. Cauliflower releases moisture as it cooks, and a crowded pan traps it, which is the whole difference between golden and gray.
Swap it: Sweet potato and cauliflower roast well together because they share a similar cook time, so add 1 pound of sweet potato cubes to the pan for a sturdier side. For warmth instead of smoke, use regular paprika and a pinch of cayenne.
Storage: Keeps 4 days refrigerated in a sealed container. Reheat in a 425°F (220°C) oven for 10 minutes, or spread on a hot skillet with a splash of oil to bring the edges back. The cooked florets freeze for 2 to 3 months.
5. Balsamic Roasted Brussels Sprouts
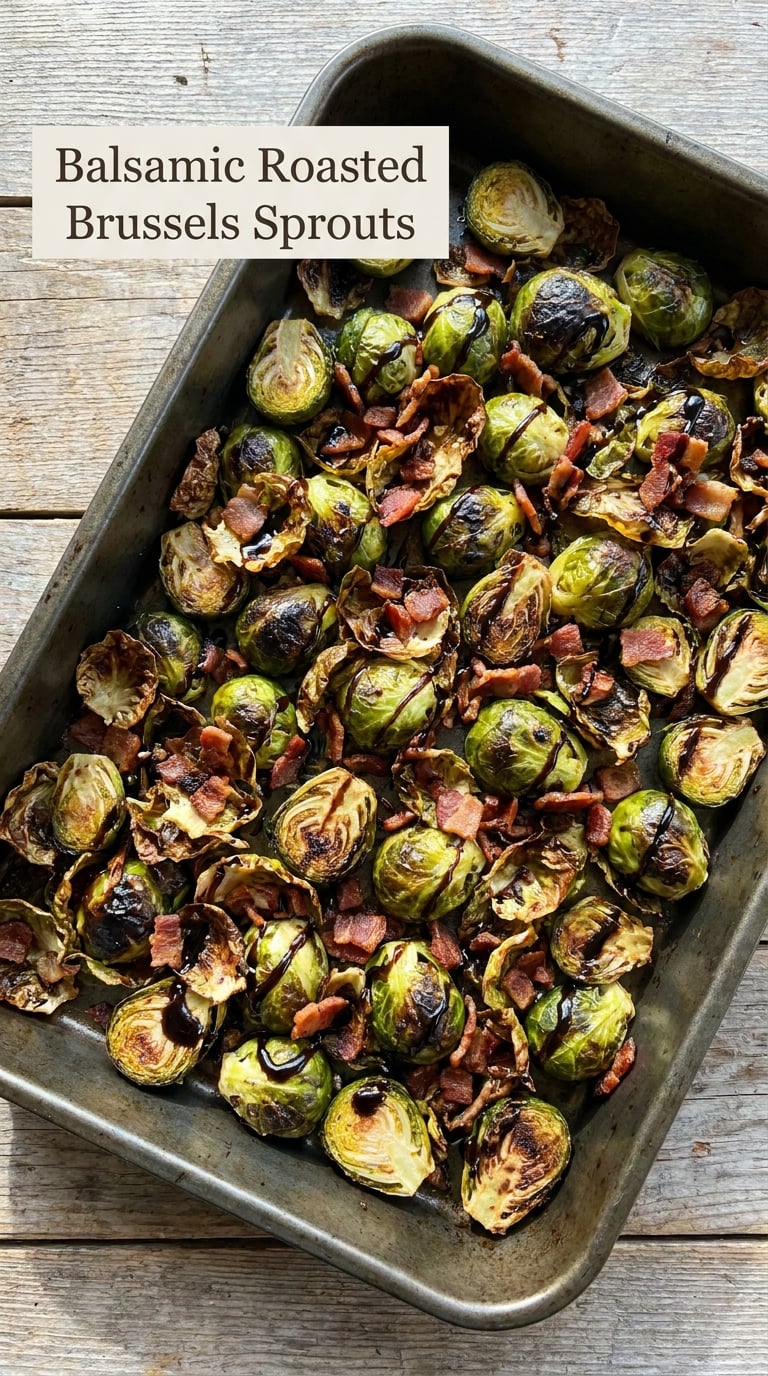
If you only take one crisping technique from this list, take this one. Brussels sprouts need a hot pan and enough space, and once you halve them so they sit cut-side down, the flat faces turn papery crisp in half the usual time.
Yield: 4 servings · Prep: 12 min · Cook: 18 min · Total: 30 min · Difficulty: Medium
Ingredients
- 1.5 pounds Brussels sprouts, trimmed and halved lengthwise
- 3 tablespoons olive oil
- 1 tablespoon balsamic vinegar
- 3/4 teaspoon kosher salt
- 1/4 teaspoon black pepper
- 2 tablespoons chopped bacon or pancetta (optional)
- 1 tablespoon chopped parsley
Instructions
- Preheat the oven to 425°F (220°C).
- Pull the loose outer leaves off the sprouts and set them aside; they crisp like chips.
- Halve the sprouts through the stem and toss with the olive oil, salt, and pepper.
- Spread cut-side down in a single layer along with the loose leaves and roast for 15 minutes.
- Turn the sprouts and roast for 5 minutes more, until the cut faces are browned and a knife slides into the core with no resistance.
- Take the pan out of the oven and drizzle with the balsamic vinegar, then toss to coat.
- Top with the cooked bacon and parsley before serving.
Tip: Add the vinegar after roasting, off the heat. Acid in the pan while the sprouts are cooking makes the cut faces stay pale and soft rather than browning.
Swap it: Use maple syrup in place of the balsamic for a sweeter glaze, or add a teaspoon of Dijon mustard with the vinegar. Nut allergies are not a concern here, but this recipe is naturally gluten-free and dairy-free as written.
Storage: Keeps 4 days in the fridge, though the leaves soften after a day. Reheat in a 425°F (220°C) oven for 8 minutes with the cut faces facing down. Blanch and roast-halve the sprouts a day ahead for easier weeknight assembly.
6. Chili-Lime Roasted Sweet Potatoes
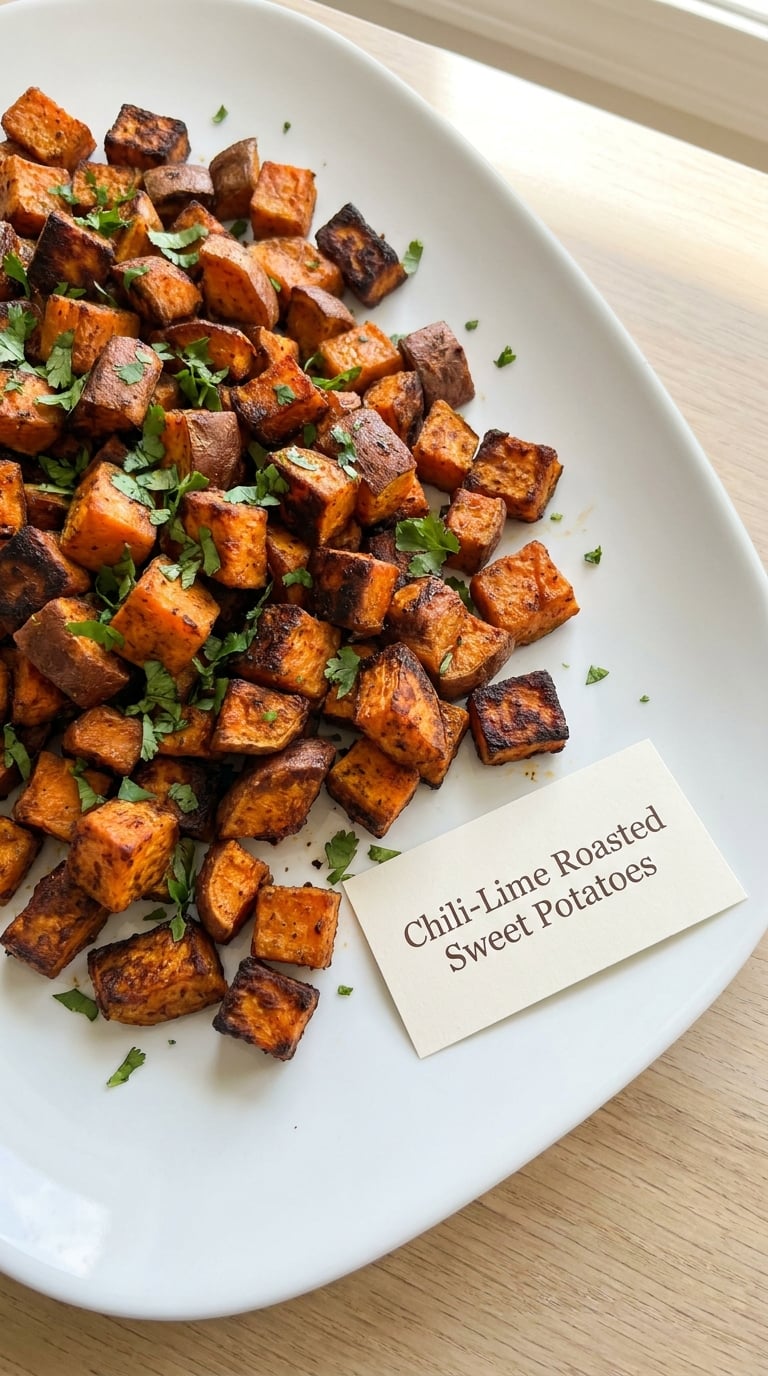
Sweet potatoes take a while, so this is a dish to start before you make everything else. It holds well on a warm platter for 20 minutes, which makes it forgiving when dinner runs late, and the chili-lime finish works with just about any protein.
Yield: 4 servings · Prep: 12 min · Cook: 33 min · Total: 45 min · Difficulty: Easy
Ingredients
- 2 pounds sweet potatoes, cut into 1-inch cubes
- 2 tablespoons olive oil
- 2 teaspoons chili powder
- 1 teaspoon ground cumin
- 1/2 teaspoon garlic powder
- 3/4 teaspoon kosher salt
- 1 lime, juiced and zested
- 1/4 cup chopped cilantro
- 2 tablespoons toasted pepitas, optional
Instructions
- Preheat the oven to 425°F (220°C).
- Put the sweet potato cubes in a bowl and toss with the olive oil, chili powder, cumin, garlic powder, and salt.
- Spread on a large sheet pan with the cut faces down, leaving gaps between the pieces.
- Roast for 20 minutes, then turn with a spatula.
- Roast for 12 to 15 minutes more, until the edges are dark and caramelized and a knife slides through a cube with no resistance.
- While the pan is out of the oven, add the lime juice and zest and toss with the cilantro.
- Serve with the pepitas scattered over the top.
Tip: Leave the lime until the end. Citrus added before roasting scorches and turns bitter, and the fresh version at the end keeps the flavor bright and clean.
Swap it: Chipotle in adobo or ancho chile powder gives a smokier version, and a tablespoon of orange juice works if you are out of lime. Yams roast the same way with nearly identical timing.
Storage: Keeps 4 days refrigerated; the cilantro wilts, so store it separately and add it when reheating. You can cube the sweet potatoes and mix the dry seasoning two days ahead, then oil and roast on the day.
7. Herb-Roasted Zucchini and Yellow Squash
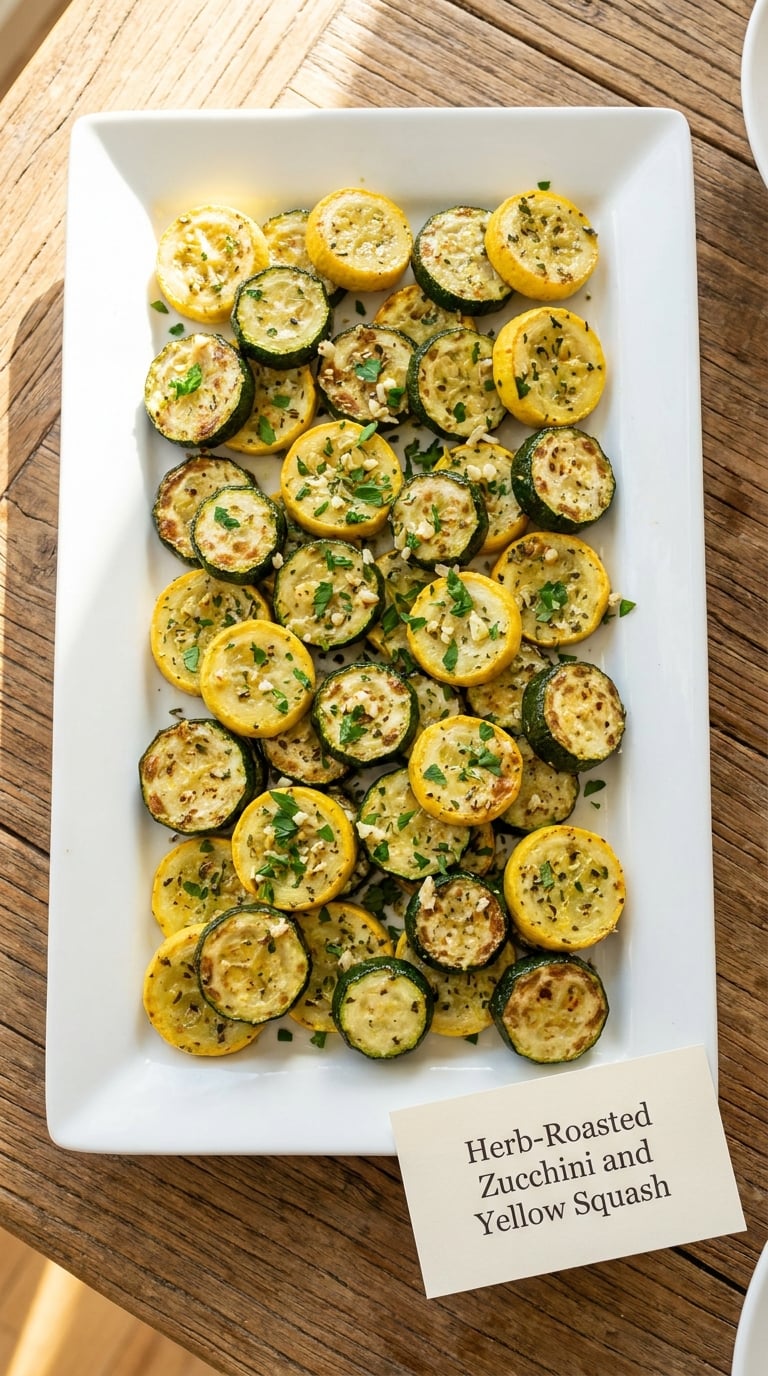
This is the fastest recipe here and the one that goes most wrong when people skip the salting. Summer squash holds a surprising amount of water, and a short salt rest is what buys you browning instead of a puddle under the pan.
Yield: 4 servings · Prep: 12 min · Cook: 13 min · Total: 25 min · Difficulty: Easy
Ingredients
- 1 medium zucchini, cut into 1/2-inch half-moons
- 1 medium yellow squash, cut into 1/2-inch half-moons
- 3/4 teaspoon kosher salt, divided
- 2 tablespoons olive oil
- 3 cloves garlic, thinly sliced
- 1/2 teaspoon black pepper
- 2 tablespoons chopped parsley
- 1 tablespoon chopped fresh thyme leaves
- 1 tablespoon lemon juice
Instructions
- Slice the squash and lay it in a colander set over a bowl.
- Sprinkle with half the salt and leave for 10 minutes while you do something else.
- Blot the slices dry with a towel, discarding the water in the bowl.
- Heat the oven to 400°F (205°C).
- Arrange the slices in a single layer on a rimmed sheet pan, tucking the garlic slices between them.
- Drizzle with the olive oil, the remaining salt, and the pepper, then turn each slice with your hands so both sides are coated.
- Roast for 12 to 14 minutes, until the edges are browned and the slices bend easily but still hold their shape.
- Toss with the parsley, thyme, and lemon juice off the heat.
Tip: The salt rest is non-negotiable, and 400°F (205°C) is the ceiling here. Push the temperature higher and the delicate slices brown unevenly before the centers cook.
Swap it: Keep it vegan as written. Adding a tablespoon of balsamic in the last five minutes gives it a sharper, almost pickled edge, and sliced red onion added halfway through roasts down sweet alongside the squash.
Storage: Keeps 3 days in the fridge, though the texture softens noticeably. Reheat a single layer in a hot skillet with a little oil for 3 minutes rather than microwaving, which turns the slices watery.
8. Sesame-Roasted Green Beans
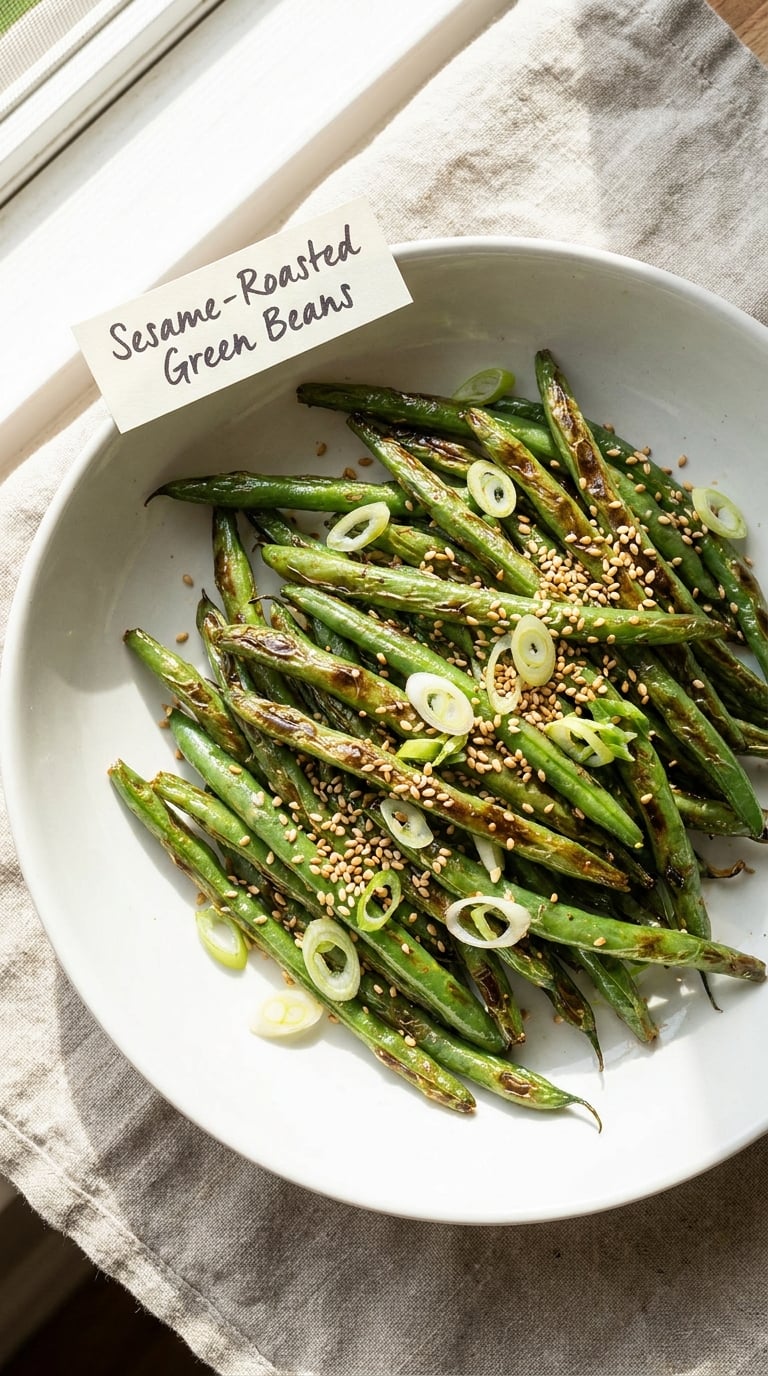
Green beans are the vegetable most often boiled into mush, and a short blanch before roasting fixes that completely. Two minutes in salted water, then eight minutes in a hot oven, gives you beans that snap instead of bend.
Yield: 4 servings · Prep: 10 min · Cook: 12 min · Total: 25 min · Difficulty: Easy
Ingredients
- 1 pound green beans, trimmed
- 1 tablespoon kosher salt, for the blanching water
- 2 tablespoons olive oil
- 2 tablespoons low-sodium soy sauce
- 1 tablespoon toasted sesame oil
- 1 teaspoon minced garlic
- 1 teaspoon red pepper flakes
- 2 tablespoons toasted sesame seeds
- 2 scallions, sliced thin
Instructions
- Bring a pot of salted water to a boil and blanch the beans for 2 minutes.
- Immediately transfer the beans to a bowl of ice water, then drain and pat them completely dry.
- Heat the oven to 425°F (220°C).
- Toss the dry beans with the olive oil, soy sauce, sesame oil, garlic, and red pepper flakes.
- Spread in a single layer on a sheet pan and roast for 8 to 10 minutes, until the beans are blistered in spots and just tender, with a snap when you bend one.
- Finish with the sesame seeds and scallions.
Tip: Ice bath after blanching, then dry the beans thoroughly. Water sitting on the surface is what turns roasted green beans soft and dull, and this is the step that fixes it every time.
Swap it: For a nut-free version, swap the sesame seeds and sesame oil for toasted pumpkin seeds and a little extra olive oil. Tamari is a gluten-free stand-in for the soy sauce, and harissa works in place of the red pepper flakes.
Storage: Keeps 4 days in the fridge, and the beans stay crisper than most roasted vegetables. Reheat in a 425°F (220°C) oven for 6 minutes. Blanching and chilling them up to two days ahead makes this a ten-minute cook on a busy night.
9. Italian Herb-Roasted Tomatoes and Peppers
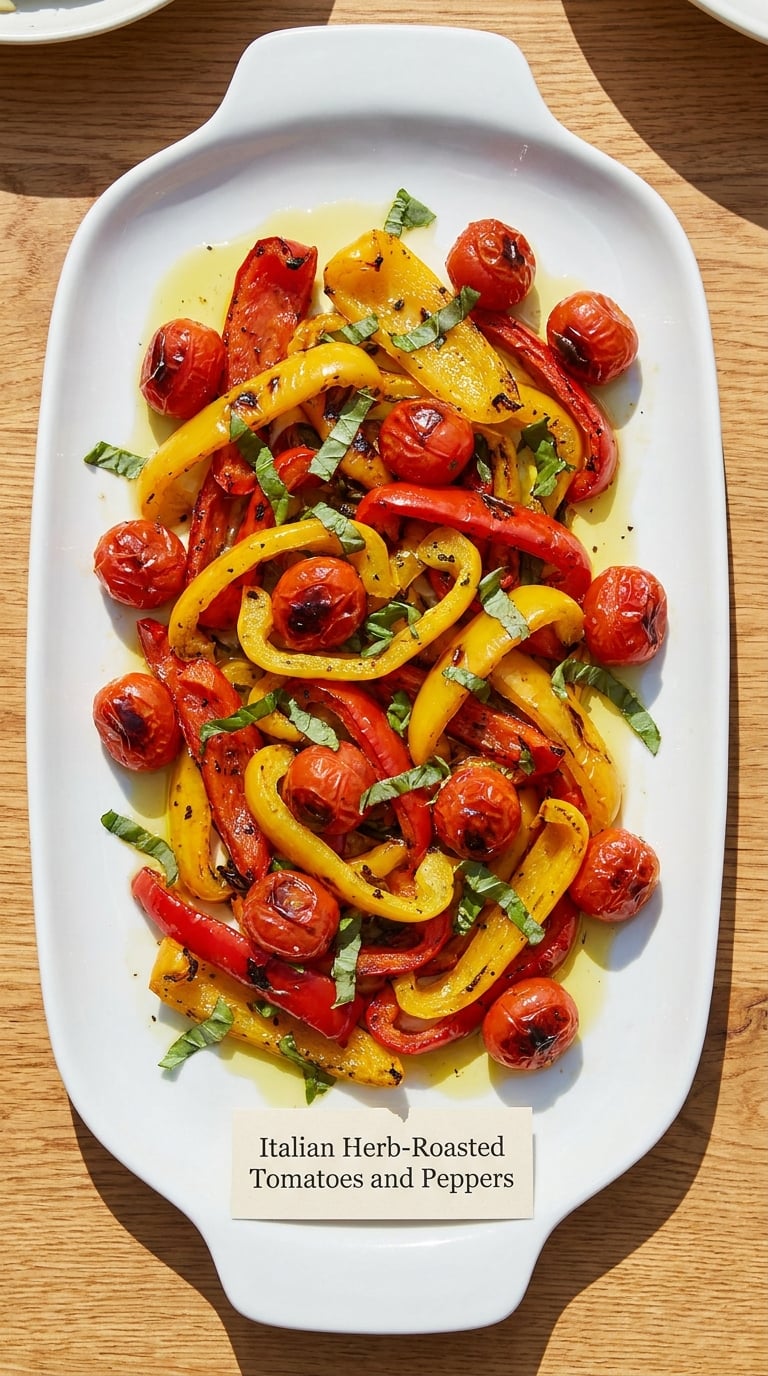
Late-summer tomatoes roast into something closer to jam, and pairing them with peppers on the same pan gives you a sauce that belongs next to pasta, chicken, or anything off the grill. Parchment matters more here than for other vegetables because the juices caramelize instead of scorching on bare metal.
Yield: 4 servings · Prep: 10 min · Cook: 30 min · Total: 40 min · Difficulty: Easy
Ingredients
- 2 red bell peppers, cut into 1-inch strips
- 1 yellow bell pepper, cut into 1-inch strips
- 1 pint cherry tomatoes, halved
- 4 cloves garlic, left unpeeled and lightly crushed
- 3 tablespoons olive oil
- 1 teaspoon dried oregano
- 1/2 teaspoon red pepper flakes
- 3/4 teaspoon kosher salt
- 1/3 cup fresh basil leaves, torn
- 1 tablespoon red wine vinegar
Instructions
- Heat the oven to 425°F (220°C) and line a rimmed sheet pan with parchment paper.
- Let the tomatoes sit at room temperature for 10 minutes if they have been in the fridge; cold tomatoes release liquid and steam instead of roasting.
- Arrange the peppers in a single layer, cut-side down, with the tomato halves facing up and the garlic tucked in among them.
- Drizzle with the olive oil and sprinkle with the oregano, red pepper flakes, and salt.
- Roast for 18 minutes, then turn the pepper strips with tongs.
- Roast for 12 to 15 minutes more, until the pepper skins are blistered and the tomato juices have thickened and darkened at the edges.
- Squeeze the softened garlic out of its skins, discard the papery skins, and toss everything with the basil and red wine vinegar off the heat.
Tip: Give the peppers a single layer and let the tomatoes sit cut-side up on top. If the tomatoes are packed underneath the peppers, they steam and you lose the blistered skin that makes the dish worth making.
Swap it: Roasted red peppers alone make an excellent side with a drizzle of olive oil and flaky salt, and you can serve them at room temperature. Add sliced Italian sausage or chickpeas to the pan and it becomes a main.
Storage: Keeps 4 days refrigerated in their own juices, and the flavor is better the next day. Reheat in a 400°F (205°C) oven for 8 minutes. The peppers also freeze for up to 3 months; tomatoes do not freeze well in this form.
10. Maple-Dijon Roasted Winter Vegetables
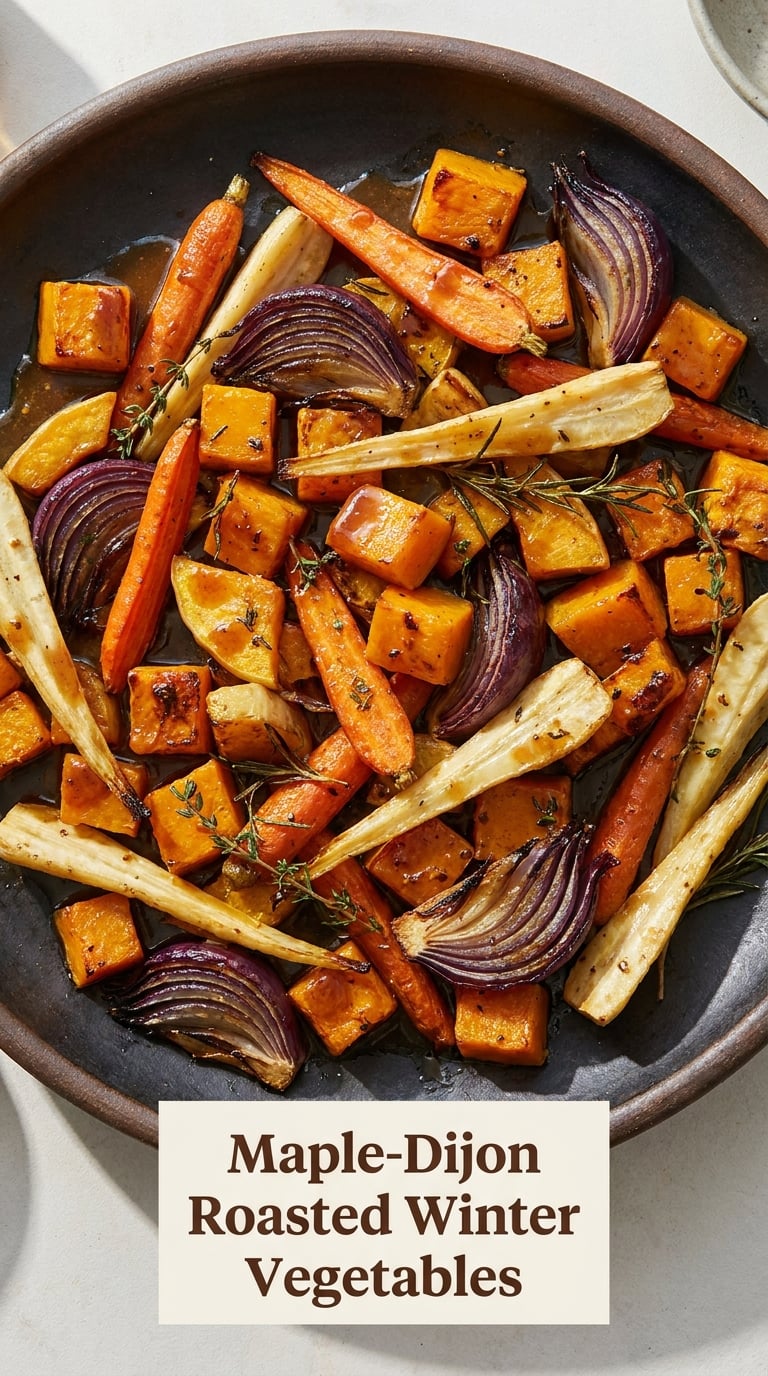
This is the one to make when the grocery store starts leaning toward root vegetables. Squash, parsnips, carrots, and red onion share a long, forgiving roast time, and the maple-Dijon glaze gives you something that tastes like a holiday side without any of the holiday work.
Yield: 6 servings · Prep: 18 min · Cook: 40 min · Total: 55 min · Difficulty: Medium
Ingredients
- 1 small butternut squash (about 2 pounds), peeled, seeded, and cut into 1-inch cubes
- 3 large carrots, cut into 1-inch pieces at an angle
- 3 parsnips, peeled and cut into 1-inch pieces
- 1 large red onion, cut into 1-inch wedges
- 3 tablespoons olive oil
- 2 tablespoons pure maple syrup
- 2 tablespoons Dijon mustard
- 1 teaspoon fresh thyme leaves
- 1 teaspoon kosher salt
- 1/2 teaspoon black pepper
Instructions
- Preheat the oven to 425°F (220°C).
- Cut every vegetable to the same 1-inch size so they all finish together; small parsnips often need to join the squash, not the carrots.
- Whisk the olive oil, maple syrup, Dijon, thyme, salt, and pepper in a large bowl.
- Add the vegetables and toss well, making sure every cut face is coated in the glaze.
- Spread in a single layer across two pans if one looks crowded, and roast for 20 minutes.
- Turn everything with a spatula and roast for 20 to 25 minutes more, until the squash is fork-tender, the onion is soft and sweet, and the cut faces are caramelized.
- Serve hot, or at room temperature with a drizzle of extra maple.
Tip: Cut size, not pan size, is what makes a mixed roast work. Everything needs to reach fork-tender at the same moment, so measure the squash and carrots against each other before you start rather than adding them in batches.
Swap it: Use honey instead of maple syrup, or rice vinegar plus a second spoon of Dijon for a sharper glaze. Delicata or kabocha squash work in place of butternut, and adding a pound of cubed sweet potato makes it more substantial.
Storage: Keeps 4 days refrigerated. Rewarm in a 425°F (220°C) oven for 12 minutes, and if you want the glaze glossy, add a fresh spoon of maple and mustard mixed with a teaspoon of warm water before reheating. You can roast everything a day ahead and finish it in the oven while the rest of dinner cooks.
Tips for Making These
Most roasted vegetables fail for the same three reasons, and none of them are the recipe. Here is what actually changes the result, and it applies to every one of the ten above.
Why the same rules make every easy roasted vegetable recipe for dinner sides work
- Give the pan room. A single uncrowded layer is the rule people break most often, and it is the reason vegetables steam instead of brown. If your sheet looks full, use a second pan or work in two batches.
- Dry the vegetables before they meet oil. Patting them with a towel, or salting them and waiting ten minutes for zucchini, keeps surface water from starting the cook with steam instead of heat.
- Start the oven hot and let the pan heat with it. 425°F (220°C) is the number most home cooks land on, and dropping to a lower temperature is what produces pale, soft edges instead of browning.
- Cut everything the same size. A one-inch cube next to a half-inch piece means one burns while the other stays raw. Ten extra seconds of knife work is the cheapest fix available.
- Leave space, then leave the pan alone. Turn the vegetables once at the halfway mark so all four sides brown, and resist opening the oven door more often than that. The heat recovery each time you open it costs you browning.
- Add delicate things late. Fresh herbs, Parmesan, honey glazes, and citrus all go on in the last five to ten minutes. Cheese added at the start scorches to a yellow shell, and honey burns long before the vegetable is done.
Which vegetables to roast together, and which to skip
Group vegetables by cook time and they share a pan happily. These three groupings are the whole trick.
- 20 to 25 minutes: green beans, zucchini, yellow squash, bell peppers, cherry tomatoes, broccoli florets.
- 30 to 35 minutes: carrots, cauliflower, Brussels sprouts, red onion, corn, mushrooms.
- 40 to 50 minutes: butternut and delicata squash, sweet potato, whole carrots, beets, parsnips, potatoes.
And a few things not to bother roasting: cucumbers and tomatoes on the vine, which release so much water they stew; eggplant without an aggressive salting step first; and leafy greens, which go from raw to burnt in under four minutes. Mushrooms are worth it, but roast them on their own tray or at the top of the oven, where they brown rather than weep into the pan.
Two adaptations come up constantly in our kitchen. With a convection oven, drop the temperature by 25°F (14°C) and start checking 10 minutes early, since the fan cuts the cooking time. In an air fryer, use 400°F (205°C) for most of these recipes and shake the basket at the halfway mark; it will brown in roughly two-thirds of the time.
For the rest of the week, try our easy cabbage recipes for dinner ideas if you want more one-pan vegetable sides, or pair any of these with a main from our easy skillet dinner recipes collection. If you are roasting a larger tray of potatoes or vegetables for a crowd, the easy ground beef dinner recipes roundup is a good second main to serve alongside.
Frequently Asked Questions
What is the best temperature for roasting vegetables so they are tender but still crisp?
425°F (220°C) is the number most home cooks settle on: hot enough to drive moisture out and brown the cut faces, gentle enough that the centers cook before the edges burn. Drop to 375°F (190°C) and you get softer, paler vegetables, which suits winter roots but not broccoli or green beans. With a convection oven, go 25°F (14°C) lower and start checking 10 minutes early, because the fan cuts cooking time. One more variable matters as much as the number: how much room the pieces have on the pan.
How do I stop roasted vegetables from becoming soggy?
Three fixes cover nearly every soggy tray. Spread the pieces in a single uncrowded layer, because a full pan traps steam and boils the vegetables in their own moisture. Dry the vegetables before adding oil, either with a towel or by salting them for ten minutes and patting them dry, especially zucchini and tomatoes. And keep the temperature high at 425°F (220°C) so moisture leaves the surface quickly. Overcrowding is the most common cause, and it is the easiest to fix.
Can I use frozen vegetables instead of fresh for these roasted vegetable recipes?
Yes, and for broccoli, cauliflower, green beans, and Brussels sprouts it works well. Roast frozen vegetables straight from the freezer at 425°F (220°C) without thawing, and add 5 to 10 minutes to the cook time since they start colder and wetter. Spread them in a single layer rather than dumping the bag on the pan. Frozen squash, carrots, and peppers often come out soft rather than crisp, so for those, fresh is worth the extra trip to the store.
What can I use if I do not want Parmesan or another cheese?
Nutritional yeast is the closest dairy-free swap in the garlic-Parmesan broccoli, adding the same salty, nutty flavor without the cheese, and it browns just as well. Finely grated pecorino or a hard aged cheese works for anyone who wants a stronger flavor, while breadcrumbs toasted with garlic and olive oil give you crunch with no dairy at all. On the maple-Dijon winter vegetables, skip the cheese entirely and finish with a spoonful of grain mustard, which cuts the sweetness the same way.
How should I reheat roasted vegetables without making them soft or mushy?
Skip the microwave, which heats the moisture in the vegetables instead of the surface. Spread the vegetables in a single layer on a hot sheet pan and reheat in a 425°F (220°C) oven for 8 to 10 minutes, or warm them in a skillet with a small splash of oil over medium-high heat for 3 to 4 minutes. Both drive off surface moisture and re-crisp the cut faces. Reheating over a low heat is what turns yesterday’s good tray into today’s soft one.
A Simple Vegetable Side for Any Dinner
Start with the crispy smashed potatoes. They are the most forgiving recipe in the group, they look the most impressive for the least effort, and they work next to roast chicken, sheet-pan fish, or a steak without any change to the method. The boiling and smashing take fifteen minutes you can spend on the rest of dinner, and the oven does the rest while everything else finishes.
Once you have that one down, the rest of these easy roasted vegetable recipes for dinner sides are variations on the same method, so pick the vegetable you actually want to eat and let the seasoning do the work. Whatever you choose, preheat the pan, keep the layer uncrowded, and check the edges rather than the clock.