
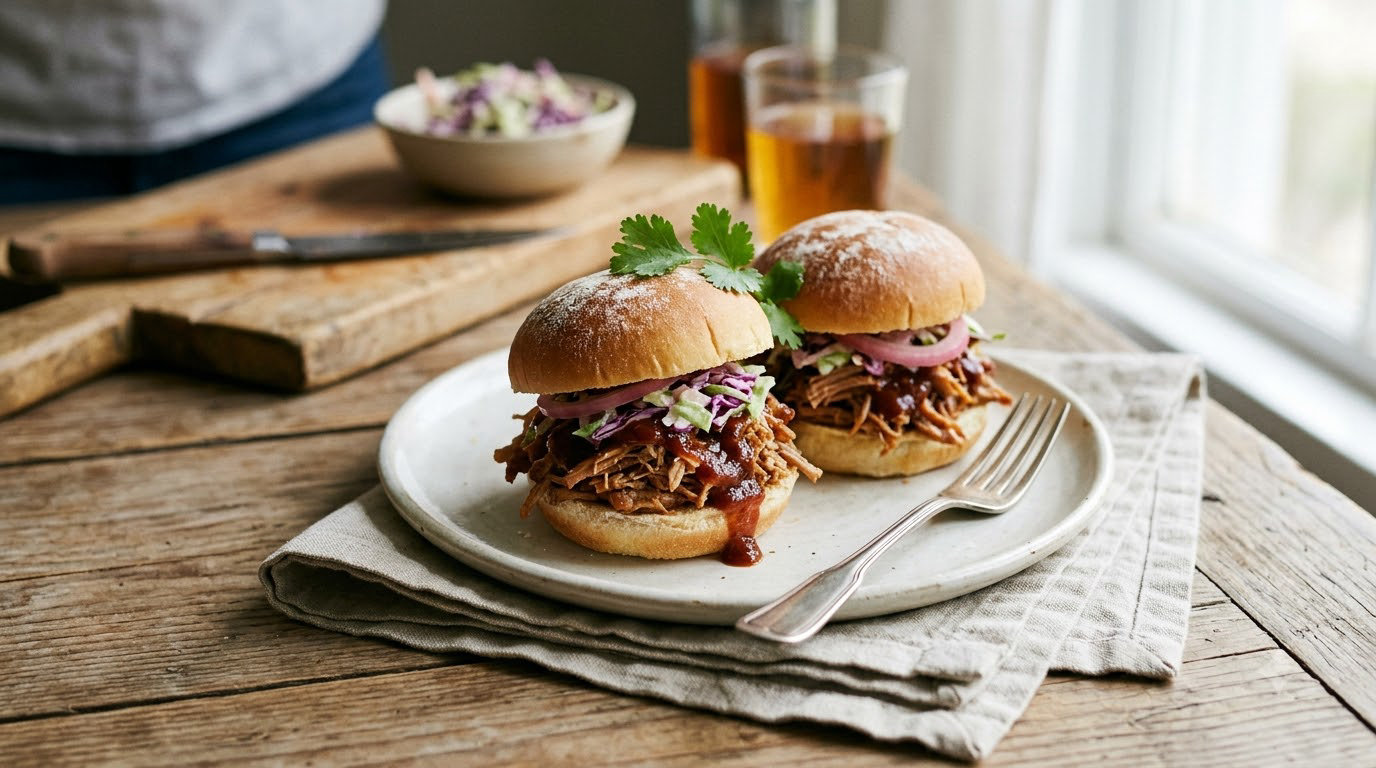
Graduation season lands somewhere between a rainy Saturday in May and a hot evening in June, and either way your kitchen is about to be hosting a lot of people at once. The 15 easy graduation party food ideas below are all make-ahead, crowd-friendly, and forgiving — the kind of food you can set out on a table and let people graze for three hours without you hovering over a stove.
Every recipe here includes exact quantities, times, and storage notes so you can cook from the page without guessing. Most are no-cook or one-pan, several are vegetarian, and all fifteen scale up cleanly when the RSVPs run past sixty. If you need a second oven, our 14 easy Fourth of July party food ideas list is built the same way, with nothing needing last-minute attention.
Table of Contents
15 Easy Graduation Party Food Ideas at a Glance
| Recipe | Total Time | Difficulty | Best For |
|---|---|---|---|
| 1. Mini Caprese Skewers | 20 min | Easy | No-cook, vegetarian |
| 2. Classic Deviled Eggs | 35 min | Easy | Brunch open house |
| 3. Easy Chicken Sliders | 30 min | Easy | Warm handheld main |
| 4. Slow-Cooker Pulled Pork Sliders | 20 min hands-on | Easy | Big crowds, zero fuss |
| 5. Garden Veggie Pinwheels | 25 min + chill | Easy | Vegetarian, kid-friendly |
| 6. Lemon Herb Chicken Bites | 35 min | Easy | Sheet-pan hot main |
| 7. Turkey Pesto Pinwheels | 20 min + chill | Easy | Light lunch spread |
| 8. Mini Sausage Pizza Bites | 30 min | Easy | Kids and picky eaters |
| 9. Cucumber Tea Sandwiches | 20 min + chill | Easy | Afternoon tea table |
| 10. Caprese Pasta Salad | 25 min + chill | Easy | Best make-ahead side |
| 11. Mini Quiche Cups | 40 min | Medium | Make-ahead savory bake |
| 12. Strawberry Shortcake Bites | 20 min + chill | Easy | No-bake dessert |
| 13. Graduation Cap Cupcakes | 1 hr 10 min | Medium | The themed centerpiece |
| 14. Chocolate Diploma Scrolls | 45 min + chill | Easy | Dessert table filler |
| 15. Caprese Fruit Cups | 15 min | Easy | Light, refreshing, gluten-free |
1. Mini Caprese Skewers
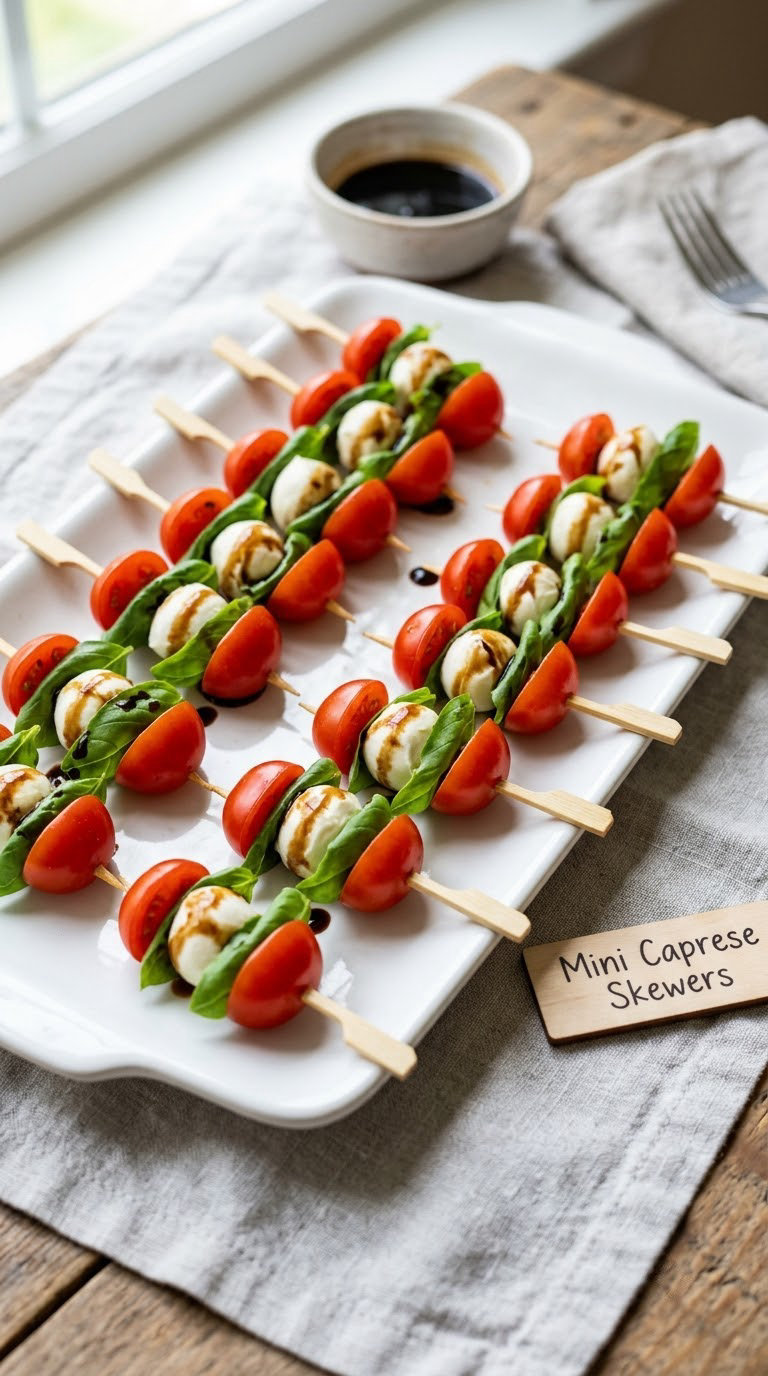
These are the first thing to disappear at an open house because there is nothing to fork, cut, or wipe off a plate. Assembling them takes fifteen minutes and they look like you tried much harder than that.
Yield: 24 skewers (about 48 pieces, serves 12 as a starter) · Prep: 20 min · Cook: none · Total: 20 min · Difficulty: Easy
Ingredients
- 1 pint (about 1.5 cups) cherry tomatoes, halved
- 8 ounces mini fresh mozzarella balls, drained
- 1 cup fresh basil leaves, plus a few small ones for garnish
- 2 tablespoons balsamic glaze or balsamic vinegar
- 1 tablespoon extra-virgin olive oil
- 1/4 teaspoon kosher salt
- 24 small wooden cocktail skewers or bamboo picks
Instructions
- Pat the mozzarella balls dry with a paper towel.
- Thread each skewer with one tomato half, one mozzarella ball, and one basil leaf.
- Repeat until all 24 skewers are assembled.
- Arrange the skewers on a platter, seam side up if you want them to stand.
- Drizzle with the olive oil and balsamic glaze.
- Finish with a sprinkle of salt and a couple of tiny basil leaves.
Tip: Poking a tiny hole through each tomato half before skewering stops them from spinning and sliding off. It takes ten seconds for the whole batch.
Swap it: Use flat-leaf Italian parsley in place of basil for a brighter finish, or add a folded piece of prosciutto between the tomato and the mozzarella. For a dairy-free version, use marinated artichoke hearts in place of the mozzarella.
Storage: Refrigerate in a covered container for up to 24 hours. Assemble the balsamic drizzle right before serving so the tomatoes stay crisp. Allergen: milk.
2. Classic Deviled Eggs
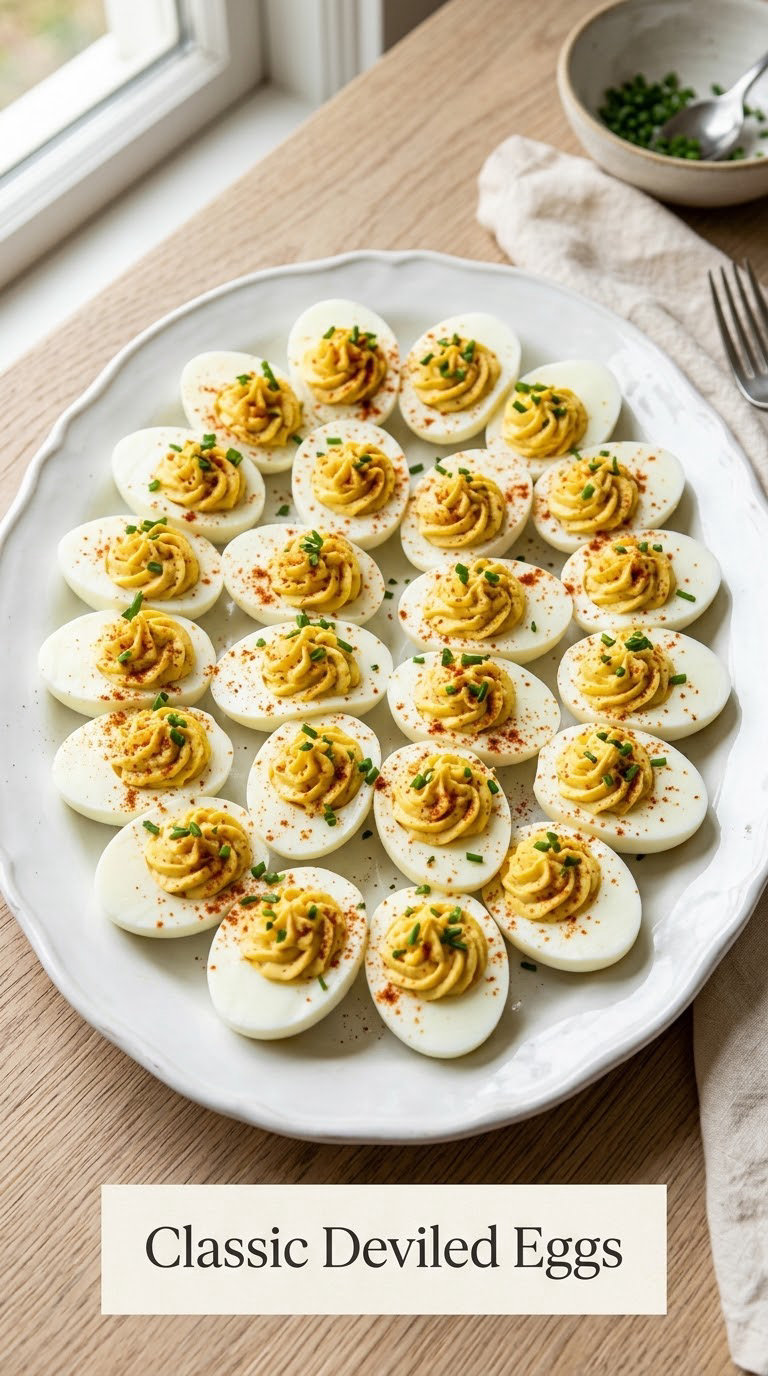
Deviled eggs are a graduation open house staple because they are bite-sized, protein-heavy, and they vanish faster than you can plate the second tray. Twelve eggs become 24 halves, which feeds about eight people.
Yield: 24 halves · Prep: 15 min · Cook: 12 min · Total: 35 min (plus 15 min cooling) · Difficulty: Easy
Ingredients
- 12 large eggs
- 1/3 cup mayonnaise
- 1 teaspoon yellow mustard
- 2 teaspoons pickle relish, drained
- 1/4 teaspoon salt
- 1/8 teaspoon black pepper
- 1 tablespoon paprika
- 2 tablespoons chopped fresh chives
Instructions
- Place the eggs in a saucepan and cover with cold water by 1 inch.
- Bring to a boil over high heat, then turn off the heat and cover.
- Let the eggs stand for 12 minutes, then transfer to ice water for 5 minutes.
- Peel the shells and halve each egg lengthways.
- Scoop the yolks into a bowl and mash with a fork.
- Stir in the mayonnaise, mustard, relish, salt, and pepper until smooth.
- Spoon the filling back into the white halves.
- Dust with paprika and chives, then chill 15 minutes before serving.
Tip: That boil-then-turn-off method gives you set whites with a creamy yolk every time, no cracking. Older eggs of 7 to 10 days peel more easily than fresh ones, so buy them a few days early.
Swap it: Swap the relish for two finely chopped pickles and a teaspoon of Dijon for a sharper filling. A tablespoon of chopped bacon or smoked salmon folded in at the end turns these into a more grown-up version.
Storage: Refrigerate in a sealed container for up to 4 days. Keep the filling in a separate container if you are storing the whites, so nothing gets soggy. Allergens: eggs, milk.
3. Easy Chicken Sliders
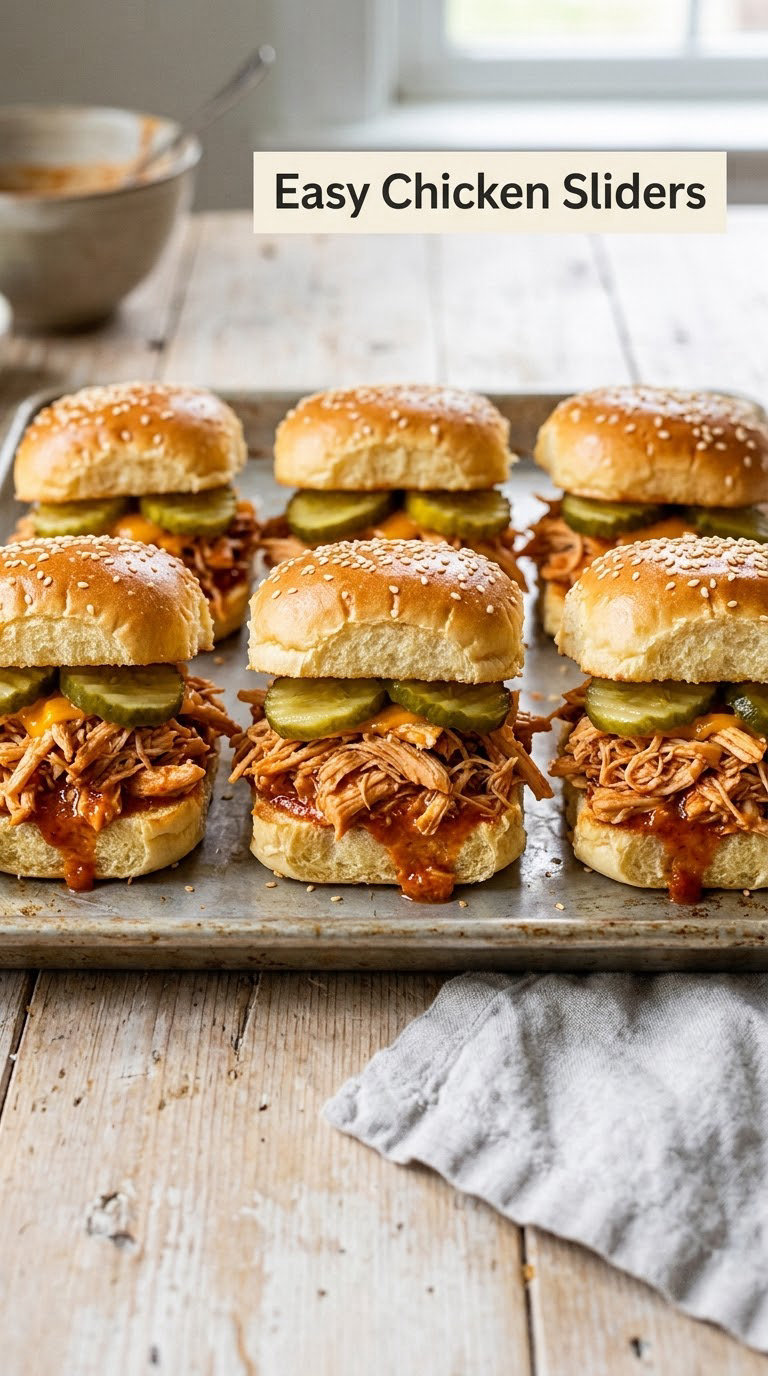
Chicken sliders win over picky eaters and hungry teenagers in the same tray, which is exactly what a graduation party needs. Rotisserie chicken from the grocery store cuts the active time down to about ten minutes.
Yield: 12 sliders · Prep: 15 min · Cook: 10 min · Total: 30 min · Difficulty: Easy
Ingredients
- 2 cups cooked shredded chicken (rotisserie works well)
- 1/2 cup mayonnaise
- 2 tablespoons yellow mustard
- 1 tablespoon pickle brine
- 1/2 teaspoon garlic powder
- 1/4 teaspoon salt
- 12 small slider buns
- 1/2 cup sweet pickle chips, for topping
Instructions
- Warm the shredded chicken in a skillet over medium heat until steaming hot, about 5 minutes.
- Check the temperature with an instant-read thermometer. Chicken must reach 165°F (74°C) to be safe if it is not from a cooked source you trust.
- Whisk the mayonnaise, mustard, brine, garlic powder, and salt in a small bowl.
- Toss the hot chicken with the sauce and let it sit 3 minutes.
- Toast the buns cut-side up in a dry skillet for 1 to 2 minutes.
- Fill each bun with the sauced chicken.
- Top with a pickle chip and serve right away.
Tip: If you are starting from raw boneless chicken breasts, cook them to 165°F (74°C) with a 3-minute rest, then shred with two forks. Warm the shredded meat in the sauce so nothing dries out.
Swap it: Use a honey-mustard or buffalo sauce in place of the mayo-mustard mix. Vegetarian? Swap in a can of drained chickpeas, rinsed and lightly tossed, for a similar texture.
Storage: Keep the shredded mixture refrigerated for up to 3 days and reheat to 165°F (74°C) before assembling. Assembled sliders get soggy after about an hour. Allergens: wheat, milk, eggs, soy, mustard.
4. Slow-Cooker Pulled Pork Sliders
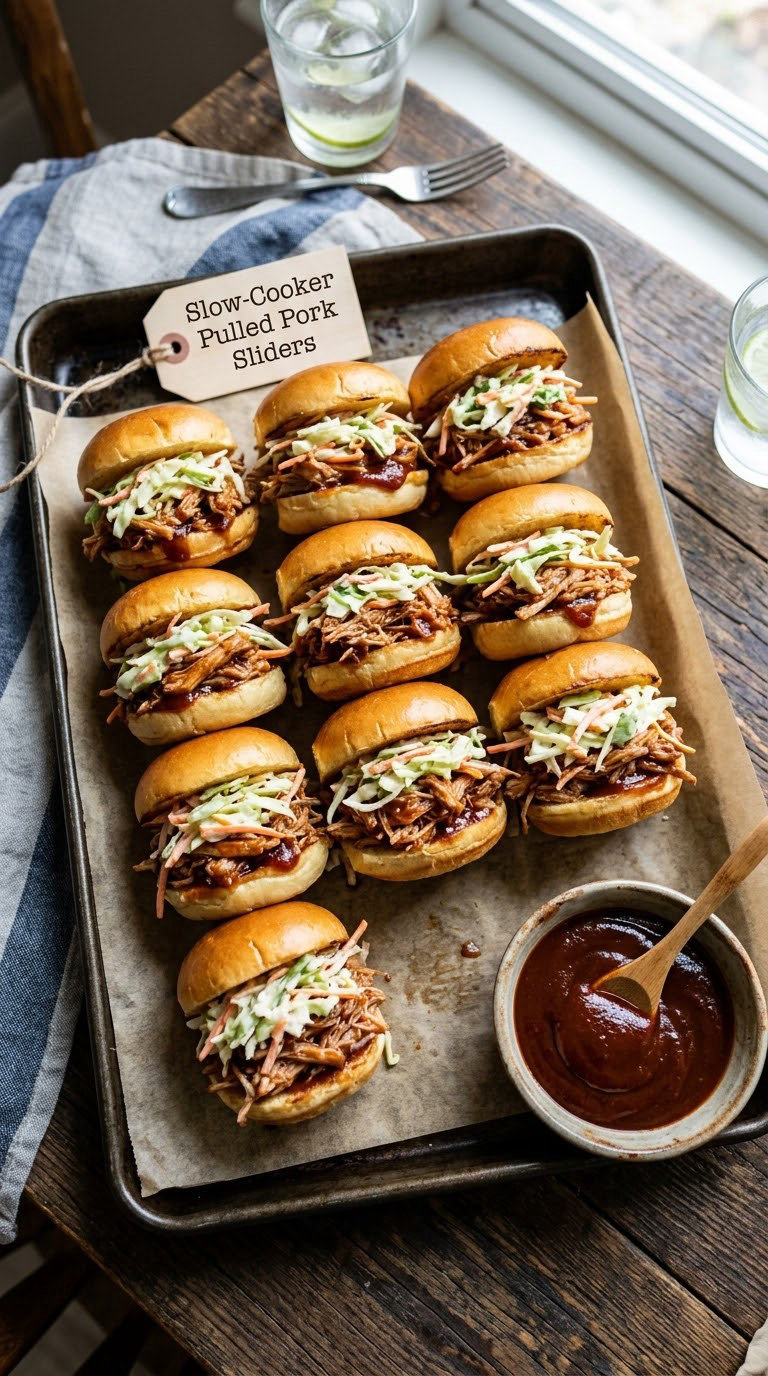
This is the one recipe that keeps working after the party starts, because the slow cooker does the timing while you greet people at the door. It is the answer to feeding a hundred people without a second oven.
Yield: 24 sliders · Prep: 10 min · Cook: 8 hours on low · Total: 8 hours hands-off · Difficulty: Easy
Ingredients
- 3 pounds boneless pork shoulder
- 1 tablespoon olive oil
- 1 teaspoon kosher salt
- 1 teaspoon black pepper
- 1 teaspoon smoked paprika
- 3/4 cup barbecue sauce
- 1/2 cup chicken stock
- 1 tablespoon Worcestershire sauce
- 24 small slider buns
- 3 cups prepared coleslaw
Instructions
- Pat the pork dry and cut it into 4 large chunks.
- Heat the oil in a skillet and brown the pork on all sides, about 2 minutes per side.
- Place the pork in the slow cooker with the salt, pepper, paprika, barbecue sauce, stock, and Worcestershire.
- Cover and cook on low for 8 hours, or on high for 4.
- Check with a fork. The meat is ready when it shreds easily with no resistance, and pulls apart into long strands.
- Verify it reached at least 145°F (63°C) with a 3-minute rest; it will be far past that after 8 hours.
- Shred with two forks and stir in a splash of the cooking liquid.
- Fill the buns and top with coleslaw.
Tip: Use the shoulder, not the loin. Shoulder has enough fat to stay tender through 8 hours, and the lean loin dries out before it shreds.
Swap it: Use a package of pulled-pork sauce to skip the liquid, or stir in a half cup of root beer for a sweeter glaze. To make this gluten-free, serve the pork in lettuce cups instead of buns.
Storage: Refrigerate shredded pork for up to 3 days in a sealed container. Reheat covered in the microwave on 50% power for 2 to 3 minutes with a splash of the reserved liquid. Allergens: wheat, soy.
5. Garden Veggie Pinwheels
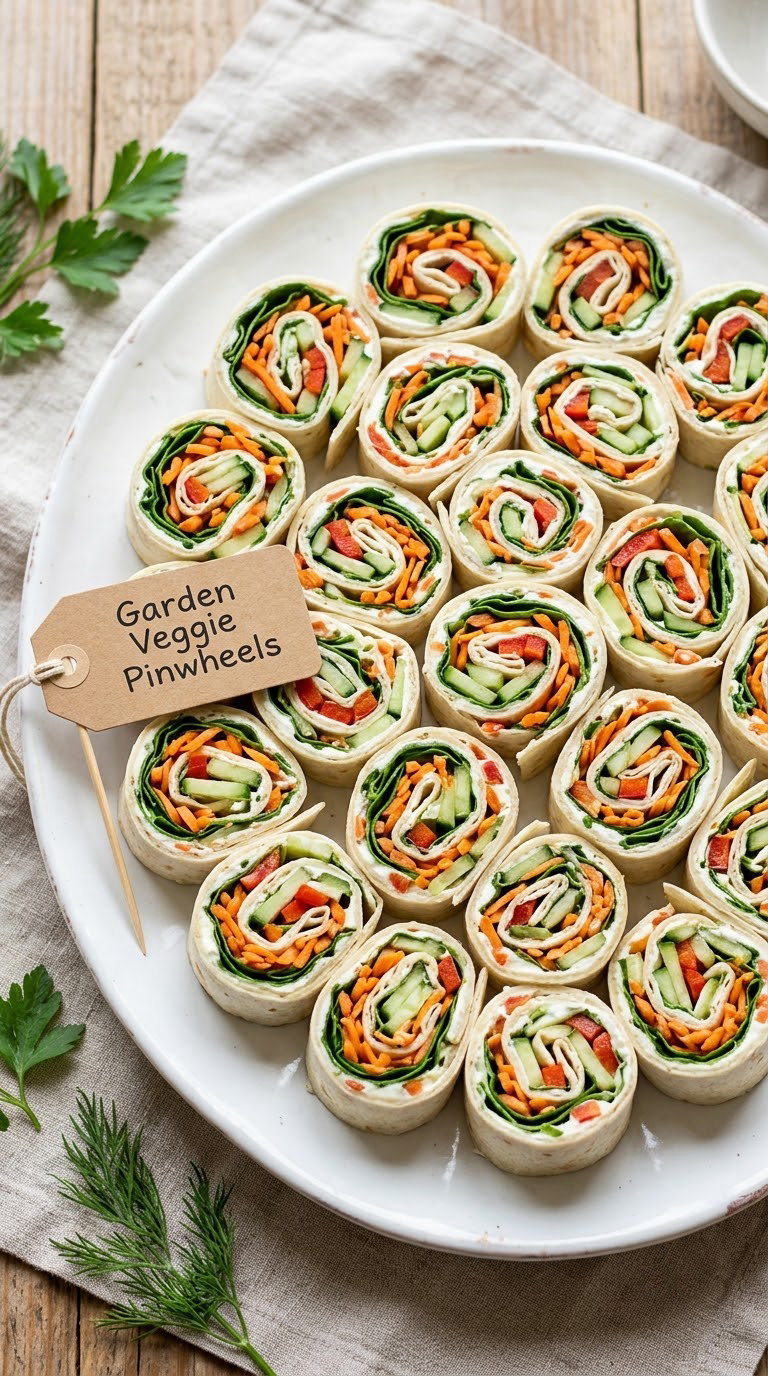
Veggie pinwheels are the item adults eat first and then hand to their kids anyway, because the cucumber and carrot show through the tortilla. Nothing goes in the oven, and they sit happily on a table for the whole party.
Yield: 24 pinwheels (about 8 servings) · Prep: 20 min · Cook: none · Total: 20 min plus 30 min chilling · Difficulty: Easy
Ingredients
- 4 large flour tortillas (10 to 12 inches)
- 8 ounces cream cheese, softened
- 1 cup shredded baby spinach
- 1 cup shredded carrot
- 1/2 cup thinly sliced cucumber
- 1/2 red bell pepper, thinly sliced into matchsticks
- 1/2 teaspoon garlic powder
- 1/4 teaspoon salt
Instructions
- Warm the spinach and carrot briefly in a dry skillet, about 1 minute, to wilt and take the raw edge off.
- Spread 2 tablespoons of cream cheese evenly over each tortilla, leaving a 1-inch border.
- Sprinkle the garlic powder and salt over the cheese.
- Lay the spinach, carrot, cucumber, and bell pepper in a tight line along one edge.
- Fold that edge over the filling, then roll the whole tortilla tightly into a log.
- Wrap each roll in plastic wrap and refrigerate for 30 minutes.
- Slice each roll into 6 rounds with a sharp knife.
Tip: Squeeze the cucumber with your hands before it goes in. Extra water makes the cream cheese slide and the roll goes slack, which is the one thing that ruins a pinwheel.
Swap it: For a dairy-free version, spread hummus or mashed avocado instead of cream cheese. For gluten-free, use a rice or cauliflower tortilla, which roll a little more stiffly, so press firmly and give them the full 30 minutes to chill.
Storage: Refrigerate in a sealed container for up to 2 days, storing the rolls whole and slicing only what you plan to serve. Allergens: wheat, milk.
6. Lemon Herb Chicken Bites
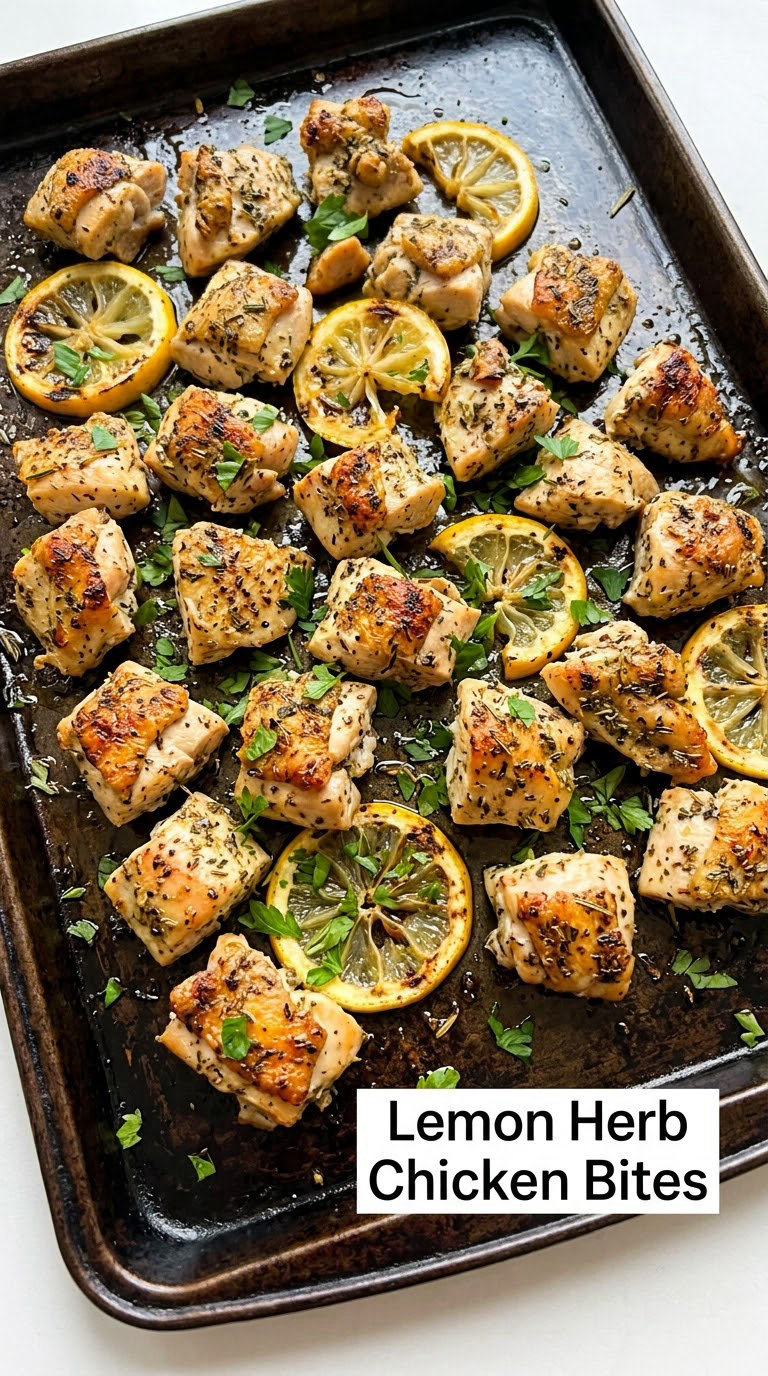
Sheet-pan chicken bites are the hot main that does not need a chafing dish if you put the pan out 15 minutes before eating. One pan, one temperature, no flipping, no stress while the doorbell is going.
Yield: about 30 bites, serves 8 · Prep: 15 min · Cook: 18 to 20 min · Total: 35 min · Difficulty: Easy
Ingredients
- 2 pounds boneless, skinless chicken breasts, cut into 1.5-inch pieces
- 2 tablespoons olive oil
- Zest and juice of 2 lemons
- 2 cloves garlic, minced
- 1 teaspoon dried oregano
- 1 teaspoon kosher salt
- 1/2 teaspoon black pepper
- 1/2 cup chopped fresh parsley
Instructions
- Heat the oven to 400°F (205°C) and line a rimmed sheet pan with parchment.
- Toss the chicken with olive oil, lemon zest, lemon juice, garlic, oregano, salt, and pepper.
- Spread the pieces in a single layer with a little space between them.
- Roast for 18 to 20 minutes, turning once at the halfway mark.
- Check with an instant-read thermometer. The thickest pieces must hit 165°F (74°C).
- Rest the pan 3 minutes, then scatter chopped parsley over the top.
- Slice any large pieces in half before serving.
Tip: If the pieces are crowding, use two pans. Chicken steams instead of browns when it touches, and the browned edges are most of the flavor here.
Swap it: Swap lemon for orange and oregano for thyme, or use a honey-mustard glaze in the last 5 minutes. Thigh meat works too; roast it 22 to 25 minutes and check the same 165°F (74°C).
Storage: Refrigerate for up to 3 days. Reheat in a single layer in a 350°F (175°C) oven for 10 minutes until steaming hot, or microwave in 60-second bursts. Allergen: none of the top eight, but check your broth and marinade labels for soy and gluten.
7. Turkey Pesto Pinwheels
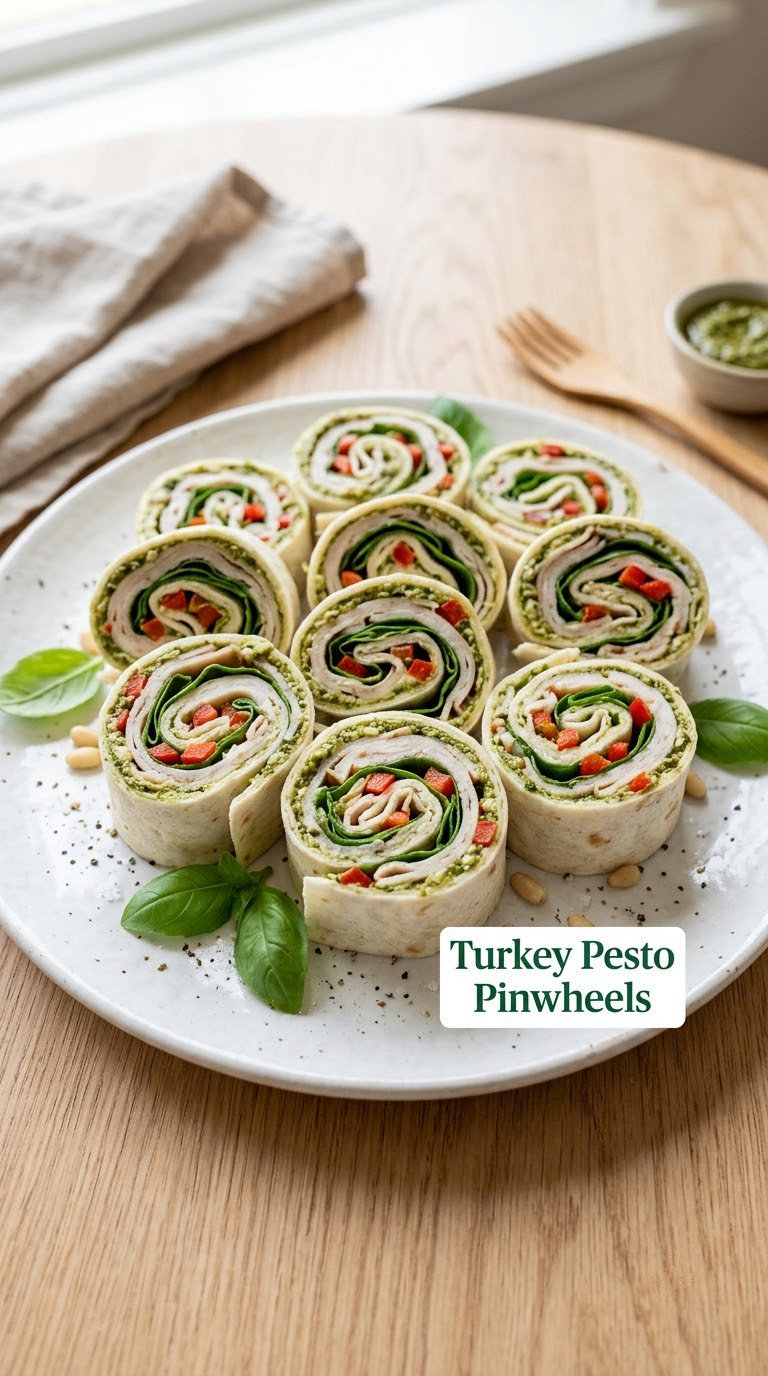
These are the grown-up version of the veggie pinwheels, with enough pesto to make them feel like an event rather than a leftover. They slice cleanly the night before and come straight out of the fridge for a lunch spread.
Yield: 20 pinwheels, serves 10 · Prep: 20 min · Cook: none · Total: 20 min plus 1 hour chilling · Difficulty: Easy
Ingredients
- 4 large flour tortillas
- 1/2 cup basil pesto
- 8 ounces cream cheese, softened
- 1 cup shredded rotisserie turkey
- 1/2 cup shredded baby spinach
- 1/2 red bell pepper, thinly sliced
- 1/4 cup grated Parmesan, for serving
Instructions
- Check the turkey is fully cooked, and if you started from a raw breast, cook it to 165°F (74°C) before shredding.
- Mix the pesto and cream cheese in a bowl until spreadable.
- Spread a thin layer over each tortilla, leaving a 1-inch border.
- Line turkey, spinach, and bell pepper along one edge.
- Fold the edge over the filling and roll tightly into a log.
- Wrap each log in plastic wrap and refrigerate for at least 1 hour.
- Slice into 5 rounds each and dust lightly with Parmesan.
Tip: Roll the log seam-side down in the fridge. It firms up against the flat surface, so the slices hold their spiral instead of collapsing on the platter.
Swap it: Use sun-dried tomato pesto for a sharper flavor, or roasted red pepper hummus in place of both spreads. Skip the Parmesan dust to keep it dairy-light. Turkey is a good swap point for any chopped cooked chicken, at the same 165°F (74°C).
Storage: Refrigerate for up to 3 days, kept whole and sliced to order. These freeze well for a month if you leave the Parmesan off; thaw in the fridge overnight. Allergens: wheat, milk, egg, and often pine nut in pesto, so check the jar label.
8. Mini Sausage Pizza Bites
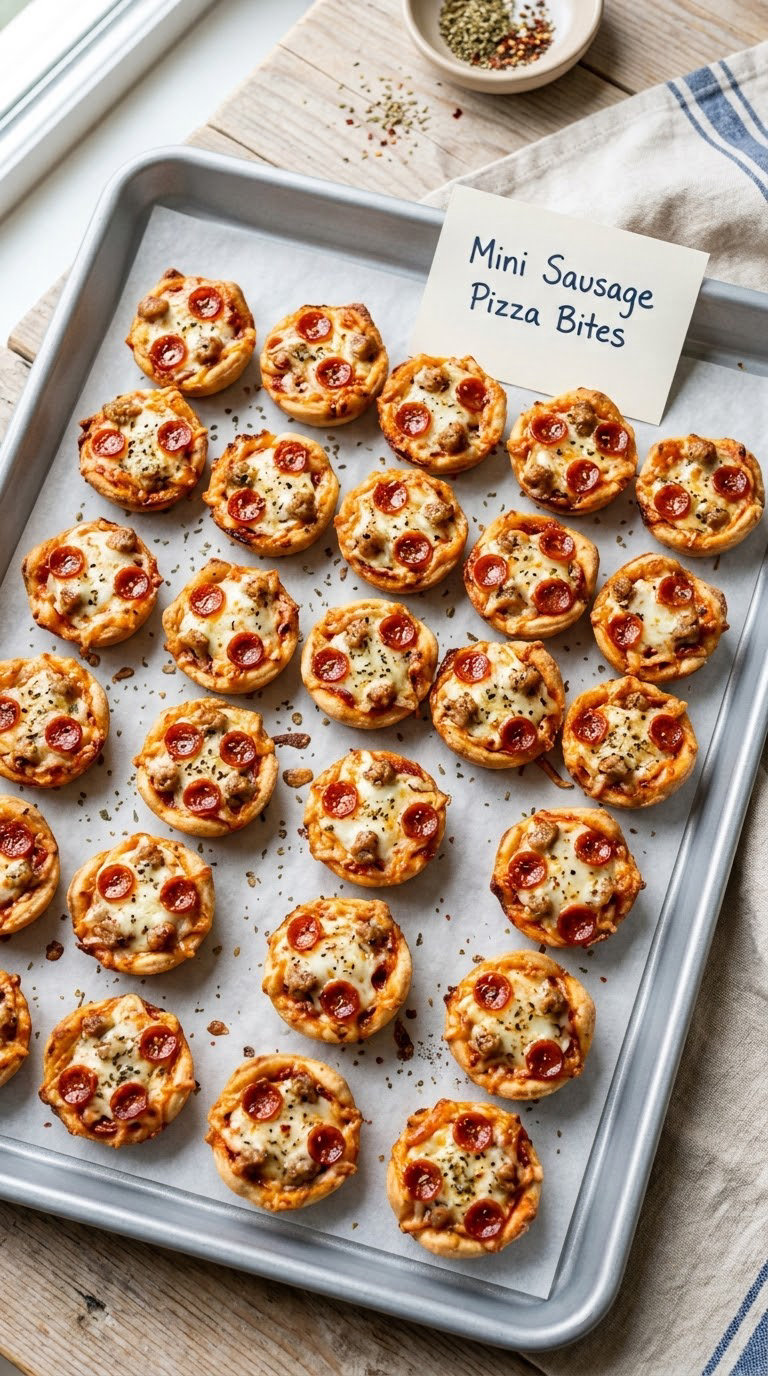
Mini pizza bites are the crowd-pleaser with the highest kid-to-adult ratio, and they are also the fastest item here when you start with refrigerated biscuit dough. Sheet pans go in the oven and come out in one pan, not a rotating half-batch schedule.
Yield: 20 bites, serves 6 · Prep: 15 min · Cook: 12 to 14 min · Total: 30 min · Difficulty: Easy
Ingredients
- 1 can (16 ounces) refrigerated biscuit dough, or 1 pound pizza dough
- 1 cup shredded mozzarella
- 8 ounces fully cooked Italian sausage, crumbled or diced
- 1/2 cup pizza sauce
- 2 tablespoons sliced black olives, optional
- 1 tablespoon dried oregano
- 1 tablespoon olive oil
Instructions
- Heat the oven to 425°F (220°C) and line two cookie sheets with parchment.
- If using sausage from a package, brown it in a skillet over medium-high heat until the color changes completely, about 5 minutes.
- If cooking fresh ground sausage, brown it and verify it reaches 160°F (71°C) before draining.
- Flatten the biscuit dough into a 12 by 9 inch rectangle.
- Spread the pizza sauce over the dough, leaving a 1-inch border.
- Scatter the mozzarella, sausage, olives, and oregano over the top.
- Cut into 20 squares and move them to the cookie sheets with a flat spatula.
- Drizzle with olive oil and bake 12 to 14 minutes until the crust is golden and the cheese is bubbling.
Tip: Let the dough sit at room temperature for 10 minutes before rolling. Straight from the can it fights you and springs back, which gives you thick, uneven bites.
Swap it: Skip the sausage and load up on mushrooms, peppers, and onion for a vegetarian version. Chicken and a small amount of pesto works too if you are feeding a mixed crowd. A thin layer of garlic butter instead of pizza sauce is a good shortcut.
Storage: Refrigerate leftovers for up to 3 days and re-crisp at 375°F (190°C) for 8 minutes. Freezer-friendly for 2 months on a tray, then bagged. Allergens: wheat, milk, egg, soy.
9. Cucumber Tea Sandwiches
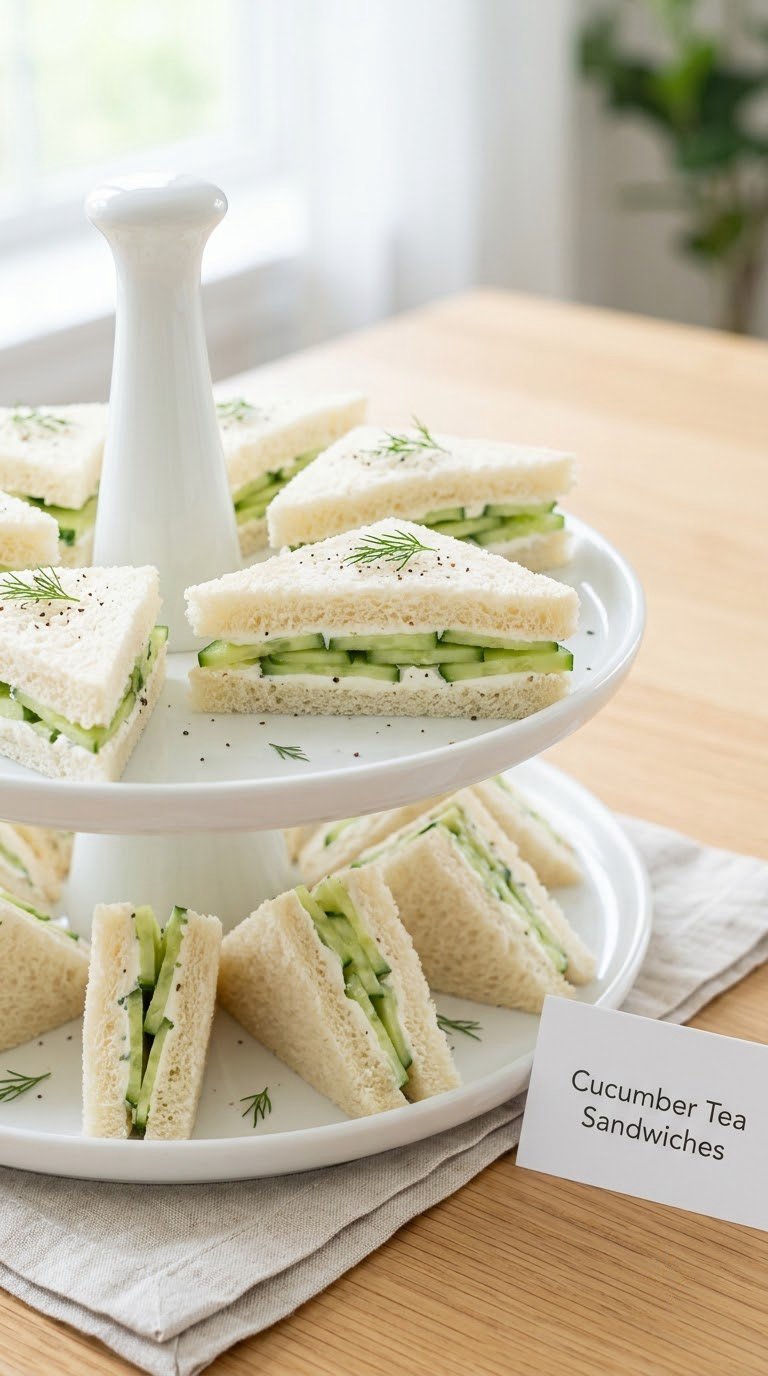
Tea sandwiches are the quiet centerpiece of a graduation afternoon table, where people are standing around a garden with a plate in one hand. They look bakery-made and take about twenty minutes.
Yield: 24 triangles, serves 8 · Prep: 20 min · Cook: none · Total: 20 min plus 1 hour chilling · Difficulty: Easy
Ingredients
- 8 slices soft white sandwich bread, crusts trimmed
- 8 ounces cream cheese, softened
- 1 medium cucumber, peeled and sliced paper thin
- 1/4 cup finely chopped fresh dill
- 1/2 teaspoon salt
- 1/4 teaspoon black pepper
- 1 tablespoon extra-virgin olive oil, for the tops
Instructions
- Salt the cucumber slices and leave them on a paper towel for 10 minutes.
- Blot the top and underside dry with a clean towel to remove the excess water.
- Stir the dill, salt, pepper, and 1 tablespoon of the cream cheese into the remaining soft cheese.
- Spread cream cheese on one side of each bread slice.
- Layer 3 cucumber slices on each, edge overlapping so the triangles are even.
- Press gently to squeeze out air, then top with a second slice, cream cheese side down.
- Brush the tops with olive oil, wrap in plastic wrap, and refrigerate 1 hour.
- Cut each sandwich into 3 triangles with a serrated knife.
Tip: Salt and blot the cucumber first. Skip that and the water seeps into the bread within an hour, and you get a soft, collapsed triangle that falls off the stand.
Swap it: Add smoked salmon or thin ham slices between the layers for a savory version. Smoked salmon, cream cheese, and a squeeze of lemon also makes a lighter, no-dill option. Use a gluten-free bread for a GF platter, and label it.
Storage: Refrigerate for up to 2 days, stacked in a sealed container with a layer of parchment or plastic between the layers to stop the bread sticking. Allergens: wheat, milk, egg.
10. Caprese Pasta Salad
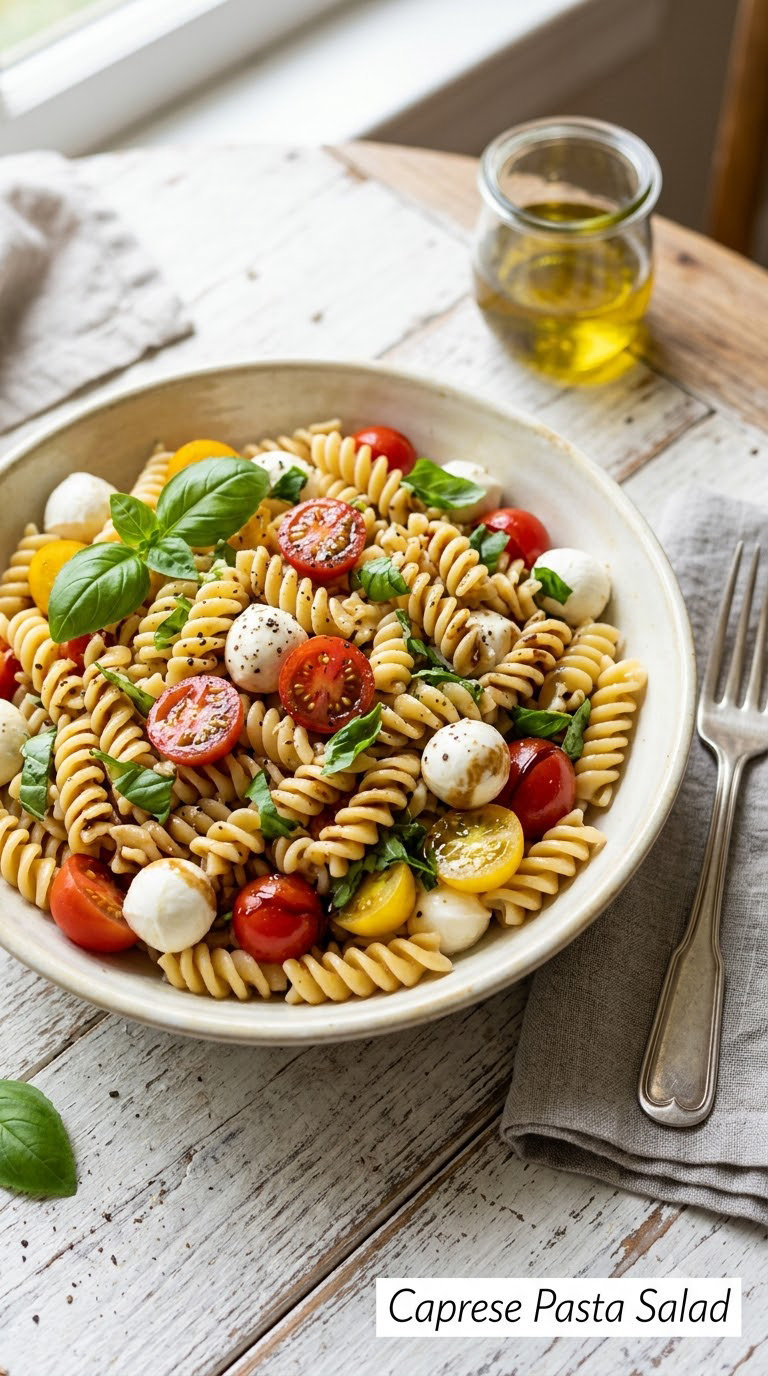
If you make exactly one thing from this list, make this. Caprese pasta salad feeds a crowd, travels to a picnic, sits out safely for hours, and gets better overnight, which is rare in party food.
Yield: 16 servings · Prep: 20 min · Cook: 12 min · Total: 35 min plus 1 hour chilling · Difficulty: Easy
Ingredients
- 1 pound rotini or farfalle pasta
- 2 pints cherry tomatoes, halved
- 8 ounces fresh mozzarella pearls, drained and halved
- 1 cup fresh basil leaves, roughly torn
- 1/2 cup extra-virgin olive oil
- 1/4 cup red wine vinegar or balsamic vinegar
- 2 cloves garlic, minced or grated
- 1 teaspoon salt
- 1/2 teaspoon black pepper
- 1/4 teaspoon red pepper flakes, optional
Instructions
- Bring a large pot of salted water to a boil and cook the pasta to the package time, about 12 minutes.
- Reserve 1/2 cup of the cooking water, then drain and rinse the pasta under cool water.
- Spread the pasta on a sheet pan for 10 minutes to cool and stop the cooking.
- Whisk the olive oil, vinegar, garlic, salt, pepper, and red pepper flakes in a jar.
- Add the tomatoes, mozzarella, and dressing to the cooled pasta.
- Fold gently with a rubber spatula until everything is coated.
- Fold in the basil and chill for at least 1 hour before serving.
Tip: Dosing the dressing in layers at the pot, and tossing again in the serving bowl, is what stops the bottom of a buffet pan from turning dry. The reserved pasta water is the trick for a dressing that clings instead of sliding off.
Swap it: Use cucumber, bell pepper, and black olives instead of tomato for a lighter version. For vegetarian protein, stir in 1 cup of white beans or a drained can of chickpeas. A handful of arugula added just before serving gives a peppery edge.
Storage: Refrigerate for up to 4 days in a sealed container. Add fresh basil and a drizzle of oil after reheating or serving so it does not go dull. Allergens: wheat, milk.
11. Mini Quiche Cups
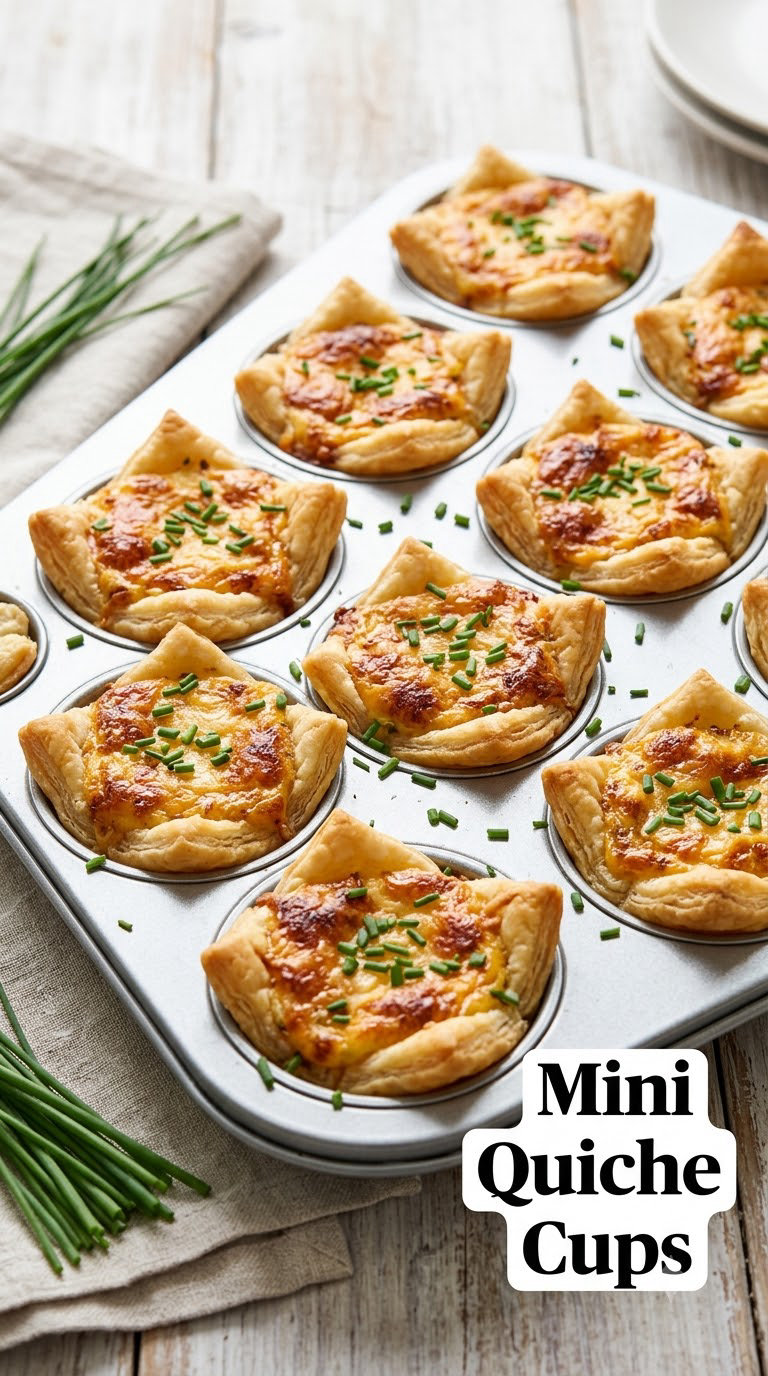
Mini quiche cups are the one item here that bakes ahead and reheats without turning rubbery, so they are a good choice if your party runs into the evening. Portioned in a muffin pan, they take no plating at all.
Yield: 12 cups, serves 6 · Prep: 15 min · Cook: 20 to 25 min · Total: 40 min · Difficulty: Medium
Ingredients
- 1 sheet refrigerated puff pastry, thawed
- 6 eggs
- 1/2 cup milk
- 1/2 cup heavy cream
- 1 cup shredded cheddar cheese
- 1/4 teaspoon salt
- 1/8 teaspoon black pepper
- 1/2 teaspoon dried thyme
- 2 tablespoons chopped chives, for garnish
Instructions
- Heat the oven to 375°F (190°C) and grease a 12-cup muffin pan.
- Unroll the pastry and press a square into each cup, letting the corners stand up like a little shell.
- Whisk the eggs, milk, cream, salt, pepper, and thyme in a bowl until completely smooth with no streaks.
- Divide 1/2 cup of the shredded cheese between the pastry cups.
- Fill each cup about three-quarters full with the egg mixture.
- Sprinkle the remaining cheese on top.
- Bake 20 to 25 minutes until the edges are set, the tops are puffed, and a knife inserted near the edge comes out clean.
- Rest 5 minutes in the pan, then run a knife around each cup to release and finish with chives.
Tip: The center should still have a very slight wobble when you pull it. Over-baking is what turns quiche into a dense little hockey puck, and it is easy to do because the center firms up as it cools.
Swap it: Skip the pastry entirely and grease the cups well for a crustless version, which bakes in about 15 minutes. Swap cheddar for Gruyere and a handful of cooked diced spinach. A teaspoon of Dijon in the custard adds a lot of depth.
Storage: Refrigerate for up to 3 days. Reheat at 350°F (175°C) for 10 minutes, or microwave 45 seconds at a time. The crustless version also freezes for 2 months. Allergens: eggs, milk, wheat.
12. Strawberry Shortcake Bites
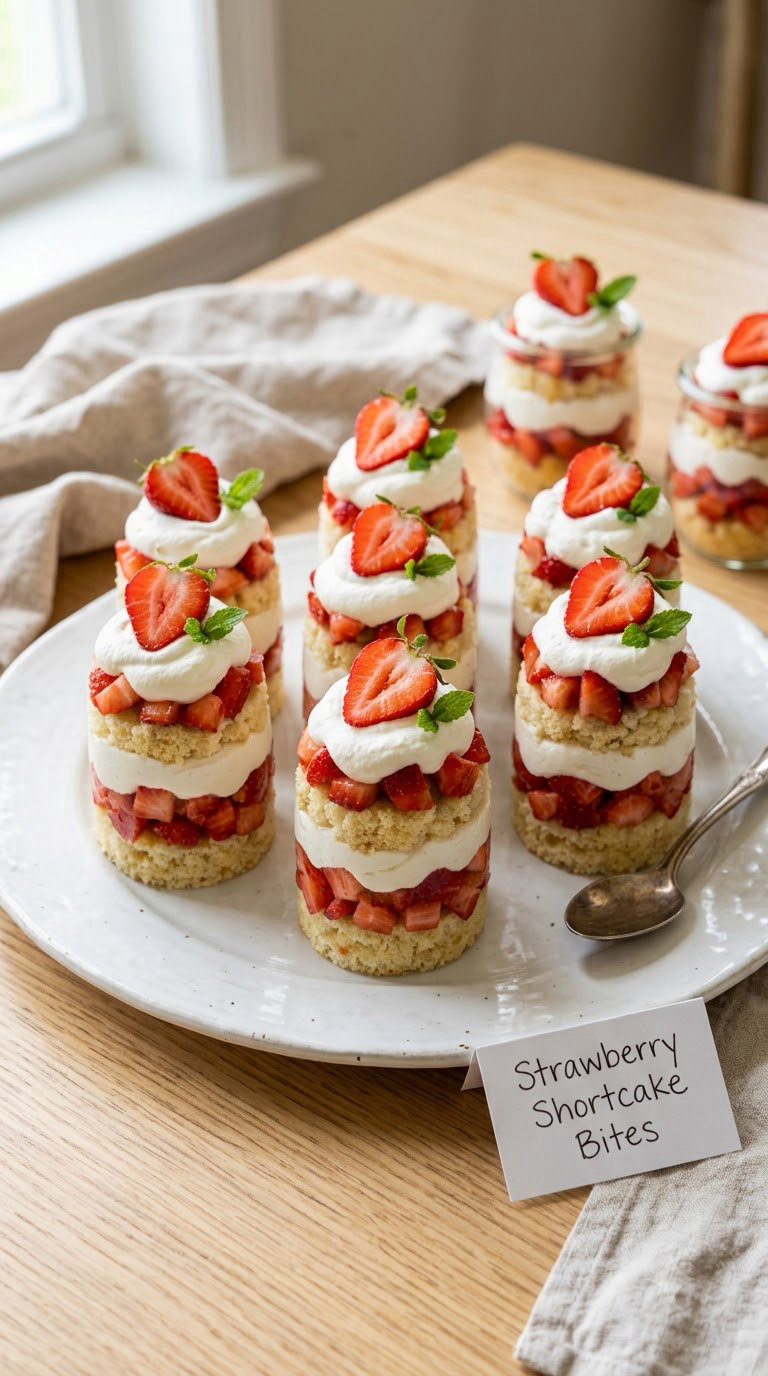
These are the no-bake dessert that looks like it took effort, built in a muffin liner with three layers of cake, cream, and fruit. They chill overnight and come out of the pan looking like a bakery case.
Yield: 12 bites · Prep: 20 min · Cook: none · Total: 20 min plus 2 hours chilling · Difficulty: Easy
Ingredients
- 1 package (about 9 ounces) prepared angel food or pound cake, cut into 12 pieces
- 1 pint fresh strawberries, hulled and diced
- 1 tablespoon granulated sugar
- 1 1/2 cups pasteurized whipped topping, thawed
- 1/2 cup whole milk, for a quick dip
- Fresh mint leaves, for garnish
Ingredients note: Use pasteurized whipped topping, or properly set whipped cream made from pasteurized heavy cream, since the cake never gets baked. Raw whipping cream will not hold its shape safely at room temperature.
Instructions
- Toss the diced strawberries with the sugar and let them sit 10 minutes until juicy.
- Line a 12-cup muffin pan with paper liners.
- Dip each cake piece briefly in the milk and place one in each liner.
- Spoon a layer of whipped topping over the cake in each cup.
- Add a spoonful of macerated strawberries.
- Repeat the topping and strawberry layers once more, finishing with strawberries on top.
- Cover and refrigerate for at least 2 hours before serving.
- Garnish each bite with a mint leaf just before the party.
Tip: Do the quick dip rather than soaking. A two-second dip softens the cake enough to eat without turning the liner into a swamp.
Swap it: Any firm cake works, including pound cake or a torn-apart butter cake. Swap strawberries for peaches or blueberries in season, or use a few spoonfuls of lemon curd between layers for a sharper dessert.
Storage: Best served the same day or the next, refrigerated at 35°F (2°C) or below. Keep covered and out of direct sun if they sit on a table for more than two hours. Allergens: wheat, milk, egg.
13. Graduation Cap Cupcakes
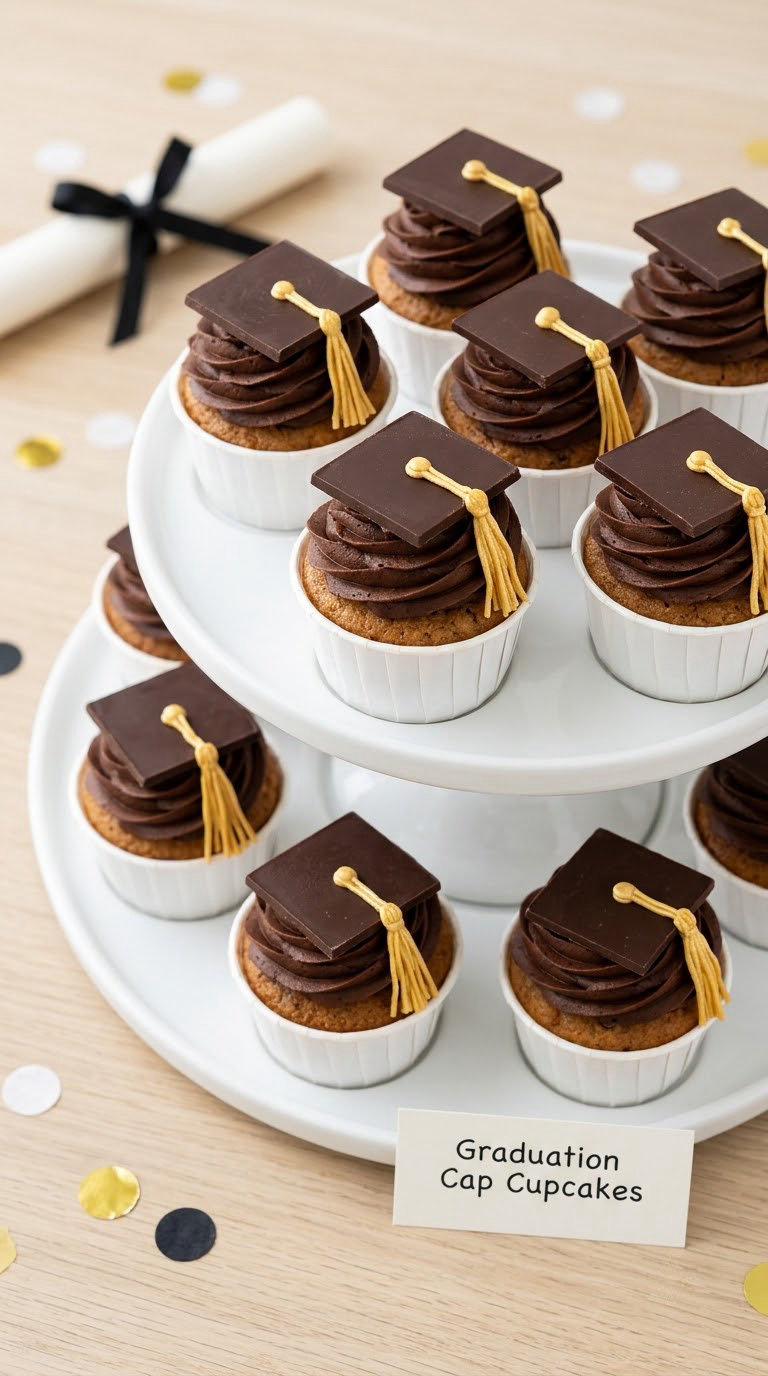
The graduation cap cupcakes are the one bake on this list worth committing time to, because they are the centerpiece people photograph. Make the square mortarboard frosting tops the night before and the whole job gets much calmer.
Yield: 12 cupcakes · Prep: 25 min · Cook: 18 to 20 min · Total: 1 hour 10 min plus cooling · Difficulty: Medium
Ingredients
For the cupcakes:
- 1 1/4 cups all-purpose flour (156 g)
- 1 teaspoon baking powder
- 1/2 teaspoon baking soda
- 1/2 teaspoon salt
- 1/2 cup unsalted butter, softened (113 g)
- 1 cup granulated sugar (200 g)
- 2 large eggs, at room temperature
- 1 teaspoon vanilla extract
- 2/3 cup whole milk (160 ml)
For the chocolate frosting and caps:
- 1/2 cup unsalted butter, softened (113 g)
- 2 cups powdered sugar (240 g)
- 2 tablespoons unsweetened cocoa powder
- 2 tablespoons whole milk
- 1 teaspoon vanilla extract
- 1/2 cup chocolate wafer cookies, roughly crumbled
- 1/2 cup gold sprinkles or gold fondant strands
Instructions
- Heat the oven to 350°F (175°C) and line a 12-cup muffin pan with liners.
- Whisk the flour, baking powder, baking soda, and salt together in a bowl.
- Beat the butter and sugar for 2 minutes until pale and fluffy.
- Add the eggs one at a time, then the vanilla, and mix until smooth.
- Add the dry ingredients in three additions, alternating with the milk, and mix just until smooth.
- Fill the liners two-thirds full and bake 18 to 20 minutes.
- Cool 5 minutes in the pan, then turn out and cool completely, about 1 hour.
- Beat the frosting butter until creamy, then add the powdered sugar, cocoa, milk, and vanilla and mix until thick and spreadable.
- Frost the cupcakes, then press a wafer crumb onto each frosting top and add a small pinch of gold sprinkles for the tassel.
Tip: A toothpick inserted into the center should come out with a few damp crumbs, not wet batter. Frost only fully cooled cupcakes or the frosting will slide straight off.
Swap it: Use a boxed vanilla cake mix and two eggs, or bake a white cake mix for a school-color look. For gluten-free, use a 1-to-1 flour blend and check that the baking powder is gluten-free too. The gold strands can be replaced with sprinkles or a pretzel stick laid across the top.
Storage: Keep in an airtight container at room temperature for 2 days, or refrigerate for 4 days. Frosted cupcakes freeze for 2 months, though the wafer caps are best added after thawing. Allergens: wheat, egg, milk.
14. Chocolate Diploma Scrolls
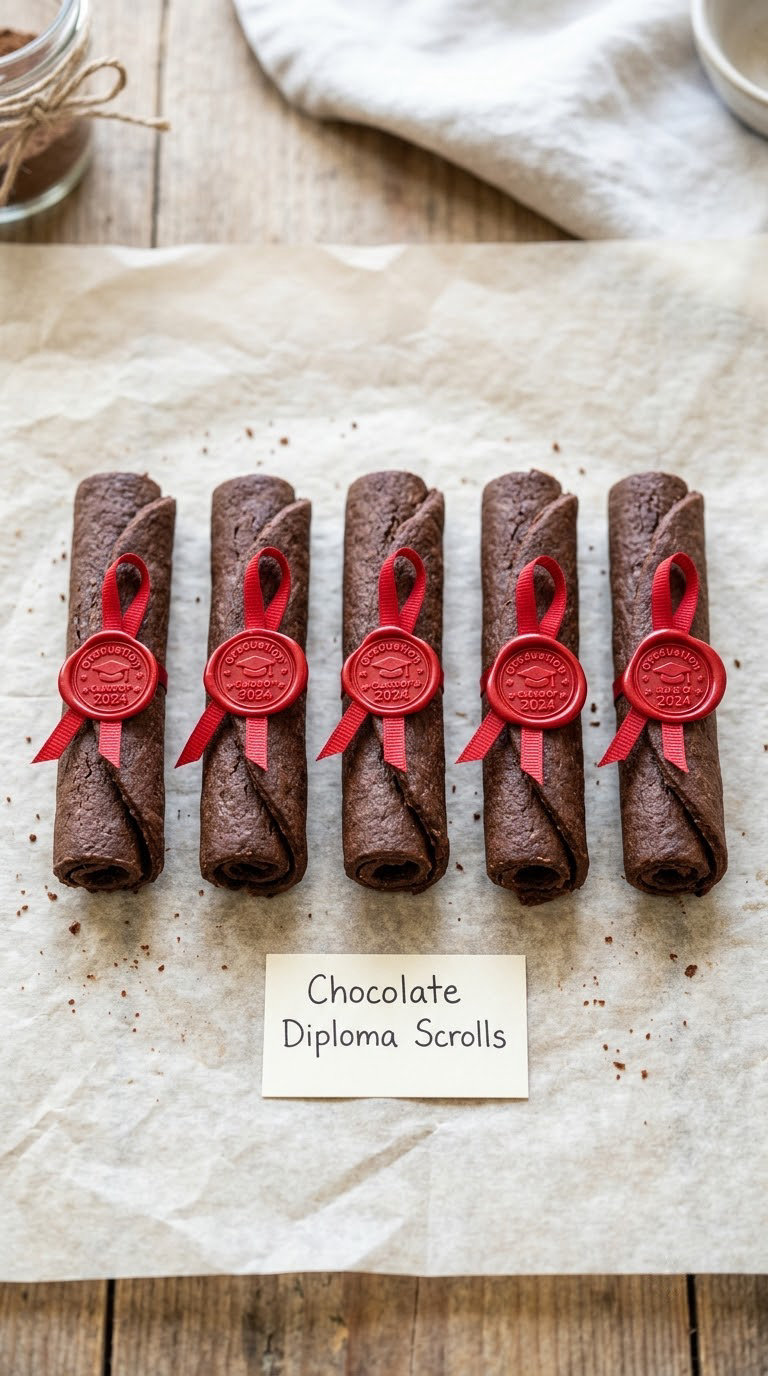
Diploma scrolls are the dessert-table filler that sells the theme, and they are the least technical recipe in the whole list. Roll the dough, chill it hard, slice thin, and bake. The ribbon does the rest.
Yield: about 20 scrolls · Prep: 20 min · Cook: 10 to 12 min · Total: 45 min plus chilling · Difficulty: Easy
Ingredients
- 1 package (16 ounces) refrigerated chocolate chip cookie dough, or 1 pound baked chocolate chip cookies
- 1/2 cup melted chocolate or white chocolate, for the ends
- Red or gold ribbon, cut into 6-inch lengths
- School-color sprinkles, optional
- Parchment paper, for setting
Instructions
- If using dough, roll it out on parchment to 1/4 inch thick and chill for 20 minutes until firm.
- Slice the chilled dough into 1/2-inch-thick rounds, 5 inches wide if you have a ruler, and 3 inches long.
- If using baked cookies, split each one into two thin flat halves to make two scrolls.
- Arrange the pieces on a lined cookie sheet and bake at 350°F (175°C) for 10 to 12 minutes, until the edges are set and the centers still look slightly underdone.
- Let the cookies cool 5 minutes on the sheet so they firm up enough to roll.
- Roll each cookie tightly into a scroll, starting from a long edge.
- Dip or brush one end with melted chocolate and set it on parchment to harden.
- Tie a ribbon around the middle of each scroll once the chocolate is set.
Tip: Take them out of the oven while the centers still look a touch soft. They set as they cool, and a fully baked cookie snaps instead of rolling.
Swap it: Use a sugar cookie dough for a different look, or roll store-bought gingerbread for a snappier cookie that sets hard. White chocolate on a chocolate cookie reads like a real diploma seal. To skip baking entirely, use a soft cookie and let each scroll rest overnight in the fridge first.
Storage: Airtight at room temperature for 5 days, in the fridge for 2 weeks. Skip the ribbon and freeze the unrolled cookies for 2 months instead. Allergens: wheat, egg, milk, soy.
15. Caprese Fruit Cups
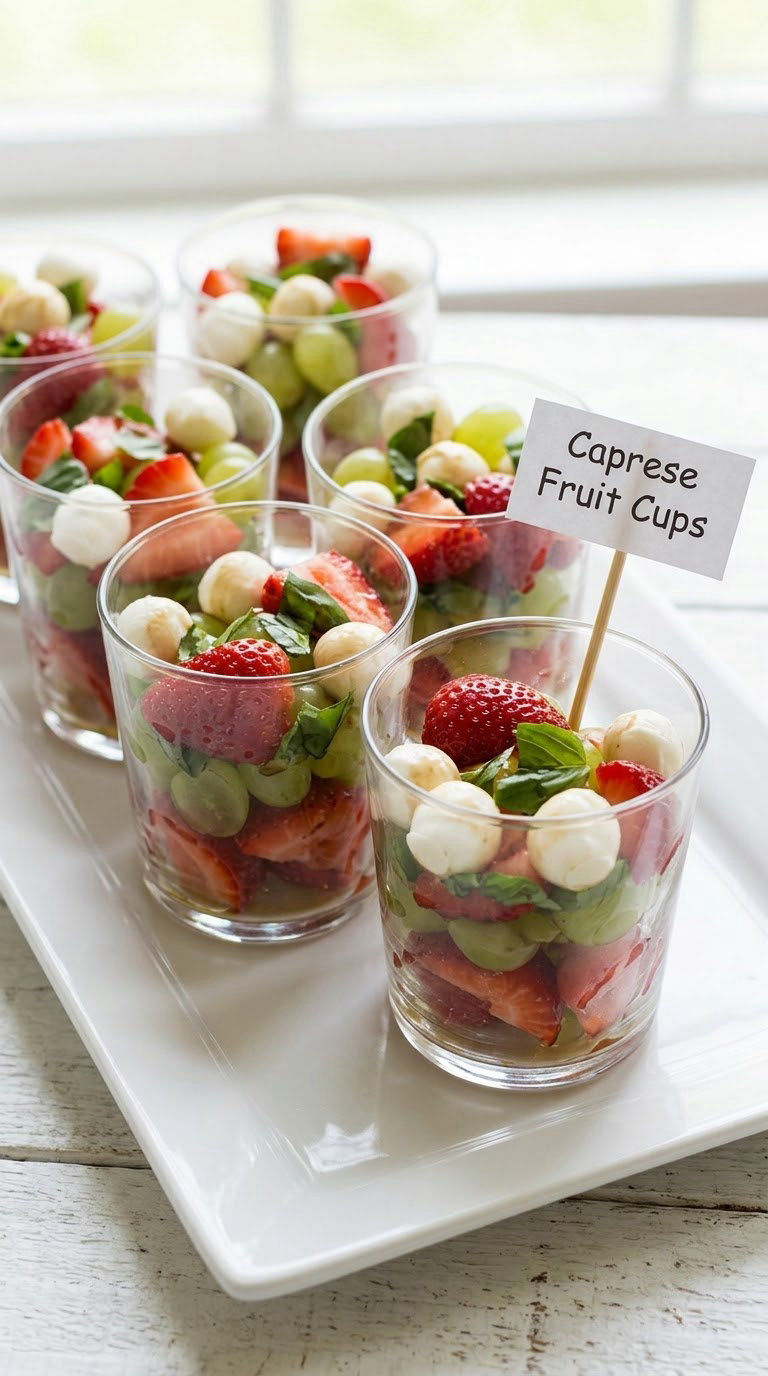
Caprese fruit cups are the easiest item on this list to put together, and the only one that is naturally gluten-free, which matters when a guest or two has restrictions nobody announced. Twenty minutes, one bowl, done.
Yield: 12 cups, serves 12 · Prep: 15 min · Cook: none · Total: 15 min plus 30 min chilling · Difficulty: Easy
Ingredients
- 1 pint strawberries, hulled and sliced
- 1 cup green grapes, halved
- 4 ounces small mozzarella pearls, drained and halved
- 1/2 cup fresh basil leaves, torn
- 3 tablespoons balsamic glaze
- 1 tablespoon honey
- 12 clear 4-ounce plastic cups or small tumblers
Instructions
- Stir the honey into 2 tablespoons of the balsamic glaze to make a dressing.
- Layer a third of the strawberries into each cup, then the grapes, then the mozzarella pearls.
- Repeat the layers until each cup is filled, finishing with a basil leaf.
- Drizzle each cup with the honey balsamic dressing just before serving.
- Chill for 30 minutes, or serve immediately at room temperature.
Tip: Layer the ingredients rather than tossing them. Separated colors read as a deliberate presentation on a buffet table, and the basil stays bright on top instead of wilting into the fruit.
Swap it: Add cubed watermelon or pineapple for a more tropical cup, or use marinated mozzarella in oil for a saltier version. For a vegan cup, swap the pearls for drained marinated artichoke hearts.
Storage: These are a same-day dish, best eaten within a few hours. Refrigerate for up to 1 day, and add the basil and dressing after it comes out of the fridge so nothing wilts. Allergen: milk.
Tips for Making These
- Plan three bites per guest per hour. For a three-hour open house, that works out to about nine small bites each. Hosts planning summer party appetizers for a crowd land on the same number, and it is the difference between feeding fifty people comfortably and running out by 7 p.m.
- Cook on a two-day timeline. Choose three recipes and make them the day before, so the party day is assembly only. The pasta salad, the pinwheels, and the pulled pork all hold better for it.
- Plan the table around hot and cold. Keep everything cold in shallow trays set over ice packs, and put only one hot item out at a time. A chafing dish holding a whole tray of chicken bites for two hours is where the drying happens.
- Thermometer, not guesswork. Poultry to 165°F (74°C), ground meat to 160°F (71°C), and whole cuts of beef and pork to 145°F (63°C) with a 3-minute rest. One instant-read thermometer removes all the doubt, and it is the cheapest tool you will buy for this kind of cooking.
- Label the allergens and the safe option. A small tent card on each tray naming milk, eggs, wheat, and soy takes two minutes and removes the most awkward moment of any party. Always keep one dish that is vegetarian and one that is dairy-free.
- Set out the food before you need it. Cold dishes can go out 30 minutes ahead. Anything hot goes out when the first guests arrive, and restock in small batches so nothing sits out for more than two hours at room temperature.
Frequently Asked Questions
How much food should I make for a graduation party?
Plan about three small bites per guest per hour for a three-hour open house, which works out to roughly nine bites each. For finger foods like sliders and skewers, that means four to five pieces per person, plus a dessert piece and two drinks. If your party is a sit-down brunch rather than a grazing open house, increase to a fuller portion such as one slider, one side serving, and two desserts per person.
Which of these graduation party food ideas can be made the day before?
Most of this list holds up well made a day ahead. The Caprese pasta salad, garden veggie pinwheels, turkey pesto pinwheels, cucumber tea sandwiches, and pulled pork sliders all improve after an overnight chill. The deviled eggs and mini quiche cups can also be prepped the day before and assembled or baked the morning of. Keep the Caprese fruit cups and strawberry shortcake bites for the same day only.
What are the easiest vegetarian graduation party foods on this list?
The no-cook options are the easiest of all: mini Caprese skewers, garden veggie pinwheels, Caprese pasta salad, and Caprese fruit cups need no heat at all, just chopping and layering. Mini sausage pizza bites and mini quiche cups work as vegetarian if you skip the meat and load up on vegetables instead. The garden pinwheels are the one to make double, because they disappear first at a mixed party.
How should I keep hot party food safe before guests arrive?
Keep hot food at 140°F (60°C) or above, which means a chafing dish with a fuel canister or a slow cooker on warm. Anything you cannot hold above 140°F (60°C) should go back into the fridge within two hours, or one hour if the party is outdoors above 90°F (32°C). Cook poultry to 165°F (74°C) and ground meat to 160°F (71°C) before it ever reaches the serving dish.
Can I prepare these recipes for a party at the office?
Yes, with a few swaps. Skip anything needing an oven or slow cooker on site, and lean on the cold items: pasta salad, pinwheels, tea sandwiches, Caprese skewers, fruit cups, and the shortcake bites. Office refrigerators are often crowded, so transport cold dishes in an insulated bag with ice packs and refrigerate them within two hours of leaving home. Check whether the break room has a microwave before relying on a hot item.
Which recipe is cheapest for feeding a large graduation party?
The Caprese pasta salad stretches the furthest, because one pound of pasta plus a few dollars of produce makes 16 servings, and every ingredient keeps for a week if you buy extras. The garden veggie pinwheels and the deviled eggs are close behind, since both lean on inexpensive staples. Save the pulled pork and the sheet-pan chicken bites for smaller groups, where the per-person protein cost is harder to dilute.
What to Make First for Your Graduation Party
Which of these 15 easy graduation party food ideas scale best for a crowd?
Start with the Caprese pasta salad, then add the easy chicken sliders. The salad does the heavy lifting: one batch covers sixteen, it sits out for hours without going off, and it feeds people who have already eaten at two other parties that weekend, which is most of them. Sliders give you a hot handheld that guests actually want, and they assemble in ten minutes once the chicken is shredded.
Both suit a beginner host and a mixed guest list. Neither needs a specialty ingredient, neither requires you to be standing at the stove when the doorbell rings, and between them they cover a vegetarian eater, a picky teenager, and an adult who wants something substantial. Add the Caprese fruit cups and a tray of deviled eggs for the parts of the afternoon when the savory table is picked clean.
If you take one thing from these 15 easy graduation party food ideas, take the make-ahead habit with it. Pick three dishes, cook them a day early, label the allergens, and you will spend your graduation party actually talking to guests instead of checking on the oven.