
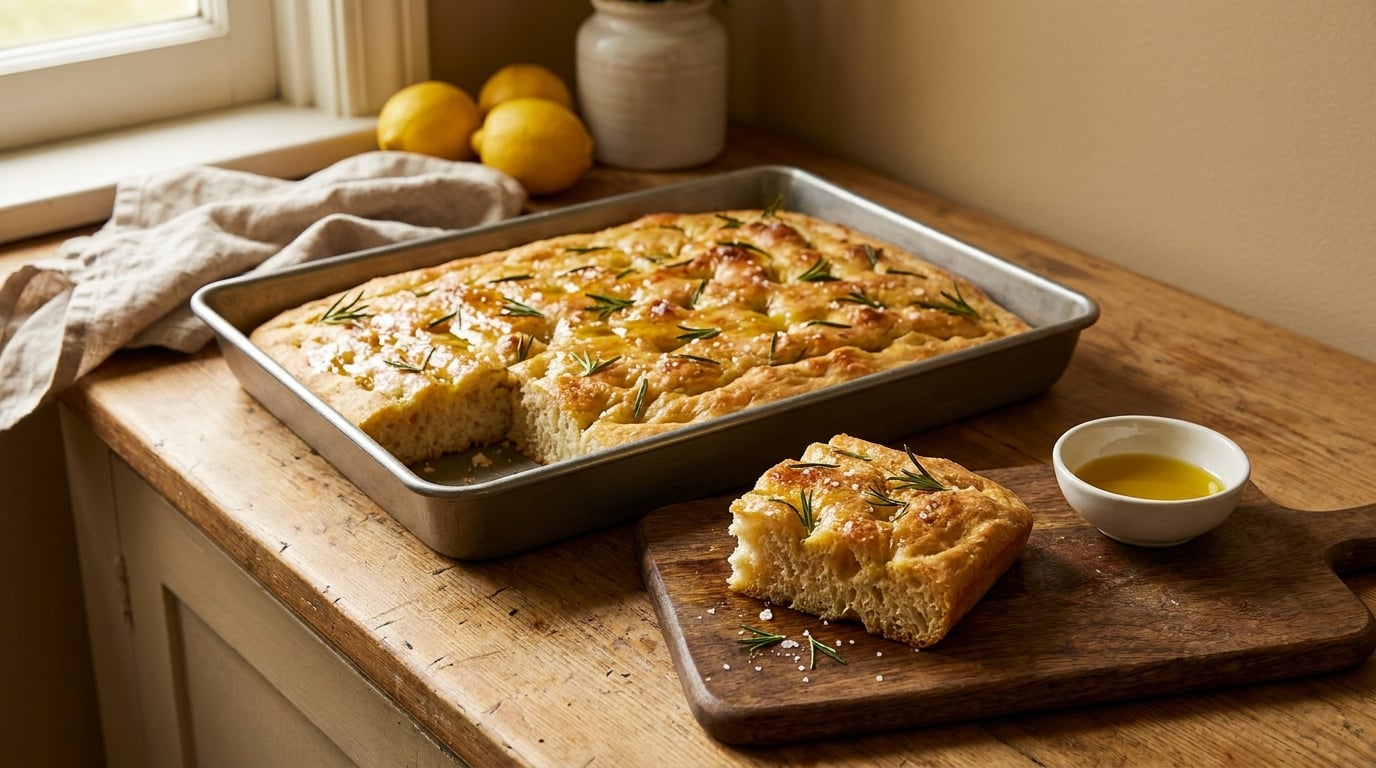
Easy focaccia bread recipes for beginners all start the same way, with wet dough, a heavy pour of olive oil, and almost no technique to get wrong. If you have never baked bread before, focaccia is the one to start with: there is no shaping, no kneading on a board, and no scoring. You mix, you wait, you poke the dough with your fingers, and you bake.
Every recipe below is written for a first-time baker with gram and cup measurements side by side, a separate hands-on time, and one tip that decides whether it works. I keep the same base dough in most of them so you only learn one dough, then change the toppings. If you want a companion bake while this one rises, my moist banana bread recipe uses the same warm-oven instincts.
Table of Contents
Easy Focaccia Bread Recipes for Beginners at a Glance
| Recipe | Total Time | Difficulty | Best For |
|---|---|---|---|
| 1. Classic Olive Oil and Rosemary | 4 hr 30 min | Easy | Your first ever focaccia |
| 2. No-Knead Garlic and Parmesan | 14 hr | Easy | A make-ahead weekend bake |
| 3. Tomato and Basil | 4 hr 30 min | Easy | Summer lunch with soup |
| 4. Potato and Chive | 5 hr | Easy | A potluck side dish |
| 5. Cinnamon Sugar | 4 hr | Easy | Breakfast and dessert |
| 6. Olive, Lemon and Thyme | 4 hr 30 min | Easy | Mediterranean dinner tables |
| 7. Mushroom and Thyme | 4 hr 45 min | Medium | A vegetarian centerpiece |
| 8. Pepperoni and Jalapeño | 4 hr 30 min | Easy | Game day and pizza nights |
| 9. Herbed Olive Oil | 3 hr 45 min | Easy | A daily sandwich loaf |
| 10. Apple Cinnamon Walnut | 4 hr 15 min | Easy | Fall brunch and dessert |
How to Choose Easy Focaccia Bread Recipes for Beginners
Start by asking how much time you actually have free, not how much time you wish you had. Recipes 1, 3, 5, 6, 8 and 9 are same-day bakes that finish inside five hours, most of it spent waiting. Recipe 2 is an overnight cold ferment, which takes about 14 hours end to end but only 20 minutes of your attention, so it suits a baker who is nervous about timing. Recipe 7 has one extra step, sautéing mushrooms first, so give it a little more patience.
Then check your equipment. Every recipe here bakes in a 9 by 13 inch metal pan, which is the easiest size to find. A 9 by 9 inch square pan works and gives a thicker, taller focaccia, and a 10 inch cast iron skillet gives you the crispest bottom of the lot. Skip a glass casserole dish if you can, because the bottom will bake pale.
Finally, pick by flavor. If you have never made focaccia, do not start with the spicy or the sweet one. Start with recipe 1 and learn what the plain dough should taste like, then move on. If you are feeding a crowd, choose based on whether the meal needs something savory with herbs, something sharp and briny, or something that works with coffee in the morning.
1. Classic Olive Oil and Rosemary Focaccia
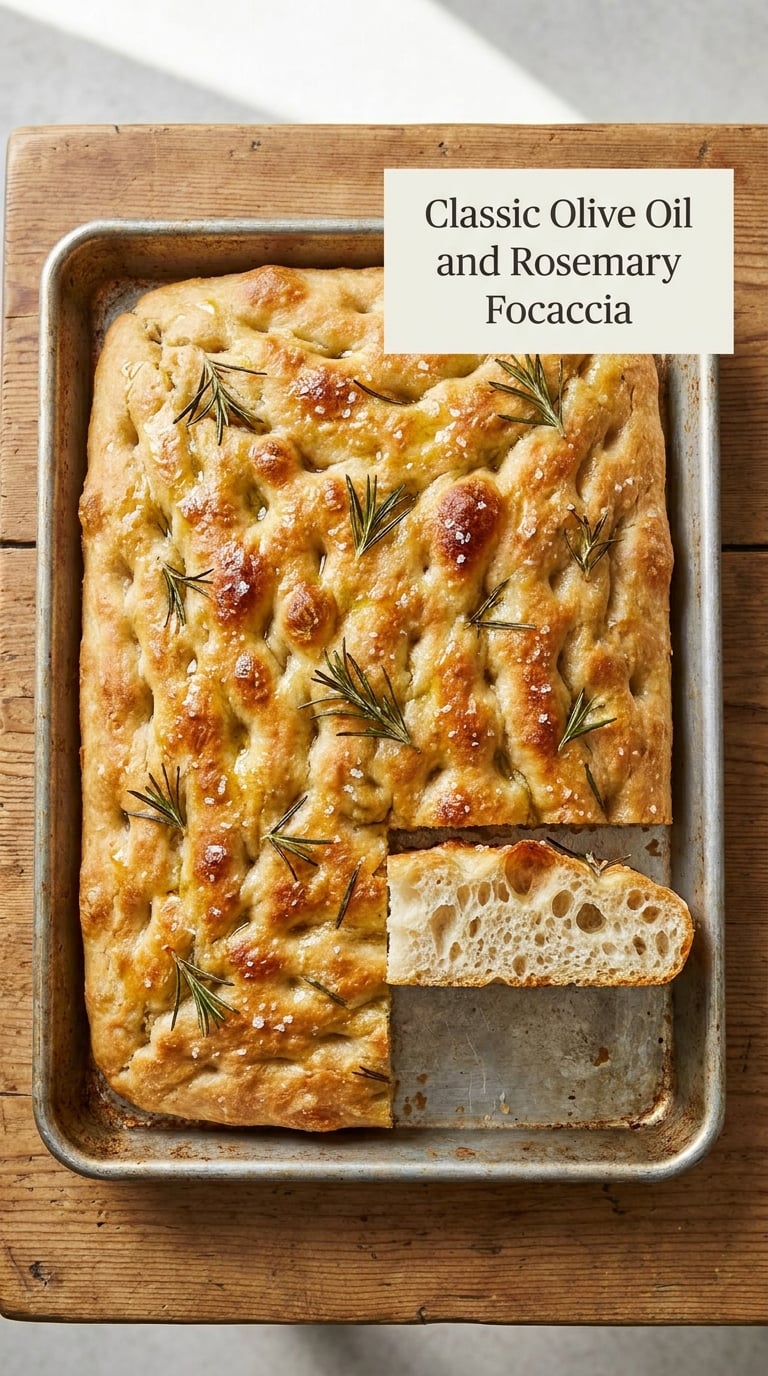
This is the version to make first, because the flavor is nothing but flour, water, oil, salt, and rosemary, so any mistake shows up plainly. You get a crisp golden bottom, an airy middle, and a top that holds a shallow pool of olive oil in every dimple.
Yield: 8 squares · Prep: 15 min · Proof: 3 hr · Bake: 22-26 min · Total: 4 hr 30 min · Difficulty: Easy
Ingredients
- 4 cups (500 g) bread flour or all-purpose flour
- 2 tsp (7 g) instant yeast
- 2 tsp (10 g) fine sea salt
- 2 cups (480 g) lukewarm water, 100-110°F (38-43°C)
- 1/3 cup (80 ml) extra virgin olive oil, divided
- 3 tbsp extra virgin olive oil for the pan and top
- 2 tbsp fresh rosemary leaves
- 1 tsp flaky sea salt, such as Maldon
Instructions
- Whisk the flour, yeast and salt together in a large bowl.
- Add the water and 2 tablespoons of the olive oil, then stir with a spoon until no dry flour is left. The dough will be loose and sticky, and that is correct.
- Cover the bowl with a damp towel and let it sit for 15 minutes while the oven heats to 450°F (230°C).
- Do a stretch and fold: wet a hand, grip one edge of the dough, stretch it up, and fold it over the center. Turn the bowl a quarter turn and repeat four times.
- Cover and let the dough rise at room temperature until it has grown by about half and looks jiggly, roughly 2 to 3 hours depending on your kitchen.
- Pour 3 tablespoons of olive oil into a 9 by 13 inch metal pan and spread it across the base and up the sides.
- Tip the dough into the pan and gently stretch it to the corners with oiled fingers. Let it sit 15 minutes to relax.
- Oil your fingertips and press them straight down about 1/2 inch into the dough, all the way to the base, spacing the holes about 2 inches apart.
- Drizzle the remaining 1 tablespoon of oil over the top, scatter the rosemary and flaky salt, and bake 22 to 26 minutes until the top is golden and the edges pull from the pan.
- Slide the focaccia out of the pan onto a rack, let it cool 15 minutes, then cut into squares with a serrated knife.
Tip: The 15 minute pre-rest in the pan is what stops the dough from springing back and leaving bare patches of pan. Skipping it is the most common reason a first focaccia looks like a mess of dimples with dough only halfway across.
Swap it: Use all-purpose flour and reduce the water to 420 g (1 3/4 cups) if a very sticky dough makes you nervous. The crumb will be slightly tighter but still good.
Storage: Keeps at room temperature in a sealed container for 3 days, and stays soft for up to a month in the freezer. Refresh a stale piece at 350°F (175°C) for 5 minutes.
2. No-Knead Garlic and Parmesan Focaccia
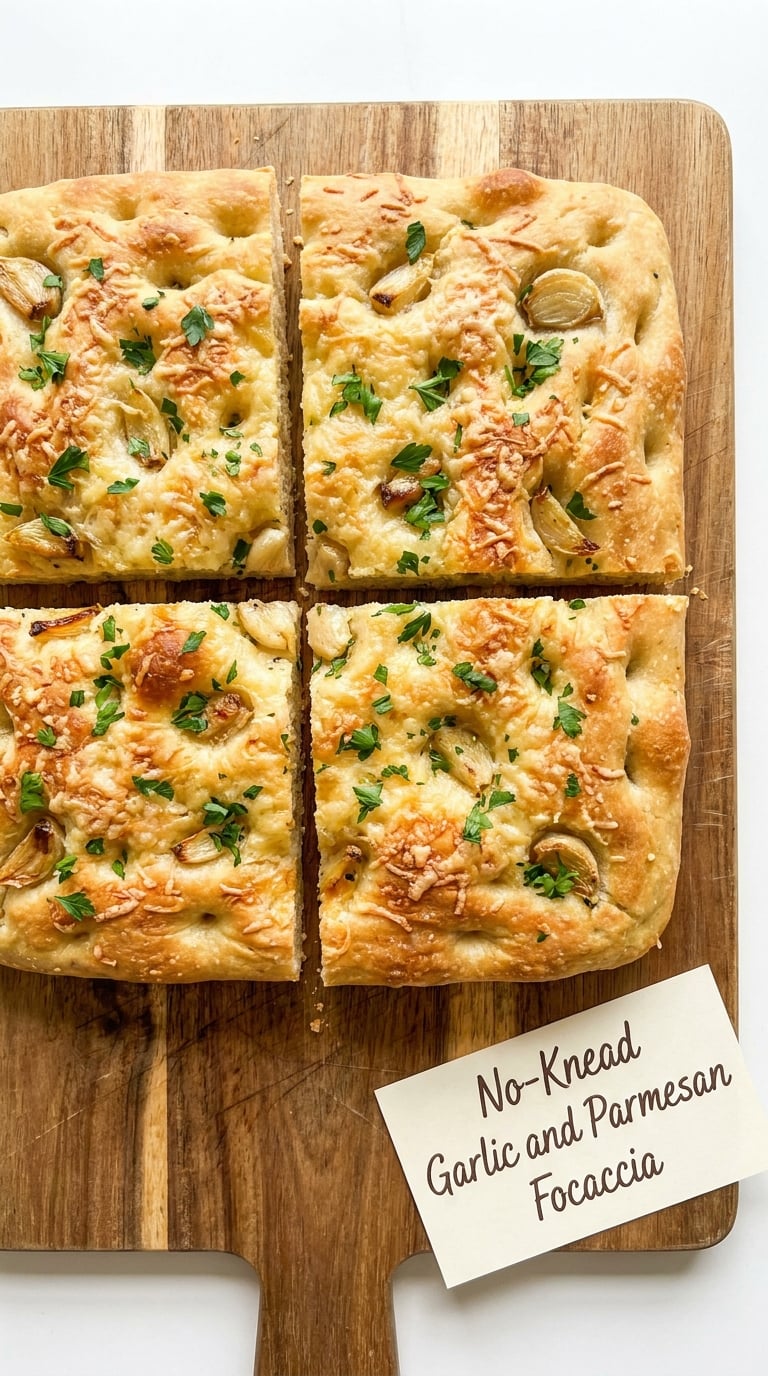
An overnight cold ferment does the work kneading normally would, and the garlic and Parmesan turn it into the most savory thing on this list. It is the recipe bakers tell me finally made bread click for them, because the timeline is almost impossible to get wrong.
Yield: 8 squares · Prep: 20 min · Cold ferment: 12-14 hr · Bake: 25 min · Total: 14 hr · Difficulty: Easy
Ingredients
- 4 cups (500 g) bread flour
- 1 1/2 tsp (5 g) instant yeast
- 2 tsp (10 g) fine sea salt
- 2 cups (480 g) lukewarm water
- 1/4 cup (60 ml) extra virgin olive oil, plus more for the pan
- 6 garlic cloves, thinly sliced
- 3/4 cup (80 g) finely grated Parmesan
- 2 tbsp chopped flat-leaf parsley
- 1 tsp flaky sea salt
Instructions
- Stir the flour, yeast and salt together, then add the water and olive oil and mix until shaggy and no dry spots remain.
- Cover and leave at cool room temperature, about 65-70°F (18-21°C), for 12 to 14 hours. Colder kitchens may need closer to 18 hours.
- Heat the oven to 450°F (230°C) and pour 3 tablespoons of olive oil into a 9 by 13 inch pan.
- Tip the cold dough into the pan and fold it over on itself a few times with oiled hands so it fills the corners without tearing.
- Let the dough sit 30 minutes, then dimple firmly all the way to the base with oiled fingertips.
- Scatter the garlic slices, Parmesan and parsley over the surface, tucking some into the dimples.
- Finish with a thin drizzle of olive oil and the flaky salt.
- Bake 25 minutes until the cheese is bubbling in spots and the crust is deep golden at the edges.
- Rest 20 minutes before cutting so the cheese sets and the crumb does not tear.
Tip: Cooler is better for this one. A kitchen at 75°F (24°C) or above will over-ferment the dough before you get to it, and an over-proofed focaccia bakes flat and dense with a collapsed, wet center.
Swap it: Swap the Parmesan for 3/4 cup (90 g) shredded low-moisture mozzarella plus 2 tablespoons of Parmesan if you want a milder, chewier top. Bake at the same time, and pull it when the cheese spots are golden, not brown.
Storage: Best the day it is baked. It keeps 3 days in a sealed container at room temperature, and freezes well for 2 months, though the Parmesan topping softens a little on reheating.
3. Simple Tomato and Basil Focaccia
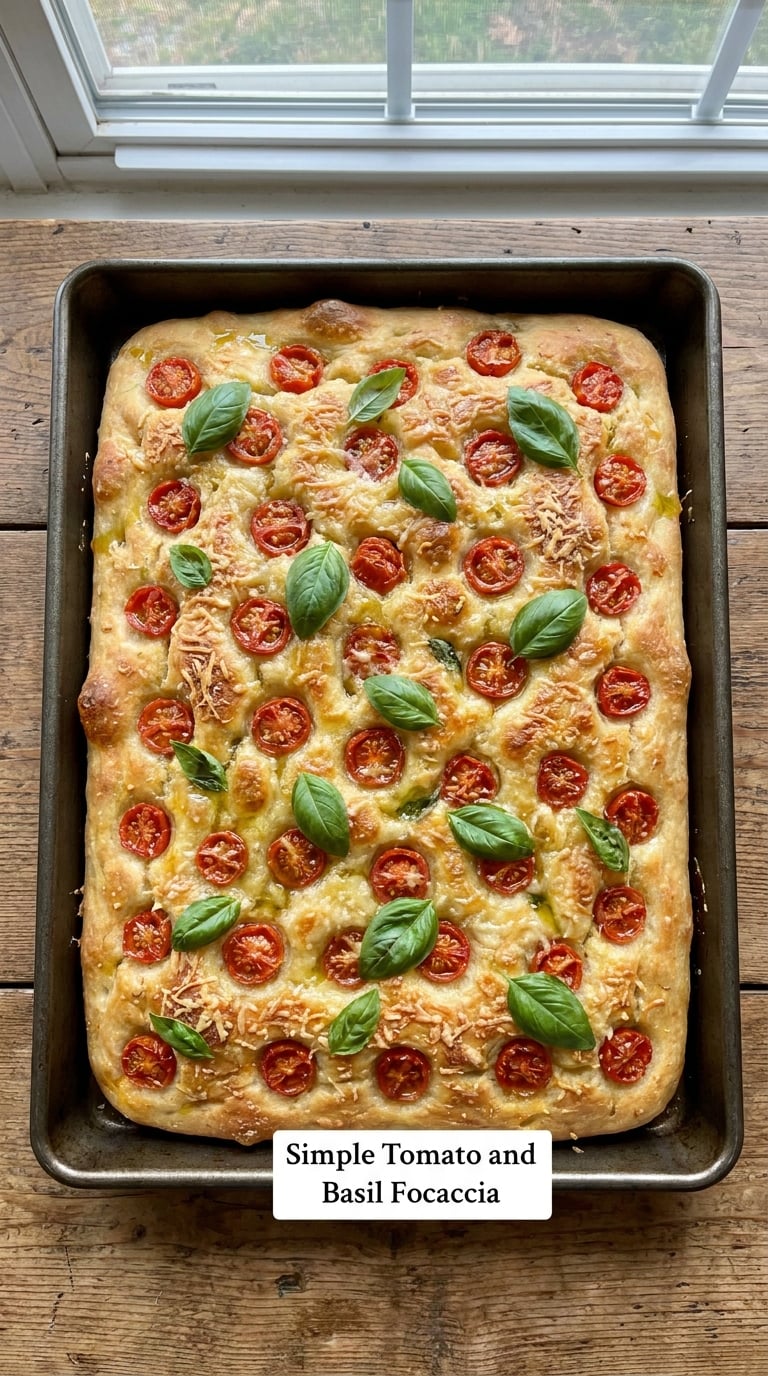
Halved cherry tomatoes collapse into jammy little pockets as they bake, and the basil goes in at the end so it stays green and smells like summer. It is the one I make for a bowl of soup and a big green salad on a Sunday afternoon.
Yield: 8 squares · Prep: 15 min · Proof: 3 hr · Bake: 22-26 min · Total: 4 hr 30 min · Difficulty: Easy
Ingredients
- 4 cups (500 g) bread flour
- 2 tsp (7 g) instant yeast
- 2 tsp (10 g) fine sea salt
- 2 cups (480 g) lukewarm water
- 1/3 cup (80 ml) extra virgin olive oil, divided
- 1 pint (300 g) cherry tomatoes, halved
- 1/2 tsp red wine vinegar
- 1/2 cup (60 g) shredded mozzarella or crumbled feta
- 1/2 cup loosely packed fresh basil leaves
- 1/4 tsp red pepper flakes, optional
Instructions
- Mix the flour, yeast and salt, then add the water and 2 tablespoons of olive oil and stir to a shaggy dough.
- Cover and rest 20 minutes, then do four sets of stretch and folds, turning the bowl a quarter turn between each.
- Cover and rise until the dough has grown by about half, 2 to 3 hours.
- Heat the oven to 450°F (230°C). Toss the halved tomatoes with the vinegar and 1 tablespoon of olive oil, then drain off any liquid that collects.
- Oil a 9 by 13 inch pan with 3 tablespoons of olive oil, tip in the dough, and stretch it to the corners with oiled fingers.
- Let the dough relax 15 minutes, then dimple all the way to the base.
- Press the tomato halves cut-side up into the dimples, scatter the cheese and pepper flakes, and drizzle with the last tablespoon of oil.
- Bake 22 to 26 minutes until the edges are crisp and the tomato skins have split.
- Scatter the basil over the focaccia the moment it leaves the oven, then rest 15 minutes and cut.
Tip: Drain the tomatoes before they go in. Extra liquid on top of the dough is the number one cause of a soggy middle, and a paper towel for 10 minutes solves it before baking.
Swap it: Use roasted cherry tomatoes and any sturdy winter squash or bell pepper instead. Roast the vegetables until they have picked up some color first, or the underside of the focaccia steams instead of crisping.
Storage: The tomatoes release moisture, so store leftovers on a rack rather than in a sealed container for the first few hours. It keeps 2 days in the fridge; reheat 5 minutes at 375°F (190°C) so the base re-crisps.
4. Cheesy Potato and Chive Focaccia
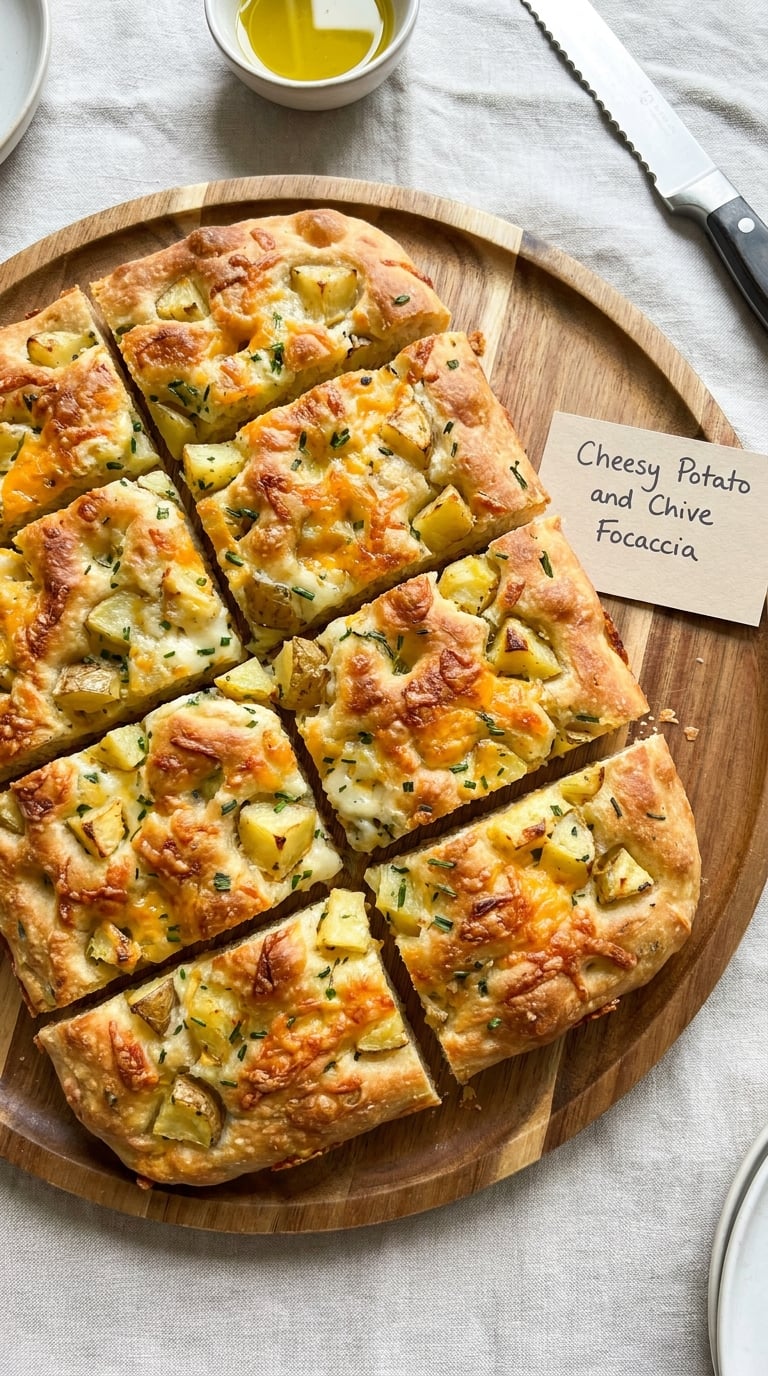
Soft cooked potatoes pressed into the dough bake into the bread like little dumplings, and chives stay bright green in the heat. It feeds a crowd easily, and it is the one to bring to a potluck when someone asks you to bring a side.
Yield: 10 squares · Prep: 25 min · Proof: 3 hr · Bake: 28-32 min · Total: 5 hr · Difficulty: Easy
Ingredients
- 4 cups (500 g) bread flour
- 2 tsp (7 g) instant yeast
- 2 tsp (10 g) fine sea salt
- 2 cups (480 g) lukewarm water
- 1/3 cup (80 ml) extra virgin olive oil, divided
- 1 pound (450 g) Yukon Gold potatoes, peeled and cut into 1/2 inch cubes
- 3 tbsp unsalted butter
- 1 cup (115 g) shredded sharp cheddar
- 1/2 cup (60 g) shredded mozzarella
- 1/4 cup chopped chives
- 1 tsp flaky sea salt and a few grinds of black pepper
Instructions
- Simmer the potato cubes in salted water for 8 to 10 minutes until just tender, then drain and let them steam dry for 5 minutes.
- Mix the dough ingredients with 2 tablespoons of olive oil and the water, cover, and rest 20 minutes.
- Do four stretch and folds, then cover and rise until the dough has grown by half, 2 to 3 hours.
- Heat the oven to 425°F (220°C) and oil a 9 by 13 inch pan with 3 tablespoons of olive oil.
- Tip in the dough, stretch to the corners, and rest 15 minutes.
- Dimple to the base, then press the buttered potatoes into the dimples, cut-side down, spacing them evenly.
- Scatter the cheddar, mozzarella, chives, flaky salt and pepper over the top.
- Bake 28 to 32 minutes until the cheese is fully melted and the crust is deep brown at the edges.
- Rest 20 minutes, then lift the pieces out with a spatula and cut on the board.
Tip: Let the boiled potatoes steam dry before they go into the dough. Water trapped on their surface makes small wet patches that never quite crisp.
Swap it: Swap the potato for 1 cup of cooked, sliced sausage or 1 cup of roasted squash. If you want it lighter, use only the mozzarella and add a handful of grated Parmesan at the end.
Storage: Keeps 3 days in a sealed container in the fridge, and the base softens, so reheat on a baking sheet at 400°F (205°C) for 8 minutes. Freezes for 1 month, though the potatoes lose a little fluffiness.
If you are building a bigger meal around this, my hamburger and potato recipes use the same oven and the same weeknight timing.
5. Sweet Cinnamon Sugar Focaccia
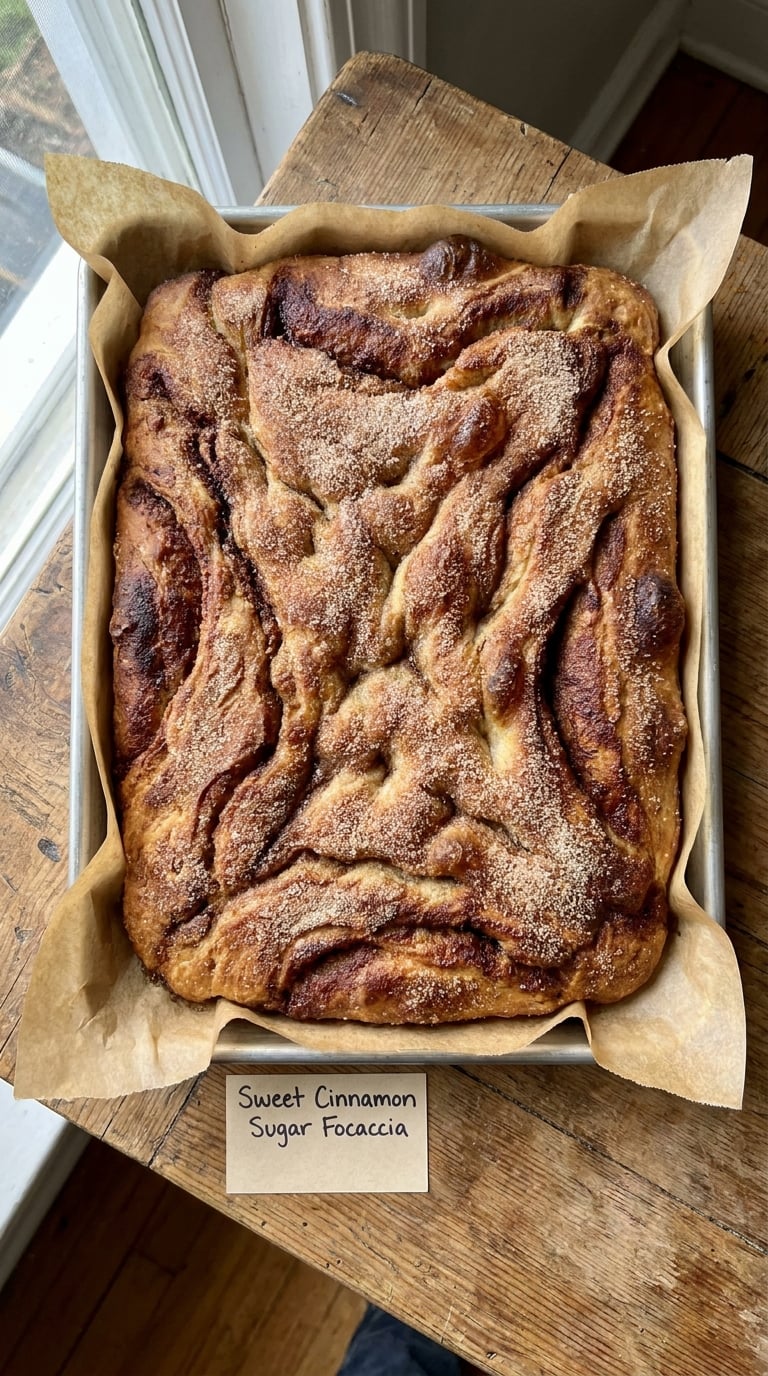
Focaccia does not have to be savory. This one bakes with a soft, almost pudding-like center, crisp caramelized edges, and a cinnamon sugar crust that smells like a bakery when it comes out. It works for breakfast with nothing on it.
Yield: 8 squares · Prep: 15 min · Proof: 2 hr 30 min · Bake: 22-25 min · Total: 4 hr · Difficulty: Easy
Ingredients
- 4 cups (500 g) bread flour
- 2 tsp (7 g) instant yeast
- 1 tsp (6 g) fine sea salt
- 2 cups (480 g) lukewarm water
- 1/3 cup (80 ml) extra virgin olive oil, divided
- 3/4 cup (150 g) granulated sugar, divided
- 2 tsp ground cinnamon
- 1 tsp vanilla extract
- 1/2 cup (115 g) unsalted butter, melted and cooled slightly
- 1 tbsp flaky sea salt
Instructions
- Whisk the flour, yeast and salt together in a large bowl.
- Add the water, 2 tablespoons of olive oil, the melted butter, 1/4 cup (50 g) of the sugar, the cinnamon and the vanilla. Stir until smooth.
- Cover and rest 20 minutes, then do four stretch and folds.
- Cover and rise until the dough has grown by about half, 1 1/2 to 2 1/2 hours.
- Heat the oven to 425°F (220°C). Mix the remaining 1/2 cup (100 g) sugar with the flaky salt.
- Oil a 9 by 13 inch pan with 3 tablespoons of olive oil, tip in the dough and stretch it to the corners.
- Rest 15 minutes, then dimple gently, about 1/3 inch deep, so you do not tear the soft dough.
- Scatter the cinnamon sugar evenly over the whole surface and press it in lightly so it does not blow off.
- Bake 22 to 25 minutes until the edges are deep golden and the center still feels soft when you press the edge of the pan.
- Cool in the pan for 15 minutes, then lift out and cut into sticks rather than squares, the way it is sold.
Tip: Press the cinnamon sugar in gently with your palm. Loose sugar left on top burns dark long before the middle of the focaccia has cooked through.
Swap it: Swap the cinnamon for 2 tablespoons of cocoa powder mixed with the sugar for a chocolate version, or add 1/2 cup of chopped dried cranberries to the topping for a festive bake.
Storage: Best within 2 days, when the center is still moist. It keeps 3 days covered, and freezes for 1 month. Reheat sticks in a 350°F (175°C) oven for 5 minutes so the edges crisp back up.
6. Olive, Lemon, and Thyme Focaccia
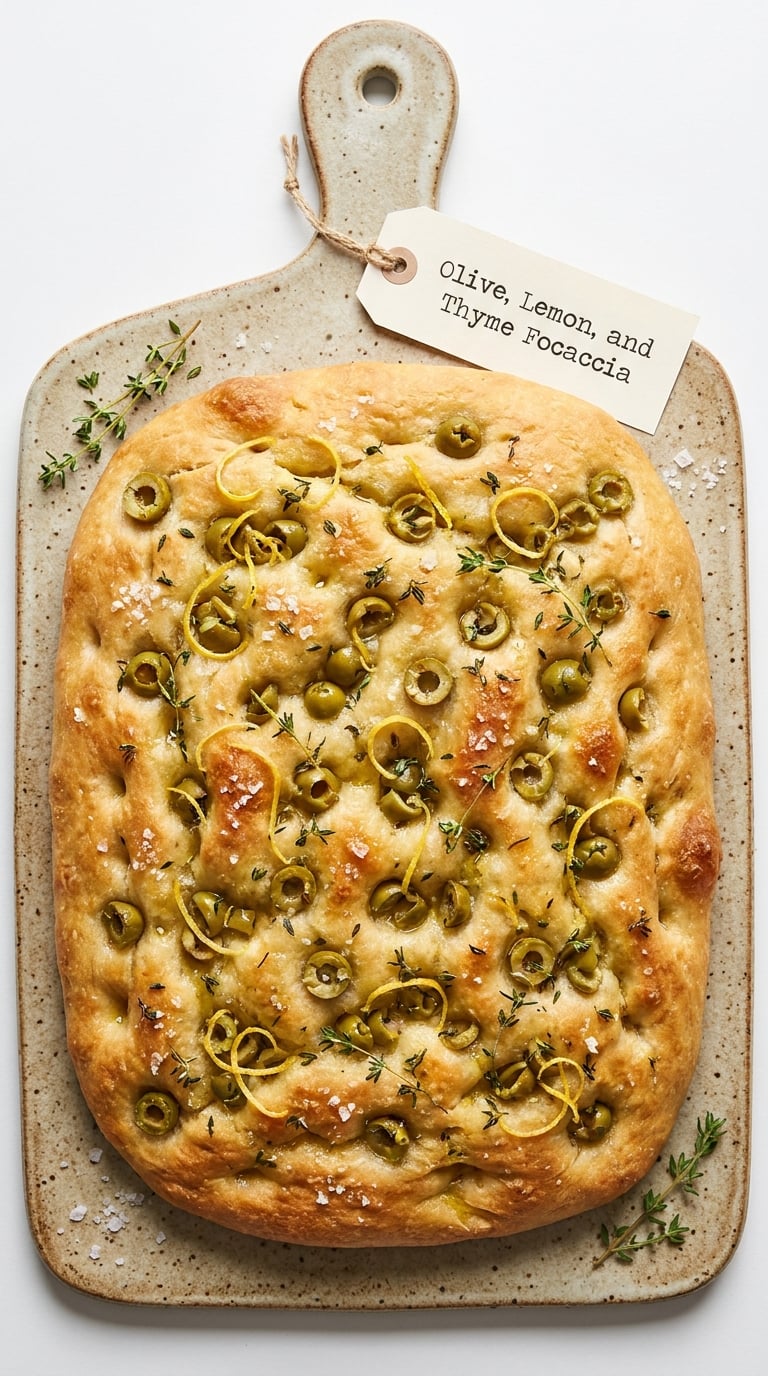
Briny olives, sharp lemon zest, and thyme on a bread that is already good with olive oil. It is the one I bring out when the table is Mediterranean, and it holds up for a whole dinner without falling apart.
Yield: 8 squares · Prep: 15 min · Proof: 3 hr · Bake: 24-28 min · Total: 4 hr 30 min · Difficulty: Easy
Ingredients
- 4 cups (500 g) bread flour
- 2 tsp (7 g) instant yeast
- 2 tsp (10 g) fine sea salt
- 2 cups (480 g) lukewarm water
- 1/3 cup (80 ml) extra virgin olive oil, divided
- 3/4 cup (110 g) Castelvetrano or kalamata olives, chopped
- Zest of 1 lemon
- 1/4 cup loosely packed fresh thyme leaves, plus 6 sprigs
- 1 tsp flaky sea salt
Instructions
- Stir the flour, yeast and salt together, then add the water and 2 tablespoons of olive oil and mix to a shaggy dough.
- Cover and rest 20 minutes, then do four stretch and folds.
- Cover and rise until the dough has grown by half, 2 to 3 hours.
- Heat the oven to 450°F (230°C) and oil a 9 by 13 inch pan with 3 tablespoons of olive oil.
- Tip in the dough, stretch to the corners, and rest 15 minutes.
- Dimple firmly to the base, then scatter the chopped olives, lemon zest and thyme leaves across the surface and into the dimples.
- Lay the thyme sprigs on top, drizzle with the last tablespoon of oil, and scatter the flaky salt.
- Bake 24 to 28 minutes until the crust is golden brown at the edges and the olives have crisped.
- Rest 15 minutes, then cut with a serrated knife and finish with a little more olive oil.
Tip: Pat the olives dry after chopping. Salty olives carry brine, and that liquid sits on the dough and stops the top from browning properly.
Swap it: Swap in 1/2 cup of chopped sun-dried tomatoes for half the olives for a sweeter, less salty version, and add a teaspoon of honey to the dough with it.
Storage: Keeps 3 days at room temperature covered, and freezes for 1 month. The olives dry out slightly in the freezer, so refresh at 350°F (175°C) for 6 minutes.
For more plates that lean on olives, herbs, and lemon, the beginner Mediterranean recipes follow the same logic with much less baking.
7. Mushroom and Thyme Focaccia
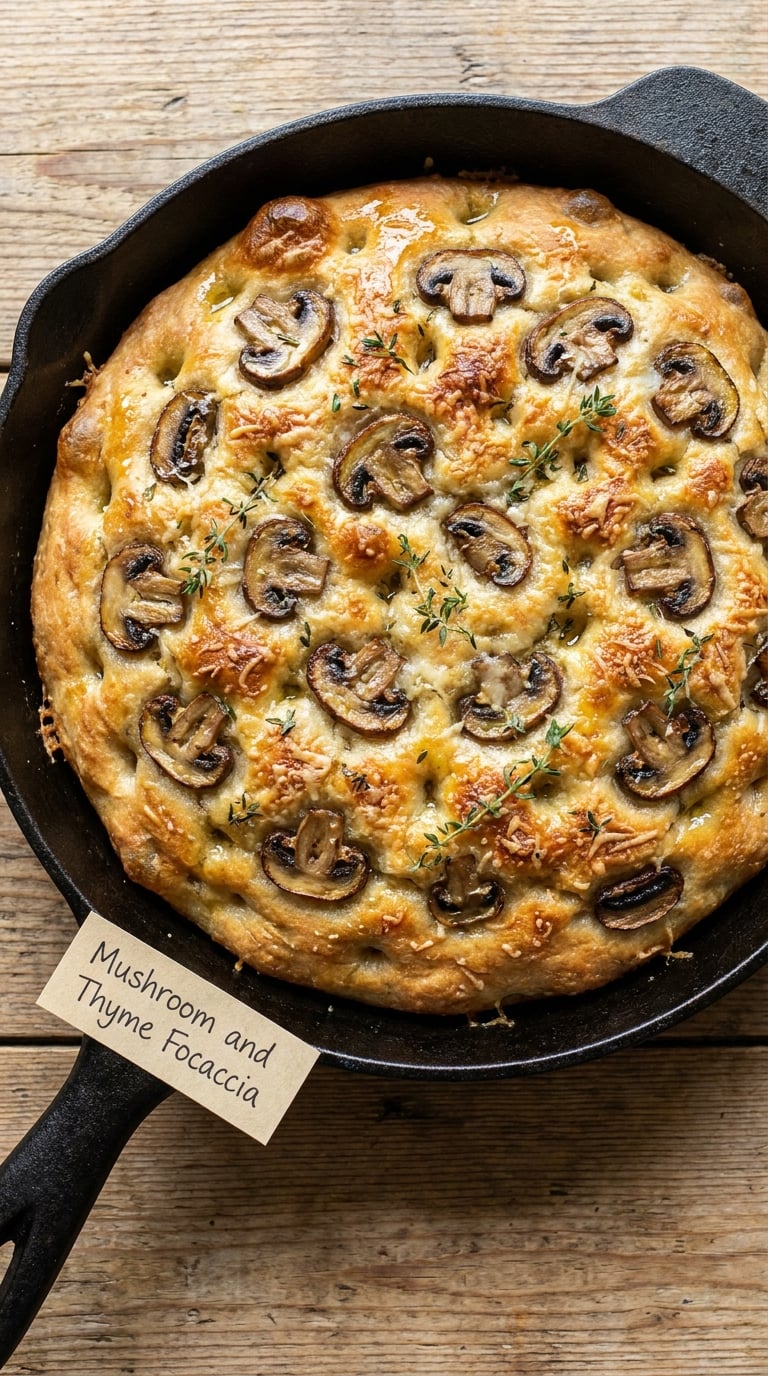
Mushrooms release water as they bake, which is the only reason this recipe needs an extra step. Searing them in a hot pan first is what keeps the focaccia from turning damp underneath, and once you do that the rest is the same dough as recipe 1.
Yield: 8 squares · Prep: 25 min · Proof: 3 hr · Bake: 25-28 min · Total: 4 hr 45 min · Difficulty: Medium
Ingredients
- 4 cups (500 g) bread flour
- 2 tsp (7 g) instant yeast
- 2 tsp (10 g) fine sea salt
- 2 cups (480 g) lukewarm water
- 1/3 cup (80 ml) extra virgin olive oil, divided
- 1 pound (450 g) cremini or shiitake mushrooms, sliced 1/4 inch thick
- 2 tbsp unsalted butter
- 1 tsp fresh thyme leaves, plus 6 sprigs
- 3/4 cup (85 g) finely grated Parmesan
- 1 garlic clove, thinly sliced
- 1 tsp flaky sea salt
Instructions
- Heat a large skillet over high heat with 1 tablespoon of the olive oil and the butter. Do not crowd the pan, and work in two batches if you need to.
- Sear the mushrooms in a single layer, undisturbed, for 2 to 3 minutes until deeply brown, then toss and cook 2 minutes more.
- Season the mushrooms with 1/2 teaspoon of the fine sea salt and the chopped thyme, then tip them onto a plate to stop the cooking.
- Mix the dough with the water, yeast, remaining fine salt and 2 tablespoons of olive oil.
- Rest the dough 20 minutes, do four stretch and folds, then let it rise until grown by half, 2 to 3 hours.
- Heat the oven to 450°F (230°C) and oil a 9 by 13 inch pan with 3 tablespoons of olive oil.
- Tip in the dough, stretch to the corners, and rest 15 minutes.
- Dimple to the base, then layer in the mushrooms cut-side up, the sliced garlic and the grated Parmesan.
- Drizzle with the last tablespoon of olive oil, lay the thyme sprigs on top and add the flaky salt.
- Bake 25 to 28 minutes until the edges are crisp brown and the Parmesan spots are toasted.
- Rest 15 minutes before cutting so the mushrooms and cheese set.
Tip: Sear the mushrooms in two batches if your pan is smaller than 12 inches. Steamed mushrooms in a crowded pan release water, and that water is exactly what you are trying to avoid.
Swap it: Swap cremini for shiitake and add 2 tablespoons of soy sauce to the pan for a deeper savoriness. Vegetarian, and the main allergens are wheat and dairy.
Storage: Keeps 3 days in the fridge in a single layer. Reheat on a rack at 400°F (205°C) for 7 minutes rather than in a microwave, which steams the crust soft.
8. Spicy Pepperoni and Jalapeño Focaccia
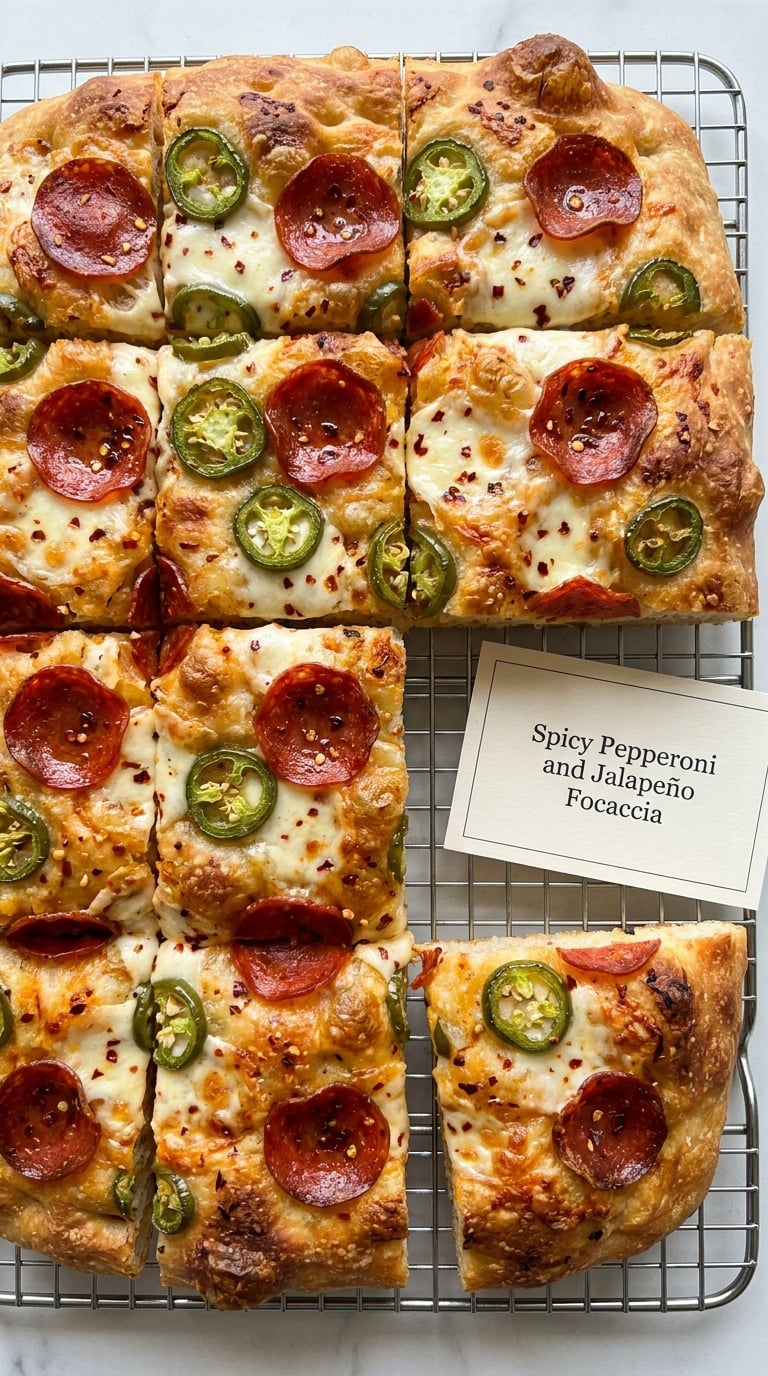
This is the one that gets eaten standing over the counter, straight from the pan, before anyone sits down. The pepperoni curls at the edges as it bakes and the jalapeño softens just enough to lose its raw bite, and the whole thing tastes like a pizza that learned to be bread.
Yield: 8 squares · Prep: 15 min · Proof: 3 hr · Bake: 22-26 min · Total: 4 hr 30 min · Difficulty: Easy
Ingredients
- 4 cups (500 g) bread flour
- 2 tsp (7 g) instant yeast
- 2 tsp (10 g) fine sea salt
- 2 cups (480 g) lukewarm water
- 1/3 cup (80 ml) extra virgin olive oil, divided
- 1 cup (115 g) shredded low-moisture mozzarella
- 5 ounces (140 g) pepperoni slices
- 2 fresh jalapeños, thinly sliced into rings
- 1/4 cup loosely packed fresh oregano leaves
- 1/2 tsp red pepper flakes
- 1 tsp flaky sea salt
Instructions
- Mix the dough ingredients with the water and 2 tablespoons of olive oil, cover, and rest 20 minutes.
- Do four stretch and folds, then cover and rise until grown by about half, 2 to 3 hours.
- Heat the oven to 450°F (230°C) and oil a 9 by 13 inch pan with 3 tablespoons of olive oil.
- Tip in the dough, stretch to the corners, and rest 15 minutes.
- Dimple firmly to the base, then scatter the mozzarella over the whole surface, pressing some into the dimples.
- Arrange the pepperoni and jalapeño rings over the cheese, spacing them so every square gets some.
- Scatter the oregano, red pepper flakes and flaky salt, then drizzle with the last tablespoon of olive oil.
- Bake 22 to 26 minutes until the crust is golden and the cheese is melted with a few browned spots.
- Rest 10 minutes, then cut into squares and pull the pieces apart while still slightly warm.
Tip: Use low-moisture mozzarella, not fresh. Fresh mozzarella releases a surprising amount of water during the bake, and you will get a soft, heavy center instead of a light one.
Swap it: Swap the pepperoni for 1 cup shredded Italian chicken sausage or turkey pepperoni if you want less heat, and use pickled jalapeños instead of fresh for a tarter, softer topping.
Storage: Keeps 3 days covered at room temperature, and freezes well for 1 month. Reheat a square at 400°F (205°C) for 6 minutes; the pepperoni crisps back up nicely.
9. Herbed Olive Oil Focaccia
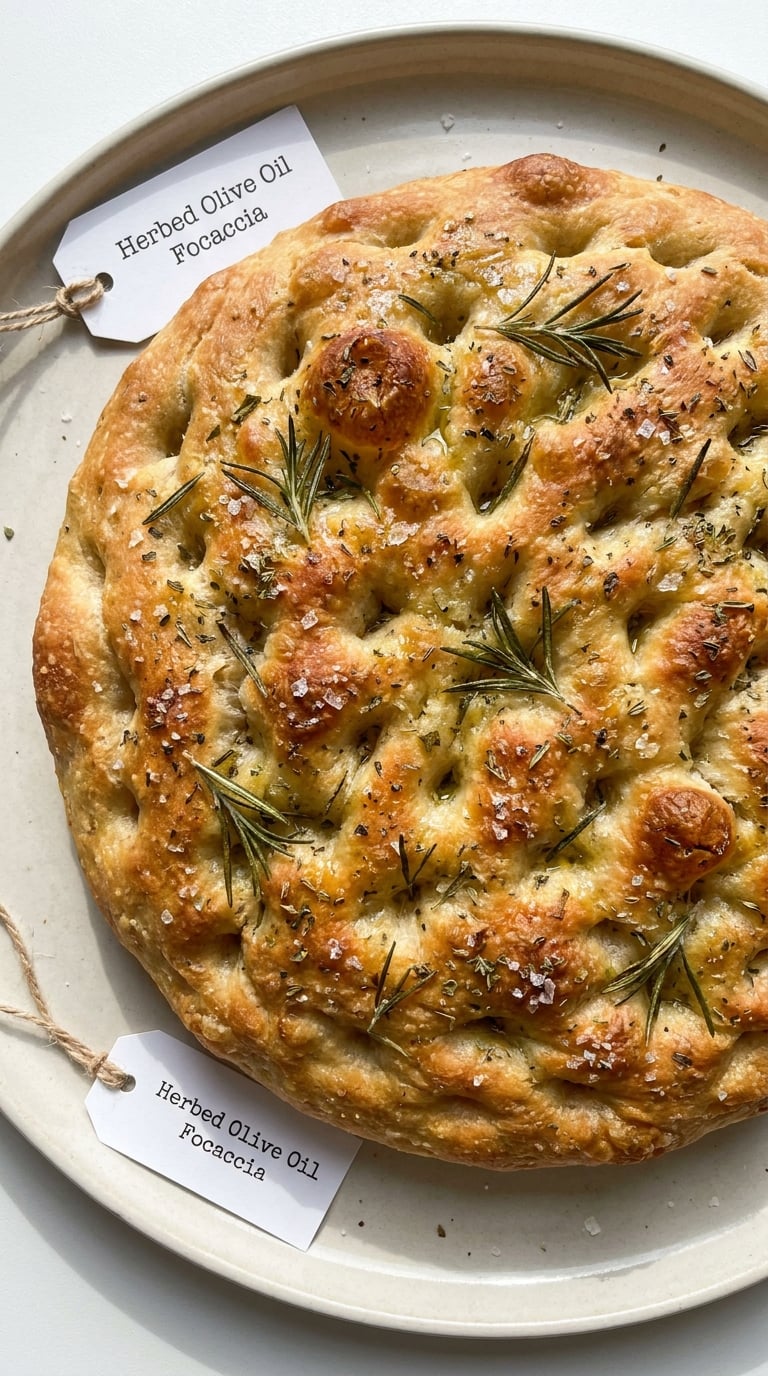
This is the plain one, and plain is exactly why it works as a daily loaf. No cheese, no vegetables, nothing to hide behind, which makes it the best way to learn what a well-made focaccia should feel like. I slice it thick and use it for sandwiches all week.
Yield: 8 wedges · Prep: 10 min · Proof: 2 hr 30 min · Bake: 24-26 min · Total: 3 hr 45 min · Difficulty: Easy
Ingredients
- 4 cups (500 g) bread flour
- 2 tsp (7 g) instant yeast
- 2 tsp (10 g) fine sea salt
- 2 cups (480 g) lukewarm water
- 1/2 cup (120 ml) extra virgin olive oil, divided, plus more for serving
- 2 tbsp fresh rosemary, finely chopped
- 1 tbsp fresh oregano, finely chopped
- 1 tsp flaky sea salt
Instructions
- Stir the flour, yeast and salt together, then add the water and 1/4 cup (60 ml) of the olive oil and mix until no dry flour remains.
- Cover and rest 20 minutes, then do four sets of stretch and folds.
- Cover and rise until the dough has grown by about half, 1 1/2 to 2 1/2 hours.
- Heat the oven to 450°F (230°C) and drizzle 3 tablespoons of olive oil into a 10 inch cast iron skillet or a 9 by 13 inch pan, tilting to coat the base and sides.
- Tip in the dough and stretch it gently toward the edges with oiled fingers, leaving it a little thicker in the center.
- Rest 15 minutes, then dimple all the way to the base with oiled fingertips.
- Scatter the rosemary, oregano and flaky salt, then drizzle the remaining 3 tablespoons of olive oil over the top.
- Bake 24 to 26 minutes until the top is deep golden and the edges sound hollow when you tap the pan.
- Turn out onto a rack, rest 15 minutes, and cut into thick wedges.
Tip: Give it a generous 15 minutes of pan time before dimpling. Herbed olive oil focaccia has more oil than the other recipes, so the surface needs longer to relax or the dimples spring back.
Swap it: Skip the herbs entirely for a plain olive oil focaccia, which is what most Ligurian bakers make. Add a layer of chopped olives and a strip of anchovy for a more traditional topping.
Storage: The most useful one for leftovers. It keeps 3 days wrapped, and 1 month frozen, and a slice toasted at 350°F (175°C) for 4 minutes comes back close to fresh.
10. Apple Cinnamon Walnut Focaccia
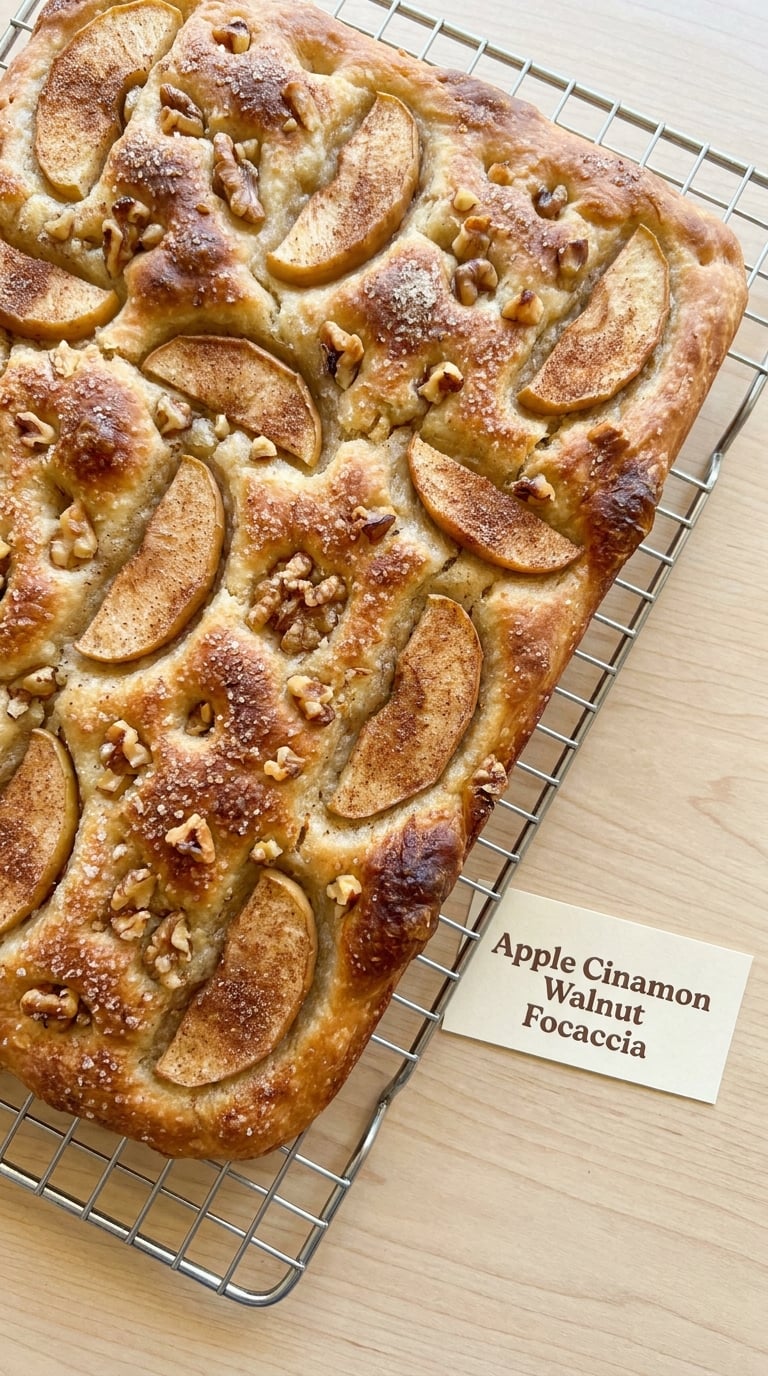
Thin apple slices turn soft and jammy in a hot oven, cinnamon sugar caramelizes on top, and walnuts toast in the dimples. It sits in the middle of breakfast and dessert at the same time, which is why it disappears so quickly.
Yield: 9 squares · Prep: 20 min · Proof: 2 hr 30 min · Bake: 25-28 min · Total: 4 hr 15 min · Difficulty: Easy
Allergen note: This recipe contains tree nuts (walnuts), wheat, and dairy. For a nut-free version, use the sunflower seed swap below.
Ingredients
- 4 cups (500 g) bread flour
- 2 tsp (7 g) instant yeast
- 1 1/2 tsp (8 g) fine sea salt
- 2 cups (480 g) lukewarm water
- 1/3 cup (80 ml) extra virgin olive oil, divided
- 1/2 cup (115 g) unsalted butter, melted
- 2 large apples, peeled, cored and sliced 1/8 inch thick
- 3/4 cup (150 g) brown sugar
- 2 tsp ground cinnamon
- 1 tsp vanilla extract
- 3/4 cup (90 g) walnuts, roughly chopped
- 1 tsp flaky sea salt
Instructions
- Toss the apple slices with 1 tablespoon of water and set them aside so they do not brown while the dough rises.
- Whisk the flour, yeast and fine salt together, then add the water, 2 tablespoons of olive oil and the melted butter. Stir until smooth.
- Cover and rest 20 minutes, then do four stretch and folds.
- Cover and rise until grown by about half, 1 1/2 to 2 1/2 hours.
- Heat the oven to 425°F (220°C) and oil a 9 by 13 inch pan with 3 tablespoons of olive oil.
- Tip in the dough, stretch to the corners, and rest 15 minutes.
- Dimple gently to the base, then fan the apple slices over the surface in overlapping rows.
- Scatter the walnuts, then mix the brown sugar, cinnamon and vanilla and rub it over the top with your fingertips.
- Bake 25 to 28 minutes until the edges are deeply golden and the apple edges are caramelized.
- Cool in the pan 20 minutes, then lift out, dust with the flaky salt and cut into squares.
Tip: Slice the apples as thin as you can manage, about 1/8 inch. Thicker slices stay firm and raw-tasting in the middle even when the crust is done.
Swap it: For a nut-free version, replace the walnuts with 3/4 cup (70 g) unsalted sunflower seeds, which toast the same way. Check that your brown sugar and vanilla are nut-free too, since both are often processed in shared facilities.
Storage: Keeps 3 days at room temperature covered, and freezes for 1 month. The apples soften a little on the second day, so the freshest version is the one you eat the same day.
Tips for Making These
- Oil the pan more than you think. Pour it in and spread it up the sides with your hand, not a brush. That oil does two jobs, and it gives you the crisp bottom and keeps the dough from welding itself to the metal as it bakes.
- Weigh the flour if you have a scale. Cups vary by up to 20 percent between measuring cups, and hydration is the one number in focaccia you cannot eyeball. Volume measuring is fine for a first attempt, grams make the second attempt better.
- Watch the dough, not the clock. Most of these recipes say 2 to 3 hours, and that is a room-temperature estimate. The dough is ready when it has grown by about half, feels full of air when you press a finger in, and the pan jiggles when you nudge the counter.
- Dimple to the base. Most people stop halfway and wonder why the top is even. Pressing all the way down creates thin spots that crisp and thick spots that stay bread, and that contrast is the whole texture of the thing.
- Keep the topping weight modest. A heavy layer of cheese, meat or wet vegetables steams the dough instead of baking it. Cook anything watery first, drain it, and use no more than about a third of the surface area.
- Check doneness at 200-205°F (93-96°C). If you own an instant-read thermometer, poke it into the thickest part through the bottom. The crust color is a good guide, but the number is the one that tells you the wet crumb has finished setting.
Slice focaccia with a long serrated knife in a single confident sawing motion, sawing straight down. Pressing down will compress the crumb and squish out the olive oil. If you bake more than once a week, a simple leftover steak recipe roundup is the other thing I keep on the counter, because sliced focaccia makes a very good sandwich base.
Frequently Asked Questions
Do I need to knead focaccia dough?
No. Focaccia is mixed with a spoon and developed with stretch-and-folds instead. Wet, high-hydration dough develops gluten through gentle pulling far better than kneading does, and the long rest in the recipes above does most of the remaining work. If you knead it, you usually end up with a tighter, denser crumb than you wanted.
How do I know when focaccia dough has finished proofing?
Poke a floured finger about 1/2 inch into the dough. If the dent springs back quickly, wait longer. If it fills in slowly and only partly, the dough is ready. The pan should also jiggle when you nudge the counter, and the surface will look full and slightly domed rather than smooth and slack. Clock time matters far less than those three signals.
Why is my focaccia dough too sticky to shape?
Most likely it is under-proofed, or the hydration is higher than you are used to handling. Wet dough is correct for focaccia, so do not add a pile of flour, which makes it dense and bready. Oil your hands instead of flouring them, let the dough rest 15 minutes more, and it will relax enough to stretch. Check the yeast with a foam test if it has not risen at all.
Can I prepare focaccia toppings before baking?
Yes, and you should for anything that needs cooking. Sear mushrooms, boil potatoes, roast squash and drain tomatoes up to a day ahead and refrigerate them. Shred the cheese, chop the herbs and zest the citrus the same morning, and add herbs like basil only after the focaccia leaves the oven. Assemble the topping on the dimpled dough right before it goes in.
How should I store extra focaccia, and can I freeze it?
Cool focaccia completely, then store it in a paper bag or loose wrap at room temperature for 2 to 3 days. A sealed container traps steam and softens the crust, so leave the top slightly open. For longer storage, wrap individual squares and freeze for up to 1 month, then refresh at 350°F (175°C) for 5 minutes. Topped focaccia keeps its base well but softens where the toppings are.
Why does my focaccia have a dense or gummy center?
Three usual causes. The dough was over-proofed, so the structure collapsed in the oven, which happens most often in a warm kitchen or after an overnight rest that ran long. Or the dough was under-proofed, so the yeast never generated enough gas. A third cause is a wet topping, which steams the center and keeps it gummy. A dimpled dough baked at 450°F (230°C) on an oiled metal pan solves most cases.
A Simple Place to Start
Make recipe 1, the classic olive oil and rosemary focaccia, first. It finishes in under five hours with nothing but a bowl, a spoon, and a 9 by 13 pan, and it is forgiving: a slightly over-proofed dough still bakes fine here, the dimples hide any uneven stretching, and the flavor is simple enough that you can taste whether the dough itself worked. Once you have made it once, every other recipe on this list is a topping away.
After that, pick by schedule rather than ambition. If your week is unpredictable, go same-day with recipes 3, 5, 8 or 9. If you would rather do almost nothing on baking day, make recipe 2 in the evening and bake it the next afternoon. Either way, you have started down the road of easy focaccia bread recipes for beginners, and the second one will be faster than the first.