
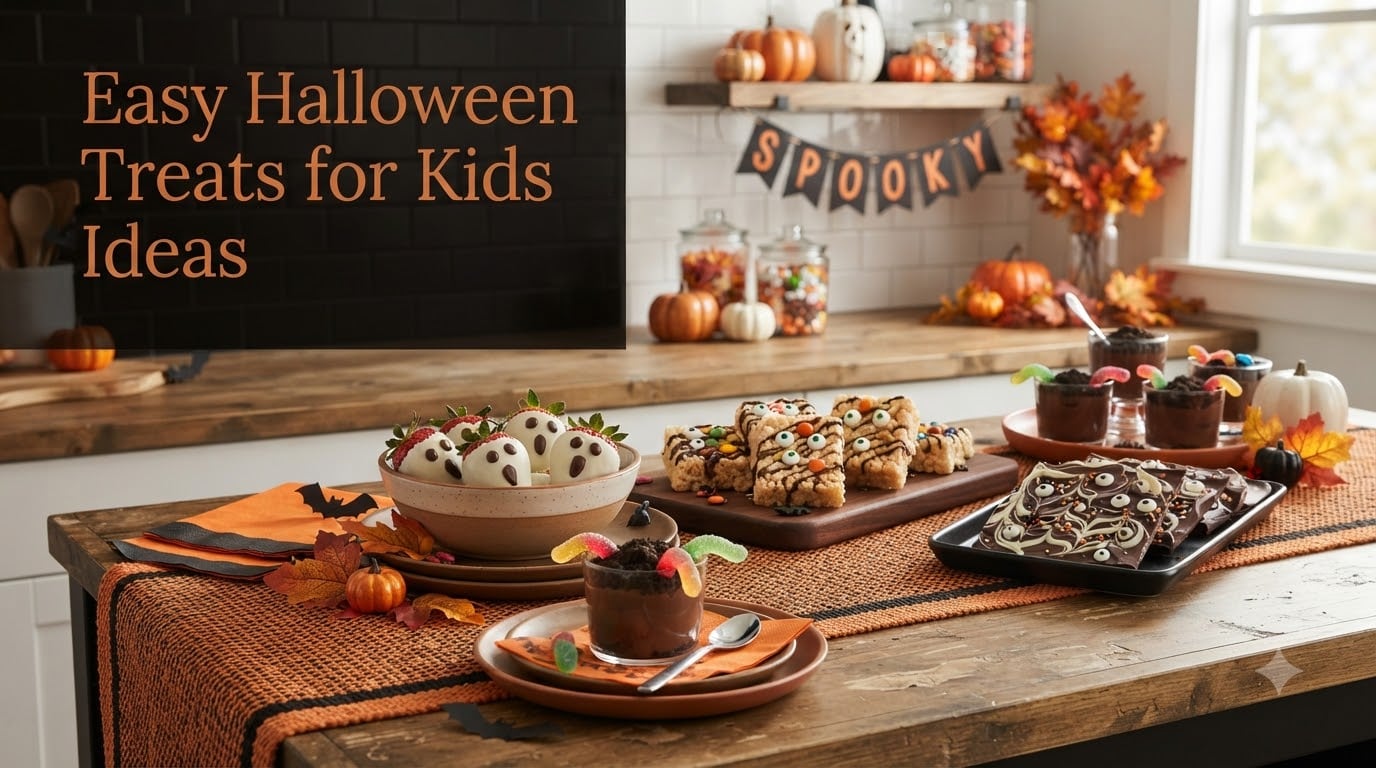
A child-friendly Halloween treat needs two plans: the food plan and the helper plan. I separate hot pans, knives, and melted coating from dipping, layering, adding faces, or arranging pieces. These easy Halloween treats for kids ideas say what must be finished by an adult and what can become the enjoyable decorating job.
Helper rule: Choose the safe action first—place, layer, dip, or add a face—then choose whether the food becomes a ghost, mummy, monster, or pumpkin.
Table of Contents
13 Easy Halloween Treats for Kids Ideas with Real Helper Jobs
Cold treats children can decorate after setup
1. Frozen Banana Ghost Pops
Serves: 8 | Time: 20 minutes plus freezing | Method: sheet pan and freezer
Ingredients
-
4 firm bananas
-
1 tablespoon lemon juice
-
1 1/2 cups vanilla Greek yogurt
-
1 tablespoon honey
-
1 teaspoon vanilla
-
24 miniature chocolate chips
-
8 wooden pop sticks
Instructions
-
Cut bananas in half crosswise, insert sticks, brush lightly with lemon, and freeze 30 minutes.
-
Stir yogurt with honey and vanilla in a narrow glass.
-
Dip frozen bananas, let excess yogurt drain, and lay them on parchment.
-
Add chocolate-chip eyes and mouths and freeze 2 hours, until the coating is firm and matte.
Substitutions: Use dairy-free yogurt or small raisin pieces.
Storage: Freeze for 1 week in a covered container.
Tip: Starting with frozen bananas helps thick yogurt set before it slides off.
2. Clementine Pumpkin Cups
Serves: 8 | Time: 15 minutes | Method: eight clear cups and cutting board
Ingredients
-
8 clementines, peeled
-
2 cups green grapes, quartered for young children
-
2 cups pineapple chunks
-
1 cup vanilla yogurt
-
2 tablespoons honey
-
1 teaspoon lime zest
-
8 short celery sticks
Instructions
-
Stir yogurt with honey and lime zest and spoon it into the bottom of eight cups.
-
Separate clementines into segments and pat them dry.
-
Layer pineapple, grapes, and clementine segments above the yogurt.
-
Stand one celery stick in each top and chill until the fruit is cold and the pumpkin shape remains visible.
Substitutions: Use kiwi for grapes or dairy-free yogurt.
Storage: Refrigerate for 1 day; add celery close to serving.
Tip: Dry citrus segments keep juice from streaking the yogurt.
Complete the Hot Work before the Decorating Table Opens
Cookies, brownies, cereal bars, and cupcakes need to be fully baked and cool before small decorations begin. One tray of finished bases and several small bowls of toppings gives children choice without exposing them to a hot pan or a crowded kitchen.
Baked bases with different decorating techniques
3. Spiderweb Peanut Butter Cookies
Serves: 18 | Time: 45 minutes plus cooling | Method: sheet pans and oven
Ingredients
-
1/2 cup softened butter
-
1/2 cup peanut butter
-
1/2 cup sugar
-
1/2 cup brown sugar
-
1 large egg
-
1 teaspoon vanilla
-
1 1/2 cups all-purpose flour
-
1/2 teaspoon baking soda
-
1/4 teaspoon kosher salt
-
4 ounces dark chocolate
Instructions
-
Heat the oven to 350°F and cream butter, peanut butter, and both sugars.
-
Beat in egg and vanilla, then fold in flour, soda, and salt.
-
Scoop 18 rounds and bake 10 to 12 minutes, until edges set and centers are soft; cool fully.
-
Pipe chocolate spirals on the cold cookies and drag a toothpick outward through each spiral to form webs; let chocolate set.
Substitutions: Use sunflower seed butter or gluten-free flour.
Storage: Store airtight for 4 days.
Tip: The cookie must be cool or the thin web lines melt into a dark puddle.
4. Mummy Brownie Squares
Serves: 16 | Time: 1 hour plus cooling | Method: 8-inch square pan and oven
Ingredients
-
8 tablespoons butter
-
6 ounces dark chocolate
-
3/4 cup sugar
-
2 large eggs
-
1 teaspoon vanilla
-
3/4 cup all-purpose flour
-
1/4 cup cocoa powder
-
1/2 teaspoon kosher salt
-
1 cup white chocolate chips
-
32 candy eyes
Instructions
-
Heat the oven to 350°F, line the pan, and melt butter with dark chocolate.
-
Whisk in sugar, eggs, and vanilla, then fold in flour, cocoa, and salt.
-
Bake 24 to 28 minutes, until the center has moist crumbs; cool completely and cut 16 squares.
-
Melt white chocolate and pipe uneven mummy wraps, then press on two eyes before the coating firms.
Substitutions: Use a trusted gluten-free flour blend or white candy coating.
Storage: Store cool and airtight for 3 days.
Tip: Cold clean-cut brownies give the white wraps sharp contrast.
5. Monster Rice Cereal Treats
Serves: 16 | Time: 30 minutes plus setting | Method: 9-inch square pan and saucepan
Ingredients
-
6 tablespoons butter
-
10 ounces miniature marshmallows
-
1 teaspoon vanilla
-
1/4 teaspoon kosher salt
-
6 cups crisp rice cereal
-
8 ounces green candy coating
-
32 candy eyes
-
1/3 cup chocolate sprinkles
Instructions
-
Line the pan and melt butter and marshmallows over low heat until smooth; stir in vanilla and salt.
-
Fold in cereal and press it gently into the pan with a buttered spatula.
-
Cool 30 minutes, lift out, and cut 16 rectangles.
-
Dip one end in melted green coating, add eyes and sprinkles, and let the coating set firm.
Substitutions: Use gluten-free cereal or dark chocolate coating.
Storage: Store airtight for 3 days at room temperature.
Tip: Light pressure keeps the bars chewy; compacting hard makes them dense.
6. Witch Hat Cookie Sandwiches
Serves: 12 | Time: 25 minutes plus setting | Method: sheet pan and microwave
Ingredients
-
24 round chocolate cookies
-
1 cup chocolate frosting
-
12 chocolate cone candies
-
12 chocolate kisses
-
1/3 cup orange sprinkles
-
1/3 cup purple sprinkles
Instructions
-
Lay 12 cookies flat and pipe a tablespoon of frosting in each center.
-
Top with remaining cookies and press until filling reaches the edge.
-
Use a small dot of frosting to attach one cone candy or kiss to each top.
-
Ring the base with alternating sprinkles and chill 15 minutes, until hats lift without sliding.
Substitutions: Use gluten-free cookies or peanut-butter cups for the crown.
Storage: Store airtight for 3 days; refrigerate if the room is warm.
Tip: A small frosting dot holds better than a thick mound that squeezes outward.
Fast savory, frozen, and layered treats
7. Cheese-and-Pretzel Broomsticks
Serves: 16 | Time: 15 minutes | Method: cutting board and platter
Ingredients
-
8 mozzarella string cheeses
-
16 pretzel sticks
-
2 tablespoons softened cream cheese
-
2 tablespoons chopped chives
-
1/2 teaspoon garlic powder
-
1/4 teaspoon black pepper
Instructions
-
Cut each cheese stick in half crosswise.
-
Fringe the cut end with several shallow vertical cuts, leaving the top intact.
-
Push one pretzel into the uncut end and spread a thin cream-cheese ring above the fringe.
-
Add chives, garlic powder, and pepper and chill 10 minutes, until cheese is firm and the handle stays upright.
Substitutions: Use cheddar cheese sticks or gluten-free pretzels.
Storage: Refrigerate for 1 day; insert pretzels within 2 hours of serving.
Tip: Shallow cuts create bristles without splitting the cheese completely.
8. Ghostly Yogurt Bark
Serves: 12 | Time: 15 minutes plus freezing | Method: rimmed sheet pan and freezer
Ingredients
-
4 cups thick vanilla Greek yogurt
-
2 tablespoons honey
-
1 teaspoon vanilla
-
1/2 cup strawberry purée
-
1/2 cup blueberries
-
1/3 cup miniature chocolate chips
-
1/3 cup toasted coconut
Instructions
-
Stir yogurt, honey, and vanilla and spread it 1/3 inch thick on parchment.
-
Spoon strawberry purée into small patches and stretch each into a ghost tail with a toothpick.
-
Add chocolate-chip eyes, blueberries, and coconut between ghosts.
-
Freeze 4 hours, until the slab snaps instead of bending; break around the ghost shapes.
Substitutions: Use dairy-free thick yogurt or raspberry purée.
Storage: Freeze airtight for 2 weeks.
Tip: Thin purée creates details; watery sauce freezes into icy holes.
9. Graveyard Pudding Cups
Serves: 10 | Time: 30 minutes plus chilling | Method: ten clear cups and refrigerator
Ingredients
-
2 boxes chocolate pudding mix, 3.9 ounces each
-
4 cups cold milk
-
20 chocolate sandwich cookies
-
10 oval vanilla cookies
-
2 ounces dark chocolate, melted
-
1 cup whipped topping
-
20 candy pumpkins
Instructions
-
Whisk pudding mix with milk for 2 minutes and let it thicken 5 minutes.
-
Crush chocolate cookies and layer half with pudding in ten cups.
-
Write simple lines on vanilla-cookie tombstones with melted chocolate and let them set.
-
Chill cups 30 minutes, until pudding is firm, then add crumbs, whipped topping, tombstones, and pumpkins.
Substitutions: Use homemade pudding or gluten-free cookies.
Storage: Refrigerate for 2 days; add tombstones just before serving.
Tip: A dry cookie tombstone stands upright longer than one inserted the night before.
If the party needs a larger savory spread, I use just one sweet craft here and add simple bites from my easy appetizer recipes rather than surrounding children with twelve versions of candy.
Let the Food Shape Create the Character
The last four easy Halloween treats for kids ideas use an apple wedge, split cookie, color layer, or piped egg as the design. The decoration belongs to the food, so the treat still makes sense after the first glance.
Faces, wings, color bands, and pumpkin ridges
10. Monster Apple Mouths
Serves: 12 | Time: 20 minutes | Method: cutting board and tray
Ingredients
-
3 crisp apples
-
1 tablespoon lemon juice
-
1/2 cup sunflower seed butter
-
1/2 cup strawberry slices
-
1/2 cup miniature marshmallows
-
1/4 cup sunflower seeds
-
24 candy eyes
Instructions
-
Quarter and core apples, then cut a narrow wedge from the skin side of each piece to form an open mouth.
-
Brush cut surfaces with lemon and pat dry.
-
Spread seed butter inside, line one edge with marshmallow teeth, and add a strawberry tongue.
-
Press sunflower-seed fangs and candy eyes into the top; serve while apples are cold and crisp.
Substitutions: Use cream cheese or sliced cheese for seed butter and teeth.
Storage: Refrigerate components for 1 day; assemble within 2 hours.
Tip: Patting away lemon juice lets sticky fillings grip the apple.
11. Chocolate Bat Cupcakes
Serves: 12 | Time: 55 minutes plus cooling | Method: muffin pan and oven
Ingredients
-
1 1/2 cups all-purpose flour
-
1/2 cup cocoa powder
-
1 teaspoon baking soda
-
1/2 teaspoon kosher salt
-
3/4 cup sugar
-
2 large eggs
-
3/4 cup milk
-
1/2 cup neutral oil
-
1 teaspoon vanilla
-
2 cups chocolate frosting
-
12 chocolate sandwich cookies
-
24 candy eyes
Instructions
-
Heat the oven to 350°F and line 12 muffin cups.
-
Whisk flour, cocoa, soda, salt, and sugar; separately whisk eggs, milk, oil, and vanilla and combine.
-
Divide batter and bake 18 to 21 minutes, until tops spring back; cool fully.
-
Frost, split cookies into semicircle wings, press two into each cupcake, and add eyes.
Substitutions: Use gluten-free flour or vanilla frosting colored with cocoa.
Storage: Refrigerate frosted cupcakes for 3 days.
Tip: Fully cooled cakes keep the wings upright rather than melting the frosting.
12. Candy-Corn Fruit Parfaits
Serves: 8 | Time: 20 minutes | Method: eight tapered glasses and refrigerator
Ingredients
-
4 cups pineapple tidbits, drained
-
4 cups mandarin orange segments, drained
-
3 cups vanilla Greek yogurt
-
2 tablespoons honey
-
1 teaspoon vanilla
-
1 cup whipped cream
-
1/2 cup toasted coconut
Instructions
-
Drain pineapple and oranges for 10 minutes and blot gently.
-
Stir yogurt with honey and vanilla.
-
Pack pineapple into the bottom third of each tapered glass and oranges into the middle without mixing colors.
-
Spoon yogurt and whipped cream on top, add coconut, and chill until layers are cold and distinct.
Substitutions: Use mango for pineapple or dairy-free yogurt.
Storage: Refrigerate for 1 day; add coconut at serving.
Tip: Well-drained fruit protects the white top and clean orange-yellow line.
13. Pumpkin Deviled Egg Faces
Serves: 12 | Time: 30 minutes | Method: saucepan and piping bag
Ingredients
-
6 large eggs
-
3 tablespoons mayonnaise
-
1 teaspoon Dijon mustard
-
1 teaspoon pickle juice
-
1/2 teaspoon smoked paprika
-
1/4 teaspoon kosher salt
-
1 tablespoon chopped chives
-
12 small olive pieces
Instructions
-
Cover eggs with water, bring to a boil, turn off heat, cover 11 minutes, then chill in ice water.
-
Peel, halve, and mash yolks with mayonnaise, Dijon, pickle juice, paprika, and salt.
-
Pipe filling into whites in ridged swirls.
-
Add a short chive stem and olive face to each and chill, until the filling is firm and the eggs are cold.
Substitutions: Use Greek yogurt for half the mayonnaise.
Storage: Refrigerate for 2 days in a covered single layer.
Tip: A star piping tip creates pumpkin ridges without extra food coloring.
Set Up One-Way Decorating
I place undecorated food first, toppings in the middle, and a finished tray at the far end. Each child takes a clean base and moves forward once, while spoons stay with their bowls. Finished food never returns beside hands touching new pieces.
The CDC food-safety overview reinforces clean hands, separation, correct cooking, and chilling. Those basics matter even when the activity looks like a craft rather than meal preparation.
Frequently Asked Questions
Which treats are easiest for preschool-age helpers?
Fruit cups, banana ghosts, yogurt bark, pudding cups, and cookie hats have simple placing or layering jobs. An adult should handle cutting, hot work, and melted coating.
Can I make the treats without artificial color?
Yes. Use pumpkin, cocoa, berries, citrus, pineapple, olives, chives, and dark or white chocolate. The recipes depend on shape and contrast more than colored batter.
What is safest for a classroom?
Ask about allergens and homemade-food policies first. Individually portioned fruit cups, cereal treats, brownies, or cupcakes are easy to count and transport, but school rules decide what is acceptable.
How many treats should I make?
Plan one substantial treat or two small pieces per child, plus a modest margin. A decorating activity can use one base per child to prevent an oversized dessert table.
Which options can be made two days early?
Bake cookies, brownies, cereal bars, and cupcakes. Prepare pudding cups and hard-boiled eggs closer to the event, and assemble crisp fruit or pretzel pieces last.
How do I prevent a messy decorating station?
Use one topping spoon per bowl, shallow trays with raised edges, parchment work mats, and a one-direction flow. Offer only toppings that actually belong to that specific treat.
Conclusion: Make the Helper Job Part of the Recipe
The most useful easy Halloween treats for kids ideas protect children from the hot or sharp work while leaving a real decision they can make. Cool every base, portion the toppings, let the food’s shape guide the character, and keep the decorating line moving in one direction. The result is festive food and an activity that feels worth repeating.