
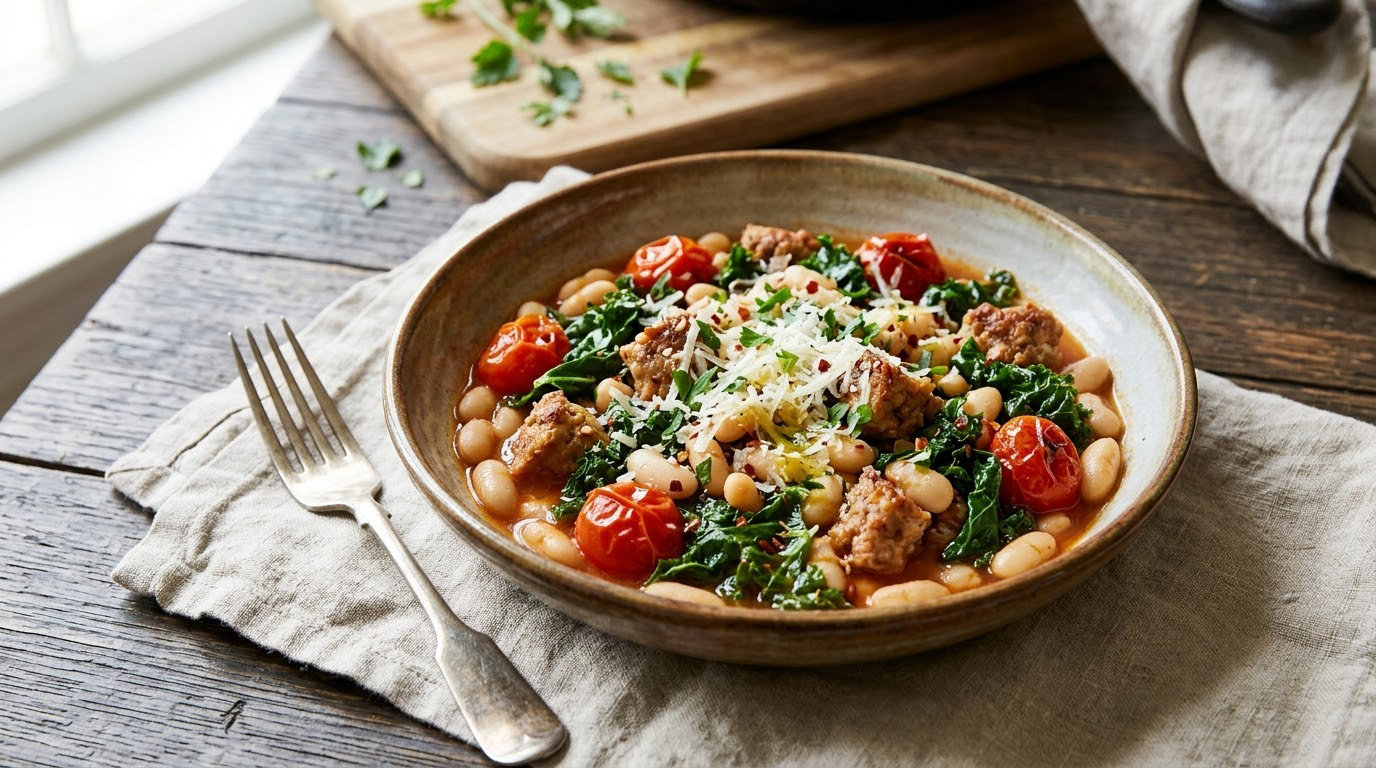
These 12 easy dinner recipes with canned beans turn one 15-ounce can into a real meal in about 30 minutes. Canned beans are already cooked, so they only need heating and seasoning, which means no soaking and no advance planning. Every recipe below has exact quantities, prep and cook times, and step-by-step instructions you can cook from your phone.
Most of these finish in one pan, use a short ingredient list, and freeze well. The hardest-working evening still lands under 45 minutes, which matters when you’re cooking at 6pm with hungry people circling the kitchen.
Table of Contents
12 Easy Dinner Recipes with Canned Beans at a Glance
Here is the fastest way to compare all twelve before you decide. Times are total time from cutting board to table, and difficulty is based on technique, not ingredient count.
| Recipe | Total Time | Difficulty | Best For |
|---|---|---|---|
| 1. One-Pot Beef and Black Bean Chili | 40 minutes | Easy | Family dinner, cold weather |
| 2. Easy Black Bean Quesadillas | 20 minutes | Easy | Picky eaters, quick weeknight |
| 3. Canned Bean and Cheese Loaded Nachos | 25 minutes | Easy | Sharing dinner, game night |
| 4. Crispy Black Bean Tacos | 25 minutes | Easy | Tuesday night taco fix |
| 5. Easy Bean and Rice Burrito Bowls | 30 minutes | Easy | Meal prep, customizable bowls |
| 6. One-Skillet Chicken and White Bean Dinner | 30 minutes | Easy | One-pan dinner night |
| 7. Hearty Beef and Kidney Bean Stew | 45 minutes | Easy | Soup night, make-ahead |
| 8. Cheesy Baked Bean Casserole | 45 minutes | Easy | Potluck, comfort food |
| 9. Easy Bean and Vegetable Pasta Sauce | 25 minutes | Medium | Vegetarian pasta night |
| 10. Black Bean and Sweet Potato Tacos | 30 minutes | Easy | Vegetarian dinner, leftovers |
| 11. Canned Bean Tuna Melt | 15 minutes | Easy | Lunch or light dinner |
| 12. Crispy Salmon and Canned Bean Bowls | 25 minutes | Medium | Weeknight healthy bowl |
1. One-Pot Beef and Black Bean Chili
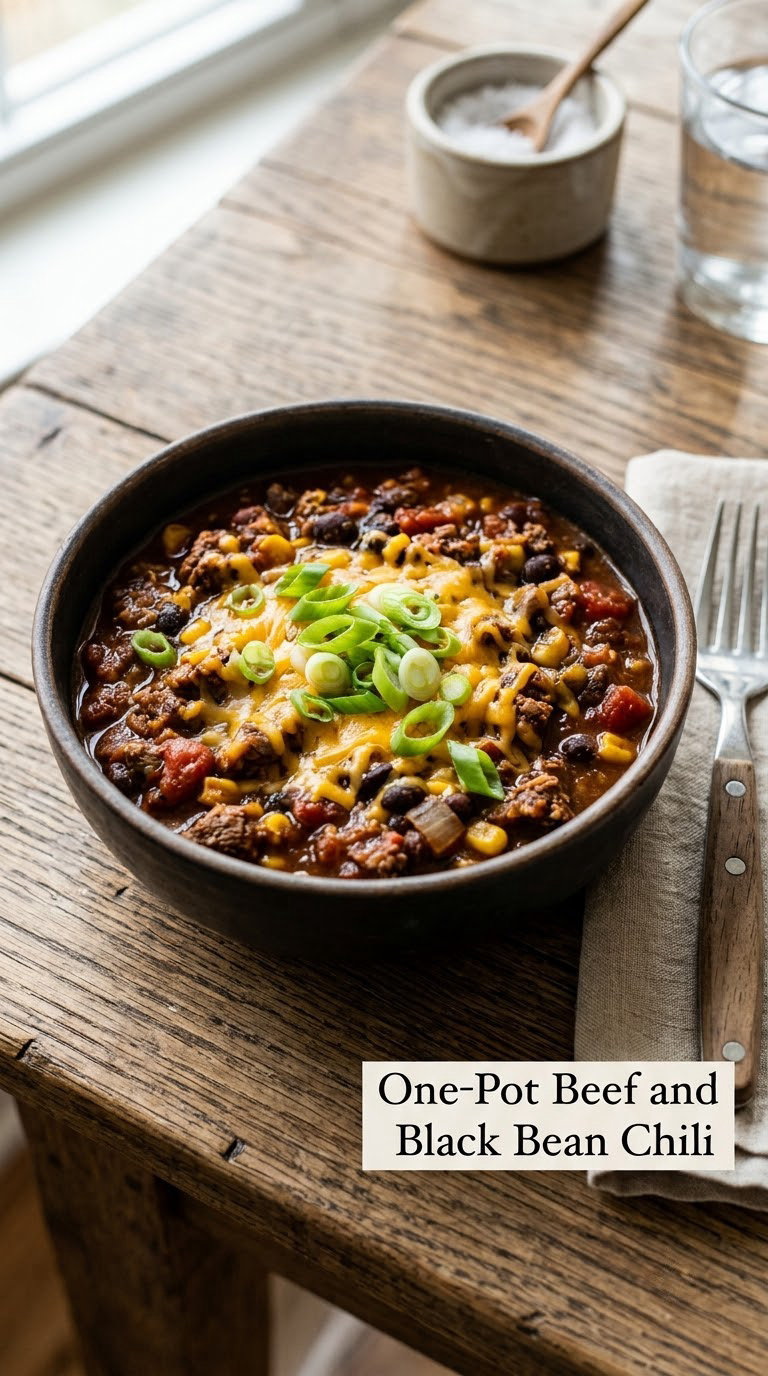
One pot, eight pantry ingredients, and a flavor profile that takes about 40 minutes from start to finish. This is the chili I make when I want something that tastes like it simmered all afternoon but I only had one pan and a free evening hour.
Yield: 6 servings · Prep: 10 minutes · Cook: 30 minutes · Total: 40 minutes · Difficulty: Easy
Ingredients
- 1 pound 80% lean ground beef
- 1 yellow onion, diced (about 1 cup)
- 3 garlic cloves, minced
- 2 tablespoons chili powder
- 1 tablespoon ground cumin
- 1 teaspoon smoked paprika
- 1 teaspoon dried oregano
- 1 can (15 ounces) black beans, drained and rinsed
- 1 can (14.5 ounces) crushed tomatoes
- 1 can (10 ounces) diced tomatoes with green chilies
- 2 cups beef broth
- 1 tablespoon lime juice
- Salt and black pepper to taste
- Sliced green onions, shredded cheese, and sour cream for serving
Instructions
- Set a heavy pot over medium-high heat and add the ground beef. Break it into small crumbles and cook until no pink remains, about 6 to 7 minutes.
- Push the beef to the edge of the pot and add the onion. Cook in the rendered fat until soft and translucent, about 4 minutes.
- Stir in the garlic and the dried spices. Cook 60 seconds, until the spices smell toasted rather than dusty.
- Add the crushed tomatoes, the diced tomatoes, and the broth. Stir until everything is combined and the mixture starts to bubble.
- Simmer uncovered for 15 minutes, stirring occasionally, until it thickens slightly.
- Add the rinsed black beans and simmer another 5 minutes. Stir gently so the beans stay whole.
- Verify the beef has reached 160°F (71°C) with an instant-read thermometer inserted into the thickest crumbles.
- Stir in the lime juice and season with salt and pepper until it tastes balanced.
Tip: Bloom the spices in the beef fat after the onion softens. That 60-second step is the difference between chili that tastes layered and chili that tastes like a can.
Swap it: Use turkey, or swap half the beef for diced bell pepper for a lighter pot. Ground beef 160°F (71°C) is the safe internal temperature either way.
Storage: Keeps 3 to 4 days in the fridge in a sealed container. Freezes up to 3 months; thaw overnight in the fridge and reheat on the stove with a splash of broth.
For more beef-and-bean combinations, try our easy ground beef and bean recipes.
2. Easy Black Bean Quesadillas
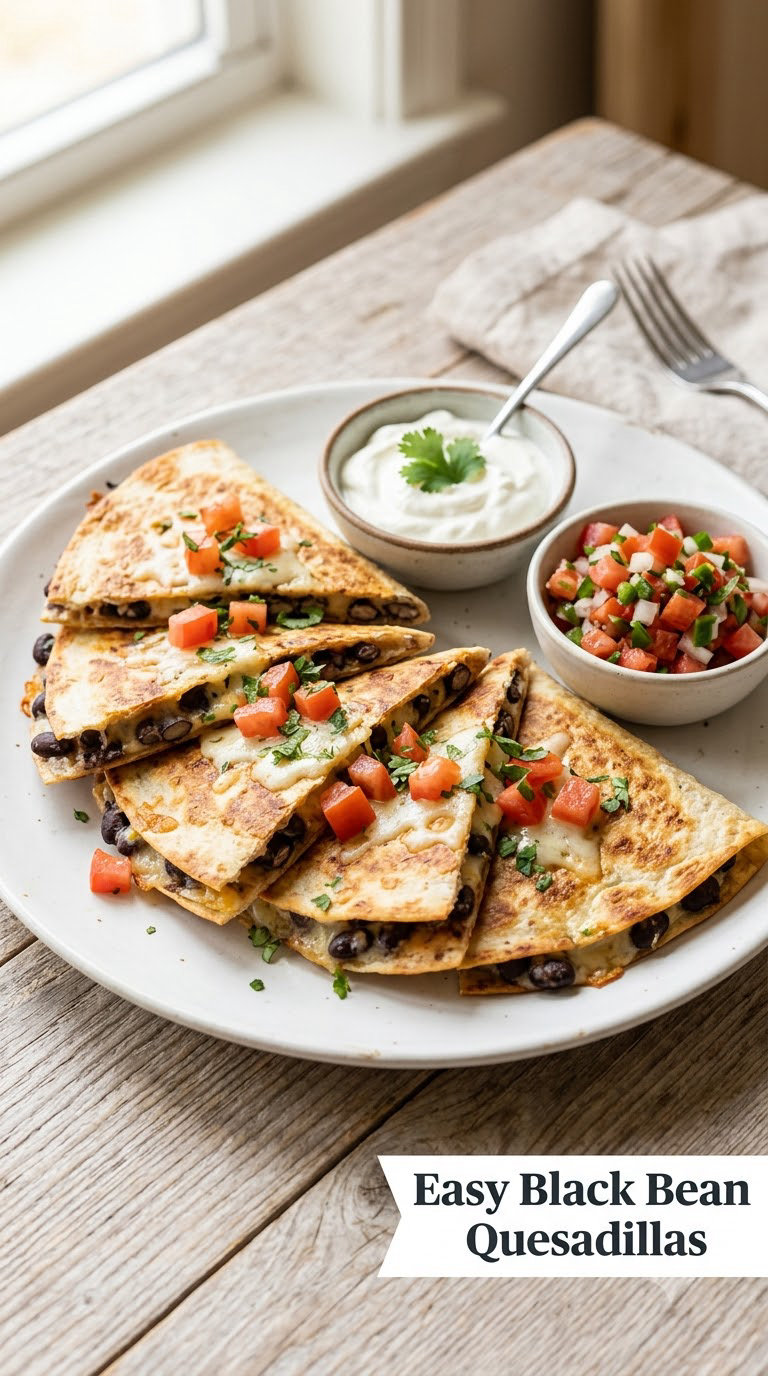
Crisp edges, molten cheese, and a filling that holds together instead of sliding out. If your household has one kid who does not want beans, mashing them into the cheese is the trick that converts them.
Yield: 4 servings (8 quesadillas) · Prep: 10 minutes · Cook: 10 minutes · Total: 20 minutes · Difficulty: Easy
Ingredients
- 1 can (15 ounces) black beans, drained and rinsed
- 8 medium flour tortillas (8 inch)
- 2 cups shredded pepper Jack or cheddar
- 1 teaspoon ground cumin
- 1/2 teaspoon garlic powder
- 1 tablespoon lime juice
- 1 tablespoon cooking oil or 2 teaspoons for the skillet
- Diced tomato, sliced red onion, sour cream, and hot sauce for serving
Instructions
- Spread the rinsed beans on a clean towel and pat them dry. Let the skillet heat over medium while you do this.
- Mash the beans lightly with a fork, leaving about a third of them whole for texture.
- Stir in the cumin, garlic powder, lime juice, and a pinch of salt. Taste one spoonful and adjust.
- Heat 1 teaspoon of oil in a 10-inch skillet over medium heat.
- Place one tortilla in the pan, scatter 1/3 cup cheese over it, then spoon 1/3 cup beans on top.
- Add another 1/3 cup cheese over the beans, then top with a second tortilla.
- Cook 2 to 3 minutes until the bottom is golden and spotted. Press lightly with a spatula.
- Flip and cook 2 more minutes until the second side is golden and the cheese has melted through.
- Rest in the pan for 1 minute, then cut into wedges and repeat with the remaining filling.
Tip: For an extra-crisp shell without more oil, finish each quesadilla under the broiler for 60 to 90 seconds, watching closely, until blistered.
Swap it: Flour tortillas for corn tortillas and the filling goes gluten-free. Add diced jalapeño, a spoonful of salsa, or shredded rotisserie chicken if you want more.
Storage: Refrigerate cut wedges on a single layer, not stacked, for up to 3 days. Reheat in a dry skillet for 2 minutes per side so the tortilla crisps back up.
How many cans of beans do these easy dinner recipes with canned beans need?
One can of black beans is all this takes, plus about a cup of shredded cheese. Buying two cans is worth it if you want eight wedges instead of four, and the second can turns into tomorrow’s burrito bowl.
If you always have extra cans on hand, our easy crockpot dinner recipes cover the set-it-and-forget version of the same idea.
3. Canned Bean and Cheese Loaded Nachos
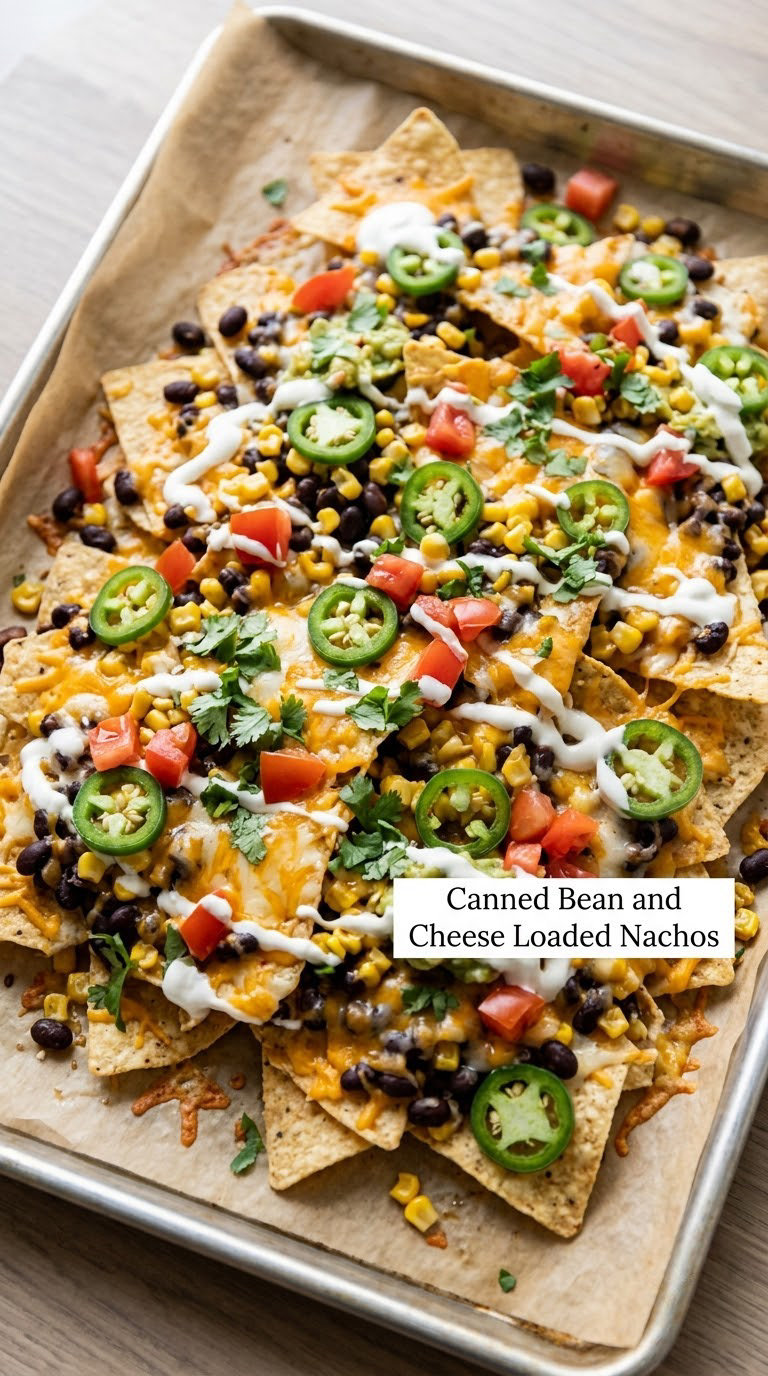
This is the dinner that wins the movie-night vote every time. One pan, ten minutes of assembly, and the broiler does the rest. Use a rimmed baking sheet so the edges stay crisp.
Yield: 4 servings · Prep: 10 minutes · Cook: 15 minutes · Total: 25 minutes · Difficulty: Easy
Ingredients
- 1 can (15 ounces) black beans, drained and rinsed
- 1 teaspoon chili powder
- 1/2 teaspoon cumin
- 8 ounce bag tortilla chips
- 2 cups shredded cheddar and Monterey Jack
- 1/2 cup corn, drained
- 1 jalapeño, thinly sliced
- 1/2 cup salsa
- 1 tablespoon chopped canned jalapeños
- Sour cream, diced tomato, avocado, and cilantro for topping
Instructions
- Heat the oven to 400°F (205°C) and set a large rimmed baking sheet inside to warm while you prepare everything.
- Warm the rinsed beans in a small pan over medium heat with the chili powder, cumin, and a splash of water.
- Cook 3 to 4 minutes until the beans are hot and any liquid has evaporated, then take the pan off the heat.
- Spread the tortilla chips in a single layer on the hot sheet.
- Scatter 1 cup of cheese over the chips, then spoon the seasoned beans over the top.
- Add the corn, sliced jalapeño, and chopped canned jalapeños, then cover with the remaining 1 cup of cheese.
- Drizzle the salsa over the top so it seeps between the chips.
- Bake 8 to 10 minutes until the cheese is fully melted and bubbling.
- Move the sheet under the broiler for 1 to 2 minutes for browned, blistered spots. Watch it the whole time.
- Rest 2 minutes, then finish with sour cream, tomato, avocado, and cilantro.
Tip: Toast the chips dry in the pan for two minutes before adding toppings. The beans and salsa soften them, so starting with crisp chips keeps the finished nachos from turning soggy underneath.
Swap it: Use pinto beans for a milder flavor, or ground turkey browned with the same spices instead of the beans. Pickled jalapeños work in place of fresh.
Storage: Best eaten right away. Any leftovers keep 2 days in the fridge; re-crisp them on a baking sheet at 400°F (205°C) for 5 minutes rather than in the microwave.
4. Crispy Black Bean Tacos
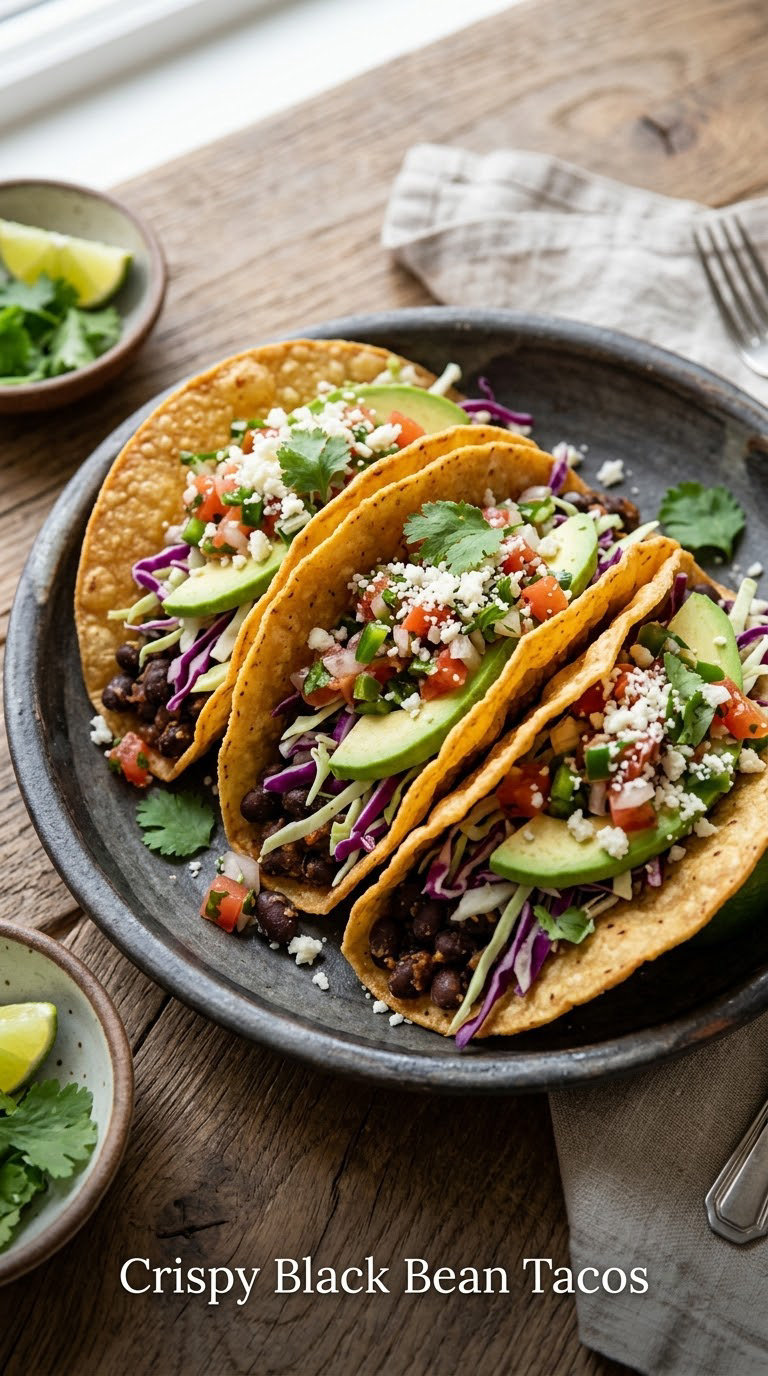
The problem with taco night is soggy shells, and the cause is wet beans. Seasoning them hard and cooking them until the liquid is gone fixes that. Add a quick cabbage slaw and it turns into a meal that holds up to a long evening.
Yield: 4 servings (12 tacos) · Prep: 15 minutes · Cook: 10 minutes · Total: 25 minutes · Difficulty: Easy
Ingredients
For the beans:
- 2 cans (15 ounces each) black beans, drained and rinsed
- 1 tablespoon olive oil
- 1 teaspoon ground cumin
- 1 teaspoon smoked paprika
- 1/2 teaspoon garlic powder
- 1 tablespoon lime juice
- 1/2 cup water
- Salt and pepper to taste
For the slaw and to serve:
- 2 cups finely shredded green cabbage
- 2 tablespoons lime juice and a pinch of salt for the slaw
- 12 corn tortillas (6 inch) or 6 flour tortillas
- 1 avocado, sliced
- 1/2 cup salsa, thick or drained
- 1/4 cup crumbled cotija or feta cheese
Instructions
- Heat the olive oil in a skillet over medium-high heat.
- Add the rinsed beans and cook 2 minutes, stirring, until the surface looks dry and slightly blistered.
- Stir in the cumin, smoked paprika, garlic powder, lime juice, water, salt, and pepper.
- Cook 5 to 7 minutes, stirring often, until the liquid has almost completely cooked off and the beans hold together when pressed.
- Turn off the heat and let the beans sit 2 minutes so excess moisture evaporates.
- Toss the cabbage with lime juice and salt in a bowl. Squeeze it firmly once to soften, about 30 seconds.
- Warm the tortillas directly over a gas flame, in a dry skillet, or in a 350°F (175°C) oven for 4 minutes until pliable and lightly marked.
- Fill each tortilla with the seasoned beans and top with slaw, avocado, salsa, and cheese.
Tip: Season the beans twice. Taste them after the liquid cooks off and add a second pinch of salt and a squeeze of lime. Beans seasoned before the water goes in always taste flat.
Swap it: Pinto beans work, and kidney beans hold their shape even better. For a gluten-free version, corn tortillas are the obvious choice, and many shops now carry thicker ones that do not split.
Storage: Store the seasoned beans and the slaw separately, both for up to 3 days, and assemble the tacos as you eat them. Warm the tortillas and beans in a dry skillet for 3 minutes to re-crisp.
5. Easy Bean and Rice Burrito Bowls
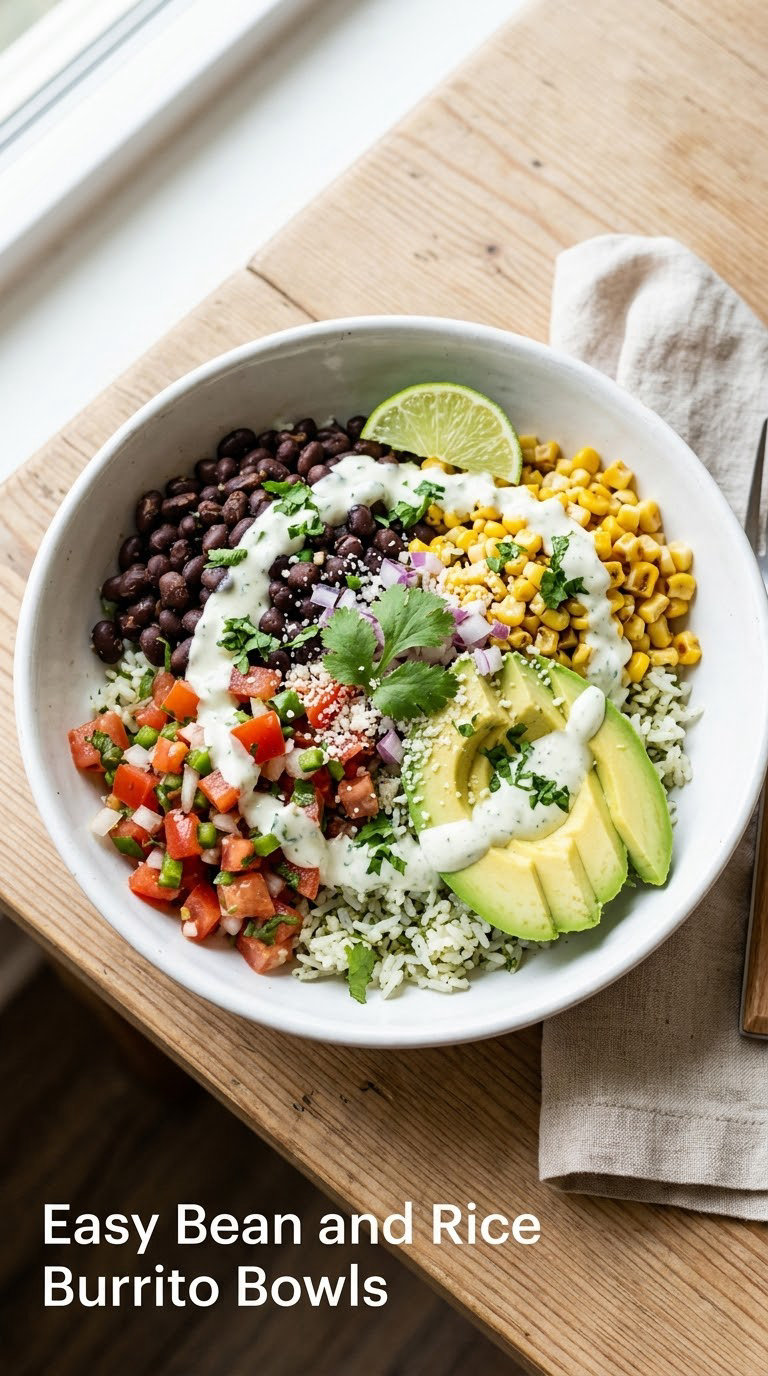
Build-your-own bowls solve the weeknight problem better than almost anything else, because everyone assembles their own. The chipotle-lime dressing is a two-minute emulsion that makes plain rice taste deliberate.
Yield: 4 servings · Prep: 15 minutes · Cook: 15 minutes · Total: 30 minutes · Difficulty: Easy
Ingredients
For the bowls:
- 2 cups cooked rice (about 1 cup dry, cooked in 2 cups broth)
- 1 can (15 ounces) black beans, drained and rinsed
- 1 teaspoon cumin and 1/2 teaspoon smoked paprika
- 1 tablespoon olive oil
- 1 cup corn, drained
- 1 cup salsa
- 1 avocado, cubed
- 1 cup shredded lettuce or chopped romaine
- 1/2 cup plain Greek yogurt or sour cream
For the chipotle-lime dressing:
- 2 tablespoons olive oil
- 2 tablespoons lime juice
- 1 chipotle in adobo, minced, plus 1 teaspoon of the sauce
- 1/2 teaspoon ground cumin
- 1 small garlic clove, grated
- Pinch of salt
Instructions
- Whisk the dressing ingredients in a small jar or bowl until they emulsify and look slightly thickened, about 60 seconds.
- Heat 1 tablespoon of olive oil in a skillet over medium heat and add the rinsed beans with the cumin and smoked paprika.
- Cook 5 to 6 minutes, stirring, until hot and lightly toasted at the edges.
- Taste one bean and season with salt. Beans seasoned only with spices need salt to taste complete.
- Warm the cooked rice with 2 tablespoons of the dressing, or add the dressing to each bowl at the table.
- Set out the rice, beans, corn, salsa, avocado, lettuce, and yogurt in separate bowls.
- Let everyone build their own bowl, then drizzle with the remaining dressing.
Tip: Dress the rice at the table, not in the pan. Rice sitting in dressing for more than 15 minutes turns clumpy, and the same goes for the beans.
Swap it: Use brown rice or quinoa for more fiber, and swap black beans for pinto or chickpeas. For a vegan version, use plant-based yogurt or a spoonful of avocado blended with lime.
Storage: Store components separately for up to 4 days so the rice does not go soft. Keep the dressing in a sealed jar in the fridge for up to a week.
6. One-Skillet Chicken and White Bean Dinner
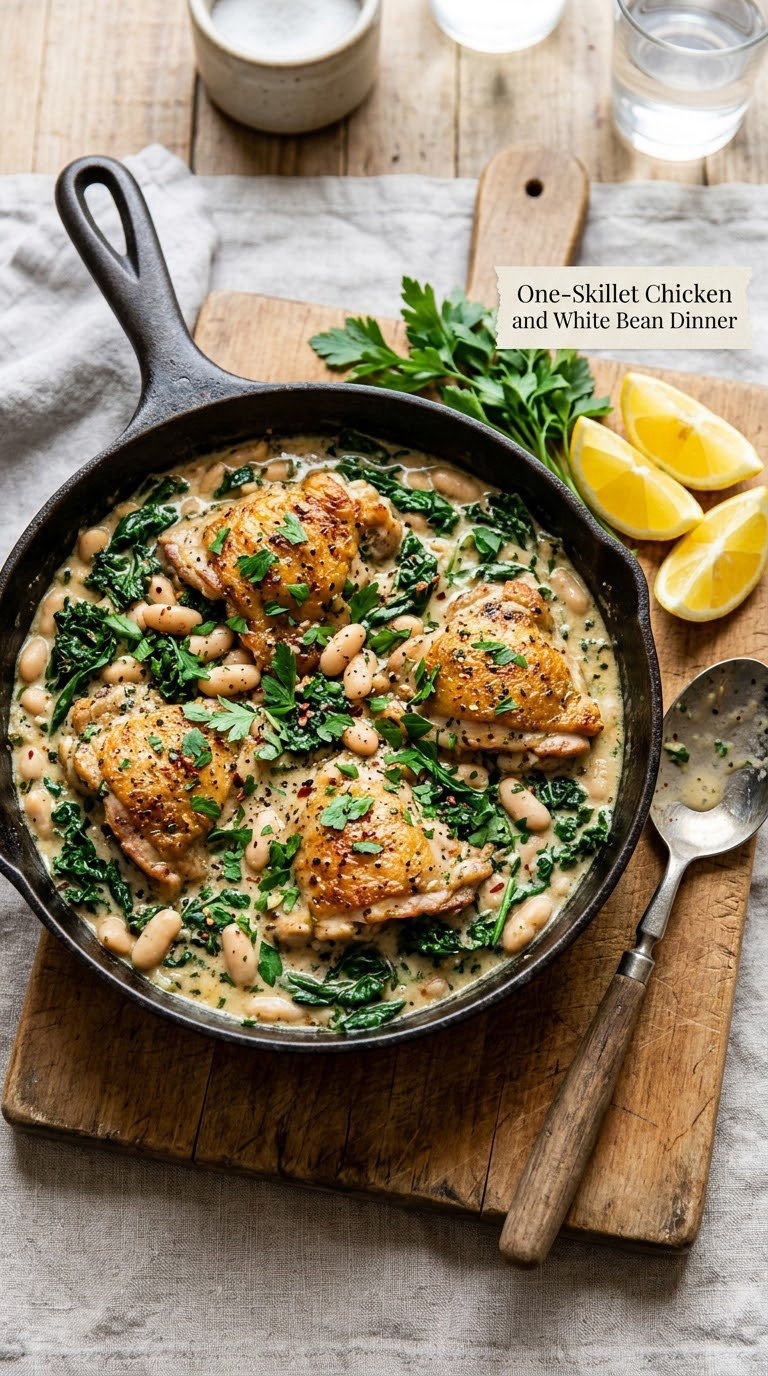
Cannellini beans turn a skillet of chicken into something that tastes like it simmered, because their starch thickens the pan juices into a light sauce. One pan, thirty minutes, and a squeeze of lemon at the end.
Yield: 4 servings · Prep: 10 minutes · Cook: 20 minutes · Total: 30 minutes · Difficulty: Easy
Ingredients
- 1.5 pounds boneless skinless chicken thighs or breasts, cut into chunks
- 1 tablespoon olive oil
- 1 can (15 ounces) cannellini or navy beans, drained and rinsed
- 3 garlic cloves, minced
- 1 cup chicken broth
- 1/2 teaspoon red pepper flakes
- 2 cups baby spinach or kale
- 1 lemon, zested and juiced
- 1 tablespoon chopped fresh parsley or dill
- Salt and black pepper to taste
Instructions
- Pat the chicken dry and season it on all sides with salt and pepper.
- Heat the olive oil in a large skillet over medium-high heat and sear the chicken in a single layer.
- Cook 3 to 4 minutes per side until browned on both sides and no longer pink in the center, then set it aside on a plate.
- Lower the heat to medium and add the garlic and red pepper flakes. Cook 30 seconds.
- Add the chicken broth and the rinsed beans, scraping up the browned bits from the bottom of the pan.
- Return the chicken and any juices from the plate to the skillet.
- Simmer gently for 8 minutes, stirring once or twice, until the broth has reduced slightly and looks lightly thickened.
- Check the chicken has reached 165°F (74°C) in the thickest piece with an instant-read thermometer.
- Stir in the spinach a handful at a time until it wilts, about 1 minute.
- Take the pan off the heat, stir in the lemon zest, lemon juice, and parsley, and season to taste.
Tip: Sear the chicken in batches rather than crowding the pan. If the pieces touch, they steam instead of browning, and you lose the fond that flavors the sauce.
Swap it: Use ground turkey or Italian sausage instead of chicken for a quicker version. Navy beans and great northern beans work as well as cannellini.
Storage: Keeps 3 to 4 days in the fridge. Reheat gently on the stove with a splash of broth, since reheated beans tighten as they cool. Safe reheating temperature is 165°F (74°C).
7. Hearty Beef and Kidney Bean Stew
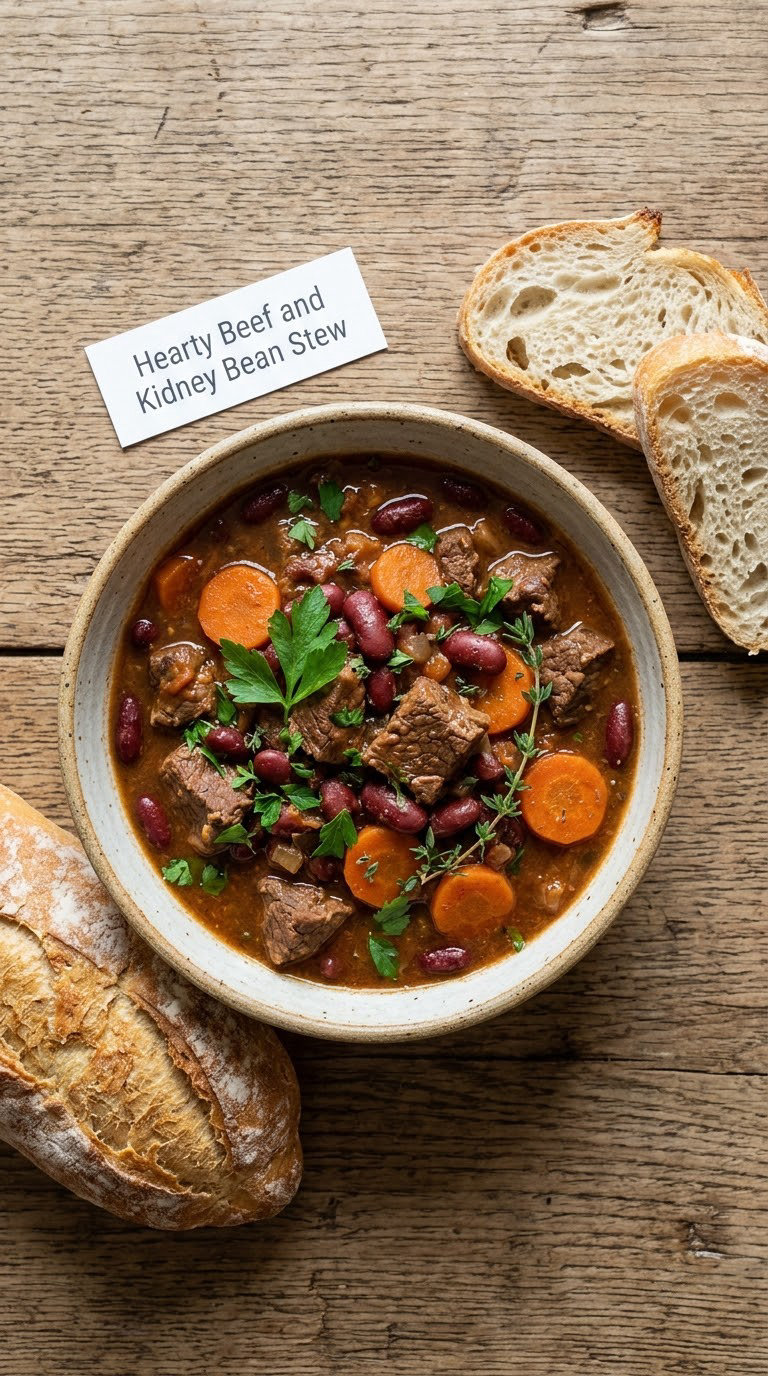
Kidney beans hold their shape and drink up broth, which makes them the right bean for a stew that should taste like it cooked slowly. The carrots go in early, the beans go in late, and that timing is what keeps the texture right.
Yield: 6 servings · Prep: 15 minutes · Cook: 30 minutes · Total: 45 minutes · Difficulty: Easy
Ingredients
- 1.5 pounds chuck or ground beef, cut into 1-inch pieces
- 1 tablespoon olive oil
- 1 yellow onion, diced
- 2 carrots, peeled and cut into thick coins
- 3 garlic cloves, minced
- 2 tablespoons tomato paste
- 2 cans (15 ounces each) kidney beans, drained and rinsed
- 1 can (14.5 ounces) crushed tomatoes
- 2 cups beef broth
- 1 teaspoon dried thyme and 1 bay leaf
- 1 tablespoon Worcestershire sauce
- Salt and black pepper to taste
- Chopped parsley and crusty bread for serving
Instructions
- Heat the oil in a large Dutch oven or heavy pot over medium-high heat.
- Brown the beef in batches until each side is deeply browned, 3 to 4 minutes per batch. Browning first is what gives the broth its body.
- Set the beef aside and lower the heat to medium. Add the onion and carrots with a pinch of salt and cook 6 minutes until softened.
- Stir in the garlic and tomato paste and cook 1 minute, until the paste darkens slightly.
- Pour in the crushed tomatoes and scrape the bottom of the pot clean. Cook 3 minutes until the sauce thickens and the raw tinned taste disappears.
- Return the beef to the pot and add the broth, thyme, bay leaf, and Worcestershire sauce.
- Cover and simmer for 20 minutes, stirring occasionally, until the beef is fork-tender.
- Add the rinsed kidney beans and simmer uncovered for 8 to 10 minutes so they heat through without splitting.
- Verify the beef has reached 160°F (71°C) for ground beef or 145°F (63°C) with a 3-minute rest for whole cuts, then season to taste.
- Remove the bay leaf and finish with parsley.
Tip: Salt the stew in layers rather than all at the end. Beans added to an already-seasoned broth absorb less flavor than beans cooked in a seasoned liquid.
Swap it: Use ground beef and cut the browning time to 6 minutes, or swap half the beef for sliced sausage. Pinto and black beans both work, though the broth will need more simmering to thicken.
Storage: Holds 4 days in the fridge, and this is the recipe that improves overnight. Freeze in portions for up to 3 months; thaw in the fridge and reheat on the stove, stirring in a splash of water if it thickens too much.
8. Cheesy Baked Bean Casserole
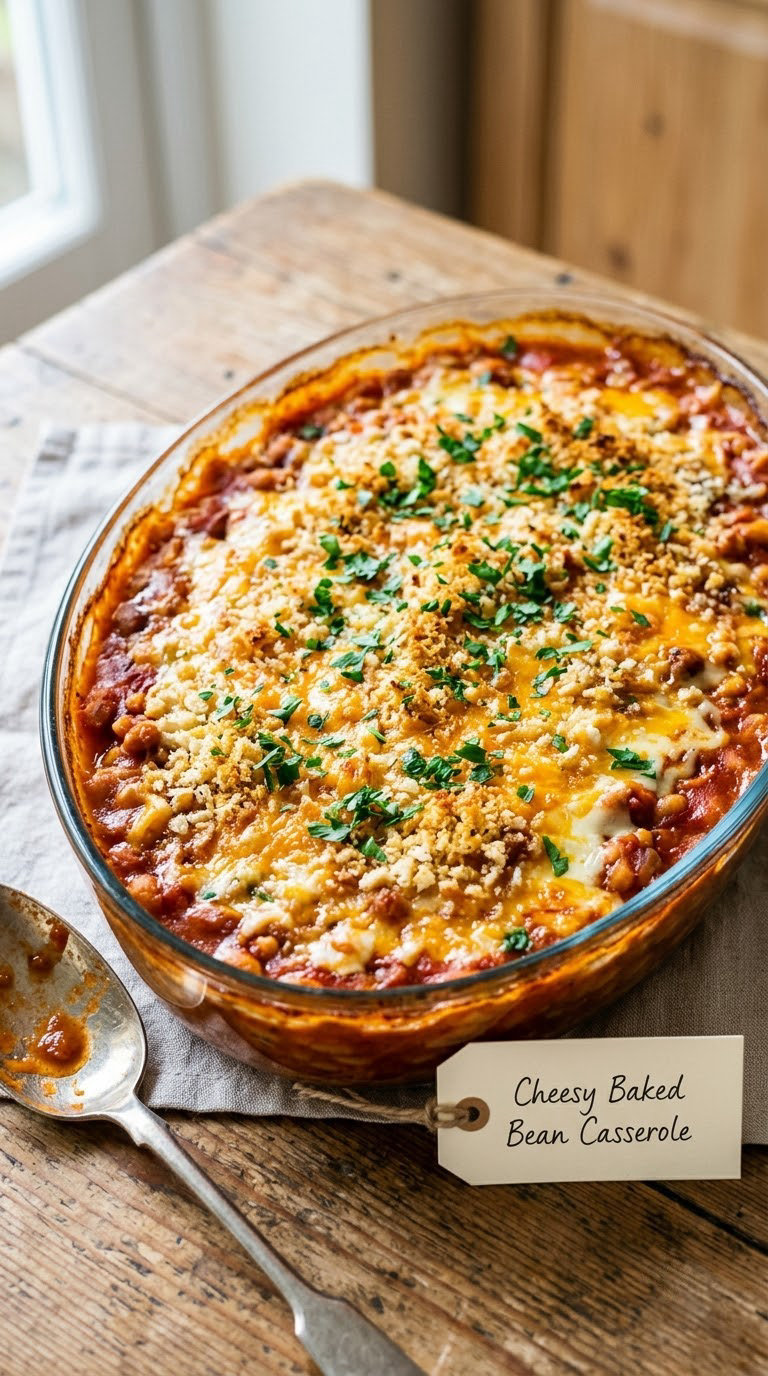
Two kinds of beans, a fast tomato sauce, and a breadcrumb top make this the most forgiving recipe in the roundup. It is also the best make-ahead option: assemble it in the morning and bake it when everyone walks in.
Yield: 6 servings · Prep: 15 minutes · Cook: 30 minutes · Total: 45 minutes · Difficulty: Easy
Ingredients
- 1 tablespoon olive oil
- 1 yellow onion, diced
- 1 can (15 ounces) pinto beans, drained and rinsed
- 1 can (15 ounces) kidney beans, drained and rinsed
- 1 can (15 ounces) crushed tomatoes
- 1 cup shredded cheddar
- 1/2 cup shredded mozzarella
- 2 teaspoons chili powder and 1 teaspoon cumin
- 1 tablespoon brown sugar
- 3/4 cup panko or coarse breadcrumbs
- 2 tablespoons melted butter
- Salt and pepper to taste
- Chopped parsley and sour cream for serving
Instructions
- Heat the oven to 375°F (190°C) and butter a 9 by 13-inch baking dish.
- Heat the olive oil in a skillet over medium heat and soften the onion for 5 minutes.
- Add the chili powder and cumin and cook 1 minute, until fragrant.
- Add the crushed tomatoes, brown sugar, and both rinsed beans. Stir and simmer for 6 minutes until thick.
- Season with salt and pepper, then stir in 1 cup of the cheddar.
- Scrape the bean mixture into the baking dish and spread it level.
- Scatter the mozzarella over the top, then the breadcrumbs, then drizzle the melted butter over the crumbs.
- Bake uncovered for 25 to 30 minutes, until the edges bubble and the topping is golden.
- Rest 10 minutes before serving so the sauce sets instead of running across the plate.
- Finish with parsley and a spoonful of sour cream.
Tip: Mash about a quarter of the pinto beans against the side of the pot. It thickens the whole casserole without flour, and it is what makes the sauce cling to the beans.
Swap it: Make it vegetarian as written, or add browned ground beef or sliced sausage for a meatier version. For a gluten-free top, use certified gluten-free breadcrumbs or a layer of shredded cheese alone.
Storage: Cover and refrigerate for up to 4 days. To reheat, cover with foil and bake at 350°F (175°C) for 20 minutes so the top stays crisp. It also freezes well for 3 months.
More weeknight favorites built around a slow cooker are collected in our easy crockpot dinner recipes.
9. Easy Bean and Vegetable Pasta Sauce
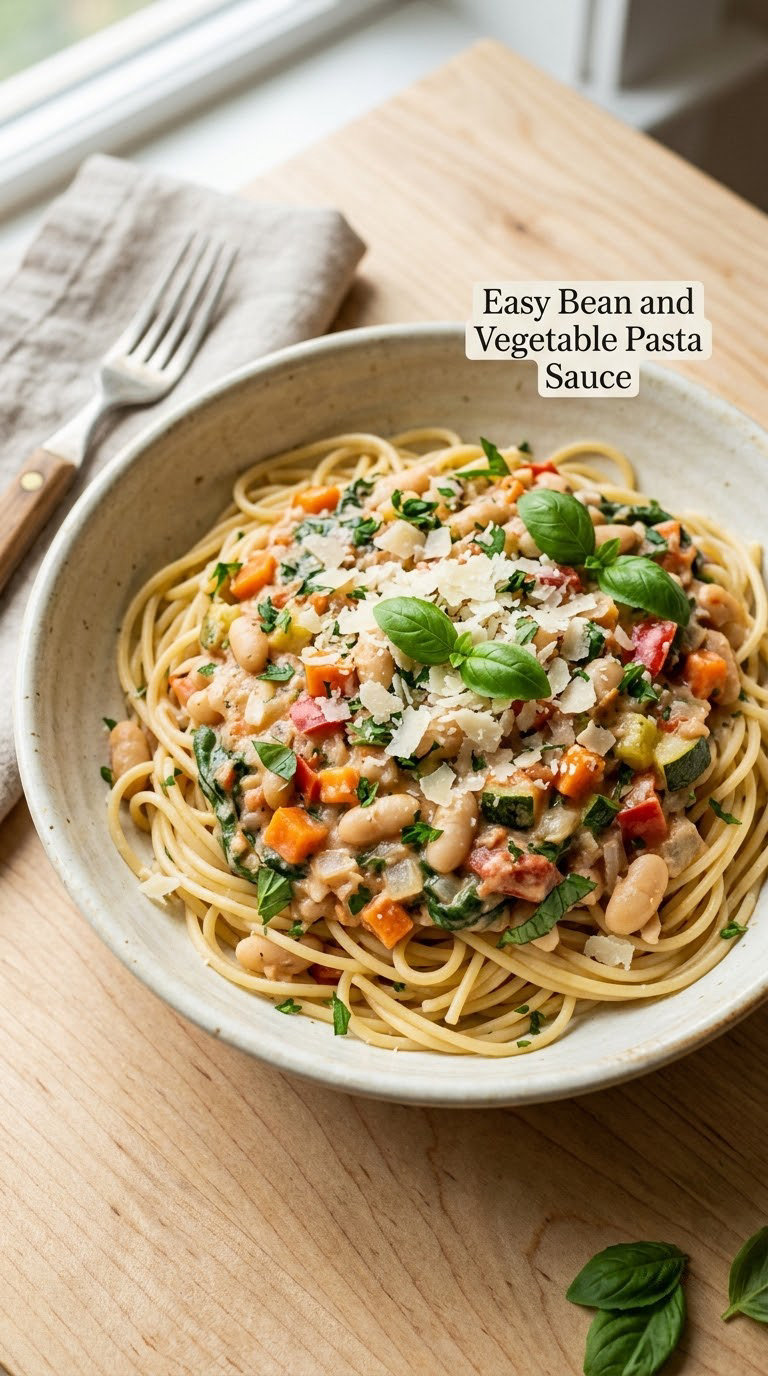
This is how you make a meatless pasta sauce that coats instead of pools. Mashing beans in the pan releases starch that thickens the sauce, so there is no cream, no flour, and no blender.
Yield: 4 servings · Prep: 8 minutes · Cook: 17 minutes · Total: 25 minutes · Difficulty: Medium
Ingredients
- 2 tablespoons olive oil
- 1 yellow onion, finely diced
- 2 garlic cloves, minced
- 8 ounces mushrooms, sliced
- 1 can (14.5 ounces) crushed tomatoes
- 1 can (15 ounces) cannellini beans, drained and rinsed
- 2 cups baby spinach
- 2 teaspoons Italian seasoning
- 1/2 teaspoon red pepper flakes
- 1/2 cup vegetable broth, plus more as needed
- 12 ounces spaghetti or rigatoni
- Grated Parmesan and torn basil for serving
Instructions
- Bring a large pot of salted water to a boil for the pasta and cook until al dente, about 9 to 11 minutes. Reserve 1 cup of pasta water before draining.
- Heat the olive oil in a wide skillet over medium heat and cook the onion for 6 minutes until soft and pale gold.
- Add the mushrooms and cook 5 minutes, until they release their liquid and it cooks away.
- Stir in the garlic, Italian seasoning, and red pepper flakes and cook 1 minute.
- Add the crushed tomatoes and simmer 3 minutes to cook off the sharp edge.
- Add the rinsed beans and mash about half of them against the side of the skillet with a potato masher.
- Stir in the spinach and 1/2 cup of broth and simmer 4 to 5 minutes, until the sauce is thick enough to hold a spoon mark.
- Add a splash of pasta water if the sauce tightens too far.
- Drain the pasta, return it to the pot, and toss with the sauce over low heat for 1 minute until glossy.
- Finish with Parmesan, torn basil, and black pepper.
Tip: Mash half the beans rather than all of them. You get body from the starch and still have whole beans for texture, which is what makes the sauce read as a meal instead of a purée.
Swap it: Use chickpeas for a slightly grainier sauce, or white beans for a creamier one. Zucchini or grated carrot works in place of mushrooms and adds sweetness.
Storage: Keeps 4 days in the fridge, and the sauce thickens as it sits. Loosen with broth or pasta water when reheating over low heat. Freeze flat in a container for up to 3 months.
10. Black Bean and Sweet Potato Tacos
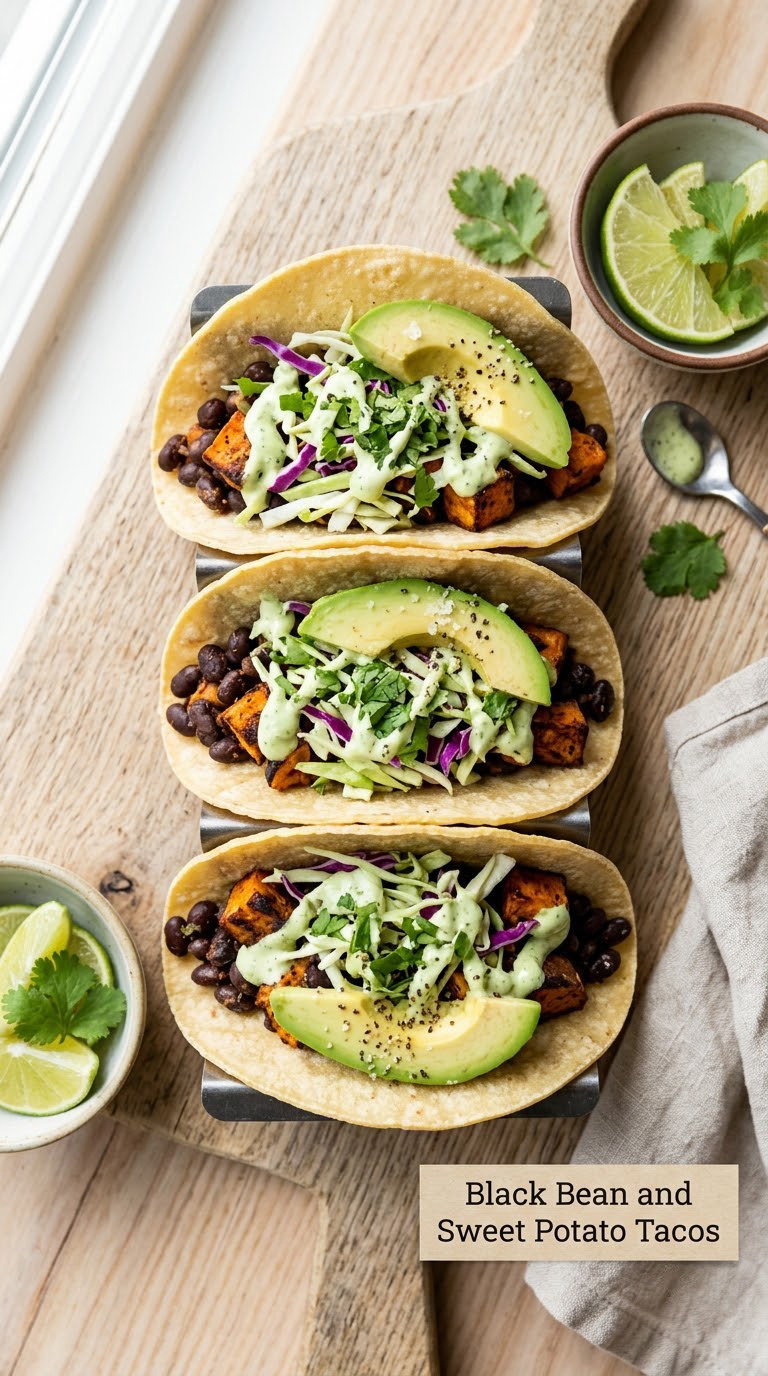
Roasted sweet potato and warm spice take canned beans from side dish to main event. Microwaving the sweet potato cuts the cooking time nearly in half, and the result is soft enough to mash into the beans.
Yield: 4 servings (12 tacos) · Prep: 12 minutes · Cook: 18 minutes · Total: 30 minutes · Difficulty: Easy
Ingredients
- 1 large sweet potato, peeled and cut into 1/2-inch cubes
- 1 tablespoon olive oil
- 1 can (15 ounces) black beans, drained and rinsed
- 1 teaspoon ground cumin and 1 teaspoon smoked paprika
- 1/2 teaspoon cinnamon
- 12 corn or flour tortillas
- 1 cup finely shredded cabbage
- 1/2 cup plain Greek yogurt
- Juice of 1 lime
- 1 avocado, sliced
- Chopped cilantro, salt, and hot sauce
Instructions
- Heat the oven to 425°F (220°C) and toss the sweet potato cubes with the olive oil and a pinch of salt.
- Spread the cubes on a baking sheet and roast 20 minutes, turning once, until the edges caramelize.
- If you want to save time, microwave the cubed sweet potato in a covered bowl for 5 to 6 minutes until tender, then proceed.
- Warm the rinsed beans in a skillet over medium heat with the cumin, smoked paprika, and cinnamon.
- Add the roasted sweet potato and mash roughly one-third of it with the beans until the mixture holds together.
- Cook 4 minutes until everything is hot and the moisture cooks off.
- Season with salt and a squeeze of lime.
- Stir the lime juice into the yogurt to make a quick crema.
- Warm the tortillas in a dry skillet or a 350°F (175°C) oven for 4 minutes.
- Fill each tortilla with the bean and sweet potato mixture and top with cabbage, lime crema, avocado, and cilantro.
Tip: Mash part of the sweet potato into the beans. The starch is what binds the filling so it does not fall apart when someone takes the first bite.
Swap it: Use butternut squash cubes in place of sweet potato. Pumpkin or canned butternut squash works too, though it makes the filling sweeter, so cut the cinnamon in half.
Storage: Keeps 3 days in the fridge in a sealed container, and it reheats well in a skillet with a drop of oil. The lime crema keeps 4 days but goes thinner, so stir it before serving.
Our easy Instant Pot dinner recipes have plenty of ways to use the same cans in a faster timeline.
11. Canned Bean Tuna Melt
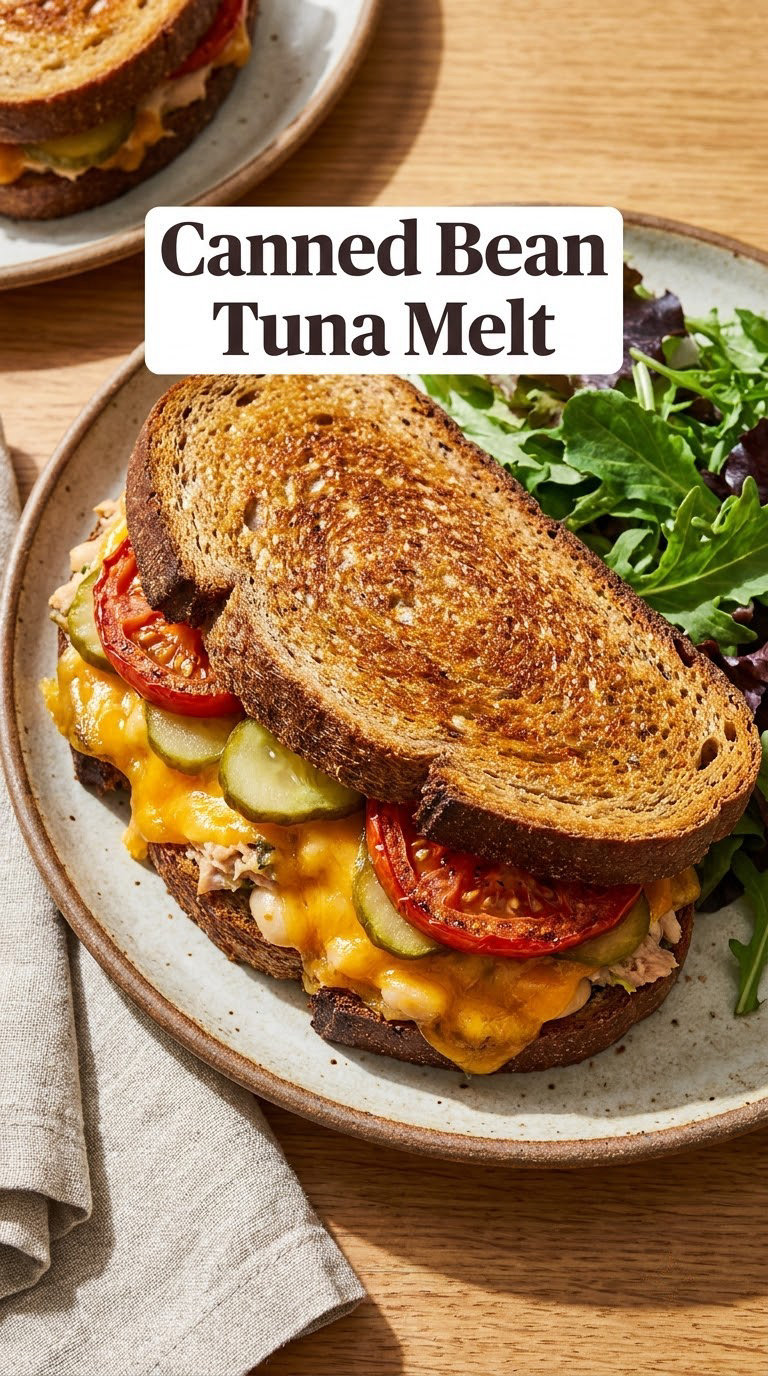
Fifteen minutes, one skillet, and about 20 grams of protein per slice. White beans mashed into the tuna make it moist and add fiber, which is the whole trick behind this version.
Yield: 2 servings (4 open-face melts) · Prep: 10 minutes · Cook: 5 minutes · Total: 15 minutes · Difficulty: Easy
Ingredients
- 1 can (5 ounces) tuna in water, drained
- 1 can (15 ounces) cannellini beans, drained and rinsed, about 1/2 cup used
- 1/4 cup plain Greek yogurt
- 1 tablespoon mayonnaise
- 1 tablespoon Dijon mustard
- 1 teaspoon lemon juice
- 4 slices rye or sourdough bread
- 3/4 cup shredded cheddar
- Pickle slices, tomato slices, and black pepper to serve
Instructions
- Warm the bread in a dry skillet or toaster so the slices are crisp before the topping goes on.
- Mash 1/2 cup of the rinsed beans with a fork until mostly smooth.
- Stir in the drained tuna, yogurt, mayonnaise, mustard, and lemon juice.
- Mash everything together until the mixture is spreadable and holds its shape on a spoon.
- Season with black pepper and a pinch of salt.
- Spread the tuna-bean mixture thickly on each slice of toast, covering the edges.
- Scatter the cheddar over each slice.
- Broil 3 to 5 minutes, watching constantly, until the cheese is melted and blistered in spots.
- Check the tuna has reached 145°F (63°C) if it was not canned as fully cooked ready-to-eat tuna.
- Top with pickle and tomato slices and serve immediately.
Tip: Toast the bread first. Bread under a broiler goes from pale to burnt in about 90 seconds, and a pre-toasted slice can take the heat without crumbling.
Swap it: Use canned salmon instead of tuna, or go meatless with chickpeas plus a spoonful of chopped celery and relish. Provolone melted with a pinch of oregano is a good change from cheddar.
Storage: Keeps 2 days in the fridge, but the bread softens, so store the tuna-bean mixture separately and assemble right before eating. Reheat leftovers in a skillet rather than the microwave.
12. Crispy Salmon and Canned Bean Bowls
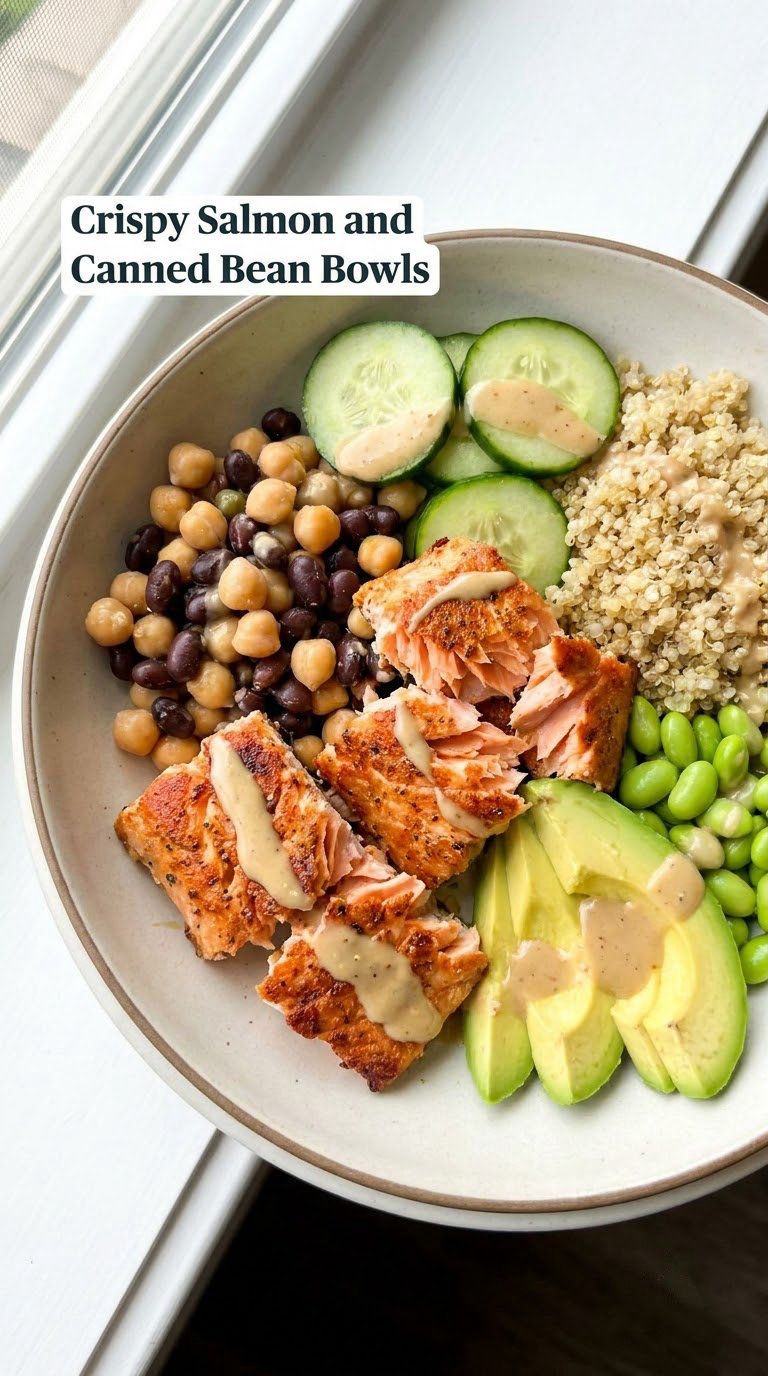
The last recipe is the healthiest and the fastest. Crisping the beans in a hot pan first is what keeps them from disappearing into the grain bowl, and it takes 5 minutes.
Yield: 4 servings · Prep: 12 minutes · Cook: 13 minutes · Total: 25 minutes · Difficulty: Medium
Ingredients
- 1 can (15 ounces) black beans, drained and rinsed
- 1 tablespoon olive oil
- 1 teaspoon smoked paprika
- 4 salmon fillets, 5 to 6 ounces each
- 1 tablespoon sesame oil
- 2 cups cooked quinoa or brown rice
- 1 English cucumber, diced
- 1 avocado, cubed
- 1 cup shelled edamame
- 2 tablespoons low-sodium soy sauce
- 1 tablespoon rice vinegar and 1 teaspoon sesame oil for the dressing
- Lime wedges and lime crema for serving
Instructions
- Place the rinsed beans in a bowl and toss with 1 tablespoon of olive oil, the smoked paprika, and a pinch of salt.
- Heat a skillet over medium-high heat and spread the beans in one layer. Leave them untouched for 3 minutes until crisp on the bottom.
- Stir, cook 2 more minutes, and remove from the pan while they are still slightly firm.
- Pat the salmon dry, season with salt and pepper, and heat the sesame oil in the same pan over medium-high heat.
- Sear the salmon skin-side down for 4 minutes, pressing gently for the first 20 seconds to keep the skin flat.
- Flip and cook 2 to 3 minutes more, until the salmon flakes at the thickest point and reaches 145°F (63°C).
- Whisk the soy sauce, rice vinegar, and sesame oil in a small bowl for the dressing.
- Divide the warm quinoa or rice between four shallow bowls.
- Top each with the crisped beans, cucumber, avocado, edamame, and a piece of salmon.
- Drizzle with the dressing and serve with lime wedges and lime crema.
Tip: Do not stir the beans while they crisp. Leaving them alone for the first 3 minutes is what creates the browned edges, and stirring too soon breaks them up before they set.
Swap it: Use chickpeas, which crisp just as well, or skip the fish entirely and add an extra scoop of edamame. Brown rice or farro works in place of quinoa.
Storage: Store the components separately and assemble within 3 days so the beans stay crisp. The dressing keeps in the fridge for up to 2 weeks and is good on roasted vegetables too.
Tips for Making These
Most disappointing bean dinners come down to the same handful of habits. These fix the problems that come up again and again in the comment sections of bean recipes.
- Drain and rinse, every time. Pouring off the packed liquid and rinsing under cold water removes a meaningful amount of sodium and washes off the starchy taste. It takes 30 seconds and changes the finished dish.
- Cook the beans in something. Beans heated on their own are a side dish. Beans simmered in broth, crushed tomatoes, salsa, or a creamy sauce become dinner.
- Mash some of them. A third to a half of the beans mashed in the pan releases starch that thickens any sauce without flour or cream. Leave the rest whole for texture.
- Season twice and taste. Salt before the liquid cooks off, then taste again at the end and add lime, vinegar, or more salt. Canned beans absorb seasoning differently than dried ones.
- Brown something. If the recipe has beef, chicken, or sausage, brown it in batches and scrape the pan. Those browned bits carry more flavor than an extra spice.
- Add acid last. A squeeze of lime or a splash of vinegar at the end wakes up a dish that tastes flat but not bland.
- Batch without sogginess. Store rice, beans, and toppings separately for meal prep, and dress or sauce only when you eat. Holding a hot casserole for a book club or a potluck, our slow cooker dinners do the same work with less tending.
Most cooked bean dishes, whether from these recipes or anywhere else, keep 3 to 4 days in the fridge. Freeze them in single portions, leave 1 inch of headspace for expansion, and thaw in the fridge rather than on the counter.
Frequently Asked Questions
Do I need to rinse canned beans before using them in these dinner recipes?
Rinse them. Draining and rinsing canned beans under cold water removes part of the sodium from the packing liquid and washes away the starchy taste that makes jarred beans taste different from home-cooked ones. It takes about 30 seconds. Every recipe in this roundup assumes rinsed beans, and the difference is most obvious in no-salt chili, quesadillas, and any dish where beans are the star rather than a background texture.
Which canned beans work best for these easy dinners?
Black beans are the most versatile and hold their shape best in tacos, bowls, nachos, and chili. Cannellini and navy beans are the creamiest and best for mashing into sauces, soups, and pasta. Pinto beans work well in casseroles and dip. Kidney beans hold shape for stews. Chickpeas roast and crisp better than any other variety. Keep two or three types in the pantry at all times.
Can I make these recipes ahead of time?
Most of them, yes. The chili, kidney bean stew, baked casserole, and burrito bowl filling all hold 4 days in the fridge and many taste better on day two. Cook the beans and meat separately from rice, tortillas, and crunchy toppings, and assemble the last few minutes before serving. Do not dress rice or salsa hours ahead, or both turn soft and watery.
How long do cooked canned bean dinners keep in the fridge?
Most cooked bean dishes keep 3 to 4 days refrigerated at 40°F (4°C) or below, including chili, stews, and pasta sauce. Use a shallow container so the food cools quickly, and cover it well. Reheat only the portion you plan to eat, on the stove or in the microwave until steaming hot throughout, and count reheated food within the first two days for the safest results.
Can I use these recipes for meal prep?
Yes, and about half of these were built with it in mind. The burrito bowls, loaded nachos, taco filling, white bean soup, and the salmon bowls all split cleanly into separate components. Portion rice, beans, and toppings into containers and keep dressings in small jars. Assemble at lunch or dinner, and keep cooked food in the fridge for no more than 4 days.
What can I serve with the bean and rice dishes?
For burrito bowls and bean and rice plates, go with Mexican street corn, simple yellow rice, guacamole, pickled onions, and a crunchy romaine salad with lime dressing. Warm tortillas and sour cream handle the rest. Tortilla chips and salsa work just as well for casual nights, and a bowl of fruit or cucumber sticks balances the heavier bowls on hot days.
Easy Canned Bean Dinners for Busy Nights
Start with the one-pot beef and black bean chili. It teaches the two techniques that unlock almost everything else in this list, cooking the spices in fat and giving the liquid somewhere to go, and it reheats better than any other recipe here. Once you have that down, the black bean tacos and the burrito bowls take almost no time at all.
Keep three cans in the cupboard at all times: one black, one white, one chickpea. Those three cover all 12 of these easy dinner recipes with canned beans, and every one of them comes together in under 45 minutes on a weeknight.