
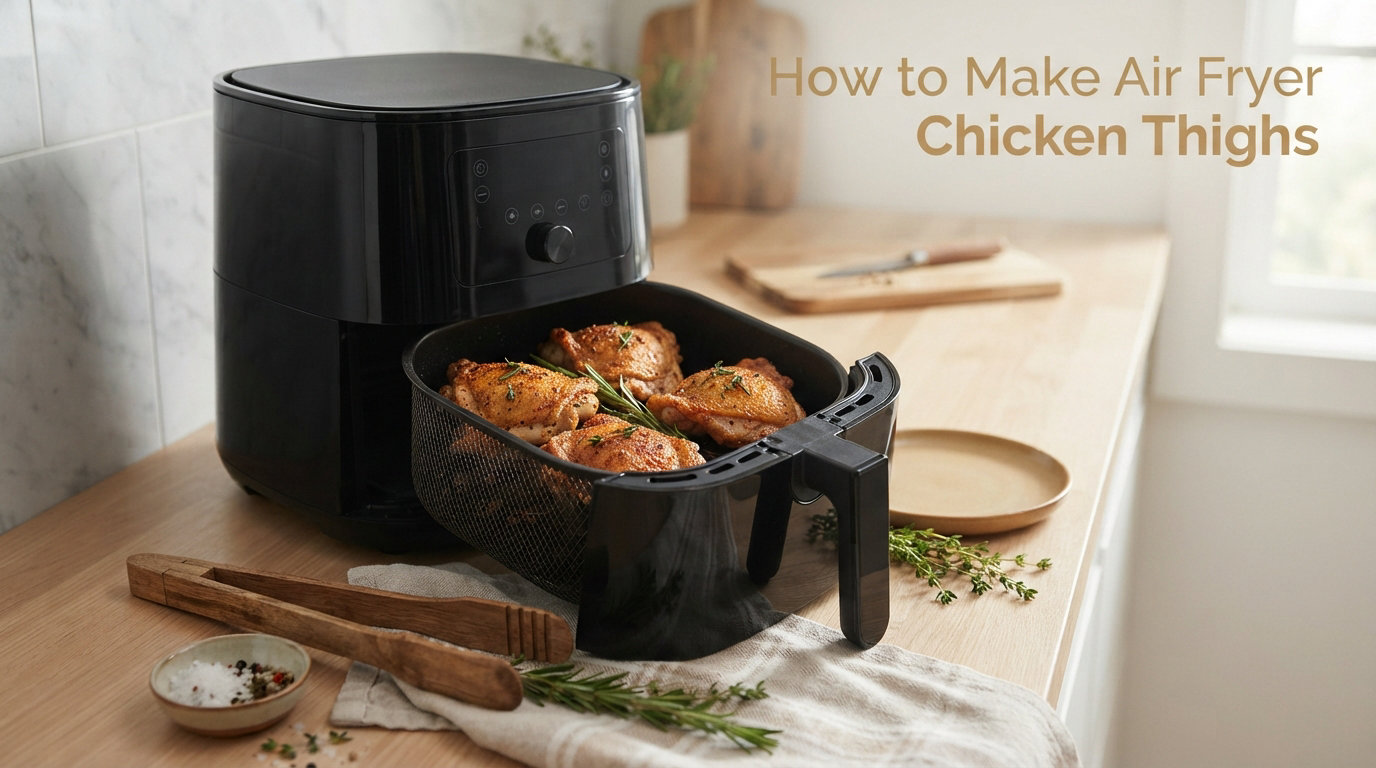
How to make air fryer chicken thighs is mostly a matter of matching the time to the cut, leaving room for hot air to circulate, and checking the thickest piece with a food thermometer. This complete recipe uses bone-in, skin-on thighs at 380°F, with a dry paprika-garlic seasoning and a skin-side-down start followed by a skin-side-up finish.
The guide also covers boneless thighs, preheating, batch size, smoke prevention, crisp-skin troubleshooting, five flavor variations, leftovers, and reheating. Air fryer power and chicken size vary, so use the time ranges to decide when to check—not as proof that the chicken is done.
Table of Contents
How to Make Air Fryer Chicken Thighs
Serves: 4 | Time: 35 minutes | Method: Air fryer
Ingredients
-
4 bone-in, skin-on chicken thighs, about 1 1/2 to 2 pounds total
-
1 tablespoon avocado oil or olive oil
-
1 teaspoon kosher salt, or 3/4 teaspoon fine salt
-
1 teaspoon smoked or sweet paprika
-
1 teaspoon garlic powder
-
1/2 teaspoon onion powder
-
1/2 teaspoon dried oregano or Italian seasoning
-
1/4 teaspoon black pepper
-
Lemon wedges and chopped parsley for serving, optional
Equipment
-
Basket-style or oven-style air fryer with a clean basket or tray
-
Instant-read food thermometer
-
Small bowl
-
Tongs
-
Clean plate or wire rack for resting
Instructions
-
Check the air fryer manual for the recommended preheating and basket instructions. If the model supports preheating, heat it to 380°F for 3 to 5 minutes.
-
Remove loose flaps of skin and large pieces of excess fat without stripping away the skin that covers the meat. Pat every side of the thighs dry with paper towels. Do not rinse raw chicken.
-
Mix the salt, paprika, garlic powder, onion powder, oregano, and pepper in a small bowl.
-
Rub the chicken with the oil, then coat both sides with the seasoning. Lift the edge of the skin and season the meat beneath it without pulling the skin off.
-
Arrange the thighs skin-side down in a single layer. Leave a little space around each piece and make sure no skin is folded under another thigh.
-
Air-fry at 380°F for 12 minutes. Open the basket carefully and use tongs to turn every thigh skin-side up.
-
Cook for 8 more minutes, then check the thickest part of each thigh. Insert the thermometer into the meat without touching the bone. Continue in 2-minute increments until every thigh reaches at least 165°F.
-
If the chicken is safe but the skin needs more color, cook skin-side up at 400°F for 1 to 3 minutes. Watch closely because spices and rendered skin can darken quickly.
-
Move the thighs to a clean plate or wire rack and rest for 5 minutes before serving. Do not put cooked chicken back on a plate or tray that held it raw.
The USDA air fryer safety guide explains that appliance size and power affect cooking time, while the safe internal temperature does not change. Poultry must reach at least 165°F as measured with a food thermometer.
Choose the Right Chicken Thighs
Bone, skin, thickness, and starting temperature change the cooking window. Do not place several different cuts in one batch and expect them to finish together. Use these ranges as starting points, and remove each piece only after its thickest part reaches 165°F.
-
Bone-in, skin-on thighs: Start checking at 20 minutes at 380°F; many average pieces need about 20 to 26 minutes.
-
Boneless, skinless thighs: Start checking at 12 minutes at 380°F; many pieces need about 12 to 18 minutes.
-
Very large bone-in thighs: Expect more time than the base recipe and check in 2-minute increments rather than raising the temperature immediately.
-
Skinless, bone-in thighs: Use the bone-in timing range but begin checking early because there is no skin to protect the surface.
-
Chicken leg quarters: Use a recipe written for the larger combined thigh-and-drumstick cut; it is not a direct timing swap.
For the most even batch, choose thighs that are close in weight and thickness. If one is clearly smaller, place it where the air fryer runs cooler and check it first. When shopping, remember that package weight includes bone and skin, so total package weight cannot predict the exact cooking time.
Why the Air Fryer Method Works
An air fryer is a compact convection oven. A fan moves hot air quickly around the basket, helping moisture leave the surface while rendered fat drains away. That circulation can produce browned skin without submerging the chicken in oil, but it works only when air can reach the food.
Crowding changes the process. When thighs overlap or touch closely, moisture becomes trapped between them and the covered areas soften. A single uncrowded layer is more important than fitting the whole package into one cycle. Cook two batches if necessary.
Preheating is model-dependent. Some air fryers preheat automatically, some recommend a short manual preheat, and others are designed for a cold start. Follow the appliance manual first. If the manufacturer supports preheating, a hot basket gives the surface a quicker start; if it does not, add a few minutes to the checking window rather than assuming the published time will match.
How to Measure Doneness Safely
Appearance cannot confirm safety. Dark skin can cover undercooked meat, and properly cooked poultry can retain some pink color. The USDA poultry temperature guidance sets 165°F as the safe minimum for all poultry.
-
Pull the basket out only far enough to reach the chicken safely and keep hands clear of hot surfaces.
-
Insert the clean thermometer probe into the thickest, meatiest section from the side.
-
Keep the probe tip away from the bone and away from the hot basket, because either can distort the reading.
-
Wait for the number to stabilize and check a second spot when a thigh is irregularly shaped.
-
Return any thigh below 165°F to the air fryer and check again after 2 minutes.
-
Wash the thermometer stem with hot, soapy water after it touches undercooked poultry and after the final check.
Check every piece rather than only the largest one. Air fryers often have warmer zones, and similar-looking thighs can differ in thickness. If one finishes first, transfer it to the clean resting plate while the others continue.
How to Get Crisp Chicken Skin
Dry the Surface Thoroughly
Surface water must evaporate before browning can begin. Pat the top, bottom, and folds near the bone dry. Season immediately after adding a thin film of oil; too much oil can make the seasoning slide off and can add to smoke.
Start Skin-Side Down, Finish Skin-Side Up
The first stage begins rendering fat, while the second exposes the skin directly to the moving heat. Finish skin-side up so the crisp surface is not pressed against the basket as it reaches its final color.
Leave Space Between Pieces
Do not stack, overlap, or wedge chicken tightly against the basket walls. If a thigh has a loose skin flap, spread it over its own meat rather than letting it cover the neighboring piece.
Use a Short Hot Finish Only When Needed
A final 1 to 3 minutes at 400°F can improve pale skin after the chicken is safely cooked. This is a finishing step, not a substitute for drying and spacing. Stay nearby, especially with paprika, sugar, honey, or sauce on the surface.
Rest Without Trapping Steam
Rest the thighs uncovered on a clean wire rack or plate. A tight foil tent holds steam against the skin and softens it. If the meal must wait, keep the chicken uncovered and re-crisp it briefly just before serving.
Prevent Smoke, Burning, and Mess
Chicken thighs can release a noticeable amount of fat. Start with a clean air fryer, empty accumulated grease between batches, and follow the manufacturer’s instructions for the basket, drip tray, and maximum fill level.
-
White smoke: Rendered fat may be heating in the bottom of the appliance. Stop cooking if required by the manual, allow safe access, and empty or clean the collection area before continuing.
-
Black smoke or an acrid smell: Food or seasoning may be burning. Turn off and unplug the appliance, then follow its safety instructions before inspecting it.
-
Loose parchment rises: Never preheat with an empty lightweight liner that can lift toward the heating element. Use only liners approved for the model and weigh them down with food as directed.
-
Skin touches the element: The pieces are too large or the tray is too high. Reduce the batch size or use a lower rack position allowed by the appliance manual.
-
Sugary sauce burns: Add honey, maple, or barbecue sauce during the final few minutes instead of at the beginning.
Do not pour water into the appliance unless the manufacturer’s instructions specifically allow it. Air fryer designs differ, and a workaround that is safe for one model may damage another.
Five Seasoning Variations
Keep the oil and salt under control, then change the remaining seasoning with one of these combinations. Read labels on commercial blends before adding separate salt.
-
Lemon herb: Use 1 teaspoon dried oregano, 1/2 teaspoon garlic powder, 1 teaspoon lemon zest, and black pepper; add lemon juice after cooking.
-
Smoky cumin: Combine 1 teaspoon smoked paprika, 1/2 teaspoon cumin, 1/2 teaspoon garlic powder, and a pinch of cayenne.
-
Cajun-inspired: Use 2 teaspoons salt-free Cajun seasoning, then add salt separately to taste.
-
Garlic Parmesan: Use the base garlic-herb seasoning, then add finely grated Parmesan during the last 2 minutes so it does not scorch.
-
Honey soy: Mix 1 tablespoon low-sodium soy sauce with 1 tablespoon honey; brush on during the final 2 to 3 minutes and watch closely.
Wet marinades can still work, but let excess marinade drip off before the chicken enters the basket. A heavy coating can splatter, soften the surface, or burn. Discard marinade that contacted raw poultry unless it is boiled according to a safe, tested method.
Boneless Chicken Thigh Method
Boneless, skinless thighs cook faster and will not develop the same crisp exterior as skin-on pieces. Use the same seasoning, reduce the oil to 2 teaspoons, and arrange the unfolded thighs in one layer at 380°F.
-
Cook the first side for 7 minutes.
-
Flip with tongs and cook for 5 more minutes.
-
Check the thickest part of every thigh for 165°F.
-
Continue in 2-minute increments as needed, then rest for 5 minutes.
Very thin thighs may finish near the early end, while thick folded pieces need longer. Open each thigh flat before cooking so the thick center is not hidden in a fold.
Scaling the Recipe and Cooking in Batches
For two thighs, halve the oil and seasoning but keep the temperature and doneness checks unchanged. The pieces may finish a little sooner because more air circulates around them.
For six to eight thighs, cook in two batches unless the air fryer has enough tray space for a single uncrowded layer. The second batch can cook faster because the appliance is fully hot, so begin checking it 2 minutes earlier. Empty excess fat between batches if the manual directs you to do so.
In an oven-style air fryer, place a drip tray in the manufacturer-approved position and rotate trays if the manual recommends it. Check pieces from both trays separately; upper and lower positions may not brown at the same rate.
Troubleshooting Air Fryer Chicken Thighs
-
Skin is rubbery: The surface was damp, the basket was crowded, or the chicken rested under foil. Dry thoroughly, leave space, and rest uncovered.
-
Skin is dark before the center is safe: The thigh is large, the basket runs hot, or the seasoning contains sugar. Lower the temperature to 360°F and continue checking in short intervals.
-
Seasoning falls off: Excess surface moisture or oil prevented it from adhering. Pat dry, use a thin oil coating, and press on the seasoning.
-
Some thighs finish early: The batch contains uneven sizes or sits across hot and cool zones. Remove finished pieces and rotate the remaining positions if the appliance manual permits.
-
Chicken is dry: It cooked past the needed point. Start checking earlier next time and remove each thigh as soon as it is safely done.
-
Basket has burnt residue: A sugary glaze was added too early or grease from a previous batch remained. Apply sweet sauces late and clean the appliance after it cools.
Serving Ideas
-
Serve with roasted broccoli, green beans, or Brussels sprouts
-
Add mashed potatoes, roasted sweet potatoes, or rice pilaf
-
Slice boneless thighs over a green salad or grain bowl
-
Tuck chopped chicken into wraps or tacos with crunchy vegetables
-
Pair lemon-herb thighs with cucumber-tomato salad
-
Serve smoky thighs with corn, slaw, or beans
For another cut, use our dedicated air fryer chicken breast method or air fryer chicken wings guide. If you prefer not to use an air fryer, follow the separate oven-baked chicken thigh method.
Storage, Freezing, and Reheating
Refrigerate cooked chicken in a shallow covered container within two hours. The USDA’s chicken storage guidance lists 3 to 4 days for cooked chicken in a refrigerator at 40°F or below.
-
Refrigerate: Cool promptly, then store the thighs in a sealed container for 3 to 4 days.
-
Freeze: Wrap cooled portions well and freeze for up to 4 months for best quality.
-
Thaw: Thaw overnight in the refrigerator, in cold water changed regularly, or in the microwave followed by immediate cooking.
-
Reheat in the air fryer: Heat at 350°F for about 4 to 7 minutes, checking that the center reaches 165°F.
-
Reheat without burning: Lower the temperature and add time when the skin is already dark or contains a sweet glaze.
For meal prep, keep sauces and wet sides in separate containers so the skin does not absorb moisture. Remove the bone and chop fully chilled leftovers for salads, sandwiches, soup, or grain bowls.
Frequently Asked Questions
How long do chicken thighs take in the air fryer?
Bone-in, skin-on thighs often need about 20 to 26 minutes at 380°F, while boneless, skinless thighs often need about 12 to 18 minutes. Size, thickness, starting temperature, batch spacing, and air fryer power change the time. Verify at least 165°F in every piece.
What temperature should I use for air fryer chicken thighs?
Use 380°F for the base recipe. It gives thick bone-in thighs time to cook while the skin renders. A short 400°F finish can deepen pale skin after the meat is safe, while 360°F is useful if the exterior darkens too quickly.
Do I need to flip chicken thighs in the air fryer?
Flip them for this method. Starting skin-side down begins rendering fat; finishing skin-side up exposes the skin to circulating heat and makes its color easier to monitor.
Should I preheat the air fryer?
Follow the appliance manual. If the model supports or recommends preheating, give it 3 to 5 minutes at 380°F. If it is designed for a cold start, expect the checking window to shift and rely on the thermometer.
Can I line the basket with parchment or foil?
Use only liners allowed by the air fryer manufacturer. Never let a lightweight liner sit loose during preheating because circulating air can lift it toward the heating element. A liner can also restrict airflow and reduce crisping.
Can I cook frozen chicken thighs in the air fryer?
Thawing first gives more even seasoning and makes it easier to unfold, space, and check the thighs. If cooking from frozen, use instructions tested for the exact cut and appliance, allow substantially more time, and verify 165°F in the thickest part. Never air-fry a raw stuffed breaded chicken product unless its package specifically says it is designed for that method.
Why is my air fryer smoking?
Rendered fat, old residue, loose seasoning, or food too close to the heating element can create smoke. Turn off and unplug the appliance if the manual calls for it, allow safe access, clean the collection area, and reduce the batch size before continuing.
How do I reheat chicken thighs without making them soggy?
Reheat them skin-side up in a single layer at 350°F until the center reaches 165°F, usually about 4 to 7 minutes. Avoid covering the skin, and use a lower temperature if a sweet glaze could burn.
Conclusion: How to Make Air Fryer Chicken Thighs
How to make air fryer chicken thighs becomes predictable when the chicken is dry, the basket is uncrowded, and doneness is measured rather than guessed. Cook bone-in thighs skin-side down at 380°F, flip them skin-side up, and begin checking at 20 minutes. Continue only until every piece reaches at least 165°F.
Once the base method is familiar, adjust the seasoning, batch size, or cut while keeping the same safety checks. A clean appliance, late-added sweet glazes, and an uncovered rest protect the crisp surface from basket to plate.