
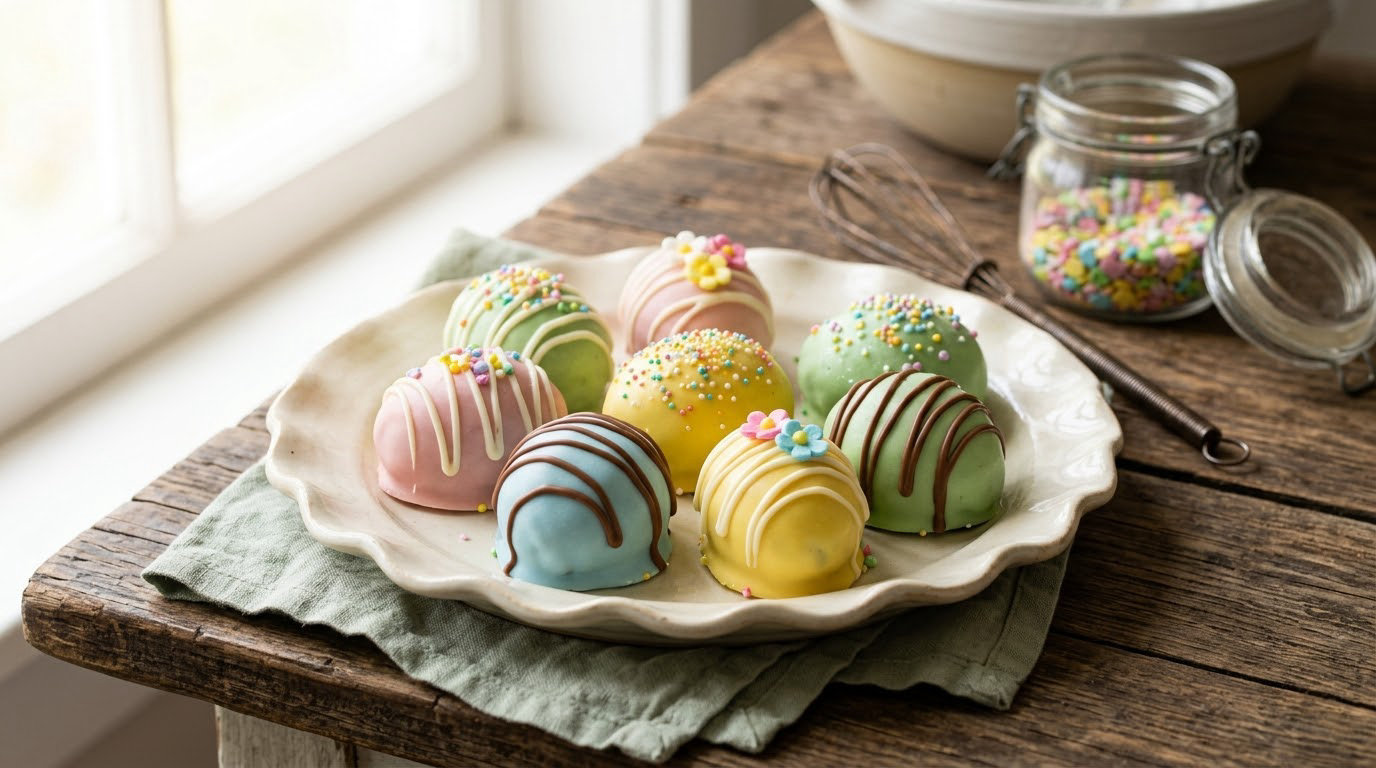
These 15 easy Easter dessert ideas for kids all share two things: short ingredient lists and steps a child can genuinely help with. Most need 20 minutes of hands-on work, and eight of them never touch the oven at all, which matters when Easter morning is already booked with a brunch, a church service and a basket to pack.
Every recipe below is written out in full with US measurements, gram weights for the baking ingredients, a doneness cue and a storage note, so you can cook straight from this page. Order them by the table first, then let the decorating step belong to the kids. Updated for 2026.
If you want more options for the weeks around the holiday, our no-bake dessert recipes and four-ingredient dessert recipes both hold up well for spring.
Table of Contents
15 Easy Easter Dessert Ideas for Kids at a Glance
Pick by the time you actually have, not by how cute the photo looks. A five-minute no-bake sits in the same list as a 45-minute mini pie, and the table tells you which is which.
| Recipe | Time | Difficulty | Best for |
|---|---|---|---|
| 1. Easter Bunny Rice Krispie Treats | 20 min + chill | Easy | Preschoolers, no oven |
| 2. Mini Lemon Easter Cupcakes | 35 min | Easy | A bright dessert table |
| 3. Easy Easter Fruit Pizza | 25 min | Easy | Brunch centerpiece |
| 4. Chocolate Easter Bunny Bark | 15 min + set | Easy | A crowd, one pan |
| 5. Mini Easter Fruit Tartlets | 30 min + chill | Easy | Individual servings |
| 6. No-Bake Easter Yogurt Bark | 15 min + chill | Easy | A lighter option |
| 7. Soft Carrot Cake Cookies | 30 min | Easy | Lunchbox drop-offs |
| 8. Strawberry Easter Shortbread Bites | 40 min | Medium | Freezer make-ahead |
| 9. Easy Easter Egg Brownies | 40 min | Easy | Twelve big squares |
| 10. Coconut Cream Easter Dessert Cups | 25 min + chill | Easy | Make-ahead cups |
| 11. Banana Pudding Easter Cups | 20 min + chill | Easy | Classroom drop-off |
| 12. Mini Apple Easter Pies | 45 min | Medium | A warm dessert |
| 13. Marshmallow Chocolate Cups | 30 min + set | Medium | S’mores flavour fans |
| 14. Rainbow Fruit Easter Parfaits | 15 min | Easy | Layered brunch glasses |
| 15. Easter Hot Cocoa Mug Cakes | 5 min | Easy | Last-minute single serves |
1. Easy Easter Bunny Rice Krispie Treats
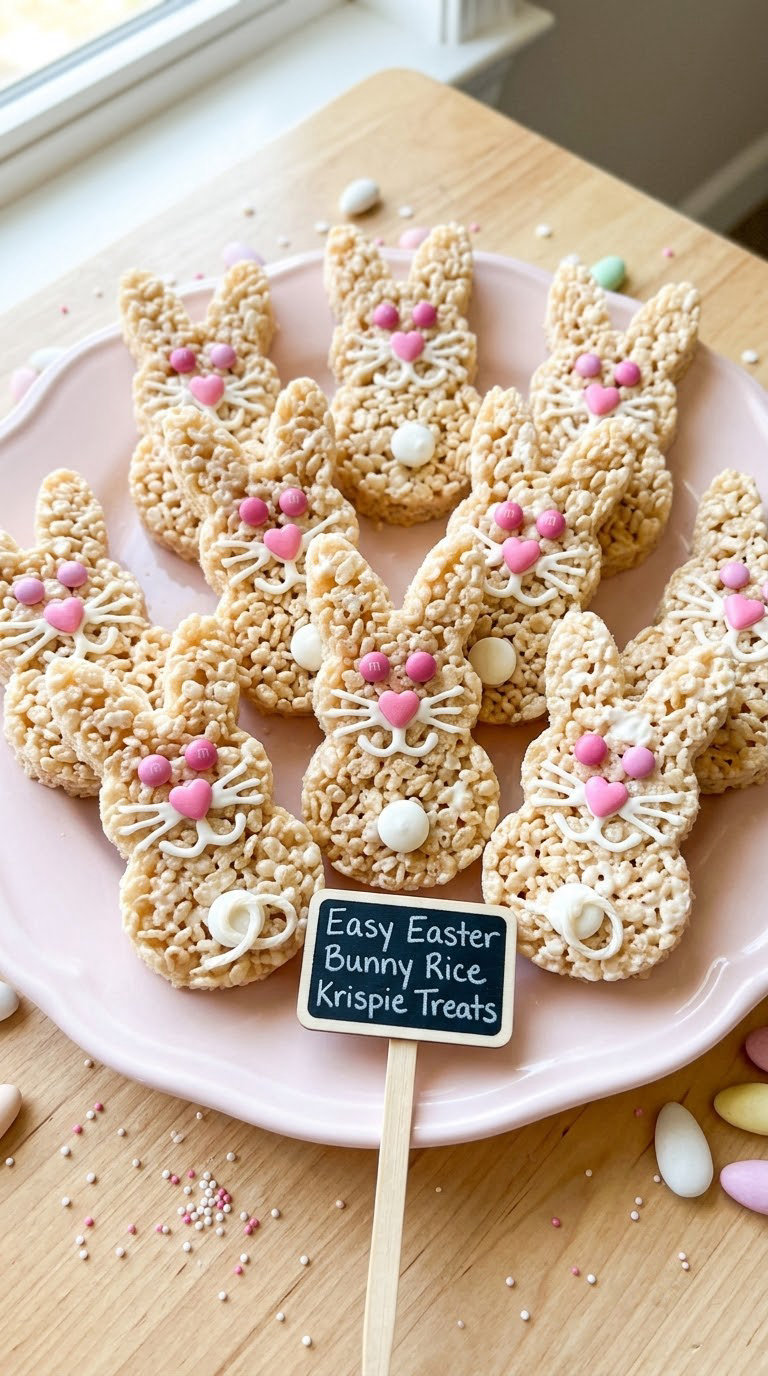
These are the treats I make when the oven is already occupied and two small children need to be entertained. A sticky marshmallow mixture presses into a parchment-lined pan, chills firm, then gets cut into bunny shapes with two ear triangles and a few jelly beans for the face.
Yield: 12 bunnies · Prep: 10 min · Cook: 10 min · Total: 20 min plus 2 hours chilling · Difficulty: Easy
Ingredients
- 3 tablespoons unsalted butter
- 10 ounces (280 g) marshmallows
- 6 cups (18 oz / 510 g) crispy rice cereal
- 1/2 teaspoon vanilla extract
- Pink and white candy melts or jelly beans, for decorating
- Cooking spray
Instructions
- Line a 9 by 13 inch baking pan with parchment and lightly spray it.
- Place the butter in a large saucepan over medium-low heat and melt it fully, about 2 minutes, with no colour.
- Add the marshmallows and stir constantly until smooth and melted, 3 to 4 minutes. Take the pan off the heat.
- Stir in the vanilla, then the cereal, until every piece is coated.
- Press the mixture into the pan with buttered hands, packing it flat and firm.
- Cool at room temperature for 1 hour, then chill for 1 hour until solid enough to lift out.
- Lift the slab onto a cutting board and cut a 3 by 4 inch rectangle for the body. Slice the rest into 12 pieces and reshape each one.
- Press two small triangles onto the top of each piece for ears, then add a jelly bean eye and a pink candy nose.
Tip: Pack the cereal mixture down harder than feels right. A loosely packed slab crumbles when you try to move the ears onto it.
Swap it: Use coconut flakes or gluten-free crispy cereal in place of the rice cereal, and check that your marshmallows are nut-free if the treat is heading to a classroom.
Storage: Store airtight at room temperature for up to 3 days. Freeze on a parchment-lined sheet, then move to a container for up to 2 months. Thaw 15 minutes before serving.
2. Mini Lemon Easter Cupcakes
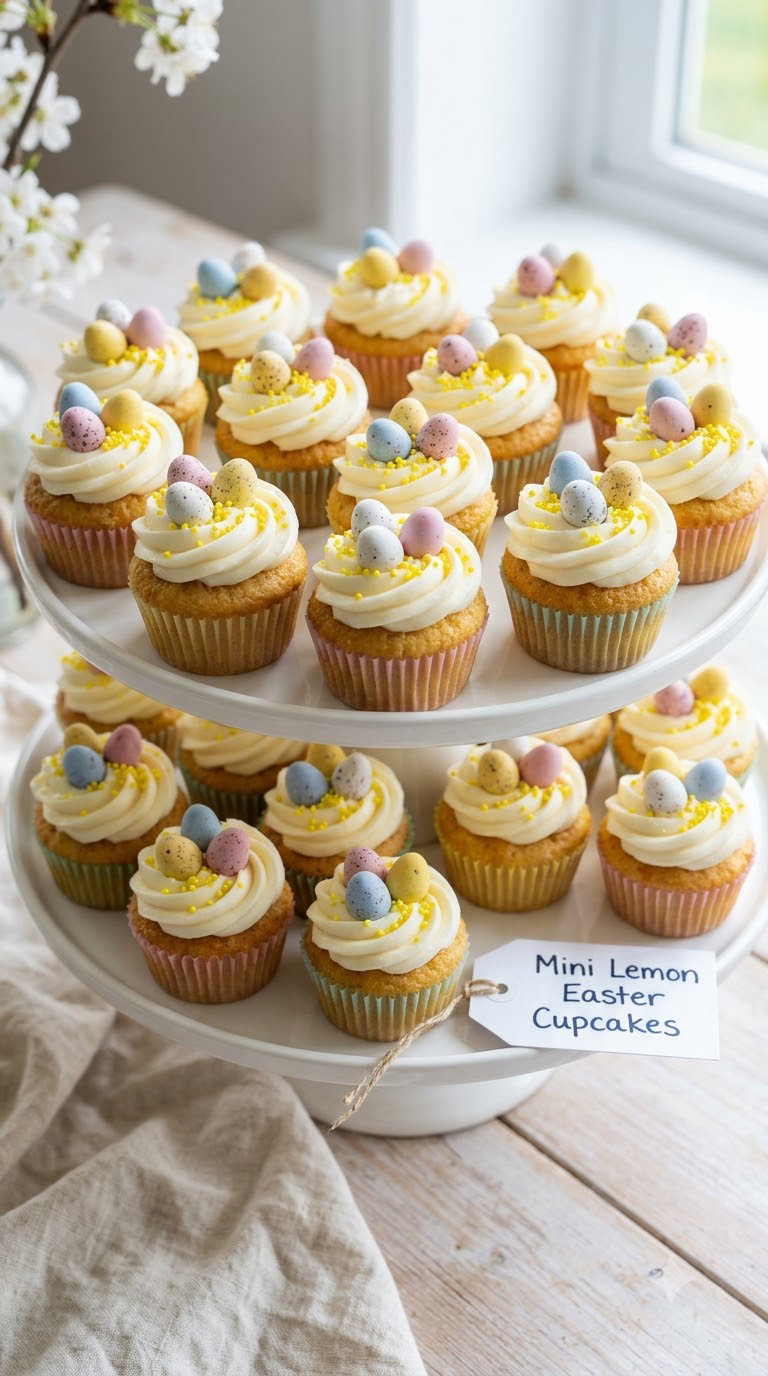
Lemon keeps these from tasting like the rest of the Easter table, and a boxed mix turns them into a 35-minute job. The trick is halving the batter between two lined muffin pans to get mini cakes that a six-year-old can hold in one hand.
Yield: 12 mini cupcakes · Prep: 10 min · Cook: 12 to 14 min · Total: 35 min · Difficulty: Easy
Ingredients
- For the cupcakes:
- 1 cup (125 g) all-purpose flour
- 2 teaspoons baking powder
- 1/4 cup (50 g) granulated sugar
- 1/2 cup (115 g) unsalted butter, softened
- 2 large eggs
- 1/2 cup (120 ml) whole milk
- 1 teaspoon vanilla extract
- Zest of 1 lemon and 2 tablespoons juice
- For the frosting:
- 1/2 cup (115 g) unsalted butter, softened
- 2 cups (400 g) powdered sugar
- 2 tablespoons milk
- 1 teaspoon vanilla extract
Instructions
- Heat the oven to 350°F (175°C) and line a mini muffin tin, or a regular tin if you want 12 standard cupcakes.
- Whisk the flour, baking powder and sugar together in a bowl.
- Beat the butter for 1 minute until pale, then add the eggs one at a time, beating well between each.
- Add the milk, vanilla, lemon zest and juice, then fold in the dry ingredients until just combined with no streaks of flour.
- Fill the cups two-thirds full and bake for 12 to 14 minutes, until a skewer comes out with a few moist crumbs.
- Cool in the tin for 5 minutes, then turn onto a rack.
- Beat the frosting butter and powdered sugar until light, adding the milk a teaspoon at a time to loosen.
- Pipe swirls, then let the children add sprinkles and candy eggs.
Tip: Weigh the flour and sugar rather than spooning them. A heaped cup of flour is roughly 20 g extra, which shows up as flat, dense little cakes.
Swap it: A box of yellow cake mix plus 3 tablespoons of lemon curd cut into the dry mix works and saves about 15 minutes. Use a dairy-free butter substitute for a free-from version.
Storage: Keep unfrosted cakes in a tin at room temperature for 2 days, or freeze for 1 month. Frosted cupcakes keep 2 days at room temperature and 5 days refrigerated.
3. Easy Easter Fruit Pizza
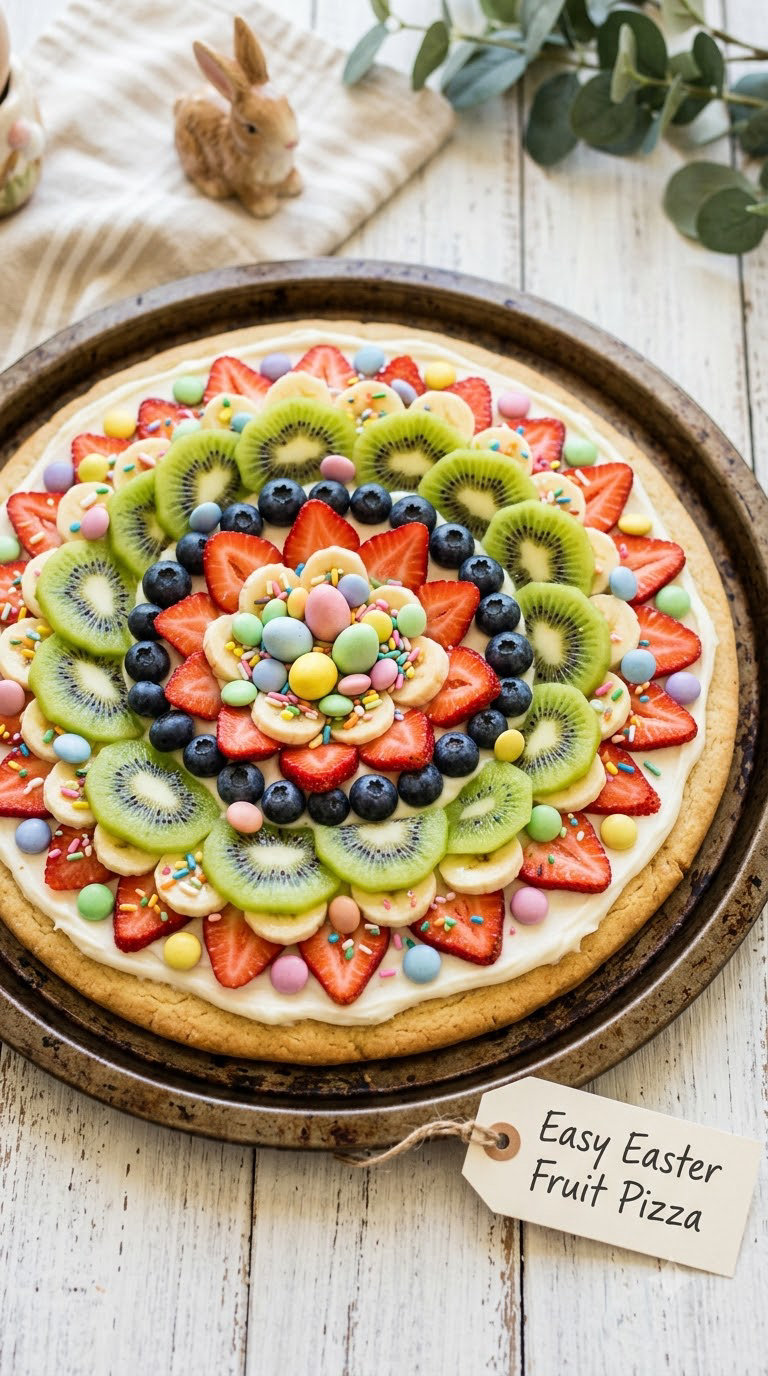
A fruit pizza is the one Easter dessert the kids genuinely finish. Refrigerated dough does the work, the cream cheese glaze goes on warm, and the fruit goes on last so nothing goes watery.
Yield: 1 pizza, 8 slices · Prep: 10 min · Cook: 12 to 15 min · Total: 25 min · Difficulty: Easy
Ingredients
- 1 tube (400 g / 14 oz) refrigerated pizza dough
- 4 ounces (115 g) cream cheese, softened
- 1/3 cup (75 g) powdered sugar
- 1 teaspoon vanilla extract
- 1 cup chopped strawberries
- 1/2 cup blueberries
- 1 banana, sliced
- 1 kiwi, peeled and sliced
- Pink and white candy pieces, for the border
Instructions
- Heat the oven to 425°F (220°C) and line a baking sheet with parchment.
- Roll the dough into a 12 inch round on the parchment and slide the sheet onto a rack.
- Bake for 12 to 15 minutes, until the rim is golden and the centre is lightly browned with no pale patches.
- Beat the cream cheese, powdered sugar and vanilla until smooth and spreadable.
- Leave the crust on the sheet for 5 minutes so it is warm but not fragile, then spread the glaze across the top, stopping 1 inch from the edge.
- Arrange the fruit in rows or rings, starting with the strawberries and blueberries.
- Add the banana and kiwi last, and scatter candy pieces around the rim.
- Slice with a sharp knife and rest for 10 minutes before lifting the slices off the pan.
Tip: Put the banana and kiwi on right before serving. Citrus juice on the kiwi keeps the cut faces bright for about 20 minutes.
Swap it: A gluten-free pizza crust works the same way and keeps the recipe nut-free if you use coconut flakes instead of almonds. Low-sugar jam thinned with a teaspoon of water replaces the glaze entirely.
Storage: Refrigerate for up to 2 days, but expect the crust to soften. Freeze the baked crust alone for 1 month and add fresh glaze and fruit on the day.
4. Chocolate Easter Bunny Bark
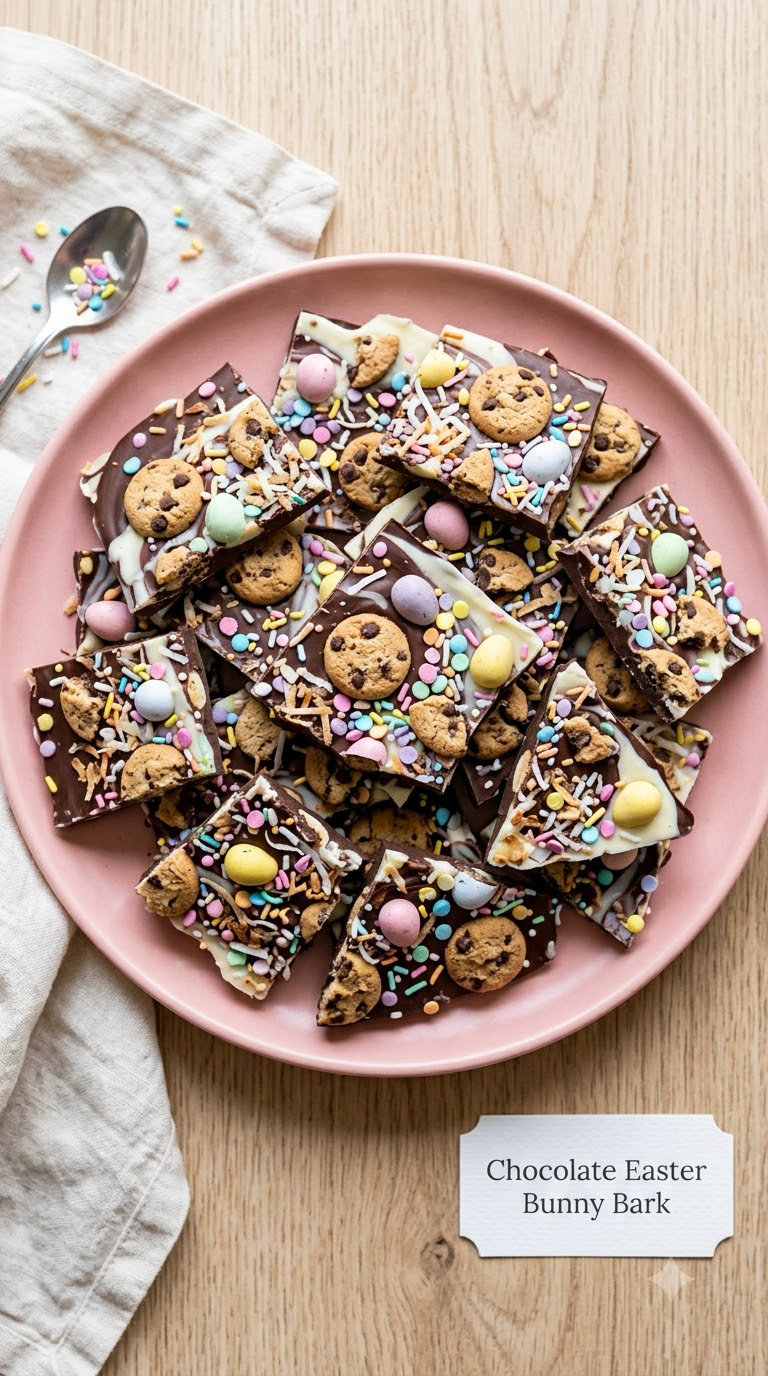
This is the fastest thing on the list and the one that disappears first. Melt one kind of chocolate, spread it thin, decorate, and walk away while it sets. Small children handle the sprinkling; the melting stays with you.
Yield: about 20 pieces · Prep: 15 min · Cook: 2 min · Total: 15 min plus 1 hour setting · Difficulty: Easy
Ingredients
- 8 ounces (280 g) chocolate, semisweet, milk or white
- 1/2 cup mini cookies or sprinkles
- 1/2 cup (40 g) shredded coconut
- 1/2 cup candy eggs or pastel candy pieces
- 1/4 cup chopped nuts, optional
Instructions
- Line a baking sheet with parchment and, if using white chocolate, mark a 9 by 12 inch rectangle with pencil so the bark has straight edges.
- Fill a saucepan with 2 inches of water and bring it to a bare simmer.
- Set a heatproof bowl over the water, add the chocolate and stir until just melted and smooth.
- Take the bowl off the heat and stir for another minute so the chocolate stops seizing.
- Pour the chocolate onto the parchment and spread it with the back of a spoon to 1/4 inch thick.
- Scatter the toppings over the surface, leaving a bare inch around the edge.
- Chill for 45 to 60 minutes until the bark is firm and snaps cleanly.
- Break it into rough shards rather than cutting, and store in a tin between layers of parchment.
Tip: A thin sheet sets harder and snaps better than a thick one. If your kitchen is warm, chill the pan for 10 minutes before pouring.
Swap it: For a nut-free classroom version, leave the chopped nuts off and double the coconut and cookies. Use a dairy-free chocolate bar to keep it free of milk solids.
Storage: Keeps in a cool room for up to 5 days in an airtight tin. Do not refrigerate, which causes sugar bloom on the surface. Freeze in layers for up to 2 months.
5. Mini Easter Fruit Tartlets
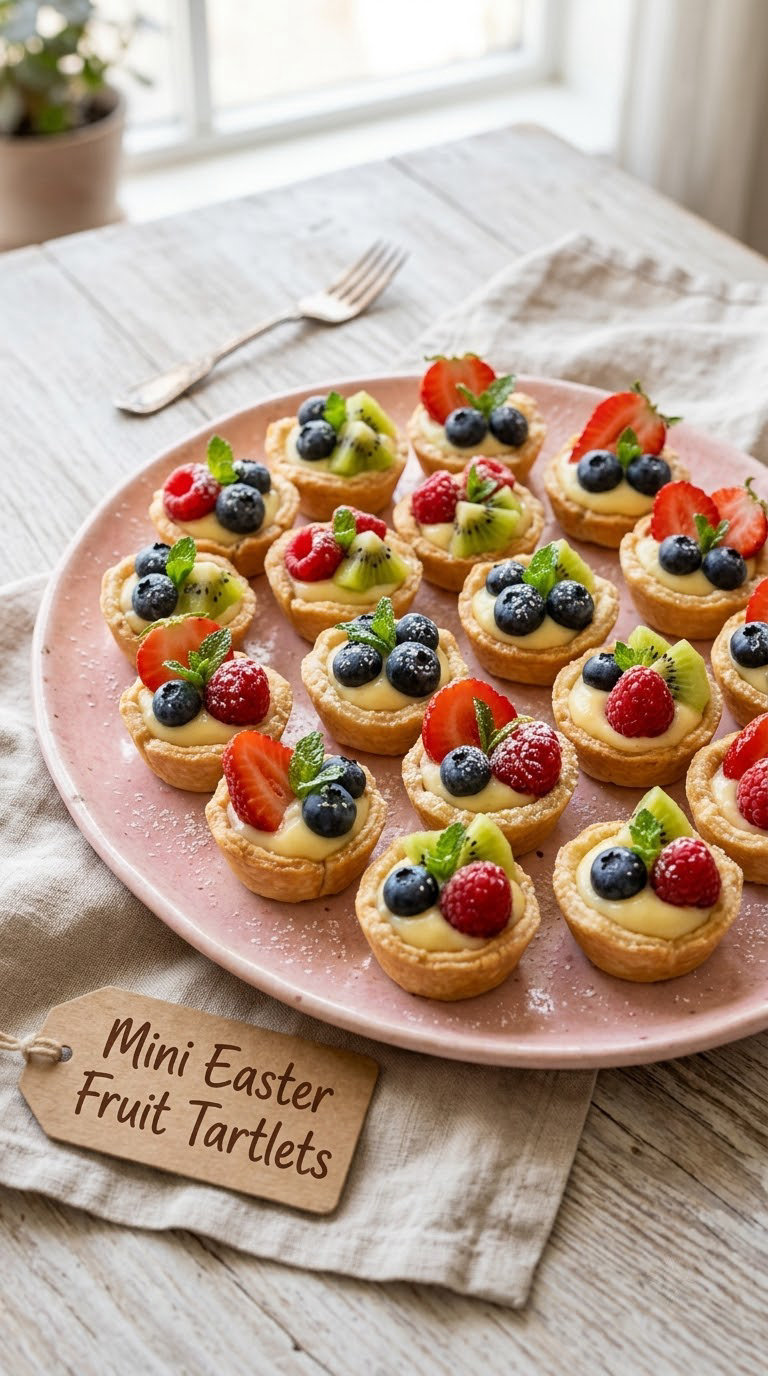
These look like bakery tartlets and come together from a cup of cream cheese. Because there is no pastry to roll or chill, they are a good pick when you want something elegant-looking and have about half an hour.
Yield: 12 tartlets · Prep: 10 min · Cook: none · Total: 30 min including 2 hours chilling · Difficulty: Easy
Ingredients
- 12 mini tartlet shells or muffin-cup liners, baked or unbaked
- 8 ounces (230 g) cream cheese, softened
- 1/2 cup (120 g) powdered sugar
- 1 teaspoon vanilla extract
- 1 teaspoon lemon zest
- 1 cup mixed berries and sliced fruit
- 2 tablespoons jam for brushing, optional
Instructions
- Bake empty tartlet shells at 350°F (175°C) for 12 minutes if they are unbaked, until dry and pale gold, then cool completely.
- Beat the cream cheese, powdered sugar, vanilla and lemon zest for 2 minutes until smooth and airy.
- Fold in two-thirds of the cut fruit, using small pieces so each tartlet gets an even amount.
- Spoon the filling into the cooled shells, filling each to the rim.
- Chill for at least 2 hours, or overnight, until firm enough to lift out of the tin.
- Top with the remaining fresh fruit just before serving, and add a thin brush of jam for shine.
- Run a thin knife around the edge of each shell to release it before lifting out.
Tip: A little lemon zest in the filling stops the cream tasting flat against all that sweet fruit.
Swap it: Replace the fruit with a thick yogurt folded with honey and a spoonful of jam for a lower-sugar version. Check that your tartlet shells are nut-free for a school treat.
Storage: Refrigerate for up to 3 days, and add the fresh fruit topping on the day you serve. Frozen in a rigid container for up to 1 month, though the shells soften slightly.
6. No-Bake Easter Yogurt Bark
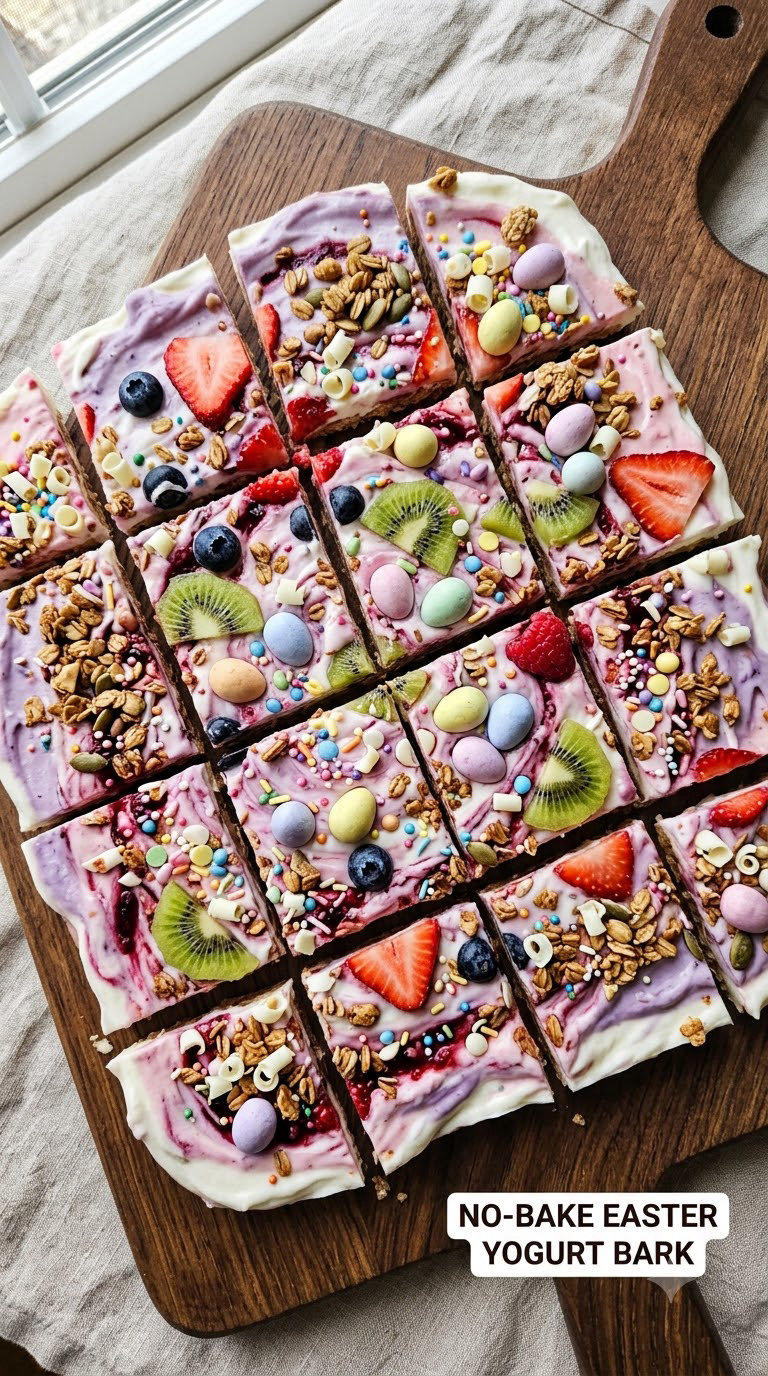
Yogurt bark is the useful one to make when the children have already eaten all the candy. Spread, chill, snap. Use yogurt from the fridge with a pasteurised date, and treat it as a perishable dairy food rather than a shelf-stable treat.
Yield: 8 to 10 pieces · Prep: 10 min · Cook: none · Total: 15 min plus 4 hours chilling · Difficulty: Easy
Ingredients
- 3 cups (700 g) plain Greek yogurt or full-fat yogurt
- 1/3 cup (80 g) honey, plus 1 to 2 tablespoons more for drizzling
- 1 teaspoon vanilla extract
- 1/2 cup sliced strawberries and blueberries
- 1/2 cup granola
- Candy pieces or mini chocolate eggs, for the top
Instructions
- Line a baking sheet with parchment, leaving an inch of overhang on two sides.
- Stir the yogurt, honey and vanilla together in a bowl until smooth and pourable.
- Spread the mixture over the parchment about 1/3 inch thick, using the back of a spoon to push it into the corners.
- Scatter the fruit, granola and candy over the surface, leaving a small border clear.
- Drizzle with the extra honey and, if you like, swirl two or three stripes of the yogurt mixture through the top.
- Freeze for 3 to 4 hours, or chill overnight, until solid all the way through.
- Lift the sheet by the parchment and snap it into rough squares, then store flat so the layers do not crack.
Tip: Do not use nonfat yogurt. Without the fat, the bark freezes chalky instead of creamy.
Swap it: Coconut yogurt works, or use soy yogurt for a dairy-free version and skip the honey for maple syrup. Sunflower seed or pumpkin seed butter replaces granola for a nut-free school safe plate.
Storage: Keep refrigerated and eat within 2 days, or freeze in a sealed container for up to 1 month. Transport it in a cooler box if it is going anywhere warm.
7. Soft Carrot Cake Cookies for Easter
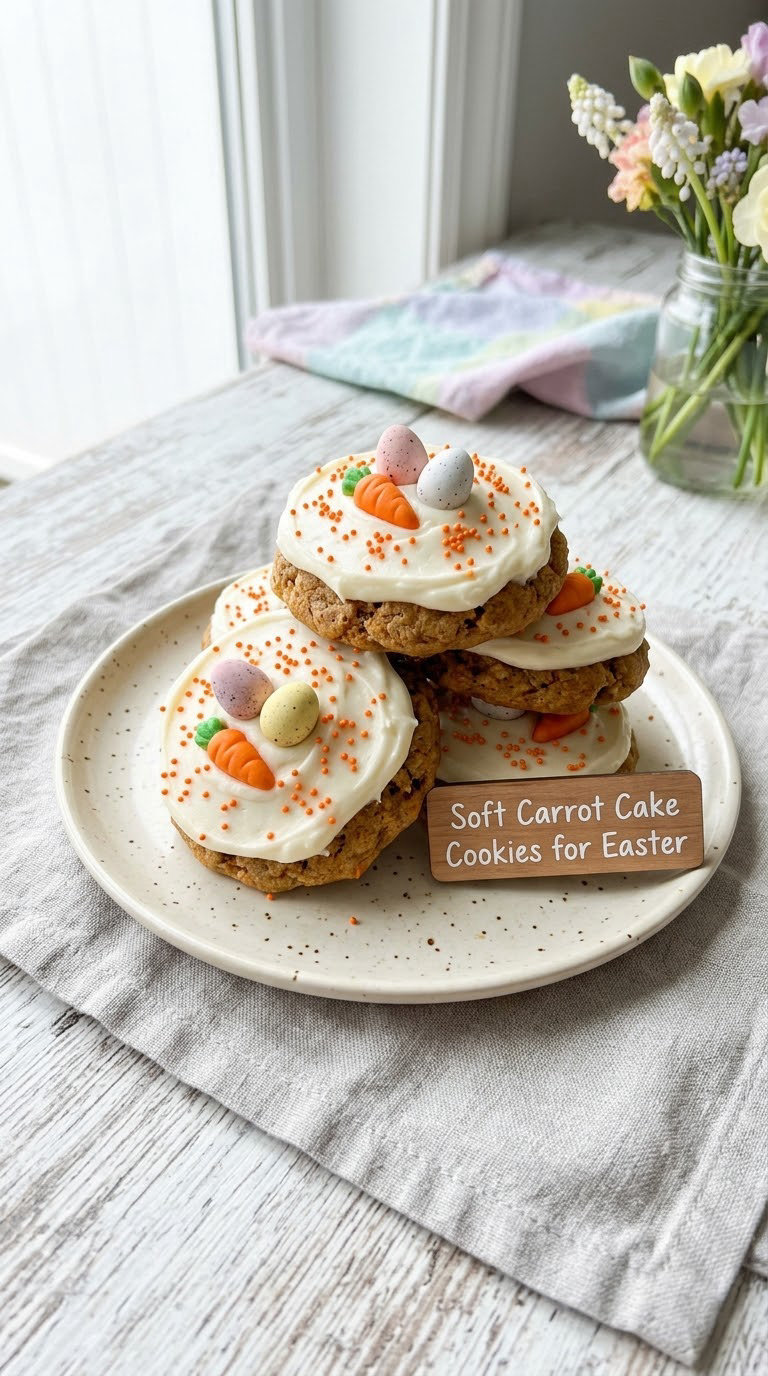
Soft carrot cake cookies are the ones that travel best to school, which is why they are on this list twice over. They stay tender for three days, take a beige drizzle of icing, and taste faintly of spice and citrus rather than plain sugar.
Yield: about 24 cookies · Prep: 15 min · Cook: 11 to 13 min · Total: 30 min · Difficulty: Easy
Ingredients
- 1 cup (150 g) finely grated carrot
- 1/2 cup (65 g) all-purpose flour
- 1/4 cup (65 g) oats, blended into flour
- 1/2 teaspoon baking powder
- 1/2 teaspoon cinnamon
- Pinch of salt
- 4 tablespoons (55 g) unsalted butter, softened
- 1/3 cup (70 g) light brown sugar
- 1 large egg
- 1/2 teaspoon vanilla extract
- 3 to 4 tablespoons powdered sugar, mixed with milk, for icing
Instructions
- Squeeze excess moisture from the grated carrot between your hands and set it aside.
- Heat the oven to 350°F (175°C) and line two baking sheets with parchment.
- Whisk the flour, oats, baking powder, cinnamon and salt together.
- Beat the butter and brown sugar for 1 minute, then beat in the egg and vanilla until smooth.
- Add the carrot and the dry ingredients and stir until combined, with no dry patches left.
- Drop heaped teaspoons onto the sheets, flatten to 2 inches wide and space them 2 inches apart.
- Bake for 11 to 13 minutes, until the edges feel set and the centres still spring back slightly when pressed.
- Cool on the sheet for 5 minutes, then move to a rack and drizzle with the icing.
Tip: The dough sticks. Chill the scooped balls for 10 minutes before baking and they will hold their shape and bake evenly.
Swap it: For a gluten-free version, use a 1 to 1 gluten-free flour blend and check that your oats are certified gluten-free. A thicker carrot ribbon gives the same result, so drain it well.
Storage: Stack in an airtight tin for 3 days at room temperature. Freeze in layers between parchment for up to 2 months, and let each cookie sit 10 minutes before eating.
8. Strawberry Easter Shortbread Bites
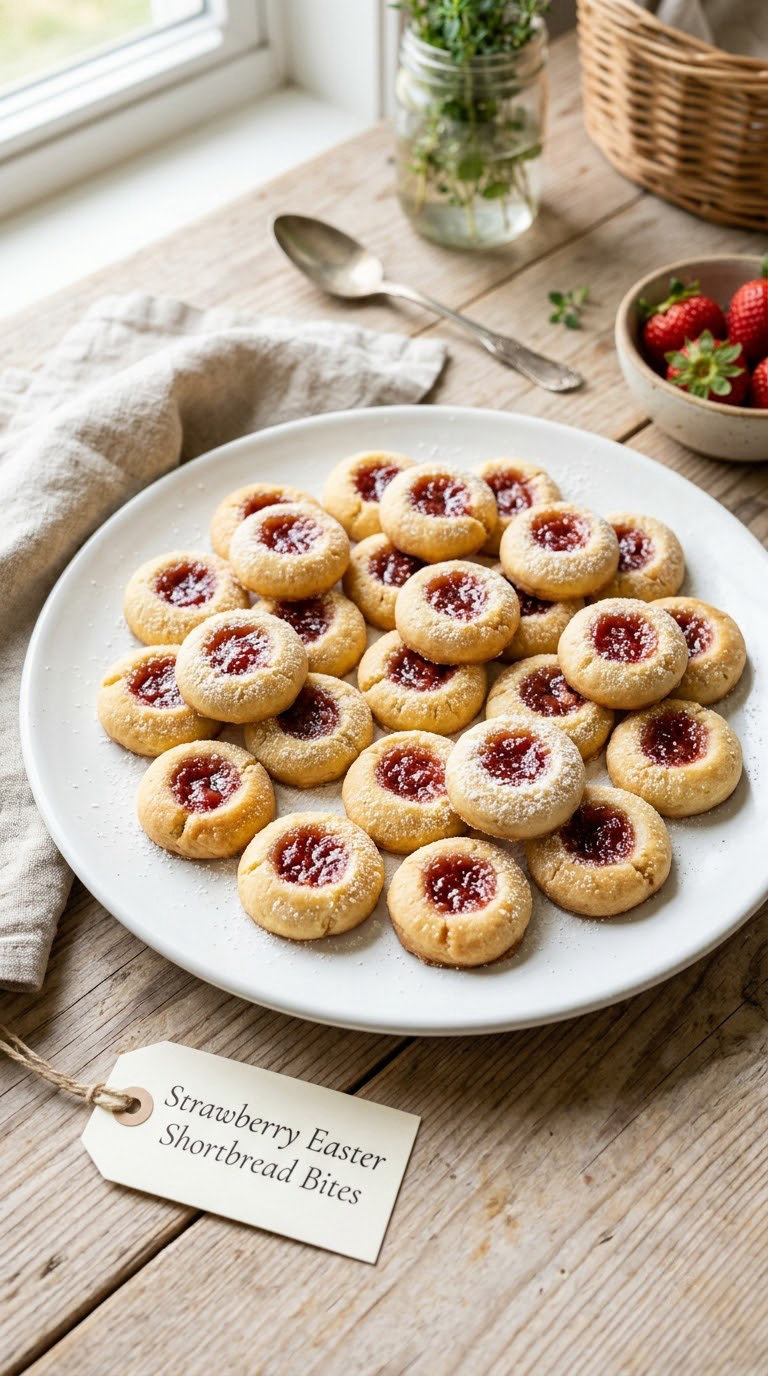
These are little pressed cookies with a strawberry centre, so each bite is about the size of a coin. Baking a whole sheet gives you 24 at a time, which is the right number for a family Easter hunt.
Yield: 24 bites · Prep: 20 min · Cook: 22 to 26 min · Total: 40 min · Difficulty: Medium
Ingredients
- 1 1/4 cups (155 g) all-purpose flour
- 1/2 cup (100 g) powdered sugar
- 1/2 teaspoon salt
- 10 tablespoons (140 g) cold unsalted butter, cubed
- 1 teaspoon vanilla extract
- For the filling:
- 1/2 cup (140 g) strawberry jam
- 2 tablespoons cornstarch
- Powdered sugar for dusting, optional
Instructions
- Whisk the flour, powdered sugar and salt in a bowl, then rub in the cold butter with your fingertips until it resembles coarse crumbs.
- Add the vanilla and press the mixture together. If it will not hold, add 1 to 2 teaspoons ice water.
- Pat the dough into a 9 inch round, about 1/2 inch thick, and chill for 30 minutes.
- Heat the oven to 325°F (165°C). Stir the jam and cornstarch together in a small pan, bring to a simmer and cook for 60 seconds, then cool.
- Roll the dough 1/8 inch thick and cut 1 1/2 inch rounds. Reroll and repeat until you have 24.
- Use a small cutter or a clean glass to press a shallow well in the centre of each round.
- Spoon a teaspoon of strawberry filling into each well, keeping it below the rim.
- Bake for 22 to 26 minutes, until the edges are pale gold and the bases look dry.
- Cool on the sheet for 10 minutes before moving them, then dust lightly with powdered sugar.
Tip: Chilling the dough is not optional. Warm shortbread spreads and loses the well, and the filling runs out during baking.
Swap it: Apricot or seedless raspberry jam works in the same quantity. A wheat-free version needs a 1 to 1 gluten-free baking flour and a little extra chilling.
Storage: Keep in an airtight tin for 4 days, separate layers with parchment. These freeze well for up to 2 months; cool completely before stacking.
9. Easy Easter Egg Brownies
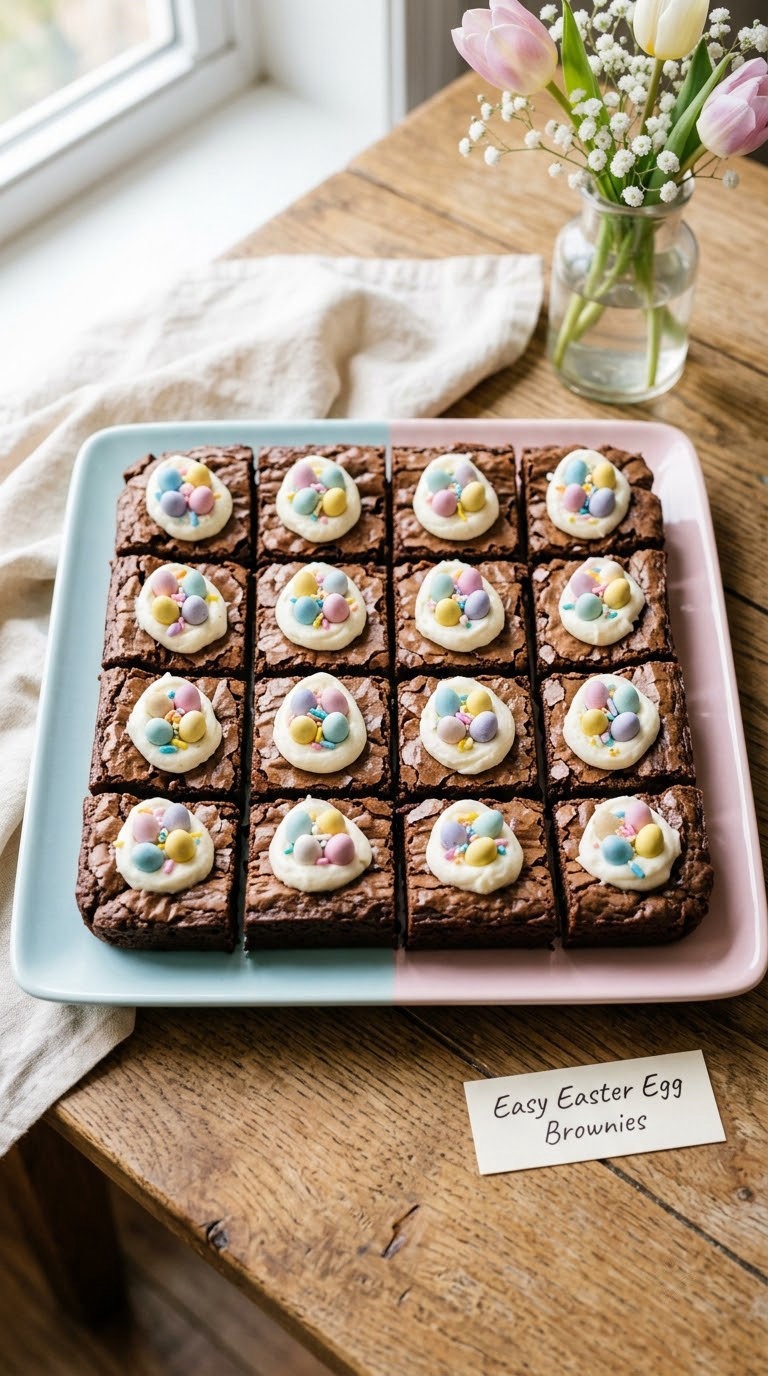
Brownies are the safest bet of the fifteen when you know a big table is coming. This version leans fudgy, bakes in a single pan, and takes its Easter cue from a small piped frosting egg on each square rather than a whole layer of icing.
Yield: 12 large squares · Prep: 10 min · Cook: 24 to 28 min · Total: 40 min · Difficulty: Easy
Ingredients
- 1/2 cup (115 g) unsalted butter
- 1 1/4 cups (250 g) granulated sugar
- 3/4 cup (110 g) cocoa powder
- 1/2 teaspoon salt
- 2 large eggs
- 1 teaspoon vanilla extract
- 1/2 cup (65 g) all-purpose flour
- 3/4 cup (135 g) chocolate chips, divided
- Frosting and candy eggs, for decorating
Instructions
- Heat the oven to 350°F (175°C) and line an 8 inch square pan with parchment, leaving an overhang.
- Melt the butter in a saucepan, then whisk in the sugar, cocoa and salt and let the mixture bubble for 2 minutes.
- Remove from the heat and whisk in the eggs one at a time, then the vanilla, until the batter is glossy and no skin forms.
- Stir in the flour and 1/2 cup of the chocolate chips just until no dry streaks remain.
- Scatter the remaining chips over the top and bake for 24 to 28 minutes, until the top is set and puffed with no wet shine in the centre.
- Cool fully in the pan, then lift out by the parchment and cut into 12 squares.
- Decorate with frosting and a small candy egg on each square once they are completely cool.
Tip: Pull the pan from the oven while the middle still looks a shade under. It firms up as it cools, and overbaking is the one mistake that cannot be undone.
Swap it: Use a gluten-free 1 to 1 flour blend and confirm the chocolate chips are certified gluten-free. For an egg-free version, replace each egg with 2 tablespoons of applesauce.
Storage: Keeps in an airtight tin for 4 days at room temperature. Freeze in a single layer, then stack with parchment, for up to 3 months.
10. Coconut Cream Easter Dessert Cups
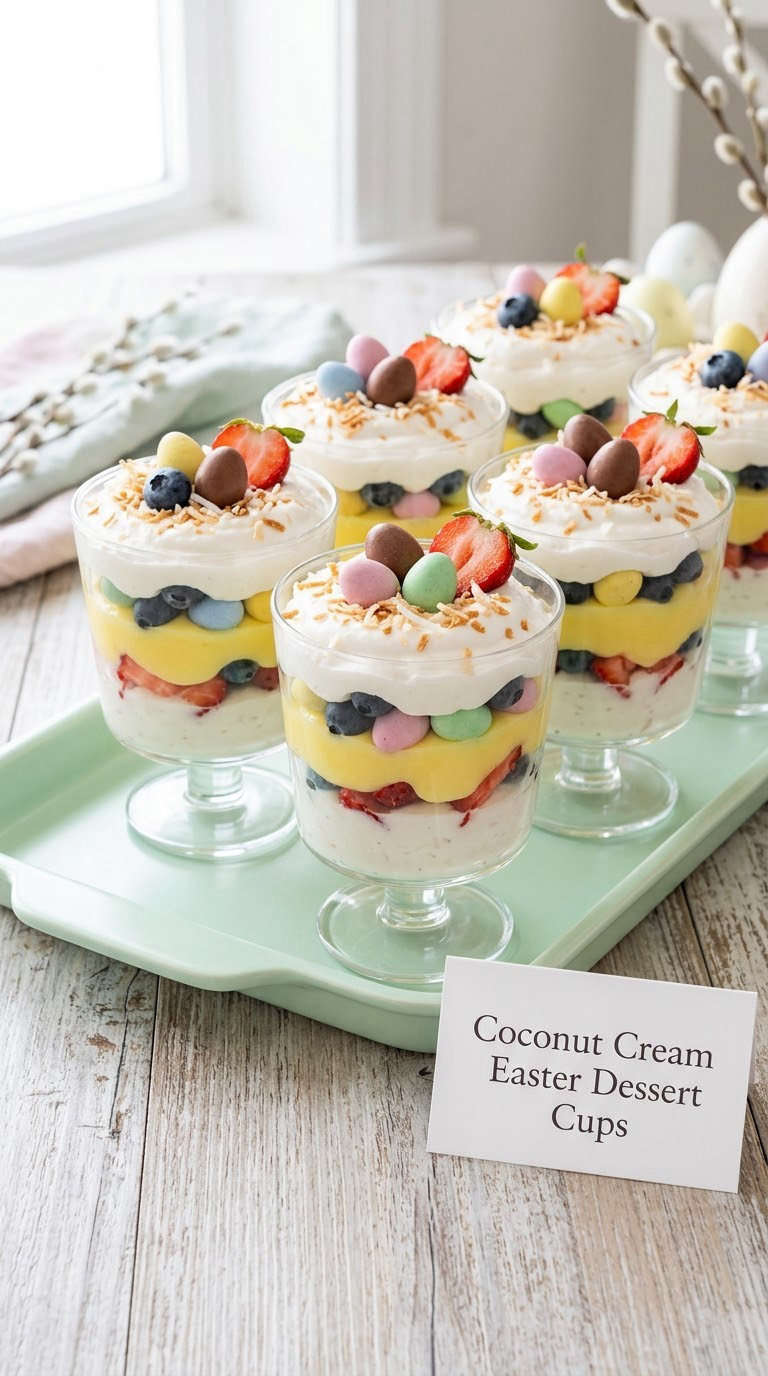
These cups are made a day ahead, which is the whole point. Layer, cover, refrigerate, and pull them out when the egg hunt starts. A blowtorch or a hair dryer is optional here, and honestly the toasting step is the fun bit.
Yield: 8 cups · Prep: 20 min · Cook: 5 min · Total: 25 min plus 4 hours chilling · Difficulty: Easy
Ingredients
- 1 cup (240 ml) heavy or coconut cream
- 1/4 cup (60 g) powdered sugar
- 1/2 cup (120 g) instant vanilla pudding mix
- 1 cup (240 ml) whole milk or oat milk
- 1 cup fresh berries, halved
- 1/2 cup shredded coconut, toasted
- 1 chocolate egg per cup
Instructions
- Whisk the cream and powdered sugar for 2 minutes until it holds soft peaks and you can tip the bowl without it running.
- Whisk the pudding mix and milk in a second bowl for 2 minutes until it thickens.
- Stir the toasted coconut into half the whipped cream so the coconut flavour is spread through the dessert.
- Layer pudding, fruit and cream into clear cups, ending with a swirl of cream so the filling is visible through the side.
- Chill for at least 4 hours or overnight, until the layers are firm.
- Top each cup with a chocolate egg just before serving.
Tip: Chill the glasses for 20 minutes before filling them. A cold glass sets the pudding on contact and the layers stay crisp instead of blending.
Swap it: Coconut cream replaces the dairy entirely, and the pudding is naturally dairy-free if you use an almond or oat milk, so this can be dairy-free as written. Skip the whipped cream and top with yogurt for a lighter cup.
Storage: Refrigerate for up to 2 days, and keep the chocolate eggs off until serving. Do not freeze, as the cream separates and goes grainy.
11. Easy Banana Pudding Easter Cups
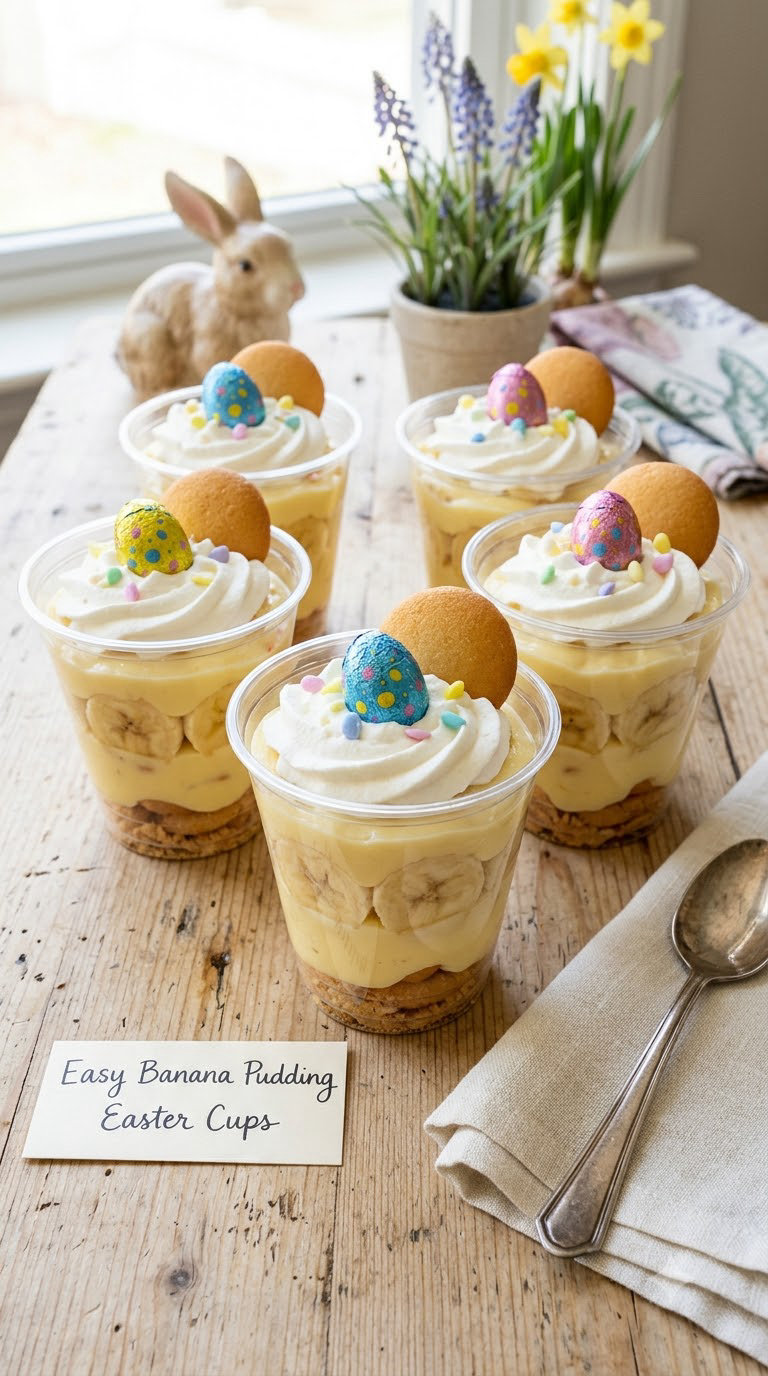
Banana pudding in single portions is the safest thing on this list to hand to a classroom or a daycare, since each cup is already portioned, sealed and easy to carry. Ripen the bananas the day before and the whole thing goes together in twenty minutes.
Yield: 6 cups · Prep: 15 min · Cook: none if using a mix · Total: 20 min plus 3 hours chilling · Difficulty: Easy
Ingredients
- 1 box (3.4 oz / 96 g) instant vanilla pudding mix
- 2 cups (480 ml) whole milk
- 3 ripe bananas, sliced
- 1 cup (240 ml) heavy cream
- 1/4 cup powdered sugar
- 1 teaspoon vanilla extract
- Chocolate eggs or crushed chocolate cookies, for the top
Instructions
- Whisk the pudding powder and milk for 2 minutes until thick and glossy.
- Whip the cream, powdered sugar and vanilla to soft peaks, then fold in a quarter of it into the pudding so the mixture is light.
- Layer a third of a cup of pudding, then banana slices, then more pudding, finishing with pudding in each cup.
- Chill for 3 to 4 hours, or overnight, until set to the texture of soft custard.
- Dollop the reserved whipped cream on top and add a chocolate egg or cookie crumbs just before serving.
Tip: Layer the banana slices between pudding rather than on top, then cover the final layer. Exposed banana browns and weeps into a puddle within a couple of hours.
Swap it: For a no-added-sugar version, make the pudding from 2 tablespoons cornstarch, 2 cups milk and 1/4 cup pureed ripe banana, cooked gently until thick, then chill. The banana supplies the sweetness on its own.
Storage: Refrigerate for up to 3 days in cups with lids. Freeze without the whipped cream for up to 1 month and add the cream after thawing in the fridge.
12. Mini Apple Easter Pies
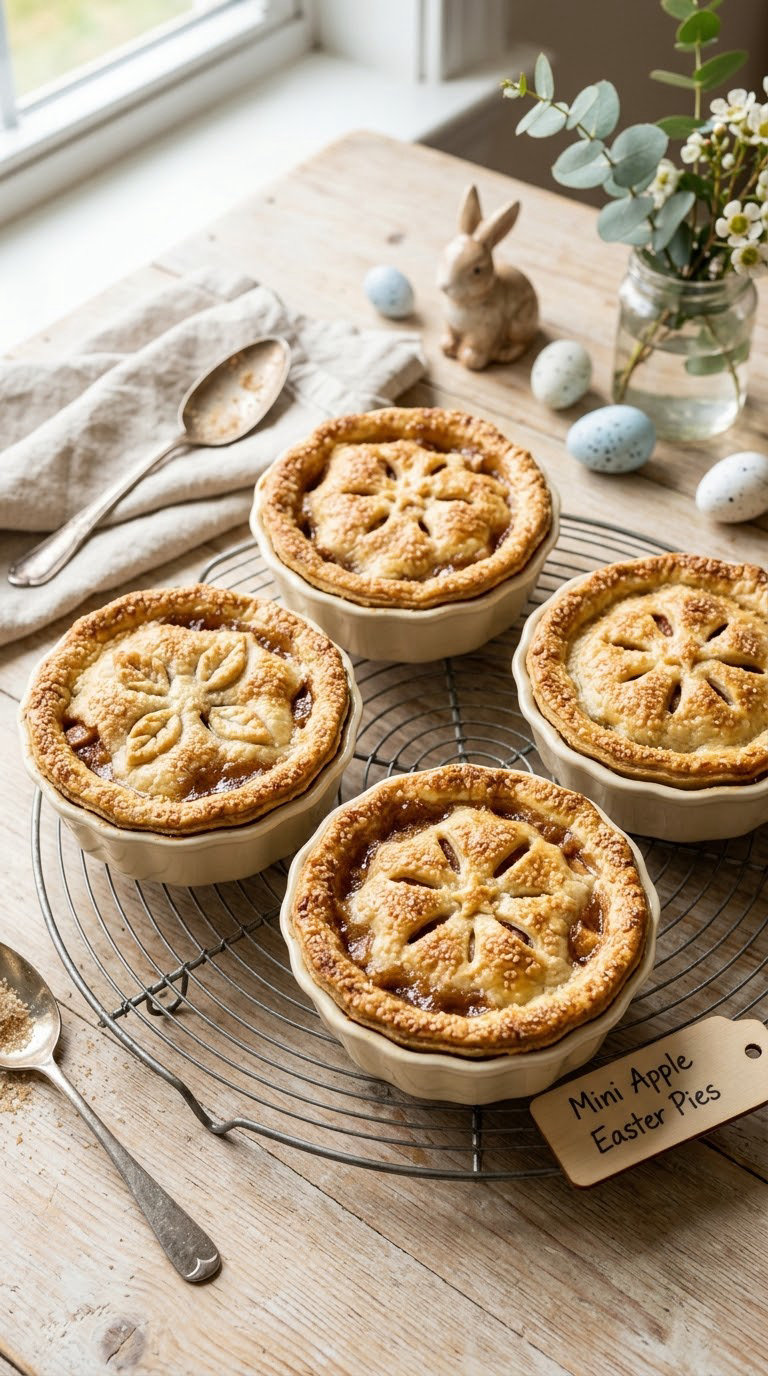
Mini apple pies are the only real baking project here, and they are worth it because a tart, cinnamon-scented mini pie in the hand beats a slice of anything. Use canned apples and you can assemble them while the coffee brews.
Yield: 6 mini pies · Prep: 20 min · Cook: 18 to 22 min · Total: 45 min · Difficulty: Medium
Ingredients
- 2 cans (15 oz each) sliced apples in juice, drained
- 2 tablespoons brown sugar
- 1 teaspoon cinnamon
- 1/2 teaspoon nutmeg
- 1 tablespoon cornstarch
- 1 teaspoon vanilla extract
- 2 sheets (about 400 g total) refrigerated pie dough, or 1 sheet for a 3-inch version
- 1 egg, beaten, for the wash
- 2 tablespoons turbinado sugar, for the edges
Instructions
- Heat the oven to 375°F (190°C) and grease six 3 inch pie dishes or muffin cups.
- Toss the drained apples with the brown sugar, cinnamon, nutmeg and cornstarch in a skillet over medium heat.
- Cook for 6 to 8 minutes, stirring, until the liquid thickens and coats the back of a spoon. Stir in the vanilla and cool.
- Roll the dough 1/8 inch thick and cut 6 rounds to fit your dishes, plus 6 smaller rounds for the tops.
- Press the larger round into each dish, flute the edge with a fork, and fill three-quarters full with the cooled apple mixture.
- Top with the smaller round, crimp the edges, and cut three vents in the pastry.
- Brush with egg wash and sprinkle the edges with turbinado sugar.
- Bake for 18 to 22 minutes, until the pastry is deep golden and the filling bubbles through the vents.
- Rest for 10 minutes before serving so the hot filling does not run out on the first bite.
Tip: Cool the filling before it meets the pastry. Hot fruit melts the butter in the dough and the bottom turns flaky and pale.
Swap it: A gluten-free pie crust works the same way. For a sugar-free pie, drop the brown sugar and use unsweetened applesauce with cinnamon and a little lemon juice.
Storage: Keep at room temperature for 2 days, covered loosely. They freeze for 3 months; reheat from frozen at 350°F (175°C) for 15 minutes.
13. Easter Marshmallow Chocolate Cups
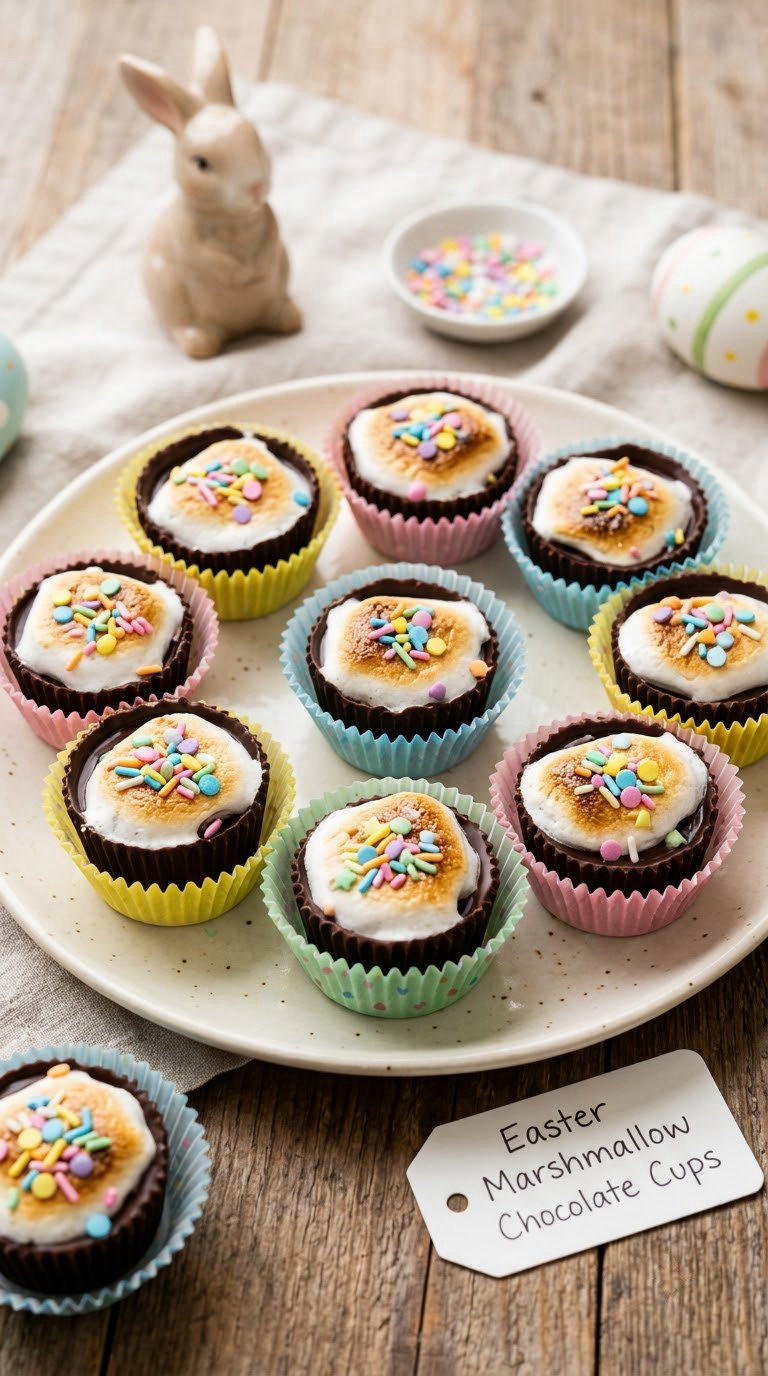
These are a s’mores dessert in a paper liner, and they go from tin to table in about half an hour. The chocolate shell is the fiddly part and it is worth it, because the crack when you bite in is the entire point.
Yield: 8 cups · Prep: 20 min · Cook: 3 min · Total: 30 min plus 2 hours chilling · Difficulty: Medium
Ingredients
- 8 ounces (280 g) chocolate, semisweet or dark
- 1 cup (280 g) large marshmallows
- 2 tablespoons butter
- 2 tablespoons water
- 1/2 teaspoon vanilla extract
- 1/4 teaspoon salt, for a smokier profile
- 8 mini chocolate eggs or sprinkles, for the tops
Instructions
- Set eight paper liners on a baking sheet and, if using standard marshmallows, snip each one in half with kitchen scissors.
- Melt the chocolate in a bowl set over barely simmering water, stirring until smooth, then spoon a thin layer into each liner, rotating the tray to coat the sides.
- Refrigerate the shells for 15 minutes until they look matte and firm, then chill the marshmallow halves in a separate dish for the same time.
- Put the butter, water and a quarter of the marshmallows in a saucepan over medium-low heat and stir until the marshmallows melt completely, about 3 minutes.
- Remove from the heat and beat in the vanilla and salt, then fold in the rest of the chilled marshmallows. The mixture should be thick and stretchy.
- Spoon the filling into the chilled shells, then press a mini egg into the top of each.
- Chill for 2 hours, or freeze for 20 minutes, before peeling away the paper liners.
- Hold the cup in one hand and use a blowtorch or hair dryer for 10 seconds to toast the surface before serving.
Tip: A thin shell cracks better than a thick one. Keep each liner to about a teaspoon of chocolate and chill it properly before filling.
Swap it: Use dairy-free chocolate and coconut oil in place of the butter for a fully dairy-free set. Skip the mini eggs and use coconut flakes for a nut-free version.
Storage: Refrigerate for up to 4 days, and return the toasted cups to the oven at 350°F (175°C) for 2 minutes if you want them warm again.
14. Rainbow Fruit Easter Parfaits
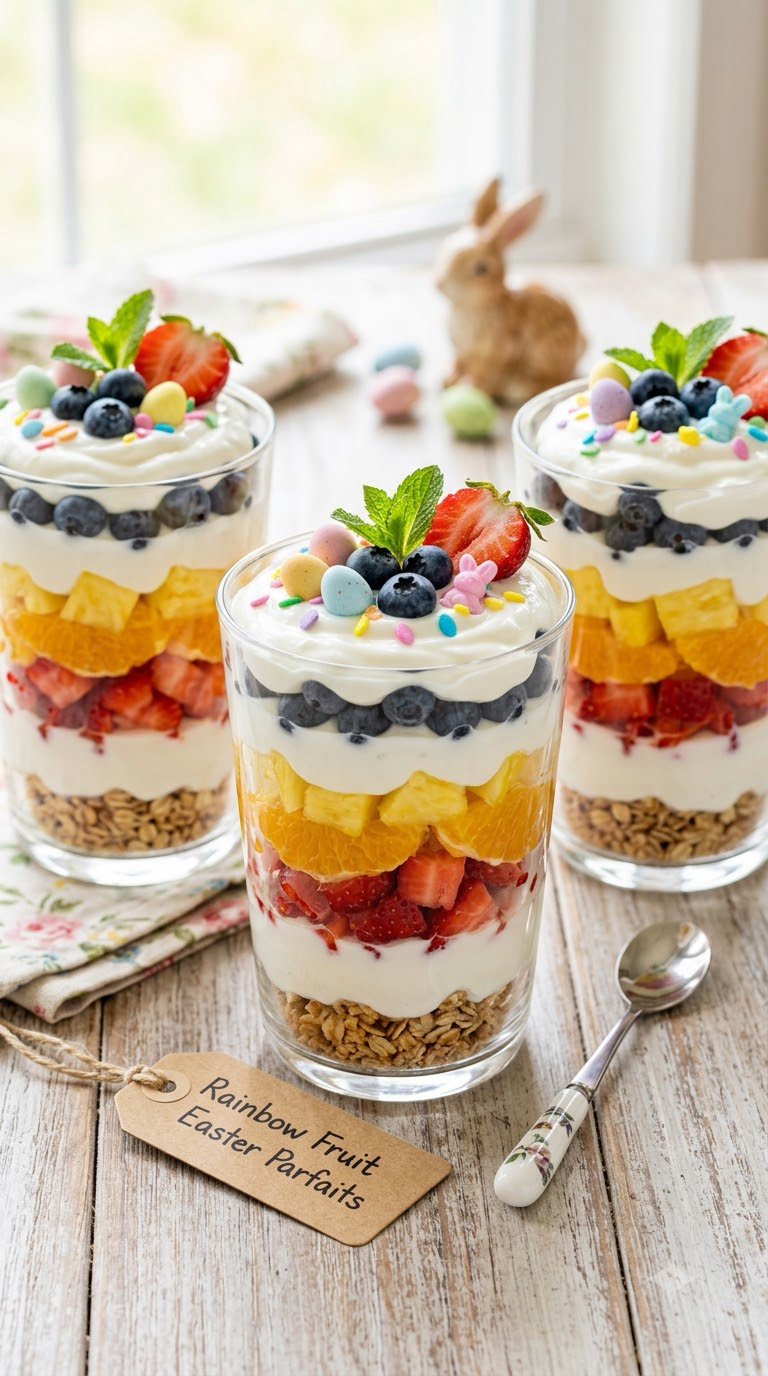
Fruit-forward and assembled in under a quarter of an hour, parfaits are the answer when the egg hunt has already supplied more sugar than anyone needs. The trick to a clean colour band is to add each fruit gently rather than stirring.
Yield: 6 parfaits · Prep: 15 min · Cook: none · Total: 15 min · Difficulty: Easy
Ingredients
- 1 1/2 cups (360 g) Greek yogurt or vanilla pudding
- 1 cup chopped strawberries
- 1 cup diced pineapple
- 1 cup mandarin orange segments, drained
- 1/2 cup blueberries
- 1/2 cup (45 g) granola
- 2 tablespoons honey, for drizzling
- Candy pieces, for the top
Ingredients note: Pat all the cut fruit dry on a paper towel first so the layers do not bleed into each other.
Instructions
- Choose six clear glasses and lay out every fruit in its own small bowl, in rainbow order from strawberry to blueberry.
- Add a spoonful of yogurt to the base of each glass, then a layer of strawberries.
- Layer pineapple, then mandarin, then blueberries, adding a spoonful of yogurt between each colour.
- Finish with yogurt, then spoon granola over the top so it stays crunchy.
- Drizzle with honey and let the children add the candy pieces.
- Serve straight away, or chill for up to 2 hours if you are assembling ahead.
Tip: Add the granola at the last moment. Stirred in early, it goes soft and turns the yogurt grey within an hour.
Swap it: For a nut-free version use sunflower seed granola or toasted coconut flakes. Coconut yogurt plus non-dairy milk makes the whole cup dairy-free, and swapping yogurt for whipped cream gives a lighter, sweeter version.
Storage: Refrigerate without the granola for up to 2 days and add it when serving. These are not freezable, because the fruit turns watery and the yogurt splits.
15. Easter Hot Cocoa Mug Cakes
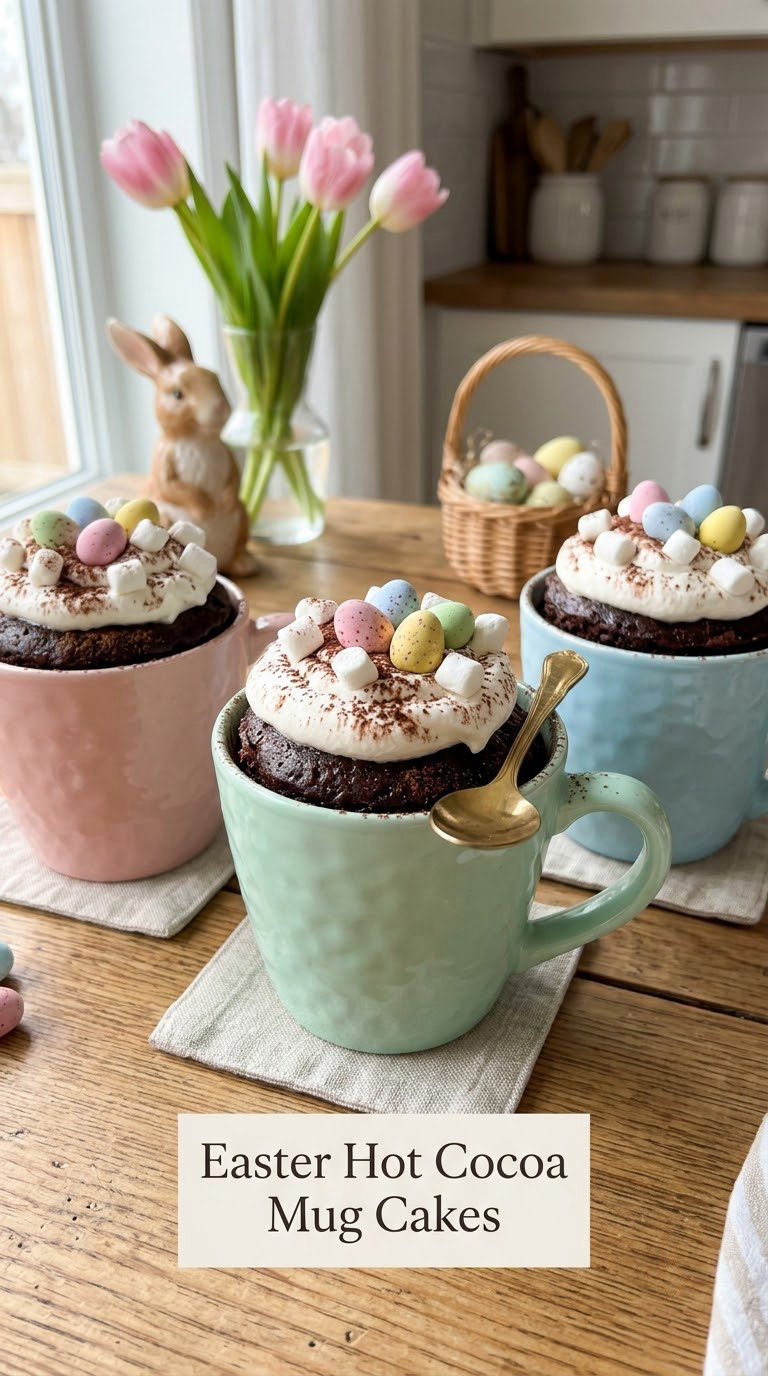
Last one, and the one to know for the case where a child wants a dessert and you have four minutes. A single mug, one spoon of batter, and a microwave that does the rest. Use mugs well over 1 cup so the cake has room to rise.
Yield: 1 serving · Prep: 3 min · Cook: 75 seconds · Total: 5 min · Difficulty: Easy
Ingredients
- 4 tablespoons all-purpose flour (30 g)
- 2 tablespoons sugar (25 g)
- 2 tablespoons unsweetened cocoa powder (12 g)
- 1/2 teaspoon baking powder
- 1/4 teaspoon salt
- 3 tablespoons milk (45 ml)
- 2 tablespoons neutral oil (30 ml)
- 1 large egg
- 2 tablespoons mini marshmallows, plus more for the top
Instructions
- Whisk the flour, sugar, cocoa, baking powder and salt in a mug with a fork until no dry pockets remain.
- Make a well in the centre and pour in the milk, oil and egg.
- Beat with the fork for 30 seconds until the batter is smooth and glossy.
- Drop the marshmallows in and push them below the surface with the fork, so they stay in the middle of the cake.
- Microwave uncovered on full power for 60 seconds, then check. If the top still looks wet, give it 15 more seconds.
- It is done when the top springs back lightly and a skewer pushed into the centre comes out with moist crumbs and no wet batter.
- Let it stand for 1 minute, then top with whipped cream, mini marshmallows, a dusting of cocoa powder and a candy egg.
Tip: A mug under 12 ounces will overflow in the first 30 seconds. If yours is small, use 3 tablespoons of milk and 1 tablespoon of oil.
Swap it: For a single-scoop version, skip the egg and oil, add 4 tablespoons of flour and 1/4 cup of milk, and microwave for 60 to 75 seconds for a dense chocolate cake. Nut-free and gluten-free flour blends both work here.
Storage: Mug cakes are best the day they are made and are not worth saving. If you must, cover loosely and eat within 4 hours.
Tips for Making These
- Chill everything that sets overnight on a Friday night. Yogurt bark, tartlets and chocolate cups all need hours to firm up, and none of them taste worse for being made early. The baked items are better fresh.
- Decorate last, out of adult hands only. Small candy pieces, sprinkles and chocolate eggs are a choking risk under age four, so let the children spread frosting and yogurt, and do the pieces yourself.
- Drain fruit properly. Pat slices dry, add bananas last and cut kiwi and apple just before serving, and nothing on the table turns into a puddle.
- Read labels for school treats. Check cereal, frosting, cookies and chocolate for peanuts, tree nuts and cross-contact warnings before anything leaves the house. Put nut-free items in a separate sealed container.
- Line every pan with parchment. The rice cereal slab, the bark, the brownies and the yogurt bark all lift straight off, which is most of the work.
- Give each child one job, not the recipe. Preschoolers stir and sprinkle, elementary kids measure and pipe, and older ones handle the piping bag and the knife work with a proper board.
Frequently Asked Questions
What are some easy dessert ideas for kids at Easter?
The fastest are the no-bake ones: Easter bunny Rice Krispie treats, chocolate bark, fruit tartlets and coconut cream cups all come together in under 30 minutes and need only a fridge. If you have an hour and a warm oven, mini lemon cupcakes, carrot cake cookies and one pan of brownies cover most tables. Every recipe here lists its time, difficulty and storage so you can match one to whatever time you actually have left before the egg hunt.
How long do these Easter desserts take to make?
Four of the fifteen are done in 15 minutes or less, including the fruit parfaits, chocolate bark, no-bake yogurt bark and the mug cakes. Most sit between 20 and 40 minutes, counting chilling. The apple pies take the longest at about 45 minutes, and the cupcakes need 35 minutes because the oven does most of the work. Anything that chills can be made a day ahead and taken out of the fridge when you are ready to serve.
Which of these desserts can kids actually help make?
Almost all of them. Good jobs for a preschooler are stirring, sprinkling, pressing cereal into a pan and dropping marshmallows. Elementary-aged kids can measure, roll dough, pipe frosting and cut shapes with a plastic knife. Save the knife work, the microwave and the melting chocolate for an adult. The decorating step is the most satisfying part for children, so leave that one entirely to them.
What are nut-free Easter desserts I can send to school?
The Rice Krispie treats, yogurt bark, chocolate bark, shortbread bites, fruit tartlets and fruit parfaits can all be made without nuts, provided you read the labels. Cereal, frosting, granola, cookie dough and chocolate are the usual culprits, and granola is the one most parents miss. For any classroom treat, check for cross-contact warnings, skip loose candy pieces, and pack it in a sealed container with an ingredient list.
What can I fill toddler Easter eggs with instead of candy?
Yogurt bark, banana pudding cups and fruit parfaits all work as basket fillers if you pack them in small sealed cups. For loose fillings, consider dry cereal, small pretzels, dried fruit, cheese cubes or homemade yogurt bark crumbs. Keep anything round, hard or sticky out of a toddler’s basket, since those are the pieces that come straight back out. Our u003ca href=u0022https://thesweetandsimplekitchen.com/easy-dinner-ideas-for-kids/u0022u003ekid-approved dinner ideasu003c/au003e pair nicely with a lighter dessert table.
A Final Sweet Easter Pick
If you only make one, make the Easter bunny Rice Krispie treats. Twenty minutes of work, one bowl, no oven, and a chilling window where the children can decorate six of them unsupervised while you cook breakfast.
For a table that looks like you tried harder than you did, add the fruit pizza and a tray of chocolate bark, since both slice and transport well. Between them, these 15 easy Easter dessert ideas for kids cover a brunch, a classroom drop-off and an egg hunt without a single complicated bake.