
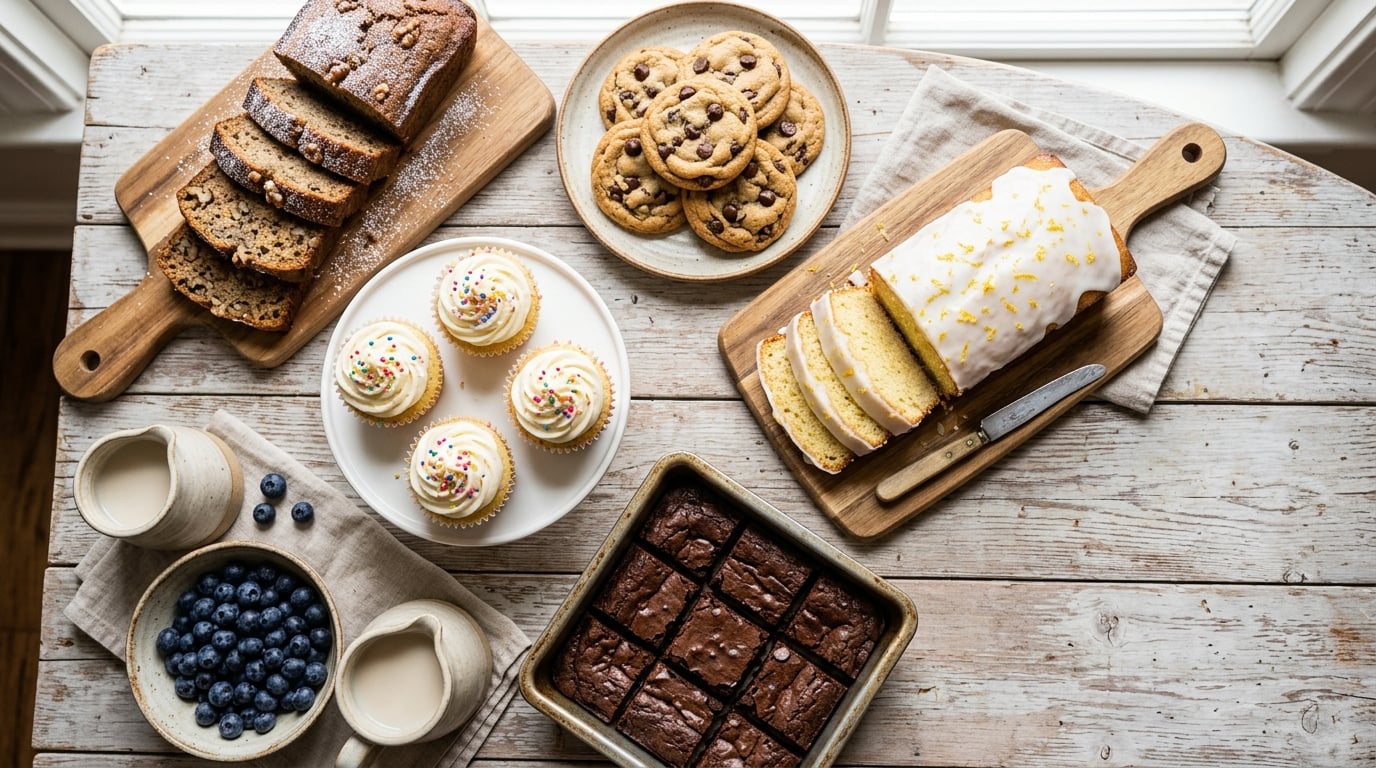
Dairy free baking recipes for beginners rarely need anything exotic. They need a swap you can measure, a pan you already own, and one honest cue that tells you the middle is done. Every recipe below lists US and metric amounts, uses supermarket ingredients, and bakes at a single temperature you can set before you start.
I made these after years of baking for a house that avoids dairy, and the pattern was always the same: fat gives tenderness, sugar gives moisture, and eggs or a binder hold the crumb together. Take dairy out and you put those three jobs back with plant butter, an extra egg, or one tablespoon of flaxseed. Each recipe here names which one it uses and why. They’re forgiving, they hold for a few days, and they freeze if you need to bake ahead. If you want a warm-weather bake alongside these, my cottagecore baking recipe ideas use the same simple pantry.
Table of Contents
Dairy Free Baking Recipes for Beginners at a Glance
| Recipe | Time | Difficulty | Best For |
|---|---|---|---|
| 1. Easy Dairy Free Banana Bread | 75 min | Easy | Breakfast and afternoon snacking |
| 2. Simple Dairy Free Chocolate Chip Cookies | 60 min | Easy | After-school snacks and bake sales |
| 3. Beginner Dairy Free Chocolate Brownies | 3 hr | Easy | Potluck desserts and bake sales |
| 4. Easy Dairy Free Vanilla Cupcakes | 60 min | Easy | Birthdays and party dessert tables |
| 5. Dairy Free Blueberry Scones | 45 min | Easy | Weekend breakfast and brunch |
| 6. Beginner-Friendly Dairy Free Apple Cake | 60 min | Easy | Autumn baking and holiday tables |
| 7. Easy Dairy Free Lemon Loaf | 65 min | Easy | Afternoon tea and lunchboxes |
| 8. Dairy Free Coconut Macaroons | 35 min | Easy | Gluten-free treats and quick gifts |
| 9. Easy Dairy Free Pumpkin Quick Bread | 75 min | Easy | Autumn baking and Thanksgiving |
| 10. Beginner Dairy Free Chocolate Muffins | 40 min | Easy | Grab-and-breakfast and lunchboxes |
1. Easy Dairy Free Banana Bread
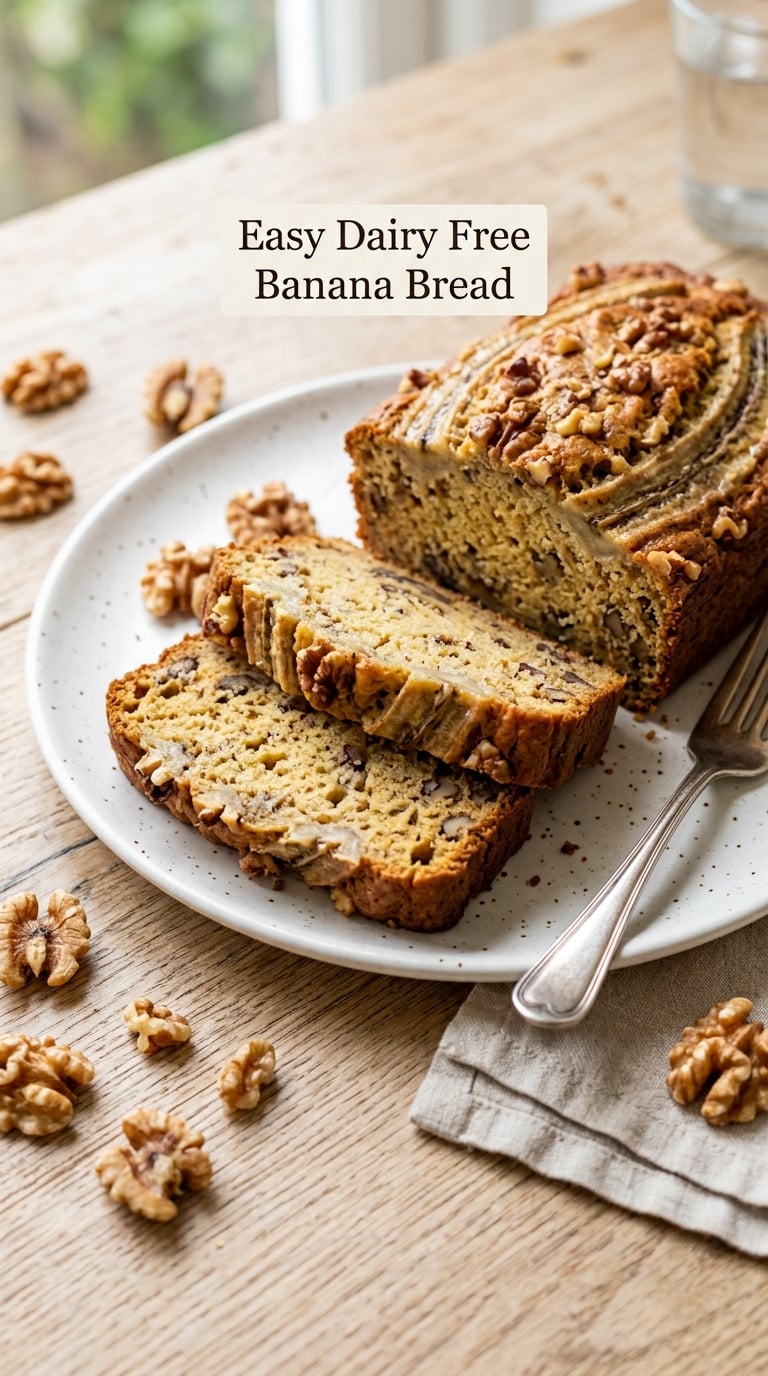
This is the loaf I hand to anyone who thinks dairy free baking is a compromise. Very ripe bananas supply the moisture dairy milk usually provides, so the crumb stays soft for days without any butter at all.
Yield: 1 loaf, about 10 slices · Prep: 15 min · Cook: 55-60 min · Total: 75 min · Difficulty: Easy
Ingredients
- 2 cups all-purpose flour (250 g)
- 1 teaspoon baking soda
- 1/2 teaspoon baking powder
- 1 teaspoon ground cinnamon
- 1/2 teaspoon fine salt
- 1/2 cup plant-based butter, softened (113 g), or coconut oil
- 3/4 cup packed light brown sugar (150 g)
- 2 large eggs, room temperature
- 1 teaspoon vanilla extract
- 1 cup mashed very ripe bananas, about 3 medium (300 g)
- 1/4 cup unsweetened plant milk (60 ml)
Instructions
- Heat the oven to 350°F (175°C) and grease a 9×5 inch loaf pan with parchment on the base and two sides.
- Whisk the flour, baking soda, baking powder, cinnamon and salt in a bowl.
- Beat the softened plant butter and brown sugar for 2 minutes until pale and slightly fluffy.
- Add the eggs one at a time, beating 20 seconds after each, then stir in the vanilla.
- Add the mashed bananas and mix until mostly combined.
- Add the dry ingredients and the plant milk in three additions, stirring with a spatula only until no dry streaks remain.
- Scrape into the pan and smooth the top so the loaf bakes flat.
- Bake for 55-60 minutes until a skewer in the centre comes out clean and the top springs back when pressed.
- Cool in the pan for 10 minutes, then turn out onto a rack.
Tip: Overmixing is the whole game here. A few lumps are fine; a smooth, overworked batter gives you a dense, heavy loaf that nobody wants a second slice of.
Swap it: For an egg-free version, stir 2 tablespoons ground flaxseed with 6 tablespoons water, rest it 10 minutes, and use that in place of each egg. This loaf contains wheat and eggs, and most plant butters carry soy, so check the label if that matters to you.
Storage: Airtight at room temperature for 3 days. Wrap slices and freeze for up to 3 months; toast briefly to bring the crumb back.
2. Simple Dairy Free Chocolate Chip Cookies
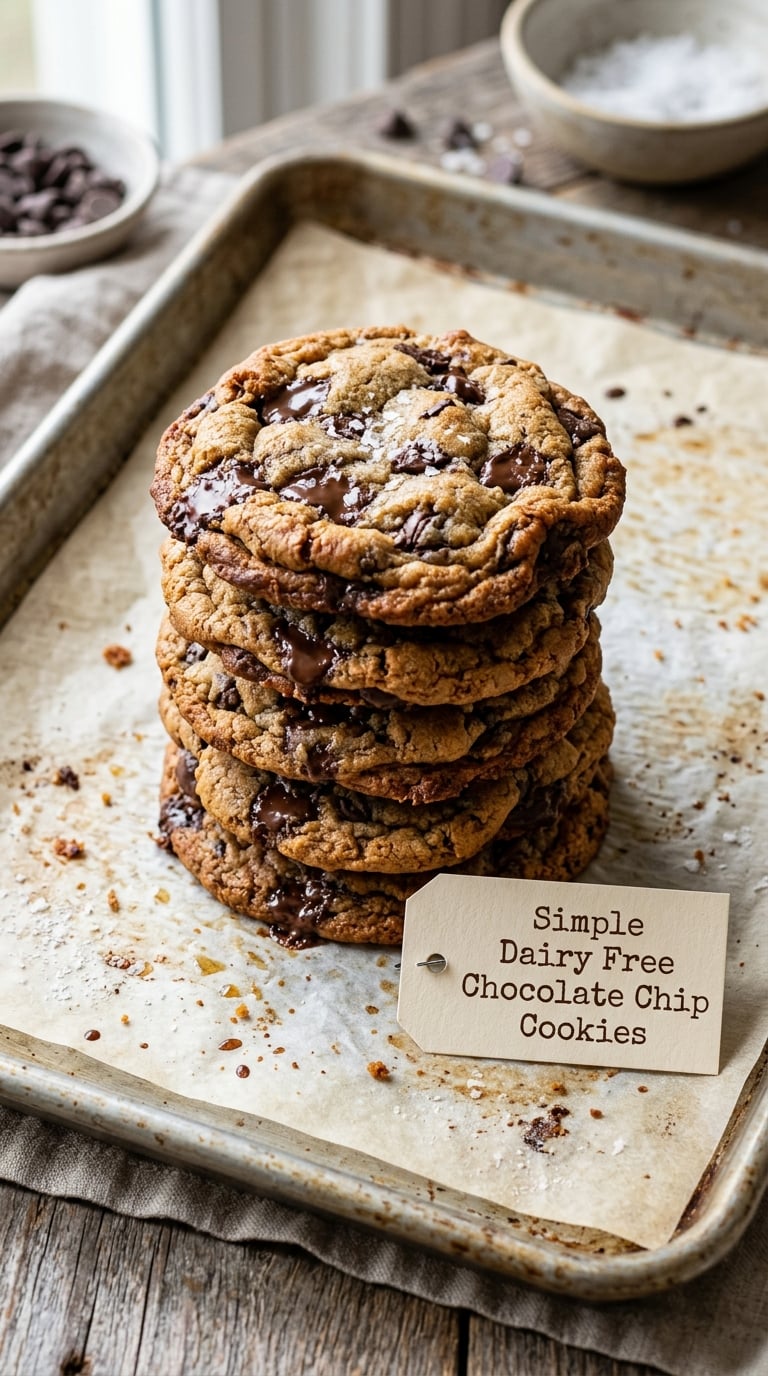
Chewy in the middle, crisp at the rim, and forgiving about spreading. The one thing that separates a chewy cookie from a flat puddle is dough temperature, so this recipe chills before it bakes.
Yield: 24 cookies · Prep: 15 min · Chill: 30 min · Cook: 10-12 min · Total: 60 min · Difficulty: Easy
Ingredients
- 2 1/4 cups all-purpose flour (280 g)
- 1 teaspoon baking soda
- 1/2 teaspoon fine salt
- 1/2 cup plant-based butter, softened (113 g), or coconut oil
- 1 cup packed light brown sugar (200 g)
- 1/2 cup granulated sugar (100 g)
- 1 large egg, plus 1 tablespoon unsweetened plant milk
- 2 teaspoons vanilla extract
- 2 cups semisweet chocolate chips (300 g)
Instructions
- Heat the oven to 350°F (175°C) and line two baking trays with parchment.
- Whisk the flour, baking soda and salt together in a small bowl.
- Beat the softened plant butter and both sugars for 2 minutes until creamy.
- Beat in the egg, the plant milk and the vanilla until smooth.
- Add the dry ingredients and stir until just combined, then fold in the chocolate chips.
- Chill the dough for 30 minutes so the fat firms up and the cookies hold their shape.
- Scoop 2-tablespoon balls onto the trays, spaced 2 inches apart.
- Bake for 10-12 minutes until the edges are set and lightly browned and the centres still look underdone.
- Cool on the tray for 5 minutes; the residual heat finishes the centres.
Tip: Pull them while the centres still look soft. They set on the tray, and that two-minute window is the difference between a chewy cookie and a dry one.
Swap it: Oat milk is the best-tasting swap here, though any unsweetened plant milk works. Chocolate chunks instead of chips make them more grown-up, and this dough also contains wheat and eggs.
Storage: Airtight for 5 days, though the first day is best. Roll unbaked balls and freeze for up to 2 months, then bake straight from frozen with 2 extra minutes.
3. Beginner Dairy Free Chocolate Brownies
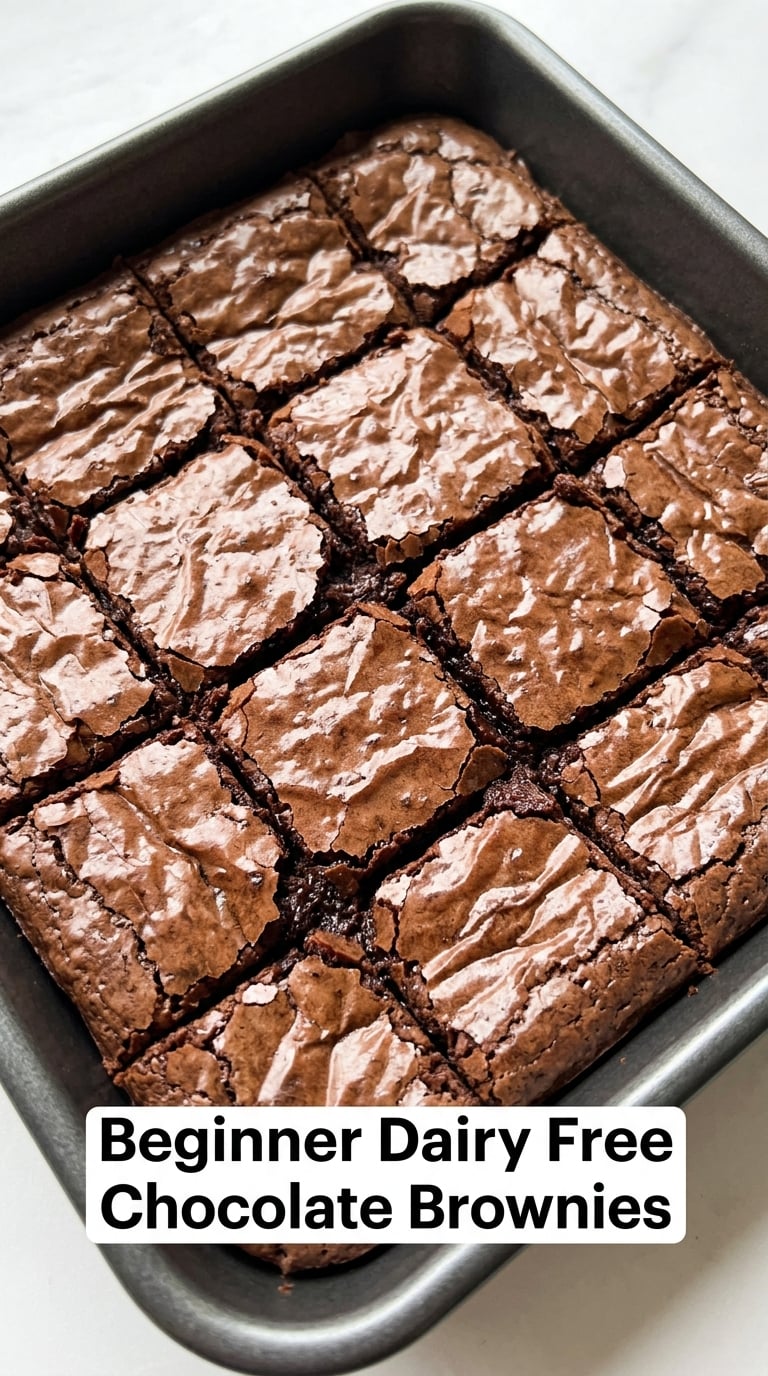
Fudgy, glossy on top, and impossible to overwork. Using melted plant butter keeps the batter thin and takes the guesswork out of mixing, which is why this is the recipe I recommend as a second bake after the banana bread.
Yield: 16 squares · Prep: 15 min · Cook: 26-30 min · Chill: 2 hr · Total: 3 hr · Difficulty: Easy
Ingredients
- 10 tablespoons plant-based butter (140 g)
- 1 cup granulated sugar (200 g)
- 2 large eggs, room temperature
- 2 teaspoons vanilla extract
- 3/4 cup unsweetened cocoa powder (75 g)
- 1/2 cup all-purpose flour (65 g)
- 1/2 teaspoon baking powder
- 1/4 teaspoon fine salt
- 1 cup chopped dairy-free chocolate or dark chocolate chunks (150 g), optional
Instructions
- Heat the oven to 325°F (165°C) and line an 8-inch square pan with parchment, base and sides.
- Melt the plant butter in a saucepan over low heat, then let it cool for 5 minutes.
- Whisk the sugar into the warm butter until smooth and glossy.
- Whisk in the eggs one at a time, then the vanilla and the cocoa powder.
- Add the flour, baking powder and salt and whisk until no dry patches remain.
- Pour into the pan, scatter the chopped chocolate over the top and spread the batter to the corners.
- Bake for 26-30 minutes until the edges are set and a toothpick in the centre comes out with moist crumbs, not wet batter.
- Cool completely in the pan, then chill for 2 hours before cutting so the squares hold their shape.
Tip: Moist crumbs, not a clean toothpick. A clean pick means the centre has baked past fudgy into cakelike, and no amount of frosting will bring that back.
Swap it: A 1:1 swap for almond butter or smooth peanut butter adds nut flavor and cuts the fat, and they bring up the batter slightly so the bake time stays close. This recipe contains wheat, eggs and soy.
Storage: Airtight for 5 days. Squares freeze well for 2 months; let them sit at room temperature for 20 minutes before eating. If you want more sweets that cut out sugar, my sugar free dessert recipes lean on the same forgiving batters.
4. Easy Dairy Free Vanilla Cupcakes
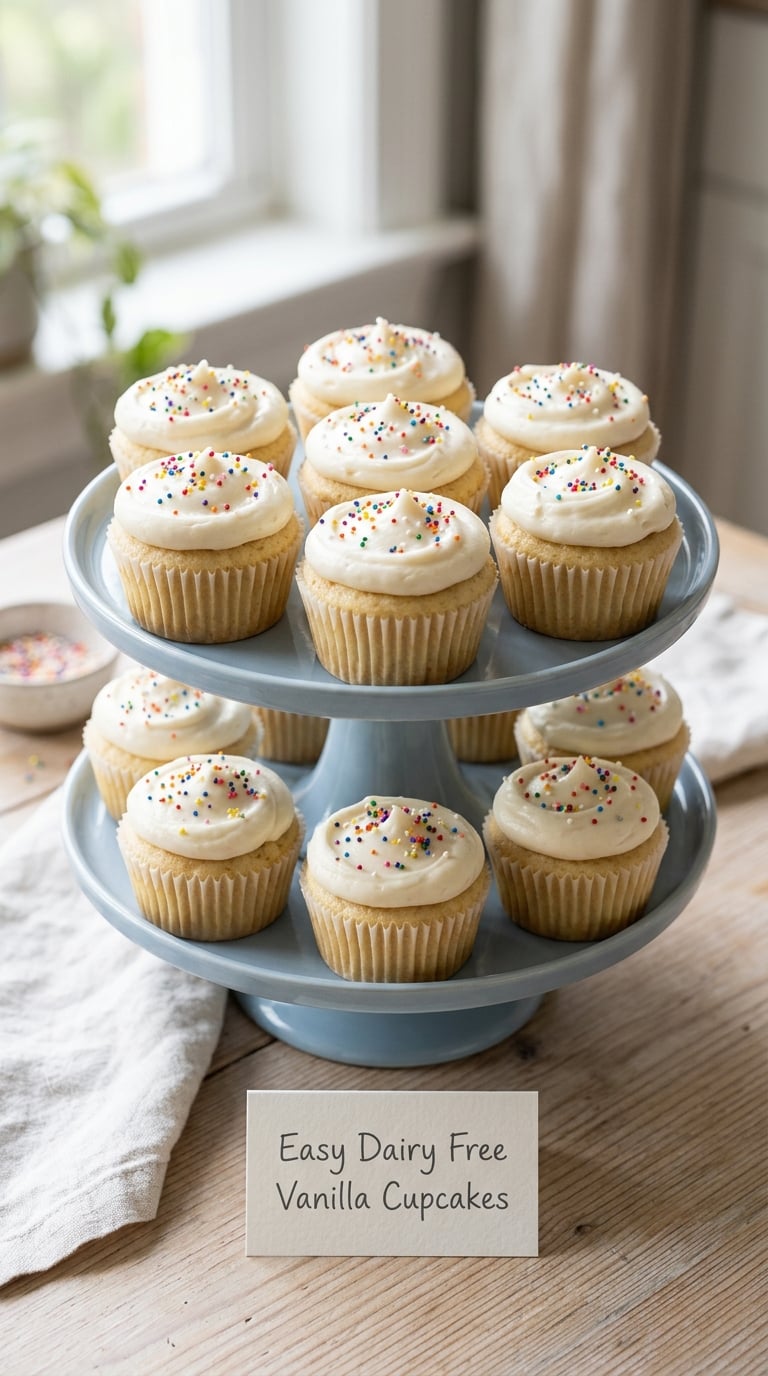
A light, from-scratch cupcake with a frosting you can pipe or just swirl with a spoon. It uses the creaming method properly, which is the reason it stays soft and moist rather than dense.
Yield: 12 cupcakes · Prep: 20 min · Cook: 18-20 min · Total: 60 min · Difficulty: Easy
Ingredients
- For the cupcakes:
- 1 3/4 cups all-purpose flour (220 g)
- 2 teaspoons baking powder
- 1/2 teaspoon fine salt
- 3/4 cup granulated sugar (150 g)
- 1/2 cup plant-based butter, softened (113 g)
- 2 large eggs, room temperature
- 3/4 cup unsweetened plant milk (180 ml)
- 2 teaspoons vanilla extract
- For the frosting:
- 1/2 cup plant-based butter, softened (113 g)
- 3 cups powdered sugar (360 g)
- 1 teaspoon vanilla extract
- 2-4 tablespoons unsweetened plant milk
Instructions
- Heat the oven to 350°F (175°C) and line a 12-cup muffin pan with paper liners.
- Whisk the flour, baking powder and salt in a bowl.
- Beat the softened plant butter and sugar for 3 minutes until very pale and airy.
- Beat in the eggs one at a time, then the vanilla and half the plant milk.
- Add the dry ingredients and the remaining milk alternately, mixing on low until the batter is just smooth.
- Fill each cup two-thirds full and bake for 18-20 minutes until the tops spring back and a skewer comes out clean.
- Cool in the pan for 10 minutes, then transfer to a rack and cool fully.
- Beat the frosting butter for 2 minutes, add the powdered sugar and vanilla, then thin with plant milk a tablespoon at a time until it holds a soft peak.
- Frost the completely cool cupcakes, about 3 tablespoons each.
Tip: Frost only when the cupcakes are at room temperature. Plant-based butter softens faster than dairy butter, and any warmth at all will slide the frosting off the top.
Swap it: For a chocolate version, add 2 tablespoons cocoa powder and take 2 tablespoons off the flour. A 1:1 gluten-free flour blend works without any other change, and this recipe contains wheat and eggs.
Storage: Covered in the fridge for 4 days. Freeze unfrosted for up to 2 months, then thaw at room temperature and frost shortly before serving.
5. Dairy Free Blueberry Scones
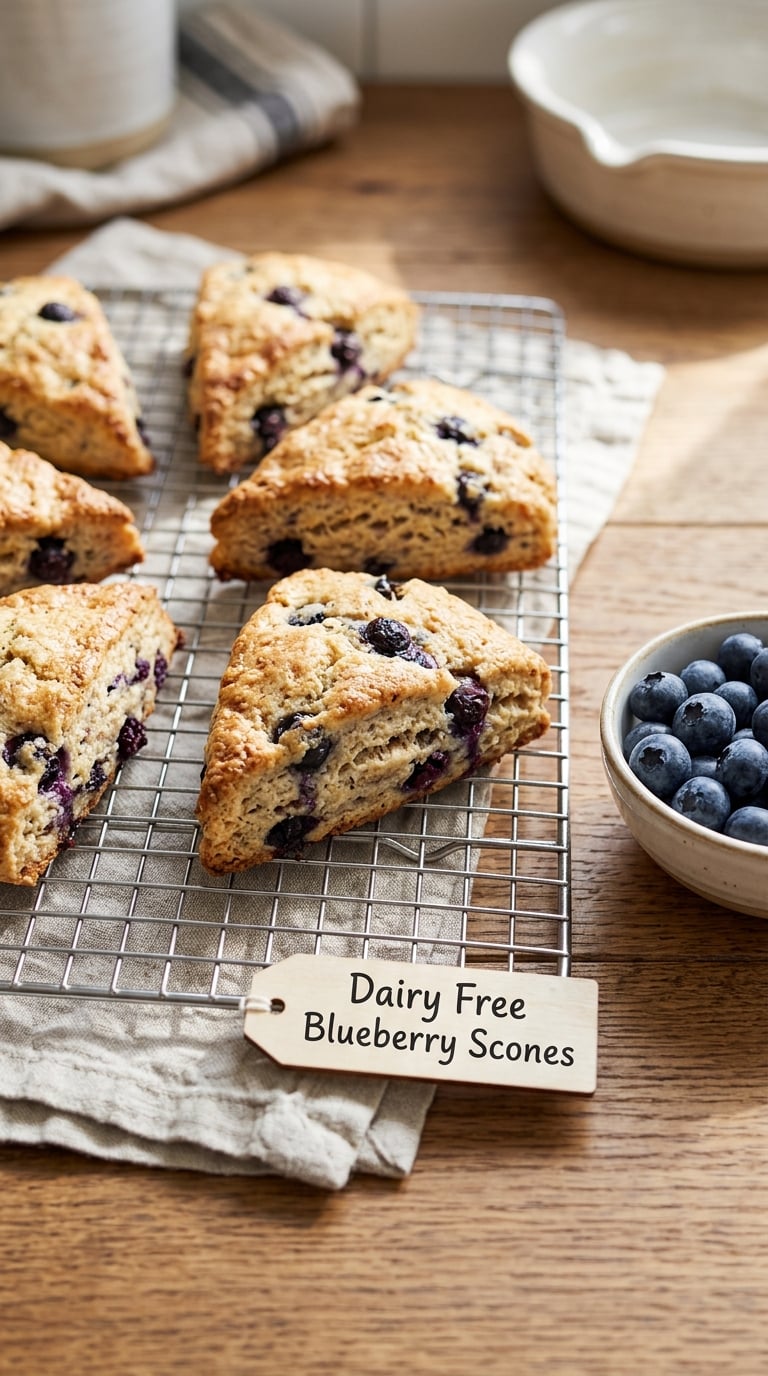
Tender inside, crusted on top, and shaped in under two minutes. Scones punish overhandling more than almost any bake, so the dough gets stirred just until it looks shaggy and then goes straight into the oven.
Yield: 8 scones · Prep: 20 min · Cook: 14-16 min · Total: 45 min · Difficulty: Easy
Ingredients
- 2 cups all-purpose flour (250 g)
- 2 teaspoons baking powder
- 1/3 cup granulated sugar (66 g)
- 1/2 teaspoon fine salt
- 6 tablespoons cold plant-based butter, cubed (85 g)
- 3/4 cup unsweetened plant milk (180 ml), plus 1 tablespoon to brush
- 1 cup fresh blueberries (150 g)
- 1 teaspoon lemon zest, optional
- Optional glaze: 1/2 cup powdered sugar (60 g) with 1 tablespoon lemon juice
Instructions
- Heat the oven to 400°F (200°C) and line a baking tray with parchment.
- Whisk the flour, baking powder, sugar, salt and lemon zest in a large bowl.
- Rub the cold cubed plant butter through the flour with your fingertips until the pieces are the size of peas.
- Pour in the plant milk and stir with a fork until the dough just holds together and still looks shaggy.
- Fold in the blueberries with a light hand.
- Pat the dough into 8 rounds about 2 inches wide and 1 inch tall, spacing them 2 inches apart.
- Brush the tops with plant milk and bake for 14-16 minutes until deep golden and risen.
- Cool on the tray for 5 minutes, then drizzle with the glaze while still warm.
Tip: Cold fat and a light hand. The moment the dough feels smooth, you have mixed too much, and the scones will bake up tough and chewy instead of tender.
Swap it: Chopped apple, fresh cherries or dairy-free chocolate chips all work in place of the blueberries. Oat milk has the most buttery flavor here, and the scones contain wheat.
Storage: Best on the day they are baked, and still good airtight for 24 hours after. Freeze for up to 1 month and reheat at 350°F (175°C) for 5-8 minutes. If you want more scone ideas, my bread machine picks for gluten free baking cover the same flour swaps from another angle.
6. Beginner-Friendly Dairy Free Apple Cake
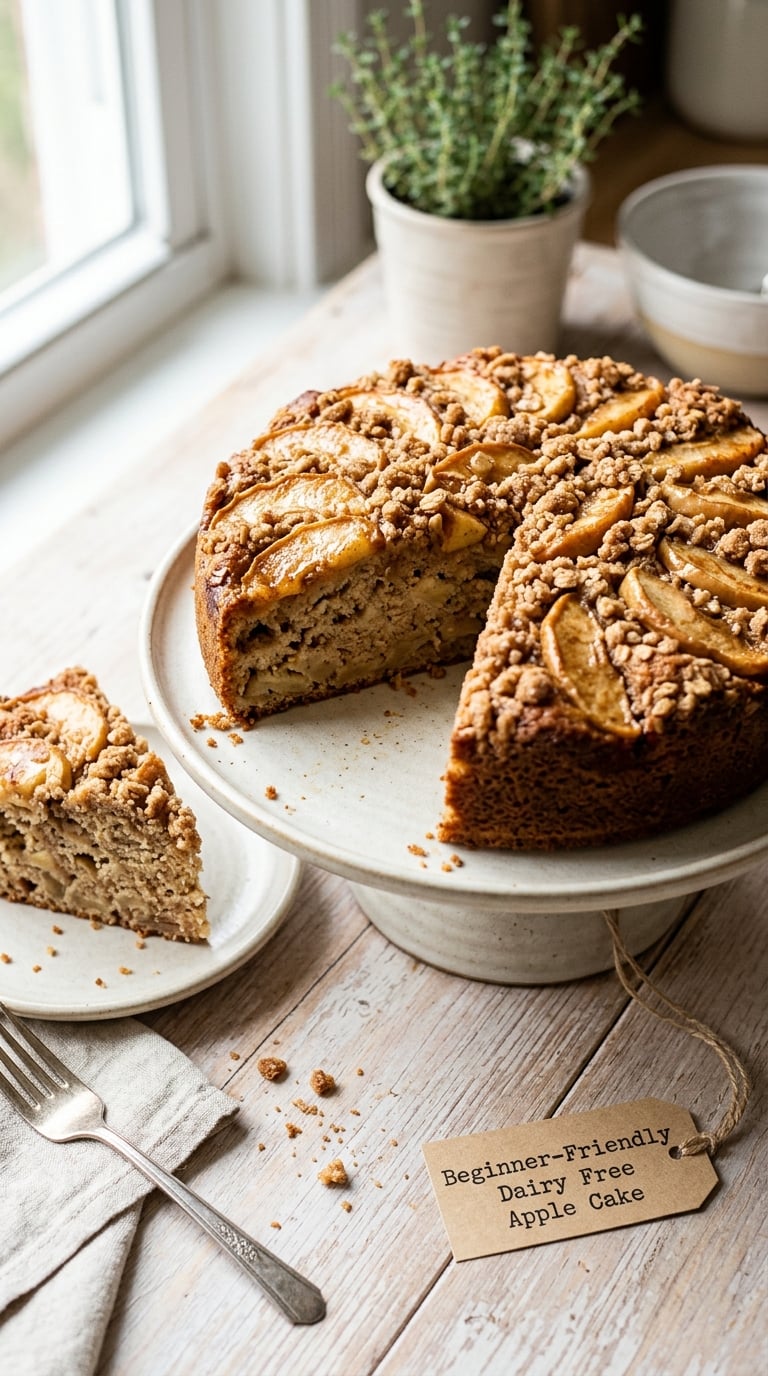
A single-layer cake that tastes like autumn and never collapses in the middle. The apples are diced small and folded in at the end so they sit evenly through the crumb rather than sinking to the base.
Yield: 8-10 slices · Prep: 20 min · Cook: 35-40 min · Total: 60 min · Difficulty: Easy
Ingredients
- 1 3/4 cups all-purpose flour (220 g)
- 2 teaspoons baking powder
- 1 teaspoon ground cinnamon
- 1/4 teaspoon ground nutmeg
- 1/2 teaspoon fine salt
- 3/4 cup granulated sugar (150 g)
- 1/2 cup plant-based butter, melted and cooled (113 g)
- 2 large eggs
- 1 teaspoon vanilla extract
- 1/2 cup unsweetened plant milk (120 ml)
- 2 medium apples, peeled and finely diced (300 g)
- 2 tablespoons packed brown sugar, for the top
Instructions
- Heat the oven to 350°F (175°C) and line an 8-inch round pan with parchment, base and sides.
- Whisk the flour, baking powder, cinnamon, nutmeg and salt together.
- Whisk the sugar, melted plant butter, eggs, vanilla and plant milk in a second bowl until smooth.
- Add the wet mixture to the dry and fold with a spatula until the batter is just combined.
- Fold in the diced apples, then scrape the batter into the pan and level the top.
- Scatter the brown sugar over the surface.
- Bake for 35-40 minutes until golden brown and a skewer in the centre comes out clean.
- Cool in the pan for 15 minutes before turning out onto a rack.
Tip: Dice the apples small and toss them with a spoonful of the flour. Larger pieces create gaps, and those gaps are where the middle sinks.
Swap it: Pears work the same way in autumn, and replacing half the plant milk with unsweetened applesauce makes the crumb extra moist. For a lower-sugar version, swap the topping for a spoon of cinnamon crumbs. This cake contains wheat and eggs.
Storage: Airtight at room temperature for 4 days. Individual slices freeze for up to 2 months and thaw in about an hour.
7. Easy Dairy Free Lemon Loaf
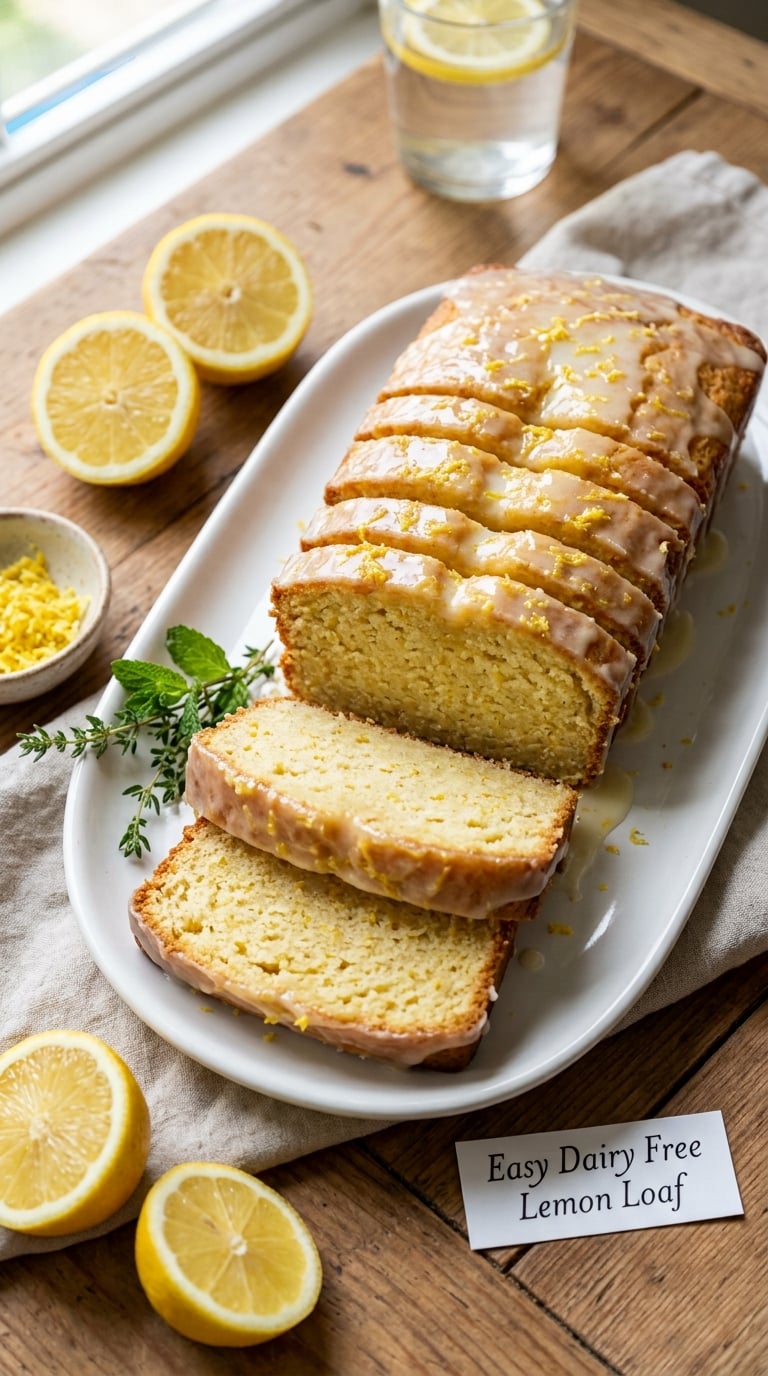
Tangy, moist and quick to mix, this is the loaf I make when the kitchen smells like cleaning and I want it to smell like a bakery. Zesting before juicing doubles the lemon flavor in one step.
Yield: 1 loaf, about 10 slices · Prep: 15 min · Cook: 45-50 min · Total: 65 min · Difficulty: Easy
Ingredients
- 1 3/4 cups all-purpose flour (220 g)
- 2 teaspoons baking powder
- 1/2 teaspoon fine salt
- 1 cup granulated sugar (200 g)
- 1/2 cup plant-based butter, softened (113 g)
- 2 large eggs, room temperature
- 1 teaspoon vanilla extract
- Finely grated zest of 2 lemons
- Juice of 2 lemons (60 ml)
- 1/4 cup unsweetened plant milk (60 ml)
- Optional glaze: 1 cup powdered sugar (120 g) with 2-3 tablespoons lemon juice
Instructions
- Heat the oven to 350°F (175°C) and line a 9×5 inch loaf pan with parchment.
- Whisk the flour, baking powder and salt together.
- Beat the softened plant butter and sugar for 2 minutes until light and creamy.
- Beat in the eggs one at a time, then the vanilla, the lemon zest and the lemon juice.
- Add the dry ingredients and the plant milk in alternating additions, stirring until the batter is smooth.
- Scrape into the pan and bake for 45-50 minutes until golden and a skewer comes out with a few moist crumbs.
- Cool in the pan for 15 minutes, then turn out onto a rack.
- Whisk the glaze ingredients and drizzle over the loaf while it is still warm.
Tip: Zest the lemons before you juice them, and rub the zest into the sugar with your fingers for 30 seconds. That releases the oils and the whole loaf tastes lemony rather than merely sour.
Swap it: Oranges work identically for a winter version. If your plant milk is unsweetened and rather thin, any brand works fine here, and the loaf contains wheat and eggs.
Storage: Airtight for 4 days, and it keeps its moisture remarkably well. The unglazed loaf freezes for up to 2 months; add the glaze after thawing.
8. Dairy Free Coconut Macaroons
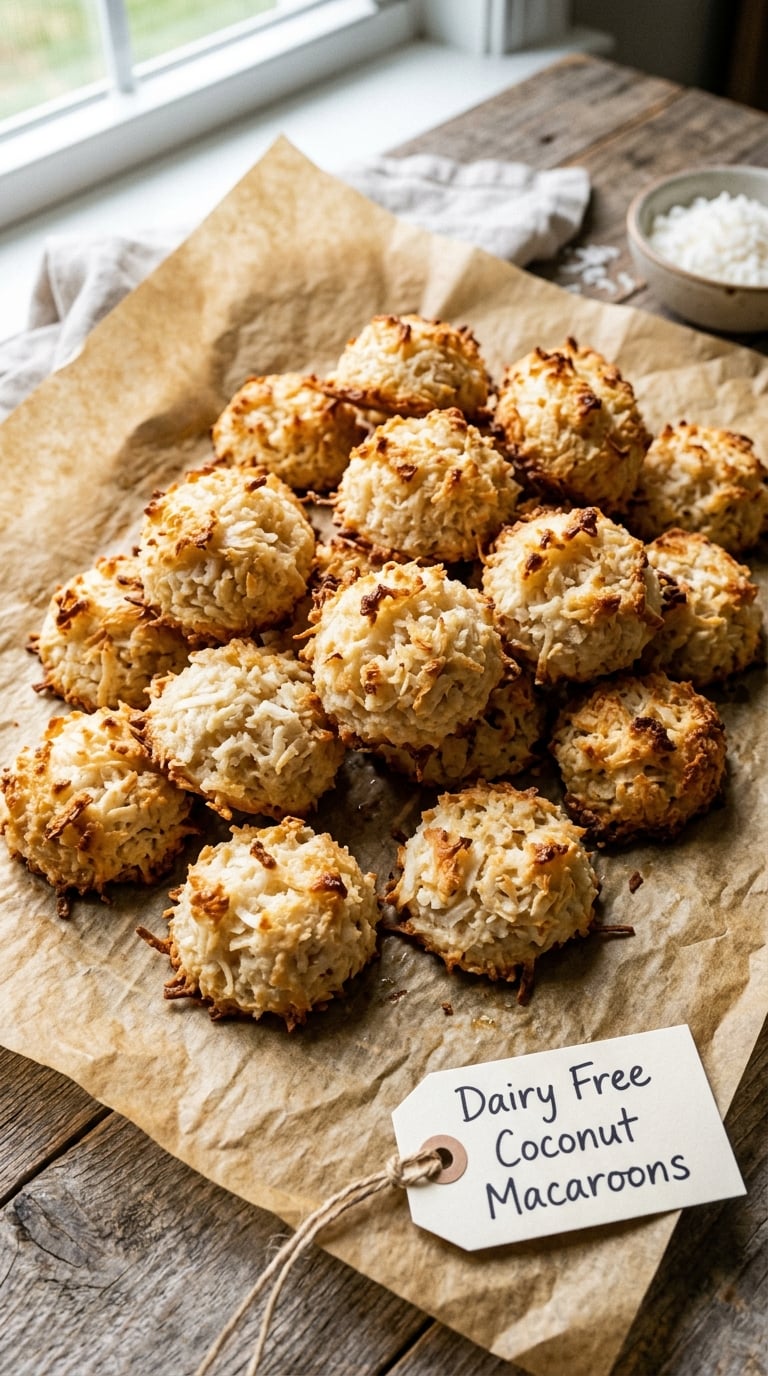
Four ingredients, one bowl, and about half an hour from start to cooling tray. This is the recipe for a weeknight when you want a treat in the house and no mixer to clean afterwards.
Yield: 14 macaroons · Prep: 15 min · Cook: 12-15 min · Total: 35 min · Difficulty: Easy
Ingredients
- 3 cups unsweetened shredded coconut (240 g)
- 3 large egg whites, at room temperature (90 g)
- 3/4 cup granulated sugar (150 g)
- 1 teaspoon vanilla extract
- 1/4 teaspoon fine salt
- 1/3 cup dairy-free chocolate chips, optional
Instructions
- Heat the oven to 325°F (165°C) and line a baking tray with parchment.
- Beat the egg whites with an electric whisk for about 2 minutes, until they hold soft peaks.
- Add the sugar gradually, a spoonful at a time, beating after each addition until the mixture is glossy and holds a ribbon.
- Fold in the coconut, the vanilla and the salt with a spatula until the mixture looks like thick, damp paste.
- Drop 1/4 cup mounds onto the tray, spacing them 2 inches apart, or pipe them from a large bag.
- Press a few dairy-free chocolate chips onto the tops if you like.
- Bake for 12-15 minutes until the edges are golden brown and the centres still feel soft.
- Cool on the tray for 5 minutes, then move to a rack. They firm up as they cool.
Tip: Stop whipping the whites at soft peaks. Stiff, dry whites make macaroons brittle, and the sugar needs that glossy, marshmallowy stage to bind properly.
Swap it: To go egg-free, whip the aquafaba from 1 can of chickpeas for 5-6 minutes until it holds firm peaks, then follow the same method. This recipe contains egg, and most brands of shredded coconut are processed in a facility that also handles tree nuts.
Storage: Airtight at room temperature for 4 days, in a single layer so they do not stick. They freeze well for 1 month, though they lose a little crispness after thawing.
9. Easy Dairy Free Pumpkin Quick Bread
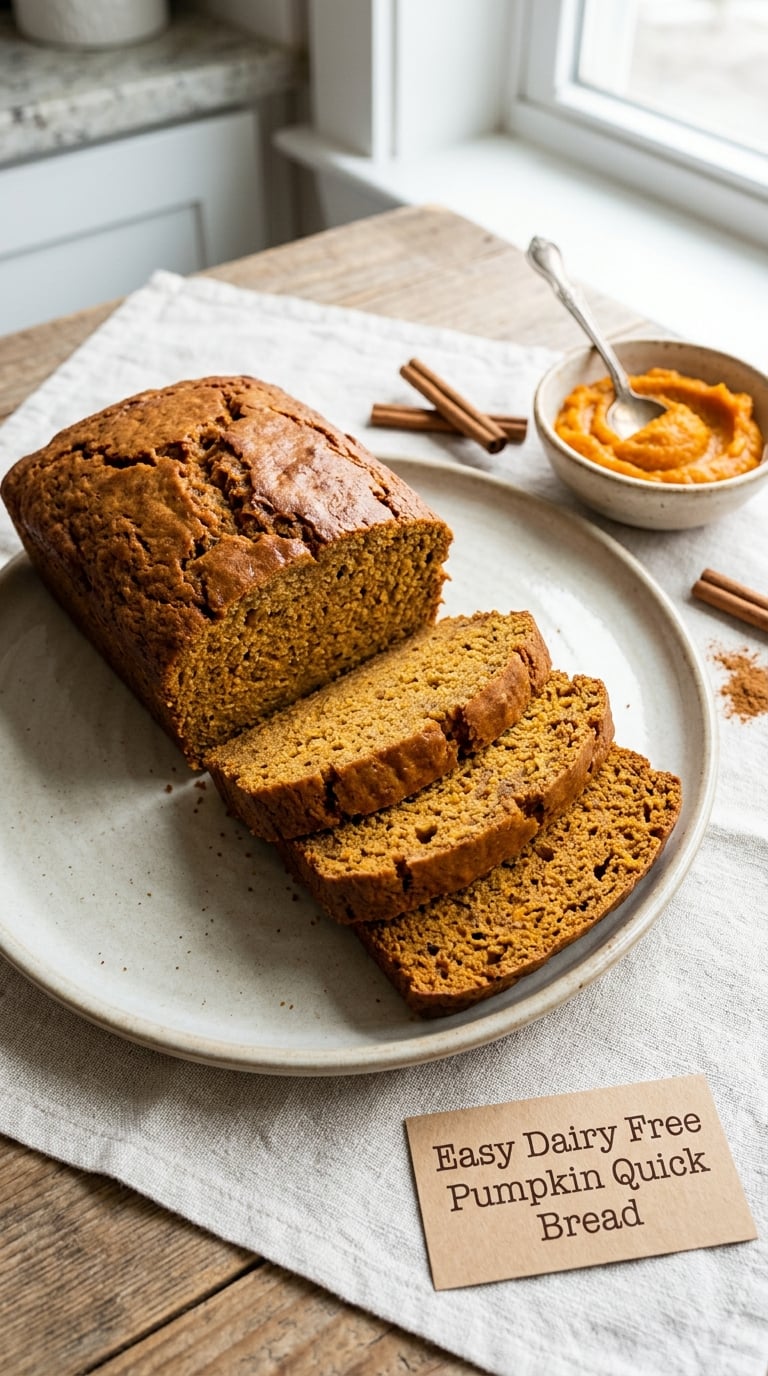
Spiced, dense in a good way, and forgiving enough to mix while the oven heats. Canned pumpkin puree brings its own moisture, so the loaf stays soft for days without any oil at all.
Yield: 1 loaf, about 10 slices · Prep: 15 min · Cook: 55-60 min · Total: 75 min · Difficulty: Easy
Ingredients
- 1 3/4 cups all-purpose flour (220 g)
- 1 teaspoon baking soda
- 1/2 teaspoon baking powder
- 2 teaspoons ground cinnamon
- 1/2 teaspoon ground ginger
- 1/4 teaspoon ground cloves
- 1/4 teaspoon ground nutmeg
- 1/2 teaspoon fine salt
- 1 cup plain pumpkin puree (245 g), about 15 oz
- 2 large eggs
- 3/4 cup packed light brown sugar (150 g)
- 1/4 cup maple syrup (42 g)
- 1/2 cup plant-based butter, melted and cooled (113 g)
- 1/2 cup dairy-free chocolate chips or chopped pecans, optional
Instructions
- Heat the oven to 350°F (175°C) and grease a 9×5 inch loaf pan with parchment on the base and two sides.
- Whisk the flour, baking soda, baking powder, cinnamon, ginger, cloves, nutmeg and salt together.
- Whisk the pumpkin puree, eggs, brown sugar, maple syrup and melted plant butter in a second bowl until smooth.
- Add the wet mixture to the dry and fold with a spatula until no dry streaks remain, about 20 strokes.
- Fold in the chocolate chips or chopped pecans.
- Spoon the batter into the pan, spread the top flat and bake for 55-60 minutes, checking at 50.
- The loaf is done when a tester in the centre comes out clean and the centre springs back when lightly pressed.
- Cool in the pan for 10 minutes, then turn out and cool completely on a rack.
Tip: Use full-fat pumpkin puree, not the pie-filling variety, which is already sweetened and spiced. The plain kind lets you control the sugar and gives you a loaf that tastes like autumn rather than like a pie.
Swap it: A 1:1 gluten-free flour blend works without other changes, and half whole wheat flour gives a nuttier crumb. This loaf contains wheat, eggs and soy.
Storage: Wrapped airtight it keeps 4 days at room temperature, and it freezes for 3 months. Toast slices rather than microwaving so the edges stay crisp.
10. Beginner Dairy Free Chocolate Muffins
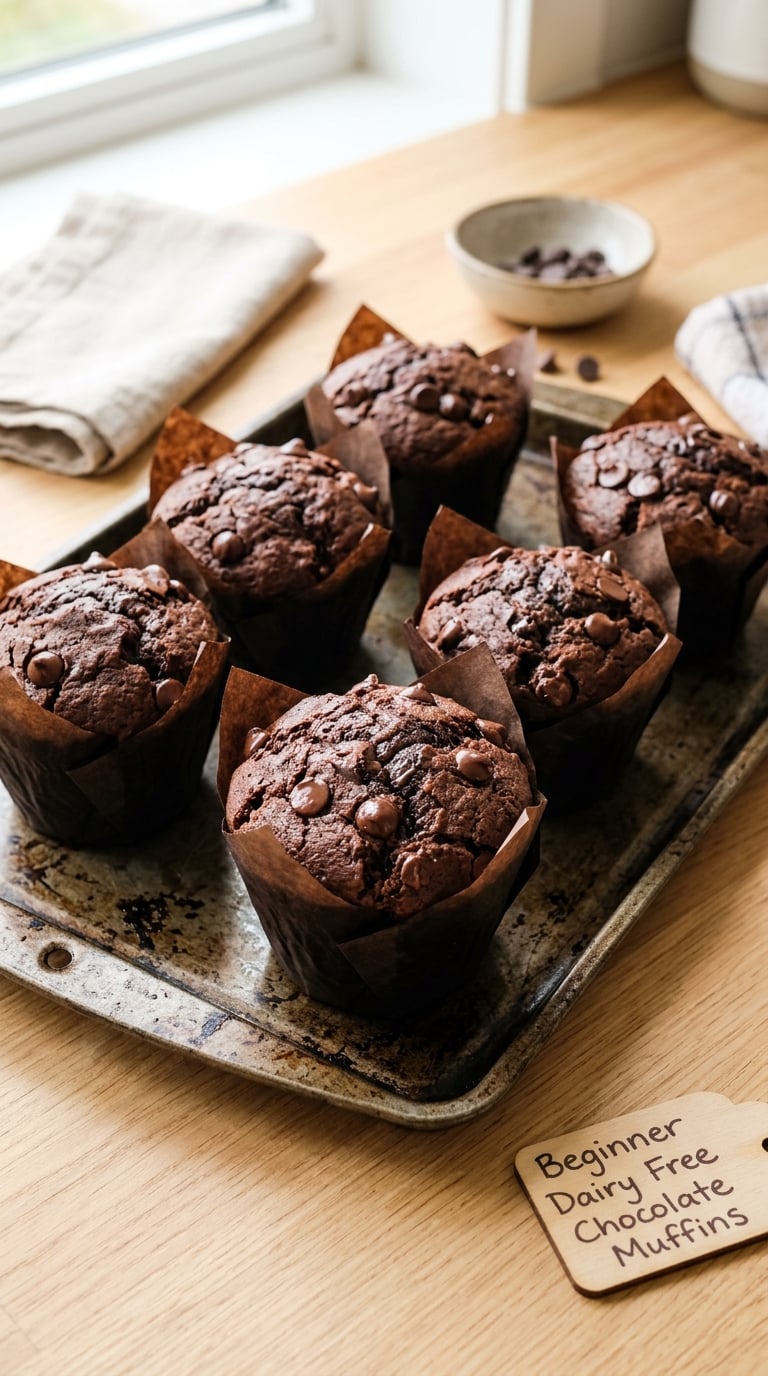
One bowl, ten minutes of mixing, and a high oven that gives you bakery domed tops. Fill the cups to the rim; at a lower temperature they come out flat, which is the only way this recipe disappoints.
Yield: 12 muffins · Prep: 15 min · Cook: 18-20 min · Total: 40 min · Difficulty: Easy
Ingredients
- 1 3/4 cups all-purpose flour (220 g)
- 1/2 cup unsweetened cocoa powder (50 g)
- 2 teaspoons baking powder
- 1/2 teaspoon baking soda
- 1/2 teaspoon fine salt
- 3/4 cup granulated sugar (150 g)
- 1/4 cup packed brown sugar (50 g)
- 1 cup unsweetened plant milk (240 ml)
- 1/3 cup neutral oil or melted plant butter (80 g)
- 1 large egg
- 2 teaspoons vanilla extract
- 1 cup dairy-free chocolate chips (175 g)
Instructions
- Heat the oven to 400°F (205°C) and line a 12-cup muffin pan with paper liners.
- Whisk the flour, cocoa, baking powder, baking soda and salt in a bowl.
- Whisk the sugar, brown sugar, plant milk, oil, egg and vanilla in a second bowl until smooth.
- Add the wet to the dry and fold with a spatula about 20 times, stopping the moment no dry streaks remain.
- Fold in the chocolate chips.
- Fill each liner to the very top.
- Bake for 18-20 minutes until the tops are domed and a skewer in the centre comes out clean.
- Cool in the pan for 5 minutes, then turn out onto a rack.
Tip: Stop mixing while a few flour streaks are still visible. Batter mixed smooth and long turns into muffins with a heavy, brick-like crumb, and no amount of extra chocolate fixes it.
Swap it: For egg-free, combine 1 tablespoon ground flaxseed with 3 tablespoons water, rest 10 minutes and stir it into the wet bowl. A 1:1 gluten-free flour blend also works, and this recipe contains wheat, eggs and soy.
Storage: Airtight for 3 days at room temperature, and 5 days in the fridge. Freeze for up to 2 months and reheat at 350°F (175°C) for 5 minutes.
Tips for Making These
- Read the label on plant products every time. Plant milks and vegan butters carry wheat, soy or almond, and recipes change between brands. If someone in the house has a genuine dairy allergy rather than a preference, check shared equipment and baking surfaces too, since traces survive in a toaster oven or on a reused whisk.
- Weigh the flour if you have a scale. A cup of flour can swing by 20 grams between scooping methods, and that is often the difference between a good loaf and a dense one. Spoon flour into the cup and level it, never scoop and shake.
- Stop mixing the moment the dry streaks disappear. Gluten develops with stirring and kneading, and dairy-free batters have less fat to slow that process down. Use a spatula and count about 20 strokes.
- Use room temperature eggs, milk and plant butter. Cold ingredients do not emulsify properly, and dairy-free milks need it more than dairy milk does. Pull them out of the fridge 30 minutes before you start.
- Trust the cue, not the timer. Oven thermometers run hot and cool, and every one of these bakes is judged by color and a tester rather than by clock alone. Bake the final 10 minutes by sight.
- Let quick breads cool in the pan before cutting. The crumb is still setting as it comes out of the oven, and cutting early gives you a gummy slice. Ten minutes in the pan and 20 more on a rack is the habit worth building.
Frequently Asked Questions
What does dairy free mean when baking?
Dairy free baking means no milk-derived ingredients: no milk, butter, cream, cheese, sour cream, yogurt, condensed milk or whey. Every recipe on this page uses plant-based milk and plant butter, coconut oil or solid oil in their place. Dairy free is not the same as vegan, because dairy free bakes can still contain eggs and honey. If a genuine milk allergy is involved, read every label and check your equipment for cross-contact.
Can I use regular butter in these recipes?
Yes, and the results will be good, because these recipes are written as ordinary cakes, cookies and loaves with one swap already made. Using real butter is fine for anyone avoiding dairy for preference, and the texture will be slightly richer and more familiar. If you are baking for a milk allergy rather than a preference, use the plant butter or oil listed in each recipe and check that the plant butter is labelled dairy free, since some brands still process it alongside milk products.
How do I make baked goods without milk without making them dry?
Replace the milk 1:1 with an unsweetened plant milk, keep the sugar or maple syrup in the recipe, and do not reduce the fat unless you are also adding something wet. Sugar and fat are what hold moisture in a crumb, so cutting either is what dries dairy free bakes out, not the missing milk. On this page, very ripe bananas in the banana bread, canned pumpkin in the quick bread and applesauce in the apple cake all add wetness of their own. Wrap cooled loaves tightly, since they dry faster than dairy versions.
What is the best dairy-free substitute for milk in baking?
Oat milk is the best all-rounder because it is creamy and neutral enough not to fight the flour, and it browns well in cakes. Soy milk has the closest protein and fat parity with dairy milk and gives the tallest rise in cupcakes and muffins. Almond milk is thinner and slightly nutty, which suits muffins and light cakes but can make a loaf dry. Rice milk is the most neutral of all, and coconut milk is for richness, usually in place of cream rather than as a drinking milk.
How do I know when a dairy-free baked recipe is done?
Colour first, then a tester. Quick breads are done when the top is deeply golden and a skewer from the centre comes out completely clean. Brownies are done when the edges are set and the tester still has moist crumbs, which is a fudgy centre rather than a wet one. Cookies come out of the oven with underdone-looking centres and finish on the tray, so pull them at the 10-minute mark. Muffins and cupcakes spring back when pressed gently.
A First Recipe for New Dairy Free Bakers
Start with the chocolate chip cookies. The dough forgives a minute of extra mixing, the chilling step is a waiting period rather than a technique, and a slightly overdone cookie is still a good cookie. You learn the two things that matter most in dairy free baking, weighing and not overmixing, on a recipe with almost no room to fail.
Once cookies feel routine, move to a quick bread. The banana bread or the pumpkin loaf introduce the one skill cookies never taught you, reading a loaf for doneness, and both keep for days. From there, pick by occasion: scones for a slow weekend, brownies for a bake sale, cupcakes for a birthday. Whatever you choose from these dairy free baking recipes for beginners, weigh the flour, stop mixing early and trust the color.