
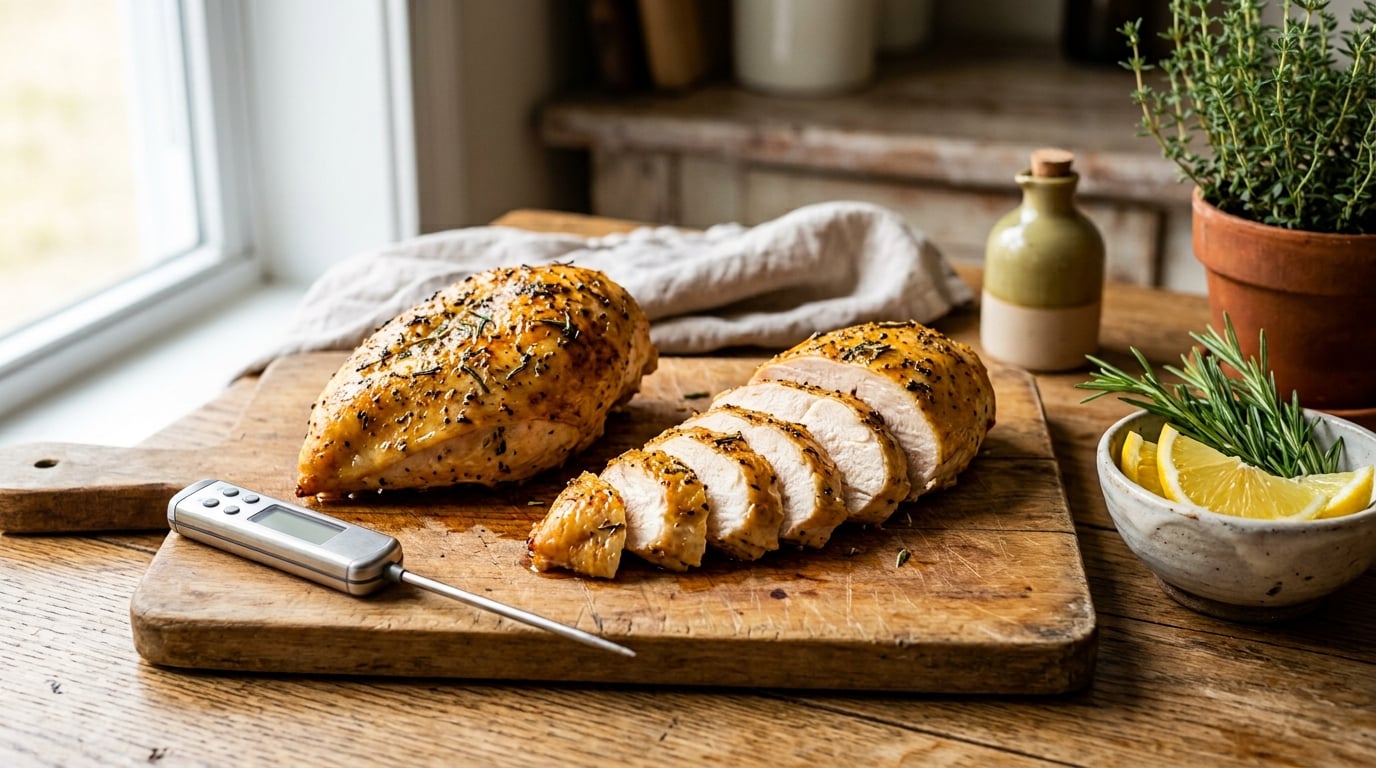
How long to bake chicken breast at 400 degrees? A standard boneless skinless breast that is about ¾ inch thick needs 16 to 20 minutes, while a thick 1.5 inch breast needs 24 to 28 minutes. The clock is only a starting point, though, so pull the chicken at 160°F and let it finish on the counter until it hits 165°F. That single habit fixes most dry chicken breast.
I used to bake chicken by time alone, which is why my early batches were either pink in the middle or tough and stringy. Chicken breast is lean, with very little fat to cushion the meat, so a few minutes past done is the whole difference between juicy and rubbery. Getting the answer right takes one cheap instant-read thermometer and about 30 seconds of attention.
Below is how long to bake chicken breast at 400 degrees by thickness and weight, what to do while it is in the oven, and how to store and reheat the leftovers without turning them into rubber.
Table of Contents
How Long to Bake Chicken Breast at 400°F: Baking Times by Size
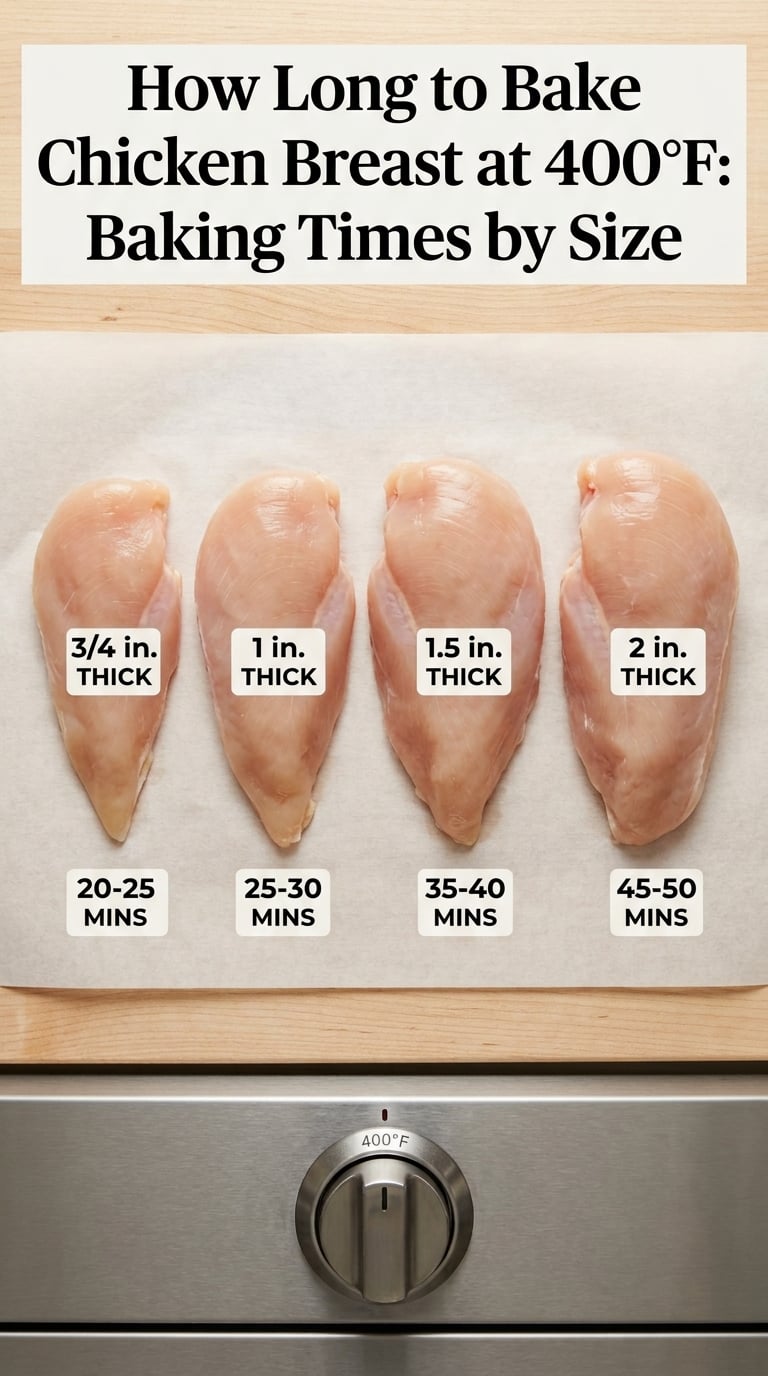
A boneless skinless chicken breast at 400°F takes 16 to 28 minutes depending on how thick it is. Thin cutlets that are ¾ inch thick are done in 16 to 20 minutes, and a thick 2 inch breast needs closer to 28 to 32 minutes.
Breast size in the grocery store is wildly inconsistent, which is why a single number never works for everybody. A 4 ounce breast from one package might be ¾ inch thick, and an 8 ounce breast from another might be 1¼ inches. Thickness decides the cooking time, and weight is only a rough stand-in for it.
How Long to Bake Chicken Breast at 400°F by Thickness
| Breast thickness | Typical weight | Bake time at 400°F (200°C) | Pull the pan when the thermometer reads |
|---|---|---|---|
| ¾ inch | 4 to 6 oz | 16 to 20 min | 160°F (71°C) |
| 1 inch | 6 to 8 oz | 18 to 22 min | 160°F (71°C) |
| 1¼ inch | 8 to 10 oz | 21 to 25 min | 161°F (72°C) |
| 1½ inch | 10 to 12 oz | 24 to 28 min | 161°F (72°C) |
| 2 inch | 12 oz and up | 28 to 32 min | 162°F (72°C) |
Every one of those times assumes an even thickness and a fully preheated oven. Bake breasts of similar size together, because a small one next to a large one will finish long before its neighbour and dry out waiting.
For very thick breasts, you have a better option than a longer bake. Slice the breast horizontally into two thinner pieces, or butterfly it, and both halves cook in about 18 to 22 minutes with a much better chance of staying moist. That trick came up repeatedly in home cooking conversations when people asked why their dinner kept failing, and it fixes the problem at the source.
Bone-in breasts run longer than boneless ones because the bone acts as a heat sink. Skin-on breasts cook at roughly the same rate but brown and crisp more readily at this temperature.
| Breast type | Bake time at 400°F | Notes |
|---|---|---|
| Boneless skinless | 16 to 28 min | Use the thickness chart above |
| Skin-on boneless | 22 to 32 min | Skin slows cooking slightly and crisps at 400°F |
| Bone-in | 35 to 45 min | Check the thickest part, not near the bone |
| Frozen, unbreaded | 30 to 45 min | Add 10 to 15 minutes; thaw first when you can |
Do not cook chicken from frozen if you have any choice. The outside bakes long before the centre thaws, so the breast ends up pale and watery on the outside and cold in the middle.
How to Prepare Chicken Breast for Baking
The reason chicken breast bakes unevenly is thickness, and it is fixable in about a minute. Pound the thick end of each breast until the whole piece is an even ¾ to 1 inch, and the thin tail and the thick centre will finish at the same time.
A meat mallet works well, and you do not need one. A wooden rolling pin, the flat side of a heavy skillet, or even a clean bottle filled with water will do the same job. Put the chicken between two sheets of plastic wrap or parchment, pound to an even thickness, then peel the wrap off.
Pat the breasts dry with paper towels before they go on the pan. Surface moisture is what steams instead of browns, and dry chicken browns faster and develops a better crust in the same oven.
Rub the chicken with a little oil and season on both sides. Olive oil and avocado oil both take heat well, and a simple blend of salt, pepper, garlic powder and smoked paprika is enough for most weeknights. I like adding a squeeze of lemon or a spoon of Dijon to the oil, which helps the seasoning stick and gives the breast a slight tang when it hits the pan.
Preheat the oven fully at 400°F before the chicken goes in. A breast that goes into a still-cool oven spends the first several minutes warming the oven, which adds a few minutes of cooking time and dries the meat out. Line a rimmed baking sheet with parchment if you want to skip scrubbing later, then leave space between the pieces.
If you prefer not to bake at all, the same flattening and seasoning steps work for a juicy Instant Pot chicken breast, and it is a good backup for a busy night when the oven is already occupied. I keep that option in my back pocket and decide once the pan is prepped.
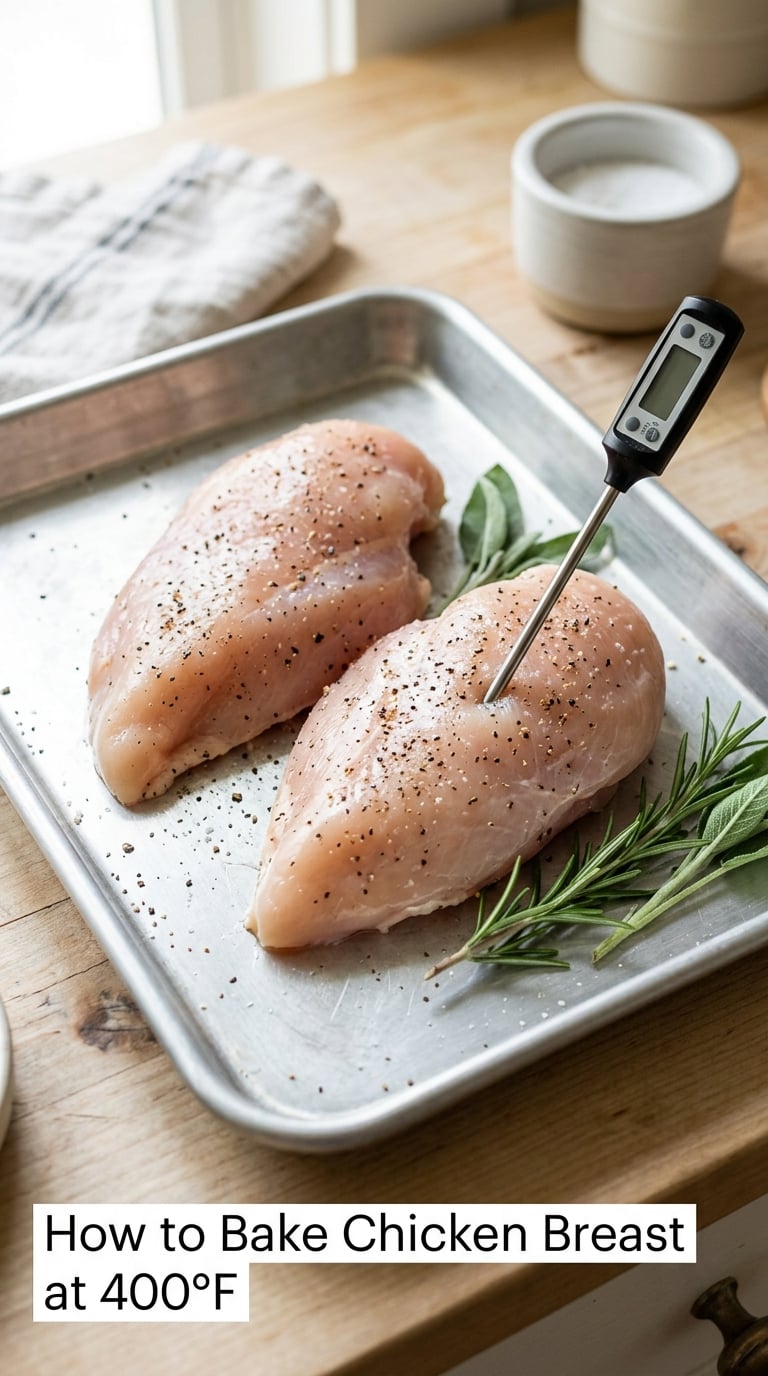
How to Bake Chicken Breast at 400°F
- Preheat the oven to 400°F (200°C) and place a rack in the centre.
- Pound the chicken to an even ¾ to 1 inch thickness.
- Pat the chicken dry, drizzle with oil, and season both sides.
- Arrange the breasts on a lined baking sheet with a finger’s width of space between them.
- Bake uncovered and start checking with a thermometer at the low end of the range in the thickness table.
- Pull the pan when the thickest part reads 160 to 162°F (71 to 72°C).
- Move the chicken to a plate or a wire rack and let it rest 5 to 10 minutes.
- Slice against the grain with a sharp knife and serve.
Step 6 is where most guides skip ahead, and it is the step that protects the meat. Carryover cooking means the internal temperature keeps climbing after the chicken leaves the oven, so a breast pulled at 160°F will usually finish at 165°F while it rests.
Resting does a second job. The juices that are loose in the hot meat settle back into the fibres, so slicing immediately loses moisture that you would rather be eating. Give thin breasts 5 minutes and thick ones closer to 10.
There is no need to flip the chicken midway. The underside sits on a hot pan and picks up plenty of colour, and flipping interrupts the even cooking you just set up.
If you want more colour without drying the meat, move the pan under the broiler for the final 1 to 2 minutes and watch it. Stay in the kitchen for this part, because the difference between golden and burned is about 30 seconds.
How to Tell When Chicken Breast Is Done
Chicken breast is done when the thickest part of the breast reaches 165°F (74°C) internal, which is the safe minimum temperature the USDA recommends for all poultry. Colour is not a reliable signal on its own, because both undercooked and overcooked chicken can look pale on the outside.
Insert the thermometer into the thickest part of the breast, not touching bone, pan or the side of the oven wall. Leave it in for 10 to 15 seconds so the reading settles, then take it out and check again in another spot, since one breast is rarely even all the way through.
Supporting signs, once you have confirmed 165°F, are clear juices running out when you pierce the breast, a firm texture that springs back when pressed, and no pink or translucent flesh anywhere when you slice it.
Here is what to do when the reading is not where you hoped.
| Internal reading at first check | What to do next |
|---|---|
| Below 140°F (60°C) | Back in the oven for 4 more minutes, then recheck |
| 140 to 149°F (60 to 65°C) | Another 3 minutes, then recheck |
| 150 to 155°F (66 to 68°C) | Another 2 minutes, then recheck |
| 156 to 160°F (68 to 71°C) | One more minute, or pull and let the rest finish it |
| 161 to 164°F (72 to 73°C) | Pull now and rest, it will carry into the safe zone |
| 165°F (74°C) or higher | Done, move it off the pan and rest 5 to 10 minutes |
Two caveats on colour. Lemon juice, yogurt, vinegar and other acidic marinades can tint raw chicken pink, so a pinkish breast is not proof that it needs longer when you have used one. And the juices in the pan are not a doneness test, because they can run clear well before the centre is cooked.
Cutting into the breast to check leaks juice and slows the cooking, which is the reason the thermometer was invented for this. Check with a probe, not with a knife.
Ways to Keep Baked Chicken Breast Juicy
Dry chicken breast is the most common complaint I hear, and it is nearly always one of four things: uneven thickness, a tray packed too tightly, an oven that was not preheated, or a breast that stayed in after it was done.
- Pound to even thickness. Nothing else fixes the thin, overcooked tail. Even it out before seasoning.
- Brine for 20 to 30 minutes. Mix 2 tablespoons of kosher salt per quart of cold water, submerge the chicken, then rinse and dry. This seasons the meat all the way through and holds water inside it.
- Do not crowd the pan. Give each breast space so hot air moves around it. Steaming breasts stuck together never brown and cook unevenly.
- Pull at 160°F and rest. The rest both completes the cooking and lets the juices settle back into the meat.
- Cover the first half only for very thick pieces. Foil for the first 12 to 15 minutes steams the meat gently, then pull the foil off to brown the last stretch. Skin-on pieces are better left uncovered so the skin can crisp.
There is also a case for a lower oven. A popular view in home cooking circles is that 400°F bakes the outside of a boneless breast faster than the middle can catch up, and that 375°F for 30 to 45 minutes gives a more forgiving window when there is no skin to crisp. The trade-off is real: a lower temperature browns less without a broiler finish, but it is gentler on the inside. Many home cooks use 400°F for thin or medium breasts and drop to 375°F when working with a thick one.
| Oven temperature | Approximate time range | Best for |
|---|---|---|
| 350°F (177°C) | 20 to 34 min | Very large, thick breasts where you want a gentle cook |
| 375°F (190°C) | 18 to 30 min | Thick boneless breasts with a low drying risk |
| 400°F (200°C) | 16 to 28 min | The everyday choice, good browning and fast cooking |
| 425°F (220°C) | 15 to 26 min | Thin breasts and skin-on pieces that need crisping |
| 450°F (230°C) | 12 to 24 min | Small cutlets only, watch closely |
Add a small splash of liquid to the pan if you like. A couple of tablespoons of stock or olive oil keeps the drippings from scorching, and those drippings are worth saving for weeknight gravy.
How to Store and Reheat Chicken Breast
Cooked chicken breast keeps in the refrigerator for 3 to 4 days at or below 40°F (4°C), and it freezes well for 2 to 3 months. Cool the breasts on a plate rather than in a sealed container, because trapped steam makes the surface wet and soggy. Slice before freezing and the portions thaw in minutes instead of as one solid block.
Reheating is where leftover chicken most often gets ruined, since heat applied to already-cooked meat pushes out the last of the moisture. A splash of broth or water in a covered pan, warmed over low heat for a few minutes, brings it back without drying it out. The microwave works in 30-second bursts with a cup of water in the dish, and it is fine for small portions even though the edges toughen slightly.
Slice it cold for salads and grain bowls, or use it in one of my best leftover chicken breast recipe ideas where a little strong sauce hides the reheating entirely. For a warmer dinner with almost no work, a sweet heat chicken bake does the same job and keeps for the same 3 to 4 days.
Common Chicken Breast Baking Mistakes
Leaving the breasts different thicknesses. Pound them or slice a thick breast horizontally into two thinner pieces before baking.
Slicing straight into the meat to check. You lose the juices you are trying to keep. Use an instant-read thermometer in the thickest part instead.
Overloading the baking sheet. Cook similar sizes together and leave a finger’s width between pieces so heat circulates.
Using a very large pan for a few pieces. A wide sheet cools the oil, so the chicken seizes and sticks. Use a small rimmed sheet or a cast-iron skillet for one or two breasts.
Trusting the colour. Golden brown outside means nothing about the centre. Only 165°F measured at the thickest part confirms it.
Skipping the rest. Cutting immediately lets the juice run out onto the board. Wait 5 to 10 minutes.
Cooking it from frozen. A frozen breast has time to overcook on the outside before the middle thaws. Thaw in the fridge overnight when you can.
Frequently Asked Questions
Do I need to cover chicken breast when baking it at 400°F?
Leave it uncovered for the normal bake. That is what gives you browned edges and a slightly crisp exterior, and 400°F is hot enough to colour the meat in a short cook. For a very thick breast, tenting with foil for the first 12 to 15 minutes steams the meat gently, then take the foil off to brown the last stretch. Skin-on pieces should stay uncovered the whole time so the skin can crisp.
Should I pound chicken breast before baking?
Yes, if you want even cooking and juicy meat. Pound each breast to a uniform 3/4 to 1 inch thick so the thin tail and the thick centre finish at the same time. Without it, the thin end is overcooked and dry before the middle reaches 165°F. A wooden rolling pin, a heavy skillet or a filled water bottle all work as substitutes for a meat mallet. Put the chicken between two sheets of plastic wrap or parchment while you pound.
How long should I bake chicken breast from frozen?
An unbreaded frozen boneless breast needs about 30 to 45 minutes at 400°F, compared with 16 to 28 minutes for a thawed one. Check the thickest part with an instant-read thermometer and add time in small increments until it reads 165°F. Freezing often means the outside overcooks before the centre thaws, which gives you pale, watery meat with a cold middle. Thawing overnight in the fridge is slower but gives a far better result.
Can I bake bone-in chicken breast at 400°F?
Yes. Allow 35 to 45 minutes for a bone-in breast, compared with 16 to 28 minutes for a boneless one, because the bone holds and conducts heat. Check the temperature in the thickest part of the meat rather than right next to the bone, which will read hotter than the flesh. Pull the breast at 160 to 162°F and let it rest 5 to 10 minutes so it finishes at the USDA safe minimum of 165°F.
Why does my baked chicken breast come out dry?
Four things cause it most of the time: uneven thickness, a crowded pan, an oven that was not fully preheated, and leaving the breast in past 165°F. Chicken breast is lean, so there is very little fat cushioning the meat once the moisture is gone. Pound the breast to an even thickness, space the pieces apart on the sheet, preheat the oven fully, and pull the chicken at 160°F to rest up to temperature. A 20 to 30 minute brine also helps.
Can I use an oven temperature conversion if my oven does not display Fahrenheit?
Yes. Oven temperatures convert directly while the food safety temperature does not. Bake at 200°C for 400°F, 190°C for 375°F, 180°C for 350°F, 220°C for 425°F and 230°C for 450°F. For doneness you still need 165°F, which is 74°C. A thermometer that only reads Celsius works fine, though many home cooks convert 74°C back to a roughly 165°F reading for comparison with recipes.
Use Thickness and Temperature for Reliable Results
Start with the chart, not the clock. A ¾ inch breast at 400°F needs 16 to 20 minutes and a 1½ inch breast needs 24 to 28, so the same oven and the same setting can be a twelve minute difference. Then ignore the timer at the finish and let a thermometer in the thickest part tell you when the chicken is cooked to 165°F.
Pull it at 160°F, rest it 5 to 10 minutes, and slice across the grain. That is how long to bake chicken breast at 400 degrees for the breasts in front of you, and it works every week without the guesswork.