
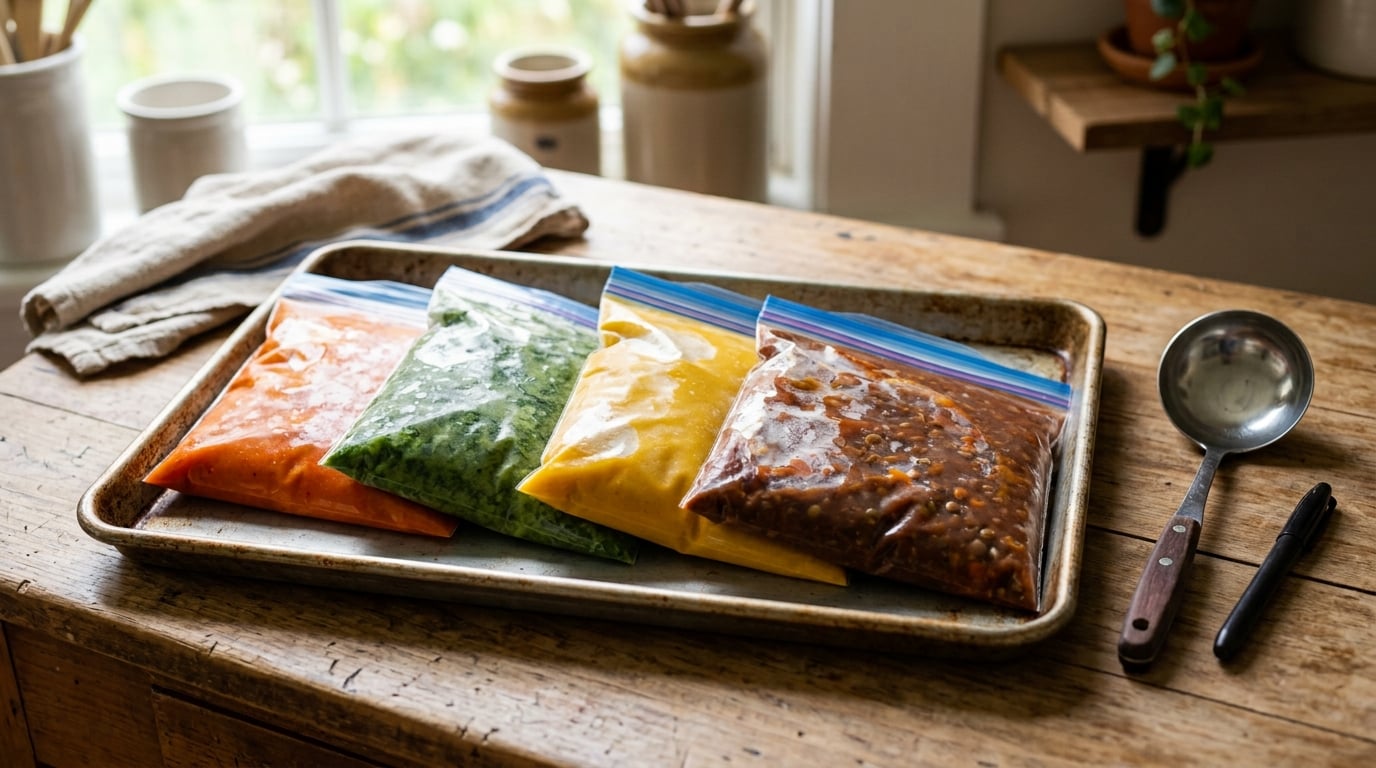
How to freeze soup in bags without a mess comes down to three things: cool the soup fast, stand the bag up in something steady while you ladle, and leave a couple of inches of room at the top. Get those right and your counter stays clean and the soup comes out later in neat flat bricks you can thaw one at a time.
I froze about forty batches of soup this way last fall, and the only time I ended up mopping the counter was when I tried to pour straight into a bag held in one hand. Everything changed once I stopped improvising. Below is the method I actually use, plus the bag sizes, the cooling rules that keep the batch safe, and what to do when a bag leaks anyway.
Updated for October 2026. If you want recipes that hold up well once frozen, start with 10 cozy fall soup recipes that freeze well.
Table of Contents
How to Freeze Soup in Bags Without a Mess
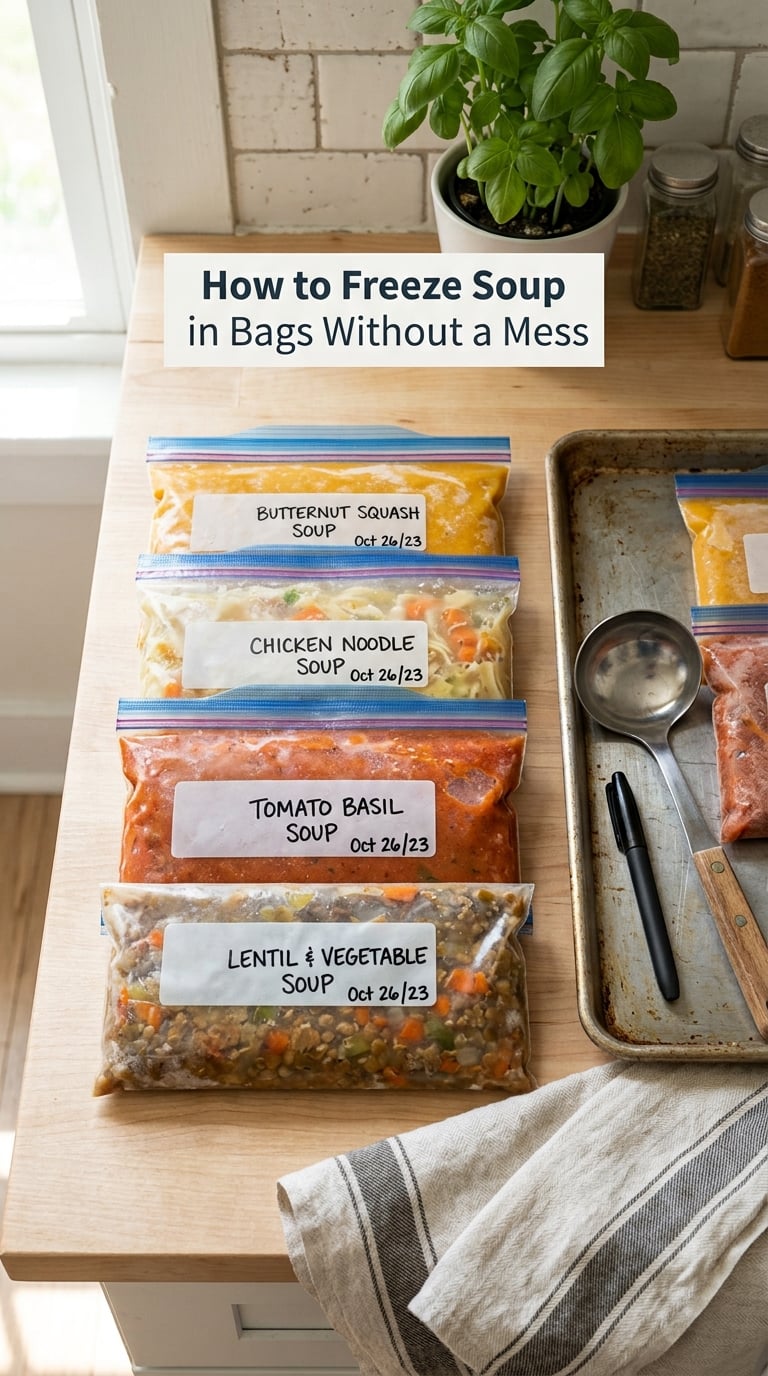
Cool the soup completely first. Then ladle it into heavy-duty zip-top freezer bags, leaving 1 to 2 inches of headspace at the top so the liquid can expand as it freezes.
Before you ladle, stand the open bag inside a measuring cup, mixing bowl, or deep mug and fold the top cuff over the outside of the rim. That holds the bag open and upright so nothing spills down the front. Press the air out, seal the bag, and lay it flat on a baking sheet in the freezer until solid. Once frozen, stand the packets upright in a bin so you can pull out one portion at a time.
How to Freeze Soup in Bags Without a Mess Step by Step
- Cool the soup quickly. Move it off the heat into a shallow container or an ice bath and stir now and then. Get it below 40°F (4°C) within two hours, then let it finish cooling in the refrigerator.
- Label the empty bag first. While it is still flat and empty, write the soup name, the date, and the portion size with a marker or tape label. Doing it now takes ten seconds. Doing it after freezing means peeling off a solid brick.
- Stabilize the bag. Open the zip-top and set the bag inside a measuring cup, bowl, or deep mug. Fold the cuff over the outside of the rim so the mouth stays wide and the bag stands up on its own.
- Ladle in the soup. Fill to roughly two-thirds, leaving 1 to 2 inches of headspace. Liquid expands as it freezes, and a bag filled to the seam will split open on that seam.
- Press out the air and seal. Push the extra air toward the opening, run your fingers along the zip to close every inch of it, then set the bag on a flat surface. Air left inside is what causes freezer burn.
- Freeze flat on a baking sheet. Lay the bags in a single layer on a rimmed baking sheet and slide it into the freezer. The sheet catches anything that does leak during the first hours, and the flat shape lets you stack more bags later.
- Stand them up. After the soup is solid, transfer the packets to a bin or box and file them upright like books, oldest at the front, newest at the back.
That last step is the one people skip. A basket of loose flat bags means a small avalanche every time you need dinner, and you end up taking the whole freezer apart for one container.
What Kind of Freezer Bags Are Best for Soup?
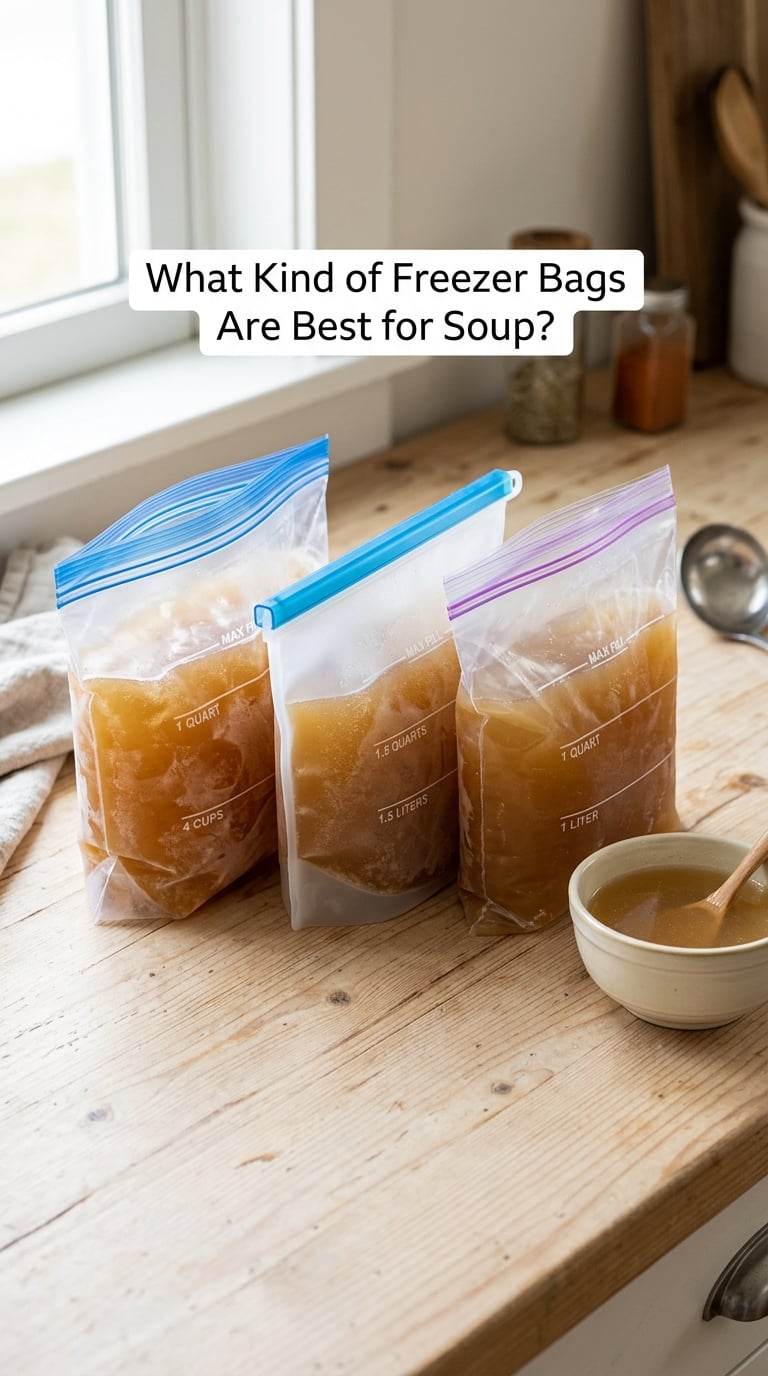
Heavy-duty freezer bags are the best all-round choice for soup, because a double zip and thicker plastic survive the pressure of a freezing solid block.
Reusable silicone freezer bags are the better buy if you freeze soup every month. They wash well, they never split on a seam, and you can boil water in them to sanitize. They hold less than a quart bag, though, so they suit lunches rather than family dinners.
Standard zip-top bags are the ones already in your pantry, and they work fine for thin broths and small portions. I would not fill a thin bag with a full cup of hot soup and expect it to hold.
Freezing soup in plastic bags is safe as long as you cool the soup before it goes in. Pouring boiling liquid into a plastic bag can warp it or melt the seal, and hot steam also lifts the zip while you are trying to close it.
- Heavy-duty freezer bags: best for family-size portions and soups with chunks. Look for a double zip and a 7 to 8 mil thickness.
- Reusable silicone bags: best for single servings you reheat often. They also tolerate boiling water for sanitizing.
- Standard zip-top bags: fine for broth, thinner soups, and small portions.
- Microwave-safe markings: worth checking if you plan to reheat in the bag. Many bags are freezer-safe but not microwave-safe.
A freezer bag does not have to be brand new. Washing a used bag in the dishwasher on a hot cycle, or hand washing it with hot soapy water and air drying it open, works for most batches. Toss any bag that smells permanently of tomato or garlic.
How Much Soup Should Go in Each Bag?
Fill to about two-thirds and stop. The table below is what actually fits once you leave room for expansion.
| Bag size | Usable amount | Good for |
|---|---|---|
| Quart freezer bag | About 2 to 3 cups filled | Two large bowls, or one lunch and one dinner |
| Gallon freezer bag | About 4 to 5 cups filled | A family of four, or two days of lunches |
| Snack or silicone bag | About 1 cup filled | One person’s lunch, or a soup base for a sauce |
| Muffin tin well | About 1 cup filled | Single portions; pop the frozen discs out into a bag later |
A quart bag is the workhorse size in my kitchen. Anything bigger than a gallon gets awkward to pour and takes forever to thaw.
How to Cool Soup Safely Before Freezing
Cooling is the safety step people rush. The danger zone sits between 40°F and 140°F (4°C to 60°C), and bacteria multiply fast in that range.
The rule is to get soup below 40°F within two hours of cooking. Shallow containers do most of the work, dividing a big pot into several one-inch-deep pans. An ice bath works even faster: set the pot in a sink full of ice water and stir for a few minutes, then transfer it to the refrigerator to finish cooling.
Once the soup is cold enough to handle, ladle it into the bags. Freezing hot soup also blows up the bag, because water expands about nine percent as it turns to ice.
Reheat leftovers and frozen soup to 165°F (74°C), measured with a food thermometer in the thickest part. If the soup holds raw poultry, simmer it to a full rolling boil before tasting. For beef, pork, veal and lamb steaks, chops and roasts, the safe minimum is 145°F (63°C) with a 3-minute rest, and fish is 145°F (63°C) as well.
| What the soup contains | Safe reheating temperature |
|---|---|
| Poultry, or leftovers reheated in a microwave | 165°F (74°C) |
| Ground beef, ground pork, ground turkey | 160°F (71°C) |
| Beef, pork, veal and lamb steaks, chops and roasts | 145°F (63°C) plus a 3-minute rest |
| Fish and shellfish | 145°F (63°C) |
How to Label and Organize Frozen Soup
Write five things on every bag: the soup name, the main ingredients that are not obvious, the date you froze it, the portion size, and any reheating note you would want to read in a hurry.
- Name: “Turkey and White Bean Soup,” not “Soup.”
- Key detail: “spinach added on reheating” saves a soggy batch.
- Date: written plainly, like 10/4. Check the fridge windows on how long homemade soup lasts in the fridge before you freeze it.
- Portion: “2 cups, serves 2.”
- Reheat: “low and slow, stovetop only” for anything with cream.
Use a permanent marker on the plastic, or stick on a freezer-safe label. Masking tape peels off eventually, and pen scrawl on a wet bag smears.
For organization, a single bin works better than a whole shelf. Line it up oldest in front, newest in back, and date the front of the bin. When you want dinner, you look at the front row instead of digging. Frozen soup keeps its best quality for 3 months and stays safe for up to 6.
How to Thaw and Reheat Frozen Soup Safely
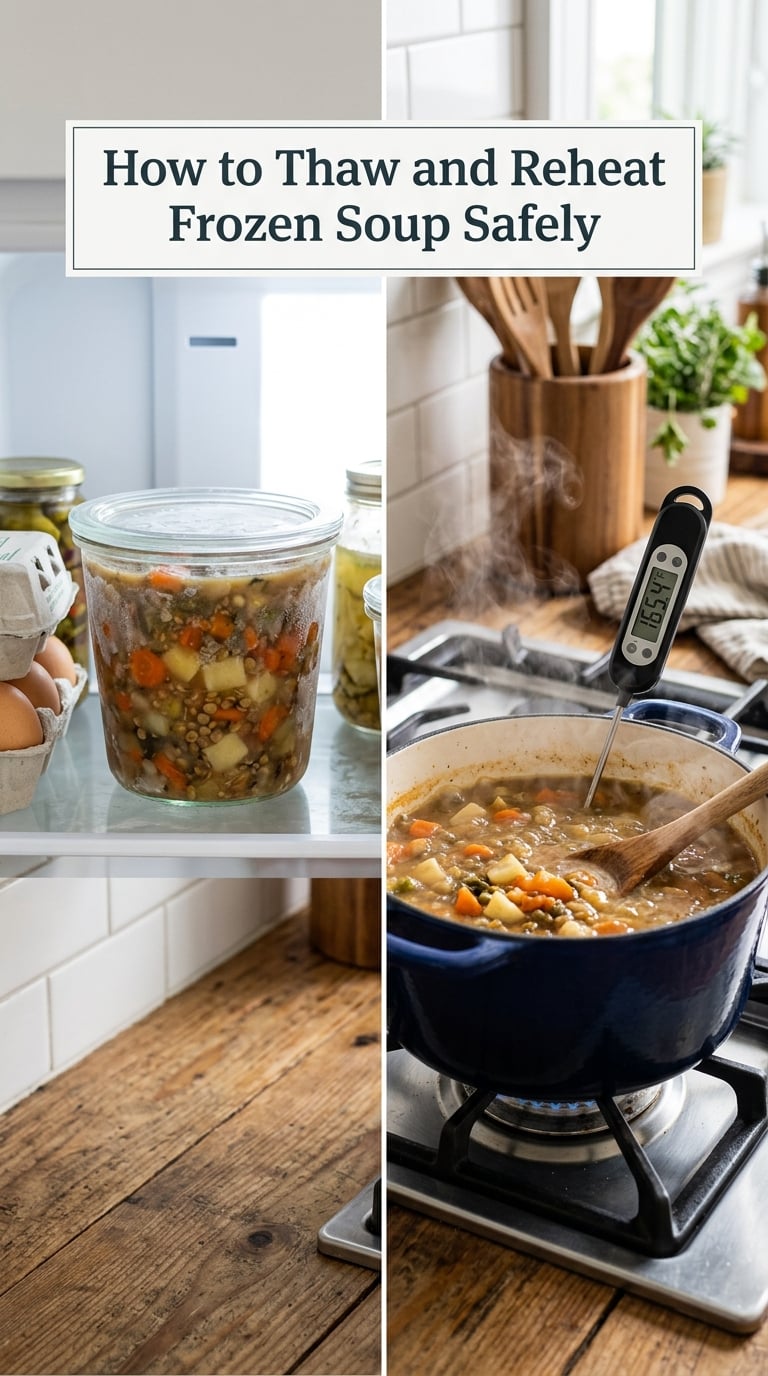
Thawing in the refrigerator overnight is the safest method and the one that keeps texture best, because the soup warms slowly and never enters the danger zone.
Cold water is the faster option. Put the sealed bag in a bowl of cold tap water and change the water every 30 minutes. A flat brick usually loosens within an hour.
The microwave works, but move the bag to a microwave-safe dish first, set it on 50% power, and stir every minute or two. Many freezer bags are not rated for microwaving, and boiling liquid in a sealed bag is a real burn risk.
You can also reheat straight from frozen. Put the brick in a saucepan with a splash of water or broth, cover it, and use low heat until it loosens, then raise the heat and bring it to a simmer while stirring.
Frozen soup can taste dull. A pinch of acid at the end, a fresh grind of pepper, or a handful of chopped herbs fixes most of it.
Which Soups Freeze Well (and Which Ones Do Not)
Broths, bean soups, chicken and beef soups, lentil soups, chowders made with evaporated milk, gazpacho, and most purees freeze well.
These need a workaround:
- Cream soups freeze fine but separate. The pale layer on top is congealed fat, not spoilage. Whisk it back in over low heat. If it stays thin, a slurry of 1/4 teaspoon arrowroot or agar per serving brings the body back, the same idea as how to thicken soup without flour.
- Pasta, rice, and barley soups turn gritty and mushy. Leave the grains out and cook them fresh, or add cooked pasta when you reheat. See our guide to freezing cooked rice safely.
- Potato soups go gluey. Cut back on the potatoes, or freeze carrots and broth alone and add spuds later. Can you freeze mashed potatoes for later? covers the starch side of this.
- Delicate fresh herbs, milk, and cornstarch thickeners lose body. Add fresh herbs and dairy after reheating.
Undercook root vegetables by a few minutes before freezing. They keep cooking as the soup reheats, and that is how you end up with mush.
Common Mistakes When Freezing Soup
1. Filling bags to the top
The seam splits as the liquid expands. Fill only two-thirds and leave 1 to 2 inches of headspace.
2. Holding the bag up with one hand
Set the bag in a measuring cup or bowl first, then ladle with the other hand. This is the single biggest mess-prevention move in the whole process.
3. Pouring hot soup straight into plastic
Cool it below 40°F (4°C) first. Warped plastic and lifted zips are not worth the shortcut.
4. Leaving air in the bag
Press the bag flat on the counter, push the air to the opening, then seal. Air touching soup is what causes freezer burn.
5. Freezing without a tray underneath
Lay bags flat on a rimmed baking sheet. If a seam does give, the sheet catches the soup instead of your freezer floor. Discard any soup that touched the counter or the floor, then wipe the area down.
6. Thawing on the counter
A frozen brick left out moves through the danger zone far too slowly. Use the fridge, cold water, or a microwave.
7. Freezing in containers that are not freezer-safe
Glass jars without freezer-safe shoulders can crack as contents expand. Wide-mouth jars leave more headroom than narrow ones.
8. Forgetting to label
Unlabelled bricks become freezer archaeology. Label before you fill, not after.
Frequently Asked Questions
Can you freeze soup in a Ziploc bag?
Yes. A standard zip-top freezer bag works well for soup, as long as you cool the soup below 40°F (4°C) first, fill the bag only two-thirds full, and press out the air before sealing. Heavy-duty bags with a double zip hold up better for family-size portions, and thin bags are best reserved for broth and small servings. Laying the sealed bag flat on a baking sheet while it freezes also gives it room to expand.
How long can soup stay frozen in a bag?
Frozen soup keeps its best flavor and texture for about 3 months and stays safe to eat for up to 6 months. Write the freeze date on every bag so you can pull the oldest one forward first. For longer storage, freeze the broth and vegetables separately and add fresh pasta, rice, or dairy after reheating.
Should freezer soup bags be frozen flat or upright?
Freeze them flat first, then store them upright. A flat bag freezes into a thin rectangle that thaws faster and stacks neatly like a folder. Once the soup is solid, stand the packets upright in a bin, oldest at the front, so you can pull one portion without unstacking the whole freezer.
How do you prevent soup bags from leaking in the freezer?
Leave 1 to 2 inches of headspace, press the air out, close the zip along its entire length, and freeze the bag flat on a rimmed baking sheet for the first few hours. Double-bagging the soup before it goes into the freezer bag adds a second line of defense. If a bag does leak, discard any soup that touched the freezer floor and clean the area before restocking.
Can you freeze soup in a glass Mason jar?
Yes, if the jar is freezer-safe and you leave 2 inches of headspace for expansion. Standard canning jars are riskier than wide-mouth freezer jars because narrow shoulders concentrate the pressure, and a dropped jar can shatter on the floor. Skip the screw-top lids on regular canning jars in favor of lids designed for the freezer, or use bags if your freezer gets dropped often.
What is the safest way to thaw and reheat frozen soup?
Thaw in the refrigerator overnight for the safest results, or seal the bag in cold water and change the water every 30 minutes. Reheat on the stovetop with occasional stirring and bring it to a simmer, or microwave in a microwave-safe dish at 50% power. Heat leftovers and poultry-based soups to 165°F (74°C) and verify with a food thermometer.
Conclusion
Start with one batch. Cool it in a shallow pan or an ice bath down below 40°F (4°C), stand an open bag inside a measuring cup with the cuff folded over, ladle in two-thirds of a bag, press the air out, seal, and lay it flat on a baking sheet until solid. Label every bag with the name, date, and portion size before it goes into the freezer.
Once you have that rhythm, freezing soup in bags without a mess stops being a chore and turns into a stockpile of dinners you can pull out on a Tuesday. If you want somewhere to start, pick something from 10 cozy fall soup recipes that freeze well and freeze it while the weather is still cooperating.