
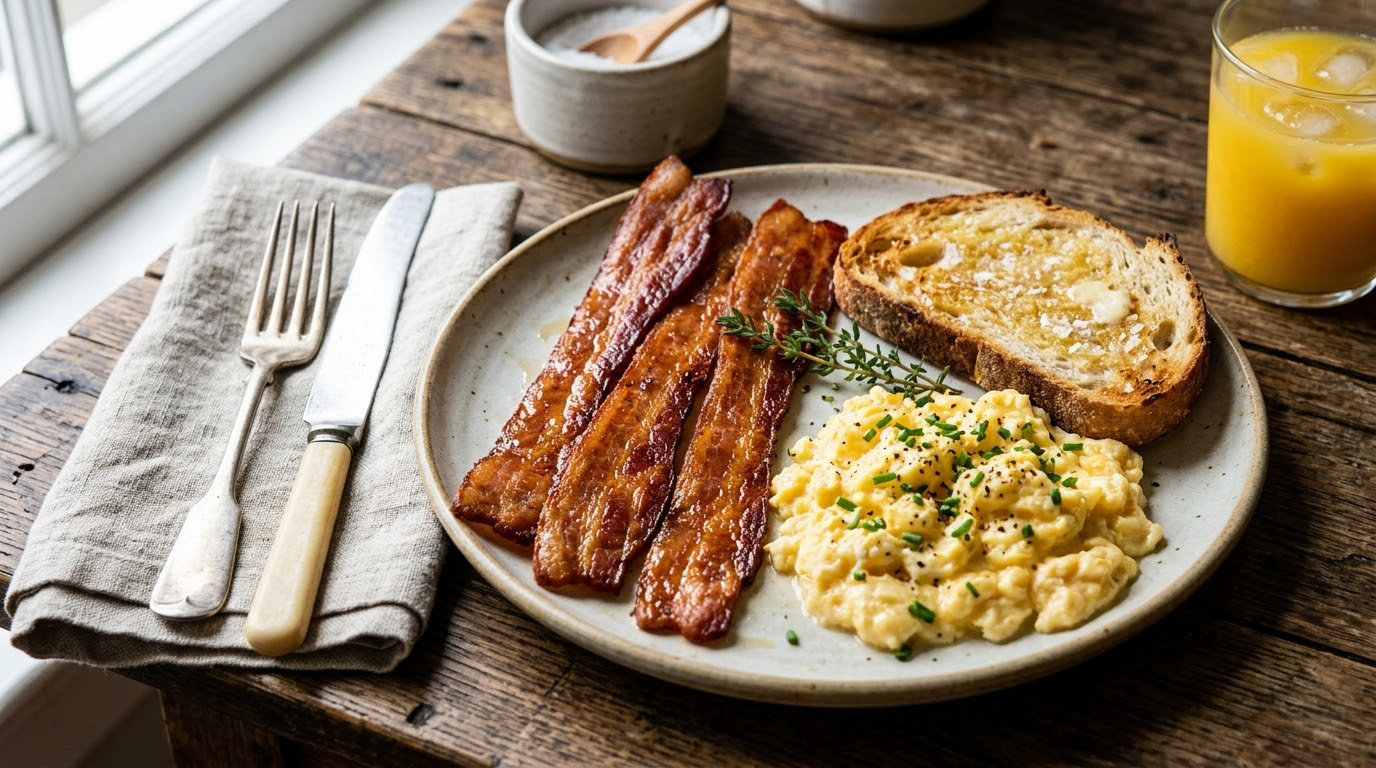
Dry the bacon, lay the strips in a cold skillet with room between them, and press each one flat with a spatula or a heavy pan while it cooks. Slow heat is the part people skip. Curling is mostly a temperature problem, not a technique problem, and a moderate burner fixes most of it.
This is the one I get asked about most, usually at 7:40 on a Saturday with a whole package waiting. A little curl is normal and nobody is going to complain about it, but flat strips brown evenly, crisp on both sides, and turn without tearing into a strip-shaped mess. If you also want the crisp-crackle kind, a cool pan will get you there with a few extra minutes.
Table of Contents
How to Keep Bacon From Curling in the Pan
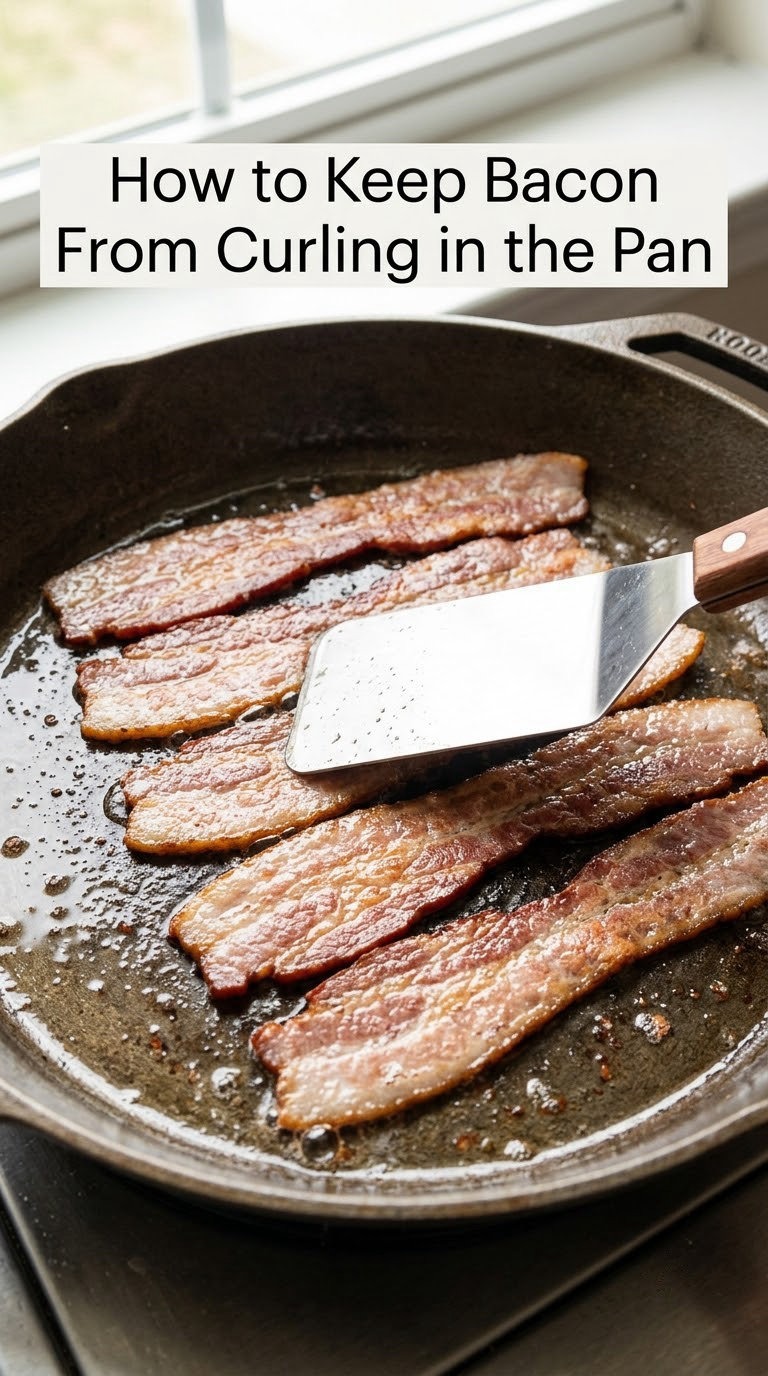
The direct answer: pat the strips dry, start them in a pan that is not yet hot, keep the heat at medium or lower, leave a strip of empty pan between each piece, and hold them down until the edges release from the surface. Add weight only if you have something handy.
Dry bacon matters more than people expect. Surface water turns to steam in the first seconds of contact, and the strip floats on a cushion of it instead of searing flat. A paper towel takes about fifteen seconds per side and it is the cheapest improvement to the whole process.
The other half of the answer is not moving the strips. Bacon releases from the pan when the proteins at the surface have set. Poke a strip and if it moves easily, it is ready. If you have to drag it, the edge that needed to lift has stuck to the meat instead, and you will tear it.
Why Does Bacon Curl in the Pan?
A strip of bacon is not even. The belly end holds a thick ribbon of fat, the middle is leaner, and both long edges are thin enough to see the light through. The thin edges hit the pan first, cook, and shrink within about a minute. The fat under the middle is still solid, so the strip pulls its edges upward while its center stays pinned to the metal.
Heat is the main culprit, not geometry. A ripping hot pan sears the outside of a strip while the inside is still cold and slack. The seared layer contracts, the slack interior does not, and the bacon bows. Add a splash of water or oil and the temperature at the pan surface drops, everything heats at the same rate, and the contraction becomes even.
Crowding makes it worse in a specific way. Strips that touch cook in each other’s steam, and touching points fuse together. As the meat contracts, fused areas resist while free areas move, so the strip buckles. That is also why one bent strip makes three neighbors bend, and why a whole package in a small pan is a curling experiment.
Thickness changes the timing but not the cause. Thick-cut bacon needs longer in the pan, which means more time at temperature and more opportunity to curl. Cut strips in half and each piece is easier to keep flat, and easier to fit in the pan without touching.
Canadian and back bacon curls even more readily than streaky pork bacon. It is leaner and uniformly thick, so the whole strip heats at roughly the same rate, and the dry outer surface grips the pan and holds the middle down. A cold pan start matters more for it, not less.
Simple Methods to Keep Bacon Flat
These are the methods that actually work, ordered by how consistently they flatten strips in my kitchen. The first one fixes the cause; the rest manage the symptom.
1. Pat the bacon dry
Lay the strips on a paper towel, blot the top side, flip, blot again. Ten to fifteen strips take about a minute. This is the step people skip and the one that makes the biggest difference on a humid morning.
2. Start the bacon in a cold pan
Lay the strips in the skillet, turn the burner to medium, and walk away for two minutes. The pan and the bacon warm together, so the fat renders at roughly the same rate across the whole strip. This is the tip that shows up in every forum thread and video about the topic, and the reason behind it is simple: even heat produces even shrinkage.
3. Add a quarter cup of water
Put the strips in first, then pour about 1/4 cup water around them and cover the pan. Water cannot exceed 212°F, so the temperature is effectively capped while the meat and fat heat gently instead of searing. When the liquid is gone, the bacon is close to where you want it, so lower the heat and let it finish. It buys you four to six minutes of patience and kills the curl.
4. Put a weight on top
Anything flat and heavy will do: a cast iron skillet, a second pan, a baking sheet, a brick wrapped in foil, a cookie cooling rack laid across the strips. Press gently at the center of each strip and stop watching. If you want to buy a dedicated tool instead, a bacon press does this exact job and stores in a drawer. I keep the skillet handy for other jobs, which is a better argument for a single-purpose press than its price is.
5. Snip the fatty edge
Make small cuts about every half inch along the strip, cutting through the top layer of fat without severing the meat underneath. Those snips release the tension that pulls the edges inward. Cutting strips in half works the same way, because a shorter piece has less length to buckle over.
6. Turn only when the edges release
Rinse a pair of tongs in cool water and use the wide, flat side. Pinched tongs crush the strip. Slide the blade of a spatula underneath, lift gently, and lower it away from you so the hot side goes toward the pan’s far edge instead of flipping through the steam. A single mid-cook turn is plenty; more flips mean more chances to tear.
| Method | Flatness | Crispness | Effort | Best for |
|---|---|---|---|---|
| Cold pan start, medium heat | Best | Very good | None beyond setup | Everyday stovetop breakfast |
| 1/4 cup water, covered | Excellent | Good, softer finish | Two minutes of babysitting | Thick-cut and lean bacon |
| Weight on top | Excellent | Good | One pan to wash after | Batches, and anyone who wants it hands-off |
| Edge snips, every half inch | Good | Very good | 30 seconds per strip | Canadian and back bacon |
| Oven, 400°F, weighed down | Excellent | Very good | Oven preheat | Whole package, brunch, no splatter |
| Air fryer or toaster oven | Good | Very good | Little | Small batches and small kitchens |
One note on pans. A heavy skillet holds and spreads heat more evenly than a thin one, which is the same reason [carbon steel pans for searing](https://thesweetandsimplekitchen.com/best-carbon-steel-pans-for-searing/) are worth the seasoning time. If your strips brown in stripes rather than evenly across the whole strip, the burner is hotter than the pan can buffer. A wide [saute pan with a lid](https://thesweetandsimplekitchen.com/best-saute-pans-with-lids/) gives you room to lay strips without touching, and the lid makes the water method a lid-on job instead of a bare-pan one. A shallow [rondeau pan](https://thesweetandsimplekitchen.com/best-rondeau-pans-for-braising/) is overkill for bacon, but it works if it is the widest thing you own.
How to Keep Bacon From Curling in the Oven
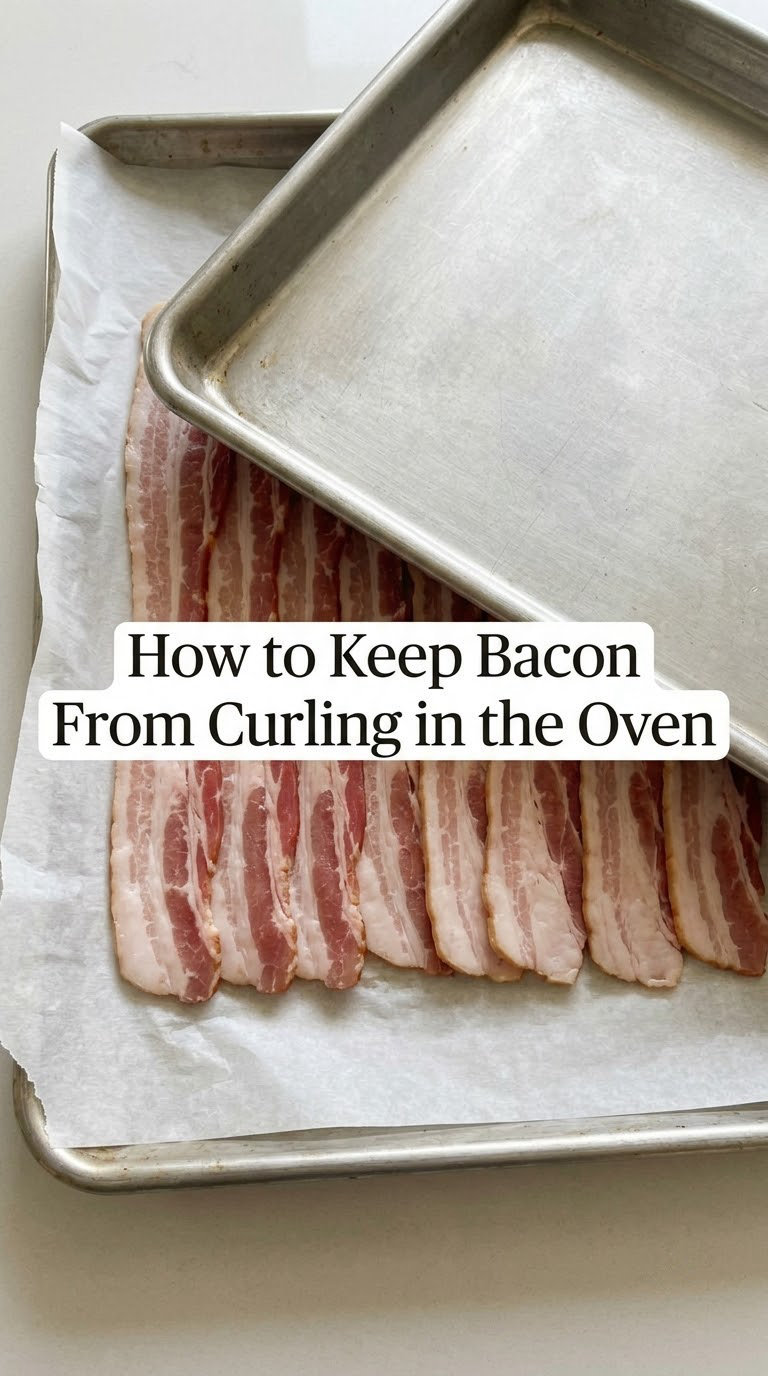
The oven is the answer for anyone cooking a full package, for anyone who hates the splatter, and for anyone who would rather make eggs than stand at a stove. Lay parchment on a rimmed baking sheet, arrange the strips in a single layer with gaps, and bake at 400°F.
Give it 15 to 20 minutes. Check at 15. Thick strips need the full 20, thin ones are usually done at 12 to 15. Turn once, halfway, with tongs. Drain on paper towels rather than a plate, because a plate traps steam and softens the underside.
For the flattest results, set a second baking sheet upside down over the strips after about five minutes, and put a cast iron skillet or a couple of foil-wrapped bricks on top. The strips stay pressed against the parchment the whole time, so there is nothing left to curl. Leave a small gap at the corners so you can lift the sheet without dripping rendered fat down the inside of the oven door.
A cooling rack set inside a rimmed sheet pan does the same job for people who want crisp bacon but not pressed bacon. The rack lifts the strips so grease drips away and hot air reaches the underside, which speeds up the cook and gives a dryer, more evenly browned result.
Toaster ovens and air fryers work on the same principle at 400°F for roughly 12 to 18 minutes, depending on how much room the strips have. Put the strips on the rack rather than the basket floor so fat drains instead of steaming the underside. They will still curl a little, and no weight works well in either, but the convection is closer to the oven’s dry, even heat than a skillet is.
What Temperature Keeps Bacon From Curling?
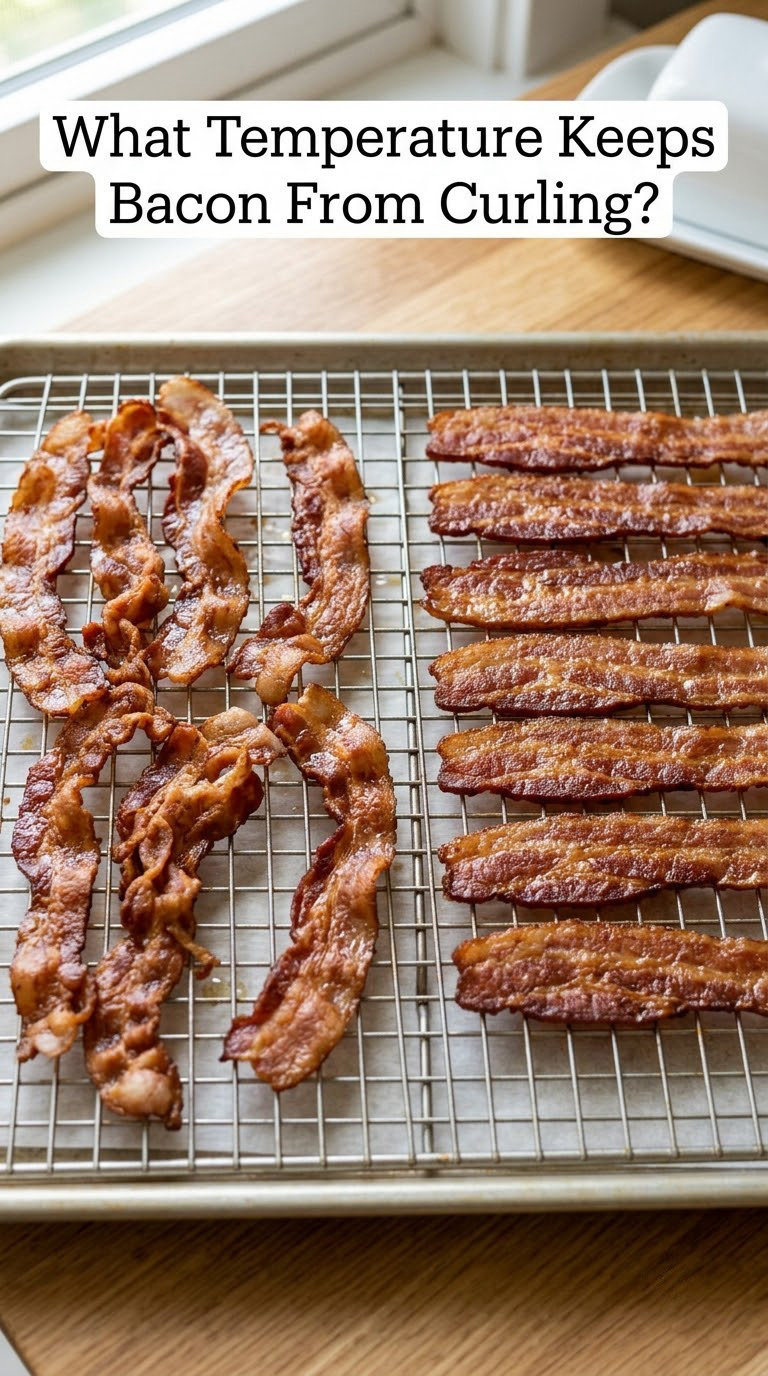
On the stovetop, medium heat with a cold pan start. If your burner runs hot, use medium-low and give it a couple of extra minutes. High heat is the fast route to curled, burned, chewy bacon, because the outside sets long before the fat under the middle has rendered.
In the oven, 400°F for 15 to 20 minutes is the working range. Above 425°F the edges crisp and darken in a hurry, and the strips cup as they contract. Below 375°F you are really slow-roasting them, which renders fat beautifully but takes a long time and leaves the meat soft.
Flat and crispy are two different goals, and it helps to pick one. Slow, gently heated bacon renders its fat and stays flat but comes out tender and chewy. Bacon that is cooked hard and fast crisps loudly but curls. A moderate heat plus a weight gets you the middle of that road, which is flat strips with browned, crackling edges and a little bite.
You do not need a thermometer. Bacon is cured with salt or nitrite before sale, so there is no raw state to cook out of the way, and an internal temperature reading tells you almost nothing. The cue is visual and takes about eight seconds: the fat has gone from cloudy white to clear and translucent, the edges are amber and dry-looking, and the meat has firmed from pink to a warm tan. If the fat is still milky, give it another minute.
Common Mistakes When Cooking Bacon
| Problem | What is happening | Fix |
|---|---|---|
| Curled but not crispy | Heat is high enough to set the outside before the fat renders | Drop to medium, add 1/4 cup water, cover 4 minutes |
| Sticks when flipping | Strip moved before the surface proteins set | Wait until edges release, then use a wide spatula |
| Shrinks a lot | Muscle fibres tighten and water cooks off | Do not freeze it, cook it straight from the fridge, and stop at translucent fat |
| Uneven browning in stripes | Direct flame is hotter than the pan can spread | Lower the flame, move the pan to a wider ring, use a heavier pan |
| Grease everywhere | Wet bacon, crowded pan, or too much heat too soon | Pat dry, leave gaps, keep the burner at medium |
| Strips fused together | They touched, then welded as the fat rendered | Single layer with a gap, nudge with a spatula early |
Does the cold-water dip myth hold up?
The cold-water dip gets repeated constantly in comment sections, usually with a number attached about how much shrinkage it prevents. I have never found a controlled comparison, and the mechanism does not hold together. A wet surface creates steam, which is the same thing that makes a strip hover rather than sear. Patting dry helps. A brief rinse followed by a thorough dry is neutral at best, and it adds a step. Skip it.
Paper towels do double duty
A folded paper towel under the strips catches rendered fat and keeps the underside from sitting in grease, which is the difference between a crisp strip and a soggy one. Blotting the top of each strip with a dry towel before cooking serves a different purpose, removing surface moisture. Both are worth doing, and they are not the same move.
Seasoning early stiffens the surface
Salt and pepper sprinkled on before cooking pull a little water out of the surface and leave a tacky skin. That skin grabs the pan and can hold a curl in place. Season at the end, or season during the last minute on one side.
Frequently Asked Questions
How do I keep bacon from curling up in the pan?
Dry the strips with a paper towel, lay them in a cold skillet with a gap between each one, and set the burner to medium. Wait two minutes before touching anything, then press each strip flat with a spatula or a second pan. A quarter cup of water poured in around the bacon and left to boil off caps the pan at 212°F and stops the curling almost completely.
Do I need a bacon press to get flat bacon?
No. A cast iron skillet set on top of the strips does the same job, and so does a second baking sheet in the oven, a brick wrapped in foil, or a cooling rack laid across the top. If you already own any of those, skip the dedicated press. Where a weight really earns its place is on a full package of bacon, where holding ten strips flat by hand is not realistic.
Why do chefs add water when cooking bacon?
Because water holds the pan near 212°F, so the bacon cannot sear hard in the first seconds. That gentle, even heat lets the fat render from the inside out instead of the edges cooking and contracting first. About 1/4 cup, poured in after the strips go in and covered, buys you several minutes of slow cooking. Once it evaporates, the bacon is close to done.
How do I cook Canadian bacon so it does not curl?
Lean, uniformly thick back bacon curls more than streaky bacon because the dry surface grips the pan while the middle is still cooking underneath. Use a cold pan start, snip the surface every half inch to release tension, and lay the strips flat with a weight on top. Cook it less than you think. It is already thin and needs less fat rendering than a strip of pork belly.
How do I cook bacon ahead of time and reheat it flat?
Cook it flat first, on the oven method at 400°F, then cool the strips on a rack so the underside does not steam. Store them in an airtight container with a paper towel for up to 3 to 4 days, or freeze in single layers. Reheat in a 350°F oven for 5 to 8 minutes, not a microwave. A microwave reheats the fat and the strips re-curl in seconds.
Is curled bacon undercooked or unsafe?
No. Curling is a shape issue caused by uneven heat, not a doneness issue. Bacon is cured with salt or nitrite before it is packaged, so there is no raw state that needs cooking out. Judge it by the fat instead: once it turns from cloudy white to clear and translucent, and the edges are amber and dry, it is done. No thermometer is needed.
A Short Conclusion
Start where the curling actually begins. Pat the bacon dry, lay it in a cold skillet with room around each strip, and bring the heat up slowly to medium. Leave it alone for two minutes, press it flat if you have a spare pan, and wait for the edges to release before you turn anything.
That is enough to fix most of it. A slight curl at the ends is normal, and it does not mean the bacon is undercooked or that anything went wrong. If you are cooking a full package for a crowd, switch to the oven at 400°F with a second sheet pan on top and let the oven do the work.