
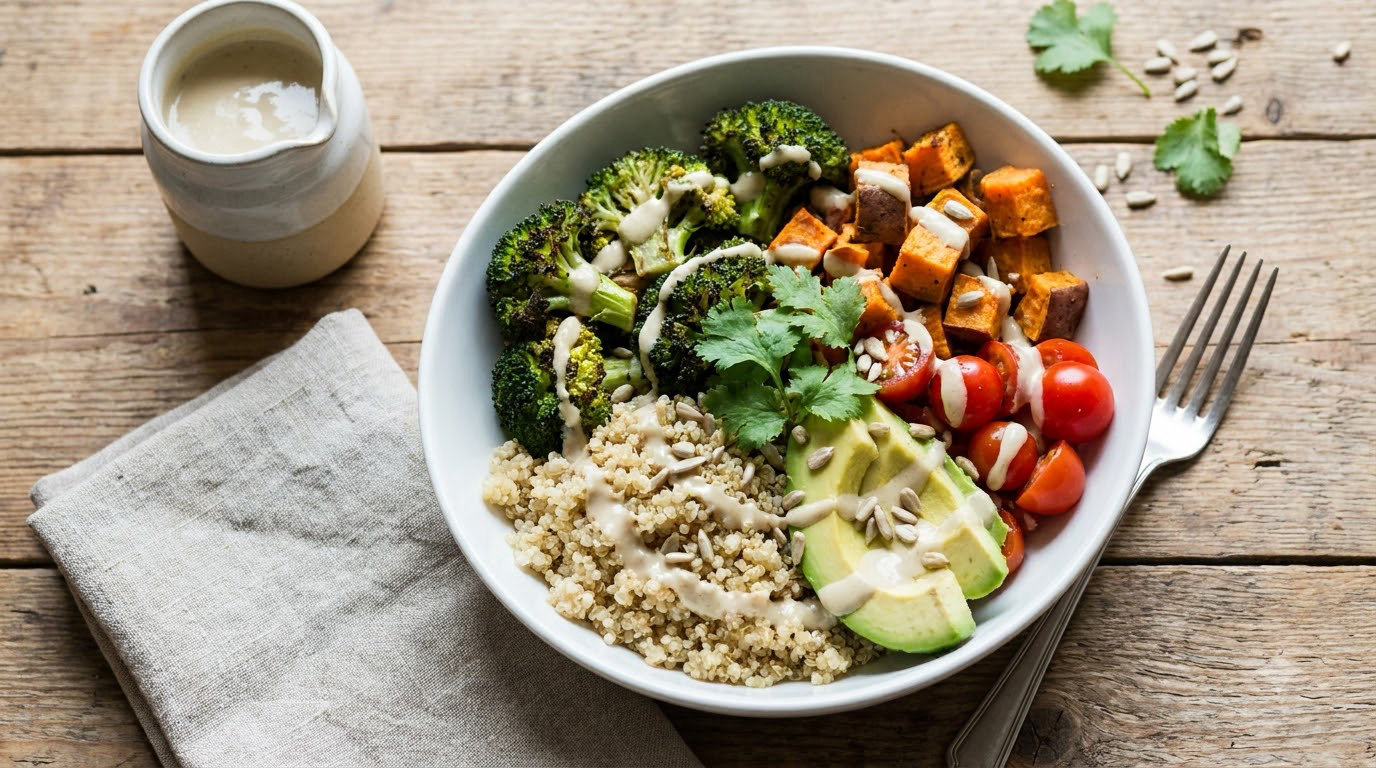
Dairy free lunch ideas for work only fail when you pack the same three things every day. These twelve are built to be made ahead, eaten cold or reheated, and still taste good at 1pm on a Wednesday, so a normal workweek of packing lunch stops feeling like a chore.
Everything here is portioned for adults, not kids, and each one lists its yield, timings, storage window, and the swap that makes it work for a vegan, gluten-free, or nut-free version of the same lunch. Several need no reheating at all, which matters if your office has no microwave.
If you want more general inspiration first, my cold lunch ideas for work and easy work lunch meal prep ideas cover the same ground with more variety.
Table of Contents
Dairy Free Lunch Ideas for Work at a Glance
| Recipe | Total Time | Difficulty | Best For |
|---|---|---|---|
| Mediterranean Chickpea and Cucumber Wraps | 15 min | Easy | No microwave, travels well |
| Turkey and Hummus Lettuce Cups | 15 min | Easy | Low-carb, no reheat |
| Peanut Butter Apple Rice Cakes | 5 min | Easy | Five-minute assembly |
| Chicken Pesto Pasta Salad | 25 min | Easy | Meal prep, eats cold |
| Tuna White Bean Salad Sandwiches | 12 min | Easy | No-cook assembly |
| Roasted Vegetable and Quinoa Bowls | 40 min | Medium | Batch cook on Sunday |
| Caprese Chicken Pasta | 30 min | Easy | Reheat-friendly bowl |
| Edamame Crunch Bowls | 25 min | Easy | Cold, high-fibre lunch |
| Dairy-Free Egg and Potato Salad | 30 min | Easy | Make-ahead classic |
| Southwest Chicken and Black Bean Rice Bowls | 35 min | Easy | Filling, freezer-friendly parts |
| Apple Cheddar Vegan Snack Boxes | 10 min | Easy | No cooking at all |
| Lemon Herb Chicken and Couscous | 35 min | Medium | Weekend batch cooking |
One quick decision before you start: if there is no microwave at your office, cross out anything you would need to heat and lean on numbers 1, 2, 3, 4, 5, 8, 9, and 11. Every one of those is good straight from the fridge.
1. Mediterranean Chickpea and Cucumber Wraps
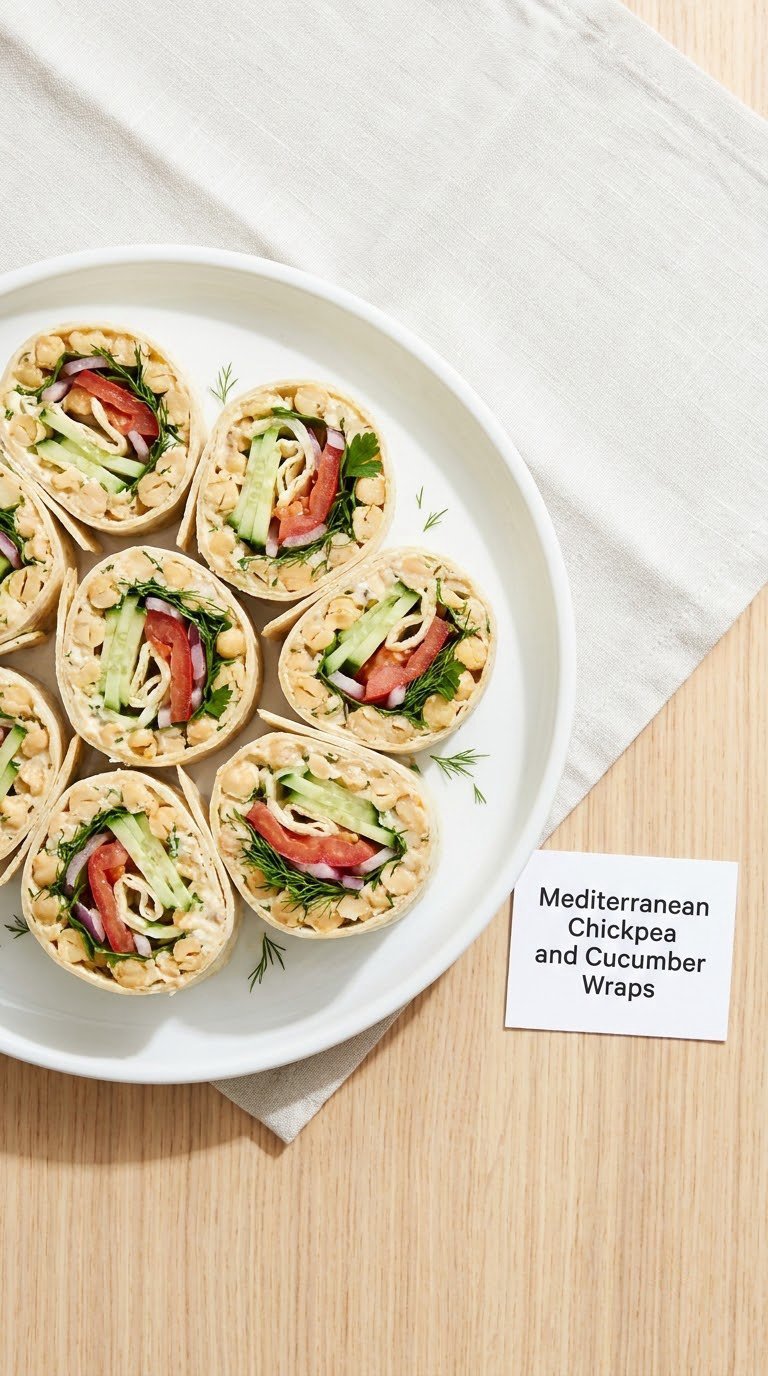
This is the one I make most often, because it holds up better than most wraps and the flavour improves overnight. Smash the chickpeas with olive oil and lemon instead of mayo and it stays creamy without any dairy at all.
Yield: 4 wraps · Prep: 15 minutes · Cook: none · Total: 15 minutes · Difficulty: Easy
Ingredients
- 1 can (15 ounces) chickpeas, drained and rinsed
- 2 tablespoons extra-virgin olive oil
- 1 tablespoon lemon juice
- 1 small garlic clove, grated
- 1/2 teaspoon ground cumin
- 1 large cucumber, sliced into thin ribbons
- 2 large flour tortillas (8-inch)
- 1/2 cup shredded red cabbage
- 1 medium tomato, diced
- 1/4 cup chopped fresh parsley
- 2 tablespoons chopped red onion
- Salt and black pepper to taste
Instructions
- Put the chickpeas in a bowl and roughly crush them with a fork, leaving about a third whole for texture.
- Add the olive oil, lemon juice, garlic, cumin, a pinch of salt and a crack of pepper.
- Mash until the mixture holds together when you pinch it, roughly 30 seconds.
- Warm the tortillas in a dry skillet for 20 seconds per side, or microwave them for 10 seconds.
- Spread the chickpea mix over two-thirds of each tortilla, leaving a border at the bottom for rolling.
- Layer on the cabbage, tomato, cucumber ribbons, red onion and parsley.
- Fold in the sides, then roll tightly from the bottom edge and press the seam so it holds.
- Slice each wrap in half on the bias and pack seam-side down so nothing pushes out.
Tip: Salt the cucumber ribbons in a small bowl for five minutes, then pat them dry. The extra water they release is exactly what makes wraps soggy by lunchtime.
Swap it: Swap flour tortillas for gluten-free wraps and cook them in a lightly oiled skillet rather than the microwave, since they crisp better and stay flexible for rolling. For a nut-free version, replace the lemon dressing with 2 tablespoons of olive oil plus a splash of red wine vinegar.
Storage: Refrigerate for up to 3 days in a sealed container with the cut side up. Keep the wet ingredients on one side of the tortilla if you are packing it whole, and add the herbs on the morning you eat it. For more cold or no-reheat lunches, see my no-microwave cold lunch guide.
2. Turkey and Hummus Lettuce Cups
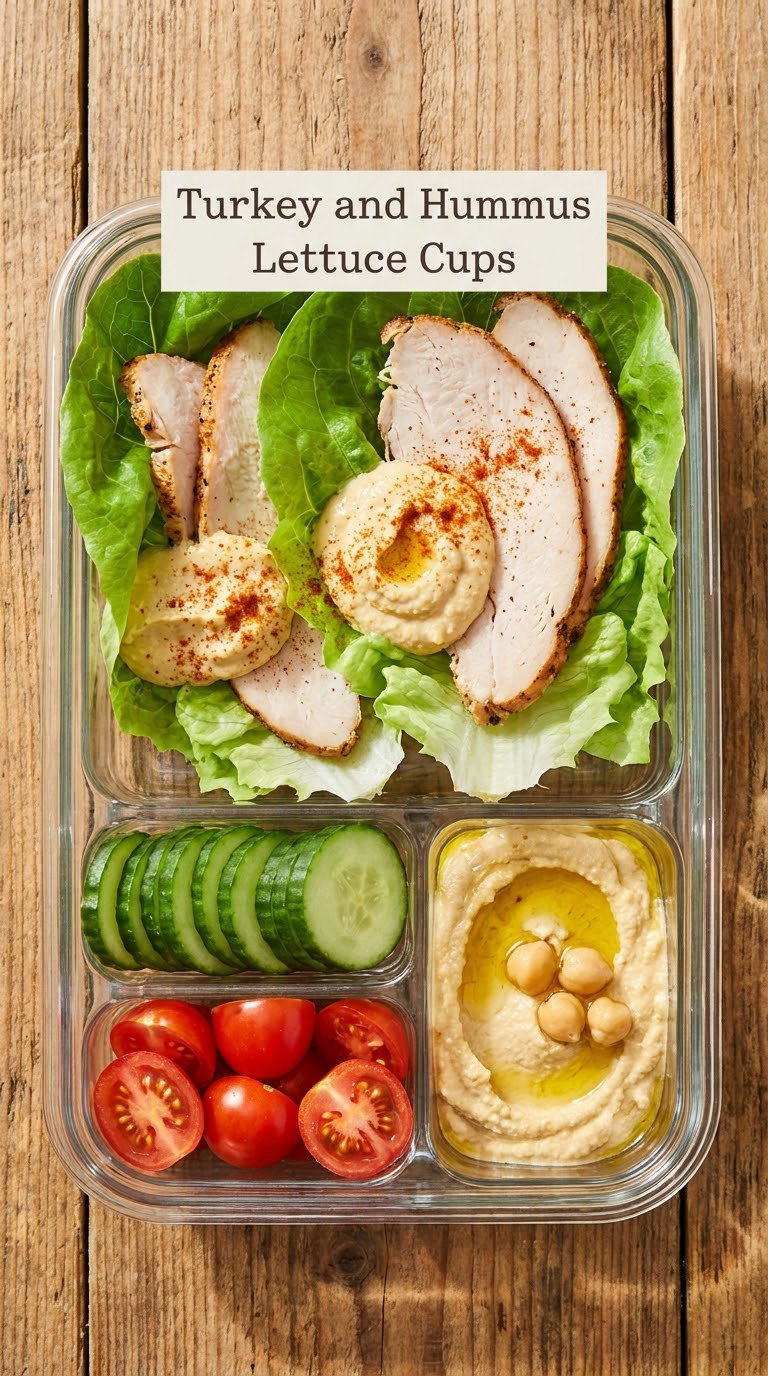
These are the answer on days when a wrap feels heavy. Small butter lettuce leaves hold a surprising amount, and the crunch survives the commute in a way that a flour wrap does not.
Yield: 2 servings (about 12 leaves) · Prep: 15 minutes · Cook: none · Total: 15 minutes · Difficulty: Easy
Ingredients
- 10 ounces cooked turkey breast, sliced thin
- 1/3 cup hummus
- 1 small cucumber, diced
- 1/2 cup cherry tomatoes, halved
- 2 tablespoons finely shredded carrot
- 2 tablespoons chopped fresh dill
- 1 tablespoon lemon juice
- 1 teaspoon Dijon-style mustard
- 1 small head butter lettuce, leaves separated
- 1 tablespoon olive oil
Instructions
- Whisk the hummus, Dijon mustard, lemon juice and olive oil together in a small bowl until it loosens into a pourable sauce.
- Toss the cucumber, cherry tomatoes, carrot and dill in a separate bowl with a pinch of salt.
- Pat the lettuce leaves completely dry with a paper towel. Wet leaves will not hold anything.
- Spread a teaspoon of the hummus sauce in the cup of each leaf.
- Add three or four slices of turkey on top of the sauce.
- Spoon a small pinch of the vegetable mix into each leaf.
- Pack the leaves upright in a rigid container lined with a paper towel so they do not slide, and spoon any extra sauce into a small lidded pot.
Tip: Slice the turkey across the grain, not along it. Thin cross-grain slices stay tender and moist after sitting in a fridge all morning.
Swap it: Swap the turkey for baked tofu or roasted chickpeas for a vegan version, and use sunflower-seed or pumpkin-seed butter in place of the hummus if sesame is an issue for your office. Pumpkin seeds also make this lunch nut-free for shared fridges.
Storage: Keep the sauce separate and assemble the cups in the morning. Once dressed, the leaves go limp within 3 hours, so if you pack them dressed, eat them the same day. Properly covered, the components last 3 days in the fridge. Cook poultry to 165°F (74°C) if you are starting from raw.
3. Peanut Butter Apple Rice Cakes
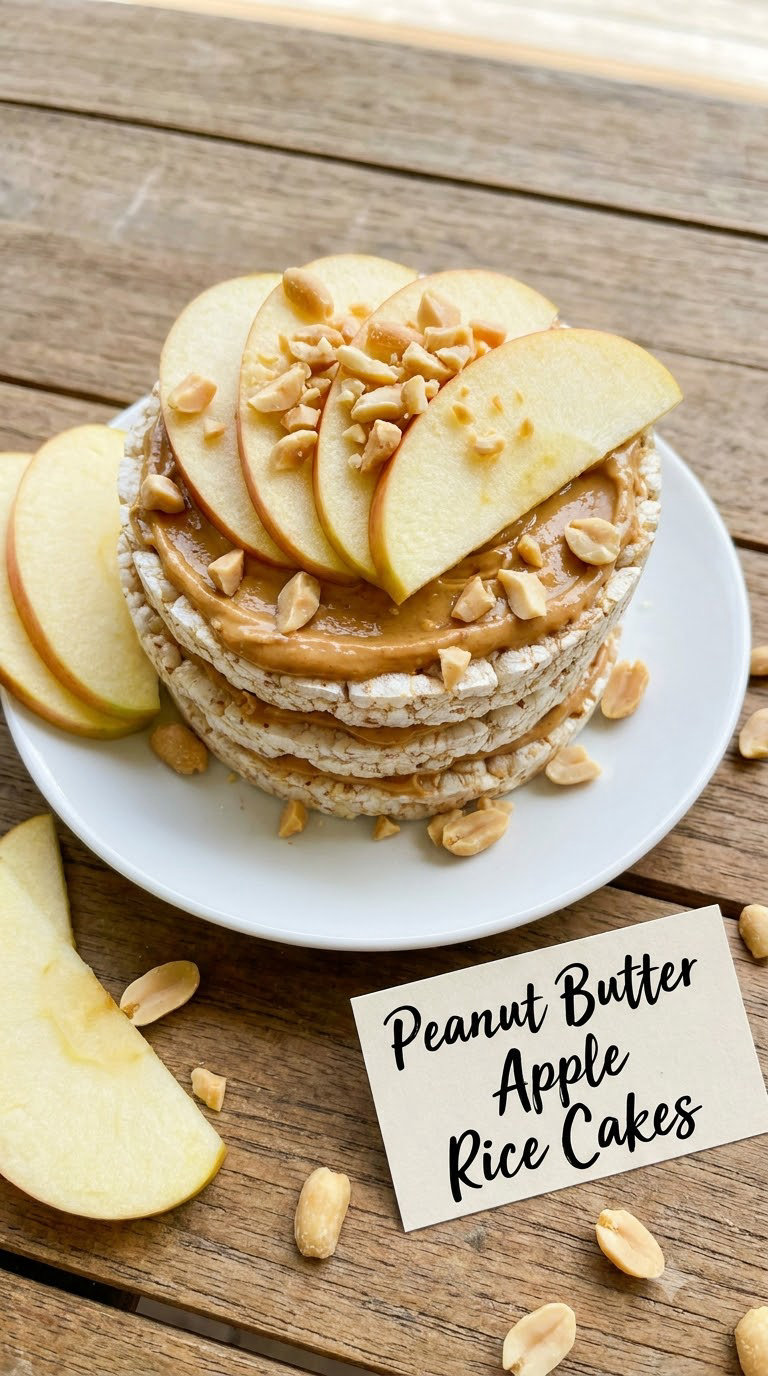
Five minutes, no cooking, no containers that leak, and no dairy anywhere in sight. This is the lunch I pack when the morning is already chaos and I have four minutes before leaving.
Yield: 1 serving (1 large rice cake, cut into 4 pieces) · Prep: 5 minutes · Cook: none · Total: 5 minutes · Difficulty: Easy
Ingredients
- 2 tablespoons creamy peanut butter
- 1 tablespoon honey or maple syrup
- 1/2 teaspoon ground cinnamon
- 1 large apple, sliced thin
- 1 large plain rice cake
- 1 tablespoon unsweetened shredded coconut
- 1 tablespoon pumpkin seeds
- Pinch of flaky salt
Ingredients note: The coconut and pumpkin seeds are for texture and staying power, not decoration. They are what stops this from being a snack.
Instructions
- Stir the peanut butter, honey and cinnamon together in a small bowl until smooth and glossy.
- Set the large rice cake on a small plate or the lid of a container.
- Spread the peanut butter mixture thickly over the whole surface with the back of a spoon.
- Fan the apple slices across the surface so they overlap like shingles.
- Scatter the shredded coconut and pumpkin seeds over the top.
- Finish with a pinch of flaky salt, then cut the rice cake into four pieces with a clean knife.
- Pack the pieces in a divided container with a separate small pot of extra peanut butter for dipping.
Tip: Rub the cut apple slices with a little lemon juice before serving. It keeps the edges from browning through the morning and sharpens the sweetness against the peanut butter.
Swap it: Swap peanut butter for sunflower seed butter to make this nut-free and school-safe, and use pumpkin seeds plus more coconut for the crunch. For a lower-sugar version, halve the honey and add a finely grated apple at mixing time.
Storage: Best eaten the day you make it, since the rice cake softens after about 6 hours. Keep the pieces and the dip pot separate in the fridge for up to 2 days. Note the peanut and tree nut cross-contact risk if you share an office kitchen.
4. Chicken Pesto Pasta Salad
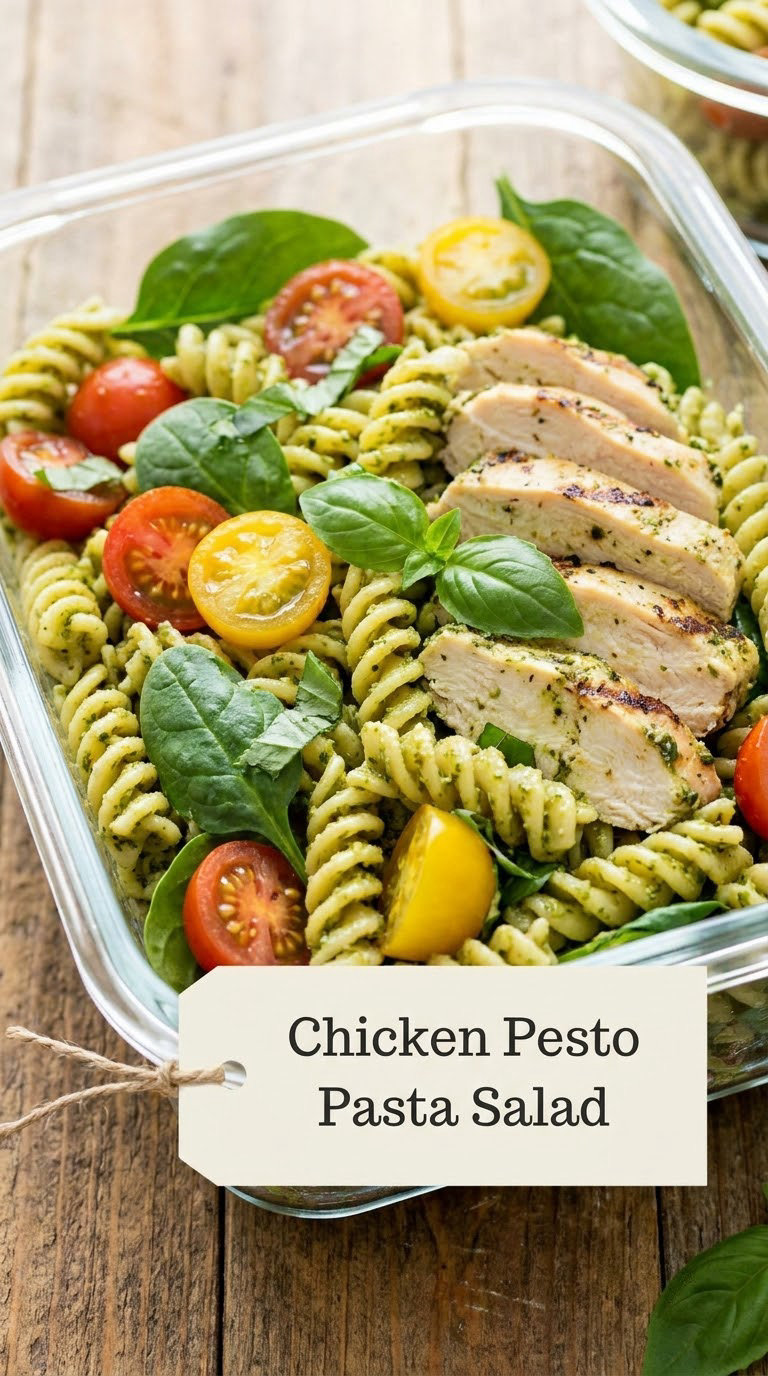
Most pesto is packed with cheese, so a lot of people quietly assume pasta salad is off the table. A basil pesto blended with olive oil and pumpkin seeds does the same job and keeps the bowl bright green and garlicky.
Yield: 4 servings · Prep: 15 minutes · Cook: 10 minutes · Total: 25 minutes · Difficulty: Easy
Ingredients
For the dairy-free pesto:
- 2 packed cups fresh basil leaves
- 1/3 cup unsalted pumpkin seeds
- 1 small garlic clove
- 2 tablespoons nutritional yeast
- 1/3 cup extra-virgin olive oil, plus more to taste
- 1 tablespoon lemon juice
- Salt and black pepper to taste
For the salad:
- 12 ounces rotini or fusilli pasta
- 1 pound boneless skinless chicken breast, cooked and cubed
- 1 cup cherry tomatoes, halved
- 2 cups baby spinach
- 1/2 cup sliced red onion
- 1/3 cup pesto, plus more for serving
Instructions
- Blend the basil, pumpkin seeds, garlic, nutritional yeast, lemon juice, olive oil, salt and pepper until mostly smooth, about 45 seconds.
- Cook the pasta in well-salted water until al dente, 9 to 10 minutes.
- Drain the pasta and rinse it under cold water for 30 seconds to stop the cooking and wash off excess starch.
- Spread the pasta in a single layer on a baking sheet and chill for 10 minutes while you prep the rest.
- Combine the cooled pasta, chicken, cherry tomatoes, spinach, red onion and pesto in a large bowl.
- Toss gently with your hands until every piece is lightly coated.
- Chill for 20 minutes before portioning so the flavors settle, then divide into four containers.
Tip: Spinach wilts into the hot pasta if you add it straight away. Wilt it separately in a dry pan for 30 seconds, then cool it before tossing.
Swap it: Swap chicken for marinated baked tofu, chickpeas or edamame for a vegetarian bowl, and use sunflower seeds instead of pumpkin seeds if needed. For a nut-free pesto, swap the seeds for 3 tablespoons of white miso.
Storage: Refrigerate for 3 to 4 days and eat cold straight from the container. Hold the extra pesto in a separate jar and add it at lunchtime so nothing goes mushy. Cooked chicken must reach 165°F (74°C).
5. Tuna White Bean Salad Sandwiches
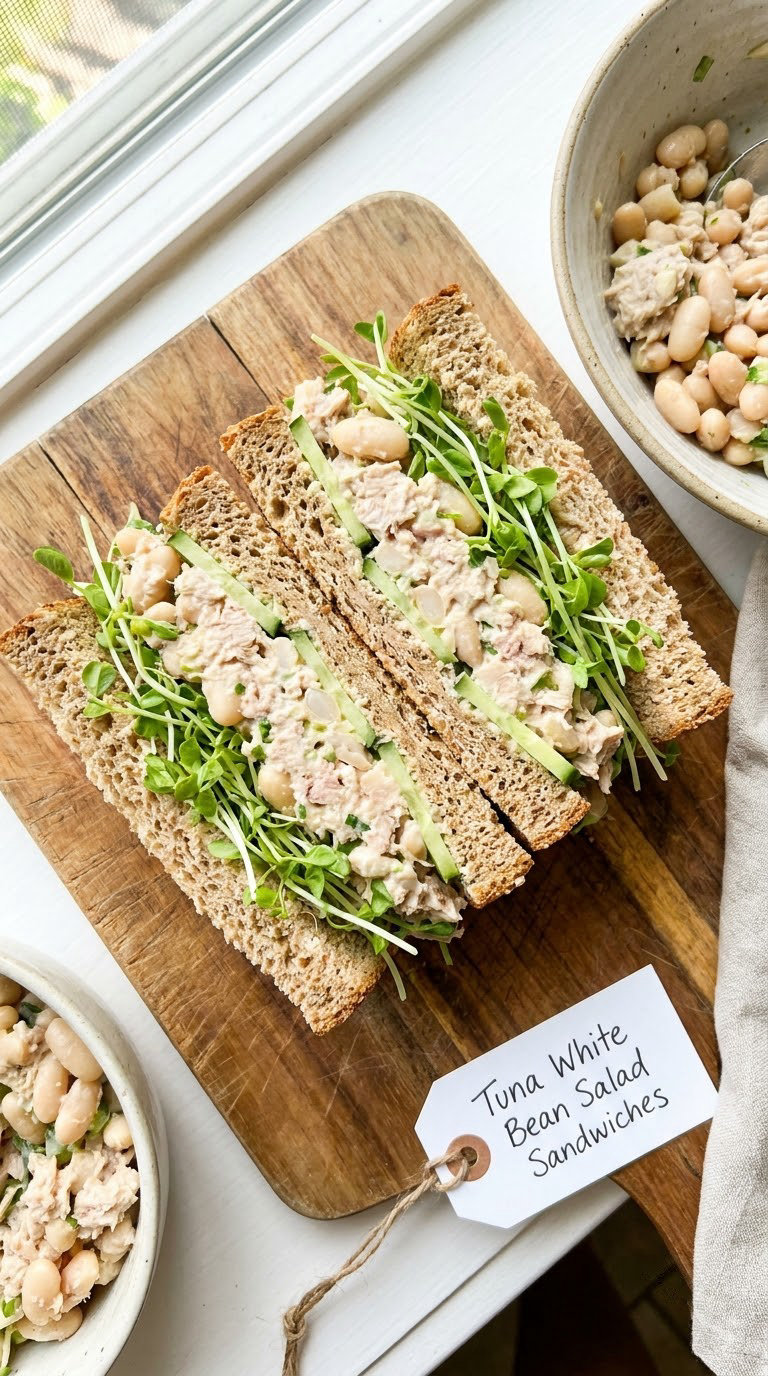
Canned tuna gets a bad reputation for being dry and boring. Mashing white beans through it with lemon and olive oil adds bulk, protein and a creamy texture without a spoonful of dairy mayo.
Yield: 2 sandwiches · Prep: 12 minutes · Cook: none · Total: 12 minutes · Difficulty: Easy
Ingredients
- 1 can (5 ounces) tuna in water, drained
- 1/2 can (7.5 ounces) cannellini beans, drained and rinsed
- 1 tablespoon dairy-free mayo or olive oil
- 1 tablespoon lemon juice
- 1 teaspoon Dijon-style mustard
- 1/2 cup finely diced celery
- 2 tablespoons chopped flat-leaf parsley
- 4 slices whole-grain sourdough bread
- 1/2 cucumber, thinly sliced
- 1/4 cup alfalfa sprouts
- Salt and black pepper to taste
Instructions
- Mash the cannellini beans in a bowl with a fork until most of them break down.
- Add the tuna, dairy-free mayo, lemon juice and mustard, and mash together until the mixture holds a spoon upright.
- Stir in the celery and parsley, then season with salt and pepper.
- Toast the bread if you like, which also helps it resist sogginess.
- Spread the tuna-bean mixture thickly on two slices, right to the edges.
- Layer on the cucumber slices and sprouts, top with the remaining bread, and press gently.
- Cut on the diagonal and wrap each half in parchment or a beeswax wrap so nothing leaks onto a bag.
Tip: Mash about two-thirds of the beans and leave the rest whole. The whole ones give you actual pieces of texture instead of a uniform paste.
Swap it: Swap the tuna for mashed chickpeas to make a chickpea version, or for crumbled firm tofu for a vegan one. Sourdough works well here, but toasted whole-wheat or a dairy-free seeded loaf also holds up.
Storage: Make the filling up to 2 days ahead and refrigerate it covered. The filled sandwich keeps 3 days in the fridge if wrapped tightly, though the bread softens after the first day. For lunches that travel, pack the filling and bread separately and assemble at your desk. Fish allergy note: this one is not for shared tables with tuna open.
6. Roasted Vegetable and Quinoa Bowls
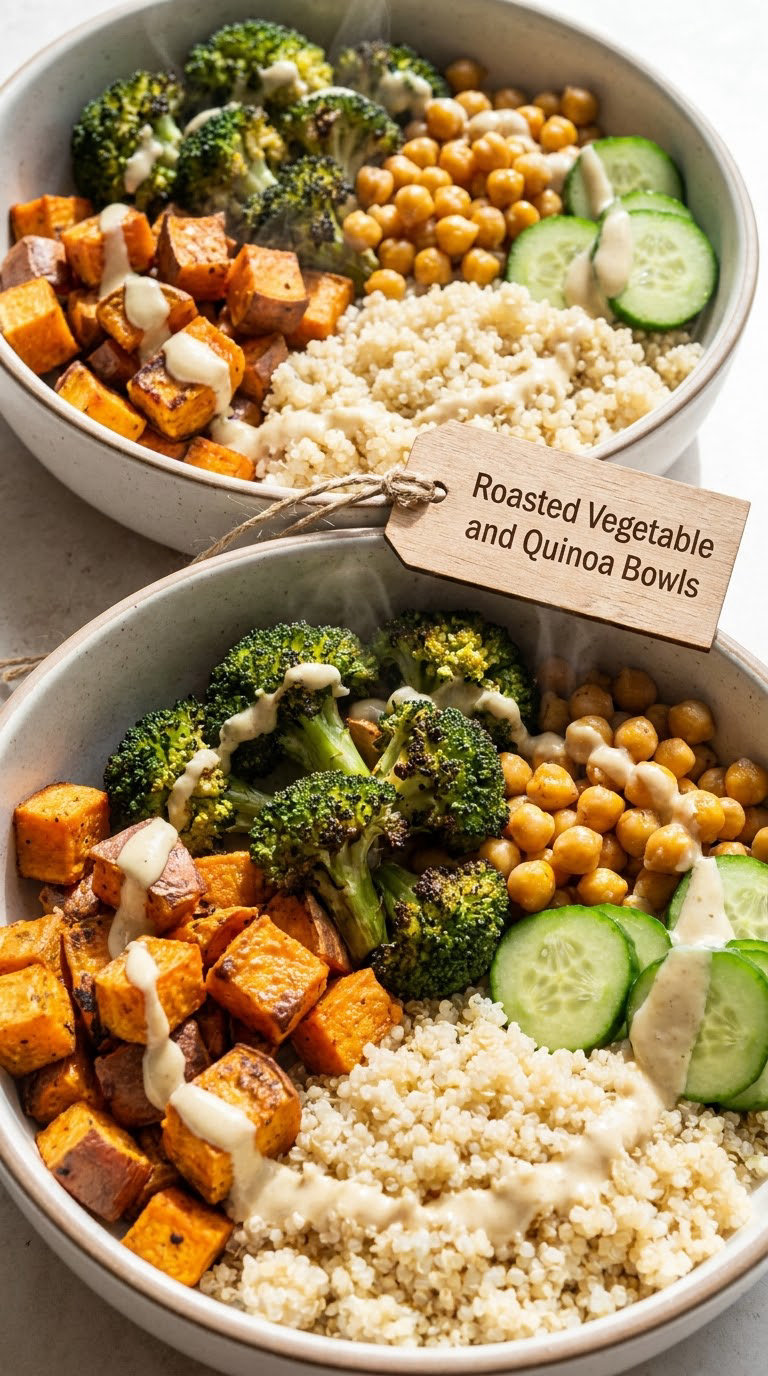
This is the Sunday batch cook that pays for itself all week. Roast one big tray of vegetables, cook one pot of quinoa, and you have four or five lunches that only need a dressing poured over them at night.
Yield: 4 bowls · Prep: 15 minutes · Cook: 25 minutes · Total: 40 minutes · Difficulty: Medium
Ingredients
For the bowls:
- 1 large sweet potato, cut into 1-inch cubes
- 1 head broccoli, cut into small florets
- 1 can (15 ounces) chickpeas, drained and rinsed
- 1 tablespoon olive oil
- 1 teaspoon smoked paprika
- 1 cup dry quinoa
- 2 cups water or vegetable stock
- 1 cucumber, diced
- 3 tablespoons chopped fresh parsley
For the lemon tahini dressing:
- 3 tablespoons tahini
- 2 tablespoons lemon juice
- 1 tablespoon olive oil
- 1 small garlic clove, grated
- 2 to 3 tablespoons water, to loosen
- Salt to taste
Instructions
- Heat the oven to 425°F (220°C) and line a large baking sheet with parchment.
- Toss the sweet potato, broccoli and chickpeas with the olive oil, smoked paprika, salt and pepper.
- Spread them in a single layer, not touching, and roast for 20 to 25 minutes, turning once, until the potato is caramelised at the edges.
- While they roast, bring the quinoa and water to a boil, cover, and simmer for 15 minutes.
- Turn off the heat and let the quinoa sit, covered, for 5 minutes, then fluff with a fork.
- Whisk the dressing ingredients together, adding water a teaspoon at a time until it pours like thin cream.
- Divide the quinoa between four wide, shallow containers, then top with the roasted vegetables, chickpeas and cucumber.
- Drizzle with dressing and scatter the parsley, or pack the dressing in a small pot to add later.
Tip: Roast on a metal sheet rather than glass if you have one. Metal gets the caramelised edges that make vegetables taste like they came from a restaurant.
Swap it: Swap the broccoli for cauliflower or chopped fennel, and the sweet potato for butternut squash or parsnips. For a sesame-free version, swap tahini for a lemon olive oil dressing, which also keeps it nut-free and sesame-free for shared fridges.
Storage: Refrigerate for 4 days. Store the dressing separately and add it the night before so the quinoa stays fluffy. The roasted vegetables and quinoa both freeze flat in a freezer bag for up to 2 months, which is the best way to keep this recipe going past a week.
7. Caprese Chicken Pasta
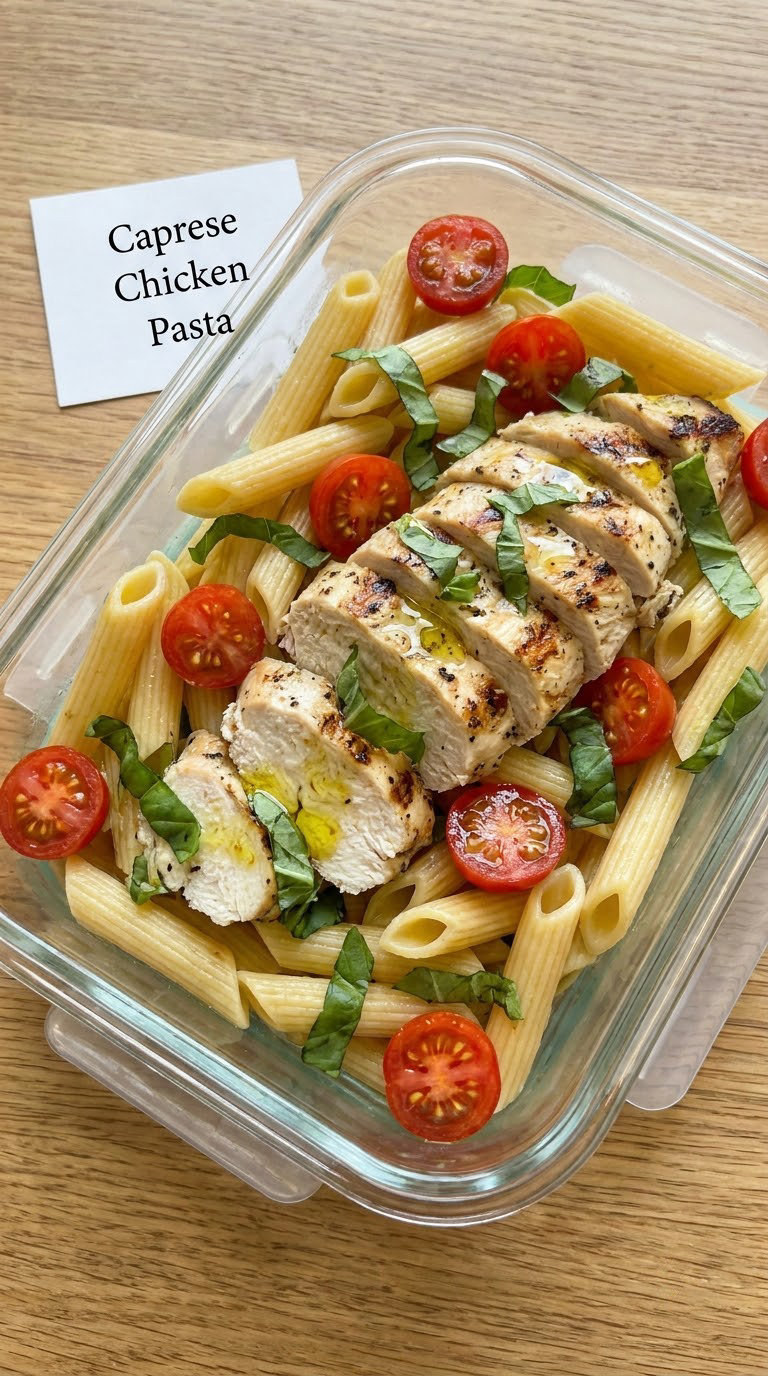
The classic caprese is built on mozzarella, and this is the version where you lose nothing by dropping it. Ripe tomatoes, warm pasta, olive oil and torn basil are enough. The chicken makes it a full lunch instead of a side.
Yield: 4 servings · Prep: 10 minutes · Cook: 20 minutes · Total: 30 minutes · Difficulty: Easy
Ingredients
- 12 ounces penne or rigatoni
- 1 pound boneless skinless chicken breast
- 1 tablespoon olive oil, plus more for drizzling
- 2 cups cherry tomatoes, halved
- 1/3 cup torn fresh basil leaves
- 1 small garlic clove, thinly sliced
- 1 tablespoon red wine vinegar
- 1/2 teaspoon flaky salt
- 1/4 teaspoon black pepper
Instructions
- Season the chicken generously with salt and pepper on both sides.
- Heat the olive oil in a large skillet over medium-high heat and cook the chicken for 6 to 7 minutes per side, until the thickest part reaches 165°F (74°C) and the juices run clear.
- Transfer the chicken to a board and let it rest for 5 minutes before slicing.
- Boil the pasta in salted water until al dente, 10 to 11 minutes, then drain and leave it in the warm pot.
- Toss the pasta with the tomatoes, garlic, vinegar, olive oil, salt and pepper while it is still hot.
- Let it sit for 5 minutes so the tomatoes soften and release their juice into the sauce.
- Slice the rested chicken into thick pieces and fold it through the pasta with half the basil.
- Portion into containers and finish with the remaining basil and a drizzle of olive oil.
Tip: Use the ripest tomatoes you can find and salt them early. Underripe tomatoes stay watery and bland, and that is the single thing that makes or breaks this pasta.
Swap it: Swap the chicken for baked tofu or chickpeas, and the fresh tomatoes for slow-roasted or oil-packed tomatoes in winter. Caprese is a summer dish, so this is the one to change with the seasons.
Storage: Refrigerate for 3 days. Reheat in a microwave for 90 seconds with a splash of water and a stir, or eat it cold, which is honestly how most people eat it. A fresh-tomato version freezes poorly because of the tomatoes, but the pasta base freezes fine for a month.
8. Edamame Crunch Bowls
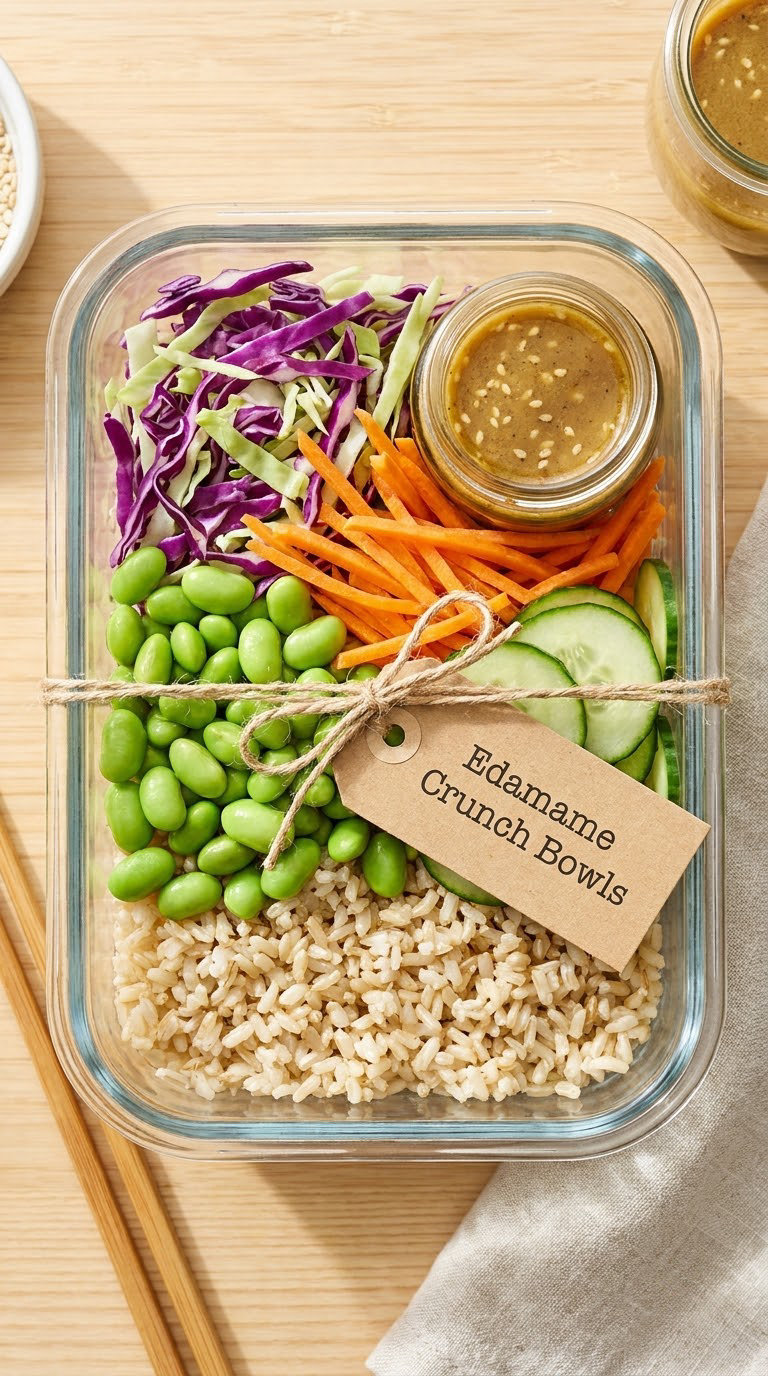
Edamame keeps its bite and its bright green colour, which means this bowl looks alive when you open it at noon on day three. It is also the fastest bowl here once the rice is cooked.
Yield: 4 bowls · Prep: 15 minutes · Cook: 10 minutes · Total: 25 minutes · Difficulty: Easy
Ingredients
For the bowls:
- 1 cup brown rice
- 1 cup frozen shelled edamame, thawed
- 1 small cabbage, finely shredded
- 1 large cucumber, diced
- 2 carrots, grated
- 1 red bell pepper, thinly sliced
- 2 tablespoons toasted sesame seeds
- 2 tablespoons chopped scallions
For the sesame-lime dressing:
- 2 tablespoons sesame oil
- 2 tablespoons lime juice
- 1 tablespoon soy sauce or tamari
- 1 tablespoon maple syrup
- 1 teaspoon grated ginger
Instructions
- Cook the brown rice according to the package directions, about 25 minutes, then let it steam off the heat for 10 minutes covered.
- Salt a bowl of cold water and add the edamame for 5 minutes to cool and firm them up.
- Whisk the sesame oil, lime juice, soy sauce, maple syrup and ginger together in a small jar.
- Drain the edamame and pat them dry so they do not water down the rice.
- Divide the rice between four containers while it is still warm, which helps it steam rather than dry out.
- Arrange the cabbage, edamame, cucumber, carrot and pepper in separate sections rather than tossing them together.
- Scatter the sesame seeds and scallions over the top.
- Pack the dressing in a small pot and shake it before pouring, since the oil and lime separate quickly.
Tip: Keep the shredded cabbage in its own section and do not dress it until you eat. A few hours of salt on cabbage in a closed container turns the whole bowl watery.
Swap it: Swap brown rice for quinoa, farro or millet, and edamame for chickpeas or white beans. For a soy-free bowl, use coconut aminos instead of soy sauce. This is a vegan bowl as written, and it also suits a gluten-free version if you swap tamari in.
Storage: Refrigerate for 4 days, and keep the dressing separate until the morning you eat it. Alliums note: the soy and sesame make this a poor choice for a shared office fridge if either is restricted there.
9. Dairy-Free Egg and Potato Salad
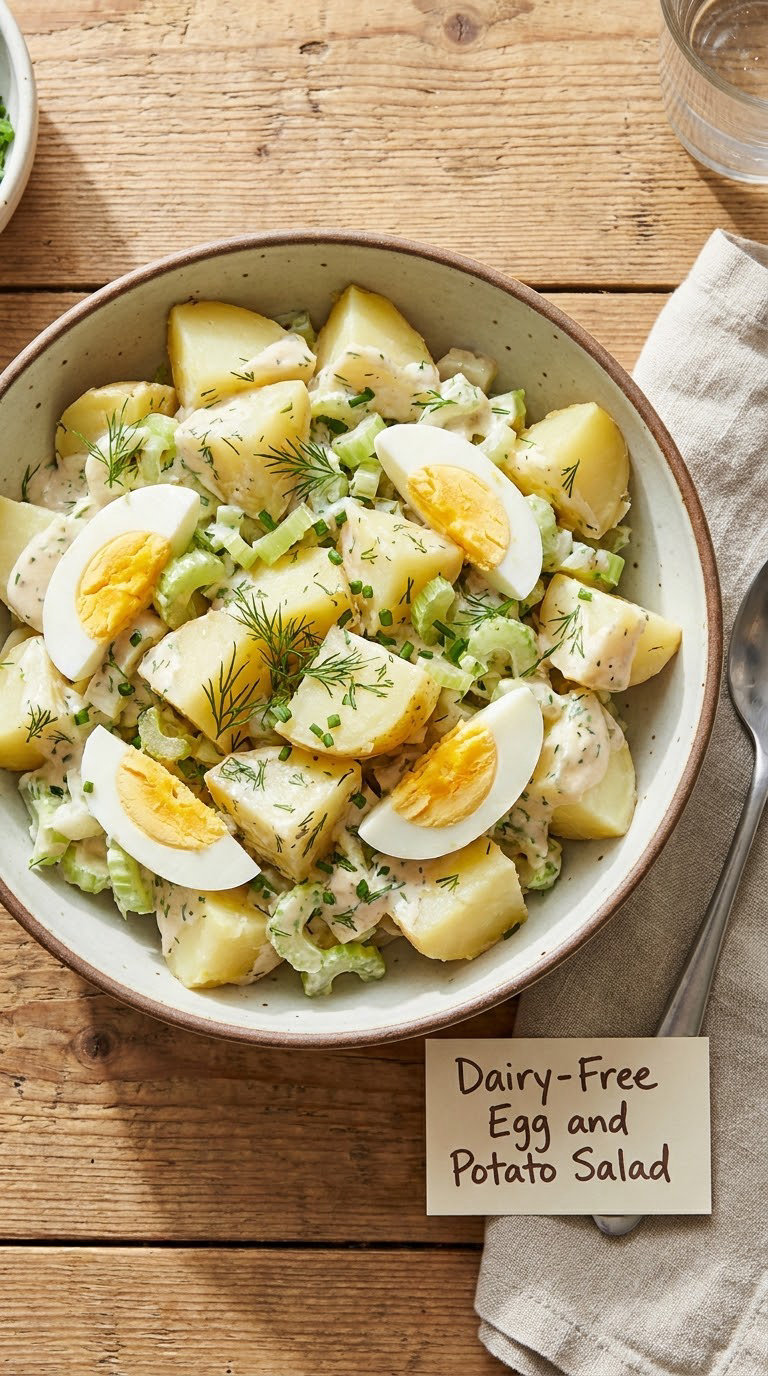
Potato salad is one of those lunches people assume has to contain mayonnaise. A blended base of white beans and dairy-free mayo gives you the same creamy result, and it stays stable for days in a work fridge.
Yield: 4 servings · Prep: 15 minutes · Cook: 15 minutes · Total: 30 minutes · Difficulty: Easy
Ingredients
- 2 pounds small waxy potatoes, halved
- 6 large eggs
- 1/2 can (7.5 ounces) cannellini beans, drained and rinsed
- 1/3 cup dairy-free mayo
- 2 tablespoons olive oil
- 1 tablespoon lemon juice
- 1 teaspoon yellow mustard
- 1/2 cup finely diced celery
- 1/3 cup chopped flat-leaf parsley
- 3 green onions, sliced
- Salt and black pepper to taste
Instructions
- Put the whole eggs in a saucepan, cover with cold water by an inch, and bring to a boil.
- Turn off the heat, cover, and let the eggs stand for 10 minutes, then transfer to ice water for 5 minutes so the yolks set firm.
- Meanwhile, simmer the potatoes in salted water for 12 to 15 minutes, until a knife slides in with no resistance.
- Drain the potatoes, spread them on a baking sheet and let them steam dry for 10 minutes.
- Blend the cannellini beans, dairy-free mayo, olive oil, lemon juice and mustard into a smooth, thick dressing.
- Peel and chop the cooled eggs, keeping the yolks slightly soft rather than chalky.
- Cut the cooled potatoes into large chunks and toss them gently with the dressing while still warm.
- Fold in the eggs, celery, parsley and green onions, season well, and chill for at least 1 hour before packing.
Tip: Dressing the potatoes while they are still warm is the whole trick. Warm potato absorbs the dressing, and cold potato just wears it as a coating.
Swap it: Swap the six eggs for 12 ounces of extra-firm tofu, pressed and torn, for a vegan version that works the same way. Swap the mayo for a lemon and olive oil dressing plus more beans if you want to keep it light.
Storage: Refrigerate for 4 days in a sealed container. This one does freeze for up to 2 months, though the texture softens a little, so freeze single servings in a container with a little space around it for expansion. Keep it in a sealed box, since an unsealed egg salad in a shared office fridge is genuinely unpleasant for everyone around it.
10. Southwest Chicken and Black Bean Rice Bowls
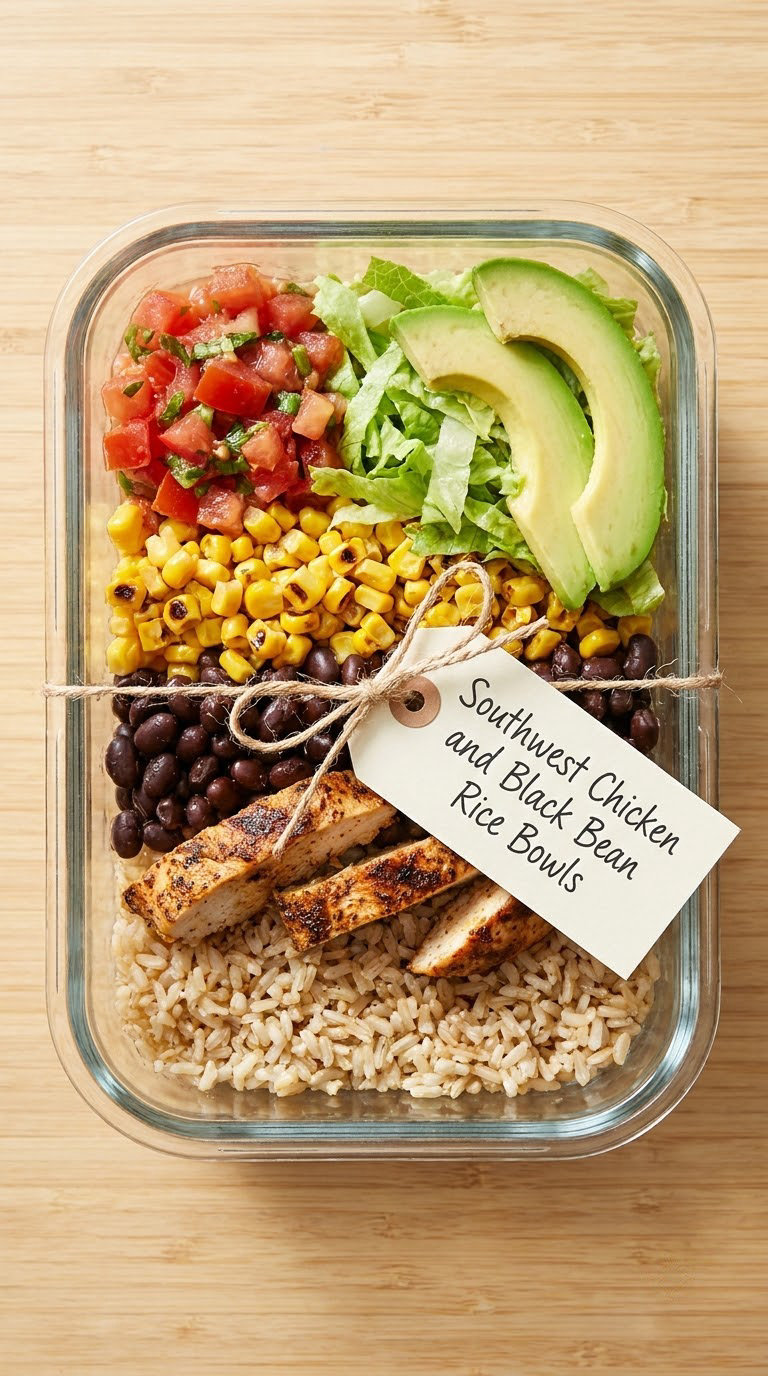
The bowl that solves the 3pm slump. Chicken and black beans together make a genuinely filling serving, and keeping the salsa and avocado separate until lunchtime keeps the rice from turning to mush.
Yield: 4 bowls · Prep: 15 minutes · Cook: 20 minutes · Total: 35 minutes · Difficulty: Easy
Ingredients
For the bowls:
- 1 pound boneless skinless chicken breast or thigh
- 1 tablespoon olive oil
- 1 teaspoon chili powder
- 1 teaspoon ground cumin
- 1/2 teaspoon smoked paprika
- 1/2 teaspoon garlic powder
- 1 cup brown rice
- 1 can (15 ounces) black beans, drained and rinsed
- 1 cup corn, fresh or frozen
- 1 cup shredded lettuce
- 1 avocado, cut into slices
For the quick salsa:
- 2 cups diced tomatoes
- 1/2 cup diced red onion
- 1 small jalapeno, finely chopped
- 1 tablespoon lime juice
- 1/4 cup chopped cilantro
Instructions
- Mix the olive oil with the chili powder, cumin, paprika, garlic powder, salt and pepper.
- Coat the chicken in the spice mix and cook in a hot skillet for 6 to 7 minutes per side, until it reaches 165°F (74°C) and the juices run clear.
- Let the chicken rest for 5 minutes, then slice or cube it.
- Cook the brown rice, then fold the black beans and corn through it while it is warm.
- Stir the tomatoes, red onion, jalapeno, lime juice and cilantro together for the salsa, and let it sit for 10 minutes.
- Divide the rice and bean mixture between four containers, then add the sliced chicken in one section.
- Keep the lettuce, avocado and salsa in separate sections or separate small pots.
- Add the salsa and avocado at lunchtime, and mix everything together right before eating.
Tip: Season the salsa with a big pinch of salt and leave it uncovered for 10 minutes before packing. The salt pulls water out of the tomatoes and concentrates the flavor so it does not taste watery on Tuesday.
Swap it: Swap the black beans for pinto beans or extra corn, and the chicken for crispy chickpeas or seasoned cauliflower for a vegan bowl. Keep the avocado in a separate pot with a squeeze of lime to slow browning.
Storage: Refrigerate for 3 to 4 days. The rice, beans, corn and chicken freeze individually for up to 2 months, so you can cook a double batch and stash it flat. Do not freeze the avocado or the fresh salsa.
11. Apple Cheddar Vegan Snack Boxes
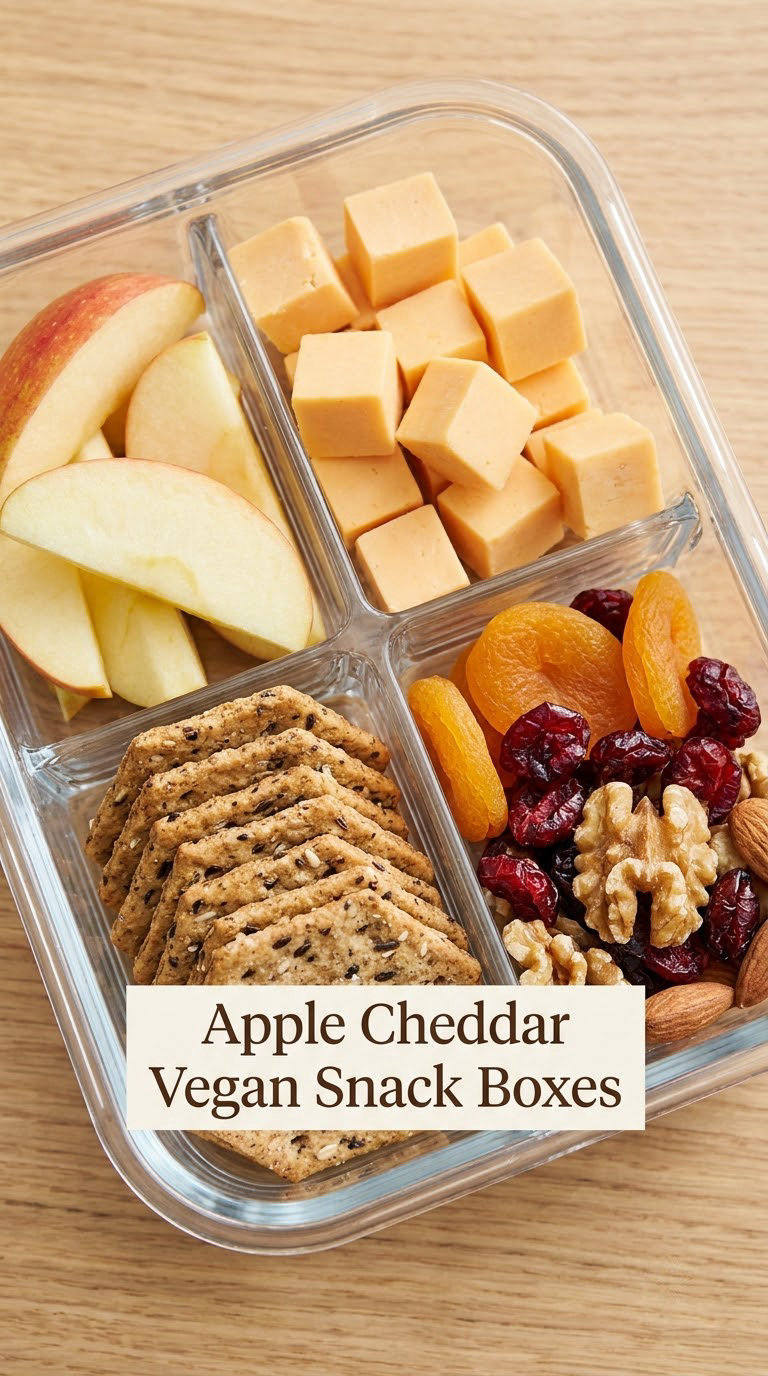
Not every lunch has to be a meal. A snack box built with adult portions of apple, vegan cheddar and crackers solves the days when you are not hungry enough for a full bowl but the 3pm vending machine is a trap.
Yield: 4 boxes · Prep: 10 minutes · Cook: none · Total: 10 minutes · Difficulty: Easy
Ingredients
- 3 large apples, cut into wedges
- 1/2 pound dairy-free cheddar, cut into cubes
- 1 cup whole-grain crackers, about 16
- 1/2 cup mixed unsalted nuts
- 1/4 cup dried cranberries or raisins
- 2 tablespoons pumpkin seeds
- 1 tablespoon olive oil
- Flaky salt, for the apple wedges
Ingredients note: A pound of vegan cheddar is unusual for a single person. Buy a smaller block and slice it thin, or make this once a week for a family rather than scaling it up.
Instructions
- Slice the apples into wedges with the core removed, about 8 wedges per apple.
- Toss the apple wedges with a small amount of olive oil and a pinch of flaky salt.
- Arrange the apple wedges in one section of a divided container so they do not touch the crackers.
- Add the vegan cheddar cubes to a second section, keeping the pieces chunky rather than slicing them thin, which dries them out.
- Fill a third section with the crackers and a small pot for any leftover pieces.
- Add the nuts, dried fruit and pumpkin seeds to the final compartment.
- Cover and chill until you are ready to leave, then add crackers to the container right before you close the lid so they stay crisp.
Tip: Put the dried fruit in its own small pot. Left loose in the box, it sticks to the apple wedges and makes everything sticky by lunchtime.
Swap it: Swap the nuts for more pumpkin seeds and sunflower seeds for a nut-free version, and use seeded rice cakes or a gluten-free crispbread instead of crackers. Vegan cheddar is the one item here worth checking labels on, since many brands still include milk-derived casein.
Storage: Refrigerate for up to 4 days, and keep the cheddar cold until you leave the house. The apple wedges are best within 2 days, and the crackers stay crisp for about 3 days in a sealed box. Everything in this box is straightforwardly vegan.
12. Lemon Herb Chicken and Couscous
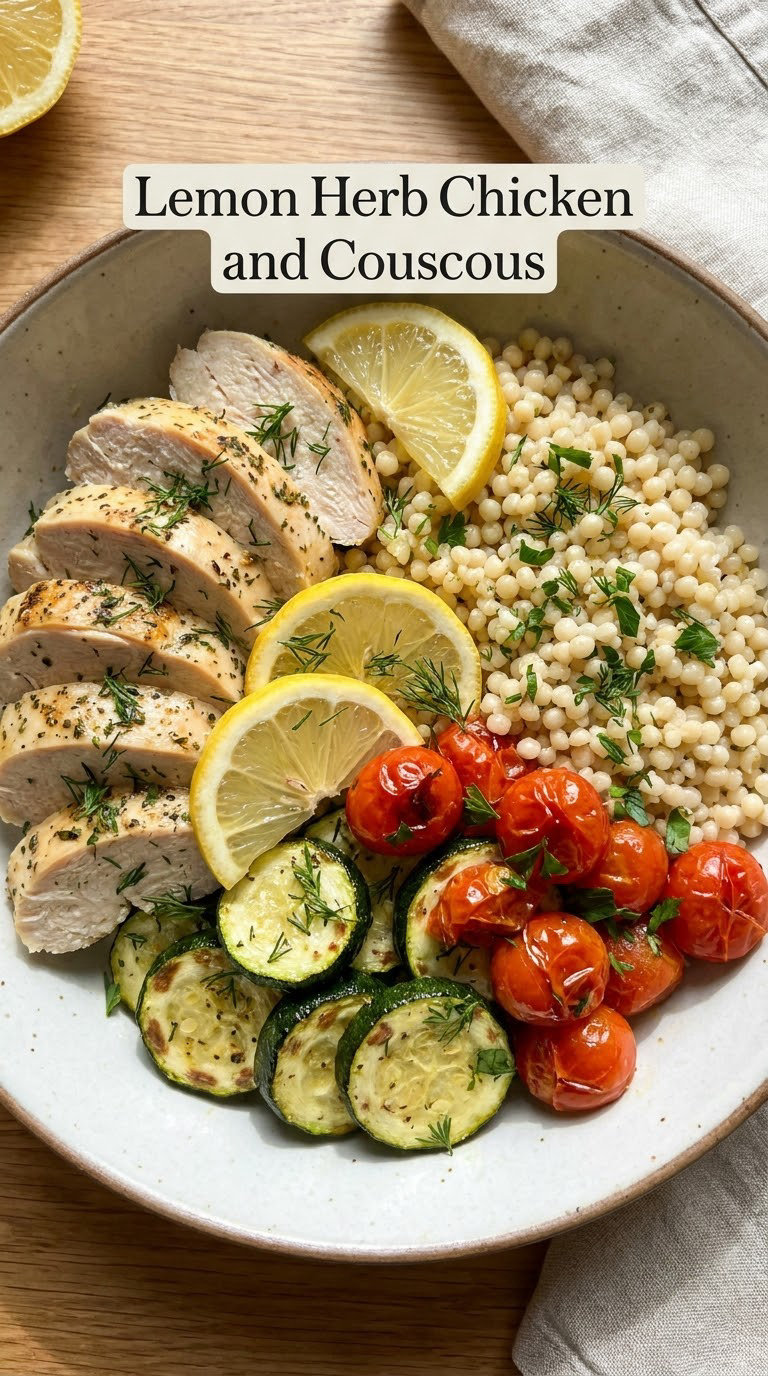
The last one is the most Sunday-cooking of the bunch, and the one that gets the most comments when I bring it in. Couscous needs almost no attention, so it is a good dish to make while the oven handles everything else.
Yield: 4 servings · Prep: 15 minutes · Cook: 20 minutes · Total: 35 minutes · Difficulty: Medium
Ingredients
- 1 pound boneless skinless chicken breast
- 1 tablespoon olive oil, plus more for the tray
- 1 lemon, halved
- 3 cloves garlic, minced
- 1 teaspoon dried oregano
- 1 teaspoon ground cumin
- 1 medium zucchini, cut into half-moons
- 1 cup cherry tomatoes
- 1 cup pearl couscous
- 1.5 cups water or vegetable stock
- 1/3 cup chopped fresh parsley and mint
- Salt and black pepper to taste
Instructions
- Heat the oven to 425°F (220°C) and line a large baking sheet.
- Rub the chicken with the olive oil, half the garlic, the oregano, cumin, salt and pepper.
- Scatter the zucchini and cherry tomatoes on the tray, toss with olive oil, and spread out.
- Roast the vegetables for 15 minutes, then add the chicken and the two lemon halves to the tray.
- Roast for a further 18 to 20 minutes, until the chicken reaches 165°F (74°C) and the vegetables are browned at the edges.
- Meanwhile, bring the couscous and water to a boil in a covered pot, then turn off and let it sit for 8 minutes.
- Fluff the couscous with a fork and squeeze in the juice of one roasted lemon half, stirring well.
- Slice the chicken, toss it with the roasted vegetables and the couscous, then finish with the parsley and mint.
Tip: Squeeze the roasted lemon half over the couscous while it is still hot. The heat melts the fat and the citrus oils into the grain rather than sitting on top of it.
Swap it: Swap the chicken for chickpeas or baked tofu roasted with the same spices, and use quinoa for a gluten-free version. If pearl couscous is hard to find at the store, Israeli couscous works too and holds its shape better in a lunchbox.
Storage: Refrigerate for 4 days. Keep the fresh herbs and any extra lemon in a separate pot, and add them at lunchtime so the dish does not go dull. The couscous and roasted vegetables freeze well for up to 2 months; slice the chicken after reheating rather than freezing it whole.
Tips for Making These
A few habits turn any of these twelve into a workweek of lunches instead of one good Monday.
- Cook components, assemble later. Sunday you roast the vegetables, cook two pots of grain, boil eggs and shred cabbage. Then each night takes five minutes of arranging rather than cooking. This is the single biggest time saver in the whole list.
- Dressings live in their own pot. Every recipe here that has a wet component stores it separately. A 2-ounce leakproof pot costs almost nothing and saves you from a dry salad or a mushy bowl.
- Never pack a warm lunch without an ice pack. Perishable food should not sit above 40°F (4°C) for more than 2 hours, and that includes the commute. A frozen water bottle or a flat ice pack in an insulated bag handles a full workday.
- Dry your vegetables properly. A salad spinner and a paper towel take ten seconds and are the difference between a crisp cucumber and a watery one by 1pm. Salt cut cucumbers and let them drain in a colander for ten minutes when you have time.
- Label the container with the day and the ingredient. In a shared office fridge, other people will move your lunch. A masking tape label with your name and the contents, including anything containing fish, soy, sesame or nuts, is a genuinely kind thing to do.
- Rotate, do not repeat. The most common complaint from people who pack lunch daily is boredom, not hunger. Make two different dressings a week instead of two different salads, and you get variety without doubling your cooking.
How to keep dairy free lunches fresh all week
Most of these keep 3 to 4 days refrigerated, which covers a Monday to Thursday prep run. For Friday, cook a fresh one or pull a bowl from the freezer, since rice and cooked chicken both hold well frozen and only lose a little texture. Rinsing quinoa and couscous in a fine sieve before freezing removes surface starch and stops them clumping into one solid block when they thaw.
One last thing worth knowing: many everyday foods carry hidden dairy. Bread, tortillas, salad dressings, protein bars and even some tortillas lists whey, casein, lactose, ghee or condensed milk on the label. If this matters to you, the ingredient lists here are written out in full so you can check them at the store without guessing.
Frequently Asked Questions
What can I pack for lunch that is dairy free and does not need reheating?
The cold options that travel best are the Mediterranean chickpea wraps, turkey and hummus lettuce cups, peanut butter apple rice cakes, chicken pesto pasta salad, tuna white bean sandwiches, edamame crunch bowls and the dairy-free egg and potato salad. All are good straight from the fridge at 12pm, which matters in offices without a microwave. Keep dressings and salsa in small lidded pots and pack them separately so nothing turns soggy by lunchtime.
How long do dairy free lunches stay safe in the fridge?
Most cooked dishes like these keep 3 to 4 days refrigerated at 40°F (4°C) or below, which fits a Monday to Thursday prep run. Cooked grains, roasted vegetables, chicken, tuna mixtures and egg salad all fall in that window. Perishable food should not sit out above 40°F (4°C) for more than 2 hours, including the commute to work, so pack an ice pack if there is no office fridge.
Can I prepare these work lunches the night before?
Yes, and most of them are better for it. The roasted vegetable quinoa bowls, chicken pesto pasta salad and Southwest bowls all need at least an hour of chilling to settle, and the flavors improve overnight. The things to save for morning are lettuce cups, the potato salad herbs and the snack box crackers. Do not dress greens or a bowl of grain until you are about to eat it.
What can I use instead of cheese or creamy dressings in dairy free lunches?
For creamy dressings without dairy, use dairy-free mayo, a tahini and lemon dressing, or blend white beans with lemon juice and mustard, which thickens surprisingly well. Instead of shredded cheese, try nutritional yeast in a pesto, crumbled vegan feta, or cashew or sunflower seed parmesan. Covering and chilling a bowl overnight also thickens a dressing naturally with no dairy at all.
Which recipes are best for packing in a cooler or insulated lunch bag?
The edamame crunch bowls, Southwest chicken and black bean bowls and the lemon herb chicken and couscous are the best fits, because everything holds its texture at temperature and the rice grains stay separate. The pasta salads fare worst in heat, since warm pasta goes soft and oily. Add a fully frozen bottle to the bag; it doubles as a drink once it thaws.
Are dairy free lunch ideas suitable for meal prep?
They suit meal prep better than most lunches, because nearly every recipe here is built from components that store separately. Cook grains, proteins and roasted vegetables in batches on Sunday, keep dressings in jars, and you can assemble four different lunches in about five minutes a night. The one thing to check is texture, since anything with fresh greens or crackers is best added the morning you eat it.
Conclusion: Pick the Easiest Dairy Free Work Lunch
Start with the Mediterranean chickpea and cucumber wraps on number 1. They take fifteen minutes, need no cooking, hold their texture overnight and improve when they sit, which makes them the least forgiving recipe here to get wrong.
Once that one is in your rotation, add a grain bowl and a pasta salad so your week has something warm, something cold and something you can eat at your desk. Pick four from this list on Sunday, write them on the containers, and you have dairy free lunch ideas for work sorted for the week without a single morning scramble.
For more combinations once you have the basics down, browse our quick and filling work lunch recipes and lunch ideas that photograph well for the desk.