
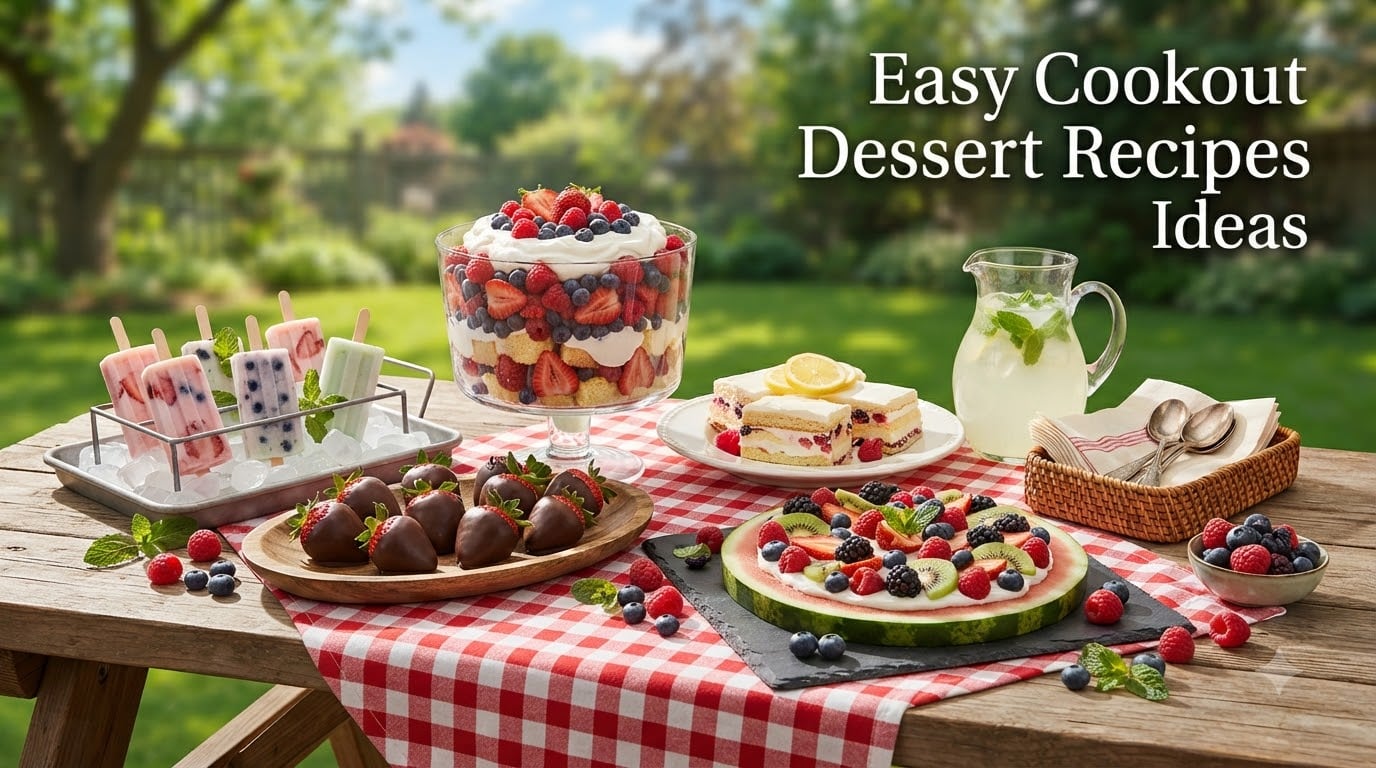
I choose dessert after I know where it will wait. A shaded counter can hold a wrapped cookie or fruit bar; a cooler is mandatory for pudding and cream; a freezer plan must exist before ice pops or sandwiches leave home. These easy cookout dessert recipes make that holding decision part of the recipe instead of an afterthought.
For twelve guests, one pan dessert or one batch of individual portions is enough. Add a frozen option only when the cooler has dedicated space and someone can serve it at the right moment.
Table of Contents
12 Easy Cookout Dessert Recipes with a Real Holding Plan
Room-temperature sweets for a shaded table
1. Blueberry Oat Crumble Bars
Serves: 20 | Time: 1 hour plus cooling | Method: 9-by-13-inch pan
A pressed oat crust and cooked berry center make these bars sturdy enough for a shaded picnic table. The same mixture forms the base and crumble, simplifying prep without sacrificing texture.
Ingredients
-
2 cups all-purpose flour
-
2 cups rolled oats
-
1 cup brown sugar
-
1 teaspoon baking powder
-
1/2 teaspoon kosher salt
-
1 cup unsalted butter, melted
-
4 cups blueberries
-
1/2 cup granulated sugar
-
2 tablespoons cornstarch
-
2 tablespoons lemon juice
Instructions
-
Heat the oven to 350°F and line the pan. Mix flour, oats, brown sugar, baking powder, salt, and butter.
-
Press two-thirds firmly into the pan and bake 12 minutes until the edges begin to color.
-
Toss blueberries with sugar, cornstarch, and lemon, spread over the crust, and add remaining crumbs.
-
Bake 32 to 38 minutes until the filling bubbles and top is golden. Cool completely before cutting.
Substitutions: Use blackberries or gluten-free flour blend.
Storage: Keep airtight at cool room temperature for 2 days or refrigerate for 5 days.
Tip: Wait for full cooling; warm berry filling cannot hold a clean square.
2. Peach Hand Pies
Serves: 12 | Time: 1 hour 5 minutes | Method: sheet pans
Individual pies contain their fruit and need no serving knife. A small amount of cornstarch thickens peach juice, and vent holes release steam before seams burst.
Ingredients
-
2 packages refrigerated pie crusts, 14 ounces each
-
4 ripe-firm peaches, diced
-
1/3 cup granulated sugar
-
1 tablespoon cornstarch
-
1 teaspoon lemon juice
-
1/2 teaspoon cinnamon
-
1/4 teaspoon kosher salt
-
1 large egg
-
1 tablespoon coarse sugar
Instructions
-
Heat the oven to 400°F and line two pans. Mix peaches, sugar, cornstarch, lemon, cinnamon, and salt.
-
Cut twelve 5-inch dough circles. Place 2 tablespoons filling on one half of each, leaving a border.
-
Brush borders with beaten egg, fold, crimp with a fork, cut two vents, and add coarse sugar.
-
Bake 22 to 27 minutes until deeply golden and the vented filling bubbles. Cool at least 30 minutes.
Substitutions: Use nectarines, apples, or puff pastry squares.
Storage: Keep at room temperature for 1 day or refrigerate for 4 days.
Tip: Do not overfill; extra fruit is better served separately than forced into the seam.
3. Lemon Cornmeal Sugar Cookies
Serves: 24 | Time: 45 minutes | Method: sheet pans
Cornmeal gives these lemon cookies a sandy crunch that survives humid air better than delicate meringue. Rolling in coarse sugar creates the only decoration needed.
Ingredients
-
2 cups all-purpose flour
-
1/2 cup fine cornmeal
-
1 teaspoon baking powder
-
1/2 teaspoon kosher salt
-
3/4 cup unsalted butter, softened
-
1 cup granulated sugar
-
1 large egg
-
2 tablespoons lemon zest
-
1 tablespoon lemon juice
-
1/3 cup coarse sugar
Instructions
-
Heat the oven to 350°F and line two pans. Whisk flour, cornmeal, baking powder, and salt.
-
Beat butter and granulated sugar until fluffy, then add egg, zest, and juice. Mix in dry ingredients.
-
Roll level tablespoons into balls, coat with coarse sugar, and space 2 inches apart.
-
Bake 11 to 14 minutes until edges are golden and centers are set. Cool fully on racks.
Substitutions: Use orange zest or replace cornmeal with 1/2 cup flour for a softer cookie.
Storage: Keep airtight at room temperature for 4 days or freeze for 1 month.
Tip: Pack only after completely cool so trapped steam does not soften the sugar crust.
4. Salted Peanut Chocolate Blondies
Serves: 24 | Time: 55 minutes | Method: 9-by-13-inch pan
Blondies travel more securely than frosted cupcakes and can be cut into small rich pieces. Salted peanuts and dark chocolate break up the brown-sugar sweetness.
Ingredients
-
1 cup unsalted butter, melted
-
2 cups brown sugar
-
3 large eggs
-
2 teaspoons vanilla extract
-
2 cups all-purpose flour
-
1 teaspoon baking powder
-
1 teaspoon kosher salt
-
1 1/2 cups dark chocolate chips
-
1 cup roasted salted peanuts
Instructions
-
Heat the oven to 350°F and line the pan. Whisk butter and brown sugar until glossy.
-
Add eggs one at a time and vanilla. Fold in flour, baking powder, and salt.
-
Stir in chocolate and peanuts, spread evenly, and tap the pan once to settle the batter.
-
Bake 27 to 33 minutes until the edges are golden and the center has moist crumbs. Cool before cutting.
Substitutions: Use pretzel pieces or sunflower seeds and allergy-safe chocolate.
Storage: Keep airtight at room temperature for 3 days or freeze for 1 month.
Tip: Label peanuts clearly and use a separate serving tray and utensil.
Chilled and frozen desserts stay in their containers
5. Strawberry Pretzel Cheesecake Squares
Serves: 20 | Time: 1 hour plus chilling | Method: 9-by-13-inch pan
A salty pretzel base supports a cold cream cheese layer and real strawberry topping. Gelatin keeps the fruit sliceable, but the pan must remain chilled until dessert.
Ingredients
-
4 cups mini pretzels, crushed
-
3/4 cup unsalted butter, melted
-
1/3 cup granulated sugar
-
16 ounces cream cheese, softened
-
1 cup powdered sugar
-
2 cups whipped cream
-
2 cups strawberries, sliced
-
1 cup strawberry puree
-
2 teaspoons unflavored gelatin
-
3 tablespoons cold water
Instructions
-
Heat the oven to 350°F. Mix pretzels, butter, and granulated sugar, press into the lined pan, and bake 10 minutes. Cool.
-
Beat cream cheese and powdered sugar smooth and fold in whipped cream. Spread over the cold crust and chill.
-
Bloom gelatin in water 5 minutes, warm until liquid, and mix with strawberry puree. Cool 10 minutes and add sliced berries.
-
Spread fruit over the cheese layer and chill at least 5 hours until firm. Cut cold.
Substitutions: Use raspberries or gluten-free pretzels.
Storage: Refrigerate for 4 days; transport on ice and do not leave in sun.
Tip: Spread cheese all the way to the pan edges to protect the pretzel crust from fruit liquid.
6. Banana Pudding Picnic Jars
Serves: 12 | Time: 45 minutes plus chilling | Method: saucepan and 8-ounce jars
Lidded jars prevent pudding from spilling in the cooler and make portions obvious. Bananas stay between pudding layers, while the final cookie is added at serving.
Ingredients
-
3/4 cup granulated sugar
-
1/3 cup cornstarch
-
1/2 teaspoon kosher salt
-
4 cups whole milk
-
5 large egg yolks
-
3 tablespoons unsalted butter
-
2 teaspoons vanilla extract
-
4 bananas, sliced
-
48 vanilla wafer cookies
-
2 cups whipped cream
Instructions
-
Whisk sugar, cornstarch, salt, milk, and yolks in a saucepan. Cook over medium heat until thick and bubbling, then continue 1 minute.
-
Remove from heat and add butter and vanilla. Press parchment on the surface and cool 20 minutes.
-
Layer three wafers, banana, and pudding in each jar. Cover and refrigerate at least 3 hours.
-
Top with whipped cream and one dry wafer immediately before serving when the pudding is cold and set.
Substitutions: Use lactose-free milk, berries, or chocolate wafers.
Storage: Keep jars refrigerated for 2 days and carry them upright in a cooler.
Tip: Leave headspace so opening the lid does not push pudding over the rim.
7. Raspberry Lemon Icebox Cake
Serves: 16 | Time: 30 minutes plus overnight chilling | Method: 9-by-13-inch pan
Graham crackers soften into cake-like layers overnight, while raspberries and lemon keep the cream fresh-tasting. It is assembled in its travel pan and sliced only when cold.
Ingredients
-
4 cups heavy cream
-
3/4 cup powdered sugar
-
2 teaspoons vanilla extract
-
2 tablespoons lemon zest
-
24 graham cracker sheets
-
4 cups raspberries
-
1/2 cup lemon curd
-
1/2 cup sliced almonds, optional
Instructions
-
Whip cream, powdered sugar, vanilla, and zest to medium peaks. Fold 1 cup cream into lemon curd.
-
Spread plain cream in the pan, add crackers, lemon cream, raspberries, and another thin layer of cream.
-
Repeat layers twice, ending with cream. Cover without touching the surface.
-
Chill 8 to 12 hours until crackers are tender. Add almonds and cut cold with a clean knife.
Substitutions: Use strawberries, vanilla pudding, or nut-free cookie crumbs.
Storage: Refrigerate for 3 days and keep the pan nested in ice during service.
Tip: Do not freeze the assembled cake; thawing berries can make layers watery.
8. Brownie Ice Cream Sandwiches
Serves: 12 | Time: 1 hour plus freezing | Method: two 9-inch square pans
Thin brownie slabs form even sandwiches without scooping ice cream outdoors. Each finished piece is wrapped before the trip and served directly from the cooler.
Ingredients
-
1 cup unsalted butter
-
2 cups granulated sugar
-
1 cup cocoa powder
-
1 teaspoon kosher salt
-
4 large eggs
-
2 teaspoons vanilla extract
-
1 1/2 cups all-purpose flour
-
1 1/2 quarts vanilla ice cream, softened
-
1 cup mini chocolate chips
Instructions
-
Heat the oven to 350°F and line two pans. Melt butter, sugar, cocoa, and salt together until smooth; cool 5 minutes.
-
Beat in eggs and vanilla, fold in flour, and divide between pans. Bake 14 to 18 minutes until set with moist crumbs. Cool and freeze.
-
Spread softened ice cream over one cold slab, add the second slab, press gently, and freeze 4 hours.
-
Cut twelve sandwiches, press edges into chips, wrap individually, and freeze until solid.
Substitutions: Use dairy-free ice cream or omit the chocolate-chip edge.
Storage: Keep frozen up to 2 weeks and return unused pieces to a freezer immediately.
Tip: Serve these from a well-packed cooler one at a time, never as a platter in the sun.
9. Watermelon Lime Ice Pops
Serves: 12 | Time: 20 minutes plus freezing | Method: blender and molds
Watermelon, lime, and a small amount of honey make a clean frozen finish. Strained puree creates a smooth pop, while a pinch of salt sharpens the fruit.
Ingredients
-
8 cups seedless watermelon cubes
-
1/3 cup lime juice
-
2 tablespoons honey
-
1/4 teaspoon kosher salt
-
1/2 cup chopped strawberries
-
12 ice-pop sticks
Instructions
-
Blend watermelon, lime, honey, and salt until completely smooth.
-
Strain if desired, then divide strawberries among twelve molds.
-
Pour in watermelon mixture, insert sticks, and freeze at least 6 hours until solid.
-
Unmold under cool running water for a few seconds and serve immediately from a frozen tray.
Substitutions: Use cantaloupe, maple syrup, or omit added sweetener for very ripe melon.
Storage: Keep frozen in molds or wrappers for 2 weeks.
Tip: Place a bowl for sticks and drips near the serving area.
The pan-and-portion lessons in these crowd dessert recipes are useful here, but outdoor temperature decides which choice is practical.
Finish near the grill after dinner
10. Grilled Pineapple Shortcake Cups
Serves: 10 | Time: 40 minutes | Method: grill and cups
Pineapple can use a clean grill after dinner, then cool briefly before meeting cubed pound cake. Individual cups keep the fruit juice controlled.
Ingredients
-
1 fresh pineapple, cut in rings
-
1 tablespoon neutral oil
-
2 tablespoons brown sugar
-
1 teaspoon cinnamon
-
1 pound cake, 16 ounces, cubed
-
3 cups whipped cream
-
1 lime, zested
-
1/2 cup toasted coconut
Instructions
-
Brush pineapple with oil and mix brown sugar with cinnamon. Sprinkle lightly on both sides.
-
Grill over medium heat 3 to 4 minutes per side until marked and tender. Cool 10 minutes and dice.
-
Divide pound cake among ten cups and add warm pineapple with any collected juice.
-
Top with whipped cream, lime zest, and coconut only when the pineapple is no longer hot.
Substitutions: Use peaches, angel food cake, or dairy-free whipped topping.
Storage: Refrigerate components for 2 days; assemble within 1 hour of serving.
Tip: Do not place cold cream on hot fruit or it will melt into the cake.
11. Skillet Berry Biscuit Cobbler
Serves: 12 | Time: 1 hour | Method: 12-inch cast-iron skillet
This cobbler can bake in the oven or on a covered grill with indirect heat. Drop biscuits leave vents for berry steam and provide easy serving landmarks.
Ingredients
-
6 cups mixed berries
-
3/4 cup granulated sugar, divided
-
3 tablespoons cornstarch
-
2 tablespoons lemon juice
-
2 cups all-purpose flour
-
1 tablespoon baking powder
-
1/2 teaspoon kosher salt
-
6 tablespoons cold unsalted butter
-
3/4 cup buttermilk
-
1 tablespoon coarse sugar
Instructions
-
Toss berries with 1/2 cup sugar, cornstarch, and lemon in the skillet. Heat the oven or indirect grill to 375°F.
-
Whisk flour, remaining sugar, baking powder, and salt; cut in butter until pea-size and stir in buttermilk.
-
Drop twelve portions of dough over the berries, leaving gaps, and add coarse sugar.
-
Bake covered by the grill lid or in the oven 32 to 40 minutes until filling bubbles and biscuits are golden and cooked through.
Substitutions: Use peaches, gluten-free flour blend, or dairy-free butter and milk.
Storage: Refrigerate for 4 days and reheat covered; do not leave the skillet outdoors after serving.
Tip: Set the hot skillet on a heatproof trivet and wrap the handle as a visible warning.
12. Chocolate Marshmallow S’mores Dip Cups
Serves: 12 | Time: 25 minutes | Method: oven or covered grill
Individual foil cups control the sticky serving better than one communal skillet. Chocolate melts below a marshmallow top, while graham crackers remain dry for dipping.
Ingredients
-
2 cups semisweet chocolate chips
-
24 large marshmallows, halved
-
1/2 cup heavy cream
-
1/4 teaspoon kosher salt
-
24 graham cracker sheets
-
1 cup sliced strawberries
-
12 small foil cups
Instructions
-
Divide chocolate among foil cups and add 2 teaspoons cream and a pinch of salt to each.
-
Top each with four marshmallow halves. Heat the oven or covered indirect grill to 375°F.
-
Bake 6 to 9 minutes until chocolate is melted and marshmallows are puffed and golden.
-
Rest 3 minutes on a heatproof tray and serve with graham crackers and strawberries.
Substitutions: Use dairy-free chocolate and cream or cinnamon cookies.
Storage: Cool leftovers, cover, and refrigerate for 3 days; reheat briefly.
Tip: Keep cups on a rigid tray because the foil remains hot and flexible.
Pack for the Return Trip Too
I begin with a rigid, clean cooler and enough cold packs to surround—not merely sit beneath—refrigerated desserts. Jars and pans go in already cold, with lids or tight covers. A flat board under a flexible foil pan prevents bending. Dry desserts travel in a separate tote so condensation and ice water cannot reach cookies, crusts, or labels.
Serving utensils get their own clean bag. I pack a long knife only if a slab truly cannot be cut at home; otherwise, pre-cut pieces stay together in the pan and lift out with a small spatula. Extra parchment between cookie layers is more useful than decorative garnish. The neat cutting methods in these small celebration desserts work just as well when the colors are summer berries and citrus.
Before leaving, I reserve a cold corner for leftovers rather than assuming the cooler will still have space. Melted ice is drained only where it is safe and appropriate, and perishable dessert returns to refrigeration promptly. If a chilled pan has remained out too long or its history is unclear, I do not pack it for another day. A trash bag, paper towels, and a marker for dating containers make cleanup and storage decisions much simpler.
Label Each Dessert Shade, Ice, or Freezer
I write one holding word on masking tape before packing. SHADE goes on cookies, hand pies, blondies, and cool fruit bars. ICE goes on cheesecake, pudding, icebox cake, whipped cream, and cut fruit. FREEZER goes on pops and ice cream sandwiches. The label tells any helper what to do without a long explanation.
The FDA buffet guidance recommends keeping cold food cold and notes that hot weather shortens safe holding time. I use small refill trays, nest chilled dishes over ice when appropriate, and never rely on a shady-looking corner as refrigeration.
Time Dessert after the Main Leaves the Table
The easy cookout dessert recipes should not compete with raw-meat coolers, crowded counters, or a dirty grate. Room-temperature desserts stay wrapped. Cold desserts remain sealed. Grill-finished sweets begin only after dinner food has moved to clean platters and the cook confirms the grate or indirect zone is ready.
The last-hour clock in the Memorial Day cookout plan leaves dessert outside the busiest window. That separation also keeps children from reaching past raw-food tools for a cookie.
Frequently Asked Questions
Which desserts tolerate travel best?
Cookies, hand pies, blondies, and fully cooled crumble bars travel in rigid containers. Chilled jars travel upright in a packed cooler.
What should stay frozen?
Ice pops and ice cream sandwiches need a true frozen plan, not just a bag of melting ice. Serve them directly and promptly.
How many desserts do I need?
One full recipe is enough for most groups of ten to twelve. Offer two only for a large group or a distinct dietary option.
How do I stop bars from falling apart?
Bake until the filling bubbles or center sets, cool completely, chill when the recipe calls for it, and cut with a clean knife.
Can I make dessert on the grill?
Yes, after the main meal. Use clean grates or indirect heat, heatproof tools, a thermometer when relevant, and a protected landing place for hot pans.
Conclusion: Holding Is Part of the Recipe
Reliable easy cookout dessert recipes fit the weather as well as the menu. Decide between shade, ice, and freezer storage, carry only what the cooler can protect, reveal cold sweets at serving time, and let one well-managed dessert finish the meal without melting into a problem.