
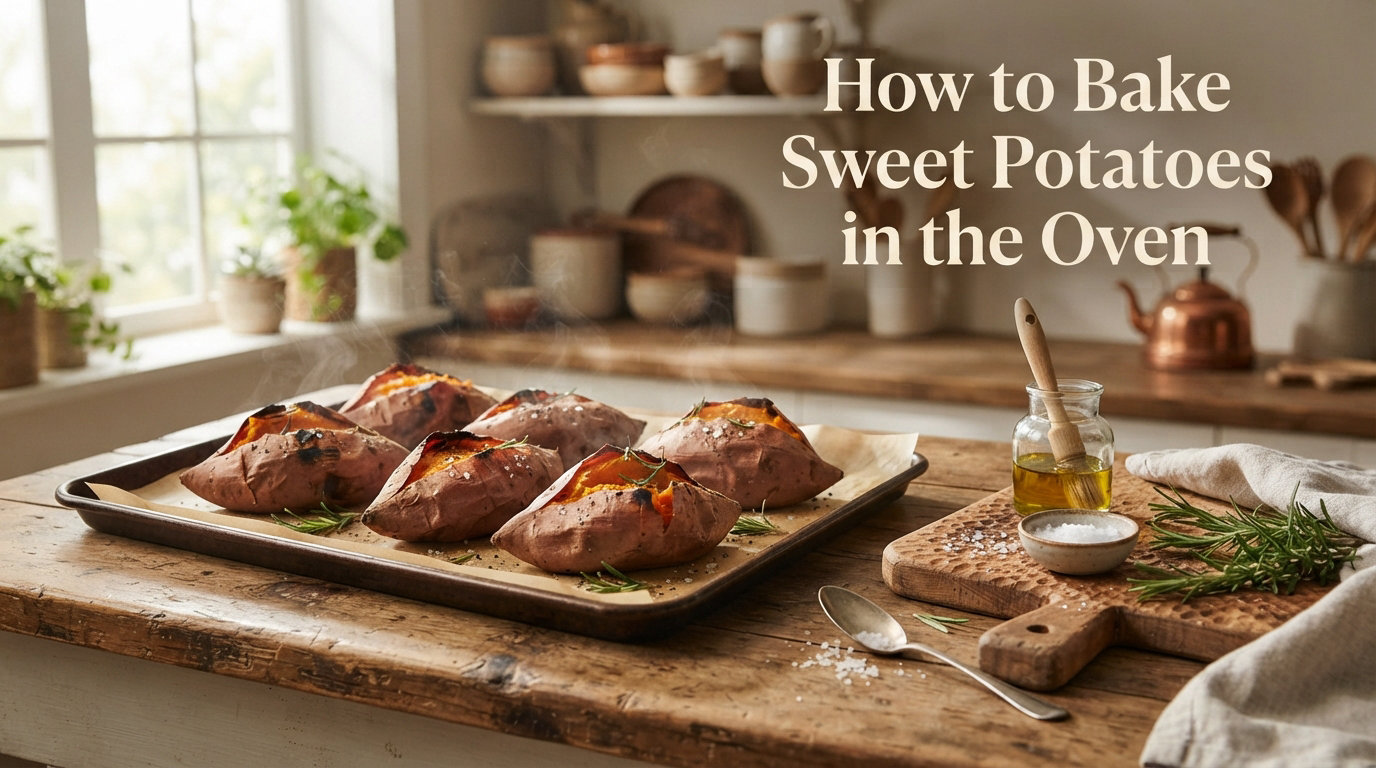
There’s something almost magical about pulling a perfectly baked sweet potato from the oven. The skin crackles slightly as you slice it open, revealing fluffy, steaming flesh that practically begs for a pat of butter. I spent years making soggy, unevenly cooked sweet potatoes until I finally cracked the code for that restaurant-quality texture we all crave.
Oven baking transforms sweet potatoes in a way no other cooking method can match. The dry heat concentrates their natural sugars, creating those coveted caramelized edges while keeping the interior impossibly tender. Whether you dress them up with cinnamon and maple for breakfast or pile on savory toppings for dinner, mastering this technique opens up endless meal possibilities.
In this guide, I will walk you through exactly how to bake sweet potatoes in the oven for consistent, crispy-skinned results every single time. You’ll learn the science behind temperature choices, finally settle the foil debate, and discover troubleshooting tricks I wish I had known years ago.
Table of Contents
Quick Answer: How to Bake Sweet Potatoes in the Oven
For those who want the essentials right now, here is the foolproof method. Preheat your oven to 425°F and bake for 45 to 60 minutes until fork tender.
- Scrub sweet potatoes clean and dry them thoroughly
- Poke holes all over with a fork to vent steam
- Rub with oil and sprinkle with salt
- Bake on a foil-lined sheet for 45-60 minutes until puffed and caramelized
The potato is done when a fork slides in easily and the skin has puffed away from the flesh. Small potatoes may finish in 40 minutes, while large ones can take up to 75 minutes.
How to Bake Sweet Potatoes in the Oven: Complete Step-by-Step Guide
Great baked sweet potatoes start before you even turn on the oven. Selecting the right potatoes and prepping them properly makes the difference between mediocre and magnificent results.
Step 1: Choose the Right Sweet Potatoes
Look for firm, smooth sweet potatoes without soft spots, bruises, or sprouting eyes. Uniform size matters more than you might think. Potatoes of similar diameter cook evenly, while mixing small and large ones guarantees some will be overdone while others remain raw in the center.
I prefer medium-sized sweet potatoes about 2 to 3 inches in diameter. These hit the sweet spot of manageable cooking time and generous serving size. Avoid giant sweet potatoes unless you plan to split them for stuffing, as they can take over an hour to cook through.
Step 2: Scrub and Dry Thoroughly
Sweet potatoes grow underground and their skins hold onto dirt and grit. Rinse them under cool water and scrub with a vegetable brush, paying special attention to any eyes or indentations where soil collects. The skins are edible and delicious when crispy, so clean them well.
Here is the secret many recipes skip: dry the potatoes completely with a clean towel. Moisture on the skin creates steam in the oven, leading to that disappointing leathery texture instead of crackly crispness. Take an extra minute to pat them dry, and you will thank yourself later.
Step 3: Pierce with a Fork
Steam builds up inside sweet potatoes as they bake. Without escape routes, that pressure can cause your potatoes to burst in the oven, creating a sticky, smoky mess. Pierce each potato 6 to 8 times with a fork, spacing holes around the entire surface.
I stab deeply enough to reach the center, about an inch into the flesh. This ensures steam releases from the core where most of it accumulates. Skipping this step risks not just messy cleanup but uneven cooking as trapped steam creates soggy pockets.
Step 4: Oil and Season
Place your prepared sweet potatoes on a foil or parchment-lined baking sheet. The lining catches the sticky syrup that oozes out during baking, saving you from scrubbing stubborn caramelized sugar off your pan later.
Drizzle about a teaspoon of olive oil or melted coconut oil over each potato. Use your hands to rub the oil all over the skin, coating every surface. The oil conducts heat directly to the skin, promoting that coveted crispy texture while helping seasonings adhere.
Sprinkle generously with coarse kosher salt. The salt creates tiny abrasions on the skin that crisp beautifully and seasons the flesh through the holes you poked. I also add a light dusting of black pepper, though this is optional depending on your topping plans.
Step 5: Bake Until Perfectly Tender
Position your rack in the center of the oven for even heat circulation. Slide the baking sheet onto that middle rack and set your timer for 45 minutes. Resist the urge to open the oven door during the first 30 minutes, as temperature fluctuations disrupt the caramelization process.
At the 45-minute mark, begin testing for doneness. Insert a fork straight into the fattest part of the largest potato. It should slide in with no resistance, meeting absolutely no hard core. If you feel any firmness in the center, return to the oven for 10 to 15 more minutes.
Visual cues matter too. Perfectly baked sweet potatoes puff up slightly as steam expands inside them. The skin pulls away from the flesh, and you will see caramelized spots where sugars have bubbled out and browned on the surface. These dark patches are flavor gold, not burnt spots to worry about.
Temperature and Timing Guide: Finding Your Sweet Spot
The most common question I hear is about the best temperature for baking sweet potatoes. The honest answer depends on your priorities: speed, caramelization, or gentle cooking. Here is how different temperatures affect your results.
Baking at 425°F (Recommended)
This is my go-to temperature and the one most restaurant chefs prefer. The high heat rapidly converts starches to sugars, creating those characteristic caramelized edges and crispy skin. At 425°F, medium sweet potatoes take 45 to 55 minutes depending on exact size.
The intense dry heat draws moisture from the skin efficiently, promoting that satisfying crunch when you bite. This temperature also causes the characteristic puffing that separates skin from flesh, making your potato easy to split open and fluff.
Baking at 400°F
Slightly gentler than 425°F, this temperature still produces excellent results with a bit more forgiveness. Expect cooking times of 50 to 65 minutes for medium potatoes. The caramelization happens more gradually, giving you a wider window between perfectly done and overdone.
400°F works beautifully if you are baking multiple trays or cooking alongside other dishes that need moderate heat. You sacrifice just a touch of crispy skin intensity in exchange for more consistent results across batches.
Baking at 375°F
This lower temperature extends cooking time to 60 to 75 minutes but produces exceptionally tender, evenly cooked flesh. The skin stays softer at this temperature, which some people actually prefer. If you plan to scoop out the flesh and discard the skin anyway, 375°F delivers perfect interiors.
Baking at 350°F
The lowest practical temperature for whole sweet potatoes requires 75 to 90 minutes of patience. This method essentially slow-roasts the potatoes, producing incredibly soft, almost custard-like interiors. The tradeoff is minimal caramelization and soft, leathery skin.
I reserve 350°F for when I am already slow-roasting something else in the oven and want to add sweet potatoes to the same load. Otherwise, the extended time rarely justifies the texture compromise.
Timing by Potato Size
Size dramatically affects baking time regardless of temperature. Small sweet potatoes under 2 inches diameter finish in 35 to 45 minutes at 425°F. Medium potatoes between 2 and 3 inches need the standard 45 to 60 minutes. Large potatoes over 3 inches can require 65 to 80 minutes to cook through completely.
When baking mixed sizes, start testing the smallest potatoes at the 40-minute mark and remove them as they finish. Let larger ones continue cooking until equally tender. This prevents the common problem of overdone small potatoes while waiting for big ones to catch up.
Foil vs No Foil: The Great Debate Explained
Search for baked sweet potato recipes and you will find conflicting advice about foil. Some swear by wrapping each potato tightly, while others insist naked baking is the only way. Here is the science behind both methods and my recommendation for different situations.
What Foil Actually Does
Wrapping sweet potatoes in aluminum foil creates a sealed, steamy environment around each potato. The moisture that escapes from the flesh gets trapped against the skin, essentially steaming the exterior rather than roasting it. This produces soft, tender skin that slides off easily and very moist, almost wet flesh inside.
Foil-wrapped potatoes also cook slightly faster because steam conducts heat more efficiently than dry air. You can expect to shave 5 to 10 minutes off your total baking time by wrapping. The downside is minimal caramelization since the trapped moisture keeps surface temperatures below the Maillard reaction threshold.
Baking Without Foil
Unwrapped baking exposes the sweet potato to direct dry heat, allowing surface moisture to evaporate quickly. This dehydration process creates crispy, crackly skin that shatters pleasantly when bitten. The exposed surfaces also reach high enough temperatures for caramelization, creating those sweet, browned spots.
The flesh inside remains fluffy and tender because the skin acts as a natural barrier, keeping most moisture contained while still allowing some steam to escape through your fork holes. The result is that perfect contrast between shatter-crisp exterior and cloud-soft interior that makes baked sweet potatoes so satisfying.
My Recommendation
I almost never wrap sweet potatoes in foil anymore. The crispy skin is too good to sacrifice, and the caramelized edges add depth of flavor that foil-wrapped potatoes simply cannot achieve. However, foil does have its place for specific situations.
Choose foil if you need the potatoes to stay hot for extended periods after baking, as the wrapping insulates them effectively. Foil also works if you absolutely despise crispy skin and prefer the soft, steamed texture. For camping or cooking directly in fire coals, foil is obviously essential.
For everyday oven baking, skip the foil. Line your baking sheet with it instead for easy cleanup, but let the potatoes bake bare for the best texture. This is the method our team has tested extensively, and it consistently produces the results people rave about.
Troubleshooting Common Baking Problems
Even with the best techniques, things sometimes go wrong. After baking hundreds of sweet potatoes over the past three years, I have encountered every failure mode and found solutions that work.
Problem: Burnt Outside, Raw Inside
This happens when your oven runs hot or when you are baking enormous potatoes at too high a temperature. The exterior overcooks before heat penetrates to the center. Drop your temperature to 375°F and extend cooking time. The gentler heat gives the interior time to catch up without further darkening the outside.
For future bakes, select more uniformly sized potatoes and rotate your baking sheet halfway through if your oven has hot spots. Placing potatoes too close together also causes uneven heating, so give them space on the pan.
Problem: Soggy Skin
Wet potatoes going into the oven are the primary culprit here. That moisture must evaporate before skin can crisp, and often it just steams the surface instead. Always dry potatoes thoroughly after washing. If you wrapped in foil, remove it for the final 15 minutes of baking to dry and crisp the skin.
Problem: Sticky Syrup Burning on the Pan
Sweet potatoes naturally exude sugars during baking, and these caramelize on your baking sheet into stubborn, blackened patches. This is completely normal but annoying to clean. The solution is simple: always line your baking sheet with foil or parchment paper. This creates a disposable barrier that catches the sticky drips.
If you forgot the lining and now have a mess, soak the pan in hot soapy water for 30 minutes before scrubbing. For really stubborn residue, make a paste of baking soda and water, apply it to the affected areas, and let it sit for 15 minutes before washing.
Problem: Uneven Cooking Within One Potato
Sometimes one end of a sweet potato is perfectly tender while the other remains firm. This usually indicates an irregularly shaped potato or inconsistent oven temperature. Choose potatoes that are uniformly cylindrical rather than tapered or knobby. Flip potatoes halfway through baking to ensure both ends cook evenly.
Delicious Topping Ideas for Every Meal
The beauty of baked sweet potatoes lies in their versatility. They serve as a blank canvas for endless flavor combinations, from breakfast to dinner to dessert territory. Here are my favorite ways to dress them up.
Sweet Breakfast Toppings
For a morning treat that feels indulgent but packs nutrition, split your potato open and fluff the flesh with a fork. Add a pat of salted butter, a drizzle of pure maple syrup, and a generous sprinkle of cinnamon. The warmth of the potato melts everything into a glorious, fragrant pool.
Other sweet combinations include almond butter with sliced bananas and a dusting of nutmeg, or Greek yogurt with honey and chopped pecans for added protein. For a dessert-like experience, try mini marshmallows toasted under the broiler for 30 seconds with a sprinkle of brown sugar.
Savory Dinner Toppings
Sweet potatoes pair surprisingly well with bold, savory flavors. My weeknight favorite is black beans, diced avocado, salsa, and a squeeze of lime juice. This combination creates a complete vegetarian meal with protein, healthy fats, and complex carbohydrates.
For meat lovers, try crumbled oven-baked bacon with chives and sour cream. The salty, smoky bacon balances the potato’s natural sweetness perfectly. Shredded rotisserie chicken with buffalo sauce and blue cheese crumbles creates a fun twist on wings.
Healthy Power Toppings
Sweet potatoes are nutritional powerhouses on their own, but you can amplify their benefits with strategic toppings. A scoop of cottage cheese adds casein protein that digests slowly. Steamed broccoli with nutritional yeast creates a cheesy flavor without dairy.
For those watching blood sugar, pair your sweet potato with protein and fat to slow glucose absorption. Top with grilled chicken, a handful of pumpkin seeds, and a drizzle of olive oil. Sweet potatoes are considered quality carbs for balanced eating when prepared simply and paired wisely.
Storage and Reheating Tips
Baked sweet potatoes are meal prep champions. They keep well and reheat beautifully, making them perfect for cooking ahead and enjoying throughout the week.
Refrigerator Storage
Let baked sweet potatoes cool completely at room temperature before storing. Trapping heat creates condensation that makes skins soggy. Once cool, wrap each potato individually in foil or place in airtight containers. Refrigerated baked sweet potatoes stay fresh for up to 5 days.
Reheating Methods
The oven remains the best reheating method for restoring crispy skin. Wrap cooled potatoes in fresh foil and bake at 350°F for 15 to 20 minutes until heated through. Remove the foil for the final 5 minutes to re-crisp the skin.
For faster reheating, the microwave works in a pinch. Pierce the skin a few times with a fork, then microwave on high for 2 to 3 minutes, turning halfway through. The skin will stay soft with this method, but the flesh heats evenly.
My favorite quick method is the air fryer. Set it to 350°F and reheat for 8 to 10 minutes. The circulating hot air restores crispiness better than any other quick method while heating the interior thoroughly.
Freezing Guidelines
You can freeze baked sweet potatoes for up to 3 months, though the texture changes slightly upon thawing. The flesh becomes slightly grainy, making frozen-thawed potatoes better suited for mashing or adding to soups rather than eating whole.
To freeze, cool completely, then wrap tightly in plastic wrap followed by foil. Label with the date and freeze flat. Thaw overnight in the refrigerator before reheating, or remove wrapping and reheat directly from frozen at 350°F for 30 to 40 minutes.
Frequently Asked Questions
What is the best temperature for baking sweet potatoes?
425°F is the ideal temperature for most home ovens. This high heat creates crispy skin and caramelized edges while cooking the interior in 45 to 60 minutes. For more forgiving results or when cooking alongside other dishes, 400°F works beautifully with slightly extended timing.
Should you wrap a sweet potato in foil when baking?
For crispy skin, do not wrap sweet potatoes in foil. Foil traps steam and creates soft, steamed skin rather than the desirable crispy texture. Line your baking sheet with foil for easy cleanup, but bake the potatoes bare. Only wrap if you specifically prefer soft skin or need to keep potatoes warm for extended periods after baking.
How to cook a sweet potato for diabetics?
Bake sweet potatoes plain without added sugars or sweet toppings. The natural glycemic impact is moderate, especially when paired with protein and healthy fats. Top with Greek yogurt, nuts, or grilled chicken to slow glucose absorption. Sweet potatoes are considered quality carbs that provide fiber and nutrients compared to refined alternatives.
How long does a sweet potato take in the oven at 400 degrees?
At 400°F, medium sweet potatoes take 50 to 65 minutes depending on exact size. Small potatoes under 2 inches diameter finish in about 40 to 45 minutes, while large potatoes over 3 inches may need 70 to 75 minutes. Test for doneness by piercing with a fork; it should slide in easily with no resistance when fully cooked.
How do you know when a baked sweet potato is done?
A perfectly baked sweet potato gives clear visual and textural cues. The skin puffs away from the flesh and may have caramelized spots. When pierced with a fork in the thickest part, it should slide in effortlessly with no hard center. The potato will feel soft when gently squeezed with an oven mitt.
Can you bake sweet potatoes at 350 degrees?
Yes, but expect significantly longer cooking times of 75 to 90 minutes. This lower temperature produces very soft, custard-like interiors but minimal caramelization and soft skin. Reserve 350°F for when you are already slow-roasting other dishes, or if you specifically want to avoid any crispy texture.
Conclusion: Master How to Bake Sweet Potatoes in the Oven
Learning how to bake sweet potatoes in the oven opens up endless meal possibilities. The combination of crispy skin and fluffy, caramelized interior beats any other cooking method. Remember the essentials: dry your potatoes well, poke them thoroughly, bake bare at 425°F, and test for true fork tenderness.
I encourage you to try this method this week. Once you taste the difference proper technique makes, you will never settle for soggy, unevenly cooked sweet potatoes again. The oven does the hard work while you prepare toppings or relax. That is the beauty of this simple, perfect technique.