
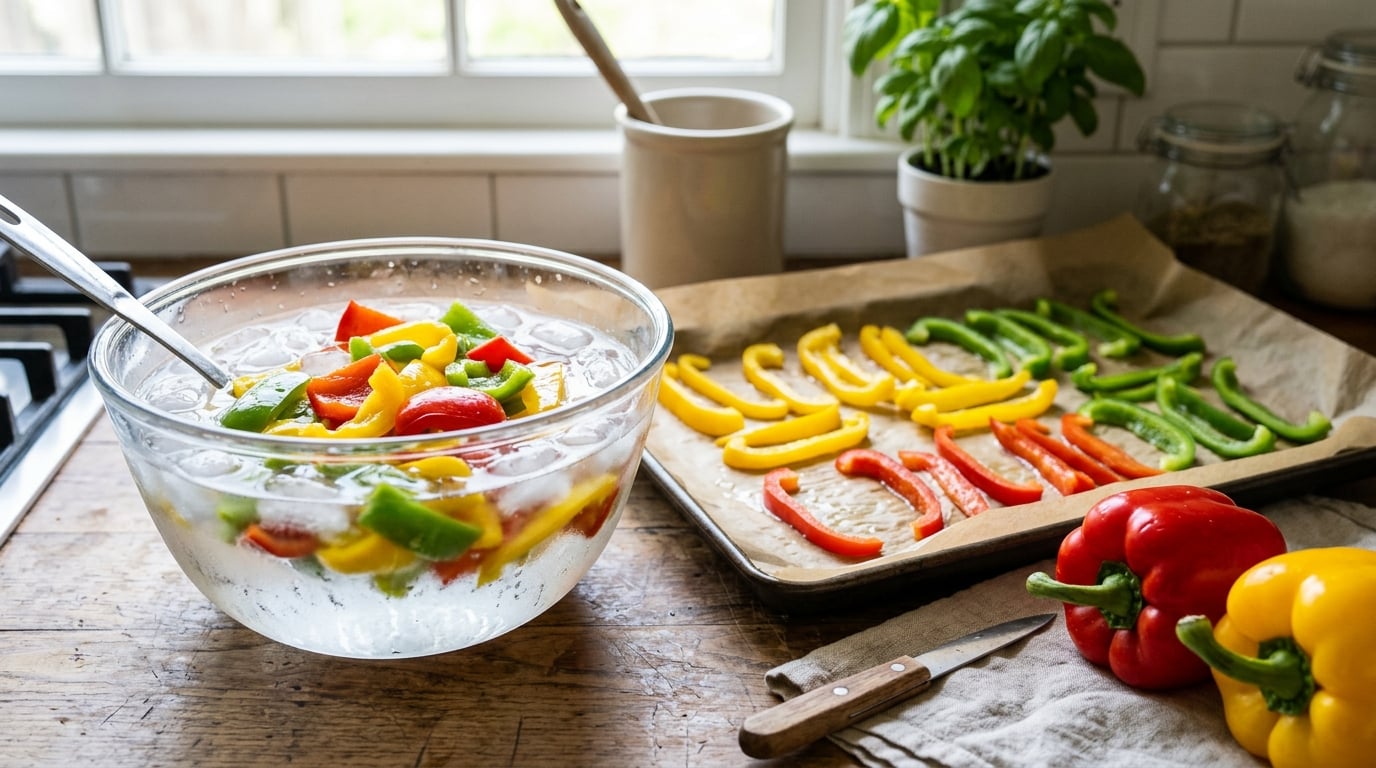
Bell peppers freeze well raw, so blanching is optional rather than required. The method that works best for cooking is simple: wash and dry the peppers, pull out the core, seeds and white membrane, cut into even pieces, flash freeze them in a single layer for 1 to 2 hours, then seal them in airtight freezer-safe bags with the air squeezed out.
I keep a bag of diced peppers in the freezer at all times, because a baggie of overbought peppers from the shop is the whole reason I started. Half go into a stir-fry on a Wednesday, a handful go into soup, and the rest become sheet-pan dinner on a Saturday. Nothing about that needs a canning kettle, a steriliser or a recipe that takes half a day.
Freezing is the fastest way to rescue a garden surplus or a grocery overbuy, and peppers are a good candidate for it. Their low acidity means you do not need to can or acidify them. What freezing does not preserve is crispness, so the goal of this guide is picking the right method for the dish you plan to cook. If a pepper is going into a stir-fry, you want a blanch. If it is going into a pot of soup, raw-frozen is fine and saves you a sink full of dishes.
Table of Contents
How to Freeze Bell Peppers for Cooking: Quick Method
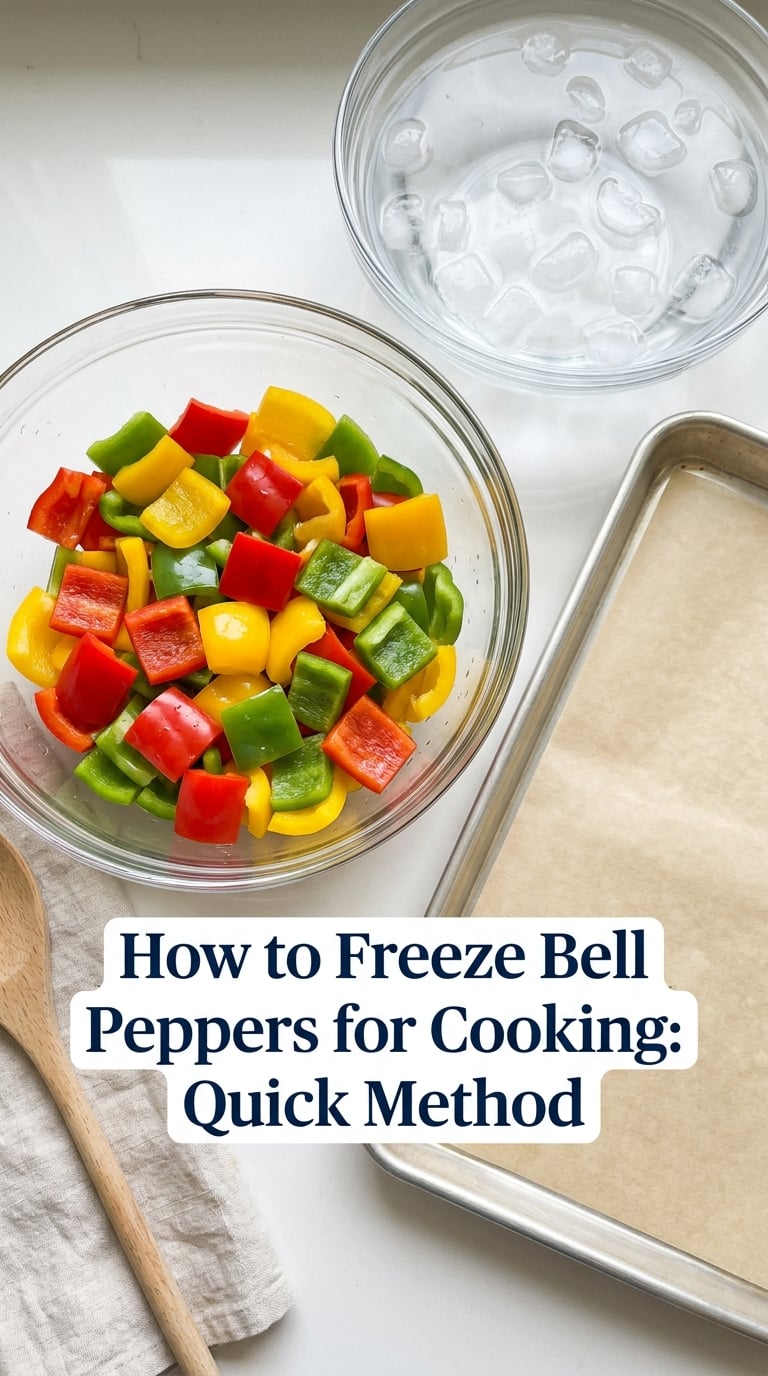
Here is how to freeze bell peppers for cooking in five steps. Each one takes a couple of minutes except the flash freeze, and the whole batch is done in well under an hour plus freezing time.
- Wash and dry the peppers under cool running water, then pat them completely dry with a paper towel.
- Halve the peppers and cut away the stem, seeds and white inner membranes.
- Cut into rings, strips or dice at the size your recipes call for, keeping the pieces even.
- Flash freeze: spread the pieces in a single layer on a parchment-lined baking sheet for 1 to 2 hours so they do not stick together in one clump.
- Transfer to airtight freezer-safe bags or containers, squeeze out as much air as possible, seal, label and date.
At 0 °F (-18 °C) or colder, properly frozen peppers keep their best quality for 6 to 12 months. Steps 1 through 3 take about ten minutes for a couple of peppers. Step 4 is the one that needs planning, so I usually do it while dinner cooks and pack the bags right before bed.
Which Bell Peppers Freeze Best?
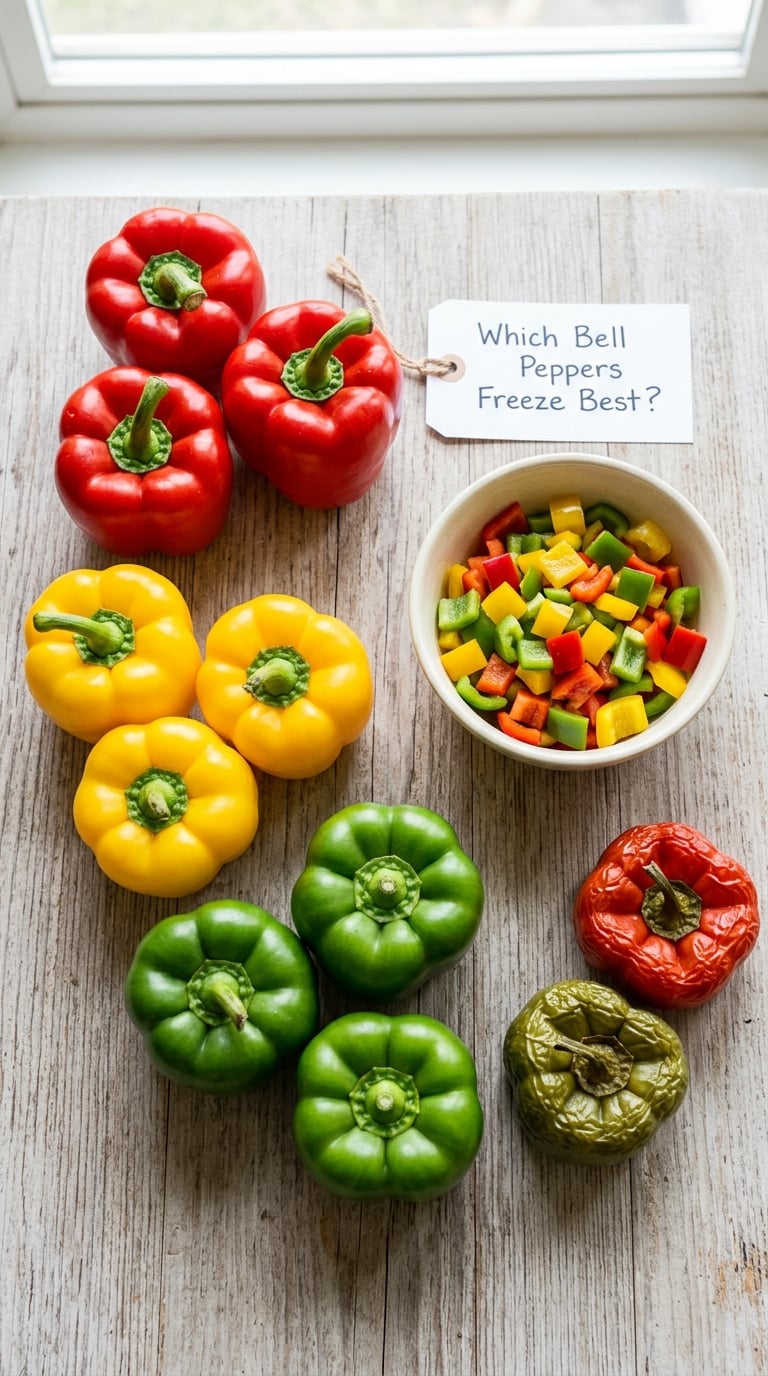
Firm, fully coloured, heavy-for-their-size peppers freeze best. The skin should be tight and glossy with no soft spots, and the flesh should feel solid when you press the stem end. Colour barely matters for cooked dishes, since cooking softens everything anyway, so pick whatever is cheapest or ripest.
Red and yellow peppers are sweeter once cooked, so they suit fajitas, sheet-pan dinners and anything where you want the pepper flavour to show. Green peppers are more assertive and hold their shape a little better in a soup. If you are mixing colours in one bag, remember they freeze at slightly different rates, and the red ones will be softer in a two-year-old bag than the green ones.
Leave these out of the freezer:
- Peppers that are wrinkled, soft or spongish, or that have a bad spot you would have to cut away anyway
- Any pepper with a slimy or mouldy patch, on the outside or near the stem
- Peppers sitting in water from a leaking fridge drawer, which spoil fast
- Thin-walled hot peppers destined for a raw topping, because freezing ruins their crunch completely
Hot peppers are a separate case. Most cooks freeze jalapenos and similar chiles whole, sliced or partly seeded, with no blanching, and use them in cooked dishes where the heat is the point. Blanching a hot pepper dulls its aroma, so skip it.
How to Prepare Bell Peppers Before Freezing
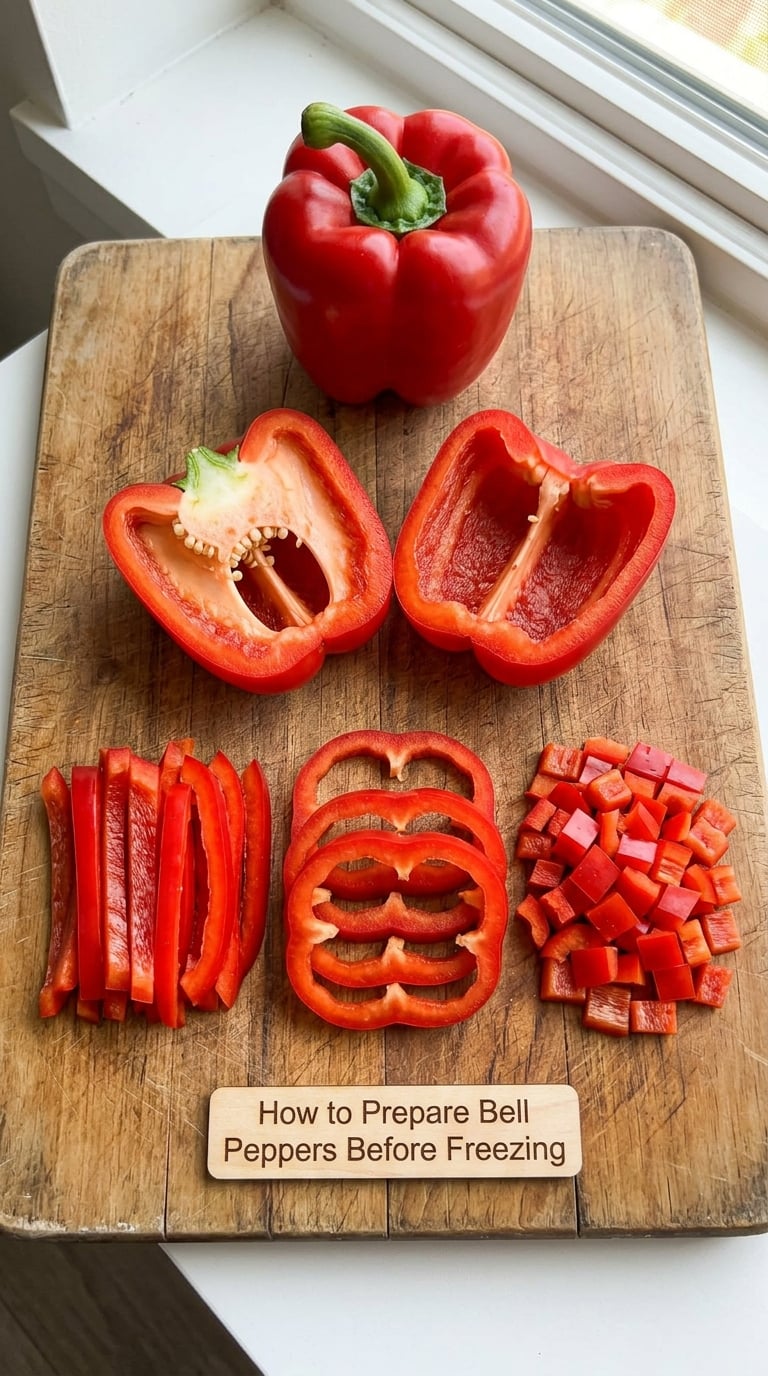
Preparation is the part that decides how good your frozen peppers taste later, and most of it happens before any water does. Wash the whole peppers first, then cut. Washing cut pieces lets water sit against the flesh and dilutes the flavour you are trying to keep.
Pat them dry properly. If you wash and then leave them in a colander, surface water works its way into the cuts and ends up trapped in the bag as ice, which is a big part of why frozen peppers turn watery later. Lay the pieces on a towel for ten minutes if you have the time.
For the cut, match the shape to how you cook. Rings for sheet pans and skewers, strips for fajitas and stir-fries, dice for soups, sauces and omelettes, halves for roasting or stuffing.
Keep every piece close to the same size. Uneven cuts freeze at different rates, and the thin ones turn to mush while the thick ones are still cold in the middle. Half-inch dice is my default, and it works whether the batch ends up in soup or on a hot pan.
Save the seeds and the white membrane if you like. They go into a freezer bag for stock, and the stems go in the compost. Nothing here needs to be thrown out.
Should you cut the peppers before or after blanching?
Cut before blanching when you want even pieces, which is nearly always. Cutting raw peppers is steadier, and blanched peppers are slippery. Cut after blanching only when you are freezing whole halves, where a single clean cut through the pepper is all it takes.
How to Blanch Bell Peppers for Freezing
Blanching briefly in boiling water stops the enzymes that keep peppers crisp from doing their work. Three or four minutes is enough to set the outside of a piece while leaving the centre raw. Any longer and you have cooked the pepper instead of pausing it.
- Fill a large pot with water and bring it to a full rolling boil.
- Prepare an ice bath in a second bowl: water with plenty of ice in it.
- Drop the pepper pieces into the boiling water in batches, keeping the water boiling.
- Time the batch: 3 minutes for halves, 2 to 3 minutes for rings and strips, 2 minutes for dice.
- Watch for the doneness cue: the colour brightens and the edges go slightly translucent while the pieces still bend rather than collapse.
- Remove with a slotted spoon or spider straight into the ice bath for 2 to 3 minutes.
- Drain thoroughly in a colander, then spread the pieces on a towel to dry.
The ice bath is not optional. Peppers carry a lot of water, and if you let blanched pieces sit in warm water or on a warm counter, they keep cooking and go limp before they ever reach the freezer. Shocking them stops the cooking exactly where you want it.
Then dry them again before packing, and this is the step people rush. Any surface water left on the pieces freezes into ice crystals that damage the cell walls, and damaged cells release their water when the pepper thaws. That is the whole mushiness story in one sentence.
How Long Should You Blanch Bell Peppers?
Use these times as a guide rather than a rule, because the real test is texture, not the clock. Peppers blanched until they are still crisp-tender come out of the freezer tasting like peppers, and peppers blanched until soft come out tasting like cooked vegetables that were frozen afterwards.
| Cut | Blanching time | What it looks like when done |
|---|---|---|
| Whole halves | 3 minutes | Skin slack, flesh bright, still holds its shape |
| Rings, about half-inch | 2 to 3 minutes | Edges translucent, ring still crisp at the centre |
| Strips, about half-inch wide | 2 to 3 minutes | Firm with a faint give when you press one |
| Dice, half-inch | 2 minutes | Bright colour, cubes still distinct |
| Thin slices under quarter-inch | 1 to 2 minutes | Colour deepened, still holds together |
Because peppers are not a tough green bean or a cob of corn, they need far less time than most blanching charts suggest. Give them three minutes, taste one if you are unsure, and go from there. Water is always at a full boil when the peppers go in, and a crowded pot drops the temperature and stretches the time past where you want it.
Can You Freeze Bell Peppers Without Blanching?
Yes, and most home cooks do. Skip the blanching, prepare the peppers as described above, flash freeze them and pack them the same way. Peppers are among the vegetables that do not strictly need blanching, and the internet advice telling you otherwise is largely inherited from vegetables that do, like green beans, corn and spinach.
What you give up is some crispness. Raw-frozen peppers that come out of the freezer are softer and wetter than blanched ones, and they release water as they cook, which can thin a sauce or leave a stir-fry swimming. The flavour is good. The bite is not what it was.
Raw-freezing is a perfectly sensible choice when:
- The peppers are headed for soup, stock, chili or a heavily seasoned sauce where texture does not matter
- You are short on time and the batch is small
- You want to keep the prep to one sink’s worth of washing up
- You are freezing hot peppers, which is usually done raw and whole
It is a poor choice for anything served with a crisp texture, so raw-frozen peppers rarely earn their place in a stir-fry, fajita or a fresh salad. If those are your main uses, spend the extra ten minutes on a blanch.
How to Freeze Bell Peppers for Cooking: Step-by-Step
This is the full method, start to finish, using blanching for the best all-purpose result. If you already know you only need peppers for soup, read the raw-freeze section above instead and skip to step 4.
- Pick firm peppers. Heavy for their size, tight skin, no soft spots, fully coloured if you care about sweetness.
- Wash and dry. Rinse under cool running water and pat completely dry with a paper towel before you cut anything.
- Core and cut. Slice off the stem, halve lengthways, pull out the seed cluster and the white inner membranes, then cut into even rings, strips or half-inch dice.
- Blanch. Boil a large pot of water, drop the pieces in for 2 to 3 minutes depending on the cut, until the edges turn translucent and the pieces still bend.
- Ice bath. Lift the peppers straight into iced water for 2 to 3 minutes to stop the cooking instantly.
- Drain and dry again. Drain in a colander, then spread on a clean towel for 10 to 15 minutes until the surface is dry to the touch.
- Flash freeze. Spread the pieces in a single layer on a parchment-lined baking sheet and freeze uncovered for 1 to 2 hours, until they are firm and no longer sticking to each other.
- Pack, seal and label. Move the pieces into airtight freezer-safe bags or rigid containers, press the air out, seal, then write the cut, the quantity and the date on the label.
Skipping step 7 is the most common shortcut and the one that costs you the most. Without a flash freeze, the pieces freeze into a single solid brick, and every time you want a portion you break off lumps and refreeze the rest, which is exactly the clumping and the repeated thawing that ruins texture. On a flat sheet, that is where freezing stops the peppers touching and you can scoop out a cup at a time.
Don’t skip the parchment either, or the pieces freeze onto the metal and the first few tear as you lift them. If you own a silicone mat, that works just as well.
Blanched vs. Raw-Frozen Bell Peppers
Neither method is universally better, and the honest answer depends on where the pepper is going. Here is how the two compare, with a third option that home gardeners swear by.
| Method | Texture after thawing | Colour and flavour | Effort | Best for |
|---|---|---|---|---|
| Blanched then frozen | Closest to fresh, still slightly soft | Colour holds well, pepper flavour bright | About 10 extra minutes plus ice-bath dishes | Stir-fries, fajitas, sheet pans, omelettes, roasting |
| Raw-frozen | Noticeably softer, releases water when cooked | Slightly duller, flavour dilutes in liquid | None beyond normal prep | Soups, stocks, chili, curries, cooked sauces |
| Roasted then frozen | Soft but rich, holds shape when reheated | Deepest, sweetest, smokiest | Full oven roast, about 40 minutes | Salsa, sandwiches, stuffed peppers, roasted pepper trays |
The roast-first route is worth knowing about if you grow peppers or find them cheap at the end of summer. Toss the pieces in oil, roast on a hot sheet until they collapse and blister at the edges, cool, then freeze in loose handfuls. They come back tasting like something you roasted rather than something you froze, and the texture is soft in a way that suits a taco, a dip or a sandwich.
For most cooks, though, blanched is the safest default. It keeps more bite, costs little, and works in every cooked dish on the list.
What to Do With Frozen Bell Peppers
Most of the time you can cook frozen peppers straight from the freezer, and that is the best way to use them because there is no thawing window for water to escape. Add them to a hot pan from frozen, give them an extra minute or two, and season at the end so nothing goes watery on the outside and bland in the middle.
By dish:
- Stir-fries and sheet pans: From frozen, into a hot oiled pan, 8 to 10 minutes over high heat. Do not crowd the pan or they will steam instead of sear. My easy sausage and peppers one-pan dinner works from frozen with no adjustment at all.
- Fajitas: From frozen, same pan, same heat. Thaw first only if you are grilling them, where water on the surface stops the browning.
- Soups and stocks: Straight from the freezer into the pot, no need to think about it. For a thickening, add them in the last 20 minutes. My cozy fall soup recipes that freeze well use frozen peppers without a defrost step.
- Omelettes and frittatas: Thaw 10 minutes in the fridge or at room temperature so the eggs do not drop in temperature and cook unevenly.
- Sauces and salsas: From frozen straight into a simmering pot. Cook until the liquid cooks off, which usually means cooking it a little longer than the recipe says.
- Stuffed peppers: If you freeze assembled stuffed peppers, wrap each one individually in plastic wrap or foil and freeze on a tray, then bag them. Cook from frozen at 375 °F (190 °C) until the filling reaches 165 °F (74 °C) for a poultry or rice filling, or 160 °F (71 °C) for a ground-meat filling, with a 3-minute rest. They are floppier after freezing, so set them in a snug dish. Some ideas for what to serve with stuffed peppers.
Thawing properly means the fridge, in a bowl, the night before. Room-temperature thawing is the one to avoid: the outside warms into the food-safe danger zone long before the middle is soft, and the pepper loses water at the same time.
How to Store Frozen Bell Peppers
At 0 °F (-18 °C) or colder, frozen peppers keep their best colour, flavour and texture for 6 to 12 months. Treat 12 months as the point where quality starts dropping rather than as a safety cliff, and note that a home chest freezer often runs warmer than a standing freezer, so use the shorter end of that range there.
Portion before you store. A cup of dice per bag for weeknight stir-fries, a flat layer of strips for a sheet pan, a small bag of diced pieces you can tip into a smoothie or a soup pot. Working in two-bag batches when a bag gets thin is the habit that keeps you from opening a frozen brick every time.
For packaging, bags save the most space because they lie flat, and they are the right choice for a freezer packed tightly. Squeeze the air out as you seal, lay the bags flat in a stack, and put a piece of cardstock between layers if you want to be able to pull one out without unstacking everything. Rigid containers waste space because air sits around the food, and they only earn their place when you want to see the contents or are portioning for lunch boxes.
Freezer bags and rigid containers are not interchangeable once packed. A bag of thin strips stacked on top of a bag of dice will press the dice into a block, so directional ice molds and other flat-freeze tricks come down to the same principle: give the food room to freeze separately, then stack.
Two details that cost nothing:
- Label everything. Write the pepper, the cut and the date with a sharpie on the bag or a masking-tape label. A freezer is a bad memory, and mystery bags always come out last.
- Use oldest first. Push new bags to the back. It is the simplest inventory system there is.
Watch for odour transfer, particularly around strong cheeses, curry powders and seafood. Peppers are porous enough to pick up smells in a busy freezer, and one leaking bag can quietly flavour a whole shelf. Keep chilli and spice-heavy bags on a separate shelf from vanilla and other delicate items if your kitchen runs to that.
Common Mistakes When Freezing Bell Peppers
Most disappointing frozen peppers come from one of six fixable problems. The mushy ones nearly always trace back to water, because freezing forms ice crystals that rupture the cell walls, and those cells release their water when the pepper thaws. Less water going in means less water coming out.
Blanching for too long. A pepper blanched past crisp-tender has already lost the cell structure you were trying to protect. Three minutes, then straight into the ice bath.
Packing the pieces wet. Water trapped against the flesh becomes ice. Drain, then dry on a towel for 10 to 15 minutes before flash freezing.
Filling the bag to the top. Peppers need room to move, and a crammed bag freezes into a block that no amount of thawing will separate. The flash-freeze sheet exists precisely to solve this, so give the peppers 60 to 90 minutes of freezer time before they go in permanently.
Storing them warm. Peppers packed straight from the counter raise the temperature of everything around them and, in a full chest freezer, can thaw the neighbouring bags. Cool them to room temperature first and let the air cool down with them.
Thawing slowly and refreezing. Each freeze and thaw cycle costs more texture than the last. If you have a freezer bag of thawed peppers and one of raw peppers, cook the thawed ones first, and if you must refreeze, expect a softer result and use them in a cooked dish rather than a salad.
Two smaller ones worth naming. Freezing the whole pepper in a bag and hoping to cut it later uses space and ice for nothing, since you have to core it anyway. And skipping the date on the label, which turns six months of peppers into a guessing game.
Frequently Asked Questions
Do bell peppers need to be blanched before freezing?
No, blanching is optional for bell peppers. They freeze well raw, and a short 2 to 3 minute blanch only improves texture. Raw-frozen peppers come out softer and release more water when cooked, which suits soups, stocks and sauces. Blanch if the pepper is going into a stir-fry, fajita or sheet pan where crispness matters.
How long do frozen bell peppers last?
Frozen bell peppers keep their best quality for 6 to 12 months in a freezer held at 0 degrees F (minus 18 degrees C). Color and texture fade gradually, and the food stays safe well past that point, so mark your bags with a date and use the oldest ones first.
Can I cook bell peppers from frozen without thawing them?
Yes, and for most cooked dishes it is the better way. Straight-from-frozen peppers need a minute or two of extra time in a hot pan and should be seasoned at the end. Thaw in the fridge first only when you are grilling, deep-pan frying, or adding them to eggs so the temperature does not drop.
What is the best way to freeze bell pepper slices and strips?
Wash and dry the whole peppers, cut away the stem, seeds and white membranes, then cut into even rings or strips. Flash freeze the pieces in a single layer on a parchment-lined baking sheet for 1 to 2 hours, then move them into airtight freezer-safe bags, squeeze out the air, seal, label and date.
Why do frozen bell peppers become mushy?
Ice crystals that form during freezing rupture the cell walls of the pepper. When the pepper thaws or cooks, those damaged cells release the water they were holding, which is why frozen peppers feel soft and watery. Drying the pieces thoroughly, blanching briefly, flash freezing and squeezing the air out of the bag all reduce the water that ends up in the dish.
Can I freeze whole bell peppers for later cooking?
Yes. Whole peppers freeze fine, and you can leave the seeds inside if you like, though removing them before freezing saves freezer space and makes the pepper easier to stuff later. Whole peppers are useful for roasting, but they are not convenient for everyday cooking because you still have to core and cut them after thawing.
Conclusion
Start with firm, brightly coloured peppers, and cut them into even pieces sized for the dishes you actually cook. If your first batch is going into stir-fries, fajitas and sheet pans, use the blanch-and-freeze method with the 1 to 2 hour flash freeze, because that is the version that keeps the most bite. If the peppers are headed for soup or a long-simmered sauce, cut them, bag them raw and skip the blanching entirely.
Either way, the method to freeze bell peppers for cooking comes down to the same three habits: get the water out before you seal, get the air out of the bag, and write the date on it. Do those three things and a single batch will carry you through the winter without another sad, watery bag in the back of the freezer.