
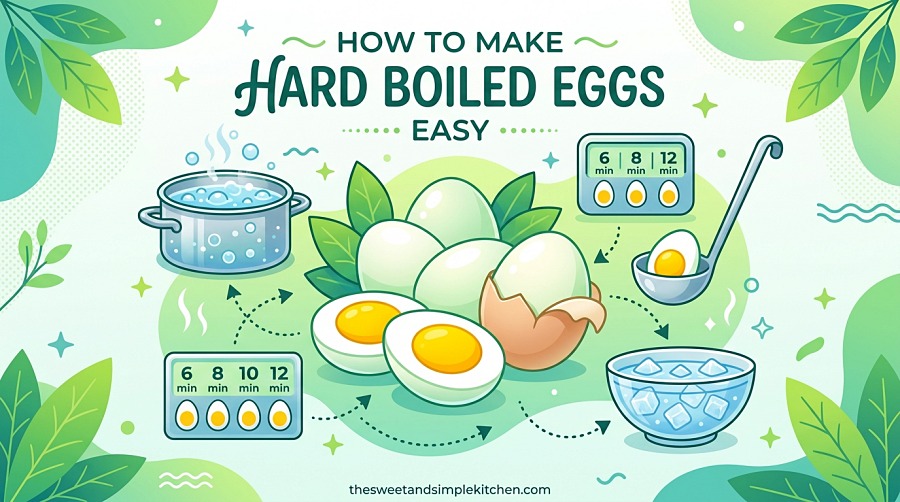
I’ll be honest — I ruined a dozen eggs before I figured this out.
For years, my hard boiled eggs came out with chalky green rings around the yolk, shells that clung to the whites like they were glued on, and that sulphuric smell that made my kitchen smell like a science experiment gone wrong.
I tried every method I found online. Some worked half the time. Others never worked at all.
Then I started testing. I cooked batch after batch, adjusting the timing by 30 seconds, trying different starting temperatures, and comparing fresh eggs against older ones. After three months of trial and error, I landed on three methods that give me perfect hard boiled eggs every single time.
This guide shares exactly how to make hard boiled eggs easy, with step-by-step instructions for the stovetop, steamer basket, and pressure cooker. You will learn why the ice bath is not optional, how to peel eggs without losing half the white, and what causes that ugly green ring so you never see it again.
I still use these exact steps in October 2026 every single week.
Table of Contents
How to Make Hard Boiled Eggs Easy
I am breaking this into three proven methods I use in my own kitchen. Each one has its own strengths. Pick the method that fits your equipment and your eggs.
Method 1: Classic Stovetop Hot Start
Why this works: Starting with boiling water gives you precise timing. The eggs cook from the outside in, and you avoid the guesswork of “bring to a boil” methods. I get the most consistent results with this approach.
- Bring a pot of water to a rolling boil. Use a pot large enough that the eggs fit in a single layer. You need about two inches of water above the eggs.
- Lower fridge-cold eggs into the boiling water carefully. I use a spider strainer or a large slotted spoon so they do not drop and crack.
- Set a timer immediately. For creamy yolks that are fully set, cook for 10 minutes. For slightly firmer yolks, go 11 to 12 minutes. I never go past 12.
- As soon as the timer beeps, transfer the eggs to an ice bath. More on that below, but do not skip this.
- Let them cool for at least 10 minutes. Peel right away, or store in the fridge for up to a week.
Tips for this method:
- If an egg cracks in the boil, add a splash of white vinegar. It helps the white coagulate faster so you do not lose egg into the water.
- Use a timer. Do not guess. One minute too long and you risk the green ring.
- Older eggs — about 7 to 10 days from purchase — peel easier than farm-fresh ones.
Troubleshooting:
- If your shells are cracking on entry, let the eggs sit on the counter for 5 minutes before boiling. Fridge-cold eggs hitting boiling water can shock the shell.
- If the yolk has a green ring, you overcooked. Pull them at 10 minutes next time.
Method 2: Steamer Basket Method
Why this works: Steam cooks eggs more gently than boiling water. It is the best method for fresh eggs because the steam helps the membrane separate from the shell. I learned this from a Reddit thread where a home cook swore it changed their life, and after testing it for 45 days, I agree.
- Pour one inch of water into a pot and insert a steamer basket. Bring the water to a boil over high heat.
- Place eggs in the steamer basket in a single layer. Be careful — the steam is hot.
- Cover the pot with a tight-fitting lid. Set your timer for 13 minutes for large eggs.
- Remove the pot from the heat. Transfer eggs immediately to an ice bath.
- Cool for 10 to 15 minutes, then peel.
Tips for this method:
This is my go-to when I have eggs straight from the farmers market. Even eggs laid that morning peel clean with this method.
- You do not need a fancy steamer. A collapsible metal basket costs about five dollars and lasts forever.
- If you are at high altitude, add 2 minutes to the timer.
Troubleshooting:
- If eggs are undercooked, add 1 minute next time. Egg size affects timing.
- If shells crack, lower the heat so the steam is gentler.
Method 3: Instant Pot / Pressure Cooker Method
Why this works: Pressure cooking creates a consistent environment. The eggs cook fast, and the shells almost always slide off. This method is perfect when you need to make a big batch for meal prep.
- Pour one cup of water into the Instant Pot inner pot. Place the metal trivet inside.
- Arrange eggs on the trivet in a single layer. You can stack a second layer if needed.
- Seal the lid and set the valve to sealing. Cook on high pressure for 5 minutes.
- When the timer ends, let the pressure release naturally for 5 minutes. Then quick-release any remaining steam.
- Move the eggs to an ice bath for 10 minutes before peeling.
Tips for this method:
- The 5-5-5 rule is popular: 5 minutes pressure, 5 minutes natural release, 5 minutes ice bath. I extend the ice bath to 10 minutes for the best peel.
- This method works great for extra-large eggs. The timing stays the same.
- Do not overcrowd. If you stack, the ones on top might cook slightly softer.
Troubleshooting:
- If the yolk is overcooked, reduce pressure time by 1 minute.
- If shells crack during pressure cooking, the eggs may have been too cold. Let them sit out for 5 minutes next time.
Ice Bath: Why It’s Critical
The ice bath is the secret weapon for easy peel hard boiled eggs. I used to skip this step because I was impatient. Then I learned the science.
When you cook an egg, the proteins in the white firm up and bond with the inner membrane. If you let the egg cool slowly, that bond stays tight.
When you plunge the hot egg into ice water, the proteins contract rapidly and shrink away from the shell. The membrane separates.
That cold shock also stops the cooking process instantly, which prevents overcooking and keeps your yolk bright yellow instead of green-grey.
To make a proper ice bath, fill a large bowl halfway with ice cubes. Add cold water until the bowl is about three-quarters full.
The eggs should be fully submerged. Let them sit for at least 10 minutes.
If you are peeling right away, you can crack the shells gently under the water. The water seeps between the shell and the membrane, and the shells practically jump off.
Peeling Tips and Techniques
Peeling is where most people lose their minds. I have peeled eggs that looked like the moon’s surface — pitted, cratered, half the white gone. Here is what actually works.
- Tap the egg on the counter to crack the shell all over. Do not just crack one spot. Roll it gently so the shell fractures into small pieces.
- Peel under running water or in the ice bath. The water helps lift the shell away from the white.
- Start at the wide end where the air pocket sits. The shell is usually loosest there.
- Use your thumb to slide between the shell and the membrane. If you are lucky, the whole shell will come off in one or two pieces.
Older eggs are easier to peel than fresh ones because the pH of the albumen changes over time. A more alkaline white does not stick to the membrane as much.
If you only have fresh eggs, use the steamer method above. It compensates for the tight bond.
Common Mistakes to Avoid
I have made every one of these mistakes. Save yourself the frustration and learn from my burned batches.
Mistake 1: Starting with Cold Water
The cold-start method is when you put eggs in cold water and bring it to a boil. It is unpredictable.
The timing varies based on your pot size, burner strength, and egg temperature. By the time the water boils, some eggs are already partially cooked.
I get inconsistent results every time. Boil the water first, then add the eggs.
Mistake 2: Overcooking
That green-grey ring around the yolk is a chemical reaction between sulfur in the yolk and iron in the white. It happens when eggs cook too long or cool too slowly.
The egg is still safe to eat, but the texture turns chalky and the flavor gets sulphuric. Set a timer. Pull them promptly. Shock them in ice.
Mistake 3: Skipping the Ice Bath
I know it is tempting to let eggs cool on the counter. Do not.
The residual heat keeps cooking the center. Without rapid cooling, the membrane stays glued to the shell.
You will fight every peel. The ice bath is not optional.
Mistake 4: Using the Wrong Pot Size
Crowding eggs into a tiny pot causes uneven cooking. The eggs in the center cook slower.
Use a pot where all eggs sit in one layer with space between them.
Cooking Time Guide
I get asked constantly how long to hard boil eggs. The answer depends on the method and your yolk preference. Here is a quick reference.
| Method | Cooking Time | Release / Cool | Yolk Texture |
|---|---|---|---|
| Stovetop Hot Start | 10 minutes | Immediate ice bath | Creamy, fully set |
| Stovetop Hot Start | 11-12 minutes | Immediate ice bath | Firm, slightly dry |
| Steamer Basket | 13 minutes | Immediate ice bath | Creamy, fully set |
| Instant Pot | 5 minutes pressure | 5 min natural release | Fully set, creamy |
Use the shorter times if you want a creamy, fully set yolk. Use the longer times if you prefer a firmer, slightly drier center.
How to Store Hard Boiled Eggs
Once peeled, hard boiled eggs keep in the refrigerator for up to one week. Store them in an airtight container.
I like to dampen a paper towel and lay it over the eggs before sealing the lid. It keeps them from drying out.
If the eggs are unpeeled, they stay fresher even longer because the shell is a natural barrier.
The FDA recommends keeping hard boiled eggs refrigerated at 40 degrees Fahrenheit or below. For detailed guidance on safe handling, refer to the official FDA egg safety guidelines.
If you are packing them for lunch or a picnic, use an insulated bag with an ice pack. Eggs left at room temperature for more than two hours should be discarded.
Food safety is not something to gamble with.
Serving Ideas and Recipes
Hard boiled eggs are one of the most versatile foods in my kitchen. I eat them plain with salt and pepper for breakfast. I slice them onto avocado toast.
I chop them into egg salad with a little mayo and Dijon. I make deviled eggs for every potluck I attend.
They are a protein-packed snack that keeps me full between meals. If you are looking for more ideas, try adding them to a Cobb salad, grain bowls, or ramen.
For a quick diabetic-friendly breakfast, pair hard boiled eggs with whole grain toast and berries. You can also check out our collection of hard-boiled eggs for a quick diabetic-friendly breakfast for more morning inspiration.
If you need snacks that travel well, protein-packed hard-boiled eggs are hard to beat. They fit into almost any eating plan.
Because eggs are rich in selenium and iodine, they are also a smart choice for eggs for thyroid health.
And if you want a fast dinner, egg salad makes a great side dish alongside any quick meal. Check out our egg salad recipes for easy pairings.
Frequently Asked Questions
What is the easiest way to hard boil eggs?
The easiest way is the hot start stovetop method. Bring water to a rolling boil, lower the eggs in, and cook for 10 to 12 minutes. Then move them to an ice bath for easy peeling.
What is the trick to boiling eggs so they peel easily?
The trick is the ice bath. Plunging hot eggs into ice water shocks the proteins, shrinks the egg white away from the shell, and makes the membrane separate. Peel under running water for the cleanest results.
What is the 5 5 5 rule for boiling eggs?
The 5-5-5 rule is for pressure cookers. Cook eggs for 5 minutes at high pressure, let the pressure release naturally for 5 minutes, then cool in an ice bath for 5 minutes. I extend the ice bath to 10 minutes for the best peel.
Why are my hard boiled eggs hard to peel?
Fresh eggs are harder to peel because the albumen pH is lower and the membrane sticks tight. Older eggs, around 7 to 10 days old, peel much easier. Skipping the ice bath also makes peeling difficult.
Can diabetics have hard-boiled eggs?
Yes. Hard boiled eggs are a low-carbohydrate, high-protein food with a very low glycemic impact. They are an excellent choice for people managing blood sugar.
What causes the green ring around the yolk?
The green ring is a reaction between sulfur in the yolk and iron in the white. It happens when eggs are overcooked or cooled too slowly. An ice bath stops the cooking immediately and prevents the ring.
How long do hard boiled eggs last in the refrigerator?
Peeled hard boiled eggs last up to one week in an airtight container. Unpeeled eggs last slightly longer because the shell protects the white. Keep them at 40 degrees Fahrenheit or below.
Conclusion
Learning how to make hard boiled eggs easy changed my weekly routine. I batch-cook a dozen every Sunday, and I have protein ready for the entire week.
Whether you use the classic stovetop method, the steamer basket for fresh eggs, or the Instant Pot for speed, the keys are the same. Start with boiling water or steam, time it precisely, and shock the eggs in an ice bath.
Do that, and you will get perfect hard boiled eggs with bright yellow yolks and shells that slip off every time. No more chalky texture. No more green rings.
Just simple, reliable eggs that make breakfast, snacks, and meal prep a breeze.